1
GAs RANGERS-1
Us
GUIDE
Installer:Pleaseleavethismanualwith
thisappliance,
Consumer:Pleasereadandkeepthis
manualfor futurereference.
Keepsales
receipt
and/orcancelled
checkasproofof
purchase.
ModelNumber
Ifyouhavequestions,
call:
Jenn-Air
Customer
Assistance
1-800-688-1100
USAandCanada
1-800-688-2080
( U.S.TTYfor
hearing
or speech
impaired)
(Mon.-Fri.,
8 am-8pmEastern
Time)
Internet:http://www.jennair.com
JENN-AIR
FormNo A/04/01 Part No.8113P310-60
74006043 Litho U.S,A
OF
CONTENTS
SafetyInstructions
....................................
1-3
SurfaceCooking......................................
4-5
OvenCooking........................................
6-11
Care& Cleaning..................................
12-16
Forserviceinformation,
seepage19.
BeforeYouCallforService..................
17-18
Warranty
....................................................
19
GuidedeI'utilisateur
..................................
20
.........................
In our contJnuJng
effortto iraprovethe qualityand performanceofourcookingproducts,
it maybe necessary
to make
changesto theappliancewith-
GuiadelUsuario
........................................
42
SerialNumber
DateofPurchase
' [A
_./_BLE
, °utrevising
thisguide ....
IMPORTANT
SAFETY
IFISTIUCTIOFIS
Read and follow all instructions technicianshow you the locationof the
before using this appliance to prevent gasshut off valve and how to shut it off
the potential risk of fire, electricshock, in an emergency,
personalinjury or damageto the appliance as a result of improperusage of
the appliance.Use applianceonlyfor its
intendedpurpose as described in this
Keepareaaroundapplianceclear and
free from combustiblemateriats,gasoline, and other flammablevapors and
materials.
Always disconnectpower to appliance If applianceis installedneara window,
beforeservicing.
properprecautionsshouldbe takento
prevent curtains from blowing over
guide
GENERAL
INSTRUCTIONS
IF THE INFORMATION IN THIS
MANUAL IS NOT FOLLOWED
>- ALL RANGES _
burners.
NEVERleave any items on the cooktop. The hot air from the vent may
ignite flammable items and may
increasepressurein closedcontainers
SlON MAY RESULT CAUSING
PROPERTY DAMAGE, PERSONEXACTLY,
OR EXPLOAL INJURY A
ORFIRE
DEATH.
CAUSE
INJURIES TO
CAN
TIP AND _
PERSONS
Manyaerosol-typespraycansare EXPLOSIVEwhen exposedto heat and
whichmay
causethemto burst. their
may be highlyflammable.Avoid
> DO NOTSTOREOR USE GASO-
> INSTALL
VAPORS AND LIQUIDS IN THE
VACINITY OF THIS OR ANY
LINE
OR OTHER FLAMMABLE
APPLIANCE.
> WHAT TO DO IF YOU SMELL
GAS:
DEVICE
PACKED
ANTI-TIP
WITH
RANGE (_
> FOLLOW ALL INSTALLATION INSTRUCTIONS
Keep plastics away from parts of the
appliancethat may becomewarm or
Many
vulnerableto
heat.
hot.
Doplasticsare
not leave plastic
items on
the
cooktopas they may melt or softenif
left
too close to the vent or a lighted
surfaceburner.
WARNING: To reduce risk of
tipping of the appliance from
abnormal usage or by excessire loading of the oven door,
the appliance must be secured by a properly installed
anti-tip device,
To eliminate the hazard of reaching
over hot surfaceburners,cabinetstorage should not be provided directly
abovea unit. If storageis provided,it
should be limited to items whicharc
usedinfrequentlyandwhichare safel_
stored in an area subjected to hen
from an appliance.Temperaturesmat
be unsafe for some items, such a._
volatile liquids, cleaners or aeroso
sprays.
- Do not try to light any appliante.
- Do not touch any electrical
switch,
- Do not use any phone in your
building,
-Immediately
call your gas
supplier from a neighbor's
phone. Follow the gas supplier's instructions,
- If you cannot reach your gas
supplier, call the fire departrnent,
INSTALLATION AND SERVICE
MUST BE PERFORMED BY A
QUALIFIED TECHNICIAN, SERVICE AGENCY OR THE GAS
SUPPLIER.
_
To checkif deviceis properlyinstalled,
removestoragedraweror broilercornpartmentand look underneathrange
with a flashlightto make sure one of
the rear leveling legs is properly
engagedin the bracketslot. The antitip devicesecuresthe rear levelingleg
to the floor when properly engaged.
You should check this anytime the
rangehas beenmoved.
use or storagenearan appliance.
IN(AS[
0FfIRE
Turnoffapplianceandventilatinghooc
to avoid spreading the flame
Extinguishflame,thenturn on hoodtc
removesmokeand odor.
COOKTOP:Smotherfire or flamein
To
ensureproperand
safe operation:
Appliancemustbe
properlyinstalledand
1
TO
PREVENT
fiR[
SMOKE
DAM.G[
pan
with a lidaor
cookie sheet. Neve
usewateron
greasefire.
groundedby
not attempttoaadjust,repair,service,or
quatifiedtechnician. Do
replace any part of your appliance
unlessit is specificallyrecommendedin
OR
Be sure all packing materials are
OVEN DOOR: If fire is in the oven c
broiler pan, smotherby closing ove,
door.
this guide.All other servicingshould be
referredto a qualifiedservicer.Havethe
removed from the appliance before
operatingit.
Never attempt to pick up or move
flaming pan. Do not use water ot
greasefires, use bakingsoda or a dry
chemicalor foam-typeextinguisherto
smotherfire or flame,
(HI[D
S,_f[ff
NEVERleave childrenalone or unsupervisednearthe appliancewhen it is
in useor is still hot.
NEVERallow childrento sit or stand
on any part of the applianceas they
could be injuredor burned,
oven vent, surfaces near the vent
opening,oven doorand areasaround
doorand window,
Alwayslet quantitiesof hotfat usedfor
deep fat frying cool beforeattempting
to moveor handle.
WARNING: NEVER use appliance
Do not let cooking grease or other
door, or drawer,if equipped,as a step
stoolor seat as this may resultin possible tippingof the appliance,damage
to the appliance,and seriousinjuries,
flammablematerialsaccumulatein or
nearthe appliance,hoodor vent fan.
Clean hood frequently to prevent
greasefrom accumulating on hoodor
Do not toucha hot oven lightbulbwith
a dampcloth as the bulb could break.
Should the bulb break, disconnect
powerto the appliancebeforeremoving bulb to avoidelectricalshock,
filter.
When
hood,turn
theflaming
fan on.foods under the
(00KIN6
Alwaysplacea panon a surfaceburner before turning it on. Be sure you
know which knob controlswhich surface burner. Make sure the correct
burner is turnedon and that the burner has ignited.Whencookingis cornpleted,turnburneroffbeforeremoving
pan to prevent exposure to burner
flame,
Alwaysplaceovenracksin the desired
positions while oven is cool. Slide
oven rack out to add or removefood,
using dry, sturdy pot holders.Always
avoid reachinginto the oven to add or
removefood. If a rack mustbe moved
while hot, usea dry pot holder.Always
turnthe ovenoffat the end of cooking.
Usecarewhenopeningthe oven door.
Let hot air or steam escape before
movingor replacingfood.
Alwaysadjustsurfaceburnerflameso
that itdoes not extendbeyondthe bot-
PREPAREDFOOD WARNING: Followfood manufacturer'sinstructions.If
tom edge
of the pan.wastes
An excessive
flame
is hazardous,
energy
and may damagethe appliance,pan
or cabinetsabovethe appliance,
a
food
containerand/or
itsplasticfrozen
cover distorts,
warps,
or is otherwise damagedduringcooking,immediately discard the food and its con-
NEVERleavea surface-cookingoperation unattended, especially when
usinga high heatsettingor when deep
fat frying. Boilovers cause smoking
and greasy spillovers may ignite,
Cleanupgreasyspillsas soonas possible.Do not usehigh heatfor extended cookingoperations.
tainer.The food could be contaminated.
NEVERuse aluminumfoil to coveran
oven rack or oven bottom. Misuse
could result in risk of electric shock,
fire, or damageto the appliance.Use
foil only as directedin this guide.
NEVER
heat an unopenedcontainer
on
the surfaceburner
or in the oven.
Pressurebuild up may causecontainer to burst,resultingin seriouspersonal injury or damageto the appliance.
Uf[NSI[
Childrenmustbetaughtthat the appliance and utensilsin it can be hot. Let
hot utensilscoolin a safe place,out of
reach of small children. Children
shouldbe taught that an applianceis
not a toy. Children should not be
allowed to play with controlsor other
partsof the unit.
CAUTION: NEVERstore items of interestto childrenin cabinetsabovean
applianceor on backguardof a range,
Children
climbing on thebeappliance
doorto
reachitemscould
seriously
injured.
_BOUT fOUR
_,IPP[IAN([
NEVER use appliance as a space
heaterto heator warma roomto prevent potentialhazardto the user and
damageto the appliance.Also,do not
use the cooktopor oven as a storage
areafor food or cookingutensils,
Do not obstructthe flow of combustion
andventilationair by blockingthe oven
vent or air intakes. Restrictionof air
flow to the burnerpreventsproperperformanceand
increasescarbon
oxide emissionto
unsafelevels, menAvoid touching oven vent area while
oven is on and for several minutes
afteroven is turnedoff. Somepartsof
the vent andsurroundingareabecome
hot enoughto causeburns.Afteroven
is turned off, do not touch the oven
vent or surroundingareas until they
have had sufficienttime to cool.
Other potentiallyhot surfacesinclude
cooktop, areas facing the cooktop,
S,_f[ff
NEVERwear garmentsmadeof flaremablematerialor loose-fittingor longsleevedapparelwhile cooking.Clothingmay igniteor catchutensilhandles.
S,_f[ff
Use pans with flat bottoms and handles that are easily graspedand stay
Usedry, sturdypot holders.Damppot
holdersmaycause burnsfrom steam.
Dishtowelsor other substitutesshould
cool. Avoid using unstable, warped,
easily tipped or loose-handledpans.
Also avoid using pans, especially
small pans, with heavy handles as
neverbe usedas pot holdersbecause
they can trail acrosshot surfaceburners and ignite or get caught on appliance pads.
they could be unstableand easily tip.
Pans that are heavy to move when
filled with food may also be hazardous.
J
IMPORTANT
SAFETY
INSTRUCTIONS,
CONT.
Besure
utensi,
is,arge
enough
to (LEAFIIFIG
SAFETY
IMPORTAHT
SAFETY
NOTICE
boilovers.Pan size is particularlyimportantin deepfat frying. Besure pan
will
volumeof
thataccommodatethe
is to be addedas wellas
the food
bub-
AHD WARHIHG
properly contain food and avoid
bleactionof fat.
To minimizeburns,ignitionof flammable materialsand spillagedue to unintentional contact with the utensil, do
not extendhandlesover adjacentsurface burners.Alwaysturn panhandles
towardthe side or back of the appliance,not out intothe roomwherethey
are easilyhit or reachedby smallchildren.
Never let a pan boil dry as this could
damagethe utensiland the appliance.
Turnoff all controlsand wait for appliance partsto cool before touchingor
cleaningthem.Do not touchthe bumer grates or surroundingareas until
they have hadsufficienttime to cool.
Clean appliance with caution. Use
care to avoid steam burns if a wet
spongear cloth is used to wipe spills
on a hot surface.Somecleanerscan
producenoxiousfumes if appliedto a
hot surface,
The California Safe Drinking Water
and Toxic EnforcementAct of 1986
(Proposition65) requiresthe Governor
of California to publish a list of substancesknownto the Stateof California to cause cancer or reproductive
harm,and requiresbusinessesto warn
customers of potential exposuresto
suchsubstances.
Users of this appliance are hereby
1_.LL,/Arq(lrlr'_"|rA_l
,_I[L[
OVEH
Follow the manufacturer'sdirections
when usingoven cookingbags.
Onlycertaintypes of glass,glass/ceramic,ceramicor glazed utensils are
suitable for cooktop or oven usage
without breaking due to the sudden
Cleanonlypartslistedinthis guide.Do
not clean door gasket.The door gasket is essentialfor a good seal. Care
shouldbe takennot to rub,damageor
removethe gasket.Do not use oven
cleanersof any kind in or aroundany
partof the self-cleanoven.
Beforeself-cleaningthe oven,remove
changein temperature.Follow manufacturer's instructions when using
glass,
broilerpan,ovenracksand otherutensils and wipe up excessivespillovers
to prevent excessivesmoke or flare-
This appliance has been tested for
safe performanceusing conventional
cookware.Do not use any devices or
accessoriesthat are not specifically
recommendedin this guide. Do not
useeyelidcoversfor the surfaceunits,
stovetopgrills,or add-onovenconvection systems.The use of devices or
accessoriesthat arenot expresslyrecommendedin this manualcan create
serioussafety hazards,result in performance problems, and reduce the
life of the componentsof the appliance.
ups.
CAUTION:Do not leavefoodor cooking utensils, etc., in the oven during
the self-cleancycle,
It is normal for the cooktop of the
range to become hot during a selfclean cycle. Therefore,touching the
cooktopduringa cleancycleshouldbe
avoided.
warned
the burning of gas
can
resultin that
low-levelexposureto
someof
the listed substances,including benzene,formaldehydeand soot, due primarilyto the incompletecombustiono
natural gas or liquid petroleum (LP
fuels. Properly adjusted burners wil
minimize incompletecombustion.Ex
posure to these substancescan als(
be minimizedby properlyventingthe
burnersto the outdoors.
Users of this appliance are hereb_
warnedthat
the self
clean cycle,when
thereengagedin
may be Iow-leve
exposureto some of the listed sub.
stances, including carbon monoxide
Exposurecanbe minimizedby proper
ly venting the oven to the outdoor,,
during the self-cleancycle to openin(
a window and/or door in the roorr
wherethe applianceis located.
IMPORTANT NOTICE REGARDIN(
PET BIRDS: Never keep pet birds i
the kitchen or in rooms where th
fumes from the kitchen could reac}
Birds havea very sensitiverespirator
system. Fumes released during a
ovenself-cleaningcyclemay be harrr
ful or fatal to birds. Fumes release
due to overheated cooking oil, fa
margarine and overheatednon-stic
cookwaremay be equallyharmful.
SAVE
THESE
IFISTRUCTIOHS
FOR
FUTURE
REFEFlEHCE
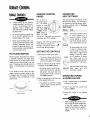
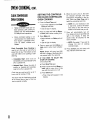
SURFACE
(OOKIFIG
SURFACE
(OFITROLS SURFACE
KNOBS cOntROL SUGGESTED
HEAT SETTINGS
If flame should go out during a
>
>
cookingoperation,turn the burner off. If a strong gas odor is
detected, open a window and
wait five minutesbefore relightingthe burner.
Be sure all surface controlsare
set in the OFF position prior to
supplyinggasto the range,
Nevertouch cooktopuntil it has
cooled.Expectsomepartsof the
cooktop, especially around the
burners,to becomewarmor hot
during cooking. Use potholders
to protectyourhands.
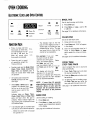
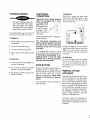
Use to turn on _
the surfaceburn- __
ers. An infinite /_ _" I • )'} _. \
choice of heat[_//
II II _/
settings is avail-/_//
II
able from LOW \_..% [[ )1 / /
to HIGH. At the _e _oj
HIGH setting a
_
° y
detent or notch
II
Pilotlessignitioneliminatesthe needfor
a constant standing pilot light. Each
sealedburnerhasa sparkignitor.When
care. If cleaningclothshouldcatch
cleaningaroundthe
surfaceburneruse
the
ignitor,it could damageit preventingignition.
If the surface burner does not light,
checkif ignitoris broken,soiledor wet.
If clogged,clean the small portbeneath
the ignitor using a straight pin or soft
bristlebrush.
c_,,
HIGH
_
Graphicsnearthe knob identifywhich
burnerthe knobcontrols.For i,
example,this graphicshows
the right rearburnerlocation.
__
g-:
THE CONTROLS
Uses
Useto bringliquidto a boil,
pressure cooker. Always
) or
reduce
setting
to a lower
reach
pressure
in a
heat when liquids beginto
boil or foodsbeginto cook.
_f
An
intermediate
flame
size
is used
to continue
cooking. Foodwill not cookany
fasterwhen a higherflame
setting is used than need-
1. Placea panon the burnergrate,
> The burner flame may lift off or
appearseparatedfromtheportif
a pan is not placedon the grate.
LOW ed to maintain a gentle
s_-_,_. boil. Water boils at the
,_,
sametemperaturewhether
L_
_ boilinggentlyor vigorously.
2. Push in and turn the knob counter- __._
clockwiseto the LIGHTsetting.
Useto simmerfoods,keep
>Aclicking (spark)soundwill be
foods warm and melt
heard and the burner will light. ___
chocolateor butter.
(All ignitorswill spark when any
surfaceburner knob is turnedto
the LIGHTposition.)
OPERATINGDURING
3. Afterthe burnerlights,turnthe knob
to the desiredflame size.
>-The ignitorwill continueto spark
until the knob is turned past the
LIGHTposition.
_o._
Setting
may be felt. The knobscan be set on
or betweenanyof the settings.
SETTING
PILOTLESSIGNITION
The size and type of cookwarewill affect the flame setting. For information
on cookwareand other factorsaffecting flame settings,refer to "Cooking
MadeSimple".
A
POWERFAILURE
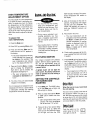
1. Holda lightedmatchto the desired
surfaceburner head.
2. Push in and turn the control knob
slowlyto LIGHT.
IGNITOR
,_o._o.,._.,_o.
3. Adjust the flame to the desired
level.
>
When lighting the surface burners, besure allof the controlsare
in the OFF position. Strike the
matchfirst and hold it in position
before turning the knob to
START.
4
SURFACE
COOKIHG,
corn,
(OOKTOP
TO PREVENTTHECOOKTOP
FROMDISCOLORINGOR
STAINING:
> Cleancooktopaftereach use.
> Wipe acidic or sugaryspills as
soonas the cooktophascooled
as thesespillsmay discolorthe
porcelain,
Unlikea rangewithstandardgasburners, this cooktopdoes not lift-upnor is
it removable.Do not attempt to lift
the cooktop for any reason.
HIGH PERFORMANCE
BURNER(12,000 BTU*)
This rangefeaturesa /
High
high speed burner,,_l--- Pe,_o_,oe
located in the right I • Front
front position.This high-performance
burner offers higher speed cooking
that can beusedto quicklybringwater
to a benandfor large-quantitycooking.
* BTU ratingswill vary whenusing LP
gas.
SIMMERBURNER
This burner is locatedin the left rear
position.The simmer burner offers a
lowerBTUflamefor delicatesaucesor
meltingchocolate.
BURNERGRATES
SEALEDBURNERS
Thesealedburnersof yourrangeare securedtothecooktopandarenotdesigned
to be removed. Sincethe burnersare
sealedintothecooktop,boiloversor spills
willnotseepunderneath
thecooktop,
However,the burnerheadsshould be
cleanedaftereachuse.(Seepage14for
cleaning
directions.)
The grates must be properly positioned before cooking. Improperinstallation of the grates may result in
chippingof the cooktop,
Do not operate the
burners without a pan
on the grate. The
grate's porcelain finish may chip without a
pan to absorb the heat
from the burner flame,
Although the burner
grates are durable,they
will graduaNylose their shine and/or
discolor,due to the high temperatures
of the gasflame.
S
_ A properly adjusted burner with
clean ports using
will light
within
a few
seconds.If
natural
gas
the
flame will be blue with a deeper
blue innercone.
If the burnerflame is yellow or is
noisythe air/gasmixture may be
incorrect.Contacta servicetechnicianto adjust. (Adjustmentsare
not coveredby the warranty.)
With LPgas, someyellowtips on
the flamesare acceptable.This is
normaland adjustmentis not necessary.
> Withsometypes of gas, you may
heara "popping"soundwhenthe
surfaceburner is turned off. This
isa normaloperatingsoundofthe
burner.
>- If the controlknob is turned very
quickly from HIGH to LOW, the
flame may go out, particularlyif
the burner is cold. If this occurs,
turn the knob to the Off position,
wait several secondsand relight
the burner.
> The flameshould be adjustedso
it does not extend beyond the
edgeof the pan.
OVEN
(OOKiN6
[ECTROHIC
CLOCK
AHD
OV[H
COHTROL
BROILPAD
I1
Bake
"= i i
More+TimerC,ock
t. Press
PressBroi,
pad
2.
More+or
Less- pad for HI
ii
SetCIock
ID
Broil
ll
Self
Clean
Usefor top browningand broiling.
ll
ll
II
Oven On
Preheat
Lock
Less-
ll
Cook
Time
I1
Stop
Time
or LO broil.
See page10for additionalinformation.
CLEANPAD
Useto set self-cleancycle.
fUNCTION
PADS
>
Press,or press and hold,
these pads to enter time, More+
_ The
indicator
light on the first
pad will
"dim"slightlyandthe
indicatorlight on the pad youjust
1. Closeand
Iockovendoor. appear
2.
PressCleanpad."3:00"will
in the display.
pressedwill be"full on."This lets
you know that you have set the
controlfor two operations,
3. Oven will automaticallyclean for 3
hours or press More+ or Lesspad to select2 to 4 hoursof clean-
oventemperature
or to select HI or LO broil.
No SetClock
beep will sound when Lessthesepads are pressed.
Foroven
example:
If you
set
the
to bakeat
350°F
> Press this pad to cancel
all operationsexcept the
Timerand Clock.
.:
> Functionpads are the Bake, Broil,
Clean, Timer, Clock, CookTime,
Stop Time and Cancel pads. A
beep will sound when these pads
arepressed,
>- Allfunctionpadsexceptthe
Cancelpadfeaturean indicatorlight.
Bake
> WhenBake or Broil pad is II
pressed,the indicatorlight
will turn on to let you know Bake
that the oven is set for this
operation,
Indicator lights on Clean, Timer,
Clock, Cook Time and Stop Time
pads will flash when the pad is
pressed.These indicator lights will
stopfunctionstarts.
flashingbut will remainlit once
the
ing.
"O_M"
andthen setat/ruingoper- Bake
at/on,the indicatorlighton
the Bake pad will "dim"
and the indicator light on "FULL-ON"
the Timer pad will be "full ll
on."
The display will show the Bake
operationfor the pad with
the "full on" indicatorlight. Pressthe
Seepages12-13foradditionalinformation.
COOK TIME/
STOPTIME PADS
Use to programthe oven to start and
stop automatically.
1. Press Cook Time pad and enter
the desiredcookingtime.
2. Pressthe Bake padand enteroven
functionpad with the "dim" indicator
temperature.
lightto recallthat operation.
3. To delaythe start of cooking,press
NOTE: If more than 30 seconds
the Stop Time pad and enter the
elapse between pressing a function
time you wishthe ovento turn off.
pad and a More+ or Less- pad, the See page11for additionalinformation.
program will be canceled and the
display will return to the previous
display.
BAKE PAD
Usefor bakingor roasting.
1. PressBake pad.
2. PressMore+or Less-pad untilthe
correctoven temperatureappears
>- If an indicatorlighton a functionpad
in the display.
is lit andyouset a secondoperation: See page8 for additionalinformation.
- Eitherthe controlwill not accept
the operationor
OVEH
COOKIHG,
CONT.
SETTING THE CLOCK
1. PressClock pad.
COHTROL
OPTIONS
2. Pressor pressand hold More+ or
Less- pad untilthe correcttime of
day appearsinthe display.
CLOCK CONTROLLED
The displaywill flash when electrical
powerisfirstsuppliedto the rangeor if
there has beena powerfailure,
To recallthe time of daywhen another
functionis displayed,pressthe Clock
pad.
Clock time cannot be changedwhen
the oven has been programmedfor
clock controlledcooking,self-cleanor
delayedself-clean,
Option 1. (default option)Four beeps
at the end of cooking, then, one
beep every 30 seconds for the
next five minutes or until the
Cancelpad is pressed,
Option 2. Four beeps at the end of
cooking,then,no other beeps.
Option 3. Four beeps at the end of
cooking, then, one beep every
minute for the next 12 hours or
untilthe Cancelpad is pressed,
OVEN
COOKING
The timercan be set from one minute
(0:01) up to 9 hours and 50 minutes
SETTINGCLOCKCONTROLLED
OVENCOOKINGBEEPS:
(9:50).
The timer can be used independently
of anyotherovenactivityandit can be
set while anotheroven functionis operating. THE TIMER DOES NOT
CONTROLTHEOVEN.
1. PressCook Time and Clockpads
at the sametimeand holdfor three
seconds.
1. Pressthe Timer pad.
2. Pressthe More+or Less- pad to
selectthe
optionnumberyouwish.
The currenttime
of day will reap-
TO CANCELTIMER: Pressand hold
Timer pad for three seconds.Timeof
daywill reappearin the display,
7
day will reappearin the display.
BEEPS
SETTINGTHE TIMER
2. Pressor pressand holdthe More+
or Less- pad untilthe correcttime
appearsin the display,
> The timer will start automatically.The TIMER indicatoron the
Timer pad will light whenever
the timeris in use.
> Onelong beepand "End"will be
briefly displayedto signal the
end of the timer operation.
TO
RESTORE:Pressthe
Cancel
pads at the sameClock
time and
and
hold for three seconds. The time of
> A singlebeepwill sound,
> Displaywillshowcurrentoption.
pear in the display after four seconds.
AUTOMATICOVENTURN
OFF/SABBATHMODE
The oven will automaticallyturn off
after 12 hours, if you accidentally
leave it on. You can deactivatethis
feature,if desired.
TO ELIMINATE12HOURTURN
OFF:
1. Pressthe Clock pad and hold for
three seconds.
2. Pressand holdthe More+or Lesspad until 8:88 appearsin the display.Currenttime of day will reappear in the displayafter four seconds.
TO RESTORE:Repeatsteps 1 and 2.
12:00will appearbriefly in the display
followedby the currenttime of day.
CONTROLLOCK-OUT
The ControlLock-Outfeatureprevents
the ovenfrom beingturnedon.
TO SETCONTROLLOCK-OUT:
CANCELCLOCK DISPLAY
if youpreferthat the timeof daynot be
displayed:
TO SET: Press Clock and Cancel
pads at the same time and hold for
three seconds,
When clock display is not shown,
press Clock pad to briefly recall the
time of day, if desired.
1. Press
and hold
both
and Cancel
pads
for Stop
threeTime
seconds.
2. "OFF" will appear in the display
whenthis featureis activated.Only
the clock and timer functions will
operate when Control Lock-Out
featureis activated.
Repeatstep 1 to deactivate.
OVEN TEMPERATURE
ADJUSTMENT
OPTION
BJKIHG
J HD
ROASTING.EAT
willlight.The
preselectedindicator
temperature
will remain
in
the display.
You may adjustthe oventemperature
if youthinkthe oven is not bakingcorrectly.To decidehow muchto change
the temperature,set the temperature
25 degreeshigher or lower than your
recipe recommends,then bake. The
resultsof the "test"shouldgive youan
ideaof howmuchto adjustthe temperature.
TO ADJUSTTHE
OVENTEMPERATURE:
4. Allow 8-15 minutesfor the oven to
> You may find that the cooking
times and temperatures vary
slightlyfromyouroldoven.This
is normal. Every oven has its
owncharacteristics,
preheat.A singlebeep will indicate
that the oven has preheated.The
OVEN ON indicator will remain lit
while the PREHEATindicator will
turn off.
> During some extended oven
cooking operations, you may
hear a "popping"sound when
the oven burnercycles.This is
normal,
5. Placefood in the oven.
> The oven temperaturecan be
changedat anytime by pressing
the More+ or Less- pad for the
desired temperature.If another
functionis displayed,press the
Bake pad, then press the
More+ or Lees- pad to select
newtemperature.
1. Pressthe Bakepad.
2. Enter550° by pressingMore+ pad.
3. Press and hold the Bake pad for
three secondsuntil 00° appearsin
the display,
> If the oventemperaturewas previouslyadjusted,the changewill
be displayed.Forexample,if the
oven temperaturewas reduced
by 15°,the displaywill show-15°.
> See roastingchart in "Cooking
Made Simple"bookletfor recommendedroasting temperaturesandtimes and bakingand
roastingtips.
PILOTLESSIGNITION
6. Checkcookingprogressat the minimumcookingtime and cooklonger
if needed.
Your range is equiped with pilotless
ignition.With
type of ignitionsystern, the gasthis
automaticallyshuts
off
7. PressCancelpad and removefood
from
theBake
oven.The
BAKE
on the
pad will
turn indicator
off. The
4. Pressandhold the More+or Lesspad to change the temperature,
Each time a pad is pressed,the
temperaturechangesby 5°.
>-The oven temperaturecan be
increased or decreased by 5 °
to 35 o.
and the oven will not operate during
a power failure,
A lighted match will not light the
oven burner. No attempt should be
made to operate the oven during a
power failure,
OVENONindicatorwill turnoff and
the time of daywill reappearin the
display.
> If youforgetto turnoffthe oven,
it will automaticallyturn off at
the end of 12hours. If you wish
to deactivatethis feature, see
page7.
5. The time of day will automatically
FOR BAKINGAND
reappearin thedisplay.
It is not necessaryto readjustthe oven
temperatureif there is a powerfailure
or interruption.Broiling and cleaning
temperaturescannotbe adjusted.
ROASTING
SETTINGTHECONTROLS
1. PressBake pad. TheBAKEindicator
Bakedisplay.
pad will light, and
000on
willthe
lightin
2. Pressor pressand holdthe More+
or Less- pad to select oven ternperature,
>- 350° will lightwhen eitherpad is
pressed.The oven temperature
can be set from 170° to 550°.
3. There will be a four second delay
before oven turns on. When the
oventurnsonthe OVENONindicatot will light, and then the PRE-
OV[N VENT
theWhenventtheopening.°Ven
is in use, never block
Theovenvent is locatedat the base of
the backguard.When the oven is in
use,this areamaybecomehot enough
to cause burns. Do not place plastics
nearthe ventopeningas heatfromthe
vent coulddistortor meltthe plastic.
0V[N [16HT
Push the switch on the
controlpanel to turn the
ovenlight on and off.
ov_NLIGHT
IUUI
I
OYEN
COOKING,
cons,
OVEN
RACKS
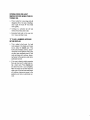
RACK
POSITIONS
!_-.-_
_,_
f_,_
>
Do not attempt to change the
Yourovenhastwo racks.Theyare designedwith a lock-stopedge.
hot.rack
positionwhen
oven is
TO REMOVE:
Pull rackthe
straight
out
until it stops at the lock-stopposition;
lift up onthe front of the rack and pull
out.
_%\\',_
Ii:if¢
I]
i_./_,1
!_'_l_
TO REPLACE:Placerackonthe rack
supportin the oven;tilt thefrontend up
slightly;slide rack back until it clears
the lock-stopposition;lowerfront and
slidebackintothe oven.
Do not cover an entire rack with aluminum foil or place foil on the oven
bottom. Baking results will be affected and damage may occur to
the oven bottom.
|
_ _
____
--5
!_
ROASTINGPOSITION:
Usedfor roastingtallercuts of meat
or turkey. Place both oven racks,
one abovethe other,on the raised
sidesof the oven bottom.
--4
RACK 5:
Used for toasting bread or broiling
_,thin non-fattyfoods.
-_ ,_--2_1
RACK 4:
Used for most broiling and some
two-rackbaking.
Used for most baked goods on a
cookie sheet or jelly roll pan, layer
cakes, fruit pies, or frozen conveniencefoods.
=_
l_i
=
=
[_
MULTIPLERACK COOKING:
Two rack:
Use rackpositions2 and4, or 1 and
NOTE: Never place pans directly on
the oven bottom.
HALF RACK ACCESSORY
Used for roasting small cuts of
meat,casseroles,bakingloaves of
bread,bundtcakes,custardpies or
two-rackbaking,
RACK 1:
Usedfor roastinglargecutsof meat
and poultry, frozen pies, dessert
souffles,angel food cake, or tworack baking.
A half rack, to increase oven capacity,is
availableasanaccessory.
Itfits in theleft,
upperportionof the ovenand provides
spacefor a vegetabledishwhena large
roasteris onthe lowerrack.Contactyour
Jenn-Airdealerfor the "HALFRACK"
AccessoryKitorcall1-800-688-8408
toorder.
BROILING
SETTINGTHE CONTROLS
FOR BROILING
Typeof Meat
1. Pressthe Broil pad.
Bacon
4
WellDone
6-10rain.
BeefSteaks- 1"thick
4
4
Medium
Well
15-20rain.
18-24min.
Chicken-Pieces
3
WellDone
(LOBroil)
30-40rain.
Fish- Fillets
Steaks,1"thick
4
4
Flaky
Flaky
8-12min.
10-15rain.
GroundBeef- Patties,3/4"thick
4
WellDone
15-18rain.
Ham- Precooked
Slice,1/2'thick
4
Warm
8-12rain.
> Broil indicatoron the Broil pad
willlight.
> 000 will lightin the display
> The Oven On indicatorwill light.
There will be an eight second
delay beforethe oventurnson.
2. Pressthe More+ pad to select HI
(high)broil or the Loss- pad to set
LO (low)broil.
>- SelectHI broil for normalbroiling.
> SelectLObroil for lowtemperature broilingof longer cooking
foodssuchas poultry.
3. Placefood in the oven,
4. Turn meat once about half way
throughcooking.
5. Press Cancel pad. Removefood
andbroiler panfromthe oven.
The Oven On indicatorwill turn
Off.
> The Broil indicatoron the Broil
padwinturn off.
Timeof daywill reappearin display.
Rack
TotalCook
Position* Doneness Time(Min.)**
PorkChops- 1"thick
4
WellDone
22-26rain.
.........................
*Top
rackp
osition
is#5.
**Broiling
times
areapproximate
andmayvarydepending
onthemeat.
OVEH
COOKIHG,
coNT.
CLOCK
(0NTROLI.ED SETTING
THE CONTROLS
FOR CLOCK CONTROLLED
OVEN
COOKING
>- Highlyperishablefoods suchas
dairy products,pork, poultry or
seafood are not recommended
for delayedcookoperations,
>
Clock controlled baking is not
recommendedfor baked items
that require a preheatedoven,
such as cakes, cookies and
breads,
Clock Controlled Oven Cooking is
used to turn the oven on and off at a
presettime of day.This featurecanbe
used with eitheroven cooking or selfcleaning,
> Immediate Start: Oven turns on
immediatelyand automaticallyturns
off at a presettime.
> Delayed Start: Delaysthe start of
cooking or cleaning and automaticallyturnsoff at a presettime.
Cooktime canonly be set for up to 11
hoursand 59 minutes(11:59).
The clock must be functioningand set
at the correcttime of day for this featureto operatecorrectly.
11
OVENCOOKING
1. Pressthe Cook Time pad.
>-CookTimeindicatoron the Cook
Time padwill flash,
>-0:00 will lightin display,
2. Pressor press and hold the More+
or Less- pad to entercookingtime.
3. PressBake pad.
_-Bake indicatoron Bake pad will
light,
> 000 will light in display.
4. Pressor press and hold More+ or
Less- pad to enter oven temperature.
NOTE: Beeps will sound and 000
will flashin displayif the Bakepad is
not pressedwithinfourseconds.
5. IF YOU WISH TO DELAY THE
STARTOF COOKING:
(if not skip to #6)
a. PressStop Time pad.
b. Pressor pressand holdMore+or
Less- pad to enter time of day
youwishthe ovento turnoff.
c. PressClock pad.
>Time of daywill reappearin the
display.
6. When theoven turns on, the Oven
On indicator will
light. The oven
temperaturewill
appearin
play.Press the Cook
Timethe
paddisto
recallthe remainingcooktime.
> NOTE: It is not necessaryto set
a start time. Control will determine when to turn the oven on
basedonthe cooktime you set.
7. Oven will automatically turn off.
Fourbeepswill soundand ENDwill
light in the display. A beep will
sound every 30 seconds for the
next 5 minutes.
>- NOTE:See page7 if youwishto
change the end of cooking
reminderbeeps.
8. Press Cancel pad and beeps will
stop. Removefood fromoven.
CARE
&CLBHIHG
____.,SI
____
OVEN
If-CLIAHO,ean
oven
> It is normalfor partsofthe rangeto
becomehot duringa cleancycle,
> Avoidtouchingcooktop,door,window, or oven vent area during a
cleancycle,
> To preventdamageto oven door,
do not attempt to open the door
when the LOCK indicatorword is
displayed,
> Do not usecommercialovencleaners on the self-cleanovenfinish or
aroundanypartofthe ovenasthey
outside of
gasket)
frame,door
and
around ____
',I
frame(area
_
the opening in the doorgasketwith a nonabrasivecleanersuchas BonAmior detergent and water. These areasare not
exposedto cleaningtemperaturesand
shouldbe cleanedto preventsoilfrom
bakingon duringthe cleancycle.
It is normal for flare-ups,smoking or
flamingto occur during cleaningif the
oven is heavily soiled. It is better to
clean the oven regularlyratherthan to
wait until there is a heavy build-up of
soil in the oven.
During the cleaning process, the
kitchenshouldbewellventilatedto help
eliminatenormalodors associatedwith
Wipe up excess grease or spillovers
from the oven bottom to prevent
excessivesmoking,flare-ups or flareingduringthe clean cycle,
Wipe up sugary and acidic spillovers
such as sweet potatoes, tomato or
milk-basedsauces. Porcelainenamel
is acid resistant, not acid proof. The
porcelainfinish may discolor if acidic
spills are not wipedup priorto a selfclean cycle,
cleaning.
DURINGCLEANCYCLE
BEFORESELF-CLEANING
When the LOCK indicator lights, the
door cannot be opened. To prevent
damage to door, do not force door
openwhenthe LOCKlightis illuminated.
Turn off the oven light beforecleaning
as the light may burn out during the
clean cycle.
Removebroiler pan, all pans and the
oven racks from the oven. The oven
racks will discolor and may not slide
easilyaftera self-cleancycle,
oven.
of metalparts expandingandcontracting.This is normalandwill not damage
AFTER SELF-CLEANING
About one hour after the end of the
clean cycle, the LOCK indicator light
will turn off. At this point,the door can
be opened.
Somesoil may leavea lightgray,powdery ashwhich canbe removedwith a
To prevent damage, do not clean or dampcloth. If soil remains,it indicates
rub the gasketaroundthe oven door. that the clean cycle was not long
The gasketis designedto seal in heat enough.The soil will be removeddurduringthe clean cycle,
ingthe next clean cycle.
wilt damagethe finishor parts.
The self-cleancycleusesabovenormal
cooking temperaturesto automatically
clean the entireoveninterior,
oven
heats,
you
may
hear
so,nds
Somesmokeand odormay be detected the first few times the oven is
cleaned.This is normaland will lessen
in time. Smokemay alsooccur if oven
is heavilysoiled or if broiler pan was
left in oven.
If the oven rackswere left in the oven
and do not slidesmoothlyaftera clean
cycle, wipe racks and embossedrack
supportswith a small amount of vegetableoil to restoreeaseof movement.
Finelines may appearin the porcelain
resultingfrom the heatingand cooling
of the finish.This is normaland will not
affectperformance.
A whitediscolorationmay appearafter
cleaningif acidicor sugaryfoodswere
not wiped up before the clean cycle.
This discolorationis normal and will
NOTaffectperformance.
CARE
&CLE,HIHG,,
coils,
SETTINGTHE CONTROLS
FOR SELF-CLEAN
_
TO CANCELCLEANCYCLE:
1. PressCancelpad.
2. If Lock indicator is NOT lit, open
oven door. If Lock indicator is lit,
allow oven to cool about one hour
thenopenoven door.
1. Closeoven door.
2. Movedoorlookleverrightto locked
position.
CLOCK
CLEANING
PROCEDURES
3. PressClean pad.
> "--:--" or "3:00" will light in display.
> CLEANlightwill flash,
> If door is not closed or locked,
beeps win sound and "dr" will
appearindisplay,
3. PressMore+or Less-padto select
clean time or changecleantime.
> Oven is preset to clean for 3
hours.Or,
> Select2 hoursfor lightsoilupto
4 hoursfor heavysoil.
4. IF YOU WISH TO DELAY THE
STARTOF CLEANING(if not, skip
to #6):
a. PressStop Time pad.
b. Press More+ or Less- pad to
select the time of day you wish
the oventoturn off.
Be sure applianceis off and all
parts are cooJbefore handlingor
cleaning.This is to avoiddamage
and possibleburns,
> To prevent staining or discoloration, clean appliance after
each use.
>
If a part is removed,be sure it is
correctlyreplaced.
BROILERPAN& INSERT
Never cover insertwith aluminumfoil
as this preventsthe fatfrom drainingto
the pan below.
_- Placesoapy cloth over insert and
pan; let soakto loosensoil.
> Wash in warm soapy water. Use
soap filled scouring pad to remove
stubbornsoil.
> Broiler pan and insert can be
will reappearin display.
d. Press Stop Time pad to recall
the timeyou set.
BURNERGRATES
6. About one hour after the clean
cycle ends, the Lock indicatorlight
will turn off. The ovendoor canbe
opened.
13
>
cleanedin dishwasher.
The Lockindicatorwill light.
> Door cannot be opened when
Lockis displayed,
AND CONTROL
PAD AREA
> To activate "Control Lock-out" for
cleaning,see page7.
c. PressClock pad andtime of day
5. Whenthe oven turnson:
> The Oven On indicatorwill light,
er, (Do not spray surroundingsurfaces.) Place in plastic bags for
several hours or over night.
Wearing rubber gloves, remove
from bags. Wash, rinse, dry and
replaceoncooktop.
> Wipewith a dampclothand dry.
> Glass cleaners may be used if
sprayed on a cloth first. DO NOT
spray directly on control pad and
display area.
CONTROLKNOBS
> Removeknobs in the OFFposition
by pullingforward.
> Wash, rinse and dry. Do net use
abrasive cleaning agents as they
may scratchthe finish.
> Turnon eachburnerto be sure the
knobs have been correctly replaced.
COOKTOP&
BACKGUARD,
PORCELAINENAMEL
Porcelain enamel
is or
glass
on
metaland
may crack
chipfused
with misuse. It is acid resistant,not acid proof.
All spillovers,especiallyacidicor sugary spillovers, should be wiped up
immediatelywitha dry cloth.
> Whencool,washwith soapywater,
rinse and dry.
> Wash grates with warm, soapy
water and a nonabrasive,plastic
scrubbingpador in the dishwasher.
For stubborn soils, clean with a
> Neverwipe off a warm or hot surface with a damp cloth. This may
soap-filled, nonabrasive pad or
spongeand a commercialCooktop
cause crackingor chipping.
CleaningCreme.*(Part#2000001.)** > Neveruse oven cleaners,abrasive
> Forburnedon soils,removegrates,
or causticcleaningagentson exteplace on newspapersand carefully
riorfinish of range.
spray withcommercialoven clean-
ENAMEL
(PAINTED)
SIDEPANELS,STORAGEDRAWER&
TRIMPARTS
DOOR
HANDLES
> Whencool,washwith warm,soapy
water,rinse and dry. Neverwipe a
> Washwith soap and water,a glass
cleaner,or mild liquidsprays,such
as Fantastik*or Formula409*.
NOTE:Neveruseovencleaners,abrasive or caustic liquid or powdered
cleansers on plastic finishes. These
cleaningagentswill scratchor mar finish.
warm or hot surface with a damp
clothas this may damagethe surface and maycausea steamburn.
> For stubbornsoil, use mildlyabrasive cleaningagents suchas baking sodapasteor BonAmi*. Do not
useabrasivecleanerssuchas steel
wool pads or oven cleaners.These
productswill scratchor permanently damagethe surface.
NOTE: Use dry towel or cloth to wipe
> To preventscratchingor dulling of
the finish, do not use mildly abrasive, abrasive, harsh or caustic
cleanerssuchas oven cleaners,
OVEN INTERIOR
NOTE: Topreventstainingor discoloration, wipe up fat, greaseor acid (tomato,lemon, vinegar,milk, fruit juice,
marinade)immediatelywith a dry paper towel.
> Followinstructionson pages12-13
for Self-CleaningOven
SEALED GAS BURNERS
up spills, especially acidic or sugary
spills. Surface may discolor or dull if
soilis not immediatelyremoved.Thisis
especiallyimportantfor whitesurfaces.
> Removestubbornsoil with cleansing powder or soap-filledscouring
pad. Rinseand dry.
Racks will permanentlydiscolor and
may not slide smoothlyif left in the
oven during a self-cleanoperation.If
this occurs, wipe the rack and
embossedrack supportswith a small
amount of vegetable oil to restore
ease of movement, then wipe off
excessoil.
GLASS
OVEN
WINOOW
& DOOR
> Avoidusing excessiveamountsof
water which may seep under or
behindglasscausingstaining,
> Wash with soap and water. Rinse
with clear water and dry. Glass
cleanercan beusedif sprayedon a
clothfirst.
> Do not useabrasivematerialssuch
as scouring pads, steel wool or
powdered cleaners as they will
scratchglass,
METAL
FINISHES
OVEN RACKS
> Cleanwith soapywater.
PLASTIC FINISHES
TRIM& ENDCAPS
> When cool, clean with soap and
water,rinse and dry.
> Use a glass cleaner and a soft
cloth.
> Clean
frequently.Allow
burner
to
cool. Clean
with soap and
plastic
scouring pad. For stubborn soils,
clean with a soap-filled,nonabrasive pad.Try to preventthe cleaner
from seepingintothe gas ports as
this will affect the flame. If the
cleanerdoes enter the ports,clean
with a soft bristlebrushor a straight
pin, especiallythe port below the
ignitor. Do not enlarge or distort
holes.
> Be careful not to get water into
burnerports.
Usecare when cleaningthe ignitor.
If the ignitoris wet or damagedthe
surfaceburnerwill not light.
* Brandnamesfor cleaningproductsareregisteredtrademarksof the respectivemanufacturers.
** Toorderdirect,call1-800-688-8408.
li
CARE
&CLEAFIIHG,
(ore.
MAINTENANCE OVEN
L,GHT
OVEN
WINDOW
TO PROTECT THE OVEN
OVEN DOOR
DOORWINDOW:
1. Do not use abrasive cleaning
agentssuchas steel wool scouring
pads or powdered cleansers as
they may scratchthe glass.
> Do notplace excessiveweighton
or stand on an open oven door.
This could causethe rangeto tip
over,breakthe door,or injurethe
user.
> Do not attemptto open or close
dooror operateoven untildooris
properlyreplaced,
> Disconnect power to range
beforereplacinglightbulb.
> Use a dry potholderto prevent
possible harm to hands when
replacingbulb.
>
Be sure bulb is cool before
touchingbulb.
>
Do not touch hot bulb with a
damp cloth as this may cause
the bulb to break.
> Never place fingers between
hinge and front oven frame,
Hingearms are spring mounted.
If accidentallyhit, the hinge will
slam shut against oven frame
andcould injureyourfingers.
TO REMOVE:
1. When cool,open the oven doorto
the firststop position(openedabout
four inches).
"
_' '
RE_,*,NER
TO REPLACEOVENLIGHTBULB:
3. Liftupevenlyuntildoorclearshinge
arms.
ing wire retainer,
2. Removebulb coverand light bulb.
TO REPLACE:
3. Replacewith a 40-watt appliance
bulb.
1. Graspdoor
at each side.
4. wire
Replacebulbcoverand
securewith
retainer.
2. Align slots in
the doorwith the hingearmsonthe
range,
5. Reconnectpower to range. Reset
clock.
use.
15
__
2. Graspdoor at each side. Do not
usethe door handleto liftdoor.
NOTE:Theoven dooron a newrange
may feel "spongy"when it is closed.
This is normal and will decreasewith
Scratching,hitting,jarring or stressing
the glass may weaken its structure
causingan increasedrisk of breakage
at alaterdate.
_ULBCovER
1. Whenoven is cool, hold bulb cover
in place,then slidewire retaineroff
cover.NOTE: Bulb cover will fall
if not held in place while remov-
3. Slidethe door downonto the hinge
arms until the door is completely
seatedon the hinges.Push down
on the top corners of the door to
completely seat door on hinges.
Doorshouldnot appearcrooked.
2. Do not hit the glasswith pots,pans,
furniture,toys or other objects.
3. Do not closethe dooruntilthe oven
racks arein place.
LEVELINGLEGS
> Be surethe anti-tipbracketsecures one of the rear leveling
legs to the floor to preventthe
rangefrom accidentallytipping.
The rangeshould be leveledwhen installed. If the range is not level, turn
the plastic leveling legs, located at
eachcornerof
the range,untilrangeis
level.
_:
_ _._
_,,"
_
_"
_ :
-_AANTI-TIPBRACKET
_'LEVELING
LEG
STORAGEDRAWER
> Donot storeplastic,paperproducts,food or flammablematerials in this drawer. The drawer
maybecometoo warmfor these
itemswhen the oven is in use.
The storagedrawercan be removedto
allowyouto clean underthe range.
TO REMOVE:
1. Emptydrawerandpullout to the first
stop position,
2. Lift upthe frontof the drawer,
3. Pullout to secondstop position,
4. Graspsides and lift drawer up and
out.
TO REPLACE:
1. Fitthe endsof the drawerglidesinto
the railsin the range.
2. Lift up front of drawer and gently
push in to the firststop position,
3. Lift drawerup again and push until
draweris closed,
ELECTRICAL
TOREMOVE:
CONNECTION
When cool, remove the oven racks.
Slide the two catches,locatedat each
rear cornerof the oven bottom,toward
the front of the oven.
Appliances which require electrical
power are equipped with a threeprong grounding
plug which must
be pluggeddirectly into a properly
grounded threehole
120volt electricaloutlet.
2 '_
Alwaysdisconnectpowerto appliance
beforeservicing.
The three-prong grounding plug
_
t3il
offers protection against shock hazards. Do not cut or remove the third
grounding prong from the power Lift the rear edge of the oven bottom
cord plug.
slightly,then slideit backuntil the front
edge of the oven bottom clears the
If an ungrounded,two-hole or other ovenfront frame.Removeoven bottom
type electricaloutlet is encountered,it from oven.
is the personal responsibility of the
appliance owner to have the outlet TO REPLACE:
replaced with a properly grounded Fit the front edge of the oven bottom
three-hole electrical outlet,
into the oven front frame. Lower the
rear of the oven bottomand slide the
OVEN BOTTOM
two catchesbackto lock the oven bottom in place.
Protectoven bottomagainstspillovers,
especially acidic or sugary spills, as
they maydiscolorthe porcelainenamel.
Use the correct pan size to avoid
REMOVALOF GAS
APPLIANCE
spillovers and boilovers. Never place
utensils or foil directly on the oven
bottom.
Gasapplianceconnectorsusedto connect this applianceto the gas supply
are not designedfor continuousmoveTent. Once installed,DO NOT repeatedly movethis gas appliancefor cleaning or to relocate.If this appliancehas
to bemovedand/orremovedfor servicing, follow the proceduredescribedin
the installationinstructions. For information contact Jenn-Air Customer
Serviceat 1-800-688-1100.
The oven bottom may be removedfor
easiercleaning,
To prevent range from accidentlytipping,rangemust be securedto floor by
slidingthe rear levelinglegintothe antitip bracket.
|(
STRONGODOROR LIGHT
SMOKEOCCURSWHENOVENIS
TURNEDON.
> Thisisnormalfora newrangeandwill
disappear
afterafewuses.Initiatinga
cleancyclewill "burnoft" the smells
morequickly.
> Turningon a ventilation
fan will help
removethesmokeand/orodor.
> Excessive
foodsoilsontheovenbottom. Usea self-clean
cycle.
"F" PLUSA NUMBERAPPEARS
IN THE DISPLAY.
> Thisis calleda faultcode.If a fault
codeappears
in thedisplayandbeeps
sound,pressthe Cancelpad.If the
faultcodeandbeepscontinue,
disconnectpowertotheappliance.
Waita few
minutes,thenreconnect
power.If fault
codeandbeepsstillcontinue,disconnectpowertotheappliance
andcallan
authorized
servicer.
> If theovenisheavilysoiled,excessive
flare-upsmayresultina faultcodeduringa cleancycle.PressCancelpad
andallowtheoventocoolcompletely.
Wipeoutheavysoilandthenresetthe
cleancycle.Ifthefaultcodeandbeeps
stillcontinue,disconnect
powerto the
applianceandcallan authorized
servicer.
11
JEHH-AIR
RAHG[
WARRAHTY
WIIAI
ISHOT
(OVERED
BY
TILES[
WkRRkHII[S:
FullOneYearWarranty- PartsandLabor
Forone(1) yearfromtheoriginalretailpurchasedate,any part whichfails in normal
homeusewillberepairedorreplacedfreeof
charge,
1. Conditions
anddamagesresultingfromanyof thefollowing:
a. Improperinstallation,
delivery,or maintenance.
b. Any repair,modification,
alteration,or adjustment
notauthorizedby the
manufacturer
or anauthorizedservicer.
LimitedWarranties- PartsOnly
c. Misuse,abuse,accidents,
or unreasonable
use.
SecondYear- Afterthe firstyearfromthe
originalpurchase
date,partswhichfailin normaihomeuse will be repairedor replaced
free of chargefor the part itself,withthe
ownerpayingallothercosts,includinglabor,
mileageandtransportation.
d. Incorrectelectriccurrent,voltage,or supply.
e. Improper
settingof anycontrol.
2. Warranties
arevoidiftheoriginalserialnumbershavebeenremoved,altered,
or cannotbereadilydetermined.
3. Lightbulbs.
Third ThroughFifthYear- Fromtheoriginal
purchasedate,partslistedbelowwhichfail in
normalhomeusewillberepairedor replaced
free of chargefor the part itself,with the
ownerpayingall othercosts,includinglabor,
mileageandtransportation,
4. Productspurchasedforcommercial
or industrialuse.
5. Thecostofserviceor servicecallto:
ElectronicControls
Third ThroughTenthYear- Fromthe original purchasedate,partslistedbelowwhich
failin normalhomeusewillberepairedor replacedfreeof chargefor the partitself,with
the ownerpayingall other costs,including
6. Consequential
or incidentaldamagessustainedby anypersonas a resultof
anybreachofthesewarranties.
Somestatesdonotallowtheexclusion
orlimitationof consequential
or incidentaldamages,so theaboveexclusionmay
not apply.
labor,mileageandtransportation.
SealedGasBurners
If YOU NEED _;ERYI(E
a. Correctinstallation
errors.
b. Instructthe userontheproperuseof theproduct.
c. Transporttheapplianceto theservicer.
I
Callthe dealerfrom whomyourappliancewas purchasedor call Maytag
AppliancesSalesCompany,Jenn-AirCustomerAssistanceat 1-800-688"It00,USAandCanadato locateanauthorizedservicer.
I
Besureto retainproofof purchase
to verifywarrantystatus.Referto WARRANTYfor furtherinformation
on owner'sresponsibilities
for warrantyservice.
I
If thedealerorservicecompanycannotresolvetheproblem,writetoMaytag
CanadianResidents
Theabovewarranties
onlycoveranappliance
installedin Canadathathasbeencertifiedor
listedbyappropriate
testagenciesforcompl{ancetoa NationalStandard
ofCanadaunless
theappliancewasbroughtintoCanadadueto
transferofresidence
fromtheUnitedStatesto
Canada.
Appliances
SalesCompany,
Attn:CAIR®Center,P.O.Box2370,Cleveland,
TN37320-2370,
or call1-800-688-1100
USAand Canada.
LimitedWarrantyOutsidetheUnitedStates
U.S.customers
usingTTYfordeaf,hearingimpairedorspeechimpaired,
call
1-800-688-2080.
andCanada- PartsOnly
Fortwo(2)yearsfromthedateof originalretail purchase,anypartwhichfailsin normal
homeusewill berepairedor replacedfreeof
chargeforthe partitself,withtheownerpaying all othercosts,includinglabor,mileage
andtransportation,
Thespecificwarranties
expressed
aboveare
the ONLYwarranties
providedby the manufacturer.Thesewarrantiesgiveyou specific
legalrights,and you may also haveother
rightswhichvaryfromstatetostate.
19
JENN-AIR
NOTE:Whenwritingor callingabouta serviceproblem,pleaseincludethe
followinginformation:
a. Yourname,addressandtelephonenumber;
b. Modelnumberandserialnumber;
c.Nameandaddressofyourdealeror servicer;
d. A cleardescription
of theproblemyouarehaving;
I
e. Proofofpurchase(salesreceipt).
User'sguides,servicemanualsand partsinformationare availablefrom
MaytagAppliancesSalesCompany,
Jenn-AirCustomerAssistance.
• 403 West Fourth Street North • P.O. Box 39 • Newton, Iowa 50208