1
www.jacksonmsc.com
Many Jackson dishmachines are equipped with electrical
solenoid valves to allow for automatic fill and rinse. These valves
are designed to specific tolerances and design aspects that must
be met in order to function properly.
Jackson offers repair kits for replacing some of the wear
items associated with solenoid valves which will allow you to save
money in that replacement of these parts can take place without
removing the solenoid valve from the plumbing assembly.
The instructions provided here are for maintenance personnel only. Unauthorized persons should not attempt any of the
steps contained in these instructions.
STEPS
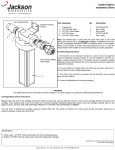
1. Remove the top screw with the 5/16” nutdriver. Remove the
screw and the data plate and set to the side.
Warning: many of the instructions and steps within
this document require the use of tools. Only authorized personnel should ever perform any maintenance procedure on
the dishmachine!
PREPARATION
1. Power must be secured to the unit at the service breaker. Tag or lock out the service breaker to prevent accidental or
unauthorized energizing of the machine.
2. Ensure that incoming water to the machine is secured
either by use of a shut-off valve or disconnecting the incoming
water line.
TOOLS REQUIRED
The following tools will be needed to perform this maintenance evolution:
1. Small flathead screwdriver
2. Medium flathead screwdriver
2. Needle nose pliers
3. 5/16” nutdriver
4. Channel locks
5. 12” pipe wrench
Removing the top screw
2. With the top screw and data plate removed, grasp the solenoid
coil and gently pull up. The coil should slide up, allowing you to
remove it from the valve bonnet. If you are wanting to replace the
coil, continue on with Step 3. If you are wanting to replace some of
the internal components of the valve, proceed to step 12.
TIME REQUIRED
It is estimated that it will take (1) person twenty minutes to
perform this task, not including all of the items indicated in the section entitled “PREPARATION”.
IMPORTANT NOTES
Removing the coil
1. Read these instructions thoroughly before attempting
this maintenance evolution. Become familiar with the parts and
what actions need to be taken. This will save time in the long run!
2. The procedures demonstrated in this manual are
shown being performed on an AJ-44 rack conveyor dishmachine.
The actual maintenance steps, however, apply to any Parker style
solenoid valve found on a Jackson dishmachine.
3. NOTE: Replacing the solenoid coil requires working with the
wiring of your machine. It is important that all wiring maintenance
be performed by qualified personnel. Always verify the wiring steps
presented in this instruction with the schematic that shipped with
the unit. A current schematic can also be found in the unit’s installation manual. Before beginning any step that involves working
with wiring, ensure that the steps located in the section entitled
“Preparation” have been performed. Power must be secured to the
machine at the service breaker. Failure to do so could result in
severe injury to maintenance personnel.
2
Parker Style Solenoid Valve Repair Kit Instructions
Revision A (04/15/2005)