1
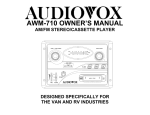
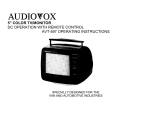
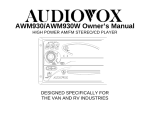
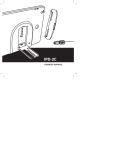
Installation
Owner’s
Guide
and
Manual
1-800-645-4994
© 1998 Audiovox Corporation, 150 Marcus Blvd., Hauppauge, NY 11788
Model : EZCPG/EZCPT
Installation Guide
PRODUCT DESCRIPTION
The E-Z Fit video floor console is an entertainment center specifically designed to fit into most mini-vans, full size
vans and sport utility vehicles. It should be placed between the driver and passenger seats with the screen facing
the rear of the vehicle. The console contains an Audiovox® AVT-597 television and an Audiovox® AVP7000 VHS
Video Cassette Player (VCP). Also provided are Audio/Video input jacks for video game or camcorder use and 2
headphone jacks for private listening. A built-in antenna provides television reception (See note below).
Operation instructions for the TV and the VCP are contained in their respective manuals.
This manual contains specific instructions on how to install this automotive E-Z Fit floor console. Please read this
manual thoroughly before installing the console into the vehicle.
**WARNING**
IN ORDER TO MAINTAIN A SAFE MOUNTING SYSTEM, THIS CONSOLE MUST
BE SECURED TO THE FLOOR OF THE VEHICLE ACCORDING TO THE
INSTRUCTIONS CONTAINED IN THIS MANUAL. FAILURE TO DO SO MAY
RESULT IN THE CONSOLE BECOMING A PROJECTILE IN THE EVENT OF
AN ACCIDENT.
Required tools for installation:
Electric drill
1/8” steel drill bit
¼” steel drill bit
Socket wrench set with deep-well, 7/16” socket
Box end wrench, size 7/16”
Standard utility knife (or equivalent)
Two people are required for installation.
Note: Due to the nature of TV signals, vehicle motion, direction the vehicle is facing, distance from
nearby transmitter, nearby surroundings and weather may adversely affect TV reception. Results of
these conditions may result in the following: picture roll, poor reception (snowy picture) and momentary
loss of color (especially when the vehicle is in motion).
Contents of one complete E-Z Fit package
Description
Quantity
E-Z Fit Console with TV and VCP
E-Z Fit Installation and Instruction Manual
12 Volt Cigarette Lighter Cord and Plug
AVT597 TV Instruction Manual
AVP7000 Video Cassette Player Instruction Manual
Hardware Package for securing Console to Vehicle
Contains the following:
4 floor bolts
4 fender washers
4 floor nuts (locking)
4 sealing washers
1
1
1
1
1
1
1
MOUNTING THE CONSOLE IN A VEHICLE
There are two approved mounting methods for the EZ-Fit floor console. One is permanent, the other is temporary
(i.e., removable).
BEFORE DRILLING ANY HOLES IN THE VEHICLE VERIFY THAT THE DRILL BIT
WILL NOT ENTER INTO THE FRAME RAIL(S) OF THE VEHICLE OR DAMAGE
ELECTRICAL WIRES, FUEL LINES, BRAKE LINES, HOSES, EXHAUST SYSTEM
COMPONENTS OR ANY OTHER ITEMS THAT WILL IMPAIR THE OPERATION
OF THE VEHICLE. THE E-Z FIT FLOOR CONSOLE MUST BE SECURED TO THE
FLOOR PANEL OF THE VEHICLE. CHECK UNDER THE VEHICLE TO ENSURE
THAT THE HOLES WILL BE IN THE PROPER LOCATIONS. ALSO CHECK UNDER
THE CARPET TO ENSURE THAT THERE ARE NO WIRING HARNESSES, FUEL
LINES, ETC. THAT COULD BE DAMAGED WHEN DRILLING THROUGH THE
FLOOR PAN OF THE VEHICLE
CAUTION: BEFORE WORKING UNDER THE VEHICLE BLOCK THE WHEELS TO
PREVENT ACCIDENTAL INJURY.
Permanent mounting of the E-Z FIT floor console.
Set the console on the floor of the vehicle and mark where the holes are to be drilled. (Make sure that you have
checked under the vehicle and in the vehicle floor (under the carpet) for obstructions).
Remove the console from the vehicle.
Using the utility knife, score the carpet over the marks with an ‘X’ so that the drill bit does not ‘grab’ and unravel
the carpet.
Drill four small 1/8” pilot holes to verify that the holes are in the proper locations.
After verifying that the 1/8” pilot holes are in the proper locations, use the ¼” drill bit to enlarge the pilot holes.
Set the console on the floor over the holes.
Place the 4 bolts through the brackets of the console and into the holes just drilled.
Place one sealing washer (rubber side towards vehicle floor) and one large fender washer over each of the bolts
and attach the nuts. (Note: In addition to the sealing washer it may be desirable to place a small circle of silicon
sealer around the hole under the vehicle before installing the washers and nut to further prevent moisture from
getting into the vehicle.)
Tighten the nuts down securely. Have the second person inside the vehicle hold the bolts securely with the
box-end wrench while the person underneath the vehicle tightens down the nuts. See Figure 1 below.
Plug the cigarette lighter cord into the jack on the console (by driver’s seat). Plug the other end into the
cigarette lighter receptacle.
Figure 1
BRACKET
BOLT
VEHICLE FLOOR
SEALING WASHER
FENDER WASHER
NUT
2
Removable (Quick-Release) mounting of the E-Z FIT floor console. (Requires
optional Quick-Release Kit: Part Number 0892125)
The E-Z FIT console can be mounted with optional brackets that allow the console to be easily removed from the
vehicle for in-home use or in-hotel use when traveling. This kit contains four (4) U-shaped brackets that
permanently mount to the floor of the vehicle. (Also included in the kit are eight (8) bolts, eight (8) fender washers
and eight (8) locking nuts.) The E-Z FIT console mounts to these brackets and is fastened down with thumbscrews
(See Figure 2 below)
Attach the four (4) U-shaped brackets to the four (4) feet of the E-Z FIT console using the thumbscrews. Make
sure that the brackets are perpendicular to the feet of the console. (See Figure 2 below.)
Figure 2
Set the console on the floor of the vehicle and mark where the eight (8) holes of the U-shaped brackets are
to be drilled. (Make sure that you have checked under the vehicle and in the vehicle floor (under the carpet)
for obstructions)
Remove the console from the vehicle.
Using the utility knife, score the carpet over the marks with an ‘X’ so that the drill bit does not ‘grab’ and
unravel the carpet.
Drill eight small 1/8” pilot holes to verify that the holes are in the proper locations.
After verifying that the 1/8” pilot holes are in the proper locations, use the ¼” drill bit to enlarge the pilot
holes.
Set the console on the floor over the holes.
Place the bolts through the brackets (attached to the feet of the console) and into the holes just drilled.
Place one large fender washer over each of the bolts and attach the nuts. (Note: It may be desirable to place
a small circle of silicon sealer around the hole under the vehicle before installing the washer and nut to
prevent moisture from getting into the vehicle.)
Tighten the nuts down securely. Have the second person inside the vehicle hold the bolts securely with the
box-end wrench while the person underneath the vehicle tightens down the nuts. See Figure 3 below.
Plug the cigarette lighter cord into the jack on the console (by driver’s seat). Plug the other end into the
cigarette lighter receptacle.
3
Figure 3
CONSOLE SHELL
VEHICLE FLOOR
FENDER WASHER
NUT
OWNER’S MANUAL
Using the E-Z Fit Console
Playing a pre-recorded VHS tape:
1. Make sure that one end of the cigarette power cord is plugged into the console and that the other end is plugged
into the cigarette lighter receptacle.
2. Push the power button on the TV.
3. Insert a tape into the VCP. The VCP will automatically turn on and start playing the tape. If there is no picture
on the screen tune TV to channel 3 or 4.
4. Adjust the volume to a comfortable level.
5. If the “A-Repeat” button is pressed at the end of the tape it will rewind to the beginning and begin playing the
tape again.
Watching a TV program:
1. Make sure that one end of the cigarette power cord is plugged into the console and that the other end is
plugged into the cigarette lighter receptacle.
2. Push the power button on the TV.
3. Make sure that the VCP is turned off.
4. Using the channel up/down buttons, select a channel to watch.
5. Adjust the volume to a comfortable level.
Using a camcorder or video game with your system:
1. Plug the Audio/Video cables from the camcorder or video game into the respective audio and video jacks on
the front of the console. (Note: Industry Standard jacks are as follows: Video – Yellow Jack, Audio- White
Jack - Left Channel, Red Jack - Right Channel) This console has one audio jack only. If the video game or
camcorder is a stereo unit, a “Y” adapter to combine left and right audio channels will need to be used. This
can be purchased at any Radio Shack or similar store.
2. Push the power button on the TV.
3. Turn on the camcorder or game.
4. If there is no video present, press the TV/VIDEO switch on the TV.
5. Adjust the volume to a comfortable level.
Using headphones with the E-Z Fit Console:
WARNING: Headphones should not be used with small children as this can present the
danger of strangulation.
When headphones are plugged into the headphone jacks on the E-Z fit console the side speaker is turned off.
This allows private listening while travelling without disturbing others.
4
Using the Remote Control:
Refer to the section “Remote Control Operation” in your AVT597 owners manual.
Troubleshooting Hints and Tips:
TV or VCP do not turn on:
Make sure that the cigarette lighter cord is plugged into the cigarette lighter
and the base of the console.
Some vehicles do not apply power to the cigarette lighter when the ignition is
turned off. Try turning the ignition switch to the ON or ACC position.
Check to see if there is power at the cigarette lighter plug. The fuse may be
blown in the fuse panel. Replace the fuse and test the system. (IMPORTANT:
Make sure the condition that caused the fuse to blow has been corrected
before replacing the fuse).
The fuses in the TV or VCP may be blown. To check these fuses, the front
bezel of the console needs to be removed. Remove the six screws that hold
the bezel of the console on and remove the bezel. Slide the TV out and check
the fuse on the back. Slide the VCP out and check the fuse on the back.
Replace these fuses if necessary. (IMPORTANT: Make sure the condition that
caused these fuses to blow has been corrected before replacing these fuses).
Replace the front bezel and screws.
No picture when playing a tape:
Make sure that the TV is turned on.
Check to see that the TV is not in video mode. Press the TV/Video switch to
change between TV and Video modes.
Make sure the brightness control is up.
No picture when playing a camcorder:
Make sure that the TV is turned on.
Make sure that the camcorder is properly plugged into the Audio/Video jacks.
Check to see that the TV is in video mode. Press the TV/Video switch to
change between TV and Video modes.
Make sure the brightness control is up.
Remote Control not working:
Check that the Remote is pointed at the TV or VCP.
Check the batteries and replace if they are worn out.
128-5238B