1
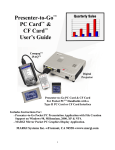
Presenter-to-Go™
Secure Digital (SD)
&
Memory Stick (MS)
User’s Guide
Presenter-to-Go MS is
compatible with all MS-enabled
Sony CLIE handhelds
Presenter-to-Go SD is
compatible with all SD-enabled
Palm handhelds
Includes Instructions For:
• Presenter-to-Go Palm OS Presentation Application with File Creation
Support on Windows 98, Millennium, 2000, XP, NT4 and Mac OS 9.
• MARGI Mirror Palm OS Graphics Display Application.
MARGI Systems, Inc. • Fremont, CA 94538 • www.margi.com
1
Table of Contents
1. Introduction .........................................................................4
Your Product Packaging Contains: .........................................4
2. System Requirements ...........................................................5
Handheld ...........................................................................5
Desktop or Laptop...............................................................5
Display Device ....................................................................5
3. PC & Palm Installation/Setup ..................................................5
Installing the Presenter-to-Go PC Creation Software. ...............5
Un-Installing the PC Creation Software...................................7
Installing the Presenter-to-Go & MARGI Mirror Palm software on
your handheld immediately after PC software installation..........7
Transfer Tutorial Presentation to Handheld .............................9
Installing the Presenter-to-Go & MARGI Mirror Palm software on
your handheld from the Presenter-to-Go desktop. ...................9
4. Creating Your Presentation................................................... 10
Creating Presentations from within Microsoft PowerPoint on your
desktop PC (or laptop):...................................................... 10
Creating Presentations from Windows Applications with Printer
Support: .......................................................................... 14
5. Software Installation/Setup on Mac ....................................... 16
Installing the Presenter-to-Go Creation Software. .................. 16
Un-Installing the Presenter-to-Go Creation Software. ............. 16
Installing the Presenter-to-Go & MARGI Mirror Palm software on
your handheld. ................................................................. 16
6. Creating Your Presentation on a Mac ..................................... 16
Creating Presentations from within Microsoft PowerPoint on your
desktop (or laptop): ......................................................... 17
Creating Presentations from Applications with Printer Support: 21
7. Bringing the Presentation into your Palm................................ 22
The HotSync™ Process: ..................................................... 22
8. Using Presenter-to-Go ......................................................... 23
Splash and Presentation Screen .......................................... 23
Module Status .................................................................. 24
Resolution and Refresh Rate Selection ................................. 24
Show, or Hide slides .......................................................... 24
Viewing Notes and Slide Text Content .................................. 25
Viewing Slide Thumbnails................................................... 26
Drag & Drop Reorganization ............................................... 27
Switching between Presentations ........................................ 27
Managing Presentations on a Memory Card........................... 27
Menu: Tools ..................................................................... 28
MOVE function .................................................................. 29
COPY function................................................................... 29
DELETE function ............................................................... 30
Beaming Files to other Palm Handhelds ................................ 30
2
Menu: Show ..................................................................... 31
Hide All, Show All.............................................................. 31
Reset Order ..................................................................... 31
Auto Advance ................................................................... 31
Menu: Options .................................................................. 32
Preferences ...................................................................... 32
About .............................................................................. 33
Making a Presentation ....................................................... 33
Showing a slide ................................................................ 33
First Show Page ................................................................ 33
Displaying Notes while making Presentations ................ 33
Remote Control Operation .................................................. 33
9. Getting the Most out of your Presenter-to-Go Presentation (Power
User Tips) ............................................................................. 34
Making Mobile Presentations look good ................................ 34
Creating a Mobile Presentations from multiple applications...... 34
Making Effective Presentations from your Handheld Efficiently . 35
Making presentations when standing away ................... 35
Reviewing Notes and Slide Text Content while Making
Presentations- the Cheat Sheet................................... 35
10. MARGI Mirror Introduction.................................................. 36
11. Using MARGI Mirror ........................................................... 36
Video .............................................................................. 37
Zoom .............................................................................. 37
Update ............................................................................ 38
Percentage of CPU Used............................................. 38
Color Scheme ................................................................... 38
Resolution and Refresh Rate Selection ................................. 39
Using MARGI Mirror with an External Keyboard ..................... 40
12. Troubleshooting ................................................................ 40
Frequently Asked Questions................................................ 40
Technical Support ............................................................. 43
13. Specifications ................................................................... 44
Appendix One: Product Warranty ............................................. 45
Appendix Two: Federal Communications Commission Information 46
Warranty Registration........................................................ 46
© 2002 MARGI Systems, Inc. MARGI, MARGI Mirror, the MARGI logo, and Presenter-to-Go are all
trademarks of MARGI Systems, Inc. PowerPoint is a registered trademark of Microsoft Corporation.
HotSync & Palm are trademarks or registered trademarks of Palm, Inc. Credits: The digital
projector picture is provided by InFocus. All rights reserved. Specifications are subject to change
without notice. All other trademarks and registries are the property of their respective owners.
Specifications and any errors in this manual are subject to change without notice. The Part Number
of this manual is 70-2415 Rev. E
Presenter-to-Go is subject to U.S. and other international patents pending.
3
1. Introduction
Thank you for purchasing Presenter-to-Go™ by MARGI Systems™. Presenter-to-Go is
available as a Secure Digital (SD) Card for Palm’s® line of personal assistants and a
Memory Stick™ (MS) for Sony™ CLIE™ handhelds. It comes with two Palm applications
that allow the Palm to be used as a presentation tool in two distinctly different ways:
1. Using “Presenter-to-Go” PC software and its associated Palm application, a user can
compress and load images from PowerPoint® (and other printable documents) from a PC
or MAC into the Palm handheld using the HotSync process. The user can then carry their
handheld to the presentation, connect to a digital projector (or VGA display) and make
1024 x 768 color presentations without the need for a laptop computer. The Presenterto-Go application is supported on Windows 98 and 2000, Millennium, XP, NT4 and
Macintosh OS 8.5 – 9.2 operating platforms.
2. Using the “MARGI Mirror” Palm OS application and the Presenter-to-Go card, a Palm
user can connect to a digital projector (or a VGA display) and display the contents of the
Palm’s LCD at 1 - 4X multiples of 160 x 160 regardless of the application it is running.
MARGI Mirror and the Presenter-to-Go card act like a graphics output card for the
handheld. It is even possible to attach a keyboard, run word processing software, and
see the output on the display as one type on the keyboard. Color graphics are supported
when using color models. Information on MARGI Mirror starts in Section 10 of this
manual.
This guide contains information on installation and use of both the “Presenter-to-Go” and
the “MARGI Mirror” applications. Downloadable updates and information are posted on
the MARGI web site, http://www.margi.com/ under Support.
Your Product Packaging Contains:
1) Presenter-to-Go™ Card/Cable with power port
2) A/C Adapter
3) Remote Control
4) Presenter-to-Go Installation CD.
5) MARGI Mirror™ & Presenter-to-Go Palm applications
6) Projector connection cable
7) Quickstart Card
4
2. System Requirements
In order to completely create and display presentations using Presenter-to-Go it is
necessary to have a Palm or Sony handheld, a desktop or laptop computer, and a display
device. The corresponding system requirements are listed below:
Handheld
•
Desktop or
•
•
•
•
•
A Palm handheld with Palm OS 4.0 (or higher) and SD support or a Sony
CLIE handheld with Palm OS 4.0 (or higher) and MS support.
Laptop
32 MB RAM
50 MB Hard Drive
Windows® 98, 98SE, Millennium, 2000, XP, NT4 or Mac OS 8.5-9.2 Operating
System
Presenter-to-Go Toolbar Plug-in support for Microsoft PowerPoint® 97, 2000
& XP and Mac 98 and 2001 versions.
A cradle and Palm Desktop software loaded.
Display Device
•
Any Display Device with HD-15 (VGA) connector and support for 1024 x 768
or 800x600 resolution. This includes most CRT monitors and most graphics
projectors.
3. PC & Handheld Installation/Setup
Installing the Presenter-to-Go PC Creation Software.
Check that your PC meets the System Requirements for operating system and hardware
requirements described in Sections 2. Run SETUP on the Presenter-to-Go CD to install the
Presenter-to-Go presentation creation software (and the PowerPoint Add-in.) on your PC.
The SETUP program may auto-run on some systems.
Presenter-to-Go will install into a default folder under Program Files. If you wish to install
the software elsewhere, you may do so at this point in the installation process.
5
Fig. 3.1: Selection of Software Installation Destination
You will then get the following message at the end of the installation. If you wish to
register the product at this time, click “Next”. If you do not wish to register the product
at this time, simply uncheck the box below and then click “Next”.
Fig. 3.2: Setup Product Registration
6
Fig. 3.3: Setup Complete
Click “Finish” and, if registration was selected, you will be brought to the Presenter-to-Go
registration page through your internet browser.
Un-Installing the PC Creation Software.
When updating PC software versions, it is recommended that you remove the old PC
creation application software prior to installing the new version. This can be done by
following the procedure below:
1.
2.
3.
4.
5.
Go to Settings/Control Panel/Add/Remove Programs
Scroll and highlight MARGI Presenter-to-Go
Press the ADD/REMOVE button.
Confirm file Deletion by selecting YES
The Un-Install Shield will uninstall the program. Answer YES if it asks if you want
to remove any no longer used files with the MARGI as part of the name.
6. Un-Install is now complete.
Installing the Presenter-to-Go & MARGI Mirror Palm software on
your handheld immediately after PC software installation.
Note: Do not insert the Presenter-to-Go card into your handheld until the Presenter-to-Go
Palm software has been installed.
7
Fig. 3.4: Installing the Handheld Application
After you click on the “Finish” button during the PC software install, the screen in Fig. 3.4
will appear. If you would like to install the Presenter-to-Go software on your handheld
during your next HotSync, click “Yes”.
Fig. 3.5: User List
The screen in Fig 3.5 will appear and provide you with a list of users whose devices you
may install the Presenter-to-Go Palm software on. Please add the user you wish to Sync
the software for using the “Add>>” button, and then click on “Close”.
Fig. 3.6: Install Application on Next HotSync
After you have selected your users, you will get the screen in Fig 3.6. After clicking on
“OK”, the Presenter-to-Go Desktop will launch itself.
8
Fig. 3.7: Presenter-to-Go Desktop
Transfer Tutorial Presentation to Handheld
Select the presentation “Palm_Tutorial.pdb” from the “Presentation List” and click
“Transfer”. Next time you HotSync “Palm_Tutorial” will be transferred to the handheld.
Installing the Presenter-to-Go & MARGI Mirror Palm software on
your handheld from the Presenter-to-Go desktop.
Click on the “Install App” button. You will then get the message in Fig. 3.6.
Click on “OK”. The next time you HotSync to your Palm, the three files shown in Fig. 3.8
will be transferred.
9
Fig. 3.8: Add/Remove Programs
Now, you’re ready to start making your mobile presentations
4. Creating Your Presentation
Presenter-to-Go presentations can be created directly from within Microsoft PowerPoint®
or from any Windows® application that has print driver support. The processes are
slightly different.
Creating Presentations from within Microsoft PowerPoint on your
desktop PC (or laptop):
The Presenter-to-Go driver provides a button icon on the PowerPoint toolbar
that looks like:
It is shown in Fig. 4.1, and can be found in the middle of the toolbar.
10
Fig. 4.1 Typical PowerPoint Screen with Presenter-to-Go Icon
Complete your PowerPoint presentation as you normally would, taking notice of the note
below.
Note: Presenter-to-Go does not support any slide-transitions, animation, or audio/video
features available in Microsoft PowerPoint®. Only static slides are supported.
Click on the Presenter-to-Go icon and the following occur automatically:
1. Conversion of PowerPoint file into the compressed mobile presentation format. The
Presenter-to-Go “Presentation Name” will be pre-filled with the same name as the
PowerPoint file.
2. The “Presenter-to-Go Creator” dialog box will appear.
11
Fig. 4.2 Presenter-to-Go Creator dialog box
The Presenter-to-Go Creator dialog box allows you to Change the name of the
presentation. To change the name, simply change the name in the “Presentation Name”
box. Press the “Create” button, to create a mobile presentation.
In order to append the presentation to a presentation in the “Presentations List”, select a
presentation from the “Presentations List”. That name will automatically appear in the
“Append To” line. Clicking on the “Append” button will now append the current mobile
presentation to the existing presentation listed on the “Append To” line.
Documents previously transferred to the Palm are saved in the Archive List. To append a
new document to an archived document, click the “Archive List” button. A list of previous
presentations will show in the “Archived Documents” area of a new window. You can view
and delete items in the archive list by using the “View” and “Delete” buttons. To copy an
archived document to the current “Presentation List”, press the “Restore” button. Now
you can use this presentation like any other presentation in the “Presentations List”.
Pressing the Create or Append button will bring you to the “Presenter-to-Go Desktop”
dialog box.
12
Fig. 5.3 The Presenter-to Go Desktop dialog box
Your presentation will appear in the “Presentations List”. This list shows all the
presentations that are ready to be transferred into the HotSync bin for the next HotSync
operation into your handheld. The button functions are described below:
Note: The buttons offer context- sensitive tool-tips, meaning that if you slide the cursor
over the button, an explanation of the button – function will appear.
Transfer
View
Delete
Change Users
SD Card
Archive List
Close
Help
About
Transfers the selected presentations into the queue for the next
HotSync operation into your handheld.
Allows you to view the contents of the selected presentation.
Allows you to delete the selected presentations.
Lets you select which users get the “Queued” presentations on that
user’s next HotSync. If only one user is registered on your handheld,
then that user name is automatically placed in the “HotSync for these
Users” list.
Allows you to save directly to a memory card in the handheld.
List of all presentations that have been previously transferred to the
HotSync bin.
Closes the Application.
Opens the Help document to understand requirements of this dialog
box.
Product Information and registration
If the user has the HotSync software and a handheld Cradle installed on the computer,
then all that is required to move the selected presentations into the handheld is to press
the “Transfer” button and HotSync.
13
Note: If you have Queued a presentation but prior to HotSync decide that you don’t
want that presentation, it can be removed in the Palm Desktop Application by clicking on
the “Install Tool” icon, and then highlighting the file you don’t want to transfer and
selecting REMOVE.
Note: If you created a presentation but did not Queue it before quitting, you can get that
presentation by selecting START then Program Files then MARGI then Presenter-to-Go.
This will bring up the “Presenter-to-Go Desktop” window with the presentation saved in
the “Presentations List”.
Creating Presentations from Windows Applications with Printer
Support:
Once the Presenter-to-Go PC creation software drivers are installed, you will find that you
now have a printer called “Presenter-to-Go” as shown below.
Fig. 4.4 Print window showing “Presenter-to-Go” Driver
If you print using the Presenter-to-Go Printer Driver, when you press OK you will
automatically:
1. Convert the document into the mobile presentation format in “LANDSCAPE”
orientation. If the size of the document exceeds a page, then the driver will simply
14
save the balance of the document as additional slides until all the material is
presented.
2. The Presenter-to-Go Creator dialog window will appear with the name taken from
the printing application in the document name box. You can rename the mobile
presentation document. If you try to create another presentation with the same
name that already exists in the queue, you will have an option to overwrite or
rename it something different.
Note: Sometimes Windows defaults the Presenter-to-Go to the PORTRAIT orientation. In
that case, choose the “properties” of the “Presenter-to-Go Printer” and change the
orientation to the LANDSCAPE mode.
For PowerPoint, the default orientation is
“LANDSCAPE” and you may not need to change the settings.
You can verify how the
presentation looks by “Viewing” the mobile presentation document after creating it.
Fig. 4.5 “Presenter-to-Go” Creator with new document Name
After the name is entered, and the “Create” button is selected OR the new pages are
Appended to another presentation, the familiar “Presenter-to-Go Desktop” dialog box will
appear. The commands and features of this window are discussed in detail above.
15
After the presentation is Queued then, you can perform a HotSync to get the presentation
into the Palm handheld.
5. Mac Software Installation/Setup
This is only available to Palm-brand handheld users.
Installing the Presenter-to-Go Creation Software.
Important Notice: Close all applications prior to beginning the installation process.
Check that your computer meets the System Requirements for operating system and
hardware requirements described in Section 2. Double-click on the Presenter-to-Go
Install icon on the Presenter-to-Go CD to install the Presenter-to-Go presentation creation
software (and the PowerPoint Add-in.) on your Mac. Re-boot the system after the
software installation is complete.
Un-Installing the Presenter-to-Go Creation Software.
When updating software versions, it is recommended that you remove the old creation
application software drivers prior to installing the new version. This can be done by
following the procedure below:
1. Insert the Presenter-to-Go software CD
2. Double-click on the “Presenter-to-Go Install” icon
3. Click on “Uninstall” in the box that appears.
Installing the Presenter-to-Go & MARGI Mirror Palm software on
your handheld.
To install the Presenter-to-Go and MARGI Mirror software on your Handheld device,
perform the following steps:
1.
2.
3.
4.
Insert the Presenter-to-Go CD.
Open the “PTG Handheld Applications” directory.
Double click each PRC file to open them with the Palm Desktop Install tool.
Perform a Hotsync.
6. Creating Presentations on a Mac
This is only available to Palm-brand handheld users.
Presenter-to-Go presentations can be created directly from within Microsoft PowerPoint®
or from any application that has print driver support. The processes are slightly different.
16
Creating Presentations from within Microsoft
PowerPoint on your desktop (or laptop):
The Presenter-to-Go driver provides a button icon on the PowerPoint toolbar like the icon
above.
It is shown in the Fig. 6.1, and can be found at the far right of the toolbar.
Note: You must select Presenter-to-Go as your printer in the Chooser to use this
function.
Fig. 6.1 Typical PowerPoint Screen with Presenter-to-Go Icon
Complete your PowerPoint presentation as you normally would, taking notice of the note
below.
Note: Presenter-to-Go for Palm does not support any slide-transitions, animation, or
audio/video features available in Microsoft PowerPoint®. Only static slides are supported.
Click on the Presenter-to-Go icon and the following will occur automatically:
17
1. Conversion of PowerPoint file into the compressed mobile presentation format. The
Presenter-to-Go “Presentation Name” will be pre-filled with the same name as the
PowerPoint file.
2. The “Presenter-to-Go Creator” dialog box will appear, as shown in Fig. 6.2.
Fig. 6.2 Presenter-to-Go Creator dialog box
The Presenter-to-Go Creator dialog box allows you to change the name of the
presentation. To change the name, simply change the name in the “Name” box. Press
the “Create” button, to create a mobile presentation.
In order to append the presentation to an existing presentation, select “Append pages to
existing presentation”. This will open the “Presenter-to-Go Archive List” as shown below.
Select the presentation you wish to append the new document to and select “OK”.
The “Dither” option is turned on by default. This feature helps gradual changes in color
appear smooth. There is a slight chance of objectionable artifacts. If this happens, you
may simply un-select this feature.
18
Fig. 6.3 Presenter-to-Go Archive List
Clicking on the “Create” button will now append the current mobile presentation to the
existing presentation listed on the “Append pages to existing presentation” line.
Documents previously transferred to the Palm are saved in the Presenter-to-Go Archive
List. To append a new document to an archived document, click the “Archive List” button.
A list of previous presentations will show in the “Archived Presentations” area of a new
window. You can view and delete items in the archive list by using the “View” and
“Delete” buttons. To copy an archived document to the current “Presentation List”, press
the “Restore” button. Now you can use this presentation like any other presentation in
“Archived Presentations”.
Pressing the Create or Append button will bring you to the “Presenter-to-Go Desktop”
dialog box.
19
Fig. 6.4 The Presenter-to Go Desktop dialog box
Your presentation will appear in the” Presentations” list.
This list shows all the presentations that are ready to be transferred into the HotSync bin
for the next HotSync operation into your Palm. The button functions are described below:
Note: The buttons offer context- sensitive tool-tips, meaning that if you slide the
cursor over the button, an explanation of the button –function will appear, if you have
“Show Balloons” activated.
Install:
View:
Delete:
Install For:
Archive:
Transfers the selected presentation into the queue for the next
HotSync operation into your Palm.
Allows you to view the contents of the selected presentation.
Allows you to delete the selected presentation.
Lets you select which users get the “Queued” presentations on that
user’s next HotSync. If only one user is registered on the Palm, then
that user name is automatically placed in the “Install For:” list.
Retains a list of all presentations that have been previously transferred
to the HotSync bin.
If the user has the HotSync software and a Palm Cradle installed on the computer, then all
that is required to move all of the presentations selected into the Palm is press the
“Create” button and do a HotSync.
20
Note: If you have Queued a presentation but prior to HotSync decide that you don’t
want that presentation, it can be removed in the Palm Desktop Application by clicking on
the Install icon, and then highlighting the file you don’t want to transfer and selecting
REMOVE.
Note: If you created a presentation but did not Queue it before quitting, you can get that
presentation by selecting “Presenter-to-Go Desktop” under the apple icon. This will bring
up the “Presenter-to-Go Desktop” window with the presentation saved in the
“Presentations” list.
Creating Presentations from Applications with Printer Support:
Once the Presenter-to-Go creation software is installed, you will find that you now have a
printer called “Presenter-to-Go” as shown below.
Note: You must select Presenter-to-Go as your printer in the Chooser to use this
function.
Fig. 6.5 Print window showing “Presenter-to-Go” Driver
If you print using the Presenter-to-Go Printer Driver, when you press OK you will
automatically:
1. Convert the document into the mobile presentation format in “LANDSCAPE”
orientation. If the size of the document exceeds a page, then the driver will simply
save the balance of the document as additional slides until all the material is
presented.
2. The Presenter-to-Go Creator dialog window will appear with the name taken from
the printing application in the document name box. You can rename the mobile
presentation document. If you try to create another presentation with the same
name that already exists in the queue, you will have an option to overwrite or
rename it something different.
21
Fig. 6.6 ”Presenter-to-Go” Creator with new document Name
After the name is entered, and the Create button is selected OR the new pages are
Appended to another presentation, the familiar “Presenter-to-Go Desktop” dialog box will
appear. The commands and features of this window are discussed in detail above. After
the presentation is Queued then, you can perform a Hotsync to get the presentation into
the Palm handheld.
7. Moving Presentations onto a Handheld
Like other Palm® OS applications, Presenter-to-Go mobile presentations are imported into
the handheld using the HotSync process. It is assumed that your computer has a
handheld cradle attached and that HotSync software is installed.
Warning: You may wish to disconnect all conduits except the “ installer” if you are using
the handheld only for presentations. This will prevent automatic syncing of other
programs each time you HotSync to load presentations. This can be done in the Palm
Desktop under HotSync/Custom.
The HotSync™ Process:
1
2
3
Put your handheld into its cradle. The Presenter-to-Go card does not need to be
in the handheld.
Press the HotSync button on the cradle to import the Presenter-to-Go
presentation(s) and any other data that is scheduled for transfer into your
handheld’s memory.
Remove the handheld from the cradle and take it to the location of your
presentation.
Note: HotSync places presentations into either the handheld’s memory or a memory card
that is in the device. You can use the MOVE or COPY command to transfer them back and
forth.
22
8. Using Presenter-to-Go
Follow the procedure below to use the Presenter-to-Go Application on your handheld.
Step 1
Plug the A/C adapter into the wall socket and push its jack into the power
connector located on the back end of the VGA connector. (Optional for short
presentations)
Step 2
Connect the VGA connector to a VGA projector, monitor, or other display
capable of 1024 x 768 resolution.
Step 3
Insert the Presenter-to-Go card connector into your handheld’s expansion
slot.
Step 4
Tap on the “Presenter” application icon. You will see a splash screen on your
handheld and on your VGA display. Press the bottom of the main button
once. You will see the first slide of a presentation called “Palm_Tutorial”
that is designed to show you the basic operation of Presenter-to-Go.
Detailed operating instructions are found in later sections of this User’s
Manual.
Notice: The expansion slot on most compatible handhelds does not lock an inserted card
in place. For best results let the handheld (with Presenter-to-Go inserted) lay on a flat
surface. If you pick up the handheld while it is attached to a display be careful that the
Presenter-to-Go connector does not pull out of the expansion slot and that undue stress is
not placed on the connector joint.
When you tap on the “Presenter” application icon, you will get a Splash
Screen followed by a Presentation Screen.
Splash and Presentation Screen
Fig. 8.1 Splash Screen
Fig. 8.2 Presentation in “Slide List”
23
Module Status
If you have opened the Presenter-to-Go Application without the module installed and
powered you will get the “Presenter module not detected” Screen.
Fig. 8.3: “Presenter module installed” Fig. 8.4: “Presenter module not detected”
Resolution and Refresh Rate Selection
Tapping on the card icon will give you the Presenter-to-Go card screen. The Presenter-toGo card should be able to detect the proper default resolution and refresh rate for the
display it is being used with. If the module is unable to detect this information or you
wish to use settings other than the defaults, then select “Use Manual Settings”.
Fig. 8.5 Resolution Option
Fig. 8.6 Refresh Rate Option
Show, or Hide slides
24
Show Slide Box
Fig. 8.7 Show/Hide Slide Box
The show-slide box, when checked means that the slide is visible during the
presentation.
The show-slide box, when unchecked means that the slide is hidden and will be
skipped during the presentation.
Viewing Notes and Slide Text Content
You can view the presenter notes and slide text content associated with any slide created
from PowerPoint by pressing the Notes icon next to that slide. You cannot change the
notes or text from within the Palm Application. You can check the notes and text of any
slide without making that slide active. This allows you to skip ahead and review notes and
slide text content prior to showing the slide to the audience. If you advance the slide
while viewing its own notes and slide text content you will see notes and slide text content
for the next slide come up. This allows the user to synchronize his notes as he advances
through the presentation. The reviewer’s notes are located at the top of the notes screen
and the text is shown below the line marked “Slide Text”.
Fig. 8.8 Notes Icon
Fig. 8.9 Slide Title – Text Content - Note Box
25
Note: Slide notes and text content of slides created in PowerPoint will automatically be
copied and placed in the Slide Note field.
Viewing Slide Thumbnails
You can preview your slides on your handheld device using the “Preview” button. Using
this feature allows you to see a thumbnail of the slide itself.
Fig. 8.10 Slide Thumbnail
To use the annotation feature discussed under “Show Preferences”, you must have the
presentation in the preview mode on your handheld. There are 4 icons at the bottom of
the preview screen, which have the following functions: the first icon, returns you to the
slide list preview; the second icon allows you to choose the color of the annotation line, as
shown in figure 8.11; the third icon allows you to select the annotation line width, as
shown in figure 8.12; and the fourth icon allows you to erase any annotations that you
have drawn on the screen. The eraser icon only appears after you have made annotations
on the screen.
Fig. 8.11 Annotation Color Options
Fig. 8.12 Annotation Line Width
26
Drag & Drop Reorganization
You can reorganize the order of slides by simply selecting a slide, and dragging &
dropping it at an appropriate place. Following is an example; wherein the “Before you
begin…” slide has been moved down from second to seventh position. If you re-arrange
the slides in a presentation, those changes will be saved.
Fig. 8.13 Drag and Drop
Switching between Presentations
The top-right corner of the display gives the name of the current presentation. When you
tap the “pull down arrow”, a list of presentations becomes available for view. You can
switch between presentations by tapping the presentation you wish to show.
Fig. 8.14 Presentation Selection
Managing Presentations on a Memory Card
To keep more free space on your handheld, presentations created with Presenter-to-Go
may be saved directly to a memory card. When you open the Presenter-to-Go Palm
application and click on the Presentation Name, the Presentation List will include
presentations on both the handheld and the memory card. Presentations that are on the
memory card will have a bullet in front of them. If you select a presentation that is on the
memory card, when this file opens, a local copy of the file is temporarily created on the
27
handheld. When you look at the Presentation List again, this presentation will now have a
dash next to it. If you remove the memory card and plug in the Presenter-to-Go Card you
will still be able to use this presentation from the memory card.
Fig. 8.15 Presentation listings from different sources
Note: After the memory card has been removed, you will still see the presentations from
the card in the Presentation List. If you select one of these presentations after the
memory card has been removed, you will be prompted to re-insert the memory card.
Note: A copy of the last presentation on the memory card that was viewed will stay in
your handheld's memory indefinitely. To remove it, the file must be deleted manually
using the instructions later in this chapter.
Menu: Tools
If you tap on the menu sector of the Palm, you will bring up the Tools menus as shown on
the following page:
Fig. 8.16 Tools Pulldown
All actions are applicable to the active (displayed) presentation.
28
MOVE function
Moves the active presentation between the handheld’s memory and a memory card. The
destination for MOVE is the handheld memory if the source is a memory card, and viceversa.
Fig. 8.17 Move Presentation
COPY function
Copies active presentation between the handheld’s memory and a memory card. The
destination for COPY is the handheld memory if the source is a memory card, and viceversa.
Fig. 8.18 Copy Presentation
29
DELETE function
Deletes the active presentation.
Fig. 8.19 Delete Presentation
Warning: Do not use the delete function of the Palm Operating System to delete
presentations. Although you may highlight one presentation, it will erase all presentations
stored in the handheld.
Beaming Files to other Palm OS Handhelds
You can beam the active presentation to any Palm OS handheld in range by selecting the
“Beam” function. The beaming process follows the normal Palm beaming protocols. See
you handheld manual for details.
Fig. 8.20
Beaming file to other Palm OS Handhelds.
30
Note: Beam preference must be switched ON for the receiving handheld to start
accepting the document.
Menu: Show
The Show Menu has the choices as shown below:
Fig. 8.21 Show Menu
Hide All, Show All
Hide All (Command-H), will uncheck the show-box on all slides. This option is
useful if you want to show a limited number of slides, and want to disable-show
for all and then selectively choose what to show.
Show All (Command-S), will check the show-box on all slides. This option is
useful if you want to show all slides.
Reset Order
Resets the order of slides to the original order from HotSync.
Auto Advance
Selecting “Auto Advance” will put the current presentation into auto
advance mode. The time between slides is the longer of the decompression
time and the time delay set in the “Auto Slide Show ” counter in the
Preferences window. A loop icon will appear at the bottom of the slide list.
If tapped, the auto advance will stop.
31
Menu: Options
The Options Menu has the choices as shown below:
Fig. 8.22 Options Menu
Preferences
Fig. 8.23 Preferences
•
•
•
•
•
“Auto Slide Show” needs settings for automatic transitions between slides. The timing
can be set from 1 to 999 seconds. If the time is set to 000, then the next slide is
shown as soon as it is ready.
“LOOP Continuously” set to loop the presentation continuously, if “Auto Advance” is
selected.
To indicate that the next slide is decoding a clock icon will appear in the lower right
corner of the screen. This can be disabled by un-checking the box.
To indicate that the Palm has detected a command from Remote Control a light will
flash in the lower right corner of the screen. This can be disabled by un-checking the
box.
When the “Annotation” feature is checked and Presenter-to-Go is in the slide preview
mode on your handheld, you can make annotations to the presentation while you are
presenting. These options were explained earlier under “slide thumbnail”.
32
About
This is the best way to see the version number of your Presenter-to-Go software.
Making a Presentation
Manual slide show presentation mode is the default. The physical Up and Down keys on
the Handheld are tied to the keys in this mode.
Pushing this button displays the previous slide.
Pushing this button displays the next slide.
Showing a slide
Tap on any slide title to show it.
First Show Page
First Show Page is the page that is displayed initially when the Presenter-to-Go Application
is launched. If the card is still powered since the last slide show, then it is the last shown
slide. This allows users to go to another application (i.e. Date Book, Address), and return
to the presentation. Otherwise it is the Presenter-to-Go splash Screen. Press next slide
and the first enabled slide of the last presentation selected is displayed.
Displaying Notes while making Presentations
To view corresponding slide-notes and slide text content while making the presentation,
view the note of the first slide and start the presentation. Then as you change the slide in
a presentation, the corresponding slide-note and text content will be enabled.
Remote Control Operation
Included with Presenter-to-Go is a 14 button IR remote control shown below.
Note: The IR port
for Presenter-to-Go
is on either side of
the box on the cable.
It is important to
have an uncluttered
line of sight between
your remote control
and either IR port.
Fig. 8.24 Remote Control
33
The following control choices are available:
REV
FWD
AUTO
RETURN
Reverse or back one slide.
Forward or advance one slide.
Set the presentation in AUTO slide-show mode. If in Preferences the
presentation is set to enable LOOP, then the presentation will run
continuously. Press AUTO again to switch off auto advance.
Return to last slide.
The slide number can be entered into the keypad directly. This in combination with the
Return feature will allow the user to toggle between two slides anywhere in the
presentation.
9. Getting the Most out of your
Presentation (Power User Tips)
By now you must have learned a lot about using the Presenter-to-Go solution. As a
power-user, if you are wondering, how you can use the product most effectively, here are
some tips:
Making Mobile Presentations look good
The mobile presentation format created on the computer uses compression techniques to
efficiently transfer and present from the handheld. Here are some tips to make the
process more efficient:
• When composing slides, keep the background simple. Don’t use textured or
pictorial backgrounds as they increase the size and the processing time for each
slide.
• Expect slides with photographs to generate larger size presentation files and
greater waits for the slide to be ready to present. Full size pictures can take up
to 10 seconds on a standard Palm.
Creating a Mobile Presentations from multiple applications
The ability to create a single presentation from multiple applications seamlessly on your
computer is one of the strengths of this product. Imagine that you are making a sales
presentation for a Product; you may take the following steps:
• Create a Microsoft PowerPoint presentation on the PC called “Sales_Prezo”, with
personal-reference notes. Click on the “Presenter-to-Go” icon on the tool-bar
and CREATE the mobile presentation. DO NOT QUEUE or INSTALL the
presentation
• Go to your Spec. Sheet of the Product (e.g. Microsoft Word), and “print” to the
Presenter-to-Go printer. Before pressing the CREATE button on your Windowscompatible computer, click on the “Sales_Prezo” in the Presentations-List. Now
Sales_Prezo will appear on the “Append to:” line. Press the APPEND button
instead of the CREATE button. The Spec. Sheet is now appended to the
“Sales_Prezo”. On your Mac, to append the presentation to an existing
presentation, select “Append pages to existing presentation”. This will open the
“Presenter-to-Go Archive List”. Select “Sales_Prezo” to append the new
document to your existing file and select “OK”.
34
•
•
•
•
Go to the Pricing sheet of the Product (e.g. Microsoft Excel®), and “print” to the
Presenter-to-Go printer. On your Windows-Compatible computer, click on the
“Sales_Prezo” in the Presentations-List, and press the APPEND button and the
Pricing Sheet is now appended to the “Sales_Prezo”. On your Mac, select
“Append pages to existing presentation”, opening the “Presenter-to-Go Archive
List”. Select “Sales_Prezo” to append the new document to your existing file and
select “OK”.
Go to any HTML pages as appropriate, and “print” to the Presenter-to-Go
printer. On your Windows-Compatible computer, click on the “Sales_Prezo” in
the Presentations-List, and press the APPEND button and the HTML is now
appended to the “Sales_Prezo”. On your Mac, select “Append pages to existing
presentation”, opening the “Presenter-to-Go Archive List”. Select “Sales_Prezo”
to append the new document to your existing file and select “OK”.
Now VIEW the “Sales_Prezo” from the Presenter-to-Go Application, and you will
find that all the slides from different applications are available in one single
presentation.
You can also RESTORE presentations from archived Presentations, and append
to them. You cannot, however, combine two existing presentations.
Making Effective Presentations from your Handheld Efficiently
Making presentations when standing away
The remote control device included in the product packaging can be very useful when
making presentations. It helps you make presentations while you are at the podium or
elsewhere in the room. A few tips:
• When the handheld “hears” the remote control, you will see an innocuous red-dot
appear at the bottom-right corner of your presentation. If that red-dot does not
appear when you press any key on the remote-control, it means that the remotecontrol is not being recognized (out-of-range, low-battery, etc.) Make sure to point
the remote control at the infra-red (IR) window of the handheld.
• You can make a complete presentation from a Remote Control. Other features
include going directly to a particular slide by punching that slide number. To return
to the slide you came from, simply press the RETURN button on the Remote
Control.
Reviewing Notes and Slide Text Content while Making Presentations- the Cheat
Sheet
One of the powerful features of the Presenter-to-Go solutions is the ability to review notes
and slide text content while making presentations. Here is how you can do it:
• Select the notes of the first slide that you want to show.
• From within the Notes window, pressing the Down button on the Palm or Forward
button on the remote will advance the presentation to the next slide. The notes
and text content corresponding to that slide are shown on the Palm display.
• If you are in the standard slide list display (i.e. not in the notes page), and while
you are viewing one slide, you can check the notes or slide text content of another
by pressing its note button. The display will not advance. You can then determine
if you want to hide that slide or not. You can the press the note button of the slide
you are showing to re-synchronize the notes with the presentation.
35
10. MARGI Mirror Introduction
This part of the guide contains information on how to use the MARGI Mirror™ application
with the MARGI Presenter-to-Go™ SD and MS Modules.
The MARGI Mirror application allows the Presenter-to-Go card to display the contents of
the handhelds LCD on a VGA projector or monitor. It allows the user to display the
thousands of Palm applications and any data stored on their handheld.
Notice: MARGI Mirror should not be confused with the Presenter-to-Go application,
which shows compressed information from a PC such as PowerPoint presentations,
Word documents and HTML at 1024x768 color resolution.
Downloadable updates and information are posted on the MARGI web site,
http://www.margi.com/ under Support.
11. Using MARGI Mirror
Follow the procedure below to use the MARGI Mirror Palm OS applet on your handheld.
Step 1
Plug the A/C adapter into the wall socket and push its jack into the power
connector located on the back end of the VGA connector. (Optional for short
presentations)
Step 2
Connect the VGA connector to a VGA projector, monitor, or another display
Step 3
Insert the Presenter-to-Go card into your handheld’s expansion slot.
Step 4
Go to the handheld’s main menu (as shown below). Touch the stylus to the
MARGI Mirror icon to launch the program. Select “Enable”, “Zoom”, “Update”
and “Background Color” as discussed in the following pages.
Step 5
Go back to the main menu and select the application you wish to display.
MARGI Mirror Icon
Fig. 11.1: Main Programs Menu
36
You need to have the Presenterto-Go card plugged-in to use the
MARGI Mirror feature. Otherwise
you will get the screen shown in
Figure 11.2.
Fig. 11.2: Module Missing Screen
Fig. 11.3: MARGI Mirror Main Menu
Video
Select “Enable” to turn on the output VGA signals. When you are done using this feature,
select “Disable”.
Zoom
Which zoom you choose depends on the projector, LCD or CRT you are using, the size of
the room and the distance of the projector from the screen or the monitor from the
audience. MARGI recommends that you use 3X or 4X. The output resolution at 1X is
160x160, 2X is 320x320, 3X is 480x480 and 4X is 640x640.
Notice: Only the zoom resolutions available to you with any
particular configuration will appear.
37
Update
Refers to the rate of update of the video display. A faster display update is at the cost of
increased CPU overhead.
Update Speed
Percentage of CPU
Used
Slow
5-10%
Medium
10-20%
Fast
20-30%
Typing and game play can be comfortably done at “Medium”.
Color Scheme
This is only available on monochrome handhelds. Allows you to choose the color of the
background. MARGI Mirror supports 1,2 and 4 bit monochrome output and 4, 8 and 16
bit color output from handhelds with color displays.
Fig. 11.4: MARGI Mirror Color Scheme Menu
About Screen
This is the best way to see the version number of your software and other information
about MARGI Mirror.
38
Information Screen
Tapping on the “Module Info” button will give you the MARGI Mirror information screen.
This screen will tell you version of MARGI Mirror you are using and tell you whether a
display is detected using EDID or not. Tapping the information indicator will give you a Tip
Screen that explains the plug and play function.
Fig. 11.5: MARGI Mirror
Information Screen
Fig. 11.6: MARGI Mirror
Tips Screen
Resolution and Refresh Rate Selection
The Presenter-to-Go module should be able to detect the proper default resolution and
refresh rate for the display it is being used with. If the module is unable to detect this
information or you wish to use settings other than the defaults, this may be done in the
MARGI Mirror Information Screen.
Fig. 11.7 Resolution Option
Fig. 11.8 Refresh Rate Option
39
Using MARGI Mirror with an External Keyboard
Since MARGI Mirror essentially provides a display function, a natural evolution is to attach
an external keyboard and create a “PC-Like” environment. The likely first application is
word processing.
To use your handheld, Presenter-to-Go card with MARGI Mirror applet and display, an
external keyboard and a word processing application (such as Dataviz Word-to-GoTM) in a
PC configuration, follow the steps below:
1. Turn on your handheld
2. Install Presenter-to-Go module, connect power and connect to a monitor or
projector
3. “Enable” MARGI Mirror application and choose settings
4. “Enable” keyboard software
5. Open word processing application. As you type, you will be able to see your work in
real-time.
Notice: MARGI does not guarantee operation with all combinations of keyboard
software and application software. Known working combinations are posted at
http://www.margi.com/.
12. Troubleshooting
Frequently Asked Questions
Q
A
Does Presenter-to-Go work with all Palm models?
The Presenter-to-Go SD Card/Cable is compatible with all SD-enabled Palm
handhelds
Q
A
Does Presenter-to-Go work with all Sony CLIE models?
The Presenter-to-Go Memory Stick Card/Cable is compatible with all MS-enabled
CLIE handhelds
Q
A
On which operating systems will the Presenter-to-Go PC software work?
The Presenter-to-Go PC software may be used on PCs running Win 98, Win 98SE,
Win ME, Win 2000, Win XP, Win NT4 and Mac OS 8.5 thru 9.2.
Q
A
How much memory space do slide presentations take?
That depends on the complexity of the slide. The Presenter-to-Go PC software is
optimized for use with presentations that are mainly text and charts or graphs.
Presentations of this nature should compress by about 65% or more. Presentations
that contain photographic images, especially jpeg images that cover more than
60% of the slide area, may actually convert to a .pdb file that is larger than the
original .ppt file. This is due to the nature of the conversion process, which was
developed to function within the limitations of the Palm processor. Keep in mind
that presentations may be stored in the Palm's memory or a flash memory module.
Also, if at all possible, do not use textured backgrounds or gradients. Instead use
solid or simple backgrounds. Recommended PowerPoint templates include;
Capsules, Straight Edge, Blends, Dad's Tie, Blueprint and Ribbons.
40
Q
A
Will I get color slides, even if my handheld is a Black and White display
model?
Yes, you will get 256 colors. Some pictures with thousands of shades of colors will
not be as detailed, but standard graphics will look fine.
Q
A
What features in PowerPoint are not supported by Presenter-to-Go?
Presenter-to-Go does not support any slide-ins, builds, transitions, animation,
motion, audio, or video features found in PowerPoint. Your slides need to be static.
Q
The Presenter-to-Go Desktop doesn't see my Palm Desktop users and as a
result I can't queue any presentations. When I try to "Add Users" using the
"Change Users" feature it says "List of available users is empty", which
means it doesn't see the user from my Palm Desktop. How do I make the
Presenter-to-Go Desktop recognize me?
One cause of this problem may be that the "Instaide.dll" is missing or was deleted
from the directory where the palm desktop was installed. Perform a "Find File" on
"Instaide.dll". Then check the path in the registry. To do this, start DOS. Enter
"regedit" and click "OK". Go to "HKEY_CURRENT_USER\Software\U.S. Robotics\Pilot
Desktop\Core\Path". The file named "Path" should have its "data" be the location of
the "Instaide.dll". If this is not where "Instaide.dll" is, make a copy to put in the
aforementioned directory.
A
Q
A
Can I display the content of my handheld’s screen?
Yes, using the MARGI Mirror Application.
Q
A
Does the Presenter-to-Go software work on Mac OS 8.5?
Yes, the software works on Mac OS 8.5 thru 9.2.
Q
My handheld, Presenter-to-Go card and secondary display are all powered
and connected but I cannot view my presentation on the display. When I
click on the “Information” button, it says there is “No Display Detected”.
This is due to a missing EDID. Either the EDID is corrupt or absent, so the module
has no way to identify the display. If the display offers 1024x768 support, even
without the EDID, the presentation may still run at the default of 1024x768 at
60Hz.
A
Q
A
Q
A
When I try to use Presenter-to-Go in "Adobe Acrobat" the file output is not
properly situated on the page.
Files being converted in "Acrobat" must have been originally exported to "Acrobat"
with their page setup as landscape.
How do I know if my presentation is too big to move to my handheld?
If you try to download a presentation to your handheld that is too large, you will
receive an error message informing you that there is not enough memory to
perform the function. Also, from the main screen on your handheld, you can hit
your menu button and select "info" to see the available space on your handheld. To
find out the size of the file you want to HotSync, you can go into the "Presenter-toGo" folder under "Program Files" and enter the "Archive" folder. Then look for the
name of the presentation that you'd like to move, and you can see the size of the
.pdb file.
41
Q
A
How do I remove a file from the hotsync bin?
To remove file from hotsync bin: run the Palm Desktop Install Tool
(Start\Programs\Palm Desktop\Install Tool)
then select user then select offending file and click Remove...
Q
When I press the Presenter-to-Go icon in PowerPoint, will it automatically
pick up the names of each slide, the presenter notes and the text content
for each slide?
Yes
A
Q
A
Q
A
I used the Presenter-to-Go printer driver to make a slide, but the slide was
compressed in the horizontal direction.
You must change the printer driver to “Landscape” mode before printing. On some
programs this must be done in the “Page Setup” and printer driver. You should be
able to get slides that are the same aspect ratio as the original if you
make these adjustments.
Can I see what my presentation looks like before I HotSync it into the
handheld?
Yes, use the “View” button to review your presentation prior to pressing the
“Queue” button for HotSync.
Q
A
Can Presentations be saved on a memory card?
Yes, you may select a memory card as the destination for a mobile presentation
when you HotSync. When you open the Presenter-to-Go Palm application and click
on the Presentation Name, the Presentation List includes presentations on both the
handheld and a memory card. Presentations that are on the memory card will have
a bullet in front of them. If you select a presentation that is on the memory card,
when this file opens, a local copy of the file is temporarily created on the handheld.
When you look at the Presentation List again, this presentation will now have a
dash next to it. If you remove the memory card and plug in the Presenter-to-Go
Card you will still be able to use this presentation from the memory card.
Q
A
How fast does Presenter-to-Go drain the handheld’s batteries?
Presenter-to-Go uses its own power supply, so the card itself does not drain the
Palm’s batteries. On handhelds with a full charge, you can present for about 3
hours. If you don’t use the Presenter-to-Go power supply, the handheld’s battery
will drain in about 80 minutes.
Q
A
The picture on my monitor/projector display is incorrect or it flickers.
The display resolution or refresh rate is incorrectly determined. Re-start the
Presenter-to-Go application, for the display to automatically detect 1024.x 768 at
75 Hz or manually adjust the display to that resolution.
Q
Auto-shut-off does not work when the Presenter-to-Go application in
running.
This is intended, and done so that a presentation does not stop in the middle, or
while in automatic loop mode.
A
42
Technical Support
There are three ways to contact the MARGI Customer Service and Support:
1
Fill out the MARGI's Online Support Form by logging into
http://www.margi.com/support/request_support.htm. MARGI support staff will
answer these contacts with one business day, usually only a few business hours.
2
You may FAX your questions to (510) 657-4430. FAXes will be answered within
one business day.
3
Telephone Support is available M-F 8:30 a.m. to 5:00 p.m. PST at (510) 657-4435.
Be sure to have your handheld and Presenter-to-Go card available when you call.
43
13. Specifications
Presenter-to-Go Card Specifications
•
•
•
Dimensions (in inches) are as follows; remote is
3.5” x 1.75” x .25”, electronic component
housing is 2.25” x 1.5” x .75” (SD) and 3.0” x
1.5” x .75” (MS), and cable length is 17”
• Operating Voltage: 5V DC (See power options
below)
• Power Consumption: under 0.5 Watts
• Output Resolution: 1024 x 768 (XGA) 8-bit color
or 800 x 600 (SVGA)
Remote Control: 14-button Infrared Red (range 50’ when pointed at cable’s IR
window)
26 pin flat VGA connection (HD-15 female) connector. The power connector at
VGA end of the cable.
Presentation Device
• Any monitor, display or projector with standard VGA input (HD15 connector) and
is capable of 1024 x 768 resolution.
Power Options
• Presenter-to-Go can be powered using the included A/C adapter for
presentations up to 3 hours in length or indefinitely using a travel charger. Short
presentations under 80 minutes in length may be made using the handheld’s
battery.
Program Control Features
• HotSync to selected users
• Selectively Hide/Show Slides
• Drag and Drop Reorganization
• View Slide Notes and Slide Text
• Create Presentations from
PowerPoint 97/2000/XP on PC
and 98/2001 on Mac with icon
button on Toolbar.
• Select From Multiple
Presentations
Remote
•
•
•
•
•
Control Features
Forward Advance, Reverse, Loop
10 Key Direct Slide Select
Return to Last Slide
44
Manual/Automatic Show/Loop
Function
Create Presentations for any
printable Windows 98, ME,
2000, XP, NT4 or Mac OS 9
application. Slides can be
appended to existing
presentations. One single
presentation can be made from
slides from multiple applications
Appendix One: Product Warranty
MARGI Systems, Inc. (“MARGI”) warrants that this product will be free from defects in
materials and workmanship during the warranty period, and will perform according to
product documentation. If your product is found to be defective in materials or
workmanship within the warranty period, MARGI will at its sole discretion, repair or
replace the product at no charge. This warranty does not cover damage from everyday
wear and tear or from transportation by a common carrier. There are not other express or
implied warranties beyond the terms of this limited warranty, and MARGI hereby disclaims
any, and or all implied warranties of merchantability and fitness for a particular purpose.
This warranty is contingent upon proper use of the product in the application for which it
is intended and does not cover any product that was modified or subjected to unusual
physical or electrical stress. MARGI’s maximum liability for breach of, or resulting from,
this warranty will be limited to an amount not exceeding the original product purchase
price. In no event shall MARGI be liable for special, incidental or consequential damages
(including without limitation, damages for loss of business profits, business interruption,
loss of business information or any other pecuniary loss), or for damages for personal
injury or property damage arising out of the use of, or the possibility of such damages.
The defective product must be returned to the original place of purchase with valid proof
of purchase. State and local laws may apply.
MARGI Systems, Inc.
Warranty Period: 1 year for US Residents. 2 years for Residents of European Community
Countries.
Product: Presenter-to-Go SD Card/Cable or Presenter-to-Go MS Card/Cable
45
Appendix Two: Federal Communications
Commission Information
This device complies with Part 15 of the FCC Rules. Operation is subject to the following
two conditions: (1) This device may not cause harmful interference, and (2) this device
must accept any interference received, including interference that may cause undesired
operation. Any changes or modifications to this product not expressly authorized by
MARGI Systems may void your authority to operate this product. NOTE: This equipment
has been tested and found to comply with the limits for a Class B digital device, pursuant
to Part 15 of the FCC Rules.
These limits are designed to provide reasonable protection against harmful interference in
a residential installation. This equipment generates, uses and can radiate radio frequency
energy and, if not used in accordance with the instructions, may cause harmful
interference to radio communications. However, there is no guarantee that interference
will not occur in a particular installation. If this equipment does cause harmful
interference to radio or television reception, which can be determined by turning the
equipment off and on, the user is encouraged to try to correct the interference by on or
more of the following measures:
• Reorient or relocate the receiving antenna.
• Increase the separation between the equipment and the receiver.
• Connect the equipment into an outlet on a circuit different form that to which the
receiver is connected.
• Consult the dealer or an experienced radio/TV technician for help.
On certain models of handhelds, ESD discharge may cause the device to freeze up.
Operation can be restored by resetting the device.
Warranty Registration
Warranty registration is available at http://www.margi.com/registration
46