1
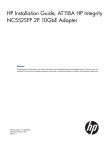
A6795A Fibre Channel Mass Storage Adapter Installation Guide HP-UX Networking Edition 3 Manufacturing Part Number: A6795-90006 E0305 Printed in the US © Copyright 2004-2005 Hewlett-Packard Development Company, L.P. Legal Notices The information in this document is subject to change without notice. Hewlett-Packard makes no warranty of any kind with regard to this manual, including, but not limited to, the implied warranties of merchantability and fitness for a particular purpose. Hewlett-Packard shall not be held liable for errors contained herein or direct, indirect, special, incidental or consequential damages in connection with the furnishing, performance, or use of this material. Warranty A copy of the specific warranty terms applicable to your Hewlett-Packard product and replacement parts can be obtained from your local Sales and Service Office. U.S. Government License Proprietary computer software. Valid license from HP required for possession, use or copying. Consistent with FAR 12.211 and 12.212, Commercial Computer Software, Computer Software Documentation, and Technical Data for Commercial Items are licensed to the U.S. Government under vendor's standard commercial license. Trademark Notices UNIX is a registered trademark in the United States and other countries, licensed exclusively through The Open Group. Localized Documentation This Installation Guide has been translated to: http://www.docs.hp.com/ja/index.html 2 Contents 1. HP-UX Installation Supported Configurations . . . . . . . . . . . . . . . . . . . . . . . . . . . . . . . . . . . . . . . . . . . . . . . . . . . . . . . . . . . . . . 5 Superdome Installation . . . . . . . . . . . . . . . . . . . . . . . . . . . . . . . . . . . . . . . . . . . . . . . . . . . . . . . . . . . . . . . . 6 Installation Prerequisites . . . . . . . . . . . . . . . . . . . . . . . . . . . . . . . . . . . . . . . . . . . . . . . . . . . . . . . . . . . . . . 6 Patches . . . . . . . . . . . . . . . . . . . . . . . . . . . . . . . . . . . . . . . . . . . . . . . . . . . . . . . . . . . . . . . . . . . . . . . . . . . . . 6 Installing Driver Software. . . . . . . . . . . . . . . . . . . . . . . . . . . . . . . . . . . . . . . . . . . . . . . . . . . . . . . . . . . . . . 7 Installing the Adapter Online . . . . . . . . . . . . . . . . . . . . . . . . . . . . . . . . . . . . . . . . . . . . . . . . . . . . . . . . . . . 8 Installing the Adapter Offline . . . . . . . . . . . . . . . . . . . . . . . . . . . . . . . . . . . . . . . . . . . . . . . . . . . . . . . . . . . 8 Attach Other Devices . . . . . . . . . . . . . . . . . . . . . . . . . . . . . . . . . . . . . . . . . . . . . . . . . . . . . . . . . . . . . . . . . 11 Verifying Installation . . . . . . . . . . . . . . . . . . . . . . . . . . . . . . . . . . . . . . . . . . . . . . . . . . . . . . . . . . . . . . . . . 12 Verifying Connectivity . . . . . . . . . . . . . . . . . . . . . . . . . . . . . . . . . . . . . . . . . . . . . . . . . . . . . . . . . . . . . . . . 12 Interpreting Hardware Paths . . . . . . . . . . . . . . . . . . . . . . . . . . . . . . . . . . . . . . . . . . . . . . . . . . . . . . . . . . 13 A. Regulatory Information FCC Statement (For U.S.A.) . . . . . . . . . . . . . . . . . . . . . . . . . . . . . . . . . . . . . . . . . . . . . . . . . . . . . . . . . . . Canada . . . . . . . . . . . . . . . . . . . . . . . . . . . . . . . . . . . . . . . . . . . . . . . . . . . . . . . . . . . . . . . . . . . . . . . . . . . . EMI (Australia and New Zealand) . . . . . . . . . . . . . . . . . . . . . . . . . . . . . . . . . . . . . . . . . . . . . . . . . . . . . . VCCI (Japan) (PCI Card Only) . . . . . . . . . . . . . . . . . . . . . . . . . . . . . . . . . . . . . . . . . . . . . . . . . . . . . . . . . EMI Statement (European Community) . . . . . . . . . . . . . . . . . . . . . . . . . . . . . . . . . . . . . . . . . . . . . . . . . Laser Safety Statements . . . . . . . . . . . . . . . . . . . . . . . . . . . . . . . . . . . . . . . . . . . . . . . . . . . . . . . . . . . . . . A6795A Declaration of Conformity . . . . . . . . . . . . . . . . . . . . . . . . . . . . . . . . . . . . . . . . . . . . . . . . . . . . . . 17 17 17 18 18 18 20 3 Contents 4 1 HP-UX Installation This chapter contains HP-UX installation information for the A6795A Fibre Channel Mass Storage Adapter and contains the following sections: • “Supported Configurations” • “Superdome Installation” • “Installation Prerequisites” • “Patches” • “Installing Driver Software” • “Installing the Adapter Online” • “Installing the Adapter Offline” • “Attach Other Devices” • “Verifying Installation” • “Verifying Connectivity” • “Interpreting Hardware Paths” Thank you for purchasing HP I/O Cards If you are installing an HP I/O card as an add-in device, please review this document before attempting installation. If this card was factory installed in your server, you can skip to the Verifying Installation section. HP welcomes your input. Please email us at: [email protected] with comments or suggestions on HP I/O Cards or related documentation. All product documentation, including a comprehensive Support Guide, Installation Guide, Release Notes, and Support Matrix are available online at: http://docs.hp.com 1. Click on browse by topic. 2. Click on networking and communications. 3. Click on the Fibre Channel product category. Supported Configurations Verify compliance with the supported configurations listed in the HP Fibre Channel Host Bus Adapter Support Matrix, available at: http://www.docs.hp.com/hpux/netcom/index.html#Fibre%20Channel Alternately, you can access the HP Fibre Channel Host Bus Adapter Support Matrix, as well as other Fibre Channel documentation as follows: a. go to http://www.docs.hp.com b. select “browse by topic” c. select “Networking and Communications” d. select “Fibre Channel” Chapter 1 5 HP-UX Installation Superdome Installation Superdome Installation Superdome systems are not intended for access by users. HP recommends that Superdome systems only be opened by a qualified HP engineer. Failure to observe this requirement can invalidate any support agreement or warranty to which the system owner might otherwise be entitled. Installation Prerequisites • Check that the /usr/bin, /usr/sbin, and /sbin directories are in PATH by entering the following command: echo $PATH • Verify that you have the following items: — Grounding wrist strap — Fibre Channel driver software media (included with OS or application CD). Alternately the driver software, FibrChanl-00, can be downloaded from http://software.hp.com. — Fibre Channel host bus adapter with an optical port protector attached (not included with all adapters). • Verify the cabling requirements: — Cable map (optional) — A 50 micron fibre optic duplex M/M cable terminated with a SFF (small form factor) LC connector • Locate the part number and the Worldwide Name for each port on the Fibre Channel adapter and record them. NOTE Patches are available from either http://www.software.hp.com or http://ITresourcecenter.hp.com. Patches Review the FibrChanl-00 (fcd) Fibre Channel Mass Storage Driver for HP-UX Release Notes for the latest patch and dependency requirements: a. go to http://www.docs.hp.com b. select “browse by topic” c. select “Networking and Communications” d. select “Fibre Channel” Install all driver software and dependency patches before you install the adapter. 6 Chapter 1 HP-UX Installation Installing Driver Software Installing Driver Software NOTE Use the following instructions if the driver is provided on a CD-ROM. If the driver software is downloaded, follow the instructions provided with that file. The driver software, FibrChanl-00, may be downloaded from http://software.hp.com. The FibrChanl-00 bundle is also provided on the Hardware Enablement CD. To load the driver from a CD-ROM, do the following: 1. Log in as root. 2. Insert the CD-ROM. 3. Mount the CD-ROM using the command: mount /dev/dsk/<cd_rom_dev_file> /<tmp_mnt> 4. Run the swinstall program to install the software. Enter the command: /usr/sbin/swinstall This opens the Software Selection window and the Specify Source window. 5. In the Specify Source window, change the Source Host Name if necessary. Enter the mount point of the drive in the Source Depot Path field and click the OK button to return to the Software Selection window. (You can click the Help button to get more information). 6. Select the FibrChanl-00 software bundle. 7. Select Mark for Install from the Actions menu. 8. Select Install from the Actions menu to begin product installation and open the Install Analysis window. 9. Click the OK button in the Install Analysis window to confirm that you want to install the software. Swinstall displays the Install window. View the Install window to read processing data while the software is being installed. When the Status field indicates Ready, the Confirmation window opens. 10. Click the OK button. A second Confirmation window opens. 11. Click the OK button again. The Install window opens. 12. Click the Done button. The Note window opens. 13. Click the OK button on the Note window to reboot. The user interface disappears and the system reboots. 14. Once the system comes back up, log in as root and view the following files to see any error or warning messages that may have occurred during the installation: /var/adm/sw/swagent.log /var/adm/sw/swinstall.log Chapter 1 7 HP-UX Installation Installing the Adapter Online Installing the Adapter Online The Online Addition and Replacement feature (OLAR for HP-UX 11i v1, or OL* for HP-UX 11i v2 and later HP-UX releases) allows PCI host bus adapters to be added, or replaced, without shutting down and rebooting the system, and without adversely affecting other system components. The system hardware uses slot-specific power control, combined with HP-UX operating system support, to enable these features. OLAR or OL* may not be supported on the system you plan to install an A6795A adapter in. See the HP Fibre Channel Host Bus Adapter Support Matrix, at http://www.docs.hp.com, to confirm if OLAR or OL* is supported. NOTE For detailed instructions on using OLAR on HP-UX 11i v1, see Chapter 2 of Configuring HP-UX for Peripherals, which can be accessed at http://www.docs.hp.com For detailed instructions on using OL* on HP-UX 11i v2 and later HP-UX releases, see the Interface Card OL* Support Guide, and the Interface Card OL* Support Matrix, which can be accessed at http://www.docs.hp.com NOTE rp54xx servers have slot restrictions for OLAR. PCI slots 1 through 4 do not support OLAR. In these servers, use PCI slots 5 through 12 for OLAR. IMPORTANT Superdome systems are not intended for access by users. HP recommends that Superdome systems only be opened by a qualified HP engineer. Failure to observe this requirement can invalidate any support agreement or warranty to which the system owner might otherwise be entitled. Installing the Adapter Offline NOTE Install all driver software and dependency patches before you install the adapter. CAUTION Observe all ESD safety precautions before attempting this procedure. Failure to follow ESD safety precautions could result in damage to equipment. NOTE See the system documentation for information about how to safely shutdown your system and obtain access to expansion slots. 8 Chapter 1 HP-UX Installation Installing the Adapter Offline In some systems, the A6795A adapter is limited to use in specific slots. The following table identifies these limitations. Table 1-1 Server Name Product Number L1000 A5576A 8, 10, 12 L2000 A5191A 3, 4, 5, 6, 8, 10, 12 N4000 Rev. A A3639A 2, 4, 6, 8, 10, 12 N4000 Rev. B A3639B 2, 4, 6, 8, 10, 12 N4000 Rev. C A3639C If upgraded from A3639A or A3639B 2, 4, 6, 8, 10, 12 NOTE Supported Slots rp54xx servers have slot restrictions for OLAR. PCI slots 1 through 4 do not support OLAR. In these servers, use PCI slots 5 through 12 for OLAR. CAUTION The optical port protector is used only to protect the adapter port when it is not in use. Do not use the protector as a diagnostic tool. To install the A6795A Adapter offline (all systems except Superdome): 1. Shutdown the system. 2. Install the adapter in an available PCI slot. 3. Attach fiber cabling to the adapter. The A6795A adapter uses a fiber optic cable terminated with an LC connector. For additional installation instructions, see the system documentation. Chapter 1 9 HP-UX Installation Installing the Adapter Offline Figure 1-1 10 A6795A Dual Port Fibre Channel Adapter Chapter 1 HP-UX Installation Attach Other Devices Attach Other Devices Attaching a Fibre Channel HBA to other Fibre Channel devices. 1. Be sure you have removed the Fibre Channel host bus adapter’s optical port protector (if included). 2. Be sure you have attached a connector cable to the Fibre Channel host bus adapter. Align the slotted plug with the keyed connector. Push the connector in until you hear it click. 3. Attach the free end of the cable to a compatible Fibre Channel device. 4. Reconnect the power cord, if necessary, and power up the system. The following table lists the Fibre Channel cables that you can use with Fibre Channel Host Bus Adapters. Be sure to use LC-LC or LC-SC cables for the A6795A. adapter. Table 1-2 Cable Products LC-LC C7524A Fibre Channel Cable 2m LC 50/125 duplex M/M C7525A Fibre Channel Cable 16m LC 50/125 duplex M/M C7526A Fibre Channel Cable 50m LC 50/125 duplex M/M C7527A Fibre Channel Cable 200m LC 50/125 duplex M/M LC-SC C7529A Fibre Channel Cable 2m LC-SC 50/125 duplex M/M Optical C7530A Fibre Channel Cable 16m LC-SC 50/125 duplex M/M Optical Adapter/Extenders C7534A Fibre Channel Adapter SC F/F Adapter Kit C7540A Chapter 1 Fibre Channel Adapter Kit: Includes 2m LC/SC Cable and F/F extenders 11 HP-UX Installation Verifying Installation Verifying Installation 1. To verify the adapter installation, enter the command: ioscan -f 2. Verify that the following drivers appear for each installed adapter. If all drivers display, proceed to the next section, Verifying Connectivity. The ioscan output might look like the following. The third column represents the hardware path of the slot in which the adapter is installed. This path will be different for each installed adapter port. Table 1-3 ioscan -f Output Class I H/W Path Driver S/W State H/W Type Description fc 0 1/1/0/0 td CLAIMED INTERFACE HP Tachyon XL2 Fibre Channel Mass Storage Adapter 3. If the correct driver is installed, but the adapter does not show it in the ioscan output, the driver is not recognizing the adapter. Contact HP for assistance. NOTE If the td driver for an installed Tachyon adapter (A6795A) does not display, verify that the adapter is securely seated before taking additional action. Verifying Connectivity Once your HP Fibre Channel Mass Storage software and hardware is installed and running, type the following commands to verify mass storage hardware and software installation. 1. Check the state of all Fibre Channel hardware and interfaces. Enter the ioscan command and verify that the S/W State of all Fibre Channel hardware and interfaces is CLAIMED. If the Fibre Channel device file has not been created, enter the following commands: ioscan -f insf -e 2. Verify that all devices you attached to the Fibre Channel adapter are listed in the ioscan output. For example, if you have a direct attach Fibre Channel device attached to the system, the ioscan output might look like the following: 8/12.8.0.255.0.1.0 sdisk CLAIMED DEVICE DGC C3400WDR5 The example above is the hardware path of LUN0 of a directly attached Fibre Channel Mass Storage device with Loop ID of 1. For details on interpreting hardware paths for Fibre Channel devices, see Interpreting Hardware Paths. 12 Chapter 1 HP-UX Installation Interpreting Hardware Paths 3. HP Fibre Channel Mass Storage installation is verified if the ioscan output lists all mass storage devices attached to the adapter. If any attached devices are not listed or appear as UNCLAIMED, see the Troubleshooting and Maintenance chapter of the HP Fibre Channel Adapters Support Guide. Interpreting Hardware Paths The following illustration is the Fibre Channel hardware path format: Figure 1-2 Example of a Hardware Path for a Public Loop Device Adapter Domain Area Port Bus Target LUN 0/1/2/0.1.19.255.15.4.0 Figure 1-3 Example of a Hardware Path for a Direct Fabric Attach Device Adapter Domain Area Port Bus Target LUN 0/1/2/0.1.19.255.0.0.0 Figure 1-4 Example of a Hardware Path for a Private Loop Device Adapter Domain Area Port Bus Target LUN 0/1/2/0.8.0.255.0.1.0 Each field in the hardware path is described below: Fibre Channel Topology of HBA Field Adapter Chapter 1 Value Information Fabric Topologies such as Public Loop and Direct Fabric Attach Private Loop This is the hardware path of the Fibre Channel adapter through which the LUN is seen. In the case of multi-port adapters, this field describes a specific port on the adapter. 13 HP-UX Installation Interpreting Hardware Paths Fibre Channel Topology of HBA Field Domain Area Value Information Fabric Topologies such as Public Loop and Direct Fabric Attach Private Loop The value depends on the Fibre Channel topology of the HBA. This field is typically the Domain ID of the switch to which the target device is attached. The value of this field is taken from the most significant byte of the N_Port ID of the target device. This field is set to 8. The value depends on the Fibre Channel topology of the HBA. This field is taken from the second byte of the N_Port ID of the target device. This field is set to 0. For historical reasons, HP-UX uses a Domain ID of 8 to indicate Private Loops. Fibre Channel switches seen by HP-UX hosts cannot be configured with Domain ID of 8; doing so is unsupported and will not work. On some switches, the second byte of the N_Port ID encodes the switch port to which the device is connected. How this encoding is done depends on the switch. Consult the relevant switch manual to interpret this field. Port Bus The value depends on the Fibre Channel topology of the HBA and the target device, and on the LUN addressing method used. For LUNs with Peripheral Device Addressing, the value of this field is always 255. For LUNs with Peripheral Device Addressing, the value of this field is always 255. For other LUN methods, the value of this field is the least significant byte of the N_Port ID of the target device. For other LUN methods, the value of this field is the Loop ID of the target device. The value depends on the Fibre Channel topology of the HBA and the target device, and on the LUN addressing method used. For LUNs with Peripheral Device Addressing, the value of this field is the upper 4-bits of the least significant byte of the N_Port ID of the target device. For LUNs with Peripheral Device Addressing, the value of this field is the upper 4-bits of the Loop ID of the target device. For LUNs with Logical Unit Addressing, the value is the Bus Number field of the Logical Unit Number. For LUNs with Volume Set Addressing (Flat Space Addressing), the value is bits 7 - 13 of the Logical Unit Number 14 Chapter 1 HP-UX Installation Interpreting Hardware Paths Fibre Channel Topology of HBA Field Target Value Information The value depends on both the Fibre Channel topology and the LUN addressing method used. Fabric Topologies such as Public Loop and Direct Fabric Attach For LUNs with Peripheral Device Addressing, the value of this field is the lower 4-bits of the third byte of the N_Port ID of the target device. Private Loop With Peripheral Device Addressing, the value of this field is the lower 4-bits of the Loop ID of the target device. This field usually corresponds to the Arbitrated Loop Physical Address (AL_PA) of the target device. For LUNs with Logical Unit Addressing, the value is the Target field of the Logical Unit Number. For LUNs with Volume Set Addressing (Flat Space Addressing), the value is bits 3 - 6 of the Logical Unit Number. LUN The value of this field depends only on the LUN addressing method used, see below. LUN Addressing Method Value of LUN field in FC HW Path Peripheral Device Addressing The Target or LUN field of the Logical Unit Number. Logical Unit Addressing Volume Set Addressing (Flat Space Addressing) The LUN field of the Logical Unit Number. Bits 0 - 2 of the Logical Unit Number. For more information about the fields in the Logical Unit Number, please refer to the SCSI Architecture Model - 3 (SAM-3) standards document. NOTE Fibre Channel devices can connect to a Fabric using either Direct Fabric Attach or Public Loop. Different devices may have different types of connections to the same Fabric, for example an HBA may have a Direct Fabric Attach connection to the Fabric, while an array has a Public Loop connection to the same Fabric. In other words, in a Fabric, the Fibre Channel Topology of an HBA may be different from the Fibre Channel Topology of devices seen by that HBA. Public Loop devices have an Arbitrated Loop Physical Address (AL_PA). The AL_PA usually appears in the least significant byte of the device's N_Port ID. Direct Fabric Attach devices do not have an AL_PA and the least significant byte of their N_Port ID is usually 0. This is dependent on the switch implementation and not all switches adhere to this scheme. Some switches allow devices in Private Loop mode to connect to a Fabric. In these situations, the switch typically translates the private loop device as either a Public Loop or Direct Fabric Attach device to the rest of the Fabric. The switch also typically translates the rest of the Fabric as Private Loop devices to the Private Loop device. Chapter 1 15 HP-UX Installation Interpreting Hardware Paths 16 Chapter 1 A Regulatory Information FCC Statement (For U.S.A.) Federal Communications Commission Radio Frequency Interference Statement WARNING This device complies with Part 15 of the FCC rules. Operation is subject to the following two conditions: (1) This device may not cause harmful interference and (2) this device must accept any interference received, including interference that might cause undesired operation. This equipment has been tested and found to comply with the limits for a Class A digital device, pursuant to Part 15 of the FCC rules. These limits are designed to provide reasonable protection against harmful interference when the equipment is operated in a commercial environment. This equipment generates, uses and can radiate radio frequency energy, and, if not installed and used in accordance with the instruction manual, may cause harmful interference to radio communications. Operation of this equipment in a residential area is likely to cause interference, in which case the user at his own expense will be required to take whatever measures may be required to correct the interference. Hewlett-Packard’s system certification tests were conducted with HP-supported peripheral devices and cables, such as those received with your system. Changes or modifications to this equipment not expressly approved by Hewlett-Packard could void the user’s authority to operate the equipment. Canada Warning: This Class A digital apparatus meets all requirements of the Canadian Interference-Causing Equipment Regulations. Cet appareil numérique de la classe A respecte toutes les exigences du règlement sur le matériel brouilleur du Canada. EMI (Australia and New Zealand) This product meets the applicable requirements of the Australia and New Zealand EMC Framework. Appendix A 17 Regulatory Information VCCI (Japan) (PCI Card Only) VCCI (Japan) (PCI Card Only) This equipment complies with the Class A category for information technology equipment based on the rules of Voluntary Control Council for Interference by Information Technology Equipment. When used in a residential area, radio interference may be caused. In this case, the user may be required to take appropriate corrective actions. Figure A-1 VCCI Regulatory Statement EMI Statement (European Community) NOTE This is a Class A product. In a domestic environment, this product may cause radio interference, in which case you may be required to take adequate measures. Laser Safety Statements Laser Safety Statements - U.S. FDA/CDRH - Optical (laser) Transceiver CAUTION The optical transceiver provided on the network interface card contains a laser system and is classified as a “Class-I Laser Product” under a U.S. Department of Health and Human Services (DHHS) Radiation Performance standard according to the Radiation Control for Health and Safety Act of 1968. The Class I label and compliance statement are located on the optical transceiver. To ensure proper use of this product, please read this instruction manual carefully and retain for future reference. Should the unit ever require maintenance, contact an authorized service location. CAUTION Use of controls, adjustments or the performance procedures other than those specified herein may result in hazardous radiation exposure. To prevent direct exposure to laser beam, do not try to open the enclosure. Laser Safety - European Union - Optical Transceiver Only 18 Appendix A Regulatory Information Laser Safety Statements CAUTION The optical transceiver provided on the network interface card contains a laser system and is classified as a “Class 1 Laser Product” per EN 60825-1, Safety of Laser products. Class 1 laser products are considered safe and do not pose a biological hazard if used within the data sheet limits and instructions. To ensure proper use of this product, please read this instruction manual carefully and retain for future reference. Should the unit ever require maintenance, contact an authorized service location. CAUTION Use of controls, adjustments or the performance procedures other than those specified herein may result in hazardous radiation exposure. To prevent direct exposure to laser beam, do not try to open the enclosure. There are no user serviceable parts nor any maintenance required for the optical transceiver. All adjustments are made at the factory before shipment to customers. Tampering with or any attempt to modify the optical transceiver will result in voided product warranty. It may also result in improper operation of the network card circuitry and possible overstress of the laser source. Device degradation or product failure may result. Appendix A 19 Regulatory Information A6795A Declaration of Conformity A6795A Declaration of Conformity 20 Appendix A