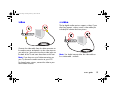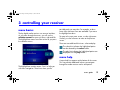
1
hp digital media receiver
user's guide
Filename: Lexus Cover.doc
Title: Lexus User's Guide
Template: HP-Print2K.dot
Author: Softeq Development Corp.
Revision #: 4
Page: 1 of 3
Printed: 10/31/02 05:56 AM
Last Saved By: Chris Howard
Lexus.book Page i Monday, January 6, 2003 2:00 AM
Contents
welcome ...............................1
sharing content ...................13
getting started.......................3
server software . . . . . . . . . . . . . . . . . . . . . . .
server menu . . . . . . . . . . . . . . . . . . . . . . . . .
sharing content. . . . . . . . . . . . . . . . . . . . . . .
synchronizing content . . . . . . . . . . . . . . . . . .
forcing resynchronization . . . . . . . . . . . . . . .
music quality . . . . . . . . . . . . . . . . . . . . . . . .
supported music formats . . . . . . . . . . . . . . . .
recording digital music . . . . . . . . . . . . . . . . .
copy protection . . . . . . . . . . . . . . . . . . . . . .
organizing music files . . . . . . . . . . . . . . . . . .
creating music playlists . . . . . . . . . . . . . . . . .
supported photo formats . . . . . . . . . . . . . . . .
organizing photo albums. . . . . . . . . . . . . . . .
server printers . . . . . . . . . . . . . . . . . . . . . . .
connection list . . . . . . . . . . . . . . . . . . . . . . .
power settings . . . . . . . . . . . . . . . . . . . . . . .
unpacking the box . . . . . . . . . . . . . . . . . . . . . 3
installing software . . . . . . . . . . . . . . . . . . . . . . 4
video. . . . . . . . . . . . . . . . . . . . . . . . . . . . . . . 5
audio . . . . . . . . . . . . . . . . . . . . . . . . . . . . . . 6
remote control . . . . . . . . . . . . . . . . . . . . . . . . 6
network connection . . . . . . . . . . . . . . . . . . . . . 7
connecting power . . . . . . . . . . . . . . . . . . . . . . 8
setup wizard . . . . . . . . . . . . . . . . . . . . . . . . . 8
controlling your receiver........9
menu basics . . . . . . . . . . . .
remote buttons . . . . . . . . . .
onscreen keyboard . . . . . . .
receiver options . . . . . . . . .
changing the receiver name .
controlling another receiver .
screen saver . . . . . . . . . . . .
running the setup wizard . . .
.
.
.
.
.
.
.
.
..
..
..
..
..
..
..
..
.
.
.
.
.
.
.
.
.
.
.
.
.
.
.
.
.
.
.
.
.
.
.
.
..
..
..
..
..
..
..
..
.
.
.
.
.
.
.
.
.
.
.
.
.
.
.
.
.
.
.
.
.
.
.
.
...9
. . 10
. . 11
. . 11
. . 12
. . 12
. . 12
. . 12
13
14
14
15
15
16
16
17
17
18
18
19
19
20
20
21
playing music ......................23
music jukebox . . . . . . . . . . . . . . . . . . . . . . . 23
supported music files . . . . . . . . . . . . . . . . . . . 23
user’s guide
i
Lexus.book Page ii Monday, January 6, 2003 2:00 AM
playing a track . . . . . . . . . . . . . . . . . . . . . . . 23
browsing for music . . . . . . . . . . . . . . . . . . . . 24
music icon hints . . . . . . . . . . . . . . . . . . . . . . 25
searching for music . . . . . . . . . . . . . . . . . . . . 25
playing an artist or album . . . . . . . . . . . . . . . 26
creating a playlist . . . . . . . . . . . . . . . . . . . . . 26
playing a playlist . . . . . . . . . . . . . . . . . . . . . 27
controlling music playback . . . . . . . . . . . . . . . 28
displaying music status . . . . . . . . . . . . . . . . . 28
shuffle and repeat . . . . . . . . . . . . . . . . . . . . . 28
viewing track information . . . . . . . . . . . . . . . . 29
viewing photos with music . . . . . . . . . . . . . . . 29
changing the view order . . . . . . . . . . . . . . . . 29
controlling other receivers . . . . . . . . . . . . . . . 30
viewing photos ...................31
photo albums . . . . . . . . . . . . . . . . .
supported photo files . . . . . . . . . . . .
viewing a photo . . . . . . . . . . . . . . .
photo and album icon hints . . . . . . .
playing a photo slideshow . . . . . . . .
controlling photo playback . . . . . . . .
viewing photo information . . . . . . . .
playing music with slideshows . . . . .
setting music for an album . . . . . . . .
ii
hp digital media receiver
..
..
..
..
..
..
..
..
..
.
.
.
.
.
.
.
.
.
.
.
.
.
.
.
.
.
.
.
.
.
.
.
.
.
.
.
. . 31
. . 31
. . 31
. . 32
. . 32
. . 32
. . 33
. . 33
. . 33
printing photos . . . . . . .
rotating photos . . . . . . .
changing the view order
organizing your photos .
.
.
.
.
.
.
.
.
.
.
.
.
..
..
..
..
.
.
.
.
.
.
.
.
.
.
.
.
..
..
..
..
.
.
.
.
.
.
.
.
.
.
.
.
..
..
..
..
.
.
.
.
34
34
34
34
network setup .....................35
running the setup wizard . . .
preparing for wired setup . .
wired home network . . . . . .
wired with dynamic address
wired with static address . . .
wired with cross-over cable .
preparing for wireless setup .
wireless infrastructure . . . . .
wireless ad hoc . . . . . . . . .
wireless encryption . . . . . . .
wireless signal strength . . . .
....
....
....
....
....
....
....
....
....
....
....
.
.
.
.
.
.
.
.
.
.
.
....
....
....
....
....
....
....
....
....
....
....
.
.
.
.
.
.
.
.
.
.
.
..
..
..
..
..
..
..
..
..
..
..
.
.
.
.
.
.
.
.
.
.
.
35
35
37
37
38
39
40
41
41
42
44
troubleshooting ...................45
glossary ..............................49
warranty and license...........53
Lexus.book Page 1 Monday, January 6, 2003 2:00 AM
1 welcome
Thank you for purchasing an hp digital media receiver!
With your new, easy-to-use media receiver you can:
To begin setting up your hp digital media receiver, see
“unpacking the box” on page 3.
• Browse and listen to your digital music on any TV
and stereo in your home
finding information
• View your favorite digital pictures right on your TV
and print them to any PC-connected printer
Setup Sheet. Follow the instructions to quickly and
easily set up your receiver.
• Combine music and pictures into entertaining
multimedia slideshows
User’s Guide. You are here! Use this guide to learn
about using your receiver.
• Automatically gather all digital music and pictures
from multiple PCs to a central location
Onscreen User’s Guide. This is the electronic
version of this guide. View it directly off of the CD or
from the Start Menu program group after you install the
receiver software on the PC.
• Control music on multiple hp digital media
receivers
setting up your receiver
This guide describes how to use your new media
receiver. It includes information to help you get
acquainted with your receiver, and plenty of detailed
usage and troubleshooting information.
World Wide Web. Visit Hewlett-Packard’s internet
website at http://www.hp.com for information and
support.
user’s guide
1
Lexus.book Page 2 Monday, January 6, 2003 2:00 AM
viewing the onscreen guide
A copy of this User’s Guide is available on your
computer when you install the media receiver software
CD.
To view the onscreen User’s Guide:
1. Click on the Start menu button
2. Select All Programs
3. Select hp digital media
4. Select View User’s Guide
If Adobe® Acrobat® Reader® version 4.0 or later is
not installed on your computer, it will be installed for
you automatically when you first view the guide.
2
hp digital media receiver
Lexus.book Page 3 Monday, January 6, 2003 2:00 AM
2 getting started
This section will help you set up your hp digital media
receiver. Your connection locations and system
components may vary.
front of receiver
unpacking the box
Make sure you have the following items:
hp digital media receiver
batteries
power button
back of receiver
remote control
wireless antenna (model ew5000 only)
audio cable
power adapter
video cable
installation cd
ethernet network
s-video
network cable
user’s guide
video
audio left
audio right
dc power in
user’s guide
3
Lexus.book Page 4 Monday, January 6, 2003 2:00 AM
installing software
Install the hp digital
media software on the
PC where you store your
music and digital
photos.
It is best to install the
software before setting
up the receiver, so the
receiver has content to
display.
To install the software, insert the CD into the CD-ROM
drive of your computer. The installation program starts
automatically, and you can follow the on-screen
instructions.
Note: If the software does not start automatically, you
can access it from the Start menu on the Windows
taskbar. On the Start menu, click Run. In the Run
dialog box, type x:/setup.exe, where x is the drive
letter of your CD-ROM drive.
4
hp digital media receiver
The software will share the music and photos in your
My Music and My Pictures folders. To change
these folders or add additional shared folders, see
“sharing content” on page 14.
You can install the software on multiple computers if
you wish to share additional music and photos.
Lexus.book Page 5 Monday, January 6, 2003 2:00 AM
video
s-video
The hp digital media receiver supports s-video. If your
television supports s-video, use an s-video cable (not
included) for a better television picture.
Connect the video cable from the video connector on
the media receiver and attach it to the video input on
your television. Some televisions have video inputs on
the back of the TV and some have them on the front.
Note: If you have run out of video connections on
your TV, connect the media receiver to your VCR.
Note: You should connect either the video cable or
the s-video cable...not both.
For home theater systems, connect the video to your
home theater receiver.
user’s guide
5
Lexus.book Page 6 Monday, January 6, 2003 2:00 AM
audio
remote control
For the best music quality, connect the media receiver
audio output to your home stereo system.
Place the included batteries in the remote control.
Alternately, connect the audio cable to your television.
6
hp digital media receiver
Match the battery direction shown above for proper
operation.
Lexus.book Page 7 Monday, January 6, 2003 2:00 AM
network connection
In a wired home network, connect the media receiver
to your home network hub or router.
In a wireless home network, no network cable
connection is required (model ew5000 only).
If your computer is connected directly to a cable or DSL
modem, and there is only one network port on the
back of the modem, you do not have a home network.
To set up your network, purchase a modem or router
with additional network ports.
For the best possible reception, rotate the antenna so it
extends perpendicular to the receiver, as shown
above.
A router will allow you to share your internet
connection with other PCs, and allows the media
receiver access to your music and photos stored on
your PC.
Note: For alternate network connections, see
page 39.
The hp digital media receiver can communicate with
wireless access points (infrastructure mode) or directly
to computers with wireless network cards (ad hoc
mode).
Like all wireless devices, some experimentation may be
necessary to find the best location for your media
receiver. Signal strength and quality will depend on
distance, walls, and building structure.
user’s guide
7
Lexus.book Page 8 Monday, January 6, 2003 2:00 AM
connecting power
setup wizard
When power is applied for the first time, the setup
wizard will appear.
Turn your television on. If you hooked up the audio to
your stereo system, turn your stereo system on as well.
Tune them both to the proper mode to match the audio
and video connectors attached to the receiver.
Insert the small end of the power adapter cable into the
power connection on the back of the media receiver.
Make sure it is connected firmly.
Plug the power adapter into a working electrical outlet.
Use the remote control to set up your hp digital media
receiver. The setup wizard allows you to assign a
name and quickly configure your network settings.
Once you have successfully completed the wizard,
your media receiver will be ready to use!
Note: You can run the setup wizard again if you wish
to change any of your settings. On the main screen,
press the options button, highlight Run Setup
Wizard, and press select.
8
hp digital media receiver
Lexus.book Page 9 Monday, January 6, 2003 2:00 AM
3 controlling your receiver
menu basics
The hp digital media receiver uses a menu interface.
As you move through the menus, you will use the
selection arrows to move up, down, right and left.
The highlight bar moves from item to item as you press
the selection arrows.
possible paths you may take. For example, a down
arrow hints that more items are available if you move
the highlight bar down.
To move to the next menu screen, use the right arrow.
Similarly, use the left arrow to move to the previous
screen.
There are two additional hint icons: select and play.
The select hint indicates the highlighted option
can be selected by the select button.
The play hint indicates the highlighted option can
be played with the play button.
menu help
The highlight bar contains arrow “hints” to help you
with menu navigation. These hints show you the
A menu help line appears at the bottom of the screen.
This line provides additional help as you navigate
through the media receiver menus and options.
user’s guide
9
Lexus.book Page 10 Monday, January 6, 2003 2:00 AM
remote buttons
power
play
pause
stop
selection arrows
page up/down
next
fast forward
rewind
home
control
search
options
display
print
shuffle/repeat
play, pause, stop. Play, pause, or stop music tracks and
photo slideshows.
hp digital media receiver
rewind, fast forward. Rewind or fast forward through a
music track.
home. Jump directly to the home menu screen.
search. Search for a particular music track.
display. Display status information at the top of the screen.
Multiple presses will cycle through any additional
information.
control. Control a different receiver on your network.
power. The power button turns the receiver on, or places
the receiver in a low-power standby state.
10
previous, next. Skip to the previous or next track, or skip
photos in a slideshow.
page up/down. Page up and down quickly through long
menu lists.
select
previous
selection arrows, select. Navigate the onscreen menus
with the selection arrows, and press select to choose the
highlighted item.
options. Display or change options for the current music
file, photo, or album. Also displays the main receiver options
when pressed while on the main menu.
print. If a photo file is highlighted, the photo will be printed
on your computer’s default printer.
shuffle/repeat. Cycle between shuffle, repeat, shuffle and
repeat, and original order. Useful when playing music
albums or photo slideshows.
Lexus.book Page 11 Monday, January 6, 2003 2:00 AM
menu home
receiver options
The menu home screen is the top level menu. From the
home screen, you can access the music jukebox and
the photo album. To jump directly to the home screen,
press the home button on the remote.
The options button is context sensitive. This means it
displays options for the currently highlighted menu.
onscreen keyboard
The onscreen keyboard will appear whenever any text
entry is required. The keyboard appears when naming
your media receiver, entering network addresses, and
performing searches.
While on the menu home page, press the options
button to view or change main receiver options. From
the main options menu, you can change your receiver
preferences, configure your network settings, control
other hp digital media receivers, or run the setup
wizard.
Within the music jukebox, the options button will
display options for the highlighted genre, artist, album,
or track. For example, highlight a track and press
options. From the music options menu, select Track
Information to view the artist and album name, track
title, date, and duration.
Similarly, highlight a photo and press the options
button to print or rotate the photo, view photo
information, or adjust the slideshow delay.
To use the keyboard, highlight a character with the
arrow buttons and press select. Highlight and select
Done when you are finished entering text.
See “playing music” on page 23 and “viewing
photos” on page 31 for more information on using the
options button.
user’s guide
11
Lexus.book Page 12 Monday, January 6, 2003 2:00 AM
changing the receiver name
screen saver
During setup, the receiver name defaults to “My
Receiver”. You can either leave this name or change it
to something more meaningful, such as “Living Room”
or “Bedroom”. The name is used when allowing access
to your servers, or when you are controlling more than
one media receiver on your network.
The screen saver will appear after two minutes of
inactivity. Press any button on the remote to exit the
screen saver.
From the home screen, press the options button,
select Preferences and then Receiver Name. Use
the onscreen keyboard to edit the name.
controlling another receiver
You can control music playback on another receiver if
you have more than one media receiver on your
network. See “controlling music playback” on
page 28.
The screen saver time-out can be changed. From the
home screen, press the options button, select
Preferences and then Screen Saver Delay.
Choose a delay from a minimum of15 seconds to a
maximum of 10 minutes.
Note: If your TV is sensitive to screen burn-in, you
should reduce the screen saver delay to a minimum.
Consult your TV manual for recommended settings.
running the setup wizard
The setup wizard runs the very first time you setup your
hp digital media receiver. If you relocate the receiver
or wish to make changes to your settings, you can run
the setup wizard again.
From the home screen, press the options button, then
highlight and select Run Setup Wizard.
12
hp digital media receiver
Lexus.book Page 13 Monday, January 6, 2003 2:00 AM
4 sharing content on your pc
server software
server start and stop
The first step toward sharing content is installing the
digital media software on your PC. Simply install the
included software on each PC where you store your
music or digital photos. For installation instructions, see
“installing software” on page 4.
The media server software will start whenever you
power on your PC. If the server software is not running,
you can access it from the Start menu on the Windows
taskbar. On the Start menu, click All Programs,
then hp digital media, and select hp digital
media server. The server icon will appear in your
system tray.
Once the software is
installed, the media server
icon will appear in your
system tray. To configure the
server, click on the icon.
The server shares the music
and photos on your PC with all media receivers on
your network. When you view a photo or music file on
your TV, the server sends (serves) the file to your media
receiver.
To stop the server (and stop sharing your photos and
music on your PC), click on the server icon and select
Shutdown from the server menu.
Note: If the media server is not running, your photos
and music will not be available on your hp digital
media receiver.
user’s guide
13
Lexus.book Page 14 Monday, January 6, 2003 2:00 AM
server menu
To open the server menu,
click the server icon with
your left or right mouse
button. The server menu will
then display.
Add folders where your music and photos are stored,
or remove folders you no longer wish to share.
Depending on the number of files in your folders, it
may take some time for the receiver to fully list the new
folder contents.
sharing content
The media server will share content in the following
default directory folders:
• My Music
• My Pictures
• MUSICMATCH playlists (if MUSICMATCH
Jukebox is installed)
You can share up to five folders per computer. All
subfolders within a shared folder are shared as well.
To add or change the shared folders, click on the
media server icon and select Settings. A dialog will
appear with a list of shared folders.
14
hp digital media receiver
Note: You cannot share folders that reside on a
network or on removable drives or CDs. Shared folders
must be local (physically attached) to your PC.
Lexus.book Page 15 Monday, January 6, 2003 2:00 AM
synchronizing content
Your music and photos must be synchronized between
the server software on your PC, and the hp digital
media receiver. This can take several minutes or more
the first time, depending on the number of files you are
sharing.
Synchronization will also occur any time you add or
remove files to your shared folders. This occurs very
quickly when adding a small number of files or when
ripping a CD. If you add or remove shared folders, or
drag-and-drop a large subfolder into your shared
folder directories, synchronization will take longer.
forcing resynchronization
While the server software is
synchronizing your files, a
dialog box will be displayed
on your PC. During
synchronization, your music
and photo files will be unavailable on the media
receiver. If all servers are synchronizing, the media
receiver will display a help message to let you know
that “All servers synchronizing”. Your music and
photos will be available once synchronization is
complete.
If some files are not appearing on your media receiver,
or they are appearing incorrectly, try resynchronizing
the server. Click on the server icon, select Settings
from the menu, choose the Maintenance tab, and
click the Resynchronize button. This will force a
resynchronization of all your shared folders.
Note: The synchronization status message can be
hidden. Click on the server icon and uncheck Show
Synch Status. Check the option to turn the status
message on again. During synchronization, the server
icon will display an hourglass.
Note: When photos are resynchronized, the photo
rotation setting will be lost. Photos will again appear in
their original orientation. To permanently rotate your
photos, use your photo editing software to rotate and
save them.
If you have changed a large number of files, or
renamed or restructured your folders, your media
receiver may become out of sync with your server.
user’s guide
15
Lexus.book Page 16 Monday, January 6, 2003 2:00 AM
about mediaspace
supported music formats
If you run the media server software on more than one
PC on your network, the media receiver will collect all
of the content and display it as one unified list. This list
is called Mediaspace.
The following music file formats are supported:
Mediaspace means all your music and photos are
available on any of your media receivers at any time. It
does not matter where the files are stored.
music quality
Your music listening experience on the receiver
depends upon the quality of your digital music files on
your PC. Avoid quality settings below 48kbps as they
are unsupported. For CD quality music, rip your CDs at
128kbps. In recorders such as MUSICMATCH
Jukebox, 128kbps is the default setting.
16
hp digital media receiver
• mp3
MPEG Audio file. The standard internet music file
format, and the most common.
• wma
Windows Media Audio file. Supported by the
Microsoft Windows Media player and some
music jukebox programs.
• m3u, pls, and rmp
A playlist file. This is a text file supported by
nearly all music software. A playlist is used for
creating and storing lists of music tracks.
Lexus.book Page 17 Monday, January 6, 2003 2:00 AM
recording digital music
It is easy to digitally record your music onto your PC.
This process is commonly called ripping. To rip a file
with MUSICMATCH Jukebox:
1. Start the MUSICMATCH Jukebox program by
selecting it from your Start menu, or by doubleclicking the MMJB icon on your desktop.
2. Insert a music CD into your CD-ROM drive
3. Click the red recorder button on the player
4. MUSICMATCH will auto-configure your CD-ROM
(this only happens once)
5. If you are connected to the Internet, the CD
lookup service will auto-enter tag information
(album, artist, and song name) into the Recorder
screen.
6. Click the box next to the tracks you want to
record
7. Click Record
The recorded tracks will be placed into your Music
Library when completed. If you have that directory
shared (which is the default), the tracks will appear on
your hp digital media receiver as well.
MUSICMATCH Jukebox is automatically set to record
(rip) music files into the MP3 format at 128kbps, which
is widely accepted as CD quality. If you want to
change the quality settings:
1. Select Options/Settings from the main
dropdown menu
2. Click on the Recorder tab
3. Adjust the quality and format as desired (48kbps
minimum).
copy protection
Some music files are copy protected and can only be
played on your computer. Copy protected files cannot
be played on your hp digital media receiver. If a file is
copy protected, it will not appear in the media receiver
music jukebox.
If you plan on sharing and playing music files on your
media receiver, turn copy protection off when ripping
your own CDs to your PC.
user’s guide
17
Lexus.book Page 18 Monday, January 6, 2003 2:00 AM
organizing music files
creating music playlists
Your music files can be contained in one directory
folder, or organized in several subfolders...the folder
names are ignored.
Use your favorite music software on your PC to create
music playlists. A playlist allows you to specify exactly
what tracks to play and in what order to play them. For
example, create a “favorites” playlist and just listen to
your favorite tracks. Save the playlist in the industry
standard .m3u playlist format.
The media receiver automatically organize your music
files by genre, artist, album, and tracks. This
information is obtained from the ID3 tags in each of
your music files. The ID3 tag is created for you when
you rip (copy) your music from your CD.
However, if your music files have incorrect or
incomplete tags, the tracks may not appear where they
should in your music jukebox.
MUSICMATCH Jukebox Plus lets you add artist, album
and song information to your entire music library
quickly and easily with Super Tagging. Automatically
tag groups of tracks using the filename, or tag tracks
directly from MUSICMATCH online. You can also
clean up existing track tags with the new Rename
files from Tag feature.
For more information on how to edit tags or how to use
Super Tagging see MUSICMATCH Help.
18
hp digital media receiver
For more information on creating playlists, see
“creating a playlist” on page 26.
Lexus.book Page 19 Monday, January 6, 2003 2:00 AM
supported photo formats
The following photo file formats are supported:
• bmp
Windows bitmap file. Widely used in Microsoft
Windows for pictures and backgrounds.
• jpg and jpeg
The JPEG format is the Internet and digital photo
format standard used by most digital cameras.
• gif
Older format still widely available on the internet
for photos, web pages, and clip art.
• png
Portable Network Graphics standard created in
response to limitations in the GIF file format.
organizing photo albums
Unlike music files, photos contain very little information
about their content. Therefore, photos are organized
by their filename and by the folder they are in. Each
folder will become an album on the receiver, and all
files in the folder will appear in the album.
Many digital cameras will organize your photos into
folders when you connect and unload them to your PC.
Each time you dock or connect, a new folder is created
using the current date and time, and all photos are
copied into that folder.
You can also create your own photo albums. For
instance, create a folder in the My Pictures directory
called My Birthday and copy all your birthday
photos into it. Your receiver will show the folder as a
photo album named My Birthday. To play a
slideshow of the album, highlight it and press the play
button. To view a list of the photos in the album,
highlight it and press the > (right arrow) button.
Similarly, you can give your photos meaningful names
by changing the filename. Most digital cameras will
number the photos sequentially. Rename the photo
IM001059.jpg to My Birthday Cake.jpg. The
photo will be named My Birthday Cake on your
receiver.
You can create as many album folders as you need.
Create a folder for the year, then create folders inside
for each of the months, and then folders in each month
for special occasions (birthday, vacation, holidays).
user’s guide
19
Lexus.book Page 20 Monday, January 6, 2003 2:00 AM
server printers
Photos will be printed 4x6” on the default printer of the
PC where they are stored. If you are running the server
software on more than one PC, make sure each PC has
a default printer. If your PC does not have a printer, no
photos can be printed.
The solution is the connection list. To view the list, click
on the server icon and select Connection List from
the menu. A window will be displayed, listing all
receivers that have ever connected to the server. To
hide server content from a particular receiver, uncheck
the box next to the receiver name.
For the best prints, use a photo printer with glossy 4x6”
photo paper and set it as the default printer.
For more information on printing photos, see “printing
photos” on page 34.
connection list
Each media server maintains a list of media receivers
on your network. By default, the server allows all
receivers to view the shared content on your computer.
This is the preferred setting for most users.
If you have multiple media receivers, advanced users
may wish to restrict the sharing of content. A receiver
in the living room may not need access to all the songs
on the computer upstairs, or a receiver located in a
bedroom may not require content from the office PC.
20
hp digital media receiver
If you wish to be prompted before allowing a receiver
access to shared content on the server PC, uncheck the
Allow Clients By Default box. Whenever you
attach a new receiver, a message box will appear on
the PC asking whether you wish to allow access.
Note: Checking the Allow Clients By Default box
will not change the status of receivers that have tried to
connect before.
Lexus.book Page 21 Monday, January 6, 2003 2:00 AM
power settings
If you want access to your music and photos all the
time, make sure to configure your PC’s power settings.
Do not allow your computer to enter a standby power
state, or you will have to “wake up” your PC to view
music or photos on your media receiver. However,
your monitor can be in a low power state or turned off.
To change your power settings on Windows XP:
1. Click on start
To change your power settings on Windows Me:
1. Click on start
2. Select Settings
3. Select Control Panel
4. Select Power Options
5. Change both System standby and
System hibernates to Never
6. Click OK
2. Select Control Panel
3. Select Performance and Maintenance
4. Select Power Options
5. Change both System standby and
System hibernates to Never
6. Click OK
user’s guide
21
Lexus.book Page 22 Monday, January 6, 2003 2:00 AM
22
hp digital media receiver
Lexus.book Page 23 Monday, January 6, 2003 2:00 AM
5 playing music
music jukebox
playing a track
Playing music on the hp digital media receiver is easy
with the music jukebox. The jukebox combines all of
the shared music on all of the PCs on your network,
organizes the tracks, and displays them in one easy to
use menu interface.
Once you enter the music jukebox menu, you can view
tracks by artist, genre, album, or track name.
For remote button positions and functions, see “remote
buttons” on page 10.
supported music files
The media receiver supports the two most common
music file formats:
• mp3
MPEG Audio
• wma
Windows Media Audio
For best results, rip your music files at 128 kbps or
higher, with a sample rate of 44.1 kHz. See
“recording digital music” on page 17.
Use the selection arrows to navigate to the track
you wish to play. Once you have found your track,
highlight it and press the play button on the remote.
The track will begin playing on your stereo or television
speakers.
The track list contains all of your music tracks...simply
scroll or page through the track list to find the track.
user’s guide
23
Lexus.book Page 24 Monday, January 6, 2003 2:00 AM
To play a track starting from the main home screen:
To browse by artist:
1. Select music jukebox
1. Select Artists
2. Select Tracks
2. Select Creed
3. Highlight a track name. Use the selection arrows,
or use the page up and page down buttons
to quickly move through the track list.
3. Select Human Clay
4. Press play
4. Highlight With Arms Wide Open
To browse by album:
1. Select Albums
browsing for music
2. Select Human Clay
There are many ways to browse for a music track. For
example, let’s use the following music file:
3. Highlight With Arms Wide Open
With Arms Wide Open.mp3
Artist: Creed
Album: Human Clay
To browse for this track in the track list:
1. Select Tracks
2. Highlight With Arms Wide Open
24
hp digital media receiver
To browse by genre:
1. Select Genres
2. Select Rock/Pop
3. Select Creed
4. Select Human Clay
5. Highlight With Arms Wide Open
You can also search for music, as shown in the next
section.
Lexus.book Page 25 Monday, January 6, 2003 2:00 AM
music icon hints
As you browse your music library, the following icon
hints will help you identify music content:
Playlists
When in a track list, press the search button. An
onscreen keyboard will appear with a search edit box.
Use the selection arrows to highlight the first letter
for your search and press select. As soon as you enter
a letter, the track list will scroll to the first matching
track name.
Genres
Artists
Albums
Tracks
These icons appear to the left of the name when the
name is highlighted.
searching for music
Some music track lists can be very long and therefore
tedious to scroll through...especially if the song you are
looking for is at the bottom of the list. The page up
and page down buttons can help you move more
quickly. You can also search for a particular song.
For example, selecting M would search and find Mad
Season. You can continue to enter letters to find a
closer match, or press the search button again to
clear the keyboard. Now press the play button to play
your selected song.
Note: For more information about the onscreen
keyboard, see “onscreen keyboard” on page 11.
user’s guide
25
Lexus.book Page 26 Monday, January 6, 2003 2:00 AM
playing an artist
• m3u
MPEG Playlist File
To play all the tracks by an artist, highlight the artist
name and press the play button. All tracks by that
artist will be played.
• pls
MPEG Playlist File
• rmp
RealJukebox, RealOne Player
To view the albums and tracks by the artist, highlight
the artist name and press the right button instead of
the play button.
Create a playlist with your favorite PC music program,
and save it as a supported playlist format.
MUSICMATCH Jukebox
To create a playlist using MUSICMATCH Jukebox:
playing an album
To play all the tracks in an album, highlight the album
name and press the play button. All tracks in the
album will be played.
To view the tracks in an album, highlight the album
name and press the right button instead of the play
button.
creating a playlist
The hp digital media receiver will play tracks from
playlists you create on your computer. The media
receiver supports playlists in several standard formats:
26
hp digital media receiver
1. Open the Music Library by clicking on the My
Library tab on the Player. Or go to the menu
View/My Library.
2. If you have not already done so, add files into
your Music Library by double-clicking or
dragging tracks from the library into the Playlist
window.
3. Drag and drop files to change the order of the
tracks in the playlist.
4. Click the Save button to save the Playlist.
5. When prompted, enter the name you would like
to give this playlist in the Name field. Click the
Save button.
Lexus.book Page 27 Monday, January 6, 2003 2:00 AM
You now have a playlist that you can use on your PC
or on your hp digital media receiver. Your playlists will
appear under Playlists in the music jukebox menu.
Note: MUSICMATCH Jukebox stores playlists in the
following directory:
Program Files\MusicMatch\MusicMatch Jukebox\
\Playlist\Default
If MUSICMATCH Jukebox was installed before you
installed the media server software, this directory is
already shared. Otherwise, add this folder to your
shared folder list or copy the playlists from the
MUSICMATCH directory to your shared music folder.
RealOne Player
RealPlayer Jukebox and RealOne Player store your
playlists internally. To share a RealOne playlist, export
it into one of your shared media directories. The
exported playlist will be stored in the RMP format.
Windows Media Player
Windows Media Player 9 stores playlists in:
My Music\My Playlists
Because the My Music directory is already shared,
your playlists are also shared and ready to be played.
Remember to save them in a supported playlist format
like m3u. If necessary, load and resave the playlist in
m3u format.
playing a playlist
To play all the tracks in a playlist, highlight the playlist
name and press the play button. All tracks will be
played in the order they appear in the playlist.
To view the tracks in a playlist, highlight the playlist
name and press the right arrow button instead of the
play button.
Note: You can play a single track from a playlist.
View the playlist tracks, highlight the track you wish to
play, and press the play button.
user’s guide
27
Lexus.book Page 28 Monday, January 6, 2003 2:00 AM
controlling music playback
shuffle and repeat
Your media receiver jukebox works just like a stereo or
CD player. Controlling your music playback will be an
easy and natural experience.
Once you play a group of tracks (for example, playing
an album, an artist, or a playlist), each track will play
in the original order listed.
Use the remote to play, pause, or stop music. Press
the previous and next buttons to skip to the previous
or next track, or rewind and fast forward through
a song.
To change the play order, press the shuffle/repeat
button. There are four play modes:
• shuffle. Change the order of the tracks, like you
shuffle a deck of cards.
displaying music status
• repeat. When the last track is played, repeat the
list again.
Press the display button to view information about the
currently playing track. Each time you press the
display button, another page of information will
appear. After the final page, the information will clear.
• shuffle and repeat. When the last track is
played, shuffle them once more and repeat the list
again.
• normal. Play tracks in their original order.
The next play mode will be selected each time you
press the shuffle/repeat button.
The displayed information includes the track name, the
music state (playing, paused, stopped) and the elapsed
time.
28
hp digital media receiver
Lexus.book Page 29 Monday, January 6, 2003 2:00 AM
viewing track information
controlling music during slideshows
To view information about a music track, highlight the
track and press the options button. From the options
menu, select Track Information.
While a photo slideshow is playing, the play, pause,
stop, previous, and next buttons will control the
photo slideshow.
The artist, album, track title, file date, and duration will
be displayed. To change any of the track information,
use MUSICMATCH Jukebox or the music program on
your PC. See “organizing music files” on page 18.
To control the music while a photo slideshow is
playing, press the display button repeatedly until you
see the music status. While the music status is
displayed, the remote buttons will control the music
playback. Pressing pause will pause the music and
not the slideshow.
viewing photos with music
Your hp digital media receiver is capable of viewing
photos and playing music simultaneously.
To return control to the photo slideshow, press the
display button until the status screen disappears.
Once you have started playing your selected music,
return to the home screen (press the home button on
the remote). Select photo albums and view your
photos while listening to music.
changing the view order
Note: To learn how to associate a playlist with a
photo album, see “playing music with slideshows” on
page 33.
To change the view order, press the options button
while viewing a track list. Select Change View and
then choose your viewing order preference.
Tracks can be listed by their original order, or
alphabetically by track name.
user’s guide
29
Lexus.book Page 30 Monday, January 6, 2003 2:00 AM
controlling other receivers
If you have more than one hp digital media receiver on
your home network, you can use a single media
receiver to control music playback on all of them.
For example, there is a media receiver in the living
room and one the bedroom. The receiver in the
bedroom is connected to speakers, but may not be
connected to a TV (or the TV is off). From the living
room, you can select the bedroom receiver and start or
stop music playback in the bedroom. This feature is
very useful for locations where you want music but may
not have a television.
To control another receiver on your network:
1. Press the control button on the remote
2. If there are other media receivers on your
network, a message at the top of the screen will
display the name of the receiver you are now
controlling. For example, “controlling: bedroom”.
3. Press the control button repeatedly until you find
the media receiver you wish to control.
30
hp digital media receiver
Once you are controlling another receiver, browse the
music jukebox and play an album...music will start
playing on the bedroom speakers. You can also stop
or start music, pause and skip tracks using the remote.
To return control back to the receiver in front of you,
press the control button until the controlling message
goes away.
Note: Alternatively, press the options button on the
home screen and choose Select Receiver. A list of
available media receivers will appear. Highlight the
receiver you wish to control and press select.
Lexus.book Page 31 Monday, January 6, 2003 2:00 AM
6 viewing photos
photo albums
viewing a photo
Viewing photo albums on the hp digital media receiver
is easy. The media receiver photo album combines all
of the shared photos on all of the PCs on your network,
organizes them by album, and displays them in one
easy to use menu interface.
Once you enter the photo album menu, you can
view your list of photo albums and photos. Beside each
album or photo is a small thumbnail of the photo.
supported photo files
The media receiver supports the most common digital
photo file formats:
• bmp
Windows Bitmap
• jpg
JPEG
• gif
Graphics Interchange Format
• png
Portable Network Graphics
For more information about these file formats, see
“supported photo formats” on page 19.
Use the selection arrows to navigate to the album
or photo you wish to view. Highlight and press the
select button to view the photo, or press the right
arrow to view a list of photos in an album.
user’s guide
31
Lexus.book Page 32 Monday, January 6, 2003 2:00 AM
photo and album icon hints
playing a photo slideshow
A photo thumbnail appears before each photo or
album name. As you browse your photos, the following
icon hints will help you identify photos and albums:
To start playing a photo slideshow, highlight a photo
or album and press the play button. Your selected
photo will display, and after a brief delay, it will be
followed by the next photo in the album.
Photo
The slideshow will display all photos in the album, and
all photos in any sub-albums. When the end of the
photo album is reached, the slideshow will repeat.
Album
These icon hints will appear just after the thumbnail
image, and before the photo or album name.
controlling photo playback
Controlling photo playback is very similar to
controlling a CD player...instead of music tracks, there
are photos.
photo icon
album icon
32
hp digital media receiver
Once you have started a photo slideshow, use the
remote to play, pause, or stop the show. Press the
previous and next buttons to skip to the previous or
next photo.
The default slideshow delay is five seconds. Before
starting a slideshow, you can change the delay
between photos by highlight a photo album and
pressing the options button. Select Photo
Lexus.book Page 33 Monday, January 6, 2003 2:00 AM
Preferences, and then Slideshow Delay. The
delay can be set from three seconds to two minutes at
convenient intervals. To exit a slideshow, press the left
arrow.
viewing photo information
To view information about a photo, highlight the photo
and press the options button. From the options menu,
select Photo Information. The file name, photo
size, and file date will be displayed.
setting music for an album
Perhaps you have a wedding photo album and you
always want to play the songs from your wedding
while viewing the album. Follow these simple steps:
1. Create a wedding music playlist on your PC. For
help, see “creating a playlist” on page 26.
2. On the media receiver, highlight the wedding
photo album and press the options button.
3. Select the Music option
Note: To display the photo name during a slideshow,
press the display button.
4. Choose your wedding playlist and press select
playing music with slideshows
6. Press left arrow or options again to exit.
Your hp digital media receiver is capable of viewing
photos and playing music simultaneously.
First, select the music you wish to play. For help with
selecting and playing music, see “music jukebox” on
page 23. Once you have started playing your selected
music, select and view your photos as you normally
would. Browsing photos works the same whether music
is playing or not.
5. Press left arrow to exit the playlist menu
7. Press play to view your slideshow, now with
music!
Whenever you view that photo album, the wedding
playlist will play music automatically.
user’s guide
33
Lexus.book Page 34 Monday, January 6, 2003 2:00 AM
printing photos
To print a photo, highlight it on your receiver and press
the print button on the remote. You can also print a
photo by pressing the options button and selecting
print photo from the photo options menu.
Photos will be printed 4x6” on your computer’s default
printer. For the best prints, use a photo printer with
glossy 4x6” photo paper and set it as the default
printer. For more information, see “server printers” on
page 20.
Note: Your original image file is untouched. If you
force a resynchronization (see “forcing
resynchronization” on page 15), the photo will return
to its original rotation. To permanently rotate a photo,
use a photo editing program.
changing the view order
Photos can be listed by their original order, or
alphabetically by photo name.
rotating photos
To change the view order, press the options button
while viewing a photo album. Select Change View
and then choose your viewing order preference.
You can use the media receiver to rotate photos for
proper viewing on your TV. To rotate a photo:
organizing your photos
1. Highlight or select a photo
2. Press the options button and select
Rotate Photo
3. Rotate the photo 90 degrees left or right, or 180
degrees if the photo is upside down.
The photo will be rotated for viewing.
34
hp digital media receiver
Photos are organized by the folder directory they
appear in, and by their filename. To create a photo
album, create a folder in the shared directory on your
computer. Copy your photos into the new folder and
your album is complete.
For more help with organizing your photos, see
“organizing photo albums” on page 19.
Lexus.book Page 35 Monday, January 6, 2003 2:00 AM
7 network setup
running the setup wizard
Running the setup wizard is the easiest way to
configure your network settings. The setup wizard runs
the first time you power up your hp digital media
receiver.
You can run the setup wizard again at any time if your
network settings need to be changed. From the home
screen, press the options button and then select Run
Setup Wizard from the menu.
Alternatively, press the options button and select
Network Setup to manually configure your network
settings. The following sections describe the possible
network setup options.
preparing for wired setup
In a wired network, you attach the media receiver to
your network with a network cable. One end of the
cable attaches to the media receiver, and the other end
attaches to your PC, a hub, or a router.
Note: See the “glossary” on page 49 for a list of
common network terms.
To determine the proper network setup of your media
receiver, you will need to know what kind of wired
network you have.
do you have a network?
If you have a single PC and you connect to the internet
with a phone line, chances are you do not have a
network. At a minimum, you will need a network
interface card (NIC) for your PC, or a USB-to-802.11b
dongle. You can then attach the media receiver to your
PC. See “wired with cross-over cable” on page 39.
If you have a single PC and you connect to the internet
with a cable or DSL modem, check your modem
connection. If the modem has only one network jack,
you still don’t have a network. You will need to
user’s guide
35
Lexus.book Page 36 Monday, January 6, 2003 2:00 AM
purchase a different modem or add a router to your
network.
another device on the network (a DHCP server or
router) assigns the address dynamically.
Note: You can create a network of PCs without access
to the internet. The internet is simply a common reason
to network PCs together.
To determine your address settings under Windows XP:
If you have multiple PCs and can share files between
them, or all of the PCs can access the internet through
a cable or DSL modem, then you do have a network.
However, you will need to determine how your server
PC (the PC running the hp media software) is assigned
a network address.
1. Click on start
2. Click All Programs, then Accessories, then
Command Prompt
3. At the prompt, type ipconfig /all
4. Look for the line Dhcp Enabled (you may have
to scroll back to see it)
To determine your address under Windows Me:
hubs, routers and switches
1. Click on start
When PCs are networked together, each PC is
attached to a central “box” with 4, 8, 16 or more
connections. This box is either a hub, a router, or a
switch. They all operate in a similar way, with one
important difference: a router will assign a network
address dynamically, while a hub or switch will not.
2. Click Run...
network address: static or dynamic?
A PC (or any network device) is either assigned a
network address manually (a static address), or
36
hp digital media receiver
3. At the prompt, type winipcfg and click Ok
4. Click the Details... button
5. Look for the line DHCP Server (if it has an
address, DHCP is enabled)
If DHCP is enabled, you have a DHCP server on your
network. See “wired with dynamic address” on
page 37.
Lexus.book Page 37 Monday, January 6, 2003 2:00 AM
If DHCP is not enabled, you will need to assign a static
address to your media receiver. Take note of the IP
Address and Subnet Mask listed by the ipconfig
utility, and see “wired with static address” on
page 38.
Note: If you cannot tell how your network addresses
are assigned, then try dynamic address (DHCP) first.
The media receiver will display an error message if it is
unable to dynamically configure its address.
In a wired home network, all computers are connected
to a network hub or router. This may also act as a
cable/DSL modem for sharing an internet connection.
wired with dynamic address
Connect the media receiver to your router, just as you
would one of your computers. In almost all cases, the
router works as a DHCP server (i.e., it assigns network
addresses).
Set the media receiver network settings to wired using
DHCP addressing. From the main home screen:
wired home network
1. Press options
2. Select Network Setup
3. Set Connection to Wired (Ethernet)
4. Select Address
hub or router
TV
5. Set Configuration to DHCP
6. Press left arrow to return to receiver options
7. Select Apply Changes to apply the network
changes
user’s guide
37
Lexus.book Page 38 Monday, January 6, 2003 2:00 AM
Once the media receiver restarts you will be returned
to the main home screen. If there are no error
messages, your network settings are properly
configured.
wired with static address
If a DHCP server is not available, you must assign the
media receiver a static address that is valid for your
network. The address must be very similar to the
address used by your PC, and it cannot be in use by
another network PC or device.
It is best to determine the addresses of all your PCs
before assigning one to your media receiver. Use the
method described in “network address: static or
dynamic?” on page 36 to find the static addresses in
use, and then pick an available address.
For example, you have three PCs on your network:
• PC1: 192.168.0.2
• PC2: 192.168.0.17
• PC3: 192.168.0.11
38
hp digital media receiver
All with a netmask of 255.255.255.0. For the media
receiver, pick an unused address like 192.168.0.20
and use the same netmask of 255.255.255.0. Write
the addresses down for future reference.
To configure the receiver for the static address:
1. Press options
2. Select Network Setup
3. Set Connection to Wired (Ethernet)
4. Select Address
5. Set Configuration to static
6. Set the IP Address to 192.168.0.20
7. Set the Netmask to 255.255.255.0
8. Press left arrow to return to receiver options
9. Select Apply Changes to apply the network
changes
The media receiver will restart and if the media server
software is running, you should see your photos and
music content.
Lexus.book Page 39 Monday, January 6, 2003 2:00 AM
wired with cross-over cable
To configure the receiver for a cross-over cable:
1. Press options
crossover cable
(not included)
2. Select Network Setup
TV
3. Set Connection to Wired (Ethernet)
4. Select Address
5. Set Configuration to static
6. Set the IP Address to 192.168.0.2
7. Set the Netmask to 255.255.255.0
If you don’t have a home network, it is still possible to
access your music and photos on a single PC. Connect
a network crossover cable (not included) from the
media receiver to the network connection on your PC.
If your PC does not have a network connection, you
will need to purchase a network card.
Choose a static address for your PC and one for your
media receiver. For example, you can use
192.168.0.1 for your PC, and 192.168.0.2 for your
media receiver. Use a netmask of 255.255.255.0 for
both.
8. Press left arrow to return to receiver options
9. Select Apply Changes to apply the network
changes
Follow the instructions that came with your network
card for setting a static IP address of 192.168.0.1 on
your PC.
user’s guide
39
Lexus.book Page 40 Monday, January 6, 2003 2:00 AM
preparing for wireless setup
The hp digital media receiver model ew5000 supports
wireless networking. If your model does not have an
antenna, it does not support wireless networking.
For the best results, you should set up and test your
wireless network before attempting to use the media
receiver wirelessly. This will rule out any problems with
your network.
scanning for wireless networks
The media receiver will scan for available networks.
You should know the name of your wireless network,
as the receiver may pick up other wireless networks
(wlans) in your area. The network name is sometimes
called the SSID.
Note: Your network must broadcast its name for the
receiver to find it. Do not use silent broadcast.
wireless reception
Wireless reception will vary on distance, access point
manufacturer, number of walls, and environment. If
possible, try setting up the media receiver in an area
40
hp digital media receiver
that is close to your PC or wireless access point. Once
everything is working properly, you can experiment
with placement and distance.
wireless infrastructure or ad hoc?
These are intimidating names for some very simple
concepts.
In Infrastructure mode, a wireless access point exists on
the network. The access point can be attached to a hub
or router, or the router can act as a wireless access
point as well. All PCs and wireless devices
communicate through the access point.
If you do not have a wireless access point or router,
you can use Ad Hoc mode. Ad Hoc allows
communication between a PC with a wireless card and
the media receiver. Communication occurs between
the devices directly without the need for an access
point.
Lexus.book Page 41 Monday, January 6, 2003 2:00 AM
wireless infrastructure
7. Press left arrow to return to receiver options
8. Select Apply Changes to apply the network
changes
TV
After restarting, verify the media receiver is able to
view photos and play music.
wireless ad hoc
Most wireless networks communicate in infrastructure
mode. To configure the media receiver network settings
for wireless infrastructure and DHCP dynamic
addressing:
TV
1. Press options
2. Select Network Setup
3. Set Connection to Wireless (Infrastructure)
4. The receiver will scan for wireless local area
networks (WLan). Select WLan to choose your
wireless network if it is not already chosen.
5. Select Address
6. Set Configuration to DHCP
In Ad Hoc mode, an access point does not exist and
the media receiver communicates directly with
computers containing wireless network cards. It is
similar to a static network, without wires.
You will need to assign a static address to the media
receiver that is appropriate for your network. Use the
user’s guide
41
Lexus.book Page 42 Monday, January 6, 2003 2:00 AM
method described in “network address: static or
dynamic?” on page 36 to find the static addresses in
use, and then pick an available address.
Note: If you have other wireless PCs or devices,
determine all of the addresses before assigning one to
your receiver. Do not assign the same address to more
than one device.
For example, you can use 192.168.0.1 for your PC,
and 192.168.0.2 for your media receiver. Use a
netmask of 255.255.255.0 for both.
To configure the media receiver network settings for
wireless ad hoc mode and static addressing:
1. Press options
2. Select Network Setup
3. Set Connection to Wireless (Ad Hoc)
4. Select Address
5. Set Configuration to static
6. Set the IP Address to 192.168.0.2
7. Set the Netmask to 255.255.255.0
8. Press left arrow to return to receiver options
42
hp digital media receiver
9. Select Apply Changes to apply the network
changes
Follow the instructions that came with your wireless
network card for setting a static IP address of
192.168.0.1 on your PC.
wireless encryption
For security reasons, a wireless network can encrypt
the network packets broadcast between devices. This
type of encryption is called Wired Equivalent Privacy,
or WEP.
There are two levels of WEP encryption: 64 and 128
bit. You may have heard the numbers 40 and 104 bit
used in conjunction with WEP encryption. These are
just two different names for the same encryption
method. Because there has been no official
standardization of these terms, wireless vendors may
use either name.
Whether you choose 64 or 128 bit is up to you. You
must balance higher security versus slower network
performance.
Lexus.book Page 43 Monday, January 6, 2003 2:00 AM
WEP is supported in both infrastructure and ad hoc
mode. For WEP to work properly, you must use the
same encryption level and keys on all your PCs, access
points, and media receivers. Check the WEP settings
on your access point or PC, then write down the
encryption level and WEP keys.
To configure the media receiver for WEP:
1. Press options
2. Select Network Setup
3. Highlight Wireless Encryption and press the
right arrow
4. Select Encryption and choose off,
64 (40) Bit, or 128 (104) Bit.
5. Select Key #1 and enter the WEP key. An
onscreen keyboard will appear for entering the
key. Entering the colon separator : is optional.
6. Enter Key #2, Key #3, and Key #4 if needed
7. Press the left arrow to exit the encryption options
Some network devices allow the use of a text
passphrase for the WEP key. After you enter the
passphrase on that device, view the encryption keys
that were generated. Write down the keys and enter
them into the Key fields on the media receiver.
Note: If you have trouble connecting to the media
server after enabling WEP, verify you have entered the
keys correctly. The keys can be long and input errors
are easy to make.
8. Select Apply Changes to apply the network
changes
user’s guide
43
Lexus.book Page 44 Monday, January 6, 2003 2:00 AM
wireless signal strength
A lot of factors can affect the signal strength of the
wireless network. Antenna position, location of the
media receiver, distance, walls and environment all
affect the signal. For good reception, adjust the
antenna so it is pointing up.
Use the signal strength meter to adjust the position of
your media receiver or antenna. The higher the signal
strength, the better.
on this screen, the signal strength is 73%
44
hp digital media receiver
To view the signal strength, from the home screen:
1. Press options
2. Select Network Setup
3. Highlight WLan and press the right arrow
4. The Wireless Status screen will appear
5. Press the left arrow to exit
The signal strength percentage is a snapshot of the
current signal strength...it does not update while you
are viewing it. Whenever you make a change to the
receiver or antenna position, press the right arrow
on the WLan option to view the new signal strength,
then the left arrow again to exit. Repeat the process
again until you are satisfied.
Lexus.book Page 45 Monday, January 6, 2003 2:00 AM
8 troubleshooting
I don’t see the Welcome Screen when I
turn on my receiver for the first time
•
•
•
Make sure your TV is displaying the appropriate
video source. You may need to use the Input,
Source, Select, or TV/Video button on your TV
or TV remote to change video sources. If you are
having trouble changing the video source, refer to
the instructions that came with your TV.
If you did not connect the receiver directly to your
TV but are instead passing the signal through your
VCR, make sure your VCR is displaying the
appropriate video source. You may need to use the
Input or Source button on your VCR or VCR’s
remote control. Some VCRs only pass the signal
through when they are turned off. If you are having
trouble displaying the correct video source, refer to
the instructions that came with your VCR.
•
The cables you are using to connect your receiver
to your TV or other equipment may be damaged or
defective. Try exchanging the cables connected to
the receiver with other cables that you know are
working properly.
•
Make sure you have firmly attached the power
adapter plug to the back of the receiver. Also,
verify the power adapter is plugged into a working
power outlet and that the outlet is not controlled by
a light switch.
My remote control isn’t working
•
Make sure the batteries are inserted correctly.
•
Try removing the batteries and reinserting them
without touching any buttons on the remote control.
•
Replace the batteries with new ones.
Make sure cables are connected to the IN jack on
your TV or VCR, not the OUT jack.
user’s guide
45
Lexus.book Page 46 Monday, January 6, 2003 2:00 AM
I can’t see any of my music or photos
•
•
Make sure your computer is powered on and that it
has not entered standby mode. Change your
computer’s power settings if you want your content
to always be available.
Make sure the server software is running on your
computer. Look for the media server icon in your
system tray. If necessary, start the server software
again.
•
Click on the server icon and select Settings to
Verify you are sharing the correct directories.
•
If you are using a wireless network, try locating the
receiver closer to your access point or wireless
computer.
•
If you are using a wired network, verify the receiver
network cable is properly attached to your network
hub or router, and that the hub or router has
power.
•
46
If you are using static network addresses, verify the
network address and netmask are correct for your
network, and that the address is not already in use
by another PC or device.
hp digital media receiver
I can’t hear any sound when I’m
playing music
•
Make sure the audio cables are properly
connected.
•
If the audio cables are connected to your TV, the TV
must be on to hear any music.
•
If the audio cables are connected to your stereo,
make sure the stereo is on and you have the correct
stereo input source selected. If you are having
trouble selecting the correct audio source, refer to
the instructions that came with your stereo.
•
To perform an audio test, select the music
jukebox and then press the options button.
Select the audio test option to play a brief audio
test on your speakers.
Some of my music files don’t appear
•
The hp digital media receiver supports the most
common music file formats. However, there are
almost an infinite variety of bit rates and sample
rates. If a file does not appear on the receiver, it
most likely uses an unsupported rate.
Lexus.book Page 47 Monday, January 6, 2003 2:00 AM
•
The files may be copy protected. To share your
files, turn copy protection off when you rip them.
When I push the Print button, nothing
prints
•
The following sample rates are supported:
4, 8, 16, 22.05, 24, 32, 44.1, 48, 88.2
and 96 kHz.
•
Printing is supported for photos. If a music file,
music album, or photo album is selected, nothing
can be printed.
•
For best results, rip your music files at 128 kbps or
higher, with a sample rate of 44.1 kHz.
•
Photos will be printed 4x6” on your computer’s
default printer. If your computer does not have a
printer, no photos can be printed.
•
For the best prints, use a photo printer with glossy
4x6” photo paper.
To check the bit and sample
rates of a music file, right
click on the filename and
select Properties.
Select the Summary tab
and scroll to the bottom of
the list.
I created a playlist on my computer,
but it doesn’t appear on my receiver
•
Make sure the playlist file is located in a folder
shared by your receiver. Copy the playlist to your
shared music folder, or click on the media server
icon to add or change your folder options.
•
Make sure you save the playlist in the industry
standard .m3u playlist format. This is the only
format supported by your receiver. Load your
playlist into your music software and select Save
As..., then choose the .m3u format.
The file to the right has a bit
rate of 128 kbps and a
sample rate of 44 kHz.
In most cases, you don’t
need to worry about the sample rate unless you come
across a file that will not play or appear on your
receiver. Use the above procedure to check the file
settings for supported rates.
user’s guide
47
Lexus.book Page 48 Monday, January 6, 2003 2:00 AM
My receiver can’t find my access point
My media receiver has no antenna
•
Verify that your access point is not broadcasting
silently.
•
•
Try moving the receiver closer to your access point.
•
Check your WEP settings. See “wireless
encryption” on page 42.
My receiver finds my access point, but
won’t connect
•
Most likely your WEP settings are incorrect. See
“wireless encryption” on page 42.
•
Try resetting the power on the access point.
How do I reset my media receiver?
•
48
Under normal circumstances, you should not need
to reset your receiver. However, to fully reset the
media receiver, disconnect the power adapter from
the back. Wait a few seconds, then plug the power
back in.
hp digital media receiver
Some receiver models support only wired
networks. An antenna is only required for wireless
network support. If you need support for a wireless
network, purchase a media receiver with wireless
capability, such as the hp digital media receiver
ew5000.
What version of software do I have?
•
From the main home screen, press the options
button and select Preferences. The software
version will be listed.
Lexus.book Page 49 Monday, January 6, 2003 2:00 AM
9 glossary
10BaseT. The first Ethernet standard, which operated
at 10Mbps (megabits per second). Also known as
simply Ethernet.
cable modem. A class of modem that is used for
connecting to a cable TV network which offers Internet
service.
802.11. Standard specifying the characteristics for
wireless local area networks.
category 5. A type of cabling used by Ethernet
networks. Category 5 cable is rated for 100Mbps.
access point. An internetworking device that
seamlessly connects wired and wireless networks
together.
cross-over cable. Most network cables are straightthrough cables. A cross-over cable has the send and
receive connections swapped, which is useful when
connecting two network devices together without a
hub, router, or switch.
ad hoc. One of two types of wireless networking,
usually used for smaller networks. Computers
communicate directly with each other without an
access point.
album. An album of music released by an artist, or a
group of photos stored in a folder on a hard disk.
bmp. A Microsoft Windows standard for storing
bitmapped images (photos).
DHCP. Dynamic Host Configuration Protocol. Allows
the assigning of network IP addresses dynamically
(automatically).
DRM. Digital Rights Management. Some music files
have security built in so they cannot be copied.
DSL modem. A class of modem used for connecting
a digital subscriber line.
dynamic address. See DHCP.
user’s guide
49
Lexus.book Page 50 Monday, January 6, 2003 2:00 AM
ethernet. A popular network technology for
connecting PCs and other devices. Also called
10BaseT.
folder. Another name for a subdirectory on a PC. A
folder contains other files, such as music or photos.
genre. A type of music, such as rock, country, or
classical. There are many music genres.
network adapters, which can roam within a certain
range of the access point.
IP address. Internet Protocol address, sometimes
referred to as a network address. This is a series of
twelve numbers that uniquely identifies a client on the
network. For example, 192.168.0.1.
jack. A jack is a socket for attaching a network cable.
gif. Graphical Interchange Format. A popular format
for storing images.
LAN. Local Area Network. A smaller network that
typically spans a single building or campus.
hub. A device that interconnects computers and
network devices, sometimes amplifying the signals
between them.
mp3. An MPEG audio file. This is a very popular
format for storing digital music.
icon. A small graphical picture.
ID3 tag. A tagging system that allows the storage of
music information such as artist, song title, and album
title within the audio file.
infrastructure. One of two types of modes used for
wireless networking. Computers and devices
communicate through a common access point. Access
points transmit data to PCs equipped with wireless
50
hp digital media receiver
network. A collection of PCs, printers, and devices
that are connected together in order to share
resources.
network adapter. See NIC.
network address. See IP address.
network cable. A cable similar to a telephone line,
except larger. A telephone cable typically has four
wires, and a network cable has eight. Also called an
RJ-45 cable.
Lexus.book Page 51 Monday, January 6, 2003 2:00 AM
NIC. Network Interface Card. Also called a network
adapter, a NIC is a device that connects a PC to a
network. Usually this is a card that installs in the PC.
PC. A personal computer.
playlist. A file containing a list of music files used to
play tracks in a particular order. The most common
playlist format is m3u.
png. Portable Network Graphics. A popular graphics
file format for storing images.
receiver. In this document, refers to the hp digital
media receiver.
ripping. A slang term for converting a music CD into
compressed music files. Music tracks are ripped from
the CD, compressed, and stored digitally on a hard
disk.
RJ-45 cable. See network cable.
router. A device similar to a hub. A router moves
data between different network segments, and allow
all users in a network to share a single connection to
the internet.
server. A computer or software program that
provides services to clients. In this document, the term
server refers to the hp digital media software running
on a PC.
SSID. Service Set Identifier. A network ID unique to a
network. Only clients and Access Points that share the
same SSID are able to communicate with each other.
This string is case-sensitive.
static address. A network address that does not
change and usually assigned manually.
switch. A device similar to a hub, but smarter. It
improves network performance by reducing
competition for bandwidth.
systray. The Windows system tray, usually located in
the lower right corner of the display.
tag. See ID3 tag.
WEP. Wired Equivalent Privacy. A method of
encryption designed to give wireless networks the
same security found on wired networks.
wi-fi. Wireless Fidelity. Another term for wireless
networking using the 802.11 standard.
user’s guide
51
Lexus.book Page 52 Monday, January 6, 2003 2:00 AM
WLAN. Wireless Local Area Network. A wireless LAN
does not use cable to transmit signals, but rather uses
radio to transmit packets through the air.
wma. Windows Media Audio file. A popular format
for storing digital audio files, created by Microsoft and
used by Windows Media Player.
52
hp digital media receiver
Lexus.book Page 53 Monday, January 6, 2003 2:00 AM
10 warranty and license
ATTENTION: USE OF THE HP DIGITAL MEDIA
RECEIVER OPERATING SYSTEM (the
"SOFTWARE") IS SUBJECT TO BOTH THE HP
LICENSE AND WARRANTY TERMS SET FORTH
BELOW AS WELL AS ANY LICENSE TERMS IN
THE PHYSICAL MEDIA. USING THE SOFTWARE
INDICATES YOUR ACCEPTANCE OF ALL OF
THESE LICENSE TERMS. IF YOU DO NOT
ACCEPT ALL OF THESE LICENSE TERMS,
(EXCEPT FOR THE GNU GPL AND GNU LGPL,
FOR WHICH ACCEPTANCE OF THEIR
PARTICULAR TERMS ARE ONLY REQUIRED AS
SPECIFIED IN THOSE LICENSES) YOU MAY NOT
INSTALL OR USE THE SOFTWARE. ANY
ATTEMPT TO INSTALL OR USE THE SOFTWARE
IN A MANNER THAT DOES NOT COMPLY
WITH THE TERMS AND CONDITIONS OF THIS
LICENSE IS VOID AND WILL TERMINATE YOUR
RIGHTS UNDER THIS LICENSE. IF YOU DO NOT
ACCEPT ALL OF THESE LICENSE TERMS (EXCEPT
FOR THE GNU GPL AND GNU LGPL, FOR
WHICH ACCEPTANCE OF THEIR PARTICULAR
TERMS ARE ONLY REQUIRED AS SPECIFIED IN
THOSE LICENSES), YOU MAY RETURN THE
ENTIRE UNIT TO THE VENDOR WITHIN THE
VENDOR'S RETURN POLICY.
This Software contains portions of third party
software some of which is proprietary to that
third party, some of which is open source
software, including: uClibc - LGPL, uCLinux GPL, and MusicMatch (the "Bundled
Product"). Additional License and warranty
terms associated with the Bundled Product
may appear in files with the Bundled Product
on this CD. By using this Software, you are
expressly agreeing to comply with all the
license terms accompanying the Bundled
Product (except for the GNU GPL and GNU
LGPL, for which acceptance of their particular
terms are only required as specified in those
licenses).
user’s guide
53
Lexus.book Page 54 Monday, January 6, 2003 2:00 AM
HP Warranty and License
Information
HP Customer Care
Easy to reach. Easy to use. HP Customer Care is our
promise to help you get the most from owning your HP
Digital Media Receiver. By Web, phone, or through
your local retailer, you'll find what you need. And
you'll find it fast. Be sure to register your HP Digital
Media Receiver to get the full benefits of HP Customer
Care. The brief information you provide helps HP
Customer Care respond to you faster with more
personalized proactive support options.
Problems? HP Will Help
Your new HP Digital Media Receiver is built to work
now - and for many years to come. But, it is a complex,
and sometimes things go wrong. If that happens to
your product, Hewlett-Packard is ready to help. Here's
how.
54
hp digital media receiver
What to Do First:
See What You Can Do
There's lots of helpful information included with your
HP Digital Media Receiver. The HP At Home Web site,
www.hp.com/cposupport, has updated software, tips
and tricks, common problems, and solutions.
What to Do Next:
Call HP Customer Care Center
Finally, if these steps don't help, you can reach a real,
knowledgeable human by calling the HP Customer
Care Center at 1-208-323-2551 in the U.S., and
1-905-206-HOME (1-905-206-4663) in Canada.
Technical phone assistance to help diagnose potential
hardware issues is free for the duration of the
hardware warranty period. The HP Customer Care
Center is available 24 hours a day and 7 days a
week.
Lexus.book Page 55 Monday, January 6, 2003 2:00 AM
And, if Necessary:
Get Repair
The Legal Language
Consumer Replaceable Parts
Hewlett-Packard Limited Warranty
Statement
You can easily replace some of the HP Digital Media
Receiver parts yourself, (i.e. remote control or cables).
This is the fastest method of repair, as many times we
can send the part directly to your home or business in a
few days. We pay the shipping and handling. This
service is free for the duration of the hardware
warranty period.
HP Unit Exchange Service
If you encounter a hardware failure in the product
itself, we will send you a refurbished replacement unit.
You return the defective unit to us. We pay the
shipping and handling both ways. This service is free
for the duration of the hardware warranty period.
DURATION OF LIMITED WARRANTY
Hardware:
Original Systems - 1 year
Replacement Systems - For the duration of original
product warranty or 90 days, whichever is longer
Technical phone assistance to diagnose potential
hardware issues - 1 year
HP warrants to you, the end-user customer, that HP
hardware, accessories, and supplies will be free from
defects in materials and workmanship after the date of
purchase.
Original Systems - 1 year
Replacement Systems - For the duration of the original
product warranty or 90 days, whichever is longer.
If HP receives notice of such defects during the
warranty period, HP will replace products that prove to
user’s guide
55
Lexus.book Page 56 Monday, January 6, 2003 2:00 AM
be defective. Replacement components may be either
new or like new. Replacement product will be
refurbished.
HP products may contain remanufactured parts, which
are equivalent to new in performance or may have
been subject to incidental use.
HP warrants to you that HP software will not fail to
execute its programming instructions after the date of
purchase, for 30 (thirty) days, due to defects in
material and workmanship when properly installed
and used. If HP receives notice of such defects during
the warranty period, HP will replace software media,
which does not execute its programming instructions
due to such defects.
Warranty does not apply to defects resulting from (a)
improper or inadequate maintenance or calibration,
(b) software, interfacing, parts, or supplies not supplied
by HP, (c) unauthorized modification or misuse, (d)
computer viruses of any origin, (e) operation outside of
the published environmental specifications for the
product, (f) improper site preparation or maintenance,
or (g) unplanned acts of nature, such as floods,
tornadoes, lightning strikes, hurricanes, or
earthquakes.
HP does not warrant that the operation of HP products
will be uninterrupted or error-free. If HP is unable,
within a reasonable time, to repair or replace any
product to a condition as warranted, you will be
entitled to a refund of the purchase price upon prompt
return of the product. Refunds with the first 3 months of
ownership will be refunded at 100% of purchase
price. Refunds within 3-6 months of ownership will be
refunded at 85% of purchase price. Refunds within 6-9
months of ownership will be refunded at 55% of
purchase price. Refunds within 9-12 months will be
refunded at 35% of purchase price.
56
hp digital media receiver
HP MAKES NO OTHER EXPRESS WARRANTY OR
CONDITION WHETHER WRITTEN OR ORAL. TO THE
EXTENT ALLOWED BY LOCAL LAW, ANY IMPLIED
WARRANTY OR CONDITION OF
MERCHANTABILITY, SATISFACTORY QUALITY, OR
FITNESS FOR A PARTICULAR PURPOSE IS LIMITED TO
THE DURATION OF THE EXPRESS WARRANTY SET
FORTH ABOVE. Some countries/regions, states, or
provinces do not allow limitations on the duration of an
implied warranty, so the above limitation or exclusion
might not apply to you. This warranty gives you
Lexus.book Page 57 Monday, January 6, 2003 2:00 AM
specific legal rights and you might also have other
rights that vary from country/region to country/region,
state to state, or province to province.
The above warranty is transferable upon sale.
HP's limited warranty is valid in any country/region or
locality where HP has a support presence for this
product and where HP has marketed this product. The
level of warranty service you receive may vary
according to local standards. HP will not alter form, fit,
or function of the product to make it operate in a
country/region for which it was never intended to
function for legal or regulatory reasons.
You may be required to run HP-supplied diagnostic
programs before replacement is dispatched, or a
replacement product is shipped.
TO THE EXTENT ALLOWED BY LOCAL LAW, THE
REMEDIES IN THIS WARRANTY STATEMENT ARE
YOUR SOLE AND EXCLUSIVE REMEDIES. EXCEPT AS
INDICATED ABOVE, IN NO EVENT WILL HP OR ITS
SUPPLIERS BE LIABLE FOR LOSS OF DATA OR FOR
DIRECT, SPECIAL, INCIDENTAL, CONSEQUENTIAL
(INCLUDING LOST PROFIT OR DATA), OR OTHER
DAMAGE, WHETHER BASED IN CONTRACT, TORT,
OR OTHERWISE. Some countries/regions, states, or
provinces do not allow the exclusion or limitation of
incidental or consequential damages, so the above
limitation or exclusion may not apply to you.
Customer Responsibilities
You are responsible for the security of your proprietary
and confidential information and for maintaining a
procedure external to the products for reconstruction of
lost or altered files, data, or programs. Additionally,
the customer is responsible for removing any
components that were added after the purchase of the
system. HP will not be responsible for components that
the customer doesn't remove.
Obtaining Hardware Warranty Repair
Service
For the duration of the hardware warranty period,
hardware repair service includes Consumer
Replaceable Parts Service, and Unit Exchange Service
as described below. To obtain hardware warranty
service, call HP's Customer Care Center at
user’s guide
57
Lexus.book Page 58 Monday, January 6, 2003 2:00 AM
1-208-323-2551 in the U.S., and 1-905-206-HOME
(1-905-206-4663) in Canada.
apply to or override, expressly or by implication, the
terms associated with the Bundled Products.
Consumer Replaceable Parts Service
License
Components such as the remote and remote control
and cables, may be serviced through expedited part
shipment. In this event, HP will send you the
component.
GRANT - HP grants you a license to use one copy of
the Software. "Use" means storing, loading, installing,
executing, or displaying the Software. You may not
modify the Software or disable any licensing or control
features of the Software. If the Software is licensed for
"concurrent use," you may not allow more than the
maximum number of authorized users to use the
Software concurrently.
HP Unit Exchange Service
In the event of a hardware failure in the product itself,
we will send you a refurbished replacement product
equivalent to or with higher performance than your
original system. When it arrives, pack the defective
product in the replacement's box, and return it to HP
using the enclosed prepaid mailer.
HP Software Product License
Agreement
The HP Software License and Warranty Terms which
appear below apply to that binary-only portion of the
Software which is proprietary to HP or over which HP
intends to assert an ownership right and does not
58
hp digital media receiver
OWNERSHIP - The Software is owned and
copyrighted by HP or its third-party suppliers. Your
license confers no title to, or ownership in, the
Software and is not a sale of any rights in the
Software. HP's third-party suppliers may protect their
rights in the event of any violation of these License
Terms.
Copies
ADAPTATIONS - You may make copies or adaptations
of the Software only for archival purposes or when
Lexus.book Page 59 Monday, January 6, 2003 2:00 AM
copying or adaptation is an essential step in the
authorized Use of the Software. You must reproduce all
copyright notices in the original Software on all copies
or adaptations. You may not copy the Software onto
any public network.
TERMINATION - HP may terminate your license upon
notice for failure to comply with any of these License
Terms. Upon termination, you must immediately
destroy the Software, together with all copies,
adaptations, and merged portions in any form.
No Disassembly
EXPORT REQUIREMENTS - You may not export or reexport the Software or any copy or adaptation in
violation of any applicable laws or regulations.
DECRYPTION - You may not disassemble or decompile
the Software unless HP's prior written consent is
obtained. In some jurisdictions, HP's consent may not
be required for limited disassembly or decompilation.
Upon request, you will provide HP with reasonably
detailed information regarding any disassembly or
decompilation. You may not decrypt the Software
unless decryption is a necessary part of the operation
of the Software.
TRANSFER - Your license will automatically terminate
upon any transfer of the Software. Upon transfer, you
must deliver the Software, including any copies and
related documentation, to the transferee. The transferee
must accept these License Terms as a condition to the
transfer.
Restricted Rights
RIGHTS - The Software and any accompanying
documentation have been developed entirely at private
expense. They are delivered and licensed as
"commercial computer software" as defined in DFARS
252.227-7013 (Oct 1988), DFARS 252.211-7015
(May 1991), or DFARS 252.227-7014 (Jun 1995), as
a "commercial item" as defined in FAR 2.101(a), or as
"Restricted computer software" as defined in FAR
52.227-19 (Jun 1987) (or any equivalent agency
regulation or contract clause), whichever is applicable.
You have only those rights provided for such Software
and any accompanying documentation by the
applicable FAR or DFARS clause or the HP standard
software agreement for the product involved.
user’s guide
59
Lexus.book Page 60 Monday, January 6, 2003 2:00 AM
Declaration of Conformity
Supplementary Information:
According to ISO/IEC Guide 22 and EN 45014
1. The Product was tested in a typical configuration
with Hewlett-Packard Personal Computer and
peripherals.
Manufacturer's Name: Hewlett-Packard Company
Manufacturer's Address:10500 Ridgeview Ct.
Cupertino, CA 95015-4010
USA
declares that the product
Product Name:
HP Digital Media Receiver
Model Number(s):
5000 series
Product Options:
All
conforms to the following Product Specifications:
Safety:
IUL 1950
EMC:
EN61000-3-2:1995+A14 - Harmonics
EN61000-3-3:1995 - Flicker
FCC Title 47 CFR, Part 15 Class B
Radio:
FCC Title 47 CFR, Part 15, Subpart 2
60
hp digital media receiver
2. This Device complies with Part 15 of the FCC Rules.
Operation is subject to the following two
conditions: (1) this device may not cause harmful
interference, and (2) this device must accept any
interference received, including interference that
may cause undesired operation.
Hardware Quality Engineering Manager
Cupertino, CA, USA October, 2002
For Regulatory Compliance Information ONLY,
contact:
Hardware Quality Engineering Manager
Hewlett-Packard, CPC
10500 Ridgeview Ct.
Cupertino, CA 95015-4010 USA
Phone: 408-343-5000
Lexus.book Page 61 Monday, January 6, 2003 2:00 AM
Operating Specifications
Electrical ratings:
Models: 5000 series
100-127 V/200-240 V,
4/2 A, 50/60 Hz
Operating temperature:
5° to 35° C
Storage temperature:
-40° to 70° C
Operating humidity:
15 to 80% @ 26° C
Storage humidity:
90% @ 65° C
(non-condensing)
Operating altitude:
0-2286 m
Storage altitude:
0-4572 m
FCC Regulatory and Safety
Information (USA only)
Federal Communications Commission (FCC) Radio
Frequency Interference Statement
Warning: This equipment has been tested and found
to comply with the limits for a Class B digital device,
pursuant to Part 15 of the FCC Rules. These limits are
designed to provide reasonable protection against
harmful interference in a residential installation. This
equipment generates, uses, and can radiate radio
frequency energy and, if not installed and used in
accordance with the instructions, may cause harmful
interference to radio communications. However, there
is no guarantee that interference will not occur in a
particular installation. If this equipment does cause
harmful interference to radio or television reception,
which can be determined by turning the equipment off
and on, the user is encouraged to correct the
interference by one or more of the following measures:
•
Reorient or relocate the receiving antenna.
•
Increase the separation between the equipment
and the receiver.
user’s guide
61
Lexus.book Page 62 Monday, January 6, 2003 2:00 AM
•
Connect the equipment into an outlet that is on a
circuit different from the receiver.
•
Consult the dealer or an experienced radio/TV
technician for help.
Hewlett-Packard's system RFI and Radiated Immunity
tests were conducted with HP supported peripheral
devices and HP shielded cables, such as those you
receive with your system. Changes or modifications not
expressly approved by Hewlett-Packard could void the
user's authority to operate the equipment. To comply
with the limits for an FCC Class B computing device,
always use shielded signal cables and the power cord
supplied with this unit.
62
hp digital media receiver
Additional Safety Information
Warning: When using this device, basic safety
precautions should always be followed to reduce the
risk of fire, electric shock, and injury to persons,
including the following:
•
Do not use this product near water, for example,
near a bathtub, wash bowl, kitchen sink or laundry
tub, in a wet basement or near a swimming pool.
•
Avoid using this product during and electrical
storm. There may be a remote risk of electric shock
from lightening.
•
Do not plug a modem or telephone cable into the
Network Interface Card (NIC) receptacle.
•
Always unplug the system from its power source
and from any telecommunications systems (such as
phone lines), networks, or modems before
performing any of the procedures described in this
guide. Failure to do so may result in personal injury
or equipment damage. Hazardous voltage levels
are inside the power supply and modem of this
product.
Lexus.book Page 63 Monday, January 6, 2003 2:00 AM
Copyrights and Trademarks
© Copyright 2002 Hewlett-Packard Company
All rights are reserved. No part of this document may
be photocopied, reproduced, or translated to another
language without the prior written consent of HewlettPackard Company.
The information contained in this document is subject to
change without notice. Hewlett-Packard shall not be
liable for errors contained herein or for consequential
damages in connection with the furnishing,
performance, or use of this material.
Adobe, Acrobat, and Reader are registered
trademarks of Adobe Systems, Inc.
HP and the HP logo are property of Hewlett-Packard
Company.
Microsoft and Windows are registered trademarks of
Microsoft Corporation.
Other brands and their products are trademarks or
registered trademarks of their respective holders.
user’s guide
63
Lexus.book Page 64 Monday, January 6, 2003 2:00 AM
64
hp digital media receiver