1
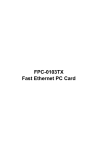
CardBus 10/100 Fast
Ethernet PC Card
User Manual
Doc. No.: 052902-01
REGULATORY STATEMENTS
FCC Certification
The United States Federal Communication Commission (FCC)
and the Canadian Department of Communications have
established certain rules governing the use of modems and
other electronic equipment.
FCC Part 15 Registration
This device complies with Part 15 of FCC rules. Operation is
subject to the following two conditions:
1) This device may not cause harmful interface, and
2) This device must accept any interface received, including
interface that may cause undesired operation.
This equipment has been tested and found to comply with the
limits for a Class B digital device, pursuant to Part 15 of the
FCC Rules. These limits are designed to provide reasonable
protection against harmful interference in a residential
installation. This equipment generates, uses and can radiate
radio frequency energy, and if not installed and used in
accordance with the instructions, may cause harmful
interference to radio communications. However, there is no
guarantee that interference will not occur in a particular
installation. If this equipment does cause harmful interference
to radio or television reception, which can be determined by
turning off and on, the user is encouraged to try to correct the
interference by one or more of the following measures:
•
Reorient or relocate the receiving antenna.
•
Increase the distance between the equipment and receiver.
•
Connect the equipment into an outlet on a circuit different
from that to which the receiver is connected.
•
Consult an experienced radio/TV technician for help.
TABLE OF CONTENTS
INTRODUCTION............................................. 1
System Requirements................................... 1
Operating Systems & Software Support...... 1
INTRODUCTION TO CARDBUS.................. 2
HARDWARE INSTALLATION ..................... 4
Inserting the CardBus Dual-Speed PC Card
..................................................................... 4
Removing the CardBus Dual-Speed PC Card
..................................................................... 4
Connecting to the Network .......................... 5
LED Indicators............................................ 5
SOFTWARE INSTALLATION ...................... 6
WINDOWS 95 INSTALLATION (OSR2) .............. 6
WINDOWS 98 INSTALLATION ........................... 7
WINDOWS 2000 INSTALLATION ..................... 10
WINDOW ME INSTALLATION ......................... 13
WINDOWS XP INSTALLATION ........................ 14
NOVELL NETWARE INSTALLATION ................ 17
SPECIFICATIONS......................................... 18
Network Interface Specifications: ............. 18
Host Interface: .......................................... 18
General Specification:............................... 18
INTRODUCTION
System Requirements
An IBM compatible notebook computer with
486 or faster processor with CardBus
supported socket.
Drivers and utilities provided with this
product.
PCMCIA PC Card compliant Card Services
and Socket Services.
100Base-TX Fast Ethernet or 10BaseT
Ethernet connectivity to your local area
network.
Operating Systems & Software Support
Windows 95 (OSR 2.x), Windows 98/ME,
Windows 2000, XP, NT 4.0
DOS ODI client
Linux OS
FTP PC/TCP
-1-
INTRODUCTION TO CARDBUS
Cardbus is the next generation 32-bit version
issued by PCMCIA PC Card standard. In addition
to support a wider bus (32 bits instead of 16 bits),
CardBus also supports bus mastering and
operation speeds up to 33 MHz. The 132M Bytes
bus transfer rate (compares with legacy 16-bit I/0
PC Card, 20MByte) provides the mobile user to
enjoy the high-bandwidth network connection.
A Mobil computer, which equipped with CardBus
and properly configured, is the fundamental
requirement to use the CardBus 10/100M PC Card.
To make sure about this point, please follow the
guideline listed below:
Cardbus is designed to support both 16-bit
and Cardbus Card. But the legacy 16-bit PC
Card slot couldn't accept the CardBus PC
Card. In order to prevent the wrong operation,
CardBus is thus developed with particular
mechanical consideration to prevent it fit into
the legacy 16-bit PC Card Slot. If you can't
insert the CardBus 10/100 PC Card into the
slot firmly reaching the bottom, your
notebook probably hasn’t the capability to
support CardBus technology. Please check
your notebook manual for detail information.
-2-
Due to variant design of notebook computers,
some models implement a setting in the
Computer’s BIOS to switch between Cardbus
and 16-bit PC Card modes. You could consult
the User’s Guide of your notebook and
properly set on the CardBus or Auto_Detect
mode.
-3-
HARDWARE INSTALLATION
Inserting the CardBus Dual-Speed PC
Card
1.
Hold the CardBus PC Card with wide
connector toward the slot and the brand label
facing upward.
2.
Insert the CardBus PC Card and push it firmly
into the bottom. (Please see the following
figure for reference)
Removing the CardBus Dual-Speed PC
Card
It’s quite different for various computer
mechanical designs. Please refer to the PC Card
removal instruction in the document for your
notebook computer.
-4-
Connecting to the Network
Connect RJ-45 port of the CardBus 10/100
Ethernet PC Card Adapter to the Category 5
Network cable before loading any network driver.
For operation in the 100Mbps (100Base-TX)
Ethernet network, a Category 5 unshielded
twisted pair (UTP) cable should be used to
connect between the RJ-45 port and 100Mbps
hub/switch.
For operation in the 10Mbps (10Base-T)
Ethernet network, Category 3 or 5 unshielded
twisted pair (UTP) cable could be used to
connect between the RJ-45 port and a 10Mbps
hub or switch.
LED Indicators
1.
LINK 10 LED indicator: glows green when
operated in the 10Mbps Ethernet network.
2.
LINK 100 LED indicator: glows green when
operated in the 100Mbps Ethernet network.
3.
ACT LED indicator: blinks orange when the
CardBus 10/100 Ethernet Attached Port PC
Card Adapter is transmitting/receiving data.
-5-
SOFTWARE INSTALLATION
Windows 95 Installation (OSR2)
1.
Boot up computer to Windows 95. Make
sure the CardBus 10/100 Fast Ethernet PC
Card is well connected to the CardBus
Socket.
2.
Click Next in the Update Device Driver
Wizard Windows.
3.
Click Others Locations to select an
installation driver manually.
4.
Insert the installation disk or CD into the
chosen drive (a floppy drive or a CD-ROM
drive). Click Browse to select the location
where you load the device driver. Click OK
to start the search. The driver will be
installed automatically.
-6-
5.
Insert the original Windows 95 CD/disks to
reset the system as requested.
6.
For the first installation, please select
Network in the Control Panel window to
add Protocols, Client and Service if needed.
7.
Restart the system to activate the card.
Windows 98 Installation
1.
Boot up computer to Windows 98. Make
sure the CardBus 10/100 Fast Ethernet PC
Card is well connected to the CardBus
Socket.
2.
The system will automatically detect the
card and ask for the device driver. Click
Next to continue.
3.
Select Search for the best driver for your
device (Recommended) and click Next to
continue.
-7-
4.
Insert the installation disk or CD into the
chosen drive (a floppy drive or a CD-ROM
drive) and select the location where you load
the device driver. Click Next to start the
search. The driver will be installed
automatically.
5.
Click Next to continue when the suitable
driver for the device selected.
-8-
6.
Insert the original Windows 98 CD/disks to
reset the system as requested. Click OK
to continue.
7.
Follow on-screen instruction to complete
installation. Click Finish.
-9-
8.
Click Yes to restart the system to activate the
card.
Windows 2000 Installation
1.
When the CardBus 10/100 Fast Ethernet PC
Card is well connected to the CardBus
Socket, the system will automatically detect
the card and ask for the necessary device
driver. Click Next to continue.
2.
Select Search for a suitable driver for my
device (recommended) and click Next.
- 10 -
3.
Insert the installation disk or CD into the
chosen drive (a floppy drive or a CD-ROM
drive) and select the location where you load
the device driver. Click Next to start the
search.
4.
Click Next to continue when the appropriate
driver for the device is selected.
- 11 -
5.
Click Yes in the Digital Signature Not
Found window to continue.
6.
Click Finish to complete installation.
- 12 -
Window ME Installation
1.
Once the CardBus 10/100 Fast Ethernet PC
Card is well connected to the CardBus
Socket, Windows ME will automatically
detect the card and ask for the device
driver.
2.
Select Automatic search for a better
driver (Recommended) and click Next to
continue.
3.
Insert the installation disk or CD into the
chosen drive (a floppy drive or a CD-ROM
drive) and select Removable Media
(Floppy, CD-ROM…) and click Next.
- 13 -
4.
Click Next to continue when the
appropriate driver for the device is
selected.
5.
Windows Me will copy the appropriate
driver to your system. Insert the original
Windows ME CD/disks into the chosen
drive to reset the system if Windows Me
system requests you to do.
6.
Click Finish to complete the installation.
Windows XP Installation
1.
Windows will detect automatically the new
device which being well connected and
prompt you to insert the network device
driver. Select Install form a list or
specific location (Advanced) to search the
best installation driver. Click Next to
continue.
- 14 -
2.
Insert the installation disk or CD into the
chosen drive (a floppy drive or a CD-ROM
drive) and select the location where you
load the device driver and Select Search
for the removable media (floppy,
CD-ROM…) and click Next to start the
search.
- 15 -
3.
Windows will start searching for the
appropriate installation driver. When the
screen instruction appears as below, click
Continue Anyway to proceed.
4.
Wait for seconds while Windows copies
the appropriate driver to your system.
5.
Click Finish to complete the installation.
- 16 -
Novell NetWare Installation
1.
At the DOS prompt type Start under the
path \NETWARE.
2.
The installation program will automatically
proceed.
3.
Follow Novell's instructions on using ODI
programs.
4.
Enter login at the Netware login prompt, e.g.
f:login>.
5.
Type your user name and password.
6.
The connection is made.
- 17 -
SPECIFICATIONS
Network Interface Specifications:
10Mbps Ethernet: IEEE 802.3 standard for
10BaseT baseband CSMA/CD local area
network.
100Mbps Ethernet: IEEE 802.3u standard
for 100Base-TX baseband CSMA/CD local
area network.
20/200 Mbps full duplex support
Autonegotiation between all four-operation
modes.
Host Interface:
Cardbus PC Card Standard compliant.
Type II PC Card form factor
General Specification:
LEDs: ACT, LINK10, LINK100
Environments Ranges:
Operating: 32°F to 140°F (0°C to 60°C)
Storage: 68°F to 158°F (20°C to 70°C)
Humidity: 10% - 95%, non-condensing
Certifications:
FCC Part 15, Class B.
CE Mark (EN55022 / EN55024, Class B).
VCCI Class B
- 18 -