Download User Manual
Transcript
User Manual
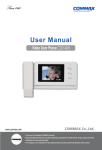
Video Door Phone CDV-40NM
513-11, Sangdaewon-dong, Jungwon-gu, Seongnam-si, Gyeonggi-do, Korea
Int’l Business Dept. Tel. : +82-31-7393-540~550 Fax. : +82-31-745-2133
Web site : www.commax.com
Printed In Korea / 2011.08.104
•
• Thank
Thank you
you for
for purchasing
purchasing COMMAX
COMMAX products.
products.
•
• Please
Please carefully
carefully read
read this
this User’s
User’sGuide
Guide(in
(inparticular,
particular,precautions
precautionsfor
forsafety)
safety)before
beforeusing
usingaaproduct
productand
andfollow
follow
instructions
instructions to
to use
use aa product
product exactly.
exactly.
•
• The
The company
company isis not
not responsible
responsible for
forany
anysafety
safetyaccidents
accidentscaused
causedby
byabnormal
abnormaloperation
operationof
ofthe
theproduct.
product.
Parts and Function
parts
Description
1
MENU/BRIGHT button
Button for MENU Screen when screen is screen saving mode (Screen
off)
Button for control Screen color/Brightness.
2
COLOR / SELECT button
Set color / Select(Menu) button
3
CONT / UP button
Set Contrast / Cursor UP (Move cursor)
4
RESET / DOWN button
Reset / Cursor DOWN (Move cursor).
5
Handset
Handset
6
Screen
LCD Screen
7
Front Door button / UP button
1. Check Front Door status through door camera.
2. Cursor UP (Move cursor)
8
Interphone Call button
9
Door Open
button
10
Power Switch
Power ON/OFF Switch
11
Control Volume Switch
Control volume.
12
Port for wiring and
programming
Port (Terminal)
software
button
/
Hold handset and call (Talk) Interphone.
DOWN
1. Turn on electric lock through door camera for door open while
talking with door camera.
2. Cursor DOWN (Move cursor).
2
for
connecting
Camera/Interphone
and
updating
1. Caution
Please, do not turn on/off, insert or remove Micro SD card during saving, capture image or recording
video. It might be caused of malfunction, harm or damage goods. (User may lose data in embedded
memory and Micro SD card or it may be reason of malfunction)
z
When memorized data exceed capacity of memory in external micro SD card, product erase
automatically delete oldest data because of limitation of embedded memory capacity.
Therefore, we recommend user do back-up data to separate memory.
z
Please, check bellow memory spec and use it.
We do not guarantee proper operation and we are not under legal responsibility if user uses
other memory which is not recommended by us.
z
Recommended spec. of MICRO SD [T-FLASH] Card
(Please, format memory first before use it)
1) Manufacturer : SANDISK
MICRO SD : 2GByte
MICRO SDHC [CLASS 4] : 4 ~ 16GByte
2) Manufacturer : TRANSCEND
MICRO SD : 2GByte
MICRO SDHC [CLASS 4] : 4 ~ 16GByte
z
This product has ‘ SUPERCAP inside.
‘ SUPERCAP’
is for preventing data lost and damaged in memory if there is temporarily
black out or lost electric power. It turns on embedded clock in period time when product lost power.
Recharging ‘ SUPERCAP’
takes over 30minutes after turning on power.
It can operate embedded clock during approximately 24hours without external power.
If data file is many or size of file is big, embedded clock may stop within 24hours. Therefore, user
must check and set time in product when turning on product again.
z
We recommend check time in product periodically because of time error or difference time.
3
z How to insert Micro SD [T-FLASH]
Please, refer to bellow photo and pay attention to direction when Insert Micro SD card.
When user inserts Micro SD card, please slide card until you feel a ‘ click’ .
4
2. How to use product
After turning on power, screen shows booting screen with COMMAX logo and melody.
2-1. Call from door camera station.
(Turning on time of screen is 30±5sec)
① When visitor push ‘ Call’
button in door camera station, Video phone sound dingdong and
show visitor’ s video in monitor screen.
(Screen automatically turns off after 30 sec. if user hold hand set and doesn’ t reply call.)
② User can set sound volume through volume control switch when dingdong sound is running.
2-2. Talk with visitor through door camera station
(Turning on time of screen with talking is 60±5sec)
① When visitor push ‘ Call’
button in door camera station, Video phone sound dingdong and show
visitor’ s video in monitor screen. User can start talk with visitor after holding handset.
② Maximum time of talking with visitor is 60 sec.
③ When screen changes to Idle mode (Screen turns off), user can turn on screen again after pushing
front door button.
④ User can do 3-way communication trough interphone when line is busy between video phone and
door camera station. Just hold one interphone handset when you want to talk.
⑤ When user holds down handset, talking is over and Video door phone turns to Idle mode.
5
2-3. Open Door
User can open door through ‘ Door open’
button while talk with visitor. When press ‘ Door open’
button, door is opened with sound.
(Door locks which should be interfaced with door camera which has door open function)
※ Interphone also has same function.
2-4. Monitoring through door camera or CCTV
Video phone is on idle status.
-
The following is sequentially operated when user push front door button. (If Video door phone
doesn’ t set up CCTV in configuration and remove jumper cap for using CAM#2)
-
Camera1
Camera2
OFF
Camera1 …………
The following is sequentially operated when user push front door button. (If Video door phone
sets up CCTV in configuration and remove jumper cap for using CAM#2)
-
Camera1
Camera2
CCTV 1
CCTV2
OFF
Camera1 …………
CCTV monitoring can’ t be activated on talking status.
-
The following is sequentially operated when user push front door button
Camera1
Camera2
Camera1
Camera2 …………
** Screen will be turned off when user holds handset during CCTV monitoring.
2-5. working with connected interphone. [Installed separated interphone which can be
interfaced]
1. Talking with door camera phone
① When visitor call tenants through door camera, video phone and interphone make ring tone.
② User hold handset in interphone or video phone then he/she can make call. Push ‘ Door open’
button which design like ‘ key’
can open door.
③ User can do 3-way communication through video door phone when line is busy between
interphone and door camera station. Just hold one interphone handset when you want to talk.
2. Call between interphone and video door phone.
① When user call videophone from interphone, hold interphone handset then press call button.
Videophone will make ring tone.
User hold handset in video phone at this time, he/she can make call from interphone to
videophone or vice versa. If visitor call through door camera station while tenants have a call with
interphone, video phone and inter phone sound ring tone and user can do 3-way communication
6
between video door phones, inter phone and door camera station.
② When user wants to call interphone from video door phone, hold hand set and press interphone
button. Ring tone will make sound during press interphone button. User can communicate with
receiver after he/she hold handset in interphone.
2-6. Operation of CCTV interfacing
When user activates CCTV in configuration, please make sure CCTV has different function from door
camera station. It only supports video monitoring function, video/image capturing, recording and
saving captured images. Unless a visitor call CCTV from door camera, LCD screen will be on
continuously.
3. Set up configuration
* Set up configuration use bellow 4 buttons.
Start Menu / Move previous page : MENU button
[Menu button is placed on left side of product and it is used when screen is turned down]
Select / Input : SELECT button (Interphone button which is placed on front side of product )
Up / right : △ UP button (Frond door button )
Down / left : ▽ DOWN button (Open door button )
7
3-1. Set screen (Brightness/Contrast/Color control)
Configuring Screen
BRIGHT
CONT
COLOR
RESET
* How to set
1.
Press Each function button which you want to set among Brightness, Contrast, and Color
during Video Communication / Monitoring status. Each category is selected when setup
menu is shown like as picture above.
① Brightness : Set brightness.
② Contrast : Set contrast.
③ Color : Set color.
2.
Use △/▽ button for setting.
3.
After changing value, push SELECT button for confirming set up.
8
Reset Screen
* How to set
1.
Press Reset Button during Video Communication / Monitoring status
2.
Use △/▽ button and select ‘ YES’ .
3.
Push SELECT button for confirming reset.
9
3-2. Set up configuration
Push Menu button in idle mode then press △/▽ button for moving category. Press select button
for moving back category..
3-2-1. MEDIA SET (Record and save video and still cut image)
Æ Still cut image can be saved up to 128 cuts.
Æ When memorized data exceed capacity of memory in external micro SD card, product erase
automatically delete oldest data because of limitation of embedded memory capacity.
*** CAPTURE (AUTO) ***
Æ When user sets ‘ auto’
in set up configuration, still cut image can be automatically saved. It is
only activated during call / talk.
Æ Press and hold call/talk button over 1 sec. user can save still cut image again.
*** CAPTURE (MANUAL) ***
Æ Press and hold call/talk button over 1 sec. during call / talk user can save still cut image.
*** Video (AUTO) ***
10
Æ When user sets ‘ auto’
in set up configuration, video can be automatically saved. It is only
activated during call / talk.
Æ If user doesn’ t receive call, time of recording video is 30 sec. If user receives call, time of
recording video is 60 sec. Video is automatically recorded and saved in auto status.
Æ Video clip can be saved max. 1minute 30 seconds after calling.
Æ If call is canceled or terminated during recording video, video is recorded until time of stop
Æ If user press and holds ‘ monitor button’
over 1sec, still cut image (captured image) can be
saved. However, video clip still be continuously recorded.
*** Video (MANUAL) ***
Æ Press and hold call/talk button over 1 sec. user can save and record video.
Æ If user press and holds ‘ monitor button’
over 1sec, video clip can be recorded. However, still
cut image (captured image) still be continuously saved.
However, CCTV can only support manual record (without auto record). Therefore, user press and
holds ‘ monitor button’ over 1sec, video clip can be recorded for 60 sec.
Please make sure, there is a limitation of memory size. Therefore, CCTV try to keep monitoring for
security reason but recording time has 60 sec. limitation.
After 60 sec. of recording, user can activate recording again by pressing ‘ monitor button’ manually.
11
*** Folder and file management ***
Î Create basic folder
Æ CDV-40NM\VIDEO\
( Video saving folder )
Æ CDV-40NM\PICTURE\
( Still cut image folder )
When the icon is displayed please built in data or backup.
Î The name of saved file and form
Still image
Video
Explanation
of file
110516_130502_D1.jpg
110516_130502_C2.jpg
110516_130502_D1.mp4
110516_130502_L1.mp4
Date
Time
Video Type
File Type
11year 5month 13hr 5min D1,D2 = Lobby 1,2
Still image Æ (*.jpg)
16 date
2sec
C1,C2 = CCTV 1,2
Video
Æ (*.mp4)
Î I t is necessary memory or minimum space of Micro SD Card.
Minimum space : Built in Flash – 20MByte, Micro SD – 100MByte
Î Stop image Mix 128 cuts
If you excess capacity please eliminate old file and then save.
ÎVideo can be saving in full.
(If not have any space in the memory )
Note
If not have any space in the Micro SD Card.
It will be displayed icon in LCD screen.
When you displayed icon it will be eliminated old file and then Video
save.
You can eliminate date to secure minimum space and please save
backup Important data.
It will be disappeared “ IN FULL” , “ SD FULL” icon when you eliminate
the format of Micro SD Card or built in memory you can secure minimum
space
You can save depend on the file qty please check reference.
It is depend on the memory size and please see the as follow
information.
Even though you have extra saving space if excess file it will be
canceled automatically old file and save.
Î If not have Micro SD Card you can save in the memory of products
If you insert Micro SD Card, after data backup you can save in Micro
12
SD.
If you eliminate Micro SD Card, you can re-save in the memory.
Î It will be displayed descending order.
Î It is possible whole cancel and selection cancel
Î The number of saving for capacity
Internal Flash
Micro SDHC Card
Capacity
100 MByte
4 GByte
8 GByte
16 GByte
Stop Image
128 cut
128 cut
128 cut
128 cut
The number of
max 100 cuts
max 400 cuts
max 1,000 cuts
max 1,000 cuts
Video saving
(60 Second)
Video storage time
80 min
400 min
800 min
1500 min
Î Stop image can make 128 cuts fixed. But it can be changed number of video according the
time of image and depend on the space.
Æ Size of stop image: 80 KByte
Æ Size of Video file: 10 MByte (60 second)
Data (video saving and still cut image) saving, play back and eliminate: It can be saved data
(video and still cut image) when you eliminate the data or play back you can check the image or
eliminate video and still cut image.
Video and still cut image setting: User can set up recording and saving video clip or saving still
cut image. User can set up video recording that you want time and save.
You can set up video recoding and saving when you call.
Î IF not MICRO SD Card it will be saved internal memory.
If MICRO SD Card insert in the product, it can back up data and save MCRO SD.
If MICRO SD Card eliminated, it will be saved internal memory.
This function is only when there is memory problem.
Please format data of video saved and still cut image ( If you format you can’ t return please
carefully use the format )
If insert MICRO SD: I t can be formatted MICTO SD.
If not insert MICRO SD : It can be formatted internal memory.
13
4. INFO : It is possible check to actual memory capacity.
(1) Data (video / still cut image) save , play back and eliminate
Play back
Eliminate
Whole Eliminate
Before screen
* A method of setting
① It can be moved from the mode of environment (3-2) to disk icon, please press
SELECT button and using the button △/▽ you can move the icon.
② Please press SELECT button and then select items.
③ Please use the button and select data saved.
④ When you select, please press SELECT button and play back and eliminate.
14
(2) Setting of video and still image
* A method of setting
①
It can be moved from the mode of environment (3-2) to disk icon, please press
SELECT button and use the button △/▽ you can move the FORMAT icon.
②
Please press the SELECT button and then select items.
③
Please use the button and select video or still cut image.
④
When you select please press the SELECT button and then it will be finished.
⑤
Please select auto or manual using the button and please press the SELECT button
and It will be finished.
15
(3) FORMAT (Data format):It can be formatted data that products video saved and image(CAPTURE).
If not read the image saved, it can be making format. ( FAT of memory break down )
* A method of setting
① It can be moved from the mode of environment (3-2) to disk icon, please press SELECT
button and using the button △/▽ you can move the FORMAT icon.
② Please press the SELECT button and then select items.
③ You can use the button△/▽ and select for FORMAT setting.
④ Please after select you should be pressed SELECT button and then it will be finished.
(4) INFO (Checking for Memory capacity)
It is possible to check actual memory capacity
(1) IN : Remain capacity /Total capacity -It can be showed internal memory capacity of product.
(2) MICRO SD : Remain capacity /Total capacity - It can be showed MICRO SD capacity
16
3-2-2. UITILITY
1. Time setting: Set the time of product. ( It will be used video and image saved )
CCTV activated : User can be settled until two CCTV.
if not activate you can not connect CCTV.
===========================================================================
17
(1). Time setting : Setting the time of the product. (It is used when you save movie or image.)
z
How to set up
① In the configuration mode of 3-2, move to UTILITY icon and after press the
SELECT(Unlocking button) button, move to Time setting icon with △/▽(Interphone
button/Call button).
② Press the SELECT(Unlocking button) button to choose an item.
③ Enter the time of the household phone with△/▽(Interphone button/Call button).
④ After entering, click select(door release) button to complete the time setting
18
(2) CCTV setting
: Users can set CCTV on or off up to 2, if not activating, CCTV can not be connected.
How to set up
① In the configuration mode of 3-2, move to UTILITY icon and after press the
SELECT(Unlocking button) button, move to CCTV activation icon with △/▽(Interphone
button/Call button).
② Press the SELECT(Unlocking button) button to choose an item.
③ Select CCTV on or off with△/▽(Interphone button/Call button).
④ After choosing, complete the set with SELECT button(Unlocking button).
3-2-3. INFORMATION (Model Version and etc..)
(1) Possible to check the information of the product such as name of product, version, etc
Model : Model name
(2) Version : The version of the product
19
5. Wiring
* CAMERA CONNECTOR POLARITY
1. RED : VOICE
2. BLUE : GND 3. YELLOW : POWER(+12V)
20
4. WHITE : VIDEO
When the system is configuring, there should be connected the Monitor to CCTV, Camera, and Interphone by
UTP(Cat.5) having 3-signal Lines and 5-grounds.
But the Coaxial Cable is recommended to get the noise free video
▣ Caution on the Wiring
Be sure to use a separate wiring for each connect
If UTP CABLE[CAT.5] is used for CAMERA No. 1 and CAMERA No.2, 2 UTP CABLE should be used.
If one UTP CABLE[CAT.5] is used for CAMERA No. 1 and CAMERA No.2, you may face video image
quality related problem. Therefore, please use separate UTP for each camera.
21
▣ CCTV Camera Wiring
♠ CCTV CAMERA requires additional power supply .
♠ Please choose appropriate Coaxial Cable, depending on the distance.
#1 : RED--(VIDEO)
#2 : Blue-(GND)
♠ UTP CABLE WIRING
If UTP CABLE[CAT.5] is used, please use 7 lines for GND line. Other wise, you may image quality
related problem.
▣ INTERPHONE WIRING
22
If UTP CABLE[CAT.5] is used, use 5 lines for GND line.
INSTALLATION
▷ Monitor Installation
Note
1. Avoid the range of direct sunlight
2. Recommended height is pertinent from 1450 ~ 1500mm
3. Avoid the installation near magnetic activity, humid temperatures and gas
* Wiring caution
1. If the product is installed near high tension cable, please use coaxial cable and
metallic pipe.
2. If the sheath of the cable is peeled off and exposure partly, it may cause short circuit
resulting in malfunction.
3. Please turn off the monitor and connect the camera.
4. Be careful of wiring as it has polarity.
23
5. Only 1 camera is available in the default setting of this product. Please remove short pin on
the back to use two door cameras.
6. 4 cameras can be connectable for this product. However, if the video signal cables are installed with not
enough space to one another, there might be noise on the LCD due to the interference of video signal. Therefore,
please maximize the distance between the cables.
7. If
UTP CABLE[CAT.5] is used, use 5 lines for GND line to avoid video noise
8. If [CAT.5] is used for CCTV wiring, please use all lines for GND except the cable for video line to avoid video
noise.
9. We recommend that NTSC and PAL types are not mixed.
10. Please turn it off and on when you connect the cameras again after the camera is disconnected
Part lists
본체 (CDV-40NM)
CDV-40NM
GH1T 4 X 50 ZnY
벽걸이 브라켓
Wall Bracket
PHM 3 X 6 ZnY
Fixing
Screw
Mounting
Screw
벽걸이 설치
스크류 Monitor
본체 설치
스크류
4*18 (4EA)
3*6 (1EA)
사용설명서
User Manual
4P*300(2EA)
연결Connector
컨넥터
4P*300(2EA)
24
PIN 2P
2P SHUNT
SHUNT
PIN
(A2095)
2P*250(2EA)
Connector
연결
컨넥터
2P*300(2EA)
Specification
CDV-40NM
Rating Voltage
100V-240V~,
Power
consumption
50/60Hz
On stand-by : 4W
Transmission way
Door camera 4wires (Polarity), interphone 4wires (polarity),
On talk: 10W
Monitor
10.16cm TFT / Digital LCD
Transmission way
Full duplex (Hands-Free)
Call sound
Door : Electronic chime (Sol Mi Do)
Display
60 ±10sec
Distance
28mm(Ф0.5) / 50mm(Ф0.65) / 70mm(Ф0.8)
Working temperature
0 ~ +40℃ (32°F ~ 104°F)
Dimension
249(W)×158.5(H)×47.6(D)
25
- interphone : Beep


