1
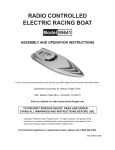
Radio controlled
Electric racing boat
Model 95641
Assembly And Operation Instructions
Visit our website at: http://www.harborfreight.com
Read this material before using this product.
Failure to do so can result in serious injury.
Save this manual.
Copyright© 2006 by Harbor Freight Tools®. All rights reserved. No portion of this manual or any artwork
contained herein may be reproduced in any shape or form without the express written consent of
Harbor Freight Tools. Diagrams within this manual may not be drawn proportionally. Due to continuing
improvements, actual product may differ slightly from the product described herein. Tools required for
assembly and service may not be included.
For technical questions or replacement parts, please call 1-800-444-3353.
Manual Revised 08e, 09j, 09k
Specifications
Boat Battery
7.2 V, 1800 mAh, NiMH
AC/DC Adapter
Input: 120 V~, Output: 9 VDC
Transmitter Batteries Required 8 “AA” batteries (sold separately)
Radio Control Frequencies
26.995 MHz, 27.045 MHz, 27.095 MHz,
27.125 MHz, 27.145 MHz, 27.175 MHz
Control Range
up to 400’
Run Time
10-20 minutes per full charge
Save This Manual
You will need this manual for the safety warnings and precautions, assembly,
operating, inspection, maintenance and cleaning procedures, parts list and assembly
diagram. Keep your invoice with this manual. Write the invoice number on the inside
of the front cover. Write the product’s serial number in the back of the manual near the
assembly diagram, or write month and year of purchase if product has no serial number.
Keep this manual and invoice in a safe and dry place for future reference.
GENERAL SAFETY RULES
WARNING!
READ AND UNDERSTAND ALL INSTRUCTIONS
Failure to follow all instructions listed below may result in
electric shock, fire, and/or serious injury.
SAVE THESE INSTRUCTIONS
Work Area
1.
Keep your work area clean and well lit. Cluttered benches and dark areas invite
accidents.
2.
Do not operate Boat in explosive atmospheres, such as in the presence of
flammable liquids, gases, or dust. Radio Control electronics may create sparks
which may ignite the dust or fumes.
3.
Keep bystanders and visitors away while operating. Distractions can cause
you to lose control. Protect others in the area from rapidly spinning propellers.
Provide barriers or shields as needed.
Electrical Safety
1.
Grounded tools must be plugged into an outlet properly installed and
grounded in accordance with all codes and ordinances. Never remove the
SKU 95641
For technical questions, please call 1-800-444-3353.
Page 2
grounding prong or modify the plug in any way. Do not use any adapter
plugs. Check with a qualified electrician if you are in doubt as to whether the
outlet is properly grounded. If the tools should electrically malfunction or break
down, grounding provides a low resistance path to carry electricity away from the
user.
2.
Double insulated tools are equipped with a polarized plug (one blade is wider
than the other). This plug will fit in a polarized outlet only one way. If the
plug does not fit fully in the outlet, reverse the plug. If it still does not fit,
contact a qualified electrician to install a polarized outlet. Do not change
the plug in any way. Double insulation eliminates the need for the three wire
grounded power cord and grounded power supply system.
3.
Do not abuse the Power Cord. Never use the Power Cord to carry the tools
or pull the Plug from an outlet. Keep the Power Cord away from heat, oil,
sharp edges, or moving parts. Replace damaged Power Cords immediately.
Damaged Power Cords increase the risk of electric shock.
4.
When operating a power tool outside, use an outdoor extension cord marked
“W-A” or “W”. These extension cords are rated for outdoor use, and reduce the
risk of electric shock.
Personal Safety
1.
Stay alert. Watch what you are doing, and use common sense when operating this Boat. Do not use while tired or under the influence of drugs, alcohol, or medication. A moment of inattention while operating may result in serious
personal injury.
2.
Dress properly. Do not wear loose clothing or jewelry. Contain long hair.
Keep your hair, clothing, and gloves away from moving parts. Loose clothes,
jewelry, or long hair can be caught in propellers.
3.
Avoid accidental starting. Be sure the Power Switch is off before plugging
in. Carrying this Boat with your finger on the Power Switch invites accidents.
4.
Do not overreach. Keep proper footing and balance at all times. Proper footing and balance enables better control.
5.
Use safety equipment. Always wear eye protection. Always wear ANSI-approved safety goggles and work gloves when using or performing maintenance on
this product.
Product Use And Care
1.
Do not use the Boat if the Power Switch does not turn it on or off. Any tool
that cannot be controlled with the Power Switch is dangerous and must be replaced.
SKU 95641
For technical questions, please call 1-800-444-3353.
Page 3
2.
Disconnect the Power Cord Plug from the power source before making any
adjustments, changing accessories, or storing the Boat. Such preventive
safety measures reduce the risk of starting accidently. Always unplug from its
electrical outlet before performing any inspection, maintenance, or cleaning
procedures.
3.
Store out of reach of children and other untrained persons. Never allow Children to come in contact with this product.
4.
Maintain with care and keep clean. Properly maintained, this product is easier to
control. Do not use if damaged in any way. Tag and “Do not use” until repaired.
5.
Check for misalignment or binding of moving parts, breakage of parts, and
any other condition that may affect the Boat’s operation. If damaged, have it
serviced before using. Many accidents are caused by poor maintenance.
6.
Use only accessories that are recommended by the manufacturer for your
model. Accessories that may be suitable for one product may become hazardous
when used on another.
Service
1.
Product service must be performed only by qualified repair personnel. Service or maintenance performed by unqualified personnel could result in a risk of
injury.
2.
When servicing this product, use only identical replacement parts. Follow
instructions in the “Inspection, Maintenance, And Cleaning” section of this
manual. Use of unauthorized parts or failure to follow maintenance instructions
may create a risk of electric shock or injury.
SPECIFIC SAFETY RULES
1.
Maintain labels and nameplates on the product. These carry important information. If unreadable or missing, contact Harbor Freight Tools for a replacement.
2.
Maintain a safe working environment. Make sure there is adequate surrounding
workspace.
3.
Always keep all electrical cords away from the propellers on this Boat.
4.
If two Boats with the same radio frequency are used (both with the same
numbers on the Transmitter and/or Receiver), they must be at least 1640’
away from one another in order to maintain adequate transmission control.
5.
Before using in the water perform a distance check to be certain that you can
maintain radio control at least 25’ from Transmitter to Boat with the Antenna
collapsed.
SKU 95641
For technical questions, please call 1-800-444-3353.
Page 4
6.
NEVER run Boat in swimming pools or bodies of water where people are
swimming or playing.
7.
NEVER recharge non-rechargeable batteries.
8.
Use only batteries of the type recommended. Do not mix old and new batteries.
9.
Remove batteries from both the Boat and the Transmitter if they will not be
used for a long period.
10. People with pacemakers should consult their physician before using this
product. Electromagnetic fields in close proximity to a heart pacemaker could
cause interference to or failure of the pacemaker. In addition, people with pacemakers should adhere to the following:
• Avoid operating this Boat alone.
• Don’t use this product with the power switch locked on.
• If powered via a power cord be certain that the tool is properly grounded. A
ground fault interrupt (GFCI) system is also a good precaution. This inexpensive device is a good safety measure because it prevents a sustained electrical
shock.
• Properly maintain and inspect all tools before use to avoid electrical shock.
11. Never pick up, or lay down the Boat until its Propellers come to a complete
stop. Moving parts can grab the surface and pull the Boat out of your control and
there is the possibility of damage, or personal injury. When handling this Boat, be
sure to keep hands clear of propellers at all times.
12. This product is for supervised use by ages 15 and up. Children must be properly trained in safety issues and operating procedures before being allowed to use
this product and must always be supervised by a responsible adult.
13. Never leave the Boat unattended when it is plugged into its AC/DC Adapter.
Turn off the Boat and unplug it from its electrical outlet before leaving. WARNING:
Always remove the Battery Pack (16) from the Battery Compartment when it
is being charged.
14. Always wear work gloves if removing the Propellers (4A and/or 4B). The
blades can be very sharp. If the Boat has been recently used, let the Twin 380 Motors (8A and 8B) as well as both Drive Shafts (6B and 6C) cool at least 15 minutes
before touching.
15. Do not recharge the Battery Pack (16) if it is hot.
REV 09i; 09j
SKU 95641
For technical questions, please call 1-800-444-3353.
Page 5
GROUNDING
WARNING!
Improperly connecting the grounding wire can result in the risk of electric shock.
Check with a qualified electrician if you are in doubt as to whether the outlet is
properly grounded. Do not modify the power cord plug provided with the tool.
Never remove the grounding prong from the plug. Do not use the tool if the
power cord or plug is damaged. If damaged, have it repaired by a service facility before use. If the plug will not fit the outlet, have a proper outlet installed by
a qualified electrician.
Double Insulated Tools: Tools With Two Prong Plugs
Note: The AC/DC Adapter included with this Boat has a 2-Pronged plug.
1.
Tools marked “Double Insulated” do not require grounding. They have a special
double insulation system which satisfies OSHA requirements and complies with the
applicable standards of Underwriters Laboratories, Inc., the Canadian Standard
Association, and the National Electrical Code. (See Outlets for 2-Prong Plug.)
2.
Double insulated tools may be used in either of the 120 volt outlets shown in the
preceding illustration. (See Outlets for 2-Prong Plug.)
Extension Cords
1.
Grounded tools require a three wire extension cord. Double Insulated tools can
use either a two or three wire extension cord.
2.
As the distance from the supply outlet increases, you must use a heavier gauge
extension cord. Using extension cords with inadequately sized wire causes a serious drop in voltage, resulting in loss of power and possible tool damage.
(See Table A.)
3.
When using more than one extension cord to make up the total length, make sure
each cord contains at least the minimum wire size required. (See Table A.)
SKU 95641
For technical questions, please call 1-800-444-3353.
Page 6
4.
If you are using an extension cord outdoors, make sure it is marked with the suffix
“W-A” (“W” in Canada) to indicate it is acceptable for outdoor use.
5.
Make sure your extension cord is properly wired and in good electrical condition.
Always replace a damaged extension cord or have it repaired by a qualified electrician before using it.
RECOMMENDED MINIMUM WIRE GAUGE FOR EXTENSION CORDS*
(120 or 240 VOLT)
NAMEPLATE
AMPERES
EXTENSION CORD LENGTH
(at full load)
25 Feet
50 Feet
75 Feet
100 Feet
150 Feet
0 – 2.0
18
18
18
18
16
2.1 – 3.4
18
18
18
16
14
3.5 – 5.0
18
18
16
14
12
5.1 – 7.0
18
16
14
12
12
7.1 – 12.0
18
14
12
10
-
12.1 – 16.0
14
12
10
-
-
16.1 – 20.0
12
10
-
-
-
TABLE A
* Based on limiting the line voltage drop to five volts at 150% of the rated amperes.
Symbology
Double Insulated
Canadian Standards Association
Underwriters Laboratories, Inc.
V~
A
Volts Alternating Current
Amperes
No Load Revolutions per Minute
n0 xxxx/min. (RPM)
SKU 95641
For technical questions, please call 1-800-444-3353.
Page 7
Unpacking
When unpacking, check to make sure that the item is intact and undamaged. If
any parts are missing or broken, please call Harbor Freight Tools at the number shown
on the cover page of this manual as soon as possible.
Note: Save the box and all Styrofoam packing that comes with this Boat. It is helpful for
safe, secure storage when it is not in use.
Assembly Instructions
Note: For additional information regarding the parts listed in the following pages, refer
to the Assembly Diagram on page 15 of this manual.
1.
WARNING! Make sure the Power Switch of the Transmitter (20) is in its “OFF”
position and that the Boat is unplugged from its electrical outlet before making any
adjustments.
2.
Remove the Boat, the Transmitter and all parts from the box. Check to make sure
everything is included as per the parts list on page 14 in this manual.
Figure 1
3.
Remove the Deck Cabin (1) by twisting the two Buttons at the back of the Deck
Cabin (1) to OPEN. This will expose the Battery Compartment. See Figure 1.
Note: There is another Button for locking and unlocking the Deck Cabin (1) and it is
located on the front section of the Deck Cabin (1). It is not shown in Figure 1. Be
sure it is also locked before using the Boat.
SKU 95641
For technical questions, please call 1-800-444-3353.
Page 8
Figure 2
Electric Speed Controller
Receptacle from Electric
Speed Controller
Plug from Battery Pack
Battery Pack
4.
If the Battery Pack (16) is plugged into the Electric Speed Controller (18), unplug
them and remove the Battery Pack (16) from the Battery Compartment so it may
be charged completely. See Figure 2.
Note: The Rechargeable Battery should be charged fully before its first use in order to
get maximum run-time for your Boat. See Charging Instructions on page 10.
5.
After fully charging the Battery Pack (16) replace it into the Battery Compartment
and plug it into the Electric Speed Controller (18).
6.
Replace the Deck Cabin (1) and lock it into place with the two Lock Buttons at the
rear.
7.
Install the Antenna Tube (3) over the string Antenna that dangles from the right rear
of the Hull (2). See assembly diagram on page 15.
8.
Make sure the Power Switch on the Transmitter (20) is in the OFF position. Open
the Battery Compartment located on the bottom of the Transmitter (20). Insert new
8 AA Batteries (not included) making sure positive and negative ends are facing in
the correct direction. Replace the Transmitter Battery Compartment cover.
9.
After reading the Operation Instructions carefully you may launch your Boat.
Note:See photo on page 16 of this manual for complete idea of inside Hull layout.
SKU 95641
For technical questions, please call 1-800-444-3353.
Page 9
CHARGING THE BATTERY
To prevent serious injury and fire:
• Constantly monitor battery while charging. The AC/
DC Adapter will continue feeding power into the battery and may
overcharge it if left unattended.
• Only charge battery on fireproof surface that will not
be damaged by heat. If the battery is accidentally overcharged, fire
may occur. Keep multiple class ABC fire extinguishers nearby.
• Do not charge for longer than 5 hours. The AC/DC
Adapter will not turn off or stop charging when the battery is fully
charged. Disconnect battery from AC/DC Adapter when battery gets
hot. Overcharging can damage the Battery Pack and can pose a fire
hazard!
1.
Remove the Battery Pack (16) from the Battery Compartment under the Deck
Cabin (1).
2.
Set the Battery Pack (16) on a fireproof surface. Plug the Battery Pack (16) into
the AC/DC Adapter (17).
3.
Plug the AC/DC Adapter (17) into a 120V wall outlet, or into an extension cord that
is connected to a 120V outlet. Constantly monitor the battery while charging.
Note: Do not force the connectors as they will only connect one way. Charge the batteries only when they are cool.
4.
Charging time is approximately 3.5 to 5 hours for totally discharged Battery Pack
(16), but charging time may be reduced if the Battery Pack (16) is not fully discharged. Do not charge longer than 5 hours.
5.
Disconnect when Battery Pack is hot to the touch. Allow charged Battery Pack to
cool before use.
6.
Insert the Battery Pack (16) into the Battery Compartment and fasten down the
Deck Cabin (1) using the two lock buttons at the back of the Deck Cabin (1) and
one at the front.
REV 07e; 08i
SKU 95641
For technical questions, please call 1-800-444-3353.
Page 10
Operation Instructions
USING THE TRANSMITTER TO STEER
Note: See Figure 3 for Transmitter (20) layout.
1.
When you push the Throttle Lever on the Transmitter (20) forward, the Twin Propellers will rotate at the same time and speed pushing the Boat forward.
2.
When you move the Steering Lever to the left, the Right Propeller will rotate faster
and the Boat will turn left..
3.
When you move the Steering Lever to the right, the Left Propeller will rotate faster
turning the Boat to the right.
Figure 3
Transmitter
Antenna
Battery Level Indicators
Throttle Trim
Steering Lever
Throttle Lever
Steering Trim
Throttle Inverter
Steering Inverter
Crystal
Power Switch
4.
The Transmitter layout is as follows:
a.Battery Level Indicators: Green light means Transmitter Batteries are
strong. If Red light is flashing and a beeping is heard, replace the 8 AA Batteries at once.
b.Throttle Trim: Adjusts the Throttle in small increments so the Boat will not move
when the Throttle is at it’s minimum position.
c. Throttle Lever: Controls the speed of the Boat and it’s movement forward.
d.Inverter Buttons: Used for changing direction for steering. This boat cannot
travel in reverse, however.
REV 07e
SKU 95641
For technical questions, please call 1-800-444-3353.
Page 11
e.Crystal: This shows the channel you are transmitting on. You can order crystals
in different channels in order to race with other boats without transmission interference.
f. Steering Lever: Used to turn Boat to the left or right.
g.Steering Trim: Used to make slight adjustments in order to keep Boat on straight
path if Steering Lever is not being used.
h.Power Switch: On - Off button. Make sure it is always in the OFF position before
picking up the Boat.
USING THE BOAT
1.
With the Transmitter Power Switch and the boat power switch both in the OFF position, place the Boat in the water pointed away from the edge of the water space.
2.
Move the Power Switch to ON and gently push the Throttle Lever forward to move
the Boat forward.
3.
At first using low speeds practice turning and making the Boat react to the commands of the Transmitter.
4.
Set the Throttle Trim and the Steering Trim before increasing speeds.
5.
Be aware of the time. Do not run out of power while the Boat is located far away
from the launch area. Once the power is depleted the Boat will stop.
6.
Always make sure you are away from others while using your Boat in order to prevent accidents and/or personal injury.
SKU 95641
For technical questions, please call 1-800-444-3353.
Page 12
INSPECTION, MAINTENANCE, AND CLEANING
WARNING! Make sure the Power Switch of the Boat is in its “OFF” position and it is
unplugged from its electrical outlet before performing any inspection, maintenance,
or cleaning procedures.
1.
BEFORE EACH USE, inspect the general condition. Check for loose screws,
misalignment or binding of moving parts, cracked or broken parts, damaged electrical wiring, and any other condition that may affect its safe operation. If abnormal
noise or vibration occurs, have the problem corrected before further use. Do not
use damaged equipment.
2.
AFTER EACH USE, inspect the Boat’s transmission shaft and bearing for water.
Water may accumulate after each use, resulting in rust or blocked transmission
shaft. Dry the transmission shaft by taking the propeller down, unscrewing and removing the shaft struts and drying the shaft and strut bearings. Adding lubricant to
the shaft and bearings will also help prevent rust. Once done, reinstall all pieces.
Changing Boat Frequency
a.Turn off the boat and the remote control.
b.Open the tabs of the boat cover and unscrew the electric speed controller housing.
c. Lightly hold down the circuit board and replace the crystal.
d.Screw down the electric speed controller housing and lock the top cover of the
boat with the tabs.
e.Pull out and replace the crystal on the controller to match the crystal in the boat.
The controller will only control the boat if it has the same frequency.
Troubleshooting
Problem
Possible Causes
Probable Solutions
Boat will not start 1. Low Transmitter batteries.
1. Replace Transmitter (20) batteries.
2. Battery Pack (16) not connected to 2. Make sure the Battery Pack (16) is
the Electric Speed Controller (18).
properly connected to the Electronic
Speed Controller (18). Refer to Figure 2.
Boat will not
steer straight or
turn correctly
One, or possibly both of the
Propellers (4A and 4B) are damaged
or possibly fouled with debris.
Turn off all power and check both Propellers
(4A and 4B) for damage or fouling and if
necessary, replace one or both.
Boat moves or
turns without
being controlled.
1. Low Transmitter batteries.
1. Replace Transmitter (20) batteries.
2. Someone else is operating a Radio 2. Change frequency crystals on your
Controlled device in the area.
Transmitter (20) and boat.
REV 07f
SKU 95641
For technical questions, please call 1-800-444-3353.
Page 13
PARTS LIST
Part
Description
Q’ty
Part
Description
Q’ty
1
Deck Cabin
1
10
Motor Housing Screws
4
2
Hull
1
11
Electric Speed Controller Housing
1
3
Antenna Tube
1
12
Electric Speed Controller Screw
1
4
Shaft Strut
2
13
Motor Housings
2
1 ea
14
Battery Box
1
2
15
Battery Box Screws
2
1 ea
16
Battery Pack
1
1
17
AC/DC Adapter
1
4A/4B Left and Right Propellers
5
Shaft Housing
6A/6B Left and Right Drive Shafts
6C
Shaft Coupling
7A
Motor Shaft Adaptor
1
18
Electric Speed Controller
1
7B/7C Left and Right Motor Fans
1 ea
19
Crystal Set
1
8A/8B Left and Right 380 Motors
1 ea
20
Transmitter
1
9
Motor Retainer
1
PLEASE READ THE FOLLOWING CAREFULLY
The manufacturer and/or distributor has provided the parts list and assembly diagram in this manual as a reference tool only. Neither the manufacturer
or distributor makes any representation or warranty of any kind to the buyer
that he or she is qualified to make any repairs to the product, or that he or
she is qualified to replace any parts of the product. In fact, the manufacturer
and/or distributor expressly states that all repairs and parts replacements
should be undertaken by certified and licensed technicians, and not by the
buyer. The buyer assumes all risk and liability arising out of his or her repairs
to the original product or replacement parts thereto, or arising out of his
or her installation of replacement parts thereto.
REV 07g
SKU 95641
For technical questions, please call 1-800-444-3353.
Page 14
ASSEMBLY DIAGRAM
4
4
Record Product’s Serial Number Here:
Note: If product has no serial number, record month and year of purchase instead.
Note: Some parts are listed and shown for illustration purposes only, and are not available individually as replacement parts.
REV 07g
SKU 95641
For technical questions, please call 1-800-444-3353.
Page 15
INTERIOR OF CABIN LAYOUT
Twin 380
Motors
Electric Speed
Controller (18)
Battery Pack
(16)
Twin Propeller
Shafts
SKU 95641
For technical questions, please call 1-800-444-3353.
Page 16