1
Instructions -- Parts List
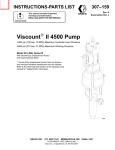
ViscountR II Pump
Hydraulic powered, severe duty pump for use with solventborne
and waterborne paints and coatings.
1500 psi (10.3 MPa, 103 bar) Maximum Hydraulic Input Pressure
1000 psi (7 MPa, 69 bar) Maximum Pump Outlet Pressure
Model 210313, Series E
With Severe-Duty Displacement Pump*
* Severe-Duty displacement pumps have an abrasion
and corrosion-resistant displacement rod and cylinder.
Refer to the Technical Data section of the separate pump
manual for “Wetted Parts” information.
Important Safety Instructions
Read all warnings and instructions in this manual.
Save these instructions.
307160T
EN
Table of Contents
Warnings . . . . . . . . . . . . . . . . . . . . . . . . . . . . . . . . . . . . . . 2
Installation . . . . . . . . . . . . . . . . . . . . . . . . . . . . . . . . . . . . . 5
Operation . . . . . . . . . . . . . . . . . . . . . . . . . . . . . . . . . . . . . 8
Maintenance . . . . . . . . . . . . . . . . . . . . . . . . . . . . . . . . . . 10
Troubleshooting . . . . . . . . . . . . . . . . . . . . . . . . . . . . . . . 11
Service . . . . . . . . . . . . . . . . . . . . . . . . . . . . . . . . . . . . . . 12
Parts . . . . . . . . . . . . . . . . . . . . . . . . . . . . . . . . . . . . . . . . 13
Dimensions . . . . . . . . . . . . . . . . . . . . . . . . . . . . . . . . . . .
Mounting holes . . . . . . . . . . . . . . . . . . . . . . . . . . . . . . . .
Performance Charts . . . . . . . . . . . . . . . . . . . . . . . . . . .
Technical Data . . . . . . . . . . . . . . . . . . . . . . . . . . . . . . . .
Graco Standard Warranty . . . . . . . . . . . . . . . . . . . . . .
Graco Information . . . . . . . . . . . . . . . . . . . . . . . . . . . . .
14
14
15
15
16
16
Symbols
Warning Symbol
Caution Symbol
WARNING
CAUTION
This symbol alerts you to the possibility of serious
injury or death if you do not follow the instructions.
This symbol alerts you to the possibility of damage to
or destruction of equipment if you do not follow the
instructions.
WARNING
EQUIPMENT MISUSE HAZARD
Equipment misuse can cause the equipment to rupture or malfunction and result in serious injury.
D This equipment is for professional use only.
D Read all instruction manuals, tags, and labels before operating the equipment.
D Use the equipment only for its intended purpose. If you are not sure, call your Graco distributor.
D Do not alter or modify this equipment.
D Check equipment daily. Repair or replace worn or damaged parts immediately.
D Do not exceed the maximum working pressure stated on the equipment or in the Technical Data
for your equipment. Do not exceed the maximum working pressure of the lowest rated component
in your system.
D Use fluids and solvents which are compatible with the equipment wetted parts. Refer to the Technical Data section of all equipment manuals. Read the fluid and solvent manufacturer’s warnings.
D Handle hoses carefully. Do not pull on hoses to move equipment.
D Route hoses away from traffic areas, sharp edges, moving parts, and hot surfaces. Do not expose
Graco hoses to temperatures above 66_C (150_F) or below --40_C (--40_F).
D Wear hearing protection when operating this equipment.
D Do not move or lift pressurized equipment.
D Comply with all applicable local, state, and national fire, electrical, and safety regulations.
2
307160
WARNING
INJECTION HAZARD
Spray from the gun/valve, leaks or ruptured components can inject fluid into your body and cause extremely serious injury, including the need for amputation. Fluid splashed in the eyes or on the skin can
also cause serious injury.
D Fluid injected into the skin might look like just a cut, but it is a serious injury. Get immediate medical attention.
D Do not point the gun/valve at anyone or at any part of the body.
D Do not put your hand or fingers over the spray tip/valve nozzle.
D Do not stop or deflect leaks with your hand, body, glove or rag.
D Do not “blow back” fluid; this is not an air spray system.
D Always have the tip guard and the trigger guard on the gun/valve when spraying/dispensing.
D Be sure the gun/valve trigger safety operates before spraying/dispensing.
D Lock the gun/valve trigger safety when you stop spraying/dispensing.
D Follow the Pressure Relief Procedure on page 8 if the spray tip clogs and before cleaning,
checking or servicing the equipment.
D Tighten all fluid connections before operating the equipment.
D Check the hoses, tubes, and couplings daily. Replace worn, damaged, or loose parts immediately.
Permanently coupled hoses cannot be repaired; replace the entire hose.
MOVING PARTS HAZARD
Moving parts can pinch or amputate your fingers.
D Keep clear of all moving parts when starting or operating the pump.
D Before checking or servicing the equipment, follow the Pressure Relief Procedure on page 8 to
prevent the equipment from starting unexpectedly.
3
307160
WARNING
FIRE AND EXPLOSION HAZARD
Improper grounding, poor ventilation, open flames or sparks can cause a hazardous condition and result in a fire or explosion and serious injury.
D Ground the equipment and the object being sprayed. Refer to Grounding on page 5.
D If there is any static sparking or you feel an electric shock while using this equipment, stop spraying/dispensing immediately. Do not use the equipment until you identify and correct the problem.
D Provide fresh air ventilation to avoid the buildup of flammable fumes from solvents or the fluid
being sprayed/dispensed.
D Keep the spray/dispense area free of debris, including solvent, rags, and gasoline.
D Before operating this equipment, electrically disconnect all equipment in the spray/dispense area.
D Before operating this equipment, extinguish all open flames or pilot lights in the spray/dispense
area.
D Do not smoke in the spray/dispense area.
D Do not turn on or off any light switch in the spray/dispense area while spraying/dispensing or while
operating if fumes are present.
D Do not operate a gasoline engine in the spray/dispense area.
TOXIC FLUID HAZARD
Hazardous fluid or toxic fumes can cause serious injury or death if splashed in the eyes or on the skin,
inhaled, or swallowed.
D Know the specific hazards of the fluid you are using.
D Store hazardous fluid in an approved container. Dispose of hazardous fluid according to all local,
state and national guidelines.
D Always wear protective eyewear, gloves, clothing and respirator as recommended by the fluid and
solvent manufacturer.
4
307160
Installation
General Information
NOTE: Reference numbers and letters in parentheses
in the text refer to the callouts in the figures and the
parts drawing.
NOTE: Always use Genuine Graco Parts and Accessories, available from your Graco distributor.
Grounding
WARNING
FIRE AND EXPLOSION HAZARD
Before operating the pump, ground the
system as explained below. Also read
the section FIRE OR EXPLOSION HAZARD on page 4.
D Spray gun: Ground through connection to a properly grounded fluid hose and sprayer.
D Object being sprayed: Follow the local code.
D Fluid supply container: Follow the local code.
D Solvent pails used when flushing: Follow the local
code. Use only metal pails, which are conductive,
placed on a grounded surface. Do not place the pail
on a nonconductive surface, such as paper or
cardboard, which interrupts the grounding continuity.
D To maintain grounding continuity when flushing or
relieving pressure, hold a metal part of the spray
gun firmly to the side of a grounded metal pail, then
trigger the gun.
D Pump: Use a ground wire and clamp as shown in
Fig. 4. Loosen the grounding lug locknut (W) and
washer (X). Insert one end of a 12 ga (1.5 mm@)
minimum ground wire (Y) into the slot in lug (Z) and
tighten the locknut securely. Connect the other end
of the wire to a true earth ground. Order part number 237569 Grounding Clamp and Wire.
Z
X
Y
D Fluid and hydraulic hoses: Use only grounded
hoses with a maximum of 500 ft (150 m) combined
hose length to ensure grounding continuity.
D Hydraulic Power Supply: Follow the manufacturer’s
recommendations.
5
307160
W
Fig. 4
06431
Installation
Mount the pump to suit the type of installation planned.
Pump dimensions and mounting hole layout are shown
on page 14.
CAUTION
The hydraulic supply system must be kept clean at
all times to avoid damage to the motor and hydraulic
power supply. Blow out all hydraulic lines with air and
flush thoroughly with compatible solvent before
connecting the lines to the motor.
Always plug the hydraulic inlets, outlets, and lines
when disconnecting them for any reason, to avoid
introducing dirt and other contaminants into the system.
Filters
Be sure that your hydraulic power supply is equipped
with a suction filter to the hydraulic pump and a system
return line filter of 10 micron size.
Carefully follow the manufacturer’s recommendations
on reservoir and filter cleaning, and periodic changes
of hydraulic fluid. Use only Graco-approved hydraulic
oil.
Hydraulic Lines
Connect a 3/4 in. minimum ID hydraulic supply line (L)
to the 3.4 npt inlet of the hydraulic motor. See the
Typical Installation on page 7. Connect a 1 in. minimum ID return line (D) to the 1” npt return port on the
hydraulic motor.
D A pressure reducing valve (H), with a drain
line (K) running directly to the hydraulic return
line (D).
D An accumulator (J) to reduce the hammering
effect caused by the motor reversing direction.
D A shutoff valve (E) isolates the pump for service.
CAUTION
Do not exceed 10 gpm (37.8 liter/minute) volume to
avoid pump stalling.
Drip Pan
The hydraulic motor is equipped with a drip pan to
collect any leakage that might occur. connect a 1/4 in.
ID drain hose (Q) to the barbed hose fitting on the drip
pan.
Drain Valve
Install a high pressure fluid drain valve (B) near the
pump fluid outlet to relieve fluid pressure in the displacement pump and hose during shutdown.
WARNING
The fluid drain valve (B) is required in your system
to help reduce the risk of serious bodily injury,
including fluid injection and splashing in the eyes or
on the skin if you are adjusting or repairing any part
of the system. Triggering the gun to relieve pressure may not be sufficient.
On the hydraulic supply side (C), install the following
accessories shown in Fig. 5, using adapters as necessary.
Fluid Supply Lines
D A shutoff valve (E) isolates the pump for service.
Connect a grounded fluid supply line to the 1--1/2” npt
fluid outlet on the displacement pump. Attach a fluid
supply line to the 2” npt pump fluid intake.
D A fluid pressure gauge (F) to monitor hydraulic oil
pressure to the motor and to avoid overpressurizing
the motor or displacement pump, and a pressureand temperature-compensated flow control
valve (G) to prevent the motor from running too
fast and possibly damaging itself.
6
307160
If you are pumping through a long hose, or if the fluid
being pumped is compressible, giving an accumulator
effect, install a check valve at the pump outlet. Be sure
that the check valve selected is capable of handling
the flow and pressure developed in your system.
Installation
E
F
H
J
K
C
N
L
S
D
G
P
A
R
T
B
Q
0627A
M
KEY
A Fluid Hose to Gun
B Fluid Drain Valve
C Suction Hose
D Hydraulic Return Line
E Hydraulic Return Shutoff Valve
F Pressure Gauge
G Flow Control Valve
H Pressure Reducing Valve
J Accumulator
Fig. 5
7
307160
K
L
M
N
P
Q
R
S
T
Drain Line (from pressure reducing valve)
Hydraulic Supply Line
Hydraulic Power Supply
Ground Wire
Wet-Cup
Drain Line (from motor drip pan)
Check Valve
Hydraulic Supply Shutoff Valve
Return Line Filter
Operation
Pressure Relief Procedure
WARNING
INJECTION HAZARD
Fluid under high pressure can be injected through the skin and cause serious injury. To reduce the risk of an injury
from injection, splashing fluid, or moving parts, follow the Pressure Relief Procedure whenever you
D
D
D
D
Are instructed to relieve the pressure
Stop spraying/dispensing
Check or service any of the system equipment
Install or clean the spray tips/nozzles
If you suspect that the spray tip or hose is completely
clogged, or that pressure has not been fully relieved
after following the steps above, very slowly loosen the
tip guard retaining nut or hose end coupling and relieve
pressure gradually, then loosen completely, then clear
the tip or hose.
CAUTION
When shutting down the hydraulic system, always
shut off the hydraulic supply line shutoff valve (S)
first, and then the return line shutoff valve (E). This
is to prevent overpressurizing the motor or its seals.
When starting the hydraulic system, open the return
line shutoff valve first.
1. Engage the safety latch.
2. Shut off the power supply to the hydraulic motor.
3. Disengage the gun safety latch.
4. Hold a metal part of the gun firmly to the side of a
grounded metal pail. Trigger to relieve pressure.
5. Open the fluid drain valve (required in your system) having a container ready to catch the drainage. Leave the drain valve open until you are
ready to spray again.
8
307160
Flushing the Pump
Flush the pump before using it for the first time to
remove the lightweight oil which is left in the pump
after factory testing to protect it from corrosion. Be
sure the solvent used is compatible with the fluid to be
sprayed, and with the wetted parts of the pump. Refer
to the Technical Data in the separate displacement
pump manual for the wetted parts. Flush until clean
solvent comes from the gun. In a circulating system,
flush long enough to clean the entire system.
Operation
WARNING
COMPONENT RUPTURE HAZARD
To reduce the risk of overpressurizing
your system, which could cause component rupture and serious injury, never
exceed the specified Maximum Hydraulic Input
Pressure to the pump (see the Technical Data on
page 15).
To prevent overpressurizing the hydraulic motor or
its seals, always shut off the supply line valve (S)
first, then shut off the return line valve (E).
Starting and Adjusting the Pump
WARNING
To reduce the risk of serious injury whenever you
are instructed to relieve pressure, always follow the
Pressure Relief Procedure on page 8.
NOTE: If the pump is not immersed in fluid, fill the
wet-cup (P) 1/3 full with Graco Throat Seal Liquid
(TSL) or a compatible solvent, to prevent fluid from
drying on the displacement rod and damaging the
pump packings. Refer to the Typical Installation on
page 7. Check the tightness of the packing nut/wetcup weekly. Before adjusting, relieve the pressure.
The nut should be tight enough to prevent leakage, but
no tighter.
Check the hydraulic fluid level, and add fluid as necessary to the fill lines, before each use. Turn on the
hydraulic power supply. Open the return line shutoff
valve (E). Slowly open the hydraulic supply shutoff
valve (S). Run the pump slowly until all air is pushed
out of the lines and fluid is flowing smoothly. Close the
spray gun; the pump will stall. Use the lowest pressure
possible to get the desired results. Higher pressures
will cause premature tip and pump wear.
9
307160
NOTE: In a direct supply system, the pump starts and
stops automatically when the spray gun is opened and
closed. In a circulating system, the pump runs continuously, speeding up or slowing down as the spray gun is
opened or closed, until the hydraulic power supply is
turned off.
CAUTION
Never allow the hydraulic oil temperature to exceed
130_ F (54_ C). The pump seals will wear faster and
leaking may occur at higher temperatures.
WARNING
To reduce the risk of overpressurizing the system,
always follow these precautions:
Never exceed 1500 psi (10.3 MPa, 103 bar), or
10 gpm (37.8 liter/min) hydraulic input to the motor.
Never exceed 1000 psi (7 MPa, 69 bar) maximum
pump outlet pressure.
Check Valve Adjustment
The fluid piston and intake valve are factory set for
high-volume pumping of heavy, spray-viscosity fluids.
To adjust the check valves, refer to the operation
section in the separate displacement pump manual.
Maintenance
Carefully monitor your fluid supply. If your pump us
running too fast, or accelerates quickly, it is probably
out of fluid. Shut off the hydraulic power supply immediately to prevent damage to the pump. If the fluid
supply is empty, and air has entered the fluid lines, be
sure to prime the pump again before regular operation.
Flush the pump frequently enough to prevent the fluid
from drying or settling in the pump and hoses to prevent costly damage. Use a compatible solvent. Refer
to the Technical Data in the separate displacement
pump manual for a list of the wetted parts.
If you are pumping water-base fluid, first flush with
water and then with a compatible solvent.
Corrosion Protection
WARNING
To reduce the risk of serious injury whenever you
are instructed to relieve pressure, always follow the
Pressure Relief Procedure on page 8.
10
307160
CAUTION
To help prevent corrosion of the pump, never leave
the pump filled with water or water-base fluids, or air
during non-use. After flushing, flush the pump again
with a compatible solvent, such as mineral spirits,
relieve the pressure, and leave a coating of solvent
in the pump and hoses..
Shutdown
WARNING
To reduce the risk of serious injury whenever you
are instructed to relieve pressure, always follow the
Pressure Relief Procedure on page 8.
Always stop the pump with the displacement rod in the
down position. This prevents fluid from drying on the
displacement rod and damaging the packings when
the pump is restarted. Relieve the pressure whenever
you shut off the pump.
Troubleshooting
WARNING
To reduce the risk of serious injury whenever you
are instructed to relieve pressure, always follow the
Pressure Relief Procedure on page 8.
Before servicing this equipment, always make sure to
relieve the pressure.
NOTE: Check all possible problems and solutions
before disassembling the pump.
Problem
Cause
Pump fails to operate
Restricted lines or inadequate hydraulic Clear lines. Increase hydraulic supply.
supply
Pump operates, but the fluid
output is low on both strokes
Solution
Insufficient hydraulic pressure; closed
or clogged valves, etc.
Open; clean.
Exhausted fluid supply
Refill and reprime, or flush.*
Clogged fluid line, valves, etc.
Clear.**
Damaged hydraulic motor
Service the motor. See manual 307158
Dried fluid seizure of displacement rod.
Clean. See Displacement pump manual
308043. ALso, keep TSL in the pump
wet-cup and stop the pump at the bottom of its stroke during non-use.
Restricted lines, or inadequate hydraulic supply
Clear lines. Increase hydraulic supply.
Insufficient hydraulic pressure; closed
or clogged valves, etc.
Open; clean.
Exhausted fluid supply
Refill and reprime or flush.*
Clogged fluid line, valves, etc.
Clear.**
Piston check valve needs adjustment
Adjust. See manual 308043.
Packing nut too tight
Loosen.
Loose packing nut or worn throat packings.
Tighten packing nut or replace packings
as needed, See manual 308043.
Pump operates, but the output The intake valve is stuck open or worn.
is low on the downstroke
Clear; service. See manual 308043.
Pump operates, but the output The piston valve is stuck open, or the
is low on the upstroke
packings are worn
Clear; service. See manual 308043.
Pump is operating erratically,
or speeds up suddenly
Exhausted fluid supply
Refill and reprime or flush.*
The intake valve is stuck open or worn
Check; replace parts as needed. See
manual 308043.
The piston valve is stuck open or the
packings are worn.
Check; replace parts as needed. See
manual 308043.
Excessive hydraulic fluid supply volume Lower volume.
Air entrained in fluid
Purge all air; change fluid.
* Stop the pump immediately if it is running too fast; check the fluid supply. If empty, refill and reprime the pump
being sure to eliminate all air from the system, or flush the pump and store it with an oil-based solvent, such as
mineral spirits, to prevent corrosion.
** Relieve the pressure, and then disconnect the fluid line. If the pump starts when the hydraulic power is restored, line, etc. is clogged.
11
307160
Service
NOTE: To service the displacement pump, refer to
manual 308043, supplied.
NOTE: To service the hydraulic motor, refer to manual
308158, supplied.
1
Torque to 40--50 ft-lb (54--68 NSm)
Disassembly (See Fig. 6)
WARNING
To reduce the risk of serious injury whenever you
are instructed to relieve pressure, always follow the
Pressure Relief Procedure on page 8.
11
1. Flush the pump with a compatible solvent, if possible. Stop the pump at the bottom of its stroke.
Relieve the pressure.
2. Disconnect the hoses from the pump. Plug the
hydraulic lines to prevent contamination. Remove
the pump from its mounting and clamp it in a vise.
8
1
9
7
4. Remove the lower cotter pin (1). Loosen the
locknut (4). Unscrew the connecting rod (9) from
the displacement rod (T).
5
Reassembly (See Fig. 6)
6
4
T
1
3. Remove the upper cotter pin (1). Unscrew the
coupling nut (7). Unscrew the three tie rod
locknuts (3), then unscrew the three tie rods (6)
from the hydraulic motor (11). Carefully pull the
displacement pump (12) away from the motor (11).
1. Screw the three tie rods (6) into the motor (11).
Torque to 40--50 ft-lb (54--68 NSm).
2. Screw the connecting rod (9) into the displacement
rod (T). Install the cotter pin (1) and tighten the
locknut (4).
3. Guide the displacement pump (12) onto the tie
rods (6).
12
4. Install the locknuts (3) on the tie rods. Torque the
nuts to 40--50 ft--lb (54-68 NSm).
31
5. Tighten the coupling nut (7). Insert the upper cotter
pin (1) through the coupling (8)
6. Connect the hoses to the pump. Run the pump
slowly to be sure it runs smoothly and does not
bind. If necessary, adjust the displacement pump
tie rods and locknuts (see manual 308043), or the
tie rods (6) and locknuts (3) which attach the
motor, to eliminate binding.
Fig. 6
12
307160
06640
7. Reconnect the ground wire to the motor.
Parts
11
8
7
5
1
9
6
4
1
12
3
06640
13
307160
Ref.
No.
Part No.
Description
1
3
100103
101712
4
5
6
101936
158674
167911
7
8
9
168210
168211
168212
11
235345
12
210208
PIN, cotter; 1.5” (38.1 mm) long
LOCKNUT; 5/8--11;
with nylon insert
NUT, hex, jam; 3/4--10
O-RING; nitrile rubber
ROD, tie; 7” (177.8 mm) long,
shoulder-to-shoulder
NUT, shouldered
COUPLING, connecting rod
ROD, connecting;
3.69” (93.7 mm) long
HYDRAULIC MOTOR
See manual 307158 for parts
DISPLACEMENT PUMP
See manual 308043 for parts
Qty.
2
3
1
1
3
1
1
1
1
1
Dimensions
Mounting Hole
Layout
gasket
161806
1” npt
outlet
3/4 npt
inlet
48.1”
(1220 mm)
4” (102 mm)
four 0.437” (11.1 mm)
holes on 10.5”
(267 mm) bolt circle
9.75”
(247.7 mm)
diameter
90_
23.2”
(585 mm)
45_
1--1/2” npt
fluid outlet
06641
2” npt fluid inlet
14
307160
1.38”
(34.9 mm)
radius
06595
Technical Data
Maximum hydraulic input pressure . . . . . . . . . . . . . . . . . . . . . . . . . . . . . . . . . . . . . . . . . . . . 1500 psi (10.3 MPa, 103 bar)
Maximum pump outlet pressure . . . . . . . . . . . . . . . . . . . . . . . . . . . . . . . . . . . . . . . . . . . . . . . . . 1000 psi (7.0 MPa, 69 bar)
Hydraulic fluid consumption . . . . . . . . . . . . . . . . . . . . . . . . . . . . . . . . . . . . . . . . . . . . . . . . . . . . 0.2 gal (0.76 liter) per cycle
Maximum Recommended Pump Speed . . . . . . . . . . . . . . . . . . . . . . . . . . . . . . . . 50 cycles/min; 15 gpm (56.8 liter/min)
Wetted parts . . . . . . . . . . . . . . . . . . . . . . . . . . . . . . . . . . . . . . . . . . . . . . . . . . . . . Displacement Pump: See manual 308043
Pump Performance Charts
Pump Pressure Developed
Hydraulic
Input Pressure
Pump Outlet
Pressure
Pump Output
Pump
Speed
Hydraulic
Fluid Required
Pump
Output
(Cycles/min)
gpm
liter/min
gpm
(0.9 MPa, 9 bar)
5
1.0
3.8
1.5
5.6
(1.4 MPa, 14 bar)
10
2.0
7.6
3.0
11.4
15
3.0
11.4
4.5
17.0
(2.3 MPa, 23 bar)
20
4.0
15.1
6.0
22.7
(2.7 MPa, 27 bar)
25
5.0
18.9
7.5
28.4
30
6.0
22.7
9.0
34.1
100 psi
(0.7 MPa, 7 bar)
66 psi
(0.45 MPa, 4.5 bar)
200 psi
(1.4 MPa, 14 bar)
132 psi
300 psi
(2.1 MPa, 21 bar)
199 psi
400 psi
(2.8 MPa, 28 bar)
265 psi
(1.8 MPa, 18 bar)
500 psi
(3.4 MPa, 34 bar)
331 psi
600 psi
(4.1 MPa, 41 bar)
397 psi
liter/min
700 psi
(4.8 MPa, 48 bar)
463 psi
(3.2 MPa, 32 bar)
800 psi
(5.5 MPa, 55 bar)
530 psi
(3.6 MPa, 36 bar)
35
7.0
26.5
10.5
39.7
900 psi
(6.2 MPa, 62 bar)
596 psi
(4.0 MPa, 40 bar)
40
8.0
30.3
12.0
45.4
45
9.0
34.1
13.5
51.0
50
10.0
37.8
15.0
56.8
1000 psi
(6.9 MPa, 69 bar)
662 psi
(4.5 MPa, 45 bar)
1100 psi
(7.6 MPa, 76 bar)
728 psi
(5.0 MPa, 50 bar)
1200 psi
(8.3 MPa, 83 bar)
794 psi
(5.4 MPa, 54 bar)
1300 psi
(9.0 MPa, 90 bar)
861 psi
(5.9 MPa, 59 bar)
1400 psi
(9.7 MPa, 97 bar)
927 psi
(6.4 MPa, 64 bar)
1500 psi
(10.3 MPa, 103 bar)
993 psi
(6.8 MPa, 68 bar)
15
307160
Graco Standard Warranty
Graco warrants all equipment manufactured by Graco and bearing its name to be free from defects in material and workmanship on the
date of sale by an authorized Graco distributor to the original purchaser for use. With the exception of any special, extended, or limited
warranty published by Graco, Graco will, for a period of twelve months from the date of sale, repair or replace any part of the equipment
determined by Graco to be defective. This warranty applies only when the equipment is installed, operated and maintained in accordance with Graco’s written recommendations.
This warranty does not cover, and Graco shall not be liable for general wear and tear, or any malfunction, damage or wear caused by
faulty installation, misapplication, abrasion, corrosion, inadequate or improper maintenance, negligence, accident, tampering, or substitution of non--Graco component parts. Nor shall Graco be liable for malfunction, damage or wear caused by the incompatibility of
Graco equipment with structures, accessories, equipment or materials not supplied by Graco, or the improper design, manufacture,
installation, operation or maintenance of structures, accessories, equipment or materials not supplied by Graco.
This warranty is conditioned upon the prepaid return of the equipment claimed to be defective to an authorized Graco distributor for
verification of the claimed defect. If the claimed defect is verified, Graco will repair or replace free of charge any defective parts. The
equipment will be returned to the original purchaser transportation prepaid. If inspection of the equipment does not disclose any defect
in material or workmanship, repairs will be made at a reasonable charge, which charges may include the costs of parts, labor, and
transportation.
THIS WARRANTY IS EXCLUSIVE, AND IS IN LIEU OF ANY OTHER WARRANTIES, EXPRESS OR IMPLIED, INCLUDING BUT
NOT LIMITED TO WARRANTY OF MERCHANTABILITY OR WARRANTY OF FITNESS FOR A PARTICULAR PURPOSE.
Graco’s sole obligation and buyer’s sole remedy for any breach of warranty shall be as set forth above. The buyer agrees that no other
remedy (including, but not limited to, incidental or consequential damages for lost profits, lost sales, injury to person or property, or any
other incidental or consequential loss) shall be available. Any action for breach of warranty must be brought within two (2) years of the
date of sale.
Graco makes no warranty, and disclaims all implied warranties of merchantability and fitness for a particular purpose in connection
with accessories, equipment, materials or components sold but not manufactured by Graco. These items sold, but not manufactured
by Graco (such as electric motors, switches, hose, etc.), are subject to the warranty, if any, of their manufacturer. Graco will provide
purchaser with reasonable assistance in making any claim for breach of these warranties.
In no event will Graco be liable for indirect, incidental, special or consequential damages resulting from Graco supplying equipment
hereunder, or the furnishing, performance, or use of any products or other goods sold hereto, whether due to a breach of contract,
breach of warranty, the negligence of Graco, or otherwise.
FOR GRACO CANADA CUSTOMERS
The parties acknowledge that they have required that the present document, as well as all documents, notices and legal proceedings
entered into, given or instituted pursuant hereto or relating directly or indirectly hereto, be drawn up in English. Les parties reconnaissent avoir convenu que la rédaction du présente document sera en Anglais, ainsi que tous documents, avis et procédures judiciaires
exécutés, donnés ou intentés à la suite de ou en rapport, directement ou indirectement, avec les procedures concernées.
Graco Information
For the latest information about Graco products, visit www.graco.com. For patent information, see www.graco.com/
patents.
TO PLACE AN ORDER, contact your Graco distributor or call to identify the distributor closest to you:
Phone: 612--623--6921 or Toll Free: 1--800--328--0211 Fax: 612--378--3505
All written and visual data contained in this document reflects the latest product information available at the time of publication.
Graco reserves the right to make changes at any time without notice.
Original instructions. This manual contains English. MM 307160
Graco Headquarters: Minneapolis
International Offices: Belgium, China, Japan, Korea
GRACO INC. AND SUBSIDIARIES S P.O. BOX 1441 S MINNEAPOLIS, MN 55440--1441 S USA
Copyright 1975, Graco Inc. All Graco manufacturing locations are registered to ISO 9001.
www.graco.com
Revised September 2014
16
307160