1
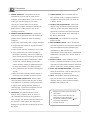
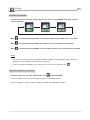
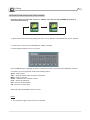
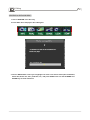
Precautions
1
CAUTION
RISK OF ELECTRIC SHOCK
DO NOT OPEN
CAUTION:
TO PREVENT THE RISK OF ELECTRIC SHOCK,
DO NOT REMOVE COVER (OR BACK).
NO USER-SERVICEABLE PARTS INSIDE.
REFER SERVICING TO
QUALIFIED SERVICE PERSONNEL.
Explanation Graphical Symbols:
The lightning flash with arrowhead
symbol, within an equilateral triangle,
is intended to alert the user to the
presence of uninsulated "dangerous
voltage" within the product's enclosure
that may be of sufficient magnitude to
constitute a risk of electric shock to
persons.
The exclamation point within an
equilateral triangle is intended to alert
the user to the presence of important
operating and maintenance (servicing)
instructions in the literature
accompanying the appliance.
WARNING:
TO PREVENT FIRE OR SHOCK HAZARD, DO NOT EXPOSE THIS APPLIANCE TO RAIN OR MOISTURE.
To avoid electric shock, do not open the cabinet. Refer servicing to qualified personnel only.
The apparatus shall not be exposed to water dripping or splashing, and no objects filled with liquids, such as vases,
shall be placed on the apparatus.
CAUTION:
Use of controls or adjustments or performance of procedures other than those specified herein may result in
hazardous radiation exposure.
INVISIBLE LASER RADIATION WHEN OPEN AND INTERLOCKS DEFEATED. AVOID EXPOSURE TO BEAM.
Important safety instructions
1. READ INSTRUCTIONS - All the safety and
operating instructions should be read before the
product is operated.
2. RETAIN INSTRUCTIONS - The safety and
operating instructions should be retained for
future reference.
3. HEED WARNING - All warnings on the product
and in the operating instructions should be
adhered to.
4. FOLLOW INSTRUCTIONS - All operating and
use instructions should be followed.
5. CLEANING - Unplug this product from the wall
outlet before cleaning. Do not use liquid cleaners
or aerosol cleaners. Use a wet cloth for cleaning.
6. ATTACHMENTS - Do not use attachments not
recommended by the product manufacturer, as
they may cause hazards.
7. WATER AND MOISTURE - Do not use this product near water - for example, near a bath tub,
wash bowl, kitchen sink or laundry tub; in a wet
basement; or near a swimming pool and the like.
8. ACCESSORIES - Do not place this product on an
unstable cart, tripod, bracket or table. The product
may fall, causing serious injury to a child or adult,
and serious damage to the product.
9. A PRODUCT AND CART
COMBINATION SHOULD
BE MOVED WITH CARE Quick stops, excessive force
and uneven surfaces may cause
the product and cart combination to overturn.
10.VENTILATION - Slots and openings in the cabinet
are provided for ventilation and to ensure reliable
operation of the product and to protect it from
overheating, and these openings must not be
blocked or covered. The openings should never
be blocked by placing the product on a bed, sofa,
rug or other similar surface. This product should
not be placed in a built-in installation, such as a
bookcase or rack, unless proper ventilation is
provided or the manufacturer's instructions have
been adhered to .
Precautions
11. POWER SOURCES - This product should be
operated only from the type of power source
2
15. OVERLOADING - Do not overload wall outlets, extension cords, or integral convenience
indicated on the making label. If you are not sure
receptacles, as this can result in a risk of fire
of the type of power supply to your home,
or electric shock.
consult your product dealer or local power
16. OBJECT AND LIQUID ENTRY - Never push
company. For products intended to operate from
objects of any kind into this product through
battery power, or other sources, refer to the
openings, as they may touch dangerous volt-
operating instructions.
age points or shout-out parts that could result
12. DAMAGE REQUIRING SERVICE - Unplug this
product from the wall outlet and refer servicing to
qualified service personnel under the following
conditions:
a) When the power-supply cord or plug is damaged.
b) If liquid has been spilled, or objects have fallen
into the product.
in a fire or electric shock. Never spill liquid of
any kind on the product.
17. SERVICING - Do not attempt to service this
product yourself.
18. REPLACEMENT PARTS - When replacement
parts are required, be sure the service technician
has used replacement parts specified by the
c) If the product has been exposed to rain or water.
manufacturer or that have the same
d) If the product does not operate normally by
characteristics as the original part. Unauthorized
following the operating instructions. Adjust only
those controls that are covered by the operating
instructions as an improper adjustment of other
substitutions may result in fire, electric shock or
other hazards.
19. SAFETY CHECK - Upon completion of any
controls may result in damage and will often
service or repairs to this product, ask the service
require extensive work by a qualified technician
technician to perform safety checks to determine
to restore the product to its normal operation.
that the product is in proper operating condition.
e) If the product has been dropped or damaged in
any way.
f) When the product exhibits a distinct change in
performance, this indicates a need for service.
13. POWER-CORD PROTECTION - Power-supply
20. WALL OR CEILING MOUNTING - The product
should be mounted to a wall or ceiling only as
recommended by the manufacturer.
21. HEAT - The product should be situated away
from heat sources such as radiators, heat
cords should be routed so that they are not likely
registers, stoves or other products (including
to be walked on or pinched by items placed upon
amplifiers) that produce heat.
or against them, paying particular attention to
cords at plugs, convenience receptacles, and the
point where they exit from the product.
14. LIGHTNING - For added protection for this
product during a lightning storm, or when it is
left unattended and unused for long periods of
time, unplug it from the wall outlet and disconnect
the antenna or cable system. This will prevent
damage to the product due to lightning and powerline surges.
Manufactured under License from Dolby
Laboratories.
"Dolby" and the double-D symbol are
trademarks of Dolby Laboratories.
Confidential Unpublished Works.
1992
-1997 Dolby Laboratories.
All rights reserved.
Precautions
3
Safety precautions
This appliance is a Class I laser product. Direct exposure to beam may cause eye injury.
Power requirement for this appliance is 120V, AC 60 Hz. Please ensure the power supply to your home
is in this range before using the recorder.
Operating precautions
Please use the original packing case and materials when transporting this DVD recorder.
The temperature of the top cover and rear panel of the recorder may be high after playing for a long period of
time. This is normal.
When the recorder is not in use, please remove the disc and turn the power off.
Malfunctions may occur if the recorder has not been used for a long period of time. For best results, turn it on
occasionally.
Some kinds of discs may cause the unit to hang or freeze. Please restart the unit when this occurs. Wait at least
10 seconds before restarting to extend the life of the recorder.
Placement
Picture and sound quality may be affected when the DVD recorder is placed close to a TV set, radio or
VCR, so please place these items as far away from the unit as possible.
Maintenance
The DVD recorder is a high-precision device. The image quality may be impaired if the laser head or disc driving
parts are dirty or damaged.
Condensation precautions
Condensation may damage the recorder. Condensation may occur when:
the
the
the
the
recorder
recorder
recorder
recorder
is
is
is
is
moved from cold to warm surroundings;
placed near a heater or air conditioner;
moved from an air-conditioned room to a place of high temperature and humidity;
being used in an environment with high humidity.
Do not use the recorder where condensation may form easily, otherwise damage may occur to the disc and/or
recorder. Please remove the disc, plug in the power cord and turn the recorder on. The moisture should evaporate
within two or three hours.
Cleaning precautions
Use a soft and dry cloth for cleaning.
For stains that cannot be removed easily, apply some diluted neutral detergent to a cloth, wring the cloth dry,
wipe the stains away, then use a dry cloth to clean. Do not use solvents such as thinner or benzine; otherwise
the surface of the recorder may be damaged.
Special Go Video Features
4
AutoPlay
Tired of wading through confusing and inconsistent menus upon loading rented DVD discs? When the
AutoPlay feature is active, the DVD+VCR will find the beginning of the movie on most discs and begin
playing the movie automatically. To enable this feature, turn AutoPlay "On" in the recorder Setup menu.
To enable the AutoPlay feature:
1. While DVD playback is stopped, press the SETUP button.
2. Use the
buttons to select PLAY and press ENTER.
3. Use the / buttons to select AutoPlay and press ENTER.
4. Use the / buttons to select ON or OFF and press ENTER.
5. Press SETUP repeatedly to exit.
Playback Setup
TV aspect ratio
Rating level
Digital audio output
Closed captions
AutoPlay
YourDVD
On*
Off
On*
Off
YourDVD
The YourDVD feature automatically searches for your preferences every time you load a DVD disc. It then
finds and selects your preferred Audio, Subtitle and Surround Sound settings (if available) so you don't
have to access the disc menu. A special YourDVD screen appears on your TV when a disc is loaded
informing you if your playback preferences were found on the disc. To enable this feature, set your Audio,
Subtitle and Surround preferences in the Setup menu and then enable "YourDVD" as follows:
1.
2.
3.
4.
5.
While DVD playback is stopped, press the SETUP button.
Use the
buttons to select PLAY and press ENTER.
Use the / buttons to select YourDVD and press ENTER.
Use the / buttons to select ON or OFF and press ENTER.
Press SETUP repeatedly to exit.
YourDVD
Searching for Preferences
Subtitle Language
Audio Language
Surround Mode
English
English
2 Channel
Table of Contents
5
Precautions .................................................................................................................................................. 1-3
Special GoVideo Features.......................................................................................................................... 4
Table of Contents ..........................................................................................................................................5
Recorder Overview ...................................................................................................................................... 6-8
Front panel ............................................................................................................................................... 6
Rear panel ............................................................................................................................................... 7
Remote control ........................................................................................................................................ 8
Connections ................................................................................................................................................. 8-12
AUDIO OUTPUT CONNECTIONS .............................................................................................. ........... 8
VIDEO OUTPUT CONNECTIONS ................................................................................. ........................ 9
TV TUNER CONNECTIONS .................................................................................................................. 10
REAR A/V CONNECTIONS ................................................................................................................... 11
FRONT A/V CONNECTIONS .................................................................................................................. 12
Special Features ...........................................................................................................................................13
Playing Discs ............................................................................................................................................... 14-18
PLAYING A DVD-VIDEO DISC ................................................................................................................ 14
PLAYING A DVD+RW OR DVD+R DISC ............................................................................................... 15-16
GENERAL FEATURES ........................................................................................................................... 17-18
Locating a Specific Title, Chapter or Track ................................................................................................. 19-20
LOCATING A TITLE ................................................................................................................................ 19
LOCATING A SPECIFIC CHAPTER OR TRACK ................................................................................... 19
Setting Repeat Options ......................................................................................................................................
20
REPEATING A TITLE, CHAPTER, OR TRACK ...................................................................................... 20
REPEATING A SPECIFIC SEGMENT ..................................................................................................... 20
Playing in Random Order/Bookmark ........................................................................................................... 21
PLAYING TITLES IN RANDOM ORDER ................................................................................................ 21
SETTING AND RECALLING BOOKMARKS ............................................................................................21
Selecting Camera Angles, Languages & Audio Settings ............................................................................ 22
CHANGING THE CAMERA ANGLE ........................................................................................................ 22
SELECTING LANGUAGE AND AUDIO SETTINGS ............................................................................... 22
Playing in a Custom Order .......................................................................................................................... 23
PROGRAMMING A CUSTOM PLAYBACK ORDER ............................................................................... 23
Selecting Subtitles ....................................................................................................................................... 24
DISPLAYING SUBTITLES ....................................................................................................................... 24
Using the On-Screen Display ...................................................................................................................... 25
CHECKING THE STATUS OF THE RECORDER ................................................................................... 25
Setting the Parental Lock ............................................................................................................................ 26
CHANGING YOUR PASSWORD ............................................................................................................ 26
Customizing Function Settings .................................................................................................................... 27
DISPLAYING THE SETUP MENU .......................................................................................................... 27
Recording Options ....................................................................................................................................... 28-31
SEARCHING FOR CHANNELS .............................................................................................................. 28
BASIC RECORDING ............................................................................................................................... 29
ONE-TOUCH RECORDING/SWITCHING TO PLAYBACK MODE/SETTING THE CLOCK .................. 30
TIMER RECORDING ............................................................................................................................... 31
Editing .......................................................................................................................................................... 32-36
EDITING A DVD+RW TITLE ..................................................................................................................................
32
EDITING CHAPTERS HIDING/UNHIDING CHAPTERS ............................................................................
33
SETTING TITLE ICONS AND TITLE NAMES ......................................................................................... 34
EDITING A DVD+RW DISC .................................................................................................................... 35
EDITING A DVD+RW DISC OR DVD+R DISC........................................................................................ 36
Specifications ............................................................................................................................................... 37
Troubleshooting ........................................................................................................................................... 38
Names and functions
6
FRONT PANEL
1
2
3
4
OPEN/CLOSE
5
6
7
8
PLAY/PAUSE
NEXT/PREV
CHANNEL
RECORD
STOP
9
1. POWER button
2. Disc tray
3. Display window
8. RECORD button
9. Front AV connections flap door
10.S-VIDEO IN jack
4. OPEN/CLOSE button
5. PLAY/PAUSE/STOP button
6. NEXT/PREVIOUS button
7. CHANNEL / buttons
11.VIDEO IN jack
12.AUDIO IN(LEFT) jack
13.AUDIO IN(RIGHT) jack
14.DV IN jack
10
11
12
13
14
REAR PANEL
1
1.
2.
3.
4.
5.
6.
2
3 4
8
9
AC IN power cord connector
VIDEO IN jack
VIDEO OUT jack
COMPONENT VIDEO OUT jacks
AUDIO OUT (Left, Right) jacks
COAXIAL DIGITAL AUDIO OUT jack
5
6
10
7
11
12
7. ANTENNA IN jack
8. S-VIDEO IN jack
9. S-VIDEO OUT jack
10. AUDIO IN (Left, Right) jacks
11. OPTICAL DIGITAL AUDIO OUT jack
12. ANTENNA passthrough to TV NO DVD OUTPUT
Recorder Overview
7
REMOTE CONTROL
Please refer to the relevant chapters for detailed descriptions of these buttons:
1
2
OPEN/CLOSE
SETUP
DISPLAY
3
POWER
20
MENU
TITLE
4
5
6
7
8
9
21
22
SUBTITLE
RANDOM
GO TO
AUDIO
PREV.
NEXT
PLAY
PAUSE
REW
FF
SLOW
STOP/RETURN
10
11
12
13
14
15
16
17
18
19
23
24
25
26
27
28
29
30
ENTER
ZOOM
TIMER
EDIT
RECORD
ADD/CLEAR
ANGLE
DISC OP.
INPUT
REPEAT
BOOKMARK
P.SCAN
VIEW
+
VOL
CH
31
32
33
34
35
36
37
38
1. REMOTE SIGNAL EMITTER
2. SETUP
3. OPEN/CLOSE
4. 0-9
5. RANDOM
6. NEXT
7. PREVIOUS
8. FAST FORWARD
9. REWIND
10. ARROW KEYS
11. TIMER
12. ZOOM
13. ANGLE
14. ADD/CLEAR
15. BOOKMARK
16. REPEAT
17. VIEW
18. PROGRESSIVE SCAN
19. DISPLAY
20. POWER
21. MENU
22. TITLE
23. SUBTITLE
24. GO TO
25. AUDIO
26. PLAY
27. PAUSE
28. STOP/RETURN
29. SLOW MOTION
30. ENTER
31. EDIT
32. RECORD
33. DISC OP.
34. INPUT
35. VOL+
36. CH
37. VOL38. CH
Connections
8
AUDIO OUTPUT CONNECTIONS
Dolby Pro Logic Surround Sound (GOOD)
Enjoy Dolby Pro Logic Surround by connecting an amplifier and speaker system (right and left front speakers,
a center speaker, and one or two rear speakers).
To AUDIO IN jacks
S u r r o u n d A u d i o Am p l i f i e r f o r H o me T h e a t er
TA-3020
CENTER
To AUDIO OUT
(LEFT/RIGHT)
jacks
FRONT
RIGHT
FRONT
LEFT
SURROUND LEFT
SURROUND RIGHT
Dolby Digital Surround Sound (BETTER)
Enjoy the dynamic sound of Dolby Digital by connecting an amplifier equipped with a digital audio input and
speaker system.
5.1CH AMPLIFIER
S u r r o u n d A u d i o Am p l i f i e r f o r H o me T h e a t er
TA-3020
- or -
CENTER
FRONT
LEFT
SURROUND LEFT
FRONT
RIGHT
SUBWOOFER
SURROUND RIGHT
Connections
9
VIDEO OUTPUT CONNECTIONS
GOOD
BETTER
Video cable
S-Video cable
TV
TV
Connect your recorder with an S-Video cable (not
included), if your TV is equipped with an S-Video
input. Do not connect the yellow video cable when
using an S-Video cable.
COMPONENT VIDEO OUTPUT (BEST)
The Component Video output allows you to enjoy
the best picture quality from a DVD video disc.
Connect your recorder with a Y /Pb/Pr Component
Video cable (not included) if your TV is equipped
with a Progressive Scan or Component Video input.
Switch between Progressive Scan or Interlace Scan
by pressing the P.SCAN button on the remote
control.
Component
video cables
TV
Connections
10
TV TUNER CONNECTIONS
Outdoor Antenna
DVD recorder
Signal input
Video
cable
Audio
cables
(L, R)
Signal output
TV
NOTE
Refer to your TV owner's manual if necessary.
Turn off the power and unplug both the TV and DVD recorder before making connections.
The ANTENNA OUT jack is for signal pass-thru only NOT FOR DVD PLAYBACK. Use the video, S-Video,
or Component Video outputs for DVD playback.
Connections
11
REAR A/V CONNECTIONS
You can watch or record from an external source (such as a VCR or cable box) connected to the rear panel
Audio/Video inputs.
External Source
S-VIDEO
OUT
VIDEO
OUT
AUDIO OUT
LEFT
RIGHT
Use either S-Video or Video cable
Audio cables
(left, right)
DVD recorder
Video
cable
Audio
cables
(L, R)
Signal output
TV
Connect your recorder with an S-Video cable (not
included) if your external Source is equipped with
an S-Video input. Do not connect the yellow video
cable when using an S-Video cable.
NOTE
Refer to the owner's manual of your external source if necessary.
Turn off the power and unplug your external source and DVD recorder before making connections.
Connections
12
FRONT A/V CONNECTIONS
DVD recorder front panel
PLAY/PAUSE
OPEN/CLOSE
NEXT/PREV
CHANNEL
RECORD
STOP
Use either
S-Video or
Video cable
Audio cables
(left, right)
External Source
S-VIDEO
OUT
Video
cable
VIDEO
OUT
AUDIO OUT
LEFT
RIGHT
Audio
cables
(L, R)
Signal output
Connect your recorder with an S-Video cable (not
included) if your external Source is equipped with
an S-Video input. Do not connect the yellow video
cable when using an S-Video cable.
TV
NOTE
Refer to the owner's manual of your external source if necessary.
Turn off the power and unplug your external source and DVD recorder before making connections.
Special features
13
The digital input connector, known as a 'firewire' or 'IEEE1394', is used to
transmit digital broadband signals commonly used by digital video camcorders.
Audio and video signals are transmitted using a special firewire cable. In
addition to DVD and Hi8 camcorders, PCs with digital video outputs can be
connected to this digital input.
MP3 files are highly compressed music files, which compress standard CD
audio files to ~1/10 of their original size. As a result, up to 10 hours of music
can be stored on a single CD.
Progressive Scan creates a picture with twice the scan lines of traditional
Component Video. This results in reduced picture flickering and motion
artifacts as well as a sharper image on large screens.
The DVD recorder can play both pre-recorded DVDs and CDs. DVDs recorded
using this DVD recorder can be played on most current and future DVD players.
Dolby Digital is a standard developed by Dolby Laboratories for transmitting
from 1 to 5 full-range channels as well as a low frequency (.1) channel for a
total of 5.1 discrete channels. The loudspeakers are arranged as follows: front,
left, front middle, front right, rear left and rear right. Dolby Digital is currently
the most common system and is often used in cinemas.
DoMiNoFXTM is a patented video processing technology that digitally
enhances and refines the picture quality during recording. This results in
visibly superior recordings, and a dramatic improvement when recording
from noisy source material, such as VHS tapes or weak TV signals.
This product contains copy protection technology, which is protected by US
Patent Nos. 4631603, 4577216, 4819098 and 4907093 and other intellectual
property rights. Use of this copy protection technology from Macrovision
Corporation requires the approval of Macrovision. It is intended exclusively
for home use and other limited pay-per-view applications, unless Macrovision
approves some other use in writing.Modifications to the equipment, removal
of components and reverse engineering are prohibited.
Playing Discs
14
PLAYING A DVD-VIDEO DISC
1. Make sure all connections are made correctly, then plug the power cord into a wall outlet.
Press POWER to power on your recorder.
2. Insert a DVD disc.
3. Use the arrow keys or 0-9 buttons to select the
desired title.
Title 1
Title 2
OPEN/CLOSE
SETUP
DISPLAY
POWER
POWER
OPEN/
CLOSE
MENU
TITLE
0-9
SUBTITLE
Title 3
Title 4
RANDOM
5. To remove the disc, press the OPEN/CLOSE button
on the remote control of front panel.
AUDIO
PREV.
NEXT
PLAY
PAUSE
REW
FF
SLOW
STOP/RETURN
PLAY
STOP/
RETURN
ENTER
ARROW
KEYS
4. Press the ENTER or PLAY button.
The selected title will start playing.
GO TO
ENTER
ZOOM
TIMER
EDIT
RECORD
ADD/CLEAR
ANGLE
DISC OP.
INPUT
REPEAT
BOOKMARK
P.SCAN
VIEW
+
VOL
CH
Playing Discs
15
PLAYING A DVD+RW OR DVD+R DISC
DVD Index Screen
1. TITLE
01/01/03-12:14PM
SP 00:00:20
2. TITLE
01/01/03-12:14PM
HQ 00:00:20
3. TITLE
01/01/03-12:14PM
SLP 00:00:20
4. TITLE
01/01/03-12:14PM
HQ 00:00:20
5. TITLE
01/01/03-12:14PM
SP 00:00:20
6. TITLE
01/01/03-12:14PM
EP 00:00:20
PREV
NEXT
Description:
The DVD Index Screen appears when you load a DVD+R or
DVD+RW disc.
1.
2.
3.
4.
1. TITLE
01/01/03-12:14PM
SP 00:00:20
1.
2.
3.
4.
The
The
The
The
name of the recording (the default name is "TITLE").
date and time of the recording.
quality setting of the recording.
length of the recording.
1. Power on your recorder.
2. Insert a DVD+RW or DVD+R disc.
Press the OPEN/CLOSE button on the remote control or front panel. The disc tray will open.
Insert a playable disc with the label side up.
Playing Discs
16
PLAYING A DVD+RW OR DVD+R DISC
3. Browse the DVD Index Screen.
A picture will appear on screen for each recording on
the DVD+R/+RW disc.
4. Use the ARROW keys (UP/DOWN/RIGHT/LEFT) to
highlight the desired title.
5. Press ENTER or PLAY to start playback of the
selected title.
OPEN/CLOSE
SETUP
DISPLAY
OPEN/
CLOSE
POWER
MENU
Use the arrow keys to highlight PREV or NEXT on the
screen and press ENTER to view the next or previous
page of titles.
TITLE
SUBTITLE
RANDOM
GO TO
AUDIO
PREV.
NEXT
PLAY
PAUSE
REW
FF
SLOW
STOP/RETURN
PLAY
6. Stop playback.
Press the STOP/RETURN button once to stop playback.
Press the PLAY button to resume playback.
To restart playback from the beginning of the disc, press
the STOP/RETURN button twice then press the PLAY
button.
ENTER
ARROW
KEYS
ENTER
ZOOM
TIMER
EDIT
RECORD
ADD/CLEAR
ANGLE
DISC OP.
INPUT
REPEAT
BOOKMARK
P.SCAN
VIEW
+
NOTE:
After finishing playback of all titles on the DVD+R or
DVD+RW disc, the recorder will return to the DVD
Index Screen.
STOP/
RETURN
VOL
CH
General features
17
The control bar provides a shortcut to all DVD playback options.
During playback, press GO TO to display the control bar:
Use the RIGHT/LEFT arrow keys to highlight the desired item, then press ENTER to select.
Once the item is selected, use the UP/DOWN arrow keys to set it and press ENTER to confirm.
Press STOP/RETURN to exit the control bar.
Playback mode
Set your preferred playback mode,
including NORMAL, PROGRAM,
RANDOM or one of four REPEAT
modes.
Playback control
Controls disc playback, such as STOP,
PLAY, PAUSE, FAST FORWARD, etc.
Angle
Select your desired camera angle,
if available.
Audio
Select your desired audio setting,
if available.
Title
Select to choose an available title
using the 0-9 keys.
Subtitle
Select to choose an available
subtitle using the 0-9 keys.
Chapter
Select to choose an available chapter
using the 0-9 keys.
Timer
Select to jump directly to a desired
time in the movie using the 0-9 keys.
General features
18
1. Fast forward
Press FF
during normal playback.
The speed will cycle with each press as follows: FF2, FF4, FF16,
FF32 or PLAY.
Press PLAY to resume normal playback.
2. Fast reverse
Press REW
during normal playback.
The speed will cycle with each press as follows: FR2, FR4, FR16,
FR32 or PLAY.
Press PLAY to resume normal playback.
OPEN/CLOSE
SETUP
DISPLAY
POWER
MENU
TITLE
3. Pause
Press PAUSE during normal playback to pause playback.
Press PLAY to resume normal playback.
4. Frame advance
Press PAUSE during normal playback.
One frame is advanced each time you press PAUSE.
Press PLAY to resume normal playback.
5. Slow motion
Press SLOW during normal playback.
The speed will cycle with each press as follows: 1/2, 1/4, 1/8
and PLAY.
Press PLAY to resume normal playback.
NOTE:
The above features vary depending on the disc type
(e.g., MP3, Audio CD, DVD+R, DVD+RW, etc.)
SUBTITLE
RANDOM
GO TO
AUDIO
PREV.
NEXT
PLAY
PAUSE
REW
FF
SLOW
STOP/RETURN
PAUSE
PLAY
SLOW MOTION
ENTER
ARROW
KEYS
ENTER
ZOOM
TIMER
EDIT
RECORD
ADD/CLEAR
ANGLE
DISC OP.
INPUT
REPEAT
BOOKMARK
P.SCAN
VIEW
+
VOL
CH
Locating a Specific Title, Chapter or Track
19
DVD VIDEO DISCS ARE NORMALLY DIVIDED INTO TITLES AND SUB-DIVIDED INTO CHAPTERS.
SIMILARLY, CD'S (AUDIO, HDCD, and MP3) ARE DIVIDED INTO TRACKS. YOU CAN CONVENIENTLY
LOCATE ANY SPECIFIC TITLE, CHAPTER, OR TRACK WITH THIS DVD PLAYER.
TITLE1
CHAPTER1
TITLE2
CHAPTER2
CHAPTER1
CHAPTER2
DVD DISCS
TRACK1
TRACK2
TRACK3
TRACK4
TRACK5
CD DISCS
LOCATING A TITLE
You can locate a specific title (if available on the disc) by pressing the TITLE button.
1. Press the TITLE button
The title menu will appear on the TV screen.
2. Use the ARROW keys
Title 1
Title 2
Title 3
Title 4
to select the title you want.
3. Press the ENTER button
The DVD player will start playback from the first chapter of
the selected title.
NOTE
Example of a title menu.
Some discs do not support this feature.
If different instructions appear on the TV screen, follow those instructions. Procedures may vary depending
on the contents of the DVD.
LOCATING A SPECIFIC CHAPTER OR TRACK
To browse for specific chapters or tracks.
Press the PREV
or NEXT
button repeatedly to display the desired chapter or track.
The player starts playback from the selected chapter or track.
Setting Repeat Options
20
YOU CAN REPEAT TITLES, CHAPTERS, TRACKS, OR SCENES DURING DVD PLAYBACK.
REPEATING A TITLE, CHAPTER, OR TRACK
1. Press the REPEAT button during playback.
The repeat mode changes each time you press the
REPEAT button.
Repeats the current chapter
.
OPEN/CLOSE
SETUP
DISPLAY
POWER
Repeats the current title.
MENU
TITLE
Repeat the entire disc.
SUBTITLE
RANDOM
GO TO
AUDIO
PREV.
NEXT
PLAY
PAUSE
REW
FF
SLOW
STOP/RETURN
Resumes normal playback.
ENTER
ARROW
KEYS
ENTER
REPEATING A SPECIFIC SEGMENT
ZOOM
TIMER
EDIT
RECORD
ADD/CLEAR
ANGLE
DISC OP.
INPUT
REPEAT
BOOKMARK
P.SCAN
VIEW
1. Press GO TO to display the control bar.
2. Use the RIGHT/LEFT keys to highlight
press ENTER.
, then
REPEAT
3. Use the UP/DOWN keys to select A-B, then press
ENTER at the start of the segment you want to
repeat (point A).
4. Press ENTER again at the end of the segment (point B).
The player will automatically return to point A and repeat
playback of the selected segment (A-B).
5. Use the RIGHT/LEFT keys to highlight
, then
press ENTER.
Use the UP/DOWN keys to select NORMAL, then press
ENTER to resume normal playback.
NOTE:
CD Repeat modes: Repeat Track and Repeat Disc.
MP3 Repeat modes: Repeat Song and Repeat Directory (Folder).
+
VOL
CH
Playing in Random Order/Bookmark
21
YOU CAN PLAY TITLES, CHAPTERS OR TRACKS IN RANDOM ORDER.
PLAYING TITLES IN RANDOM ORDER
1. During normal playback press the RANDOM button.
The disc will start playing in random order.
OPEN/CLOSE
SETUP
DISPLAY
POWER
MENU
TITLE
SUBTITLE
RANDOM
GO TO
AUDIO
RANDOM
PREV.
NEXT
PLAY
PAUSE
REW
FF
SLOW
STOP/RETURN
2. Press RANDOM again to resume normal playback.
ENTER
NOTE:
The PREV/NEXT buttons will skip to random tracks in
RANDOM mode.
ZOOM
TIMER
EDIT
RECORD
ADD/CLEAR
ANGLE
DISC OP.
INPUT
REPEAT
BOOKMARK
P.SCAN
VIEW
+
BOOKMARK
VOL
CH
SETTING AND RECALLING BOOKMARKS
You can insert up to nine bookmarks for a given disc, allowing
you to jump quickly to your favorite scene or song.
1. During disc playback, press the BOOKMARK button when playback
reaches the point you want to memorize. The bookmark icon will
appear briefly on the TV screen.
2. Repeat step 1 to enter up to nine bookmarks on the disc.
To recall a bookmarked scene
1. During disc playback, press the VIEW button. BOOKMARK menu will appear on
the screen.
2. Use the LEFT/RIGHT arrow keys to select the bookmark number you want to recall.
3. Press ENTER to start playback from the bookmarked scene.
4. To exit the BOOKMARK menu, press the VIEW button.
To clear a bookmark scene
1. During disc playback, press the VIEW button. The BOOKMARK menu will appear on
the screen.
2. Use the LEFT/RIGHT arrow keys to select the bookmark number you want to erase.
3. Press the ADD/CLEAR button. The check will be cleared from the selected bookmark number.
4. Repeat steps 2 and 3 to erase additional bookmark numbers.
5. To exit the BOOKMARK menu, press the VIEW button.
Selecting Camera Angles, Languages & Audio Settings
22
YOU CAN SELECT FROM MULTIPLE ANGLES AND LANGUAGES (IF AVAILABLE ON THE DISC).
1/4
2/4
Selecting a camera angle
Selecting a language
CHANGING THE CAMERA ANGLE
If the video on the DVD was recorded with multiple angles,
you have the option to change the camera angle of the
scene you are watching.
Press the ANGLE button while playing a scene
recorded with multiple angles.
MENU
TITLE
The ANGLE button is only valid when the angle icon
is shown on the DVD display.
Each time you press the ANGLE button, the angle will change.
SUBTITLE
RANDOM
GO TO
AUDIO
AUDIO
PREV.
NEXT
PLAY
PAUSE
REW
FF
SLOW
STOP/RETURN
ENTER
NOTE:
The angle function will not work on DVD video discs that
do not contain multiple angles.
You can change the camera angle while playback is paused.
When you resume normal playback, the camera angle
changes to the new setting.
The angle icon indicator will glow while playing titles that
contain at least one scene recorded from multiple angles.
ZOOM
TIMER
EDIT
RECORD
ADD/CLEAR
ANGLE
DISC OP.
INPUT
ANGLE
SELECTING LANGUAGE AND AUDIO SETTINGS
Many DVDs include multiple language/audio setup options. You can use the AUDIO button to
quickly view and select the options available on a disc.
1. Press the AUDIO button during playback.
2. Press the AUDIO button repeatedly to cycle through the available options.
NOTE:
The player returns to the initial default settings when you turn on the player or replace a disc.
The player plays a default sound when an unsupported format is selected.
On MP3/CD discs the AUDIO button is used to select LEFT, RIGHT and STEREO.
Playing in a Custom Order
23
YOU CAN PROGRAM A CUSTOM ORDER FOR DISC PLAYBACK (UP TO 99 TRACKS).
PROGRAMMING A CUSTOM PLAYBACK ORDER
1. Press GO TO to display the control bar.
2. Use the RIGHT/LEFT keys to highlight
, then press ENTER.
3. Use the UP/DOWN keys to select PROG, then press ENTER.
Two windows will be displayed on the screen.
The left window displays all titles available on the disc.
OPEN/CLOSE
SETUP
DISPLAY
POWER
MENU
FAVORITE/PROGRAM
TITLE
SUBTITLE
RANDOM
GO TO
AUDIO
PREV.
NEXT
PLAY
PAUSE
REW
FF
SLOW
STOP/RETURN
STOP/
RETURN
ENTER
ARROW
KEYS
ENTER
The right window allows you to edit titles in your preferred order.
2. In the left window, use the UP/DOWN arrow keys to select a
title, and press CLEAR/ADD to add it to the right window.
You can also select a title by pressing ENTER after highlighting
the title.
ADD/
CLEAR
3. To clear a title you have added to the right window, highlight
it and press CLEAR/ADD. Use the RIGHT/LEFT arrow keys
to move the cursor between windows.
4. Press RETURN to return to the control bar.
Select
, use the UP/DOWN arrow keys to select NORMAL
and press ENTER to resume normal playback.
NOTE:
Program playback screens vary slightly with Audio CDs and MP3 CDs.
ZOOM
TIMER
EDIT
RECORD
ADD/CLEAR
ANGLE
DISC OP.
INPUT
REPEAT
BOOKMARK
P.SCAN
VIEW
+
VOL
CH
Selecting Subtitles
24
Some DVDs provide subtitles in one or more languages. You can use the SUBTITLE button to quickly
view and change settings.
HELLO
Selecting a subtitle language
DISPLAYING SUBTITLES
OPEN/CLOSE
SETUP
DISPLAY
POWER
MENU
Press the SUBTITLE button during playback to choose one
of the subtitle languages available on the disc, or turn subtitles off.
TITLE
SUBTITLE
SUBTITLE
RANDOM
GO TO
AUDIO
PREV.
NEXT
PLAY
PAUSE
REW
FF
SLOW
STOP/RETURN
ENTER
ZOOM
TIMER
EDIT
RECORD
ADD/CLEAR
ANGLE
DISC OP.
INPUT
REPEAT
BOOKMARK
P.SCAN
VIEW
+
NOTE:
Due to the nature of some DVDs, you may not be able
to turn off the subtitles as they will appear on screen
automatically.
After you press the SUBTITLE button, the subtitles may
not appear immediately during some scenes.
If the subtitles continue to be displayed on your TV even
after the DVD player has been turned off, please check
the closed caption settings on your TV.
VOL
CH
Using the On-Screen Display
25
YOU CAN VIEW THE RECORDER'S STATUS AND DISC INFORMATION ON YOUR TV SCREEN.
CHECKING STATUS OF THE RECORDER
With this function, you can view the following information on your TV:
- Current title number
- Current chapter number
- Title elapsed time
- Title time remaining
Press the DISPLAY button during DVD playback.
OPEN/CLOSE
SETUP
DISPLAY
POWER
MENU
TITLE
CURRENT TITLE NUMBER/
TOTAL NUMBER OF TITLES
SUBTITLE
RANDOM
CURRENT CHAPTER NUMBER/
TOTAL NUMBER OF CHAPTERS
GO TO
AUDIO
PREV.
NEXT
PLAY
PAUSE
REW
FF
SLOW
STOP/RETURN
ENTER
TITLE ELAPSED TIME
ZOOM
TIMER
EDIT
RECORD
ADD/CLEAR
ANGLE
DISC OP.
INPUT
REPEAT
BOOKMARK
P.SCAN
VIEW
+
TITLE TIME REMAINING
CHAPTER ELAPSED TIME
CHAPTER TIME REMAINING
VOL
CH
DISPLAY
Setting the Parental Lock
26
PARENTAL LOCK IS A PASSWORD PROTECTED SYSTEM THAT ALLOWS YOU TO BLOCK PLAYBACK
OF DISCS BASED ON THEIR RATING (NOT ALL DISCS ARE RATED).
SETTING THE PARENTAL LOCK
To enable the Parental Lock feature:
1. Press the STOP button twice during playback.
SETUP
OPEN/CLOSE
SETUP
DISPLAY
2. Press the SETUP button.
POWER
MENU
TITLE
3. Use the RIGHT/LEFT keys to highlight
then press ENTER.
,
SUBTITLE
RANDOM
GO TO
AUDIO
PREV.
NEXT
PLAY
PAUSE
REW
FF
SLOW
STOP/RETURN
PAUSE
ENTER
ARROW
KEYS
4. Use the UP/DOWN keys to select Rating Level, then
press ENTER.
ENTER
ZOOM
TIMER
EDIT
RECORD
ADD/CLEAR
ANGLE
DISC OP.
INPUT
REPEAT
BOOKMARK
P.SCAN
VIEW
+
VOL
CH
5. Input your password using the 0-9 keys. When finished,
highlight OK and press ENTER.
The pre-set password is 3308.
6. Press ENTER to display the Set Rating Level drop down
menu. Use the UP/DOWN arrow keys to select the desired
rating and press ENTER.
1 Kid Safe
2 G
3 PG
4 PG 13
5 PG-R
6 R
7 NC-17
8 Adult
OFF
7. Highlight OK and press ENTER to save your settings.
8. Press the SETUP button to exit the Setup menu, then
press PLAY to start.
CHANGING YOUR PASSWORD
1.
2.
3.
4.
Follow step 1-6 and select "New".
Enter your new password.
Re-enter to confirm your new password.
Highlight OK and press ENTER to save
your new password.
5. Press the SETUP button to exit.
Customizing Recorder Settings
27
YOU CAN USE THE SETUP MENU TO CUSTOMIZE THE RECORDER TO SUIT YOUR PERSONAL
PREFERENCES.
SETUP MENU
GNRL
PLAY
REC
LANG
TUNER
CLOCK
DISPLAYING THE SETUP MENU
The Setup menu includes six categories: General, Playback, Record, Language, Tuner and Clock Setup.
General Setup
1. Press SETUP during stop
mode.
2. Use the arrow keys to
select the desired category
and press ENTER.
3. Press SETUP to exit the
setup menu.
Screen saver
Progressive/Interlace
Video output format
Restore factory settings
Playback Setup
TV aspect ratio
Rating level
Digital audio output
Closed captions
YourDVD
AutoPlay
On*
Off
Progressive
Interlace*
NTSC*
PAL
Ok*
Cancel
16:9
Pan Scan*
Letter box
Off
5.1 Surround*
2 Channel
On*
On*
Off
Off
On*
Off
* Factory defaults
Record Setup
Auto chapter marker
Default source
Default quality
Language Setup
TUNER
CLOCK
SLP
EP
SP*
HQ
English*
Spanish
French
OSD language
Menu language
Subtitle language
Audio language
English*
Spanish
French
Details see page 28
English*
Spanish
French
Main Page
GNRL
PLAY
REC
LANG
On*
Off
Off*
English*
Spanish
French
Date & Time Setup
Date(mm/dd/yy)
Time(hh:mm:ss)
AM/PM
01/01/03
01:15:01
AM
PM*
F-A/V*
F-SV
R-A/V
R-SV
DV
TUNER*
Recording Options
28
SEARCHING FOR CHANNELS
Before you can record TV programs, you must first scan for channels.
1. In STOP mode, press SETUP to access the Setup menu.
2. Use the RIGHT/LEFT keys to highlight the TUNER icon, then press ENTER.
3. Press ENTER then use the UP/DOWN arrow keys to select your input source: Air (Antenna) or Cable,
Press ENTER again to confirm.
4. Use the RIGHT/LEFT arrow keys to
highlight SCAN, then press ENTER.
The recorder will automatically
search for all available channels.
If a channel cannot be found, it
will be checked in the Skip column.
To cancel automatic channel search,
press STOP.
5. To browse the stored channels, use
the RIGHT/LEFT arrow keys to move
to CH column, then use the UP/DOWN
arrow keys to select channels.
You can also use the 0-9 keys to
select channels directly.
6. To add or delete channels use the
RIGHT/LEFT arrow keys to move to
the Skip column, then use the
UP/DOWN arrow keys to highlight
the desired channel. Press ENTER
to add or remove the check mark.
SETUP
OPEN/CLOSE
SETUP
DISPLAY
POWER
MENU
TITLE
SUBTITLE
RANDOM
GO TO
AUDIO
7. Press SETUP again to exit.
PREV.
NEXT
PLAY
PAUSE
REW
FF
SLOW
STOP/RETURN
NOTE:
Cable channel numbers are 1-125.
Air (Antenna) channel numbers are 2-69.
ARROW
KEYS
ENTER
ENTER
Recording Options
29
BASIC RECORDING
1. Connect the recorder as shown on pages 9-11.
2. Insert a recordable DVD+RW or DVD+R into the unit.
3. Press DISPLAY to access the control bar.
4. Use the RIGHT/LEFT arrow keys to highlight the "Video input source" icon , and press ENTER.
Then use the UP/DOWN arrow keys to select the input source from which you want to record:
F-A/V: Front Audio/Video Input (on the front panel)
R-A/V: Rear Audio/Video Input (on the rear panel)
F-SV: Front S-Video Input (on the front panel)
R-SV: Rear S-Video Input (on the rear panel)
F-DV: Front DV Input (on the front panel)
CH### (records from TV). To select the desired channel:
Use the UP/DOWN arrow keys
Use the CH v/^ keys
Use the 0-9 keys
5. Press ENTER to confirm your selection.
6. Use the RIGHT/LEFT arrow keys to highlight the "Record quality" icon
use the UP/DOWN arrow keys to select the desired record quality:
HQ High quality, nearly 64 minutes on a blank disc.
SP Standard Play quality, nearly 130 minutes on a blank disc.
EP Extended Play, nearly 250 minutes on a blank disc.
SLP Standard Long Play, nearly 366 minutes on a blank disc.
Press ENTER to confirm your selection.
7. Press RECORD to start recording.
To stop recording, press STOP.
If the DVD+RW or DVD+R is new, it will take a few moments to stop.
NOTE:
Up to 124 chapters can be recorded on a disc.
Up to 99 titles can be recorded on a disc.
,
and press ENTER. Then
Recording Options
ONE-TOUCH RECORDING
1. During normal recording, press RECORD again to record for exactly 30 minutes and then stop
automatically.
2. Press RECORD repeatedly to continue adding recording time in 30-minute intervals.
The length of the recording time is determined by disc capacity and record quality.
If the recording time you set exceeds the capacity of the disc, then One-Touch Recording will be
cancelled and the unit will switch to normal recording.
3. To stop recording, press STOP.
SWITCHING TO PLAYBACK MODE
When recording is stopped, press PLAY to return to normal playback mode.
SETTING THE CLOCK
1. While playback is stopped, press SETUP to display the Setup menu.
2. Use the RIGHT/LEFT arrow keys to highlight the CLOCK icon and press ENTER.
3. Use the UP/DOWN arrow keys to highlight the Date,
Time, and AM/PM respectively.
4. With "Date (mm/dd/yy)" highlighted, press ENTER
and input the date using the 0-9 keys. Press ENTER
again to confirm.
5. With "Time (hh:mm:ss)" highlighted, press ENTER
and input the time using the 0-9 keys. Press ENTER
again to confirm.
6. Highlight AM/PM, and press ENTER. Then use the
UP/DOWN arrow keys to select AM or PM and press
ENTER again to confirm.
30
Recording Options
31
TIMER RECORDING
1. Make sure the clock is set accurately as shown on page 30.
2. Press the TIMER button to display the record scheduler.
NOTE:
To delete a programmed event, use the UP/DOWN arrow keys to highlight it and press ADD/CLEAR.
3. Use the UP/DOWN arrow keys to highlight an event and press ENTER. The Item Editor dialog
box will be displayed as shown. While in the Item Editor, use the arrow keys and the ENTER
button to select and set each option.
Select your input source (see page 29).
Select the record quality (see page 29).
Select the record frequency (once, daily or weekly).
Select the timer recording start time.
mm/dd/yy
Select AM or PM.
Select the timer recording end time.
4. Select OK or press ENTER to save your settings.
5. Five minutes before the timer recording begins, a dialog box will appear on your TV screen
prompting you to confirm or cancel the event. If you do not make any selection, the timer
recording will proceed as scheduled.
NOTE:
If the recorder is in standby mode (plugged in but powered off), it will turn on automatically two minutes
before the start of the timer recording.
During recording, you can press STOP to interrupt the recording.
A DVD+RW/DVD+R disc can record for up to 366 minutes, and up to 48 titles.
Editing
32
EDITING DVD+RW TITLE
1. Insert a recorded DVD+RW in the disc tray.
The DVD Index Screen appears.
2. Use the arrow keys to highlight the title you want to edit, and press ENTER to start playback.
Use the arrow keys to highlight PREV or NEXT on the screen and press ENTER to view the next or
previous page of titles.
3. During playback, press EDIT to display the title edit bar.
use the RIGHT/LEFT arrow keys to highlight one of the following icons and press ENTER. Then use
the UP/DOWN and ENTER keys to make selections.
View current title number /
total number of title
Chapter hide or unhide
Select to hide or unhide the current
chapter (see the next page for details).
View current chapter number /
total number of chapters
Title icon or Title name
Select to name the title or set the
current image as the title's icon (see
the next page for details).
Current playback status
Chapter editing
Select to add or delete chapter markers (see
the next page for details).
4. Press EDIT to exit the menu.
Timer
Select to jump to a specific elapsed
time (see page 18 and 24 for details).
Editing
33
EDITING CHAPTERS
From the control bar, select the "Chapter Maker" icon, then use the UP/DOWN arrow keys to select
from the following:
When
is selected by pressing ENTER, a new chapter marker will be added to the current point.
When
is selected by pressing ENTER, the marker for the current chapter will be deleted.
When
is selected by pressing ENTER, all of the chapter markers in the current title will be deleted.
NOTE:
The second icon in the control bar provides immediate feedback as you add/delete chapter markers (it
displays the current chapter and total number of chapters).
If only one chapter is available in the current title, you can only select the "New" icon
HIDING/UNHIDING CHAPTERS
From the control bar, select the "Chapter Hide" icon
and press ENTER.
If the icon displays C-hide, the current chapter is visible. Press ENTER to hide it.
If the icon displays C-unhide, the current chapter is invisible. Press ENTER to unhide it.
.
Editing
34
SETTING TITLE ICONS AND TITLE NAMES
From the control bar, select the "T-Icon" or "T-Name" icon, then use the UP/DOWN arrow keys to
select from the following:
To grab a frame from the currently playing title as the icon for that title, press ENTER with "T-Icon" selected.
To rename the current title, press ENTER with "T-Name" selected.
A virtual keyboard appears on your TV screen:
Use the ARROW keys to highlight the letter or character you want to input, and press ENTER to confirm it.
The bottom row of the keyboard contains the following options:
Space - adds a space
Caps - switches between upper and lower case letters
BkSp - backs up a space
Delete - deletes the last character entered
Clear - deletes all characters
Exit - exits the virtual keyboard
OK - saves the new title name
Select OK and press ENTER to save the name.
NOTE:
The maximum length of a title name is 9 characters.
Editing
EDITING A DVD+RW DISC
1. Insert a DVD+RW in the disc tray.
2. Press DISC OP. to display the disc editing bar.
3. Use the RIGHT/LEFT arrow keys to highlight one of the icons shown above (Disc finalization,
Delete title, Erase disc, Disc protection, etc.) and press ENTER. Then use the UP/DOWN and
ENTER keys to make selections.
35
Editing
36
EDITING A DVD+RW OR DVD+R DISC
Select to view information about the selected disc, including Disc type, Title numbers,
Recorded time, Remaining time and Disc status.
FINALIZE DISC (DVD+R only)
Highlight the icon and press ENTER. It will take a few minutes to finalize the disc.
NOTE:
Finalizing makes your DVD+R disc compatible with other DVD players. Once a DVD+R has
been finalized, you cannot record or edit the disc.
T-DEL (DVD+RW only)
Select to delete the currently selected title.
ERASE (DVD+RW only)
Select to erase the currently loaded disc.
LOCK (DVD+RW only)
Select to lock the current disc to prevent further recording or editing. When a disc is locked
you will only be able to play it. To unlock the disc, select the "UNLOCK" icon.
COMPATIBLE
Select to make your disc compatible with other DVD players.
Specifications
37
DVD VIDEO PLAYER/OUTPUTS/SUPPLIED ACCESSORIES
PERSONAL VIDEO RECORDER
Power supply
120V AC 60 Hz
Power consumption
28W
Mass
11.5 Ibs (5.2 kg)
External dimensions
17.1"x3"x11" (435mm x 75mm x 280 mm (WxHxD)
Signal system
NTSC
SUPPLIED ACCESSORIES
Audio cable (red and white)
1 pair
Remote control
1
Batteries (AAA)
2
Video cable (yellow)
1
User's manual
1
Troubleshooting
Problem
38
Solution
No power
Connect the power plug into the wall outlet securely.
No picture
Verify the connection from the DVD video output to the TV video input.
Make sure the correct video input is selected on your TV.
Connect the video cable into the jacks securely. Refer to your television
owners manual.
No sound
Connect the audio cables into the jacks securely.
Verify the connection from the DVD audio output to the TV or receiver audio
input. Make sure the correct AUDIO input is selected on your TV or amplifier.
Refer to your audio amplifier owners manual.
Black & White
picture
Damaged S connector (bent pin).
The playback
picture has
occasional
distortion
A small amount of picture distortion may appear because of poor quality
video/sound transfer to disc. This is especially true of certain discs manufactured between 1997-1998.
Scratched disc.
Brightness is
unstable or picture
noise is evident
during playback.
Connect the DVD player directly to your TV and not through any other
source. What you are viewing is the effect of the copy protection circuitry
required on all DVD players.
The DVD video
player does not
start playback
Place the disc with the label side up.
Place the disc on the disc tray correctly inside the guides.
Make sure the disc is free from scratches & fingerprints.
Press the SETUP button to turn off the menu screen.
Cancel the parental lock function or change the parental lock level. (The
preset password is 3308.)
Turn the power off, disconnect the power plug, wait a few moments, and then
reinsert it. Try playing the disc again.
Use Region 1 discs only.
MP3 will not read
disc or it skips
Reburn disc as the software version used may not be compatible with the
player.
Make sure MP3 files are not encoded with a variable bitrate.
The remote
control does not
work properly
Replace the batteries with new ones.
The recorder
cannot record.
Incorrect disc type (DVD+R, DVD+RW only).
The disc is full.
The disc (DVD+R, DVD+RW) is locked; it should be unlocked.
The DVD+R has been finalized.
There is no signal from the selected channel or the source equipment does
not work properly.
Some buttons
do not work
Incorrect disc type (DVD+R, DVD+RW only).
The unit is in record mode.
The image is
distorted.
The Progressive Scan/Interlace Scan setting is incorrect. Press P.SCAN to
switch between these two options.