1
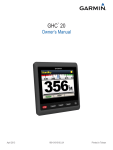
GHC 10
owner’s manual
© 2011 Garmin Ltd. or its subsidiaries
All rights reserved. Except as expressly provided herein, no part of this manual may be reproduced, copied, transmitted, disseminated, downloaded or stored in any storage medium, for any purpose without the
express prior written consent of Garmin. Garmin hereby grants permission to download a single copy of this manual onto a hard drive or other electronic storage medium to be viewed and to print one copy of
this manual or of any revision hereto, provided that such electronic or printed copy of this manual must contain the complete text of this copyright notice and provided further that any unauthorized commercial
distribution of this manual or any revision hereto is strictly prohibited.
Information in this document is subject to change without notice. Garmin reserves the right to change or improve its products and to make changes in the content without obligation to notify any person or
organization of such changes or improvements. Visit the Garmin Web site (www.garmin.com) for current updates and supplemental information concerning the use and operation of this and other Garmin
products.
Garmin®, and the Garmin logo trademarks of Garmin Ltd. or its subsidiaries, registered in the USA and other countries. GHP™, GHC™, GMI™, Shadow Drive™, and myGarmin™ are trademarks of Garmin
Ltd. or its subsidiaries. These trademarks may not be used without the express permission of Garmin.
Introduction
Introduction
‹ Warnings
You are responsible for the safe and prudent operation of your vessel.
The GHP™ 10/10V/12 is a tool that will enhance your capability to operate
your boat. It does not relieve you from the responsibility of safely operating
your boat. Avoid navigational hazards and never leave the helm unattended.
Always be prepared to promptly regain manual control of your boat.
Learn to operate the GHP on calm and hazard-free open water.
Use caution when operating the GHP near hazards in the water, such as
docks, pilings, and other boats.
The GHP autopilot system continuously adjusts the steering of your boat
to maintain a constant heading. In addition to the basic heading-hold
functionality, the GHP autopilot system allows manual steering and several
modes of automatic-steering functions and patterns.
Operate the GHP autopilot system using the GHC™ 10 control unit.
Through the GHC 10 control unit, you engage and steer, set up, and
customize the GHP autopilot system.
Tips and Shortcuts
• Select the STBY key from any screen to place the autopilot in standby
mode and return to the Heading screen.
• Select  to adjust the backlight and color mode.
• Hold to turn the autopilot on or off.
Note: If more than one GHC 10 device is wired to turn on the
autopilot, you must turn off all of the wired GHC 10 devices to turn off
the autopilot.
• Select
or
to highlight an option on a menu.
Manual Conventions
In this manual, the GHP autopilot system is referred to as the autopilot, and
the GHC 10 control unit is referred to as the device.
When you are instructed to select an item on the device, press a soft key
along the bottom of the screen.
Arrows (>) in the text indicate that you should select each item in order. For
example, if you see “select Menu > Setup,” you should select Menu, and
then select Setup.
To install the GHP autopilot system, including the GHC 10 control unit, use
the provided installation instructions.
GHC 10 Owner’s Manual
i
Table of Contents
Table of Contents
Powerboat Autopilot
Sailboat Autopilot Operation. Appendix............................ 19
Configuring the Autopilot........... 19
Operation.............................. 3 12
Introduction........................... i Powerboat Tips........................... 3 Heading Hold............................ 12 Software License Agreement... 19
Tips and Shortcuts........................i
Manual Conventions.....................i
Dynamic Menu Option................ 3
Heading Hold.............................. 3
Wind Hold................................. 13
Heading Adjustment with the
Helm...................................... 3
Heading Adjustment with the
Autopilot................................ 3
Tack and Gybe......................... 14
Getting Started..................... 1 Heading Adjustment................... 3
Front Panel................................. 1
Turning On the Autopilot............. 1
Turning Off the Autopilot............. 1
Adjusting the Display.................. 1
Adjusting the Color Mode........... 1
Adjusting the Backlight............... 1
Turning On Network Sharing...... 1
About the Heading Screen......... 2
Direction Control......................... 4
Wind Hold Adjustment.............. 14
Tack and Gybe Settings............ 14
Index................................... 21
Settings.............................. 16
Steering Patterns........................ 5
GPS Steering Patterns............... 8
GHC 10 User Settings.............. 17
Power Mode............................. 18
Zigzag Pattern............................ 5
Circles Pattern............................ 6
U-Turn Pattern............................ 7
Man Overboard Pattern.............. 7
Cancelling a Steering Pattern..... 8
Declaration of Conformity
(DoC)..................................... 19
Error and Warning Messages... 20
Route To................................... 15
System Settings..................... 16
GHC 10 Remote Settings......... 16
Using Direction Control............... 4
Route To...................................... 9
Orbit Pattern............................... 9
Cloverleaf Pattern..................... 10
Search Pattern.......................... 10
Cancelling a GPS Steering
Pattern..................................11
ii
Heading Adjustment.................. 12
Connecting the GHC 10
Remote................................ 16
Configuring the GHC 10
Remote................................ 17
Changing the Power Mode....... 18
Customizing the Power Mode... 18
GHC 10 Owner’s Manual
Getting Started
Getting Started
Front Panel
Turning On the Autopilot
Select
.
Turning Off the Autopilot
Hold .
Note: If more than one GHC 10 device is wired to turn on the
autopilot, you must turn off all of the wired GHC 10 devices to turn off
the autopilot.
Adjusting the Display
➊
Item
➀
➁
➂
➋
Description
Standby
Soft keys
Power key
➌
Adjusting the Color Mode
1. From any screen, select .
2. Select Color Mode.
3. Select Select to switch between night or day color modes.
Adjusting the Backlight
1. From any screen, select .
2. Select Backlight.
3. Select
or
to adjust the backlight brightness.
4. Select Done.
Turning On Network Sharing
You can share color mode and backlight settings with other GHC 10 and
GMI™ 10 devices across the NMEA 2000 network.
1. Select Network Sharing.
2. Select Select to turn on network sharing.
GHC 10 Owner’s Manual
1
Getting Started
About the Heading Screen
The heading screen displays the status of the autopilot and the heading. You
can use the soft keys to engage the autopilot and manually adjust the heading
from the heading screen.
When you turn on the autopilot, the system starts in standby mode, and
displays the heading screen on the GHC 10.
When you select Engage to activate the autopilot heading hold, the autopilot
takes control of the helm and steers the boat to maintain your heading. The
intended heading ➊ is indicated on the compass at the top of the heading
screen.
➊
➊
➋
➌
➍
Item
➊
➋
➌
➍
2
Refer to page 12 for information about the sailboat wind hold screen.
Description
Autopilot status
Actual heading
Rudder position indicator (sailboat and rudder sensorequipped powerboats only)
Soft key functions
GHC 10 Owner’s Manual
Powerboat Autopilot Operation
Powerboat Autopilot Operation
Powerboat Tips
Dynamic Menu Option
The first option in the menu accessed by selecting Menu from the heading
screen changes based on the following conditions:
Heading Adjustment with the Helm
You can steer the boat manually from the helm while the autopilot is
engaged. The autopilot does not steer the boat while you have the helm, and
the message “You Have the Helm” flashes at the top of the screen in yellow.
If you manually maintain a specific heading for a few seconds, the autopilot
resumes control of the new heading, and the heading screen displays the
message “Autopilot Engaged”.
• If the autopilot is not steering a pattern, select the option to go to the
engagement screen of the pattern last used.
• If the autopilot is steering a pattern, select the option to go to the
configuration screen for the pattern. If there are no configurable settings
for the pattern, you cannot select the menu option.
Resuming a Pattern After a Helm Heading Adjustment
Heading Hold
Select Menu > [Pattern Name] to resume the last-used pattern.
You can engage the autopilot heading hold function to maintain your current
heading without steering the helm.
When the autopilot is steering a pattern, you might need to steer the boat
manually from the helm to avoid hazards in the water. After you have passed
all hazards, you must manually restart the pattern. The dynamic menu option
(page 3) enables you to quickly resume the pattern.
Engaging Heading Hold
Heading Adjustment with the Autopilot
You can steer your boat using the autopilot. Step steering turns the boat
in increments of 1° when you select the steering soft key, and in larger
increments when you hold the steering soft key. Rudder steering turns the
boat in increments of 1° when you select the steering soft key, and steers the
boat when you hold the steering soft key.
Heading Adjustment
Changing the Steering Mode
From the heading screen, select Engage.
The autopilot steers your boat to maintain the current heading.
When the autopilot is engaged, you can adjust the heading using the helm
(if your autopilot is equipped with Shadow Drive™) or the soft keys on the
autopilot.
GHC 10 Owner’s Manual
1. From the heading screen, select Menu > Steering Mode.
2. Select an option:
• Select Steering Mode > Rudder to enable rudder steering
• Select Steering Mode > Step to enable step steering.
3
Powerboat Autopilot Operation
Adjusting the Step Steering Increments
1. From the heading screen, select Menu > Steering Mode > Step Turn
Size.
2. Select
or
to set the step turn size.
3. Select Done.
Steering with the Soft Keys
With the autopilot engaged, you can manually adjust the heading from the
heading screen.
Note: If the autopilot is steering a pattern (page 5), manually adjusting the
heading cancels the pattern.
Select an option:
• If you have step steering enabled, select
and
.
• If you have rudder steering enabled, select
and
.
The autopilot steers the boat, and the heading screen shows your actual
heading ➊ and intended heading ➋.
➊
4
Direction Control
When your boat is properly equipped, you can control the drive direction of
the boat (forward or reverse) using the autopilot.
Using Direction Control
From the Heading screen, select an option:
• When traveling forward in standby mode, select Direction to engage
reverse.
The autopilot engages reverse drive and the message “Rev” appears
in orange on the heading screen.
• When traveling in reverse in standby mode, select Direction to
engage forward.
The autopilot engages forward drive and the message “Rev” is
removed from the heading screen.
➋
GHC 10 Owner’s Manual
Powerboat Autopilot Operation
Steering Patterns
‹ Caution
You are responsible for the safe operation of your boat. Do not begin a
pattern until you are certain that the water is clear of obstacles.
The autopilot can steer the boat in preset patterns for fishing, and it can
also perform other specialty maneuvers such as U-turns and man-overboard
retrieval. You can use the GHC 10 to begin pattern steering.
Following the Zigzag Pattern
1. From the heading screen, select Menu > Pattern Steering > Zigzag.
2. Select Engage.
The autopilot follows the zigzag pattern, and the heading screen shows
the amplitude and period of the zigzag pattern ➊.
Pattern steering is not based on GPS, and it can be used without a GPS
device connected to the autopilot.
Zigzag Pattern
The zigzag pattern steers the boat from port to starboard and back, over a
specified time and angle, across your current heading.
➀
Setting Up the Zigzag Pattern
You can modify the amplitude and period of the zigzag pattern. The default
values are 30° and 1.5 minutes.
1. From the heading screen, select Menu > Pattern Steering > Zigzag >
Setup > Zigzag Amplitude.
2. Select
or
to set the amplitude in increments of 5°.
3. Select Done.
4. Select Setup > Zigzag Period.
5. Select
or
to set the period.
6. Select Done.
GHC 10 Owner’s Manual
TIP: To quickly resume a pattern after you make a heading adjustment with
the helm or the soft keys (page 3), select the center soft key twice.
5
Powerboat Autopilot Operation
Circles Pattern
The circles pattern steers the boat in a continuous circle, in a specified
direction, and at a specified time interval.
The autopilot follows the circles pattern, and the heading screen shows
the time of the circles pattern ➀.
Setting Up the Circles Pattern
You can adjust the time the autopilot takes to complete the circle. The
default value creates a circle that takes 5 minutes to complete.
1. From the heading screen, select Menu > Pattern Steering > Circles >
Time.
2. Select
or
to set the time.
3. Select Done.
➀
Following the Circles Pattern
1. From the heading screen, select Menu > Pattern Steering > Circles.
2. Select Engage.
3. Select an option:
• Select
to begin a clockwise turn.
• Select
to begin a counter-clockwise turn.
The autopilot positions the boat so that the circle pattern is centered on
the location at which you engage the pattern.
TIP: To quickly resume a pattern after you make a heading adjustment with
the helm or the soft keys (page 3), select the center soft key twice.
6
GHC 10 Owner’s Manual
Powerboat Autopilot Operation
U-Turn Pattern
The u-turn pattern turns the boat around 180° and maintains the new
heading. There are no settings to adjust for the u-turn pattern.
Following the U-Turn Pattern
1. From the heading screen, select Menu > Pattern Steering > U-Turn.
2. Select Engage.
3. Select an option:
• Select
to begin a starboard turn.
• Select
to begin a port turn.
The autopilot follows the u-turn pattern, and the heading screen shows
the direction of the turn ➀.
➀
Man Overboard Pattern
The man overboard pattern turns the boat around with the intent of running
alongside the location where the man overboard pattern was initiated. There
are no settings to adjust for the man overboard pattern.
Following the Man Overboard Pattern
‹ WARNING
The man overboard pattern is not determined by GPS and is affected by
wind, current, and speed. Be ready to adjust the throttle and take the helm to
avoid harm to a person in the water.
‹ Caution
The boat must be below planing speed when using this pattern.
1. From the Heading screen, select Menu > Pattern Steering > Man
Overboard.
2. Select Engage.
3. Select an option:
• Select
to begin a starboard turn.
• Select
to begin a port turn.
When the u-turn is completed, the autopilot maintains the new heading.
TIP: To quickly resume a pattern after you make a heading adjustment with
the helm or the soft keys (page 3), select the center soft key twice.
GHC 10 Owner’s Manual
7
Powerboat Autopilot Operation
The autopilot follows the man overboard pattern, and the heading screen
shows the direction of the turn ➀.
➀
TIP: To quickly resume a pattern after you make a heading adjustment with
the helm or the soft keys (page 3), select the center soft key twice.
GPS Steering Patterns
‹ caution
You are responsible for the safe operation of your boat. Do not begin a GPS
pattern until you are certain that the water is clear of obstacles.
The autopilot can steer the boat along a route defined by your GPS device,
or in preset patterns based on a GPS location (waypoint). To use GPS
steering, you must have a compatible GPS device connected to the autopilot
using NMEA 2000 or NMEA 0183. For more information on connecting a
compatible GPS device, see the autopilot installation instructions.
GPS steering patterns are based on a GPS waypoint to which you are
actively navigating using your optional GPS device. This waypoint is called
the active waypoint.
Cancelling a Steering Pattern
While following a steering pattern, perform one of the following actions:
• Physically steer the boat at the helm (if your autopilot is equipped
with Shadow Drive).
• Use the soft keys to manually adjust the heading.
• Select STBY.
8
GHC 10 Owner’s Manual
Powerboat Autopilot Operation
Route To
The autopilot steers the boat according to a route defined on your
chartplotter. Your GHC 10 must be connected to a NMEA 2000 or NMEA
0183 compatible chartplotter to use route to.
Following the Route To Pattern
Before you can begin using route to, you must define a route on your
chartplotter. Refer to the owner’s manual included with your chartplotter for
information on how to define a route.
From the heading screen, select Menu > GPS Steering > Route To.
The autopilot steers your boat according to the route defined on your
chartplotter, and the heading screen shows the distance to the next turn ➀
and distance off course ➋.
Orbit Pattern
The orbit pattern steers the boat in a continuous circle around the active
waypoint (page 8). The size of the circle is defined by your distance from the
active waypoint when you begin the orbit pattern. There are no settings to
adjust.
Following the Orbit Pattern
1. From the heading screen, select Menu > GPS Steering > Orbit >
Engage.
2. Select an option:
• Select
to begin a clockwise turn.
• Select
to begin a counter-clockwise turn.
The autopilot steers your boat in a continuous circle around the active
waypoint, and the heading screen shows the direction of orbit ➊.
➊
➋
GHC 10 Owner’s Manual
➊
9
Powerboat Autopilot Operation
Cloverleaf Pattern
The cloverleaf pattern steers the boat to repeatedly pass over an active
waypoint. When you begin the cloverleaf pattern, the autopilot drives the
boat toward the active waypoint and begins the cloverleaf pattern.
The autopilot steers your boat in a continuous cloverleaf pattern over
the active waypoint, and the heading screen shows the cloverleaf turn
direction and distance ➀.
Setting up the Cloverleaf Pattern
You can adjust the distance from the waypoint at which the autopilot turns
your boat for another pass over the waypoint. The default setting turns the
boat at a range of 1000 ft. (300 m) from the active waypoint.
1. From the heading screen, select Menu > GPS Steering > Cloverleaf >
Length.
2. Select
or
to set the length.
3. Select Done.
Following the Cloverleaf Pattern
1. From the heading screen, select Menu > GPS Steering > Cloverleaf >
Engage.
2. Select an option:
• Select
to begin a starboard turn.
• Select
to begin a port turn.
➊
Search Pattern
The search pattern steers the boat in increasingly larger circles outward from
the active waypoint, forming a spiral pattern. When you begin the search
pattern, the autopilot drives the boat to the active waypoint and begins the
pattern.
Setting up the Search Pattern
You can adjust the distance between each circle in the spiral. The default
distance between the circles is 50 ft. (20 m).
1. From the heading screen, select Menu > GPS Steering > Search >
Spacing.
2. Select
or
to set the spacing.
3. Select Done.
10
GHC 10 Owner’s Manual
Powerboat Autopilot Operation
Following the Search Pattern
1. From the heading screen, select Menu > GPS Steering > Search >
Engage.
2. Select an option:
• Select
to begin a starboard turn.
• Select
to begin a port turn.
The autopilot follows the search pattern around the active waypoint, and
the heading screen shows the spacing of the search pattern ➀.
Cancelling a GPS Steering Pattern
While following a GPS steering pattern, perform one of the following
actions:
• Physically steer the boat at the helm (if your autopilot is equipped
with Shadow Drive).
• Use the soft keys to manually adjust the heading.
• Select STBY.
➊
GHC 10 Owner’s Manual
11
Sailboat Autopilot Operation
Sailboat Autopilot Operation
‹ caution
When engaged, the autopilot controls only the rudder. You and your crew
remain responsible for the sails while the autopilot is engaged.
In addition to heading hold, you can use the autopilot to maintain a wind
hold. You can also use the autopilot to control the rudder while tacking and
gybing.
Heading Hold
You can engage the autopilot heading hold function to maintain your current
heading without steering the helm (page 2).
Engaging Heading Hold
From the heading screen, select Engage.
The autopilot steers your boat to maintain the current heading.
Adjusting the Heading with the Autopilot
You can adjust the heading using step steering on the autopilot.
Note: If the autopilot is steering a route (page 15), manually adjusting the
heading cancels the route.
Select an option:
• Select
or
to steer the boat in increments of 1°.
• Hold
or
to steer the boat in larger increments. The
increment size is shown on the soft key.
The autopilot steers your boat, and the heading screen shows your actual
heading ➊ and intended heading ➋.
➊
➋
Heading Adjustment
You can adjust the heading using the soft keys on the autopilot when the
autopilot is engaged. You must set the autopilot to standby to adjust the
heading using the helm.
Adjusting the Step Steering Increments
1. From the heading screen, select Menu > Step Turn Size.
2. Select
or
to set the step turn size.
3. Select Done.
12
GHC 10 Owner’s Manual
Sailboat Autopilot Operation
Wind Hold
You can set the autopilot to maintain a specific bearing relative to the current
wind angle. Your device must be connected to a NMEA 2000 or NMEA
0183 compatible wind sensor to perform a wind hold or a wind-based tack
or gybe.
Wind Hold Screen
The heading screen displays the status of the autopilot. When the autopilot is
not engaged, select Wind Hold to activate wind hold.
The autopilot steers heading screen changes to include new information
related to wind hold.
➊
➋
➌
➍
➎
Bearing relative to wind angle
Wind gauge: current wind angle
Engaging Wind Hold From Heading Hold
With heading hold engaged, select Menu > Wind Hold.
The autopilot steers your boat to maintain the same heading relative to
the wind direction, and the heading screen shows the wind gauge.
Using Wind Hold to Aid Raising and Lowering Sails
1. Engage wind hold.
2. Use the soft keys to adjust the wind hold direction to 0°.
The autopilot steers your boat directly into the wind, which is ideal for
raising and lowering sails.
➍
➎
➊
➋
➌
Autopilot status
Compass displaying current heading
Wind type: true or apparent
GHC 10 Owner’s Manual
13
Sailboat Autopilot Operation
Wind Hold Adjustment
You can adjust the wind hold angle using the soft keys on the autopilot when
wind hold is engaged.
Tack and Gybe
Adjusting the Wind Hold Angle with the Autopilot
Tack and Gybe Settings
Settings that define how the autopilot performs a tack or gybe are set up
during the installation. However, if the autopilot is not performing a tack or
gybe in a safe or satisfactory manner, you may want to adjust the following
settings:
You can adjust the wind hold angle using step steering on the autopilot.
Select
or
to adjust the wind hold angle in increments
of 1°.
Hold
or
to adjust the wind hold angle in larger
increments. The increment size is shown on the soft key and is the same
as the step steering increment (page 12).
The heading dial on the wind screen shows your actual heading ➊ and
intended heading ➋ while the autopilot steers the boat.
You can set the autopilot to perform a tack or gybe while heading hold or
wind hold is engaged.
•
•
•
•
•
Heading Hold Tack Angle (page 17)
Tack/Gybe Delay (page 17)
Gybe Inhibitor (page 17)
Wind Hold Type (page 18)
Wind Limiter (page 18)
Tacking and Gybing from Heading Hold
➊
14
Before you begin a tack or gybe from heading hold, you must set the heading
hold tack angle (page 17).
➋
1. Engage heading hold (page 3).
2. Select Menu > Tack/Gybe.
3. Select
or
to choose a direction.
The autopilot steers your boat through a tack or gybe, and the heading
screen shows a “Tacking” message until the maneuver is complete.
GHC 10 Owner’s Manual
Sailboat Autopilot Operation
Tacking and Gybing from Wind Hold
1. Engage wind hold (page 13).
2. Select Menu > Tack/Gybe.
3. Select TACK or GYBE.
The autopilot steers your boat through a tack or gybe, and the wind hold
screen shows the compass and wind gauges with yellow highlights that
indicate the direction and progress of the tack or gybe.
Route To
‹ caution
Garmin recommends using route to only under motor power. Using route
to while under sail can cause an unexpected gybe, risking damage to your
sailboat. Unattended sails and rigging can be damaged or cause injury to any
crew or passengers during an unexpected gybe maneuver.
The autopilot steers the boat according to a route defined on your
chartplotter. Your GHC 10 must be connected to a NMEA 2000 or NMEA
0183 compatible chartplotter to use route to.
Using Route To
Before you can begin using route to, you must define a route on your
chartplotter. Refer to the owner’s manual included with your chartplotter for
information on how to define a route.
TIP: You can begin a tack or gybe directly from the heading hold or wind
hold screen.
Select an option:
• To begin a tack or gybe to port, hold the left and center soft keys for
one second.
• To begin a tack or gybe to starboard, hold the right and center soft
keys for one second.
From the heading screen, select Menu > Route To.
The autopilot steers your boat along the route defined on your
chartplotter, and the heading screen shows the distance to the next turn ➀
and the distance off course ➋.
➊
➋
GHC 10 Owner’s Manual
15
Settings
Settings
You can customize system, remote control, and user settings.
System Settings
From the heading screen, select Menu > Setup > System.
• Units—set the units of measure used to represent values displayed on the
GHC 10.
◦◦ System Units—units used for every measurement displayed by the
GHC 10. You can select Statute (mi., ft.), Metric (km, m), Nautical
(nm, ft.), or Metric Nautical (nm, m).
◦◦ Helm Displacement—unit used for displacement volume of the
hydraulic steering pump, typically indicated on the helm. You can
select Cubic Inches (cu. in.) or Cubic Centimeters (cc).
• Heading—set the reference used in calculating heading information.
◦◦ Magnetic—calculates the heading based on magnetic north.
◦◦ True—calculates the heading based on true north.
• Variance—set the variance from true north. Variance is available only
when the Heading is set to True.
◦◦ Auto—automatically determines the ideal variance setting.
◦◦ User—you define the variance setting.
• Beeper—set whether the device makes sounds when you select a key or
when an alarm sounds.
◦◦ Alarms Only—beeps only when an alarm sounds.
◦◦ On (Keys & Alarms)—beeps when you select a key and when an
alarm sounds.
16
• Auto Power—enables the device to turn on automatically when the
NMEA 2000 network turns on.
• Unit Voltage—the device displays an alert and sounds an alarm when
the battery reaches a specified voltage. When you select On, you must
specify the voltage at which the alarm sounds and the alert displays.
• Language—set the on-screen language.
• Operating Mode—set the device to operate normally or in store
demonstration mode.
• System Information—shows the device ID numbers and software
information for the GHC and GHP.
• Factory Defaults—select Reset to restore the device to factory defaults.
GHC 10 Remote Settings
Connecting the GHC 10 Remote
Before using the GHC 10 remote, you must connect the remote to the
GHC 10 and configure the settings.
You can connect one GHC 10 remote (optional) to a GHC 10.
1. From the Heading screen, select Menu > Setup > Remote.
2. Select Search for Remote, then hold the left and right double-arrow
keys on the remote. The autopilot to searches for and pairs with the
GHC 10 remote.
GHC 10 Owner’s Manual
Settings
Configuring the GHC 10 Remote
1. From the Heading screen, select Menu > Setup > Remote.
2. Select an option:
• Button 1 Action—set the function performed by the first button on
the remote.
• Button 2 Action—set the function performed by the second button
on the remote.
• Button 3 Action—set the function performed by the third button on
the remote.
• Disconnect Remote—disconnect the remote from the device.
•
•
GHC 10 User Settings
‹ Caution
On a GHP 10 autopilot system, if you disable the Shadow Drive, you must
set the autopilot to standby (STBY) to manually control the helm. Use
caution when disabling the Shadow Drive.
•
On a GHP 10V autopilot system, if you disable the Shadow Drive, any
adjustment to the helm completely disengages the autopilot.
•
Although the autopilot is configured for your boat during installation, you
may find it necessary to adjust it depending on sea conditions.
•
Select Menu > Setup > User Autopilot Configuration.
• Shadow Drive™—enables the device to enter standby mode
automatically when you manually steer the helm, then engages the
heading hold again when you hold a steady course for a few seconds.
NOTE: The Shadow Drive is only available on hydraulic steering
•
GHC 10 Owner’s Manual
systems.
Shadow Drive Sensitivity—Shadow Drive is activated when a certain
amount of pressure is placed on the helm. Adjust this setting if the
Shadow Drive is being falsely tripped or not activating properly. If the
autopilot disengages while the helm is steady, decreasing the sensitivity
value can help alleviate unwanted disengaging. If the Shadow Drive does
not disengage the autopilot correctly when you take the helm, increasing
the sensitivity value may help.
Note: This setting does not apply to a GHP 10V or GHP 12 autopilot
system.
Sea State Filtering—adjust the sea state filtering to set the heading
responsiveness. Set sea state filtering to 0% under normal operating
conditions. Increase sea state filtering in choppy conditions at low speeds
to reduce rudder activity and reduce wear on the autopilot system.
Direction Control—enable the device to set the drive direction to
forward or reverse from the heading screen when the autopilot is in
standby mode. See page 4 for information about using direction control.
Heading Hold Tack Angle—(sailboats only) set the fixed angle at
which the autopilot performs a tack or gybe maneuver with heading hold
engaged. Select an angle from 1° to 180°.
Tack/Gybe Delay—(sailboats only) the autopilot delays steering a tack
or gybe after you initiate the maneuver using the remote or the device.
The delay counts down on the heading screen, and sounds an alarm when
the autopilot begins the tack or gybe. Select a delay from 0 to 15 seconds.
Gybe Inhibitor—(sailboats only) prevents the autopilot from performing
a gybe. The gybe inhibitor does not prevent you from manually
performing a gybe using the helm or step steering.
17
Settings
• Wind Hold Type—(sailboats only) autopilot steers to apparent wind
or true wind when wind hold is engaged. For both true and apparent
wind, wind angle is calculated in reference to the bow of the boat, and is
represented in degrees to port or starboard.
NOTE: The option to switch between wind-hold types is only available
if your boat is equipped with both a wind sensor and a water speed
sensor.
◦◦ Apparent wind speed reflects the flow of air actually experienced
while on a boat. Apparent is the only available wind hold option if
your boat is equipped with a wind sensor and no water speed sensor.
◦◦ True wind data reflects the flow of air experienced with reference
to the speed of the boat. Select True or Apparent if your boat is
equipped with a wind sensor and a water speed sensor.
• Wind Limiter—(sailboats only) during a gybe, the wind limiter slows
the rate of turn as the wind direction approaches the stern. If the rate of
turn is too slow, decrease the wind limiter value. If the rate of turn is too
fast, increase the wind limiter value.
Customizing the Power Mode
You can adjust the level of rudder activity while in economy power mode.
1. From the heading screen, select Menu > Setup > User Autopilot
Configuration > Power Saver.
2. Select a percentage and select Done.
A higher percentage setting will reduce rudder activity at the expense of
heading performance. Therefore, the higher you set the percentage, the
more your course will deviate before the autopilot corrects it.
TIP: In choppy conditions at low speeds, increasing the Power Saver
percentage will reduce rudder activity and reduce wear on the autopilot
system.
Power Mode
You can enable a power mode to help reduce rudder activity.
Changing the Power Mode
1. From the heading screen, select Menu > Setup > User Autopilot
Configuration.
2. Select an option:
• Select Power Mode > Economy to enable economy power mode.
• Select Power Mode > Normal to return to normal operation.
18
GHC 10 Owner’s Manual
Appendix
Appendix
Configuring the Autopilot
NOTICE
Changes made to the configuration of the autopilot directly affect the
behavior of the autopilot, and should be made by an authorized installer.
Unnecessary adjustments of the autopilot configuration may render the
autopilot inoperable.
The autopilot is configured for your boat during the installation process, and
the main autopilot configuration settings rarely need to be adjusted. If the
autopilot is not working correctly, contact your installer.
For advanced autopilot configuration, see the installation instructions
included with your autopilot.
Registering Your Product
1. Go to my.garmin.com.
2. Follow the on-screen instructions.
3. Keep the original sales receipt, or a photocopy, in a safe place.
Contacting Garmin Product Support
Contact Garmin Product Support if you have any questions about this
product.
• In the USA, go to www.garmin.com/support, or contact Garmin USA by
phone at (913) 397.8200 or (800) 800.1020.
• In the UK, contact Garmin (Europe) Ltd. by phone at 0808 2380000.
• In Europe, go to www.garmin.com/support and click Contact Support
for in-country support
GHC 10 Owner’s Manual
Software License Agreement
BY USING THE GHP 10/10V/12 AND THE GHC 10, YOU AGREE TO BE
BOUND BY THE TERMS AND CONDITIONS OF THE FOLLOWING
SOFTWARE LICENSE AGREEMENT. PLEASE READ THIS AGREEMENT
CAREFULLY.
Garmin Ltd. and its subsidiaries (“Garmin”) grant you a limited license to use the
software embedded in this device (the “Software”) in binary executable form in the
normal operation of the product. Title, ownership rights, and intellectual property
rights in and to the Software remain in Garmin and/or its third-party providers.
You acknowledge that the Software is the property of Garmin and/or its thirdparty providers and is protected under the United States of America copyright laws
and international copyright treaties. You further acknowledge that the structure,
organization, and code of the Software, for which source code is not provided, are
valuable trade secrets of Garmin and/or its third-party providers and that the Software
in source code form remains a valuable trade secret of Garmin and/or its third-party
providers. You agree not to decompile, disassemble, modify, reverse assemble,
reverse engineer, or reduce to human readable form the Software or any part thereof
or create any derivative works based on the Software. You agree not to export or
re-export the Software to any country in violation of the export control laws of the
United States of America or the export control laws of any other applicable country.
Declaration of Conformity (DoC)
Hereby, Garmin, declares that this product is in compliance with the essential
requirements and other relevant provisions of Directive 1999/5/EC. To view the full
Declaration of Conformity, go to www.garmin.com/compliance.
The GHP 10/12 and the GHC 10 are NMEA 2000® certified.
19
Appendix
Error and Warning Messages
Error Message
No rudder position feedback sensor detected
Cause
The autopilot can't detect a rudder feedback device or valid
rudder position.
Rudder position data is invalid.
The autopilot loses valid rudder position feedback data.
Autopilot is not receiving navigation data.
Autopilot placed in heading hold.
Autopilot Action
• Alarm sounds for 5 seconds
• Drive unit is disabled
• Autopilot transitions to Standby
• Alarm sounds for 5 seconds
• Drive unit is disabled
• Autopilot transitions to Standby
• Alarm sounds for 5 seconds
• Autopilot transitions to heading hold
The autopilot is no longer receiving valid navigation data
while performing a Route-To.
This message will also be shown if navigation is stopped on a
chartplotter prior to disengaging the autopilot.
Connection with autopilot lost
The GHC lost connection with CCU.
N/A
Lost wind data
The autopilot is no longer receiving valid wind data.
• Alarm sounds for 5 seconds
• Autopilot transitions to heading hold
Low GHC supply voltage
The supply voltage level is below the value specified in the
N/A
low voltage alarm menu.
Rudder sensor is not calibrated.
The drive unit rudder sensor has not been calibrated.
• Alarm sounds for 5 seconds
• Drive unit is disabled
Calibrate the rudder.
• Autopilot transitions to Standby
Rudder near limit. Center the rudder.
The rudder remains near its limit (rudder stop) for more than • Sounds alarm
5 seconds.
• Continues in normal operation
"Rudder near limit" flashes on the title bar
The autopilot has driven the rudder near its limit (rudder stop). Continues in normal operation
The autopilot cannot drive the rudder further in this direction.
Warning! A gybe has been initiated. Would you The autopilot has detected that the user has attempted to
• Sounds alarm
like to continue?
initiate a gybe.
• GHC 10 prompts for user input. Selecting
Gybe initiates the gybe, and selecting
Cancel cancels the gybe.
20
GHC 10 Owner’s Manual
Index
Index
A
Alarms 16
Alerts 16
Appendix 19
Autopilot Steering
Cancelling 8
GPS Pattern Steering 8
Pattern Steering 5
Auto Power 16
C
Circles 6
Cloverleaf 10
Configuring
Remote 17
Connecting
Remote 16
D
Demo Mode 16
Direction Control 4
Settings 17
Using 4
Display
Adjusting 1
Backlight 1
Color Mode 1
GHC 10 Owner’s Manual
E
Economy 18
Error Messages 20
G
Garmin Product Support 19
H
Heading Hold
Powerboat 3
Sailboat 12. See also Wind Hold
Heading Screen 2. See also Wind Hold
Screen
M
Man Overboard 7
Messages
Error/Warning 20
N
Network Sharing 1
North
Magnetic/True setting 16
Variance 16
O
Orbit 9
P
Power Mode 18
Product Support 19
R
Remote 16
Configuring 17
Connecting 16
Route To
Powerboat 9
Sailboat 15
S
Sails, raising and lowering 13
Search 10
Sea State Filtering 17
Settings 16
Remote 16
System 16
User 17
Shadow Drive 17
Sensitivity 17
Support, product 19
T
Tack/Gybe 14
From Heading Hold 14
From Wind Hold 15
Settings 14
Troubleshooting 20
Turning Off the Autopilot 1
Turning On the Autopilot 1
U
U-Turn 7
V
Voltage Alarm 16
W
Warning Messages 20
Wind
Apparent 18
True 18
Wind Hold Type 18
Wind Limiter 18
Wind Hold 13
Adjustment 14
Engaging 13
Screen 13
Wind Hold Screen 13
Z
Zigzag 5
21
For the latest free software updates (excluding map data) throughout the life of your Garmin products, go to the Garmin Web site at www.garmin.com.
© 2011 Garmin Ltd. or its subsidiaries
Garmin International, Inc.
1200 East 151st Street, Olathe, Kansas 66062, USA
Garmin (Europe) Ltd.
Liberty House, Hounsdown Business Park, Southampton, Hampshire, SO40 9LR UK
Garmin Corporation
No. 68, Jangshu 2nd Road, Sijhih, Taipei County, Taiwan
www.garmin.com
July 2011
Part Number 190-01289-00 Rev. B
Printed in Taiwan