1
P3PC-4252-01EN
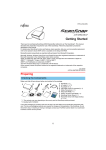
fi -7160/ fi -7260/ fi -7180/ fi -7280
Image Scanner
Getting Started
Thank you for purchasing the fi-7160/fi-7260/fi-7180/fi-7280 color image scanner. This manual describes
the preparation required to use this product. Follow the procedures in this manual. Make sure to read the
attached "Safety Precautions" manual before using the scanner. For details about scanner functions and
features, basic operation, daily care, consumable replacement and troubleshooting, refer to the Operator's
Guide (PDF). The Operator's Guide can be displayed by selecting [USER'S GUIDE] J [Operator's Guide]
in the Setup DVD-ROM.
Microsoft product screenshots in this manual are reprinted with permission from Microsoft Corporation.
Microsoft, Windows, Windows Server, Windows Vista, Excel, and SharePoint are either registered
trademarks or trademarks of Microsoft Corporation in the United States and/or other countries.
Word is a product of Microsoft Corporation in the United States.
ISIS is a registered trademark of EMC Corporation in the United States.
Intel, Pentium, and Intel Core are registered trademarks or trademarks of Intel Corporation in the United
States and other countries.
ABBYY™ FineReader™ Engine © ABBYY. OCR by ABBYY
ABBYY and FineReader are trademarks of ABBYY.
ScanSnap, ScanSnap Manager, and PaperStream are registered trademarks of PFU LIMITED in Japan.
Other company names and product names are the registered trademarks or trademarks of the respective
companies.
July, 2013
© PFU LIMITED 2013
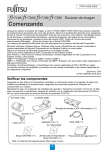
Checking the Components
Make sure that all items shown below are included in the package. If any other packaging is provided, make
sure to keep it as well. The components must be handled with care.
The box and packaging materials are required for storage and transportation of the scanner. Do not throw
them away. If anything is missing or damaged, contact your FUJITSU scanner dealer or an authorized
FUJITSU scanner service provider.
[fi-7160/fi-7180]
[fi-7260/fi-7280]
ADF paper chute (Feeder) (×1)
Scanner (×1)
AC cable (×1)
AC adapter (×1)
USB cable (×1)
[fi-7180/fi-7280]
2D Barcode for PaperStream
Setup CD-ROM (×1)
Note: The contents may vary depending on the country.
Setup DVD-ROM (×1)
1
Safety Precautions (×1)
z 2D Barcode for PaperStream
[fi-7180/fi-7280]
Safety Information
This option can recognize two dimensional
codes.
Can be used with the PaperStream IP
(TWAIN) driver, the PaperStream IP (TWAIN
x64) driver, the PaperStream IP (ISIS) driver,
or PaperStream Capture.
For fi-7160/fi-7260, the 2D Barcode for
PaperStream option is sold separately.
For details about the installation, refer to
readme in the 2D Barcode for PaperStream
Setup CD-ROM.
The attached Safety Precautions manual contains
important information about the safe and correct
use of this product. Make sure that you read and
understand it before using the scanner.
Symbols Used in This
Manual
The following symbols are used in this manual.
Symbol
WARNING
CAUTION
Description
z Software Operation Panel
This indication alerts operators to
an operation that, if not strictly
observed, may result in severe
injury or death.
Configure various settings such as the
operation of the scanner and managing the
consumables. Installed together with the
PaperStream IP (TWAIN) driver, the
PaperStream IP (TWAIN x64) driver, or the
PaperStream IP (ISIS) driver.
This indication alerts operators to
an operation that, if not strictly
observed, may result in safety
hazards to personnel or damage
to the product.
z Error Recovery Guide
Shows the error status and countermeasures
when an error occurs. Installed together with
the PaperStream IP (TWAIN) driver, the
PaperStream IP (TWAIN x64) driver, or the
PaperStream IP (ISIS) driver.
Removing the Protective
Packaging
z PaperStream Capture
An image scanning application that supports
the PaperStream IP (TWAIN) driver and the
PaperStream IP (ISIS) driver. By defining scan
settings as document profiles, you can
customize the settings according to your
preference.
The scanner is secured with orange protective
tape. Peel off the tape before using the scanner.
Installing the Software
z ScanSnap Manager for fi Series
Bundled Software
An application that scans images with the
driver settings that are used exclusively for
ScanSnap Manager for fi Series. PaperStream
IP (TWAIN) driver is required to use this
application. Enables easy scanning with a
single button.
The following software are bundled with the
scanner:
z PaperStream IP (TWAIN) Driver
Conforms to the TWAIN standard. Used when
you operate the scanner using TWAINcompliant 32-bit applications.
z Scan to Microsoft SharePoint
An application that allows you to upload your
files easily from ScanSnap Manager for fi
Series to a SharePoint site. Can be used to
scan from ScanSnap Manager for fi Series.
z PaperStream IP (TWAIN x64) Driver
Conforms to the TWAIN standard. Used when
you operate the scanner using TWAINcompliant 64-bit applications.
Can be installed on 64-bit operating systems.
z ABBYY FineReader for ScanSnap™
Bundled for use with ScanSnap Manager for fi
Series, this application converts scanned
images into Microsoft® Office (Word/Excel®/
PowerPoint® ) files. Can be used to scan from
ScanSnap Manager for fi Series.
z PaperStream IP (ISIS) Driver
Conforms to the ISIS standard. Used when you
operate the scanner using ISIS-compliant
applications.
2
z User’s Guide
Hard disk 5,400 rpm or more
drive (Recommended: 7,200 rpm or more)
Includes Safety Precautions, Getting Started,
Operator's Guide, and fi-718PR Imprinter
Operator's Guide.
Memory
z Scanner Central Admin Agent
Display 1024 × 768 pixels or more,
resolution 65,536 colors or more
Used to centralize the management of multiple
scanners, by allowing you to apply firmware
updates simultaneously, monitor the operating
status, and check the scanner information.
Note that required applications will differ
depending on the form of operation.
For details, refer to the Scanner Central Admin
User’s Guide.
Hard disk 2.2 GB or more of free hard disk space
space (*2)
DVD drive Required for installing the software
Interface USB3.0/2.0/1.1
*1: The software operates as a desktop
application.
*2: Required disk space varies according to the
file size of the scanned images.
System Requirements
The system requirements are as follows.
ATTENTION
zWindows® XP Home Edition
(Service Pack 3 or later)
zWindows® XP Professional
(Service Pack 3 or later)
zWindows® XP Professional x64 Edition
(Service Pack 2 or later)
zWindows Vista® Home Basic
(32-bit/64-bit) (Service Pack 1 or later)
zWindows Vista® Home Premium
(32-bit/64-bit) (Service Pack 1 or later)
zWindows Vista® Business
(32-bit/64-bit) (Service Pack 1 or later)
zWindows Vista® Enterprise
(32-bit/64-bit) (Service Pack 1 or later)
zWindows Vista® Ultimate
Operating (32-bit/64-bit) (Service Pack 1 or later)
system zWindows Server® 2008 Standard
(32-bit/64-bit)
zWindows Server® 2008 R2 Standard
(64-bit)
zWindows® 7 Home Premium
(32-bit/64-bit)
zWindows® 7 Professional
(32-bit/64-bit)
zWindows® 7 Enterprise (32-bit/64-bit)
zWindows® 7 Ultimate (32-bit/64-bit)
zWindows Server® 2012 Standard
(64-bit) (*1)
zWindows® 8 (32-bit/64-bit) (*1)
zWindows® 8 Pro (32-bit/64-bit) (*1)
zWindows® 8 Enterprise (32-bit/64-bit)
(*1)
CPU
1 GB or more
(Recommended: 4 GB or more)
zIf the system requirements above are not
satisfied, the scanner may not operate.
zScanning speed will slow down in the following
cases:
- The CPU or the memory does not meet the
required specifications
- The version of the USB port or the USB hub
is USB 1.1
HINT
The screenshots used in this manual are of
Windows® 7. The actual windows and
operations may differ depending on the
operating system.
Where there is no distinction between the
different versions of the operating system
shown in the table of system requirements, the
general term Windows® is used.
Installing the Bundled Software
Install the bundled software from the Setup DVDROM in the following procedure.
Note that there are two ways to install the bundled
software: select [Installation (Recommended)] to
install all the software required to operate the
scanner, or [Installation (Custom)] to select and
install the software as needed.
ATTENTION
If an old version of the software is installed
already, uninstall it first.
For details about the uninstallation procedures,
refer to "A.5 Uninstalling the Software" in the
Operator's Guide.
Intel® Pentium® 4 1.8 GHz or higher
(Recommended:
Intel® Core™ i5 2.5 GHz or higher,
except mobile device processors)
3
4.
■ Installation (Recommended)
The following software are installed:
z PaperStream IP (TWAIN) Driver
z PaperStream IP (TWAIN x64) Driver
z Software Operation Panel
z Error Recovery Guide
z PaperStream Capture
z ScanSnap Manager for fi Series
z ABBYY FineReader for ScanSnap™
z User’s Guide
z Scanner Central Admin Agent
1.
2.
Follow the instructions on the screen to
proceed with the installation.
Installing the Scanner
Install the scanner in the following procedure.
1.
Place the scanner at its installation site.
ATTENTION
Carry the scanner by supporting it from the
bottom.
zfi-7160/fi-7180
Outer dimensions
Installation space
Turn on the computer and log onto
Windows® as a user with Administrator
privileges.
Insert the Setup DVD-ROM into the DVD
drive.
380
(14.96)
D The [fi Series Setup] screen appears.
163
(6.42)
HINT
If the [fi Series Setup] screen does not
appear, double-click "Setup.exe" in the
Setup DVD-ROM via Windows Explorer or
[Computer].
3.
170(6.69)
300
(11.81)
400
(15.75)
Click the [Installation (Recommended]
button.
700(27.56)
Unit: mm (in.)
zfi-7260/fi-7280
Outer dimensions
Installation space
450
(17.72)
4.
Follow the instructions on the screen to
proceed with the installation.
450
(17.72)
■ Installation (Custom)
1.
2.
3.
300
400
(15.75) (11.81)
Perform steps 1. to 2. in "Installation
(Recommended) (page 4)".
234
(9.21)
577(22.72)
800(31.50)
Unit: mm (in.)
Click the [Installation (Custom)] button.
Select the check box for the software to
install and click the [Next] button.
4
2.
Unlock the transport lock switch.
Connecting the Cables
For fi-7260/fi-7280, there is a carrier unit
inside the flatbed which is fixed in place to
prevent damage during transportation.
Slide the transport lock switch on the front.
Connect each cable in the following procedure.
AC cable
Power connector
Unlocked
Locked
4
AC adapter
2
Transport lock switch
3.
2
Insert the tabs into the slots on the back of
the scanner in the direction indicated by the
arrow 1 , and tilt the ADF paper chute
1
USB cable
backwards in the direction indicated by the
arrow 2 until it locks in place.
CAUTION
Only use the supplied AC adapter. Not doing
so may cause the scanner to malfunction.
Furthermore, do not use the supplied AC
adaptor for other products.
ADF paper chute
(Feeder)
Side guides
1
3
USB connector
Attach the ADF paper chute (Feeder).
Tab
4
1.
2.
2
ATTENTION
Confirm that the computer is turned off.
Connect the USB cable to the USB
connector of the scanner and USB port of
the computer.
ATTENTION
Insert the ADF paper chute (Feeder) firmly
so that there is no space between the
scanner.
zUse the supplied USB cable.
zIf you connect the scanner with USB 3.0/
2.0, it is required that the USB port and
the hub be compliant with USB 3.0/2.0.
The scanning speed slows down when
you connect the scanner with USB 1.1.
zConnect it with
the USB mark
facing up.
USB mark
5
3.
2.
Connect the AC cable to the AC adapter
(hereinafter called the "power cable").
WARNING
4.
3.
Only use the supplied power cable.
To prevent electrical shock or scanner
malfunction, do not perform the following:
zUse a different power cable
zUse the supplied power cable for other
devices
Select the language to be displayed on the
LCD.
For details, refer to "Chapter 4 How to Use
the Operator Panel" in the Operator's Guide.
Turn on the computer.
D The scanner is automatically detected.
ATTENTION
Connect the power cable to the power
connector of the scanner and the power
outlet.
4.
HINT
If the [Found New Hardware] dialog box
appears, select [Locate and install driver
software (recommended)], and follow the
instructions on the screen to install the
driver.
Load a document in the scanner.
1. Pull out the chute extensions according to the
length of the document.
When you plug the cable into the outlet, the
[Power] button on the scanner’s operator
panel will flash once. Note that this is an
initial diagnosis and not a malfunction.
2. Pull the stacker out, slide stacker extension 1
and stacker extension 2 toward you
according to the length of the document, and
lift the stopper up.
Test-Scan
3. Load the document face-down in the ADF
paper chute (Feeder).
Follow the procedure described below to check
that documents can be scanned correctly by using
PaperStream Capture and the PaperStream IP
(TWAIN) driver.
4. Adjust the side guides to the width of the
document.
1.
zfi-7160/fi-7180
Side guides
Chute
extension 2
Press the [Power] button on the operator
panel.
Chute
extension 1
LCD
Check
Menu Stop/Clear
Stacker
LED indicator
Scan/Enter
Power
[Power]
button
Stacker extension 1
Stacker extension 2
D The scanner is turned on, and the [Power]
button lights in green.
During initialization, the following image is
displayed on the LCD of the operator
panel.
Stopper
zfi-7260/fi-7280
Chute extension 2
Chute extension 1
Side guides
The scanner is ready to scan when
[Ready] is displayed.
ATTENTION
If [Ready] is not displayed on the LCD,
refer to "Chapter 8 Troubleshooting" in the
Operator's Guide.
Stacker
Stopper
6
5.
6.
7.
Start up PaperStream Capture.
Contact for Inquiries
Select the [Start] menu J [All Programs] J
[PaperStream Capture] J [PaperStream
Capture] (for Windows Server® 2012 or
Windows® 8, right-click the Start screen,
select [All apps] on the app bar, and then
select [PaperStream Capture] under
[PaperStream Capture]).
Refer to the contact list on the last page of the
Safety Precautions manual.
z ABBYY FineReader for ScanSnap™
Select [Start] menu J [All Programs] J
[ABBYY FineReader for ScanSnap(TM)] J
[User’s Guide] J [Technical Support] (for
Windows Server® 2012 or Windows® 8, rightclick the Start screen, then select [All apps]
on the app bar J [User's Guide] under
[ABBYY FineReader for ScanSnap (TM)] J
[Technical Support]).
Click the [Scan] button in the Menu Area.
Click one of the three types of document
profiles that are prepared beforehand.
Below is an example of when the document
profile [B&W] is clicked.
z Color Image Scanner fi Series
For other inquiries regarding the scanner,
refer to the following web page:
http://imagescanner.fujitsu.com/g-support.html
If the solution to your problem cannot be
found on the above web page, refer to the
contact information for your Fujitsu office on
the following web page:
http://imagescanner.fujitsu.com/warranty.html
D The document is scanned, and the
scanned image is displayed.
Contact for Purchasing Consumables
or Cleaning Materials
http://www.fujitsu.com/global/shop/computing/
IMAGE_index.html
ATTENTION
When a alphanumeric character is
displayed on the LCD, refer to "Chapter 8
Troubleshooting" in the Operator's Guide.
For details about other scanning features, refer to
"Chapter 5 Various Ways to Scan" in the
Operator's Guide.
Notice
z Copying of the contents of this document in whole
or in part and copying of the scanner application is
prohibited under the copyright law.
z The contents of this document are subject to
change without notice.
7