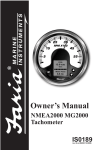
1
TM
Owner’s Manual
IS0250a
ecr7106 9/2007
TABLE OF CONTENTS
Part I: Introduction
Basic Operation
Part II: System Setup
Input Setup
Tank Setup
Depth Setup
Part III: Operating Instructions
Gauge Screen 1
Gauge Screen 2
Quick View Screen
Fuel Manager Screen
Depth / Temp Screen
Tank Level Screen
GPS Screen
Radio Control Screen (if available)
Main Menu Screen
Part IV: Menu Options / User Settings
Lighting
Fuel Manager
System Setup
Units
Calibrate
Self Test
Master Reset
Diagnostics
Part V: Alarms
Part VI: Installation / Wiring Diagrams
Part VII: FAQ / Troubleshooting
Part VIII: Warranty
3
4
6
6
8
9
10
10
11
12
13
14
15
16
17
18
19
19
20
21
22
23
26
27
28
29
31
38
39
2
Part I: Introduction
Congratulations on the purchase of your Faria Antares unit. This owner’s
manual contains very important information regarding the installation, setup,
and operation of your Antares. To get the best results in operation and
performance please take a few minutes to read this manual and get
acquainted with the Faria Antares unit.
3
B1: Escape Button
IMAGE 1.1
B2: Navigation
Pad (Up, Down,
Left, Right
Arrows)
B3: Enter Button
B4: Radio Button
(optional)
Screen Indicator
Bar
B5: Power Button
To begin, simply press the
button to turn on your Antares. It
will take about 5-7 seconds for the Antares to complete its start-up process.
Your Antares is ready to use when the Gauge 1 Screen
appears.
Navigate through display and setup screens by pressing the up, down, left, or
right arrows on the navigation pad (image 1.1, pg. 4). After familiarizing
yourself with the Antares screens, please continue to read through your
owner’s manual for detailed operating instructions.
4
BUTTON FUNCTIONS
(B1): Returns to previous page when in menu / setup / radio control
screens, silences alarms
(B2): Use to change screens, scroll menu options, adjust settings
(B3): Select highlighted item
(B4): Activates radio control screen (not available on all Antares
models)
(B5): Turns unit on / off, shortcuts to lighting control screen
SCREEN INDICATOR ICONS
MENU SCREEN
GAUGE SCREEN 1
GAUGE SCREEN 2
QUICK VIEW SCREEN
FUEL FLOW MANAGER SCREEN
DEPTH, AIR TEMP, WATER TEMP SCREEN
TANK(S) LEVEL SCREEN
GPS SCREEN
5
Part II: System Setup
SYSTEM SETUP
Your Faria Antares unit should already have been setup by either the boat
manufacturer or by your dealer. Check with your dealer before beginning the System
Setup process.
In order to get the optimal performance out of your Faria Antares unit, the
following steps are recommended. Some of the information needed to complete the setup
process will be contained in your boat owner’s manual. Be sure to have your boat
owner’s manual available before beginning the Antares setup process.
To begin, use the left or right arrows on the navigation pad to highlight the
Antares Menu Screen
on the screen indicator bar located at the bottom of the
screen. Then use the down arrow on the navigation pad to scroll down to SYSTEM
SETUP and press
.
Use the navigation pad to highlight SYSTEM SETUP,
then press
.
Step 1: INPUT SETUP
Use the navigation pad to highlight INPUT SETUP, then
press
.
Input Setup will allow you select which analog senders are connected to your
Antares unit.
To activate or deactivate a sender, use the left or right navigation buttons to select
either TANK 1, TANK 2, TRIM / TANK 3, AIR TEMP or SPEED SOURCE. Once the
desired selection is highlighted, press
. Now use the up or down navigation buttons
to highlight the desired setting, then press
. The
icon on the Save Changes bar
will automatically highlight. If your changes are correct, press
to save.
will appear to confirm that changes have been saved. If the changes are
not correct, use the navigation pad to highlight
and press
.
will appear to confirm that the changes have not been saved. Refer to the list of available
INPUTS on the next page for further instructions.
6
*For sender connection information, refer to wiring diagram HN0605 in Part VI (pg. 36)
for further information.
TANK 1 – Select the type of level sender connected to Pin 5 on HN0605*.
If nothing is connected, select “NONE”.
TANK 2 – Select the type of level sender connected to Pin 6 on HN0605*.
If nothing is connected, select “NONE”.
TRIM / TANK 3 – Choose the type of analog trim sender or level sender
connected to Pin 7 on HN0605*. If nothing is connected, select “NONE”.
AIR TEMP – Select “INSTALLED” if an analog Air Temp sender is
connected to Pin 9 on HN0605*. If an air temp sender is not connected,
select “NOT INSTALLED”
SPEED SOURCE – Choose the type of speed signal to be used by the
Antares. Refer to your boats owner’s manual to determine which type of
speed options are installed on your boat and are connected to your
Antares.
DIGITAL PWS – A digital paddlewheel sender is connected
via the J1939 backbone.
GPS – A NMEA0183 GPS signal is connected. *
ANALOG PWS – An analog paddlewheel sender is connected to pin 9
on HN0605. *
NONE – No speed signal is connected.
Once you have saved all the appropriate settings, press
SETUP menu.
to return to the SYSTEM
7
Step 2: TANK SETUP
Use the navigation pad to highlight TANK SETUP, then
press
.
Tank Setup will allow you to 1) Name each tank 2) Set each tank’s capacity and 3) Set a
low level warning for each tank.
Note: Refer to your boat owner’s manual for the correct tank capacities. Setting
the tank capacity incorrectly will effect the performance of the Fuel Flow Manager.
Use the left or right navigation buttons to select either Tank 1, Tank 2, or Tank 3.
Once the desired tank is selected, press
. Now scroll up or down to select the
setting to change and use the left or right arrows to make the appropriate changes.
Note By selecting
on the “Fuel Tank?” option, you are indicating that the
tank connected to the associated sender is a fuel tank. Any tank that is indicated as a
fuel tank will be used by the Fuel Flow Manager for calculation. If the associated tank is
not a fuel tank, then select
. Improper tank indication will effect the performance of
the Fuel Flow Manager.
Once you have adjusted all the options to the desired settings, press
. The
icon on the Save Changes bar will automatically highlight. If your changes are
correct, press
to save.
will appear to confirm that the changes have
been saved. If the changes are not correct, use the navigation pad to highlight
and
press
.
will appear to confirm that the changes have not been
saved.
Once you have saved all the appropriate settings, press
SETUP menu.
to return to the SYSTEM
8
Step 3: Depth Setup
Use the navigation pad to highlight DEPTH SETUP, then
press
.
Depth Setup will allow you to set the shallow water alarm, set the deep water alarm, and
set the keel offset.
Note: A digital depth transducer must be installed on your boat for the depth
option to work. Refer to your owner’s manual to determine if there is a transducer
installed. Your Antares will automatically recognize if a compatible digital depth
sounder is installed.
Use the up or down arrows on the navigation pad to highlight the desired option, then use
the left or right arrows on the navigation pad to make the appropriate changes.
Once you have adjusted all the options to the desired settings, press
. The
icon on the Save Changes bar will automatically highlight. If your changes are
correct, press
to save.
will appear to confirm that the changes have
been saved. If the changes are not correct, use the navigation pad to highlight
and
press
.
will appear to confirm that the changes have not been
saved.
Once you have saved all the appropriate settings, press
SETUP menu.
to return to the SYSTEM
YOU ARE NOW FINISHED WITH THE SETUP PROCESS. PRESS
TO
RETURN TO THE MAIN MENU SCREEN. SIMPLY USE THE NAVIGATION PAD
TO MOVE YOUR WAY THROUGH THE ANTARES DISPLAY SCREENS. YOU
ARE NOW READY TO HEAD OUT ON TO THE WATER.
9
Part III: Operating Instructions
Your Faria Antares unit has 8 main display screens and an optional Radio Control
Screen.
When a screen is selected, the Screen Indicator Icon on the Screen Indicator Bar located
at the bottom of the screen will be highlighted (
). Use the right or left arrows on
the navigation pad to scroll through the available display screens.
To activate the optional Radio Control Screen, press the
button if available.
SCREEN INDICATOR ICONS
MENU SCREEN
GAUGE SCREEN 1
GAUGE SCREEN 2
QUICK VIEW SCREEN
FUEL FLOW MANAGER SCREEN
DEPTH, AIR TEMP, WATER TEMP SCREEN
TANK(S) LEVEL SCREEN
GPS SCREEN
10
GAUGE SCREEN 1
/ GAUGE SCREEN 2
Gauge Screen 1 and Gauge Screen 2 provide a quick glance at up to 12 different gauge
functions. Each quadrant can be customized to display any piece of information
available.
To customize a quadrant, press
. The upper left quadrant will be highlighted
yellow as pictured below.
Now use the navigation pad to select the quadrant you wish to change. When the desired
quadrant is highlighted, press
. A list of options will appear in the center of the
screen. Use the up or down arrows on the navigation pad to highlight the desired
information to be displayed, then press
. The highlighted quadrant will change to
the selected display.
Once you have set all of the quadrants to the desired information, press
to return to
the normal operating mode.
11
QUICK VIEW SCREEN
The Quick View screen provides a large digital display for quick, easy reading.
Use the up or down navigation buttons to scroll through the available information.
12
FUEL FLOW MANAGER SCREEN
The Fuel Flow Manager screen provides all the necessary information to optimize the
fuel consumption performance of your boat.
The upper two quadrants can be customized to display various fuel flow information. To
customize these quadrants, press
. The upper left quadrant will be highlighted
yellow as pictured below.
Use the left or right navigation buttons to highlight either of the upper quadrants. When
the desired quadrant is highlighted, press
. A list of available fuel flow information
will appear in the center of the screen. Use the up or down navigation buttons to
highlight the desired information to be displayed, then press
. The highlighted
quadrant will change to the display selected.
Once you have set the quadrants to the desired information, press
normal operating mode.
to return to the
WARNING: The Total Remaining calculation is not connected to the fuel level sender(s)
on your boat and is not intended to
13
DEPTH / TEMP SCREEN
The Depth / Temp screen will display the current depth, air temperature, and water
temperature.
For Depth and Water Temperature, a digital Depth / Water Temp transducer must be
installed. If no transducer is installed then the Depth quadrant will display “Transducer
Not Installed” and the Water quadrant will display “N/A”.
For Air Temperature, an analog Air Temperature sender must be installed. If no sender is
installed then the Air quadrant will display “N/A”.
Refer to your boat owner’s manual to determine which transducers are installed on your
boat.
14
TANK LEVEL SCREEN
The tank level screen will display tank level information as reported by the tank’s level
sender. Your Antares unit can display level information for up to three tanks. Tanks
must be activated during the setup process to be displayed on this screen. See Part II:
System Setup for more information on tank setup.
Dual Tank Display
Three Tank Display
15
GPS SCREEN
Magnetic North Signal Available
No Magnetic North Signal Available
The GPS Screen will display COG, Latitude, and Longitude when a NMEA0183 GPS
Antenna is installed.
You do not need to change any settings when installing a GPS antenna. Your Antares
unit will automatically recognize if a compatible GPS antenna is connected.
When the GPS signal is acquiring the Antares will display “ACQUIRING GPS”
If no GPS antenna is installed, then “NO GPS” will appear.
Acquiring GPS Signal
GPS not connected
Refer to your boat owner’s manual to determine if a NMEA0183 GPS antenna has been
installed with the Faria Antares system.
For full details regarding Magnetic and True North GPS readings
visit NOAA’s National Geophysical Data Center website.
http://www.ngdc.noaa.gov/seg/geomag/declination.shtml
16
RADIO CONTROL SCREEN
To enter the Radio Control Screen, press the
button
The Radio Control Screen allows you to control certain functions of your boat’s Jensen
radio. This option is not available on all Antares models and requires a compatible
Jensen radio. For a list of compatible radios, visit www.fariainstruments.com/antares.html
Press up or down on the navigation button to scroll through the various radio control
functions. Then press left, right, or
to adjust the highlighted control function
Press
to turn radio on / off
Press right or left on the navigation button to increase / decrease
volume.
Press
to activate Mute. Press
again to deactivate.
Press right on the navigation button to change radio mode
Ex:
Press right on the navigation button to change band
Ex: FM1, FM2, SAT
Press right or left on the navigation pad once to Tune, press and
hold to Seek
Press right or left on the navigation pad for Shift, press and hold to
Scan.
Press
at any time to exit the Radio Control Screen
17
MAIN MENU SCREEN
The Main Menu screen provides access to the various setup screens available on your
Faria Antares unit.
Use the up or down navigation buttons to highlight the desired menu option, then press
.
A detailed description of each sub-menu is contained in Part IV: Menu Options / User
Settings.
18
Part IV: Menu Options / User Settings
LIGHTING
This screen can also be accessed by tapping the
button at any time.
Use the up or down navigation buttons to highlight the desired setting to adjust, then use
the left or right navigation buttons to adjust the highlighted section. Press
to save
your changes and exit to the previous screen or
to exit to the previous screen
without saving.
19
FUEL MANAGER
STOP: Your fuel tanks must be activated and set to the proper capacity before the fuel
manager will become functional. Refer to Part II: SYSTEM SETUP for further
information.
It is CRITICAL that you correctly set the TOTAL AMOUNT OF FUEL each time you
refuel.
Total Amount of Fuel = Fuel Added + Fuel Remaining
Use the up or down navigation buttons to highlight the desired setting, then use the left or
right navigation buttons to change the value of the highlighted area. You can make
changes to all of the Fuel Manager options before saving.
Once all the changes have been properly set, press
. The
icon on the Save
Changes bar will automatically highlight. If your changes are correct, press
to
save.
will appear to confirm that changes have been saved. If the
changes are not correct, use the navigation pad to highlight
and press
.
will appear to confirm that the changes have not been saved.
Note: The TOTAL AMOUNT OF FUEL must be set to the proper value to insure
accurate performance from the Fuel Manager.
20
SYSTEM SETUP
Refer to Part II: System Setup, pages 6-9 for detailed information.
21
UNITS
The Units screen will allow you to change the display values for Fluids, Pressure, Depth,
Temperature, Speed, and Distance.
Use the left or right navigation buttons to highlight the desired option to change, then use
the up or down navigation buttons to change the value located directly below the
highlighted option. You can make changes to all of the listed options before saving.
Once all the changes have been properly set, press
. The
icon on the Save
Changes bar will automatically highlight. If your changes are correct, press
to
save.
will appear to confirm that the changes have been saved. If the
changes are not correct, use the navigation pad to highlight
and press
.
will appear to confirm that the changes have not been saved.
22
CALIBRATE
Your Faria Antares unit is factory calibrated to give you optimal performance with the
senders installed on your boat. In order to further insure that you are getting the most
accurate readings possible, we have made the following calibrations available to you. To
adjust your speedometer calibration or trim calibration, use the up or down navigation
buttons to highlight the desired option, then press
.
23
SPEEDOMETER CALIBRATION
Step 1: Press
to begin speedometer calibration, then follow the
on-screen instructions.
Your actual speed as reported by the active speed source will be
displayed in the lower left quadrant. If you have a GPS antenna
connected to the Antares unit and a signal is present, then your speed
as reported by the GPS antenna will be displayed in the lower right
quadrant. If no GPS antenna is attached to the Antares unit, then use
a secondary GPS speed source for calibration.
Step 2: Press the left or right arrows on the navigation button to
increase or decrease the speed value in the highlighted quadrant.
Step 3: When the speed value in the highlighted quadrant matches or
is close the GPS speed value displayed in the lower right quadrant or
the GPS speed value displayed on your secondary GPS speed source,
press
.
When calibration is complete, “CALIBRATION SUCCESFUL” will
be displayed and the Antares will automatically return to the previous
screen.
24
TRIM CALIBRATION
Press
to begin Trim Calibration, then follow the on-screen
instructions.
Step 1: Set your engine to its full down position, then press
.
Step 2: Set your engine to the top of its trim range (prop still in water),
then press
.
Step 3: Set your engine to the top of its trailer / full-up position, then press
.
Once step 3 is completed, the screen will display “TRIM CALIBRATION
COMPLETE” and the
icon on the Save Changes bar will
automatically highlight. If ALL steps were followed correctly, press
to save.
will appear to confirm that the changes
have been saved. If ALL steps were not followed correctly, use the
navigation pad to highlight
and press
.
will
appear to confirm that the changes have not been saved.
The Antares will automatically return to the previous screen.
25
SELF TEST
Your Faria Antares will automatically run a self-diagnostics test when this menu option is
selected. The test may take up to 3 minutes. If no problems are found, the screen will
display “TEST SUCCESSFUL”.
If a problem is found, the screen will display “Error(s) Found”. If this occurs, contact
Faria Customer Service. Refer to Part VIII: Warranty for further information.
After running the self-diagnostics test, the Antares will automatically return to the Main
Menu screen.
26
MASTER RESET
This screen will appear when Master Reset is selected from the Main Menu screen.
will automatically be highlighted. If you do not wish to perform a Master Reset, be sure
that
is highlighted and press
. You can also press
to return to the
previous screen without performing a Master Reset.
WARNING: Performing a Master Reset will return all user defined and manufacturer set
values to the default values.
27
DIAGNOSTICS
The Diagnostics page displays the most recent engine error codes as reported by the
engine’s ECU.
“Hours” indicates at what engine hour an engine error has occurred.
“Error” indicates which engine error occurred.
To exit, press
.
28
Part V: Alarms
Your Faria Antares unit will display 3 types of alarms;
1) Engine Alarms 2) Fuel/Tank Level Alarms and 3) Depth Alarms.
When an alarm condition is present, an “Alarm” pop-up window will appear (see image
below) and alarm icons will flash in the lower corners of the display screen.
To close the alarm pop-up window and silence the alarm, press
The alarm icons will continue to flash in the lower corners of the
display screen until the alarm condition is corrected.
.
Alarm Icons
Engine Alarm Active
Depth Alarm Active
Fuel / Tank Level
Alarm Active
When an alarm condition is corrected, an “Alarms Cleared” pop-up window will appear.
You MUST press
to close the Alarms Cleared window
29
ENGINE ALARMS LIST
Your Antares unit will display the engine alarms listed in table 5.1. The Antares will
display engine alarms as they are reported by the engine’s ECU. The Antares may not be
able to display all available engine alarms. When available, the Antares will give a
detailed description of the active alarm condition(s). If a description is not provided by
the engine’s ECU, the Antares unit will most likely display “Miscellaneous Engine Fault”
in the alarm pop-up window.
NOTE: Many engines are equipped with an internal protection system. In the event that
this protection system is activated by the engine’s ECU, your Antares unit may display
“Engine Emergency Stop” in the alarm pop-up window. If this occurs, your engine’s
ECU may limit power and it is recommended that you contact your dealer or marina
immediately. The Faria Antares unit has no control over your engine’s internal
protection system.
TABLE 5.1
30
Part VI: Installation / Wiring Diagrams
INSTALLATION
Your Faria Antares unit can be mounted to your instrument panel in 4 ways; Panel
Mount, Flush Mount, Gauge Mount, and Gimble Mount
Panel Mount
Step 1: Cut a square hole with rounded corners to match the dimensions as indicated in
the figure below.
Step 2: Insert the Antares unit from front of panel, placing the Panel Mount Gasket
(GK0206) between the Antares and the panel.
Step 3: From back of panel, install back clamp. The four interior studs should line up
with the four interior holes of the back clamp. Tighten the supplied nuts, washers, and
lock washers to 7-10 inch pounds (slightly more than finger tight)
Step 4: Connect 9-pin (HN0604) and 20-pin (HN0605) wire harnesses to back of Antares
unit. Proper connection requires the locking ring on each harness to be rotated about ¼
turn.
Step 5: Connect available inputs to corresponding wire harnesses. See pages 34-37 for
detailed wiring information
31
Flush Mount
Step 1: Cut a square hole with rounded corners to match the dimensions as indicated in
the figure below.
Step 2: Install mounting studs at the dimensions indicated in the figure.
Step 3: Insert the Antares unit from back of panel, placing the Flush Mount Gasket
(GK0207) between the Antares and the panel.
Step 4: From back of panel, install back clamp. The four interior studs should line up
with the four interior holes of the back clamp. Tighten the supplied nuts, washers, and
lock washers to 7-10 inch pounds (slightly more than finger tight)
Step 5: Connect 9-pin (HN0604) and 20-pin (HN0605) wire harnesses to back of Antares
unit. Proper connection requires the locking ring on each harness to be rotated about ¼
turn.
Step 6: Connect available inputs to corresponding wire harnesses. See pages 34-37 for
detailed wiring information
32
Gauge Mount
Step 1: Cut a 3 3/8” round hole in your boat’s console
Step 2: Insert the Antares through the hole, placing the Gauge mount gasket (GK1234)
between the Antares unit and the panel.
Step 3: From back of panel, install back clamp. The two interior studs should line up
with the two holes of the back clamp. Tighten the supplied nuts, washers, and lock
washers to 7-10 inch pounds (slightly more than finger tight)
Step 4: Connect 9-pin (HN0604) and 20-pin (HN0605) wire harnesses to back of Antares
unit. Proper connection requires the locking ring on each harness to be rotated about ¼
turn.
Step 5: Connect available inputs to corresponding wire harnesses. See pages 34-37 for
detailed wiring information
33
Gimble Mount
Step 1: Locate a flat surface on your boat’s console to install the Antares Gimble Mount
Bracket.
Step 2: Using a 3/16” drill bit, drill two holes 2.7” inches apart as indicated in the figure
below.
Step 3: Using the supplied mounting hardware, mount the Gimble bracket through the
holes you just drilled
Step 4: Using the supplied fasteners, mount the Antares unit into the Gimble bracket.
Step 5: Connect 9-pin (HN0604) and 20-pin (HN0605) wire harnesses to back of Antares
unit. Proper connection requires the locking ring on each harness to be rotated about ¼
turn.
Step 6: Connect available inputs to corresponding wire harnesses. See pages 34-37 for
detailed wiring information
34
HN0604
ECU / GPS Harness
GPS
FARIA BUS
ENGINE ECU
RS232
NMEA0183
GPS
ANTENNA
HN0604
36
HN0605 – Power /
Analog Harness
FARIA BUS
Power / Gnd
Tank 1 / Tank 2
Tank 3 or Trim Air Temp or Analog PWS
Radio
HN0605
37
HN0604
HN0605
38
Part VII: FAQ / Troubleshooting
The following items are common questions regarding the installation and use of the
Antares unit. If you are experiencing a problem not described in the FAQ section, please
visit www.faria-instruments.com/antares.html for more detailed troubleshooting.
Problem
Possible Cause
Solution
"NO ECU" ALARM
Improper connection to
engine's harness
Check connection (refer to
HN0605, pg 35)
No Depth / Water
Temp Signal
Digital Depth Transducer
not installed
Improper connection
Install a compatible digital depth
/ water temp transducer
Check connection (refer to
HN???
NMEA0183 GPS Antenna
not installed
Improper connection
Install a NMEA0183 GPS
antenna
Check connection
No Radio Control
Screen
Not available on Antares
Model
Only some Antares are
available with Radio control. If
your Antares does not have a
Blue Radio Button, then it does
not have the radio control option
Unable to Control
Radio via Radio
Control Screen
Connected to incompatible
radio
No GPS Signal
Fuel Flow Manager
not Working
Fuel Flow Manager
inaccurate
Improper connection
See list of compatible radios at
www.fariainstruments.com/antares.html
Check connection of Jensen
Remote Harness to Radio Plug
on HN0605 (pg. 36)
Tanks not properly set up
Refer to Part II: System Setup
for instructions
Amount of Fuel not
properly set
Set Amount of Fuel to actual
amount of fuel in tank(s). Refer
to FUEL MANAGER, page 21
for instructions.
39
During the first 36 months from date of original retail purchase (12 months
on PWC, fog resistant gauges, Fuel Managers, Depth Sounders,
Commander-Speedo, Commander-Tach, Pilot I, Pilot II and MG2000), any
instruments that fail due to defects in materials or workmanship will be
repaired or replaced at Faria® Marine Instruments’ option at no charge. The
Warranty is further extended indefinitely beyond the initial warranty period
by enclosing the nominal fee as listed when submitting a warranty claim.
To submit a Warranty Claim, call Faria® Customer Service at
1-800-473-2742 weekdays 8:30 a.m. until 5:00 p.m. Eastern Time. One of
our Marine Applications Specialists will review the problem with you in
detail. If no solution is found, you will be given an authorization number to
return the instrument, postage prepaid and packaged to prevent damage
while in transit, along with your name, address, daytime telephone number,
sales receipt, and a brief description of the problem, to:
Fog Resistant Lens Only
$10.00
2 inch instruments
$15.00
2 inch Clock or Hourmeter
$30.00
2 inch Warning System Indicator
$35.00
2 inch Honda Trim
$35.00
Digital Depth Sounder
$55.00
Fuel Flow Manager
$90.00
Flux Gate Compass
$75.00
Flux Gate Compass with Sensor
$15.00
Electronic Speedometer
with sensor
$50.00
Tachometer, Synchronizer or
Electronic Speedometer
$30.00
Tachometer with
Hourmeter or System Indicator
$50.00
Pilot
Speedometer or Tachometer
$125.00
Commander
Tachometer or Speedometer
$125.00
Multifunction Instrument
Faria® Marine Instruments
WARRANTY SERVICE,
P.O. Box 983,
385 Norwich-New London Turnpike
Uncasville, CT 06382-0983.
$140.00
Speedometer or
Water Pressure gauge
$40.00
MG2000
Speedometer or Tachometer
$175.00
Serial Bus Gateway Box
$400.00
It will be promptly returned to you postage prepaid once analyzed, repaired
or replaced. Instrument styles which are no longer manufactured, may be
replaced with a similar instrument of equal or greater value. Flux-Gate
Compass Systems should be returned with sensor. For warranty service
beyond the initial warranty period, be certain to include your check or
money order as stated on the Warranty fees table.
Removal / reinstallation expenses, any damage to an instrument resulting from natural disasters, misuse, neglect, accident,
misapplication, improper installation, unauthorized repair or alteration, and instruments purchased prior to March 1, 1985 are
not covered by this warranty. Instruments returned to Faria® Marine Instruments that are not covered under this warranty will be
repaired or replaced at our nominal service rates or returned to you as is, at your option. Faria® Marine Instruments expressly
disclaims any liability for incidental of consequential damage caused by product defects. Some states do not allow the
exclusion or limitation of consequential damages, so the above may not apply to you. The Warranty herein is in lieu of any
other expressed warranty of merchantability or fitness or any other obligation on the part of Faria® Marine Instruments, the
Thomas G. Faria Corporation, or the seller. All implied warranties are limited to the initial 36 month period. Some states do not
allow limitation on how long an implied warranty lasts, so the above limitation may not apply to you. This warranty gives you
specific legal rights, and you also have other rights which vary from state to state.
*These fees are in effect as of 08/17/2007 and are subject to change without notice.
IS0090F 8/2007 ecr7049