1
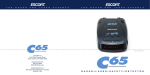
R IT DE AD TE A C R TO R K GPS Powered Threat Location System Designed in the USA ESCORT Inc. 5440 West Chester Road West Chester OH 45069 800.433.3487 www.EscortInc.com ©2010 ESCORT Inc. ESCORT®, PASSPORT®, SC55™, Speed Alert™, and Defender™ are trademarks of ESCORT Inc. Features, specifications and prices subject to change without notice. S A F E T Y C A M E R A a n d S P E E D Owner’s Manual T R A P L O C A T O R Congratulations In addition, the PASSPORT SC55 introduces the following state-of-the-art performance and features: • Compatible with certain radar and laser detectors for the ultimate in location awareness. • SpeedAlert feature provides an instant view of your vehicle’s speed during an alert. • Mark Location feature allows you to instantly “Mark” known speed traps, cameras and other places of interest. • Easy-to-use Preferences allow you to customize up to 10 features. • Ultra-bright alphanumeric display with 280 LEDs. • Selectable Markers (on/off) allow you to customize which Markers are monitored. • Includes exclusive SmartCord for easy access to pilot light, alert light and convenient Mute button. A review of the Quick Reference Guide on pages 4 and 5, and the Preferences information on pages 14-17 will briefly explain the SC55’s features. Please drive safely. Remove card along perforations PASSPORT SC55 Quick Reference Card There are 10 user-selectable options so you can customize your SC55 for your own preferences. The buttons labeled “V/M” and “CRU” are used to enter the Preferences Mode, REVIEW your current Preferences settings, and to CHANGE any settings as desired. The words “PREF,” “RVW” and “CHG” are located on the top of the device. How to use EZ-Preferences Remove card along perforations You’ve just purchased the most intelligent safety camera and speed trap locator in the world—the PASSPORT SC55. The PASSPORT SC55 provides advanced warning for high-risk locations including red light cameras, speed cameras and speed traps. Our exclusive database is completely updatable using your PC and our website. The PASSPORT SC55’s GPS-powered intelligence tcomes pre-loaded with thousands of red light and fixed position speed camera locations throughout North America. Check our website from time to time as we continually add real event content to make your drive safer and more enjoyable. Quick Reference Card 1 1 To enter Preferences, press and hold the “V/M” and “CRU” buttons down for 2 seconds. The unit will beep twice, and will display the word Prefs. 2 Then press the “RVW” button to review the categories. You can either tap the button to change categories, or simply hold the button down to scroll through the categories. 3 Press the “CHG” button to change any setting. You can either tap the button to change from setting to setting, or hold the button down to scroll through all the options. 4 To exit Preferences, simply wait 8 seconds without pressing any button, or press the power button. The unit will beep and return to normal operation. Restoring the Factory Default Settings To restore your PASSPORT to its original factory settings, press and hold the “V/M” and “CRU” buttons while turning the power on. A Reset message will be displayed, accompanied by an audible alert, acknowledging the reset. An example: Here is how you would change PASSPORT’s Pilot option: 1 Enter Preferences by holding both the “V/M” and “CRU” buttons down for 2 seconds. PASSPORT will beep twice and display Prefs. 2 Then hold the “RVW” button down. PASSPORT will scroll through the categories, starting with Pilot ( Pilot ). 3 Release the “RVW ” button when PASSPORT displays the Pilot item. Since the factory setting for Pilot is Speed and Compass, PASSPORT will display Spd Comp. Note: If you accidentally don’t release the “RVW” button in time, and PASSPORT goes to the next category, simply hold the “RVW” button down again. PASSPORT will scroll through the categories. Once you’re back to your desired category, release the “RVW” button. 4 Press the “CHG” button to change from Spd Comp to Compass. 5 To exit Preferences, simply wait 8 seconds without pressing any buttons, or press the power button. PASSPORT will beep and return to normal operation. Preferences Details Quick Reference Card Table of Contents Quick Reference Guide Installation • Connecting To A Detector Remove card along perforations OVER SPEED ALERT DETECTOR BRAND oSpd oSpd Brnd AUTOMUTE aMute aMute rCam ON or OFF (default is on) sCam ON or OFF (default is on) sTrap ON or OFF (default is on) Othr ON or OFF (default is on) * Alerts when 30-95 mph is reached ON OverSpeed off OFF OFF For ESCORT detectors ESCORT For Beltronics detectors BEL * Automatically reduces audio in alert ON AutoMute feature is off OFF • How to use Preferences 14 6-7 • Example of Preferences 14 15 • Overview of Preferences • Mounting Location 8 • Details of Preferences 16-18 • Windshield Mount 9 Technical Details 19-26 10-13 • Interpreting Radar Alerts 19 10 • Specifications 20 • AutoPower 10 • How Red Light Cameras Work 21 • Volume Control 10 • How Speed Cameras Work 21 • Mute 10 • How GPS Works 22 • Power-on Indication 10 • Software Updates 22 • AutoMute 11 Service • GPS Indicator 11 • Service Procedure 23 • CruiseAlert 11 • Troubleshooting 24 • Mark Location (MRK) 12 • Accessories 25 • SmartCord 13 • Warranty 26 • SpeedAlert 13 • Clearing the Database 13 METER Same options for your detector brand *Factory Default Settings 2 14-17 8 • Power Remove card along perforations Press the RVW button Press the CHG button to go from one category to change your setting to the next within a category PILOT LIGHT Pilot Spd Comp * Speed and Compass (Power-on indication) Pilot Compass Compass Scanning dot Pilot .> Vehicle voltage Pilot V Vehicle speed Pilot SPD AUTOPOWER aPwr ON * Shuts down after 3 hours AutoPower is off aPwr OFF UNITS Units ENG * Speed/distance in English units Speed/distance in Metric units Units MET VOICE Voice ON * Voice announcements on Voice announcements off Voice OFF BRIGHTNESS * Automatically adjusts brightness Brt Auto Dark mode Brt Dark Minimum display brightness Brt Min Medium display brightness Brt Med Maximum display brightness Brt Max MARKERS Marks DFT * Default settings Markers have been modified Marks MOD Preferences • Power Connection Controls and Features PASSPORT SC55 Quick Reference Card 4-5 6-9 3 23-26 Quick Reference Guide USB Data Port This allows you to update your database, (red light, fixed position speed cameras and speed traps) and other software from our website. Volume Adjustment/Mute Increases or decreases the alert volume. Also used to mute the audio during an alert. Page 10 Press this button Audio Jack Standard 3.5mm mono earphone jack is used with detector adapter kit. Detector Jack Plug your short detector cable into this connector. Page 6-7 Power Jack Plug the SmartCord into this connector. Page 6-7 CRU Allows you to set a threshold for alerts based on speed (30-95mph). Page 11 Power Button to turn PASSPORT on or off. Page 10 Mark Location Press to mark a specific location (e.g. speed trap, etc.). Page 12 Alphanumeric Display PASSPORT’s display will show its poweron indication. If you prefer, you can choose other power-on indications. Page 16 During an alert, the display will indicate the type of threat, accompanied by a voice announcement. NOTE: In the Dark Mode the display will not light during an alert. 4 GPS Signal Indicator The GPS icon indicates reception of GPS satellite signals. Page 11 5 Installation Connecting To A Detector Before connecting the SC55 to your radar detector using the combination kit, a few settings will need to be changed on the radar detector. These can be accessed through the radar detector’s Programming or Preferences section: • Disable Voice Alerts (if applicable) • Disable AutoMute • Set the radar detector volume level to maximum These functions will now be controlled by the SC55. The SC55 has the unique ability to be used in conjunction with an ESCORT or Beltronics branded radar detector. This allows you to add certain GPS features, including our exclusive DEFENDER™ database of safety camera and top speed trap locations, to your radar detector. NOTE: Check our website for use with other brands. IMPORTANT: The SC55 must not be connected to your radar detector for this first step. To connect the SC55 to your radar detector, simply follow these steps: 1 Using the combination mount, slide the windshield bracket into the slot located on the detector’s top case. 2 Snap the SC55 into its cradle mount on top of the detector. 6 5 4 Once the cables are connected and the SC55 is attached to the detector, turn on the power by pressing the power button on the SC55. If connected correctly, the SC55 will supply power to both the SC55 and the detector. Once power is supplied, a voice message will ask you to access Preferences and choose the type of detector you’re using. NOTE: Make sure the detector’s audio level is set to max. To enter Preferences simply: 1 Press and hold both the “V/M” and “CRU” buttons, located on the SC55’s top case, until the display and voice reads: “Prefs”. 2 Once you’re in Preferences, press and hold the V/M button until you reach “Detector Brand”. 3 Using the “CRU” button, choose your detector brand: (ESCORT, BEL, etc.) NOTE: Detector kits for other brands may be available. Please call or visit our website for more details. Once the SC55 is connected to your detector, the “CRU” button allows you to set an alert threshold based on your speed (30-95 mph). For example, if you don’t want to hear any alerts under 30 mph, select 30 mph. Now the SC55 will only provide a double tone to keep you aware of the signal. The signal strength will still be provided on your detector’s display. 3 3 Attach the audio cable to the SC55 and plug it into the audio jack on the detector. 4 Plug the short power jumper cable to the jack marked “Detector” on the SC55 and plug the other end of the cable into the power jack on the detector. 5 Plug your SmartCord into the jack labeled “Power” on the SC55. 7 Windshield Mount Installation Power Connection Where to mount the SC55 For optimum performance, we recommend the following: Using the supplied combination windshield mount, mount your SC55 and detector level on your front windshield. Or, you may also use the supplied hook and loop fastener to position the SC55 on the dashboard. Please ensure it has a clear view of the sky. To power the SC55 and detector, plug the small end of the SmartCord, (telephonetype connector) into the modular jack on left side marked “power”, and plug the lighter plug adapter into your vehicle’s lighter socket or accessory socket. The SC55 operates on 12 volts DC negative ground only. The lighter plug provided is a standard size and will work in most vehicles. NOTE: Depending on your vehicle, the lighter socket power may either be continuously on, or it may be switched on and off with your ignition switch. Windshield Mount 2 To adjust the SC55 and detector’s angle on your windshield, simply move both units together up or down, pivoting the suction cup. The SC55’s combination windshield bracket is designed for unobtrusive and hassle-free mounting of your detector and the SC55. 1 With the SC55 attached to the cradle mount and the detector, simply press the suction cup against the window. Center of pivot When installed and adjusted properly, the SC55 and detector will be level with the road ahead. Optional power cords For our optional cords call 800-433-4387 or visit our website EscortInc.com. NOTE: In order for the SC55’s GPS technology to work properly, the top case must have a clear view of the sky Mounting Location WARNING: ESCORT cannot anticipate the many ways the SC55 can be mounted. It is important that you mount it where it will not impair your view nor present a hazard in case of an accident. 8 NOTE: To ensure that the suction cup adhere to the windshield firmly, be sure to keep both your windshield and the suction cup clean. 9 Controls and Features Mute Power To mute the audio for a specific signal, briefly press the V/M button on the SC55 or use the Mute button located on the SmartCord (included). After the encounter has passed, the mute will automatically reset and the audio will alert you to the next encounter at the volume level you set. To turn the power on or off for both the SC55 and detector, simply press the power button on the SC55’s top case. AutoPower This feature automatically turns the SC55 and detector off if your vehicle has not moved for 3 hours. This is especially useful if your vehicle has a hot 12 volt accessory (constant power without the key on) See the Preferences section for details. Power-On Indication After the SC55’s start-up sequence is completed, the display will provide a speed and compass screen. Once your vehicle is moving, your vehicle speed and heading will be provided. If you prefer, you can select alternate power-on indicators. See Preferences. NOTE: You must be moving and have an acquired GPS signal for this information to be presented. Volume Control/Mute (V/M Button) To increase or decrease the audio volume, simply press and hold the (V/M) button on the SC55. A sample alert tone will be generated, along with a corresponding bargraph on the display. Once you have reached your desired volume level, simply release the button. This level will be stored in memory. 10 CruiseAlert AutoMute The CruiseAlert feature allows you to minimize audio alerts under a selected speed. To set the warning speed, simply press the “CRU” button located on the top case. Once this button is pressed, the display will read “Cru-Off”. To change, simply hold the “CRU” button down to scroll through your choices. The range is 30-95 MPH in 5 MPH increments. Once you reach your desired setting, simply release the button. To turn the CruiseAlert feature off, simply select “Cru-Off” using the same process. Your SC55 has our patented AutoMute feature. This feature automatically reduces the volume level during a radar encounter. This keeps you informed without the annoyance of a continuous full-volume alert during long encounters. If you prefer, you can turn the AutoMute feature off. See the Preferences section for details. GPS Indicator The GPS icon is visible on the right side of the SC55 display, and indicates whether it is receiving GPS signals. At start-up, this icon will flash on and off until GPS data is received. Once it receives the signals, this icon will stop flashing and remain on the display 11 Controls and Features Mark Location (MRK Button) NOTE: When a location is marked the first time, you must travel at least one mile away from that location to receive an alert. To unmark a location, simply press the “MRK” button when you are receiving a “marked location” alert. The display will read “Unmark?” Press the “MRK” again to confirm. The display will read: “Unmarked.” The “MRK” button allows you to mark a specific location and label it for future reference. Once marked, the SC55 will provide an alert with an arrow indicating the direction of the location when you reach this area again. This can be extremely useful when there are known speed traps or camera locations that you would like to remember. To mark a particular location, press the “MRK” button located on the SC55’s top case. The display will read: “Mark?” Press the “MRK button again to assign a label to it. There are four (4) labels: Red Light, Speed Camera, Speed Trap and Other. To scroll through the labels, simply press the volume “V/M” button until you reach the desired label. Once you’ve selected the label, press the “MRK” button again to confirm. Once marked and assigned a label, the SC55 provides the following alert distances for each type of label: Red Light Cameras = 250 feet or 10 seconds Speed Cameras = 250 feet or 10 seconds Speed Traps = .5 mile below 55 mph or 1 mile above 55 mph Other = .5 mile below 55 mph or 1 mile above 55 mph 12 SmartCord SpeedAlert The SC55’s power jack uses a telephonetype connector and is marked “Power”. This 4- conductor connector only works with the coiled SmartCord (included) or the optional Direct-wire SmartCord. The coiled SmartCord is a special power cord that has a power-on indicator (which only lights up when the SC55 is turned on), a bright alert light that warns of radar or laser, and a convenient mute button right on the plug. It’s perfect for any car where reaching the SC55’s mute button on the windshield is a stretch. For discreet night driving, put the SC55 in Dark mode and use the SmartCord for your visual alerts. NOTE: If you are operating the SC55 in Dark mode, the display on the SC55 will not light when an alert is given—only the audio and the flashing alert lamp on the SmartCord. The detector’s display is not affected by the brightness setting on the SC55. An optional Direct-wire SmartCord is also available. This version includes a small display module which can be wired directly into your electrical system, with a 10 foot straight cord to route to your SC55. For more information or to order, visit our website at EscortInc.com or call us tollfree at 800-433-3487. The SC55’s Speed Alert feature provides a visual indication of your vehicle speed during the first few seconds of an alert. This allows you to instantly check your speed without looking at your speedometer. NOTE: When traveling 15 mph or less, your speed will not be displayed. Clearing The Database At some point you may want to clear all of the data in the SC55’s database. This includes all markers and camera locations. In order to do this, simply press and hold the “V/M”, “CRU” and “MRK” buttons while powering the locator on. An “Erase” message will appear on the screen. To confirm, press the “PWR” button. 13 How to use Preferences Overview of Preferences An example Here is how you would change PASSPORT’s Pilot option: There are 10 user-selectable Preferences so you can customize your SC55 for your specific driving needs. The buttons labeled “V/M” and “CRU” are used to enter Preferences, REVIEW your current settings, and to CHANGE any settings as desired. The word “PREF” is located on the top of the SC55, and is highlighted in graphics. Pages 16-18 explain each option in more detail. Press the V/M button to go from one category to the next PILOT LIGHT (Power-on indication) 1 Enter Preferences by holding both the “V/M” and “CRU” buttons down for 2 seconds. PASSPORT will beep twice and display Prefs. 2 Then hold the “RVW” button down. PASSPORT will scroll through the categories, starting with Pilot ( Pilot). How to use Preferences 1 To enter Preferences, press and hold the “V/M” and “CRU” buttons down for 2 seconds. The unit will beep twice, and will display the word Prefs. 3 Release the “RVW” button when PASSPORT displays the Pilot item. Since the factory setting for Pilot is Speed and Compass, PASSPORT will display Spd Comp. NOTE: If you accidentally don’t release the “RVW” button in time, and PASSPORT goes to the next category, simply hold the “RVW” button down again. Once you’re back to your desired category, release the “RVW” button. 2 Press the “V/M” button to review the current settings. You can either tap the button to change from item to item, or hold the button to scroll through the items. 3 Press the “CRU” button to change any setting. You can either tap the button to change from setting to setting, or hold the button to scroll through all the options. 4 Press the “CHG” button to change from Spd Comp to Compass. 5 To exit Preferences, simply wait 8 seconds without pressing any buttons, or press the power button . PASSPORT will beep and return to normal operation. 4 To exit Preferences, simply wait 8 seconds without pressing any button, or press the power button . The unit will display Complete, and return to normal operation. 14 Pilot Pilot Pilot Pilot Pilot Spd Comp * Speed and Compass Compass Compass .> Scanning dot V Vehicle voltage SPD Vehicle speed AUTOPOWER aPwr ON aPwr OFF UNITS Units ENG Units MET * Speed/distance in English units Speed/distance in Metric units VOICE Voice ON Voice OFF * Voice announcements on Voice announcements off BRIGHTNESS MARKERS * Restoring the Factory Default Settings To restore your PASSPORT to its original factory settings, press and hold the “V/M” and “CRU” buttons while turning the power on. A Reset message will be displayed, accompanied by an audible alert, acknowledging the reset. Press the MRK button to change your setting within a category Brt Brt Brt Brt Brt * Shuts down after 3 hours of non-movement AutoPower feature is off Auto Dark Min Med Max * Automatically adjusts display brightness Dark mode Minimum display brightness Medium display brightness Maximum display brightness Marks DFT Marks MOD rCam sCam sTrap Othr * Default settings Markers have been modified ON or OFF (default is on) ON or OFF (default is on) ON or OFF (default is on) ON or OFF (default is on) OVER SPEED ALERT oSpd ON oSpd OFF DETECTOR BRAND Brnd OFF ESCORT BEL AUTOMUTE METER aMute ON aMute OFF * Alerts when maximum speed reached (30-95 mph) OverSpeed off For ESCORT detectors For Beltronics detectors * Automatically reduces the audio during alert AutoMute feature is off Same options for your detector brand 15 Details of Preferences Pilot (Power-on indication) Pilot Spd Comp (Speed and Compass) aPwr ON (AutoPower on) AutoPower Brightness Markers In this setting, the SC55 will display your current speed and direction. (factory default) In this setting, PASSPORT will automatically shut off if the vehicle has not moved within four (3) hours. This reduces the current drain on the vehicle’s battery when the vehicle is parked for a long period of time. (factory default) In this setting, the display brightness will automatically adjust based on the ambient light in the vehicle. (factory default) In this setting, all makers in the database will be reported as you approach them. This is the factory setting and it is recommended that you use your PASSPORT in this mode. Pilot Compass (Compass) In this setting, the SC55 will display your heading. aPwr OFF (AutoPower off) Pilot .> (Scanning dot) In this setting, the SC55 will display a scanning dot that will continuously scroll across the display. In this setting, PASSPORT should be unplugged or turned off when not in use. Units UnitsENG (Speed measured in miles per hour) In this setting, all speed related features are displayed in miles per hour (MPH). (factory default) Pilot V (Vehicle voltage) In this setting, the SC55 will continually display the vehicle’s battery voltage. NOTE: If the vehicle’s voltage drops below 10.5 volts, a low voltage warning is displayed, followed by an audible alert. A high voltage warning is also given if the voltage goes above 16.5 volts. The high-voltage warning is also followed by an audible alert. UnitsMET (Speed measured in kilometers per hour) In this setting, all speed related features are displayed in kilometers per hour (KPH). Voice Announcements Pilot SPD (Vehicle speed) In this setting, the SC55 will continually display vehicle speed. Voice ON (Voice announcements on) In this setting, all alerts and instructions are communicated using a voice announcement. (factory default) MarksDFT Brt Auto (auto) Brt DARK (dark) In this setting, each time you turn on PASSPORT, the display will be in the dark mode.This is recommended only when using PASSPORT’s SmartCord so you have a visual indication to confirm that PASSPORT is operational. MarksMOD In this setting, only the selected Markers will be reported. NOTE: The SC55 has plenty of built in memory to store thousands of locations. In the rare case that the database would become 80% full, a message will appear at start up to let you know you’re reaching its limit. Brt MIN (minimum) In this setting, each time you turn on PASSPORT, the display will be at the lowest brightness. OverSpeed Brt MED (medium) The OverSpeed feature allows you to select a speed (30-95 mph) as a reminder of how fast you are going. Once this speed is reached, an audible alert and warning message will appear. In this setting, each time you turn on PASSPORT, the display will be at the medium brightness. Brt MAX (maximum) In this setting, each time you turn on PASSPORT, the display will be at the maximum brightness VoiceOFF (Voice announcements off) With voice off, normal tones will be used for alerts. 16 17 Details of Preferences Interpreting Radar Alerts Detector Brand AutoMute Brnd Off aMute ON (AutoMute on) In this setting, the SC55 can be used independently. In this setting, the SC55 will interpret alerts from ESCORT branded detectors. In this setting, the SC55’s audio alerts will initially be at the volume you set, but after a few seconds AutoMute will automatically reduce the volume level to keep you informed, but not annoyed. (factory default) BEL aMuteOFF (AutoMute off) In this setting, the SC55 will interpret alerts from Beltronics branded detectors.. In this setting, the SC55’s audio alerts will remain at the volume you set for the duration of the radar encounter. ESCORT Meter The SC55 provides the same meter options as your ESCORT or Beltronics detector. 18 Although your detector has a comprehensive warning system and this handbook is as complete as we can make it, only experience will teach you what to expect from your detector and how to interpret what it tells you. The specific type of radar being used, the type of transmission (continuous or instant-on) and the location of the radar source affect the radar alerts you receive. The following examples will give you an introduction to understanding your detector’s warning system for radar and laser alerts. Alert Explanation Your detector begins to sound slowly, then the rate of alert increases until the alert becomes a solid tone. The Signal Meter ramps accordingly. You are approaching a continuous radar source aimed in your direction. Your detector emits short alerts for a few seconds and then falls silent only to briefly alert and fall silent again. An instant-on radar source is being used ahead of you and out of your view. Your detector suddenly sounds a continuous tone for the appropriate band received. All segments in the Signal Strength Meter are lit. An instant-on radar source or laser source is being used nearby. This kind of alert requires immediate attention! A brief laser alert. Laser is being used in the area. Because laser is inherently difficult to detect, any laser alert may indicate a source very close by. Your detector receives weak signals. These signals may be a little stronger as you pass large, roadside objects. The signals increase in frequency. A moving patrol car with continuous radar is overtaking you from behind. Because these signals are reflected (reflections are increased by large objects), they may or may not eventually melt into a solid point even when the patrol car is directly behind you. Your detector alerts slowly for awhile and then abruptly jumps to a strong alert. You are approaching a radar unit concealed by a hill or an obstructed curve. 19 Specifications Red Light Cameras Features and Specifications Patented Technology PASSPORT is covered by one or more of the following U.S. patents: 7,576,679 7,397,416 7,388,537 7,098,844 6,836,238 6,779,765 6,693,578 6,670,905 6,614,385 6,587,068 6,400,305 6,249,218 6,127,962 6,069,580 5,668,554 5,600,132 5,587,916 5,559,508 5,446,923 5,402,087 5,365,055 5,347,120 5,305,007 5,206,500 5,164,729 5,134,406 5,111,207 5,079,553 5,049,885 5,049,884 4,961,074 4,954,828 4,952,937 4,952,936 4,939,521 4,896,855 4,887,753 4,862,175 4,750,215 4,686,499 4,631,542 4,630,054 4,625,210 4,613,989 4,604,529 4,583,057 4,581,769 4,571,593 4,313,216 D314,178 D313,365 D310,167 D308,837 D296,771 D288,418 D253,752 Canadian patents: 2,381,585 2,337,077 2,330,964 1,295,715 1,295,714 1,187,602 1,187,586 European patents: 1,145,030 1,090,456 Other Patents Pending. GPS Revceiver • SiRFstar III Display Type • 280 LED Alphanumeric • 4-Levels of Brightness Control, including Full Dark Mode Power Requirement • 12VDC, Negative Ground • SmartCord (included) Preferences • Power-On Indication • AutoPower • Units • Voice Alerts • Brightness • Markers • OverSpeed • Detector Brand • AutoMute • Meter Dimensions (Inches) • 0.68" H x 2.35" W x 3.75" L 20 Speed Cameras How Red Light Cameras Work How Speed Cameras Work Red-light cameras use three basic things: 1) a camera, 2) a way to trigger the camera, and 3) a computer. An intersection may have more than one camera to monitor traffic from multiple directions. The trigger is typically a series of wires buried just beneath the surface of the road. These wires are separated by a pre-set distance in order to create a magnetic field or induction loop. Once a vehicle is in the intersection, the loop or circuit becomes closed and alerts the computer to take a picture. In some states, tickets are issued to the car’s owner, no matter who’s actually driving. In this case, the red-light camera only needs to photograph the vehicle’s rear license plate. In other states, the actual driver is responsible for paying the ticket. In this case, the system needs a second camera in front of the car, in order to get a shot of the driver’s face. There are several types of fixed position speed cameras used, including radar, laser, induction loop and photo-based. Radar and laser based cameras are typically mounted near the road and transmit a short range signal across the lanes monitored. Since this signal is transmitted across the road instead of down the road like many handheld systems, detecting them in time is critical. Another technology used is an inductive loop system. This type of system utilizes wire buried just beneath the surface of the road to trigger a computer which calculates speed between the two points. Photo-based systems take two sets of pictures of all passing vehicles between two separate fixed locations. Both sets of photographs are date and time stamped, which enables the system to calculate average speed between the two locations. Fixed speed cameras can also be set up to monitor one to four lanes of traffic in the same direction. To achieve this, a sensor is installed in each lane and a wide angle camera lens is used to photograph the vehicle which is speeding. 21 GPS Updates How GPS Works Software Updates The Global Positioning System (GPS) is made up of twenty four orbiting satellites and was developed by the U.S. military. There are at least four satellites visible at any given time every day. A GPS receiver is designed to locate and receive data from four of these satellites. This data includes the distance to your location from each of the satellites. Once the distance from each satellite is known, the receiver can calculate and pinpoint your exact location. PASSPORT’s red light and speed camera database is easily updated using our exclusive detector software tools found on our web site. Firmware, or the operating software for the detector, can also be updated using these tools. In order to have access to these updates, you must register your PASSPORT at www.EscortInc.com. Once registered, you will receive email notifications that updates are now available for your database or firmware. To update your PASSPORT SC55 database, which includes locations for speed cameras, red light cameras and the top speed traps in the U.S., please follow these simple steps: 1 Connect a mini USB cable, (included) to the PASSPORT SC55 2 Connect the USB cable to the PC 3 Log on to EscortInc.com/download 4 Follow the online instructions (registration is required) USB connection for updates 22 Service Service Procedure Out Of Warranty Repairs If Your PASSPORT ever needs service, please follow these simple steps: For out of warranty repairs, include prepayment in the amount you were quoted by the ESCORT Customer Service Representative. If the SC55 has been damaged, abused or modified, the repair cost will be calculated on a parts and labor basis. If it exceeds the basic repair charge, you will be contacted with a quotation. If the additional payment is not received within 30 days (or if you notify us that you choose not to have your PASSPORT repaired at the price quoted), your PASSPORT will be returned, without repair. Payment can be made by check, money order, or credit card. 1 Check the troubleshooting section of this manual. It may have a solution to your problem. 2 Call us at 1-800-543-1608. We may be able to solve your problem over the phone. If the problem requires that you send your PASSPORT to the factory for repair, we will provide you with a Return Authorization Number, which must be included on the outside of your shipping box. Enclose the following information with your PASSPORT: • Your Service Order Number • Your name and return address • Your daytime telephone number • A description of the problem you are experiencing • Please include the lighter cord you have been using with your unit • If you have owned your PASSPORT SC55 less than one year and did not purchase directly from ESCORT, please include a copy of your receipt from an Authorized Reseller Mail PASSPORT and SmartCord To: ESCORT Customer Service Department Return Authorization Number _________ 5440 West Chester Road West Chester, Ohio 45069 For your own protection, we recommend that you ship your PASSPORT postpaid and insured. Insist on a proof of delivery, and keep the receipt until the return of your PASSPORT. 23 Troubleshooting Problem Accessories Solution Does not recognize that the radar detector is connected. • Turn SC55 power off and then back on. • Check all cable connections. I only get a double beep during an alert. • Check Cruise Alert setting. • Turn Cruise Alert off if you prefer full alerts regardless of your speed. The radar detector is alerting but the SC55 is not doing anything. • Make sure AutoMute is turned off on the radar detector. • Make sure Voice Alerts are off on the radar detector (if applicable). • Make sure radar detector volume is set at maximum. Accessories ESCORT Extended Service Plan The following accessories and replacement parts are available for PASSPORT SC55. ESCORT offers an optional extended service plan. Contact ESCORT Sales for details at 800-433-3487. Coiled SmartCord ............................ $29.95 Straight SmartCord ......................... $29.95 Available in red or blue Direct-wire SmartCord .................. $29.95 Available in red or blue Zippered Travel Case ..................... $14.95 24 25 26 27 Yes No Would you like us to e-mail you with updates? 6. Yes No Would you like to be added to our mailing list? 5. Primary reason for purchasing this ESCORT product_________________________________________ 4. _______________________________________________________________________ Place of Purchase____________________________________ Date___________ Price_______ 3. _______________________________________________________________________ Product Purchased___________________________ Model___________ Serial Number_________ 2. E-mail (In case we have a question)__________________________________________________ City_________________________________________ State_____________ Zip_________ Address__________________________________________________________________ EscortInc.com If you purchased your detector directly from ESCORT, you do not need to fill this out. @www First Name:___________________ Middle Initial____ Last Name__________________________ online: If you did not purchase your detector directly from ESCORT, please fill out this section and return to us, or register online at our web address: www.EscortInc.com Register ESCORT PRODUCT REGISTRATION CARD What this warranty covers: ESCORT warrants your Product against all defects in materials and workmanship. For how long: One (1) year from the date of the original purchase. What we will do: ESCORT, at our discretion, will either repair or replace your Product free of charge. What we will not do: ESCORT will not pay shipping charges that you incur for sending your product to us. What you must do to maintain this warranty: Show original proof of purchase from an authorized ESCORT dealer. Warranty Exclusions: Warranty does not apply to your product under any of the following conditions: 1. The serial number has been removed or modified. 2. Your product has been subjected to misuse or damage (including water damage, physical abuse, and/or improper installation). 3. Your product has been modified in any way. 4. Your receipt or proof-of-purchase is from a non-authorized dealer or internet auction site including E-bay, U-bid, or other non-authorized resellers. 5. You are not the original purchaser of the SC55 from an authorized dealer or did not receive it as a gift from the original purchaser of the SC55 from an authorized dealer. To obtain service: 1. Contact ESCORT (1-800-543-1608) to obtain a Return Authorization Number. 2. Properly pack your product and include: your name, complete return address, written description of the problem with your product, daytime telephone number, and a copy of the original purchase receipt. 3. Label the outside of the package clearly with your Return Authorization number. Ship the product pre-paid (insured, for your protection) to: ESCORT Inc, 5440 West Chester Rd., West Chester, OH 45069. LIMITATION OF WARRANTY: EXCEPT AS EXPRESSLY PROVIDED HEREIN, YOU ARE ACQUIRING THE PRODUCT “AS IS” AND “WHERE IS,” WITHOUT REPRESENTATION OR WARRANTY. ESCORT SPECIFICALLY DISCLAIMS ANY REPRESENTATION OR WARRANTY INCLUDING, BUT NOT LIMITED TO THOSE CONCERNING THE MERCHANTABILITY AND SUITABILITY OF THE PRODUCT FOR A PARTICULAR PURPOSE. ESCORT SHALL NOT BE LIABLE FOR CONSEQUENTIAL, SPECIAL OR INCIDENTAL DAMAGES INCLUDING, WITHOUT LIMITATION, DAMAGES ARISING OUT OF THE USE, MISUSE OR MOUNTING OF THE PRODUCT. The above limitations or exclusions shall be limited to the extent they violate the laws of any particular state. ESCORT is not responsible for products lost in shipment between the owner and our service center. Other legal rights: This Warranty gives you specific rights. You may have other legal rights, which vary, from state to state. Remove card along perforations ESCORT One Year Limited Warranty 1. Warranty Remove card along perforations 29 28