1
PowerLite Home Cinema 5020UBe
®
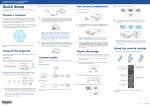
Quick Setup
Wireless HD
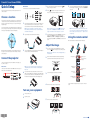
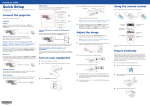
3Turn on the power switch on the back of the projector. The
power
button on the projector turns blue.
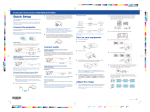
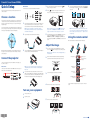
Follow these steps to set up the included WirelessHD Transmitter.
4Press the
Before using the projector, make sure you read the safety instructions in the
online User’s Guide.
6Your projector automatically adjusts images that look like
but if necessary you can press the
correct this.
or
or
buttons on the projector to
,
power button on the projector or the On button on the
remote control. The power light flashes blue, and then stays on.
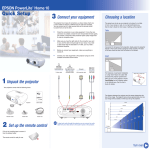
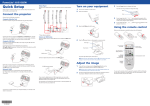
Choose a location
Keep the projector level and place it at a height so its lens is even with the top
or bottom of the screen and is centered horizontally. If this isn’t possible, use
the keystone correction buttons on the projector to reposition the image (see
“Adjust the image”).
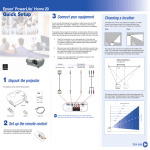
In order to view 3D images correctly, RF 3D glasses must be worn within 32 feet
(10 m) of the projector. Use the image below to determine the viewing distance
for 3D projection (the shading represents the 3D viewing area):
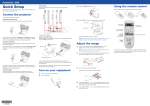
1Place the transmitter within 32 feet (10 m) of the projector. Make sure the
front of the transmitter faces the front of the projector. See the online
User’s Guide for more information on the WirelessHD transmission range.
Note: Do not place the transmitter on a metal surface, as this may
interfere with the signal. Make sure there are no obstructions between
the transmitter and the projector.
Note: To shut down the projector, press the
2
5The default language of the menu system is English. To select another
Plug the AC adapter into the transmitter and a wall outlet.
power button on the
projector twice or the Standby button on the remote control, then
unplug it. You don’t have to wait for the projector to cool down.
language, press the Menu button on the remote control. Select
Extended and press Enter. Select Language and press Enter. Select
your language and press Enter. Press the Menu button to exit the menu
system.
Note: When setting up the projector, make sure that it is placed level
to the screen in order to provide the best possible image quality. If you
must set up the projector at an angle, use the or buttons to correct
the image shape.
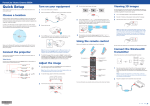
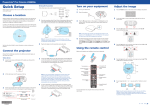
Using the remote control
Make sure the batteries are installed as shown (two AA batteries).
Adjust the image
1If you don’t see an image, press the Source buttons on the remote
Make sure the Wireless HD Transmitter is also placed within 32 feet (10 m) of
the projector. See the online User’s Guide for more information on where to
place your projector.
control or the
3Connect the HDMI cables to your video input devices and the HDMI ports
on the side and back of the WirelessHD Transmitter.
button on the projector to select the image source.
Note: If you still see a blank screen or have other display problems, see
“Troubleshooting.”
2Turn the horizontal and vertical lens shift dials to adjust the image
Connect the projector
Turn projector on
position and center it between the top and bottom of the screen.
Turn projector off
Choose which source
to display
Choose from the following connections. For additional connection types, see
the online User's Guide.
Video device
Connect up to 5 video devices and use the Source buttons on the projector or
remote control to switch between them.
HDMI cable
Switch between
2D and 3D
Note: You can connect up to five input devices to the transmitter. See
“Viewing WirelessHD content” for information on switching between
input sources.
4To use the transmitter as a pass-through device to a television or other
display, connect an HDMI cable to the display device and the HDMI output
port on the rear of the transmitter. See “Viewing WirelessHD content” for
information on switching between wireless and wired display modes.
RCA Video cable
Navigate projector
menus
3
To raise the image, adjust the front feet as shown below.
Access projector
menus
Control WirelessHD
functions
Turn off projector
display
Component video cable
4
Turn the zoom ring to reduce or enlarge the image.
Turn on your equipment
1
Turn on your video source.
2
Plug in the projector.
5Turn the focus ring to sharpen the image.
*412380400*
*412380400*
For more information on using the remote control, see the online User’s
Guide.