1
Installation Guide
English – August 2013
T205 Series
Installation
This installation guide provides instructions for installation,
startup, and adjustment. To receive a copy of the instruction
manual, contact your local Sales Office or view a copy at
www.fisherregulators.com. For further information refer to:
T205 Series Tank Blanketing Regulators Instruction
Manual, D103748X012.
P.E.D. Categories
This product may be used as a safety accessory with
pressure equipment in the following Pressure Equipment
Directive 97/23/EC categories. It may also be used
outside of the Pressure Equipment Directive using sound
engineering practice (SEP) per table below.
PRODUCT SIZE
CATEGORIES
FLUID TYPE
DN 20 and 25 / 3/4 and 1 inch
SEP
1
Specifications
Available Configurations
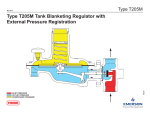
Type T205: Tank blanketing regulator with outlet
pressure range of 2.5 mbar to 0.48 bar / 1 inch w.c.
to 7 psig in seven different spring ranges and has
internal pressure registration requiring no downstream
control line.
Type T205M: Similar to Type T205 but has a blocked
throat and a downstream control line connection for
external pressure registration.
Body Sizes and End Connection Styles
See Table 1
Maximum Allowable and Operating Inlet Pressure(1)
See Tables 1 and 4
Maximum Outlet (Casing) Pressure(1)
See Table 1
Maximum Emergency Outlet Pressure to Avoid Internal
Parts Damage(1)
With Nitrile (NBR) or Fluorocarbon (FKM)
diaphragm: 2.4 bar / 35 psig
With Fluorinated Ethylene Propylene (FEP) diaphragm: 1.4 bar / 20 psig
Outlet (Control) Pressure Ranges(1)
See Table 3
Shutoff Classification per ANSI/FCI 70-3-2004
Class VI (Soft Seat)
Pressure Registration
Type T205: Internal
Type T205M: External
Material Temperature Capabilities(1)(2)
Nitrile (NBR): -29 to 82°C / -20 to 180°F
Fluorinated Ethylene Propylene (FEP):
-29 to 82°C / -20 to 180°F
Fluorocarbon (FKM): 4 to 149°C / 40 to 300°F
Ethylene Propylene Diene (EPDM):
-29 to 107°C / -20 to 225°F
Perfluoroelastomer (FFKM):
-18 to 149°C / 0 to 300°F
!
Warning
Only qualified personnel shall install or
service a regulator. Regulators should
be installed, operated, and maintained
in accordance with international and
applicable codes and regulations,
and Emerson Process Management
Regulator Technologies, Inc. (Regulator
Technologies) instructions.
If the regulator vents fluid or a leak
develops in the system, it indicates that
service is required. Failure to take the
regulator out of service immediately may
create a hazardous condition.
Personal injury, equipment damage, or
leakage due to escaping fluid or bursting of
pressure containing parts may result if this
regulator is overpressured or is installed
where service conditions could exceed the
limits given in the Specifications section,
or where conditions exceed any ratings of
the adjacent piping or piping connections.
To avoid such injury or damage, provide
pressure-relieving or pressure-limiting
devices (as required by the appropriate
code, regulation, or standard) to prevent
service conditions from exceeding limits.
Additionally, physical damage to the
regulator could result in personal injury
and property damage due to escaping fluid.
To avoid such injury and damage, install
the regulator in a safe location.
Clean out all pipelines before installation of the regulator
and check to be sure the regulator has not been damaged
or has collected foreign material during shipping. For
NPT bodies, apply pipe compound to the external pipe
threads. For flanged bodies, use suitable line gaskets and
approved piping and bolting practices. Install the regulator
in any position desired(3), unless otherwise specified, but
be sure flow through the body is in the direction indicated
by the arrow on the body.
Note
It is important that the regulator be
installed so that the vent hole in the
spring case is unobstructed at all times.
For outdoor installations, the regulator
should be located away from vehicular
traffic and positioned so that water, ice,
and other foreign materials cannot enter
the spring case through the vent. Avoid
placing the regulator beneath eaves or
downspouts, and be sure it is above the
probable snow level.
1. The pressure/temperature limits in this Installation Guide and any applicable standard or code limitation should not be exceeded.
2. See Table 2 for operating temperature ranges for available trim combinations.
3. For proper operation to achieve the published capacities at low setpoint, the spring case barrel should be installed pointed down as shown in Figure 1.
www.fisherregulators.com
D103748X014
Introduction
T205 Series
Table 1. Body Sizes, End Connection Styles, Maximum Allowable and Operating Inlet Pressures,
and Maximum Outlet (Casing) Pressure
Body Size
DN
20 or
25
Maximum outlet
(casing) pressure
End Connection Styles(1)
bar
psig
bar
psig
Gray Cast Iron
NPT
10.3
150
2.4
35
WCC Carbon Steel
NPT, CL150 RF,
CL300 RF, or PN 16/25/40 RF
13.8
200
5.2
75
Inch
3/4 or
1
Maximum ALLOWABLE and
operating Inlet Pressure
Body Material
CF8M/CF3M Stainless Steel(2)
1. All flanges are welded. Weld-on flange dimension is 356 mm / 14 inches face-to-face.
2. Pipe nipples and flanges are 316 Stainless steel for flanged body assemblies.
Table 2. Operating Temperature Ranges for Available Trim Combination
Trim Option Code
Diaphragm Material
Standard
Nitrile (NBR)
VV
Fluorocarbon (FKM)
TN
Fluorinated Ethylene Propylene (FEP)
TV
Fluorinated Ethylene Propylene (FEP)
Fluorinated Ethylene Propylene (FEP)
TK(1)
TE
Fluorinated Ethylene Propylene (FEP)
1. Includes 316 Stainless steel trim parts.
Overpressure Protection
T205 Series regulators have an outlet pressure rating
lower than the inlet pressure rating. The recommended
pressure limitations are stamped on the regulator
nameplate. Some type of overpressure protection
is needed if the actual inlet pressure can exceed the
maximum operating outlet pressure rating. Common
methods of external overpressure protection include relief
valves, monitoring regulators, shut-off devices, and series
regulation. Overpressuring any portion of the regulators
beyond the limits in the Specifications section may cause
leakage, damage to regulator parts, or personal injury due
to bursting of pressure-containing parts.
Regulator operation below the maximum pressure
limitations does not preclude the possibility of damage from
external sources or debris in the line. The regulator should
be inspected for damage after any overpressure condition.
Startup
The regulator is factory set at approximately the midpoint
of the spring range or the pressure requested, so an
initial adjustment may be required to give the desired
results. With proper installation completed and relief
valves properly adjusted, slowly open the upstream and
downstream shutoff valves.
Adjustment
To change the outlet pressure, perform the
following procedure.
For internal flat circular adjusting screw:
1. Remove the closing cap (key 22).
2. Use a 25 mm / 1-inch hex rod or flat screwdriver to
turn the adjusting screw (key 35) either clockwise
to increase outlet pressure or counterclockwise to
decrease outlet pressure. The regulator will go into
immediate operation. To ensure correct operation,
always use a pressure gauge to monitor the tank
blanketing pressure when making adjustments.
3. After making the adjustment, replace the closing cap
gasket (key 25) and install the closing cap (key 22).
Disk and O-ring Material
OPERATING TEMPERATURE RANGES
Nitrile (NBR)
Fluorocarbon (FKM)
Nitrile (NBR)
Fluorocarbon (FKM)
Perfluoroelastomer (FFKM)
Ethylene Propylene Diene (EPDM)
-29 to 82°C / -20 to 180°F
4 to 149°C / 40 to 300°F
-29 to 82°C / -20 to 180°F
4 to 82°C / 40 to 180°F
-18 to 82°C / 0 to 180°F
-29 to 82°C / -20 to 180°F
For external square head adjusting screw:
1. Loosen the locknut (key 20).
2. Turn the adjusting screw (key 35) either clockwise
to increase outlet pressure or counterclockwise to
decrease outlet pressure. Always use pressure gauge
to monitor the tank blanketing gas pressure when
making adjustments.
3. After making the adjustment, tighten the locknut
(key 20).
Taking Out of Service (Shutdown)
!
Warning
To avoid personal injury resulting from
sudden release of pressure, isolate the
regulator from all pressure before
attempting disassembly.
Parts List
Key Description
Key Description
1Body
2
Cap Screw
(2 required)
3
Spring Case
4
Lower Casing
5* Orifice
6
Spring
7
Diaphragm Head
(2 required)
8
Pusher Post
9*
Diaphragm Gasket
10*Diaphragm
11* Body Seal O-ring
12* Insert Seal O-ring
13* Disk Assembly
14 Stem
15* Cotter Pin
16
Lever Assembly
17
Machine Screw
Type T205 (6 required)
Type T205M (2 required)
18
Guide Insert
19
Upper Spring Seat(1)
20
Lock Nut(1)
22
Closing Cap
23
Hex Nut (8 required)
24
Spring Case Cap Screw
(8 required)
25* Closing Cap Gasket
26
Vent Assembly
27
Pipe Plug
(Type T205 only)
30* Stem Seal O-ring
(Type T205M only)
31* Throat Seal O-ring
(Type T205M only)
32 Pitot Tube (Type T205)
34 Machine Screw
(Type T205M only)
35 Adjusting Screw
36 Washer
38 Diaphragm Cap Screw
45* Diaphragm Head Gasket
46 Nameplate
47 Drive Screw (2 required)
48 Flow arrow
49 Backup Ring
50 Lower Spring Seat
51 NACE Tag (not shown)
52 Tag Wire (not shown)
* Recommended spare part
1. Use for optional external square head adjusting screw assembly recommended for 83 to 172 mbar / 1.2 to 2.5 psig, 0.17 to 0.31 bar / 2.5 to 4.5 psig, and 0.31 to 0.48 bar / 4.5 to
7 psig spring ranges only.
2
T205 Series
13
17
49
L1
5
32
15
18
L2
11
14
L1
12
L2
35
17
38
16
6
8
45
36
7
50
10
9
7
ERSA02735
TYPE T205 ASSEMBLY WITH INTERNAL PRESSURE REGISTRATION
13
L2
15 49 L1 11 L1 30 L1 12 17
5
34
L1 31
18
14 L2
35 38
16
8
45
7
10
6
36
50
7
9
ERSA02736
TYPE T205M ASSEMBLY WITH EXTERNAL PRESSURE REGISTRATION
2
1
48
47
46
25
ERSA02735
4
27
23
24
20
35
19
22
6
L2
26
3
22
ERSA02736
EXTERNAL SQUARE HEAD ADJUSTING
SCREW ASSEMBLY OPTION(2)
APPLY LUBRICANT(1):
L1 = SILICONE GREASE
L2 = ANTI-SEIZE COMPOUND
1. Lubricants must be selected such that they meet the temperature requirements.
2. For 83 to 172 mbar / 1.2 to 2.5 psig, 0.17 to 0.31 bar / 2.5 to 4.5 psig, and 0.31 to 0.48 bar / 4.5 to 7 psig spring ranges only.
Figure 1. T205 Series Assembly
3
T205 Series
Table 3. Outlet (Control) Pressure Ranges and Spring Information
OUTLET (CONTROL)
PRESSURE RANGE
SPRING PART
NUMBER
SPRING COLOR
SPRING WIRE DIAMETER
SPRING FREE LENGTh
mbar
Inches w.c.
mm
Inch
mm
2.5 to 6.2
1 to 2.5
1B558527052(1)(2)
Orange
1.8
0.072
82.6
Inch
3.25
6.2 to 17
2.5 to 7
1B653827052(1)
Red
2.2
0.085
92.2
3.63
17 to 40
7 to 16
1B653927022
Unpainted
2.7
0.105
95.2
3.75
34 to 83
0.5 to 1.2 psig
1B537027052
Yellow
2.9
0.114
109
4.31
83 to 172
1.2 to 2.5 psig
1B537127022
Green
4.0
0.156
103
4.06
0.17 to 0.31 bar
2.5 to 4.5 psig
1B537227022
Light Blue
4.8
0.187
100
3.94
0.31 to 0.48 bar
4.5 to 7 psig
1B537327052
Black
5.5
0.218
101
3.98
1. To achieve the published outlet pressure range the spring case must be installed pointing down.
2. Do not use Fluorocarbon (FKM) diaphragm with this spring at diaphragm temperatures lower than 16°C / 60°F.
Table 4. Maximum Operating Inlet Pressures
MAxIMUM OPERATING INLET PRESSURE
ORIFICE
SIZE
2.5 to 6.2 mbar /
1 to 2.5 inches w.c.
Outlet (Control)
Pressure Setting
6.2 to 17 mbar /
2.5 to 7 inches w.c.
Outlet (Control)
Pressure Setting
17 to 40 mbar /
7 to 16 inches w.c.
Outlet (Control)
Pressure Setting
34 to 83 mbar /
0.5 to 1.2 psig
Outlet (Control)
Pressure Setting
83 to 172 mbar /
1.2 to 2.5 psig
Outlet (Control)
Pressure Setting
0.17 to 0.31 bar /
2.5 to 4.5 psig
Outlet (Control)
Pressure Setting
0.31 to 0.48 bar /
4.5 to 7 psig
Outlet (Control)
Pressure Setting
mm
Inch
bar
psig
bar
psig
bar
psig
bar
psig
bar
psig
bar
psig
bar
psig
3.2
1/8
13.8(1)
200(1)
13.8(1)
200(1)
13.8(1)
200(1)
13.8(1)
200(1)
13.8(1)
200(1)
13.8(1)
200(1)
13.8(1)
200(1)
6.4
1/4
4.1
60
6.9
100
6.9
100
6.9
100
13.8(1)
200(1)
13.8(1)
200(1)
13.8(1)
200(1)
9.5
3/8
2.1
30
2.8
40
6.9
100
4.1
60
8.6
125
8.6
125
8.6
125
13
1/2
1.0
15
1.0
15
0.55
8
2.1
30
2.1
30
2.1
30
2.1
30
14
9/16
0.69
10
0.69
10
1.4
20
0.69
10
2.1
30
2.1
30
2.1
30
1. Inlet pressure is limited to 10.3 bar / 150 psig for gray cast iron bodies.
Industrial Regulators
Natural Gas Technologies
TESCOM
Emerson Process Management
Regulator Technologies, Inc.
Emerson Process Management
Regulator Technologies, Inc.
Emerson Process Management
Tescom Corporation
USA - Headquarters
McKinney, Texas 75069-1872, USA
Tel: +1 800 558 5853
Outside U.S. +1 972 548 3574
USA - Headquarters
McKinney, Texas 75069-1872, USA
Tel: +1 800 558 5853
Outside U.S. +1 972 548 3574
USA - Headquarters
Elk River, Minnesota 55330-2445, USA
Tels: +1 763 241 3238
+1 800 447 1250
Asia-Pacific
Shanghai 201206, China
Tel: +86 21 2892 9000
Asia-Pacific
Singapore 128461, Singapore
Tel: +65 6770 8337
Europe
Selmsdorf 23923, Germany
Tel: +49 38823 31 287
Europe
Bologna 40013, Italy
Tel: +39 051 419 0611
Europe
Bologna 40013, Italy
Tel: +39 051 419 0611
Chartres 28008, France
Tel: +33 2 37 33 47 00
Asia-Pacific
Shanghai 201206, China
Tel: +86 21 2892 9499
Middle East and Africa
Dubai, United Arab Emirates
Tel: +971 4811 8100
For further information visit www.fisherregulators.com
The distinctive diamond shape cast into every spring
case uniquely identifies the regulator as part of the
Fisher® brand and assures you of the highest-quality
engineering, durability, performance, and support.
The Emerson logo is a trademark and service mark of Emerson Electric Co. All other marks are the property of their prospective owners. Fisher is a mark owned by Fisher Controls International LLC,
a business of Emerson Process Management.
The contents of this publication are presented for informational purposes only, and while every effort has been made to ensure their accuracy, they are not to be construed as warranties
or guarantees, express or implied, regarding the products or services described herein or their use or applicability. We reserve the right to modify or improve the designs or specifications
of such products at any time without notice.
Emerson Process Management Regulator Technologies, Inc. does not assume responsibility for the selection, use or maintenance of any product. Responsibility for proper selection, use
and maintenance of any Emerson Process Management Regulator Technologies, Inc. product remains solely with the purchaser.
©Emerson Process Management Regulator Technologies, Inc., 2013; All Rights Reserved