1
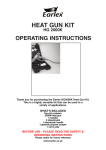
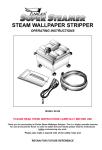
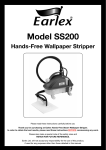
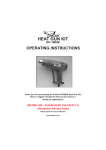
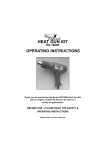
®
COMBIPOWERVAC
Dust Extraction, Vacuum
& Blower System
Model WD1200P
PLEASE READ THESE INSTRUCTIONS CAREFULLY BEFORE USE.
Please retain for future reference.
Earlex Ltd will accept no responsibility for the use of this product if
used for any other purposes than those detailed in this manual.
CONTENTS
Emptying the Tank
Cleaning & Maintenance
6. Storage
Troubleshooting
Mains Connection
After Sales Support
7. Accessories & spare parts
Guarantee
2. Safety Rules
Introduction
Features & Benefits
3. What’s Included
Set Up
Fitting the Filter & Dust Collection Bag
4. Operation
5. Power Tool Adaptor
Float Shut-Off
SAFETY RULES
DO NOT:
• Use the unit without the filter correctly installed
• Leave the unit unattended when plugged in. Unplug from mains when not in use and before cleaning
• Pick up anything that is burning or smouldering such as cigarette ends, hot coals, matches or similar
• Move the unit by pulling on the mains cable
• Pick up asbestos or asbestos dust
• Allow the unit to be used by children
• Modify the unit in any way - this is dangerous and will invalidate the guarantee
• Vacuum boat bilges since flammable liquids and fumes may be present
• Use power tools rated not more than 1800W in the power tool socket
•
•
•
•
•
•
•
•
•
•
•
•
To avoid electric shock, do not expose to rain. Store the unit indoors.
Never pick up flammable or combustible liquids such as petrol or other volatile substances.
Never use in the presence of explosive liquids, vapours or explosive dust such as coal or grain.
If motor sound becomes higher pitched always check for the following:
• Blocked hose or accessory • Blocked/clogged filter • Full container
Always check that the filter is clear and not blocked. Keep all openings clear of any blockages.
When lifting the unit, always hold it with both hands under the rim of the container. Beware of excess weight.
Always switch the unit off before changing between vacuum and blower functions.
Earlex recommends the use of appropriate ear protection when using this product.
Sound pressure level 80dB (A).
Only use the product as detailed in these instructions.
Only use the manufacturer’s recommended attachments and consumables.
This appliance is not intended for use by persons (including children) with reduced physical, sensory or mental
capabilities, or lack of experience and knowledge, unless they have been given supervision or instruction
concerning use of the appliance by a person responsible for their safety.
INTRODUCTION
Thank you for purchasing the Earlex CombiPOWERVac®. This product is an all-in-one, wet and dry, workshop
vacuum system. With no messy bags to handle or dispose, the CombiPOWERVac® is designed for everyday use
around the garden, garage, workshop, home, car & caravan. It has an on board power tool socket for use with power
tools to remove dust directly from the work area.
It has four modes:
Dry Mode - picks up all kinds of dry materials such as dust, nails, broken glass, leaves, litter and wood shavings.
Wet Mode - picks up various types of liquid spills and can help unblock sinks.
Blow Mode - collects leaves into piles and dusts out garages/workshops.
Dust Extraction - activate vacuum using power tool, and 10 second run-on when power tool is switched off.
Removes dust directly from work area.
Due to the heavy duty nature of a wet and dry vacuum cleaner, the motor may sound louder than your normal
cleaner. The reason for this is that in order for the unit to pick up liquids, a special by-pass motor is fitted so that
the liquid can be deposited into the recovery tank without going through the motor and causing damage.
Before leaving the factory, each unit has passed high safety, quality and performance checks. Should you have
any queries on this unit, please call our helpline on 01483 454666.
FEATURES & BENEFITS
•
•
•
•
•
•
•
Easy to keep your work environment clean and tidy
Suitable for wet & dry without changing the filter
Powerful vacuum sucks up small and large debris, from sawdust to glass
Dust extraction system to keep the work area clear - plug in power tool and activate vacuum via power tool
Blower function for clearing leaves & can be connected to a CombiSpray® Gun to paint a wide range of surfaces
Easy to empty and clean
On board storage for extension tubes and accessories
2
WHAT’S INCLUDED
The following components are included in this product.
WD0001
WD0035
WD0036
WD0045
WD0050
WD0217
WD0083
Collection Bin
Hose Inlet
Crevice Tool
Castors x 4
Hose
Motor Housing
Floor Head
WD0147
WD0178
WD0181
WD0182
WD0183
WD0188
WDACC4
Outlet Elbow
Cellulose Cartridge Filter
Power Tool Adaptor
Floor Head Brush/Squeegee Attachment
Outriggers x 4
Dust Collection Bag
Extension Tubes
FITTINg THE FILTER
& DUST COLLECTION BAg
Follow these simple instructions to
assemble your CombiVac® before use.
1. Remove all packing materials
and remove unit from box.
WARNINg - DISCONNECT FROM POWER
SUPPLY BEFORE OPENINg
2. Release the two tank clips on
either side of the black rim and lift
the motor housing off the collection bin.
CAUTION
NEVER OPERATE THIS UNIT WITHOUT THE
CORRECT FILTER FITTED.
Failure to do so will invalidate the guarantee. A clean
filter is essential to this unit for it to operate
efficiently. If the filter becomes clogged or damaged,
or fails to operate, you must fit an Earlex
replacement. Please call 01483 454666 for more
information or visit our website www.earlex.com
3. Remove all accessories from inside the tank.
4. Fit castors into outriggers. Ensure the castors are
fitted all the way in.
5. Turn the
collection bin
upside down
and fit the
outriggers into the holes in the bin.
8. Turn the motor housing upside down and push the
filter down over the float cage.
9. Push the filter all the way down to the base of the
motor housing taking care not to squash the filter
pleats.
10. Fasten the pin into the centre of the base of the
filter and push all the way in.
6. Push the hose inlet into
the side of the recovery
tank. It must be pushed
in from the outside of
the tank, ensuring that
the lug on the hose inlet
is lined up with the slot in the tank as shown.
7. Pull the hose inlet from inside the tank and pull with
an up and down motion to engage. Make sure the
clips on the top and bottom of the
hose inlet are fixed into place inside
the tank. Once installed, the hose
inlet can remain in place
permanently.
11. To remove the filter, pull the pin out of the base of
the filter and pull the filter off the float cage, taking
care not to squash the filter pleats.
3
NOTE: If you are using the unit for fine dust collection, you will need to fit the dust collection bag (WD0188) in addition
to the cartridge filter. To fit this, push the card sleeve over the inlet stub as shown below. Be careful to avoid tearing the
bag. Once the dust collection bag becomes full it should be disposed of. Spare bags are available to purchase from
Earlex, part code WDACC19.
For dry pick up - always ensure the filter is completely dry before use.
For wet pick up - ensure that the filter is not left submerged for longer than necessary. The combined filter supplied
is for light duty wet pick up. If you are regularly picking up wet deposits we recommend
you purchase a heavy duty combined filter from Earlex, part number WDACC13. Please
call us on 01483 454666 for more information.
12. Once the filter is fitted (and dust collection bag if required), place the motor
housing back on top of the collection bin.
13. Fit the outlet elbow to the outlet on the back of the motor housing as shown.
The outlet elbow can be used to deflect airflow from the motor away from the
work area.
OPERATION
1. Ensure that the motor housing is clipped onto the collection bin.
2. Fully unwind the mains cable and connect to the mains or extension lead.
3. The unit has three settings at switch. In continuous mode (I) the vacuum will run while
this switch is on. In power tool mode (II), switch this on and then use the power tool to
operate the vacuum. Centre position (0) is power off.
POWER TOOL MODE
SWITCH POSITIONS
Vacuum Function
1. To use the unit for suction, fit the wider end of the hose into the inlet stub as shown right.
2. Fit the extension tubes into each other and into the hose, and attach the desired accessory
to the end of the extension tube.
3. To assemble the floor head, clip the brush/squeegee attachment into place using the
securing tabs on the sides of the head - see images A & B below.
4. Unwind the mains cable and connect to mains or extension lead.
5. Switch unit on and operate as required.
A
B
Blower Function
NOTE: Always switch the unit off before changing between vacuum and blower
functions.
1. To use the unit as a blower, fit the wider end of the hose into the outlet on the back of
the motor housing, as shown, or into the outlet elbow if convenient.
2. Always ensure that the tank, hose & accessories have been cleared of any debris before
operating the blower.
3. You should always protect your eyes with safety goggles and ensure no one else is in
close proximity.
4
4. Unwind the mains cable and connect to mains or extension lead.
5. Switch unit on and operate as required.
6. You can also use the blower function to power the CombiSpray® Gun, which is available as an
optional extra (WDACC18). This paint spray gun gives an expert finish on doors, cupboards,
metals, fences, arts & crafts and can use a wide variety of paints/varnishes.
POWER TOOL ADAPTOR
The unit is supplied with a stepped power tool adaptor, designed to fit on the
exhaust port of many sanders, planers and jigsaws. Fit the large end into the hose
and the small end into the exhaust port on the power tool. It may be necessary to
cut the smaller sections off the adaptor, depending on the size of the exhaust port.
FLOAT SHUT OFF
The unit is protected by an automatic shut-off float valve when the collection bin becomes full of liquid. Once the
bin becomes full the motor will start to make a high pitched noise. If this happens:
1. Switch off the unit and disconnect from the mains.
2. Lift the hose up to drain any liquid back into the bin.
3. Empty the contents of the bin, keeping the hose raised to eliminate any spillages. Be careful as the tank may
be heavier than it appears.
The float valve is a safety device and is there for your safety. Do not attempt to modify or remove this.
Should the cleaner overturn in use, switch the unit off immediately and return to an upright position.
If collecting soapy water you will need to regularly check if the unit requires emptying as lather can bypass the
float system and there can be a discharge of foam. Should this occur:
1. Switch off the unit.
2. Wash out any foam in the filter.
3. Tip away any water around the outlet on the motor housing before recommencing work.
EMPTYINg THE TANK
WARNINg - TAKE CARE, THE TANK MAY BE HEAVIER THAN YOU THINK. BEWARE OF EXCESS WEIgHT.
1. Switch off the unit and unplug from mains.
2. Unclip the motor housing from the collection bin.
3. Empty the bin of all contents taking care to protect against yourself sharp objects.
4. Clean the filters and change if necessary (see below instructions).
5. Check and clean any blockages within the unit.
6. Replace motor housing, plug into mains and continue as before.
CLEANINg & MAINTENANCE
After using the cleaner in wet mode, empty, rinse and dry the collection bin, hose and accessories. If it has been
used for sticky liquid spills, clean the tank and accessories with warm, soapy water.
Wash dirt from the filter using warm, soapy water. Once all the dirt has been removed, rinse the filter under a
running tap, allowing the water to pass from the inside to the outside of the filter. This will improve its
performance. If the filter is very clogged, immerse it in a bucket of warm, soapy water and leave to soak for a
short period of time.
For dry pick up, always ensure that the unit is completely dry before use.
Do NOT oil the motor. It is lubricated for the life of the product.
Periodically replace the dust collection bag. For replacements, please contact Earlex on 01483 454666.
Clean the brush/squeegee attachment for the floor head with warm, soapy water.
There are no serviceable parts inside the unit apart from the filters.
5
STORAgE
1. Clean out the collection bin as described on page 5.
2. Wrap the mains lead around the upper moulding and clip plug to lead using yellow clip,
as shown.
3. Locate the extension tubes on the taller posts on top of the unit, and the accessories on
the lower, angled posts. Alternatively you can locate the accessories on the tops of the
outriggers, as shown below.
TROUBLESHOOTINg
IF A PROBLEM OCCURS, SWITCH THE UNIT OFF IMMEDIATELY.
The unit does not turn on?
Check the unit is plugged in and switched on. Check the fuse in the plug and replace with a fuse of the same
rating - 13 amps and marked BS1362. If using an extension lead, check the fuse in this lead.
The motor operates but the unit fails to pick up?
Check if the cleaner requires emptying.
Check and clear any blockages within the system.
Check that the filter is clean and not damaged.
The motor makes a high pitched noise?
Check if the cleaner needs emptying and the float valve has operated.
Dust/grit is blowing out through the outlet?
Check the filter is fitted correctly and if heavy duty filter is used, check that it is fully pushed into position.
MAINS CONNECTION
The unit is a Class I appliance which means it is earthed for your protection.
If the supply cord is damaged it must be replaced by a genuine Earlex part, available through our Service
Department. It must be replaced by the manufacturer, its Service Agents or similarly qualified personnel in order to
avoid a hazard.
Please read the following safety instructions before use.
1. If the moulded plug is cut off from the mains lead then the plug must be disposed of safely. NEVER under any
circumstances insert such a plug into a 13 amp socket.
2. NEVER under any circumstances use the appliance or mains lead without the fuse cover fitted. This is the
cover on the base of the plug to hold the fuse in place.
3. If you lose the fuse cover then please contact our helpline on 01483 454666.
4. A replacement fuse must be rated at 13 amps. These must be manufactured and approved to BS1362.
IF IN ANY DOUBT, PLEASE CONTACT A QUALIFIED ELECTRICIAN.
AFTER SALES SUPPORT
A range of accessories and all spare parts are available from the Earlex Service Department who will be more than
happy to help.
PLEASE CONTACT OUR HELPLINE ON
Tel: 01483 454666
Fax: 01483 454548
Email: [email protected]
Opening Hours: Monday-Friday 08:30 - 17:00 (excluding Bank Holidays)
6
ACCESSORIES & SPARE PARTS
Please find below the list of spare parts and accessories for the CombiVac. For further information please visit our
website www.earlex.co.uk or see contact details above.
PART CODE
DESCRIPTION
WDACC2
Deluxe Floor Head for improved performance on carpets.
Hard floor, brush & squeegee attachments.
WDACC12
Power Tool Adaptor
WDACC13
Combined Wet & Dry Filter - suitable for more heavy duty wet pick up
WDACC14
Wide Bore Hose Kit
WDACC16
Sink Unblocker
WDACC18
CombiSpray® - multi-purpose spray gun which can be simply plugged into the hose
on the CombiPOWERVac and used for large jobs such as painting walls, doors and treating
fences, down to smaller, more intricate jobs like arts & crafts
WDACC19
Dust collection bags
WDACC20
Cellulose Cartridge Filter - direct replacement for filter supplied with unit
- not recommended for prolonged use of wet pick up
gUARANTEE
This product is guaranteed for a period of 2 years against faulty materials and workmanship. The guarantee
specifically excludes the use for hire and rental purposes.
Whilst every possible care is taken by Earlex to ensure that our products leave the factory in good working
order, Earlex cannot under any circumstances accept liability for problems or damage caused by use of such
products not in adherence to the instructions enclosed. Any unit that has been modified in any way or used on
incorrect voltage will not be covered by the guarantee. Consumables such as filters are not covered by the
guarantee. This guarantee does not affect your statutory rights.
In the event of a fault occurring, please contact our helpline before returning the unit to our Service Department
at the address below, together with a copy of your purchase receipt. All repairs will be dealt with speedily.
EC DECLARATION OF CONFORMITY
We declare that the unit WD1200P conforms to 2006/95/EC, EN60335-2-2 & 2004/108/EC, EN55014-1,
EN55014-2, EN61000-3-2, EN61000-3-3, EMF EN62233.
Tim Hopper - Technical Director
Information on the disposal of waste electrical and electronic equipment known as WEEE:
Your attention is bought to new directives applicable to the disposal of this electrical equipment, where
in accordance with the legislation this product must not be disposed of in your normal household
waste. Instead it is your responsibility to dispose of this type of waste by handing it over to special
designated collection points for recovery and recycling. This product is marked with a ‘wheelie bin’
symbol with a cross on it to remind you of this action. The objective of this directive is to help conserve
resources and ensure that it is recycled in a manner that protects human health and the environment. For more
information about where you can drop off your waste, please contact your local authority. Take back facilities are free
of charge.
7
OTHER PRODUCTS FROM EARLEX
Steam Wallpaper Stripper
SS77
Removes all types of wallpaper including multi-layered, textured and even Artex®.
• Saves time and easy to use
• 90 mins usage time from one fill
• Includes a small steam plate for awkward areas around windows and doors
• Steam cleaning accessories for all around the home
Hands-Free Steam Wallpaper Stripper
SS200
Innovative hands-free steam plate that sticks itself to the wall - no need to hold.
• Removes all types of wallpaper including multi-layered & Artex
• Fast & effortless task completion - easily adapts for ceiling work
• Hose, cable & steam plate on board storage
• Two on/off switches for steam & vacuum
HVLP (High Volume Low Pressure) Spray Stations
The Best Way to Paint
Ideal for spraying all types of jobs from large scale to small detail with equal ease.
• Fast and easy
• Provides a quality finish with no brush marks
• Can spray many types of paint such as varnishes, emulsions, glazes, wood treatments
and many more
Heat gun Kit
Hg2000K
A 2000W heat gun in a sturdy and convenient carry case and includes a range of useful
accessories.
• Two heat settings at 350ºC or 600ºC
• Selection of four nozzles, 3 shavehooks and scraper
Steam Cleaning Kit
SC165
The UK’s number one best selling steam cleaner with a range of steam cleaning accessories.
• 4.5 litre capacity
• Includes carpet cleaning head, window/tile cleaner, jet nozzle with brush and scraper,
upholstery cleaner and large steam plate for wallpaper stripping
Earlex Ltd
Opus Park, Moorfield Road, Guildford, Surrey, GU1 1SZ, United Kingdom
Tel: +44 (0) 1483 454666 Fax: +44 (0) 1483 454548
Email: [email protected] www.earlex.com
© Earlex Ltd 2011.
WD0180 06/11
8