1
Package contents
Setting up your tripod
• Tripod
• Carrying case
• Quick Setup Guide
1 Open the flip-lever leg locks on each leg.
2 Extend the leg sections from the top down (thickest section first)
to reach the height you want.
Features
• 3-way pan head with slide quick release plate
• Smooth fluid movement for cameras up to 11 lbs (5 kg)
• Center column converts to a monopod that extends
59.3 in. (150.6 cm)
• Independent legs spread with three angle adjustments
• Reversible tripod leg
Center column
locking screw
3 Close the flip-lever leg locks on each leg.
Caution: Incorrectly securing a leg lock can cause the tripod leg to
retract unexpectedly and could result in damage to the tripod or to the
attached camera or camcorder.
4 Adjust the height of the center column by loosening the center
column locking screw, raising the center column to the height
you want, then tightening the locking screw.
5 To set the angle position of the legs, press the leg release buttons
and lift the tripod leg.
6 To remove the mounting plate, turn the quick-release plate
locking knob counter-clockwise to loosen it, then turn the
quick-release plate locking knob open, then lift the mounting
plate to remove it.
Mounting plate
Quick-release plate
locking knob
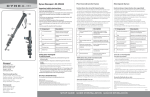
#
Item
Description
1
Leveling bubble
The quick release plate is level when the bubble
is in the center.
2
Vertical tilt lock
knob
Adjusts vertical tilt up to 90 degrees.
3
Vertical tilt lock
handle
Adjusts vertical tilt for head.
4
Leg release button
Lets you adjust the leg angle position
5
Mounting plate
Holds your camera.
6
Quick-release plate Secures the quick-release plate to the tripod.
locking knob
7
Pan locking knob
Locks the tripod head so that it will not rotate
horizontally.
8
Center column
locking screw
Locks the center column in place.
9
Center column/
monopod leg
Provides quick height adjustment.
10 Flip-lever leg locks
Locks the legs in place.
11 Rubber feet
Provide a secure, non-slip footing for your tripod.
7 Align the bottom of your camera or camcorder with the
1/4" mounting screw, then secure your camera or camcorder to
the plate with the screw. The screw should be tight.
8 To attach the mounting plate to your tripod, loosen the
quick-release plate locking knob, then slide the plate onto the
tripod head. Tighten the quick-release plate locking knob.