1
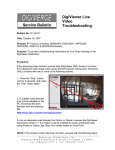
QU DNS1010 Dual-codec Video Server ICK INSTA LLATION GU IDE PACKAGE CONTENTS This installation guide provides instructions for installing the Digimerge DNS1010 Dual-Codec Video Server on your network. For all other aspects of using the product, please refer to the user manual available at www.digimerge.com or on the Installation CD included with this product. Package Contents: • 1 x Dual-Codec Video Server • 1 x Installation CD with manuals and software • 1 x Quick Installation Guide • 1 x Warranty Card • 1 x Ethernet Cable (1m / 3.3ft) • 1 x Power Adapter • 1 x mini-DIN/Terminal Block Conversion Cable (Serial/GPIO) BNC video output BNC video input Audio input Serial / GPIO Port Ethernet port Power indicator DC input Network indicator Important! This product must be installed in compliance with local laws and regulations. www.digimerge.com DNS1010_Quick Installation Guide_En_R1 Page 1 Hardware CONNECTIONS A Mounting Instructions: Run the cables to the desired location. Securely mount the device to a wall or other surface using 4 metal screws (not provided). WALL MOUNT B Connect the network cable to the Video Server’s RJ45 network connector. C Connect a BNC camera (not included) to the Video Server’s BNC Input port (left port). Optionally, an audio input device (i.e. Microphone) can be connected to the Audio In port. The Video Out port can be used to connect a local monitor (no audio). D OPTIONAL Connect the mini-DIN Terminal Block cable to the Video Server’s DIN connector. For more details on the available Terminal Block connections, please check the hardware user manual. E Connect the supplied power adapter to the power connector on the Video Server. www.digimerge.com DNS1010_Quick Installation Guide_En_R1 Page TABLE MOUNT 2 SOFTWARE INSTALLATION A The Digiconsole application loads from the CD included with your package, and provides you with the following: 1. Web links to various resources and documentation 2. Discovery of all the Digimerge IP devices on the network 3. Provides Network configuration of IP Devices 4. Installs DigiConsole and Surveillance application on your local PC 5. Warranty information and DDNS registration B Digiconsole Utility screen consists of the following menus: 1. Home 2. Find Devices 3. Register 4. Install www.digimerge.com DNS1010_Quick Installation Guide_En_R1 Page 3 SOFTWARE SET-UP A Home: Provides basic Digiconsole operating instructions, links to product information/documentation as well as 3rd party software support links. B Find Devices: Locates all available Digimerge IP devices on your network and displays a snapshot of the results. Click on any available device to display image on the right side screen display. NOTE: You may need to press the Find Devices button several times as some devices may not respond immediately. If you do not see a camera image, please check that all cables running from the Video Server to the Camera are connected properly. A camera must be connected and networked to view live images. C Menu: The Menu Button or right clicking on a device icon provides access to device specific settings: • Edit Network Parameters • View Live Image • Open Device in Browser • Update Firmware in Video Device • Refresh the device list - in order to remove inactive and disconnected devices NOTE: It is recommended that you record the device specific MAC and IP address for DDNS registration purposes. If you have multiple cameras on a local network, only one camera needs to be configured for DDNS. www.digimerge.com DNS1010_Quick Installation Guide_En_R1 Page MAC: IP: 3 SOFTWARE SET-UP Continued C1 OPTIONAL Edit Network Parameters: The Network Parameters are automatically assigned to the Device by the network router (by using DHCP). These settings can be manually changed if desired. 1. Select the IP device you would like to edit by clicking on its icon. 2. Click on the MENU button or right click the icon for the device to access the menu. Select “Edit Network Parameters” from the menu. 3. Make the necessary changes and click OK to save changes or click CANCEL to close the window without saving any of the changes made. NOTE: If a user name and password were set-up on the IP Device previously, you will be required to enter this authentication information when attempting to access the device. C2 View Live Image: View live video from the IP Device using the Apple Quicktime program. If this application is not installed on your system, please download it (no charge) at http://www.apple.com/quicktime If by clicking VIEWING LIVE IMAGE the image is not automatically shown in Quicktime, follow these steps in Quicktime: 1. Go to FILE 2. Choose OPEN URL 3. Enter the following: rtsp://<device IP address> (i.e. rtsp://192.168.2.102) A device IP address can be obtained from the Digiconsole device list. NOTE: Minimum Quicktime version installed should be 7.1.6. If you cannot install Quicktime, use Microsoft Internet Explorer to view the device. See step C3 for details. www.digimerge.com DNS1010_Quick Installation Guide_En_R1 Page 3 Continued SOFTWARE SET-UP C3 Open Device in Browser: Opens up the DigiViewer Video Browser using your default web browser (e.g. Internet Explorer). The DigiViewer browser allows the user to view streaming video from the device as well as change certain settings on the device depending on the level of access set by the administrator. Once user names and passwords are set up by the administrator, the users (except for a VIEWER level user) are required to enter this information every time they access the DigiViewer. Click to capture a snapshot image in a new browser window. Click (during streaming mode) to mute the audio. By default, the image refresh rate is set to OFF. Move slider to the right to set image refresh rate. www.digimerge.com DNS1010_Quick Installation Guide_En_R1 Page Click to capture a video clip and send it to a FTP site. FTP must be configured in the SETTINGS screen Click to bring up image brightness and contrast controls Click here to start streaming video 3 Continued SOFTWARE SET-UP 3 Levels of User Access: • Administrator (current user) • Operator (general user) Default User Name: guest Password: <leave blank> • Viewer (anonymous guest) Creating Current User Account: 1. Click SETTINGS 2. Select ACCOUNTS 3. Fill in a user name and password in the assigned fields 4. Reconfirm password 5. Click UPDATE ACCOUNTS 1. Administrator: Administrator has unrestricted access to all the settings of the device. The interface will only permit creation of ONE administrator account. 2. Operator: Operator has restricted access to the settings of the server. The interface will only permit creation of FIVE operator accounts. Note: Restrictions - View images. Requires username and password. 3. Viewer: The interface will permit the creation of ONE viewer account (i.e. Anonymous Guest). This account does not require a password. Note: Viewer Restrictions - View images if permission is granted by administrator. Note that the permission in this case refers to providing the IP address to someone. Whomever receives the IP address can view the camera remotely as a anonymous guest. No password is required. Multiple users can access the device at the same time, however this will limit the quality and speed of the video as the feed is shared between all connected users. www.digimerge.com DNS1010_Quick Installation Guide_En_R1 Page This page is intentionally left blank. www.digimerge.com DNS1010_Quick Installation Guide_En_R1 Page 4 REGISTRATION & SOFTWARE INSTALLATION C4 OPTIONAL Update Firmware in Video Device: Opens up a window to search your computer for downloaded firmware (with .bin extension). NOTE: This product will not automatically check for firmware updates. Please visit the Digimerge website to download the most current firmware for your product. D Register: Provides you with information on the device warranty and/or free DDNS service. E OPTIONAL Install: Click the Install button to install the Digiconsole application software on your computer. Click NEXT and follow the instructions to complete the installation. Once the installation is complete you can access the software by clicking START--->PROGRAMS---> DIGIMERGE TECHNOLOGIES---> DIGICONSOLE NOTE: When you install Digiconsole on a PC, it will also install Surveillance Software (see section F for further details). For detailed set-up information, please refer to the user manuals available on the Digimerge website or on the Installation CD included with the device. NOTE: Installation is not required, however installing the software on your local computer allows you to use the utility to locate and update cameras on the network from your PC. www.digimerge.com DNS1010_Quick Installation Guide_En_R1 Page 10 4 REGISTRATION & SOFTWARE INSTALLATION Continued F OPTIONAL Surveillance Software: Digimerge provides a complimentary 32 channel surveillance application. The application allows you to - View multiple cameras simultaneously on the same screen - Record video from multiple cameras to PC hard drive - Scheduled recording The application is optional as we offer software solution compatibility with some of the premier IP software developers in the industry. Visit the Digimerge website for the most up to date information on compatible software solutions. Application Installation: When you install the Digiconsole software on your PC, it will also prompt you to install additional software components: Click NEXT to install Microsoft DirectX 9 (is required to run the Surveillance application). Follow instructions on the Installer application window. When the installation is completed, click NEXT again to install the surveillance application on your PC hard drive. Follow the instructions on the Installer application window. Now the Surveillance application is ready to be used. Go to START/PROGRAMS/32 CH SURVEILLANCE SYSTEM.... to run the application. For information on using the application, please refer to the software manual (32 Channel Surveillance System) on the Digimerge website or included on the installation CD. www.digimerge.com DNS1010_Quick Installation Guide_En_R1 Page 11 Surveillance Application Hardware Recommendation: 32 ch 16 ch CPU Intel Core 2 Duo No. of Channels Used 8 ch 4 ch Intel Pentium D 930 Intel P4 2.8 GHz Intel P4 2.4 GHz or equivalent 1 GB 512 MB 512 MB RAM 1 GB Mother-board Intel 845 or 865 chip or above, Intel chipset recommended Display ATI Radeon 9200, nVIDIA GeForce FX-5200, Intel 845G/865G or above (ATI recommended) Ethernet 100 baseT or Gigabit LAN Hard disk Min. 320GB OS MS Windows 2000/XP Pro Sp2 / 2003 Min. 160GB Min. 80GB Min. 80GB 5 DDNS SET-UP AND REGISTRATION Port forwarding on your router and the creation of a DDNS account with Digimerge is required in order for you to have remote internet access. A Open your Web Browser. Enter http://ddns.digimerge.net B Select the Create Account Option http://ddns.digimerge.net Create Account C Complete Account Information 1 3 D Select the Create New Account Link 2 1. For Product License: Select your Product Model Number from the drop down menu (DNS1010) 2. For Product Code enter the MAC address (without any space) recorded earlier 3. For URL Request choose a URL Name (not to exceed 15 characters) (e.g. your name, your company etc.) www.digimerge.com DNS1010_Quick Installation Guide_En_R1 Page 12 5 Continued E DDNS SET-UP AND REGISTRATION An Automated Confirmation email will be sent to you. Make sure to Record the following information. • Your account name is: (e.g.) myhouse1 • Your account password is: (e.g.) password • Your Digimerge license number is: (e.g.) IPNC-000000000000 You can visit http://ddns.digimerge.net to change your account information and to set up additional Digimerge devices. Set up your IP product to use this service as follows: 1. Use a web browser to access the Settings screen of the camera. 2. Select the Network Services tab. 3. Enter the following settings: DDNS Domain: myhouse (.digimerge.net) Account Name: myhouse1 4. When you have finished entering the correct information for the DDNS service, check-on the ‘Enable Digimerge Dynamic DNS Service’ checkbox. myhouse1 To verify that your camera is properly set up for DDNS, click on the ‘register with DDNS service’ link. This will bring up the Digimerge DDNS Account login screen. Log in using the account information given above and then click on the ‘System Logs’ link on the left hand menu. If the Recent Activity log includes the message ‘Automatic IP update’ and the date/time of the message is very recent, then your camera has updated the server correctly. www.digimerge.com DNS1010_Quick Installation Guide_En_R1 Page 13 NOTE: Please note that normal latencies in the update protocol and Internet propagation delays require you to wait between 5 and 15 minutes and sometimes even longer for your network URL to become fully available and operational over the Internet. This is normal for the DDNS system. Attempting to use the URL within the first 5 minutes of registration may also prolong the URL update time. The URL for accessing your video is: (e.g. myhouse.digimerge.net). When setting up Internet Explorer for remote access, use this URL in place of the IP Address. If you set up a router for port forwarding to your IP Product, note that the default web port is 80 and the default streaming video port is 554. For more information, please refer to the owner’s manual. F Port Forward your Router: You will need to Forward ports 554 (default video port), 80 (default web port). All routers are different. To Port Forward your Router: Refer to your Router’s manual for specific instructions on port forwarding or check DNS1010 product page on Digimerge website www.digimerge.com to view the router configuration guide. 6 Power OVER ETHERNET (PoE) Power over Ethernet, also known as PoE, is a technology for carrying power along with data on standard CAT5 network cables, allowing devices to be powered via their network ports. It is supported by some devices directly (i.g. 802.3af compliant or “PoE Enabled” devices) while other devices require PoE accessories, such as PoE Endspans, PoE Midspans, power injectors and/or active splitters, in order to make use of the technology. More Flexible Power is injected on the Ethernet Cable Data Pairs using: Manageability •PoE Endspan – PoE enabled Ethernet switch • PoE Midspan - PoE multi port injector for use with non-PoE Ethernet switches • PoE Injectors – Adapter that injects Power into an Ethernet cable. Can be used in combination with an active splitter (for connecting to nonPoE devices) or used on its own (for connecting to PoE enabled devices) • Active Splitter – An adapter that splits the Date and Power transmissions over a single Ethernet cable (PoE) into a separate Date (using RJ45 connector) and power stream (using power barrel connector) for use strictly with non-PoE devices. Note that PoE allows devices to be powered with a power rating of up to 12.9W. Devices that consume more then 12.9W but less than 39W require use of High Power PoE (IEEE-802.3at) devices. High Power PoE devices like the 8000 series from Microsemi are readily available. An example of an IP camera that would require High Power PoE to power it up would be PTZ Speed Dome cameras which consume a lot of power. A detailed description of the 802.3af standard is available in IEEE publication SS95312 (http://standards.ieee.org/getieee802/download/ 802.3af-2003.pdf). The main benefits of PoE technology are as follows: Lower Costs • Eliminate the need to run A/C power wires • Utilize existing IT infrastructure investments • Locate device where it truly needs to be located (Not constrained by the location of an AC outlet) Centralize vs Localize Power Source • Allow use of a centralized UPS (Uninterruptible power supply) to guarantee power to the device even during a power failure • PoE devices that are Simple Network Management Protocol (SNMP) manageable can be remotely monitored and controlled The main benefits of PoE Midspan use over PoE Endspan use are: • Improve ROI on current installations • Minimize capital expenditure - Keep the existing Switches • Lower purchase price - 30% less than Enterprise PoE switch • Easy and simple to install - Lower installation costs - 20% less than Enterprise PoE switch - Enable higher productivity - Negligible downtime • PoE investment is protected - Switch technology changes - Why pay for PoE every time you upgrade your switch? • Gain flexibility to power also pre-standard terminals Examples of PoE installations using… PoE Endspan Endspan IP camera (PoE enabled) Endspan Active Splitter IP Camera (non-PoE) PoE Midspan Non-PoE Ethernet Switch enabled) Non-PoE Ethernet Switch IP Camera (non-PoE) Midspan IP Camera (PoE Midspan Active Splitter PoE Injector Non-PoE Ethernet Switch (PoE enabled) PoE Injector IP Camera Poe Injector + Splitter Non-PoE Ethernet Switch IP Camera (non-PoE) PoE Injector Active Splitter Digimerge IP Devices are certified for use with Microsemi PoE hardware solutions. Visit www.microsemi. com/PowerDsine for details on all available PoE hardware solutions. www.digimerge.com DNS1010_Quick Installation Guide_En_R1 Page 14 7 Digimerge ip camera LINE-UP • Full Range of High Resolution (520TVL+) Cameras • Dual Codec (MPEG4/MJPEG) • Hardware Solutions to Fit Most Common CCTV • Full D1 Resolution (@ up to 30fps) Applications (Day/Night/PTZ/ WDR/ Weatherproof/ • Complete Software Solution Included Vandalproof/PoE) DNP5220E High Resolution Low Light IP Professional Camera with PoE DNS1010 Dual Codec Video Server DNP5320E High Resolution Weatherproof IP Day / Night Camera with 90ft IR Range & PoE DND7220V High Resolution IP Day / Night Dome Camera with 30ft IR Range & Vandal Resistant Case DNB6300V High Resolution Weatherproof IP Day / Night Bullet Camera with Varifocal Lens & 300ft IR Range DNZ9320W High Resolution WDR IP PTZ Speed Dome Camera with 25X Optical Zoom FOR MORE INFORMATION, PLEASE VISIT w ww.digimerge.com www.digimerge.com DNS1010_Quick Installation Guide_En_R1 Page 15 8 IT’S ALL ON THE WEB Product Information User Manuals Quick Start Guides Specification Sheets Software Updates Firmware Upgrades For additional information or troubleshooting help, refer to your owners manual for assistance. You can also call or email for further support. Toll Free Technical Support: 1-866-344-4674 or +905-946-8477 Email Support: [email protected] Website: www.digimerge.com www.digimerge.com DNS1010_Quick Installation Guide_En_R1 Page 16