1
Dell Data Protection
Configuration Guide
____________________
© 2014 Dell Inc.
Registered trademarks and trademarks used in the DDP|E, DDP|ST, and DDP|CE suite of documents: Dell™ and the Dell logo, Dell
Precision™, OptiPlex™, ControlVault™, Latitude™, XPS®, and KACE™ are trademarks of Dell Inc. Intel®, Pentium®, Intel Core Inside
Duo®, Itanium®, and Xeon® are registered trademarks of Intel Corporation in the U.S. and other countries. Adobe®, Acrobat®, and
Flash® are registered trademarks of Adobe Systems Incorporated. Authen Tec® and Eikon® are registered trademarks of Authen Tec.
AMD® is a registered trademark of Advanced Micro Devices, Inc. Microsoft®, Windows®, and Windows Server®, Internet Explorer®,
MS-DOS®, Windows Vista®, MSN®, ActiveX®, Active Directory®, Access®, ActiveSync®, BitLocker®, BitLocker To Go®, Excel®, HyperV®, Silverlight®, Outlook®, PowerPoint®, Skydrive®, SQL Server®, and Visual C++® are either trademarks or registered trademarks of
Microsoft Corporation in the United States and/or other countries. VMware® is a registered trademark or trademark of VMware, Inc. in
the United States or other countries. Box® is a registered trademark of Box. DropboxSM is a service mark of Dropbox, Inc. Google™,
Android™, Google™ Chrome™, Gmail™, YouTube®, and Google™ Play are either trademarks or registered trademarks of Google Inc. in
the United States and other countries. Apple®, Aperture®, App StoreSM, Apple Remote Desktop™, Apple TV®, Boot Camp™, FileVault™,
iCloud®SM, iPad®, iPhone®, iPhoto®, iTunes Music Store®, Macintosh®, Safari®, and Siri® are either servicemarks, trademarks, or
registered trademarks of Apple, Inc. in the United States and/or other countries. GO ID®, RSA®, and SecurID® are registered trademarks
of EMC Corporation. EnCase™ and Guidance Software® are either trademarks or registered trademarks of Guidance Software. Entrust®
is a registered trademark of Entrust®, Inc. in the United States and other countries. InstallShield® is a registered trademark of Flexera
Software in the United States, China, European Community, Hong Kong, Japan, Taiwan, and United Kingdom. Micron® and RealSSD®
are registered trademarks of Micron Technology, Inc. in the United States and other countries. Mozilla® Firefox® is a registered trademark
of Mozilla Foundation in the United States and/or other countries. iOS® is a trademark or registered trademark of Cisco Systems, Inc. in
the United States and certain other countries and is used under license. Oracle® and Java® are registered trademarks of Oracle and/or its
affiliates. Other names may be trademarks of their respective owners. SAMSUNG™ is a trademark of SAMSUNG in the United States
or other countries. Seagate® is a registered trademark of Seagate Technology LLC in the United States and/or other countries. Travelstar®
is a registered trademark of HGST, Inc. in the United States and other countries. UNIX® is a registered trademark of The Open Group.
VALIDITY™ is a trademark of Validity Sensors, Inc. in the United States and other countries. VeriSign® and other related marks are the
trademarks or registered trademarks of VeriSign, Inc. or its affiliates or subsidiaries in the U.S. and other countries and licensed to Symantec
Corporation. KVM on IP® is a registered trademark of Video Products. Yahoo!® is a registered trademark of Yahoo! Inc.
This product uses parts of the 7-Zip program. The source code can be found at www.7-zip.org. Licensing is under the GNU LGPL license
+ unRAR restrictions (www.7-zip.org/license.txt).
2014-02
Protected by one or more U.S. Patents, including: Number 7665125; Number 7437752; and Number 7665118.
Information in this document is subject to change without notice.
Contents
1
Configure the Compatibility Server
server_config.xml
gkresource.xml .
. . . . . . . . . . . . . . . . . . . . . . . . . . . . . . . . . . . . . . . . . . . . . . . .
. . . . . . . . . . . . . . . . . . . . . . . . . . . . . . . . . . . . . . . . . . . . . . . .
2
. . . . . . . . . . . . . . . . . . . . . . . . . . . . . . . . . . . . . . . . . . . . . . . .
12
Configure the Core Server
. . . . . . . . . . . . . . . . . . . . . . . . . . . . . . . . . . . . . .
Disable Web Services
13
. . . . . . . . . . . . . . . . . . . . . . . . . . . . . . . . . . . . . . . . . . .
13
. . . . . . . . . . . . . . . . . . . . . . . . . . . . . . . . . . . . . . . . . . . . .
13
. . . . . . . . . . . . . . . . . . . . . . . . . . . .
14
. . . . . . . . . . . . . . . . . . . . . . . . . . . . . . . . . . . . . . . .
14
. . . . . . . . . . . . . . . . . . . . . . . . . . . . . . . . . . . . . . . . . . . .
14
Enable SMTP Server for License Email Notifications .
NotificationObjects.config
Notification.config .
. . . . . . . . . . . . . . . . . . .
15
. . . . . . . . . . . . . . . . . . . . . . .
15
Add Compatibility Server’s Folder Location to Core Server Config File .
Allow Core Server to Iterate Through Authentication Methods .
Configure the Device Server
eserver.properties
4
. . . . . . . . . . . . . . . . . . . . . . . . . . . . . . . . . . . .
17
. . . . . . . . . . . . . . . . . . . . . . . . . . . . . . . . . . . . . . . . . . . . . . .
17
. . . . . . . . . . . . . . . . . . . . . . . . . . . . . . . . . . . . . . . . . . . . . . . .
18
Configure the Security Server
context.properties
5
13
. . . . . . . . . . . . . . . . . . . . . .
PolicyService.config.
run-service.conf
11
11
Change the Policy Arbitration from Most Secure to Least Secure
3
5
. . . . . . . . . . . . . . . . . . . . . . . . . . . . . . . . . . . .
Enable Domain\Username Format
run-service.conf
5
. . . . . . . . . . . . . . . . . . . . . . . . . . . . . . . .
. . . . . . . . . . . . . . . . . . . . . . . . . . . . . . . . . . . . . . . . . . . . . . .
Configure Encryption Features
Prevent Temporary File Deletion .
Hide Overlay Icons
. . . . . . . . . . . . . . . . . . . . . . . . . . . . . . . . . .
19
19
21
. . . . . . . . . . . . . . . . . . . . . . . . . . . . . . . . . . . . . . .
21
. . . . . . . . . . . . . . . . . . . . . . . . . . . . . . . . . . . . . . . . . . . . . . .
21
. . . . . . . . . . . . . . . . . . . . . . . . . . . . . . . . . . . . . . . . . . . . .
21
. . . . . . . . . . . . . . . . . . . . . . . . . . . . . . . . . . . . . . . . . . . . . . .
21
Hide System Tray Icon
Slotted Activation.
. . . . . . . . . . . . . . . . . . . . . . . . . . . . . . . . . . .
Configuration Guide
3
Forced Poll
. . . . . . . . . . . . . . . . . . . . . . . . . . . . . . . . . . . . . . . . . . . . . . . . . . .
Inventory Options .
. . . . . . . . . . . . . . . . . . . . . . . . . . . . . . . . . . . . . . . . . . . . . . .
Non-Domain Activations .
6
. . . . . . . . . . . . . . . . . . . . . . . . . . . . . . . . . . . . . . . . . . .
Configure Components for Kerberos Authentication/Authorization
Configure Components for Kerberos Authentication/Authorization .
Windows Service Instructions .
25
. . . . . . . . . . . . . . . . . . . . . . . . . . . . . . . . . . . . . .
25
Sample Configuration File:
. . . . . . . . . . . . . . . . . . . . . . . . . . . . . . . . . . . . . . . .
26
Windows Service Instructions .
. . . . . . . . . . . . . . . . . . . . . . . . . . . . . . . . . . . . . . . .
26
. . . . . . . . . . . . . . . . . . . . . . . . . . . . . . . . . .
Assign Forensic Administrator Role
Disable Forensic Authorization
Cron Expressions
29
29
. . . . . . . . . . . . . . . . . . . . . . . . . . . . . . . . . . . . . . . .
29
. . . . . . . . . . . . . . . . . . . . . . . . . . . . . . . . . . . . . . . . . . . . .
31
. . . . . . . . . . . . . . . . . . . . . . . . . . . . . . . . . . . . . . .
31
. . . . . . . . . . . . . . . . . . . . . . . . . . . . . . . . . . . . . . . . . . .
31
. . . . . . . . . . . . . . . . . . . . . . . . . . . . . . . . . . . . . . . . . . . . . .
31
. . . . . . . . . . . . . . . . . . . . . . . . . . . . . . . . . . . . . . . . . . . . . . . . . . . .
33
Cron Expression Formats .
Special Characters .
Examples
. . . . . . . . . . . . . . . . . . . . . . . . . . . . . .
27
. . . . . . . . . . . . . . . . . . . . . . . . . . . . . . . . . .
Introduction to Cron Expressions
Create a Self-Signed Certificate Using Keytool and
Generate a Certificate Signing Request . . . . . . . . . . .
Generate a New Key Pair and a Self-Signed Certificate
. . . . . . . . . . . . . . . . .
35
. . . . . . . . . . . . . . . . . . . . . . . . . . .
35
Request a Signed Certificate from a Certificate Authority
Import a Root Certificate
. . . . . . . . . . . . . . . . . . . . . . . . . .
36
. . . . . . . . . . . . . . . . . . . . . . . . . . . . . . . . . . . . . . . . . . . .
37
Example Method to Request a Certificate .
4
25
. . . . . . . . . . . . . . . . . . . . . . . . . . . . . . . . . . . . . . . .
Remote Management Console Instructions
9
23
25
Remote Management Console Instructions
8
23
. . . . . . . . . . . . . . . . . . . . .
Key Server Config File Instructions
7
. . . . . .
22
Configuration Guide
. . . . . . . . . . . . . . . . . . . . . . . . . . . . . . . . . .
37
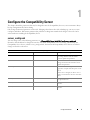
1
Configure the Compatibility Server
This chapter details the parameters that may be changed to tune the Compatibility Server to your environment. Always
back up configuration files before editing.
Only change documented parameters in these file. Changing other data in these file, including tags, can cause system
corruption and failure. Dell cannot guarantee that problems resulting from unauthorized changes to these file can be
solved without re-installing the Compatibility Server.
server_config.xml
You may change some of the following parameters in <Compatibility Server install dir>\conf\server_config.xml.
Parameters that should not be changed are noted as such. If the Compatibility Server is running, you must stop the
Compatibility Server Service, edit the server_config.xml file, then restart the Compatibility Server Service in order for
changes to this file to take effect.
server_config.xml
Parameter
Default
Description
secrets.location
$dell.home$/conf/secretKeyStore
Default location of the secretkeystore. If
you change this file from the default
location, update this parameter.
archive.location
$dell.home$/conf/archive
Default location of the archive. If you
change this file from the default location,
update this parameter.
domain.qualified.authentication
true
Indicates whether a fully qualified user
login name is required for all requests to the
Server.
If this value is changed, the Device Server
must be restarted before the new value takes
effect.
directory.max.search.size
1000
Limit on a directory find, after which an
exception is thrown.
directory.server.search.timeout.seconds
60
Server timeout in seconds for LDAP
searches.
directory.client.search.timeout
60
Client timeout in seconds for LDAP
searches.
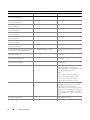
Configuration Guide
5
server_config.xml
Parameter
Default
rmi.recovery.host
Description
To use Multi-Server EMS Recovery:
<!-- uncomment and change host names to
your fully qualified domain names to chain
recovery
<property name="rmi.recovery.host">
<value>rmi://foo.fabrikam.com:1099</val
ue>
</property>
<property name="rmi.recovery.host">
<value>rmi://foo.fabrikam2.com:1099</va
lue>
</property>
-->
default.gatekeeper.group.remote
CMGREMOTE
The default name of the Group that all
Policy Proxies belong by default. You can
change this name here or in the Device
Server context.properties.
If you change the group name here, you
need to change it in the Device Server as
well if you plan to:
• Shield Windows devices
• Use CREDActivate
We recommend that all your Policy Proxies
belong to a single group.
rsa.securid.enabled
false
If you are using RSA SecurID for Microsoft
Windows version 6 as your GINA
replacement, set this parameter to true, and
then stop and restart the Compatibility
Server Service.
When Shield users activate in an RSA
GINA replacement environment, RSA
authentication replaces LDAP
authentication.
inv.queue.task.worker.size
10
Number of threads processing the inventory
queue.
inv.queue.task.timeout.seconds
900
Number of seconds before timeout occurs.
3
Number of times the Server tries to process
the inventory before it is discarded.
inv.queue.task.retry.count
report.retry.max
120
Maximum number of retry attempts.
report.retry.wait.millis
250
Number of milliseconds to wait before
retries.
6
Configuration Guide
server_config.xml
Parameter
triage.execute.time
Default
Description
0 0 0/6 * *
Triage is the process of reconciling the users
and groups that the Server already knows
about.
The default setting is 0 0 0/6 * * ?, which
means we do triage every 6 hours starting at
midnight (midnight, 6 AM, noon, 6 PM,
midnight...)
gatekeeper.service.max.sessions
5
Maximum number of Policy Proxy sessions.
gatekeeper.service.max.session.timeout
5
Timeout for maximum number of Policy
Proxy sessions.
security.authorization.method.IAdministrat
iveService.updateAdminRoles
AcctAdmin
Role required to update a group or user
administrative roles.
security.authorization.method.IAdministrat
iveService.getAdministrativeAccountGroup
s
AcctAdmin
Role required to update a group or user
administrative roles
security.authorization.method.IAdministrat
iveService.openGetLogsSession
SystemAdmin,LogAdmin
Roles required to retrieve log sessions.
security.authorization.method.IAdministrat
iveService.getLogs
SystemAdmin,LogAdmin
Roles required to retrieve logs.
security.authorization.method.IAdministrat
iveService.getLogColumnList
SystemAdmin,LogAdmin
Roles required to retrieve log column list.
security.authorization.method.IAdministrat
iveService.getLogCategoryList
SystemAdmin,LogAdmin
Roles required to retrieve log category list.
security.authorization.method.IAdministrat
iveService.getLogPriorityList
SystemAdmin,LogAdmin
Roles required to retrieve log priority list.
security.authorization.method.IAdministrat AcctAdmin,SecAdmin,HelpDeskAdmin,Sys Roles required to retrieve Unique ID names.
iveService.getUniqueIdName
temAdmin
security.authorization.method.IAdministrat
iveService.getAdministrators
AcctAdmin
Role required to retrieve the list of
administrators in the system.
security.authorization.method.IAdministrat
iveService.setSuperAdminPassword
SuperAdmin
Role required to set the superadmin
password.
security.authorization.method.IAdministrat
iveService.resetSuperAdminPassword
SecAdmin
security.authorization.method.IAdministrat
iveService.addDomain
SystemAdmin,SecAdmin
Roles required to add domains.
security.authorization.method.IAdministrat
iveService.removeDomain
SystemAdmin,SecAdmin
Roles required to remove domains.
security.authorization.method.IAdministrat
iveService.updateDomain
SystemAdmin,SecAdmin
Roles required to update domains.
security.authorization.method.IAdministrat
iveService.addGroups
SystemAdmin,SecAdmin
Roles required to add groups.
security.authorization.method.IAdministrat
iveService.removeGroup
SystemAdmin,SecAdmin
Roles required to remove groups.
Role required to reset the superadmin
password.
Configuration Guide
7
server_config.xml
Parameter
Default
security.authorization.method.IAdministrat
iveService.findLdapGroups
SystemAdmin,SecAdmin
Roles required to find LDAP groups.
security.authorization.method.IAdministrat
iveService.findLdapUsers
SystemAdmin,SecAdmin
Roles required to find LDAP users.
security.authorization.method.IAdministrat
iveService.addUsers
SystemAdmin,SecAdmin
Roles required to add users.
security.authorization.method.IAdministrat
iveService.addLicense
SystemAdmin
Role required to add enterprise licenses.
security.authorization.method.IAdministrat
iveService.getLicense
SystemAdmin
Role required to view the enterprise license.
security.authorization.method.IDeviceMan
ager.recoverDevice
HelpDeskAdmin,SecAdmin
Roles required to recover a device.
security.authorization.method.IDeviceMan
ager.isUserSuspended
HelpDeskAdmin,SecAdmin
Roles required to suspend users.
security.authorization.method.DeviceMana
gerService.proxyActivate
SecAdmin
Roles required to activate devices by proxy.
security.authorization.method.DeviceMana
gerService.proxiedDeviceManualAuth
HelpDeskAdmin,SecAdmin
Roles required to manually recover a device
by proxy.
security.authorization.method.IFileManage
r.getGatekeeperResource
SystemAdmin
Role required to retrieve the Gatekeeper
resource file.
security.authorization.method.IFileManage
r.approveGatekeeperResource
SystemAdmin
Role required to approve the Gatekeeper
resource file.
security.authorization.method.IFileManage
r.approveGatekeeperConfig
SystemAdmin
Roles required to approve Gatekeeper
configuration.
policy.arbiter.security.mode
most-restrictive
Description
This property controls how the policy
mapping algorithm works for policy
elements that have a security bias when the
policy has multiple parent nodes.
Values:
Least-restrictive - the least restrictive
element value from the parents is used
Most-restrictive - the most restrictive
element value from all parents is used
policy.set.synchronization.sync-unmodified
true
This flag indicates that the next external
synchronization should add or remap all
policy elements without setting the
modified flag to true. This flag is toggled to
false after every synchronization, so it must
be reset if the security admin wants to add
without modifications. This is an advanced
option.
db.schema.version.major
Major database schema.
db.schema.version.minor
Minor database schema.
8
Configuration Guide
server_config.xml
Parameter
Default
db.schema.version.patch
dao.db.driver.dir
Description
Patch version of database schema.
$dell.home$/lib/mssql-microsoft
dao.db.host
Default location of the database driver. If
you change this file from the default
location, update this parameter.
Your database server hostname.
This parameter is changed in the
Configuration Tool.
dao.db.name
The name of your database.
This parameter is changed in the
Configuration Tool.
dao.db.user
The username with full permissions to your
database.
This parameter is changed in the
Configuration Tool.
dao.db.password
The password for the username with full
permissions to your database.
This parameter is changed in the
Configuration Tool.
dao.db.max.retry.count
10
The maximum number of times the
Compatibility Server attempts to reconnect
to the SQL Server when a specified socket
error occurs.
dao.db.connection.retry.wait.seconds
5
The first reconnect attempt is immediate.
The second happens the specified number
of seconds later. The third happens double
the number of specified seconds later, the
fourth triple, and so on.
10000
Allows connections to be retired, 0 means
do not retire.
900
Used to determine when a connection has
not been used and can be closed.
dao.db.driver.socket.errors
0
The Compatibility Server attempts to
reconnect to the SQL Server when errors
corresponding to the codes in this
comma-separated list occur. 0 is the error
code for socket errors for Microsoft SQL.
You may also add 17142 for server paused
errors and 6002 for server shutting down
errors.
dao.db.mssql.compatability.level
90
Value for SQL 2005 or later.
dao.connection.pool.max.uses
dao.connection.pool.inactive.threshold.seco
nds
vfs.file.handler.auth
com.credant.guardian.server.vfs.AuthFileHa Authorization file handler.
ndler
vfs.file.handler.inventory
com.credant.guardian.server.vfs.InventoryFi Inventory file handler.
leHandler
Configuration Guide
9
server_config.xml
Parameter
vfs.file.handler.event
gatekeeper.resource
gatekeeper.config
Default
Description
com.credant.guardian.server.vfs.EventFileH Event file handler.
andler
$dell.home$/conf/gkresource.xml
If you move the Gatekeeper resource file
from the default location, update this
parameter.
$dell.home$/conf/gkconfig.xml
If you move the Gatekeeper resource file
from the default location, update this
parameter.
rmi.server.registry.host
localhost
The host property is only for the benefit of
client programs to determine where the
registry is. It is not used during creation of
the RMI registry and remote objects. Will
be created in localhost.
rmi.server.registry.port
1099
The RMI registry port is configurable during
installation. You can also change the port
after installation using this parameter.
If you change this value, you also need to
configure Gatekeeper Web Services.
security.authorization.method.IServerRepor AcctAdmin,HelpDeskAdmin,SystemAdmin Roles required to set Server reports
ts.getOverviewReport
,SecAdmin
Authorization.
security.authorization.method.IReportingSe
rvice.removeEntity
SystemAdmin
Role required to remove Server entities.
security.authorization.method.IReportingSe
rvice.setEntityVisibility
SystemAdmin
Role required to set the visibility of Server
entities.
security.authorization.method.IReportingSe AcctAdmin,HelpDeskAdmin,SystemAdmin Roles required to view the device detail
rvice.getHardwareDetailReport
,SecAdmin
page.
security.authorization.method.IReportingSe AcctAdmin,HelpDeskAdmin,SystemAdmin Roles required to open a Server session.
rvice.openSession
,SecAdmin
security.authorization.method.IReportingSe AcctAdmin,HelpDeskAdmin,SystemAdmin Roles required to view the paged report.
rvice.getPagedReport
,SecAdmin
security.authorization.method.IReportingSe AcctAdmin,HelpDeskAdmin,SystemAdmin Roles required to view the device type
rvice.getDeviceTypeReport
,SecAdmin
report.
security.authorization.method.IReportingSe AcctAdmin,HelpDeskAdmin,SystemAdmin Roles required to view the operating system
rvice.getDeviceOsReport
,SecAdmin
report.
security.authorization.method.IReportingSe AcctAdmin,HelpDeskAdmin,SystemAdmin Roles required to view the device model
rvice.getDeviceModelReport
,SecAdmin
reports.
security.authorization.method.IReportingSe AcctAdmin,HelpDeskAdmin,SystemAdmin Roles required to view the policy detail
rvice.getPolicyDetailReport
,SecAdmin
report.
security.authorization.method.IReportingSe AcctAdmin,HelpDeskAdmin,SystemAdmin Roles required to view the workstation
rvice.getWorkstationDetailReport
,SecAdmin
detail report.
security.authorization.method.IReportingSe AcctAdmin,HelpDeskAdmin,SystemAdmin Roles required to view the encryption failure
rvice.getEncryptionFailuresReport
,SecAdmin
report.
security.authorization.method.IReportingSe AcctAdmin,HelpDeskAdmin,SystemAdmin Roles required to view the encryption
rvice.getEncryptionSummaryReport
,SecAdmin
summary report.
10
Configuration Guide
server_config.xml
Parameter
Default
Description
security.authorization.method.IReportingSe AcctAdmin,HelpDeskAdmin,SystemAdmin Roles required to view the user detail report.
rvice.getUserDetail
,SecAdmin
security.authorization.method.IReportingSe AcctAdmin,HelpDeskAdmin,SystemAdmin Roles required to view the group detail
rvice.getGroupDetail
,SecAdmin
report.
security.authorization.method.IReportingSe AcctAdmin,HelpDeskAdmin,SystemAdmin Roles required to view the list of domains
rvice.getDomainDetail
,SecAdmin
report.
security.authorization.method.IKeyService.
getKeys
accountType.nonActiveDirectory.enabled
ForensicAdmin
This setting is used with a forensic
integration plug-in. Contact Dell Support if
forensic tool integration is needed.
false
Enabling non-domain activations is an
advanced configuration, with wide-ranging
consequences. BEFORE enabling this
configuration, contact Customer Support to
discuss your specific environmental needs.
Restart the Compatibility Server Service
after changing this value.
In addition to this setting, create or modify
the registry setting on the Windows
computer as follows:
HKLM\Software\Microsoft\Windows
NT\CurrentVersion\Winlogon\CMGShield
AllowNonDomainActivations=
REG_DWORD:1
gkresource.xml
You may change the parameters in <Compatibility Server install dir>\conf\gkresource.xml.
We recommend that you track your changes in comments at the beginning of the file. This will allow you to easily transfer
your changes to the new file when you upgrade.
NOTE: The gkresource.xml file must be a well-formed XML file. Dell recommends that if you are not familiar with XML, you not attempt to edit
this file. Be sure to use entity references where appropriate rather than raw (unescaped) special characters.
A System Administrator must approve changes to the Gatekeeper resource file before they take effect.
Enable Domain\Username Format
Add the following string to enable (or disable) the domain\username format. The format is disabled if the string does not
exist in the file. It can also be disabled by setting the value to 0.
1 Go to <Compatibility Server install dir>\conf.
2 Open gkresource.xml with an .xml editor.
3 Add the string:
<string name="EnableGKProbeMultiDomainSupport">1</string>
4 Save and close the file.
Configuration Guide
11
run-service.conf
You may change some of the following parameters in <Compatibility Server install dir>\conf\run-service.conf. These
parameters are automatically set at installation. To customize or make configuration changes to any Service:
1 Stop the Service.
2 Remove the Service.
3 Edit and save the run-service.conf file. We recommend that you track your changes in comments at the beginning of the
file.
4 Re-install the Service.
5 Start the Service.
run-service.conf
Parameter
JAVA_HOME
Default
Dell\Java Runtime\jreX.x
wrapper.java.additional.5
n/a
Description
Location of the Java installation directory.
The mac address in this line is the mac
address of the local ethernet adapter.
If a server has multiple NICS or you want to
bind to an adapter other than the primary
adapter, enter the physical mac address of
the NIC here, without dashes.
wrapper.ntservice.name
EpmCompatSvr
wrapper.ntservice.displayname
Dell Compatibility Server
wrapper.ntservice.description
Enterprise Compatibility Server
wrapper.ntservice.dependency.1
wrapper.ntservice.starttype
wrapper.ntservice.interactive
12
Configuration Guide
Name of the Service.
Display name of the Service.
Description of the Service.
Service dependencies. Add dependencies as
needed, starting from 1.
AUTO_START
Mode in which the Service is installed:
AUTO_START or DEMAND_START.
false
A setting of true allows the Service to
interact with the desktop.
2
Configure the Core Server
This chapter details the parameters that may be changed to tune the Core Server to your environment.
Only change documented parameters in these file. Changing other data in these file, including tags, can cause system
corruption and failure. Dell cannot guarantee that problems resulting from unauthorized changes to these file can be
solved without re-installing the Core Server.
Change the Policy Arbitration from Most Secure to Least Secure
PolicyService.config
Modify this setting to change the policy arbitration from most secure to least secure. Change the setting in <Core Server
install dir>\PolicyService.config. If the Core Server is running, you must stop the Service, edit the PolicyService.config
file, then restart the Service in order for changes to this file to take effect.
We recommend that you track your changes in comments at the beginning of the file. This will allow you to easily transfer
your changes to the new PolicyServiceConfig.xml file when you upgrade.
Modify the following section:
<!-- Web Service Targets -->
<object id="PolicyService" singleton="false" type="Credant.Policy.Service.PolicyService,
Credant.Policy.ServiceImplementation">
<property name="TemplateDataAccess" ref="TemplateDataAccess"/>
<property name="PolicyDataAccess" ref="PolicyDataAccess"/>
<property name="SupportDataAccess" ref="SupportDataAccess"/>
<property name="AuditLog" ref="ServiceAuditLog"/>
<property name="GlobalArbitrationBias" value="1" /> [change this value from “0” to “1” to set the value to least
secure]
</object>
Disable Web Services
NOTE: This is an advanced setting that should only be changed under the guidance of Customer Support.
To disable web services on the Core Server (for example, if there is a second Core Server installation that only does
inventory processing), change the settings in:
<Core Server install dir>\
Credant.Server2.WindowsService.exe.Config
and
<Core Server install dir>\Spring.config
If the Core Server is running, you must stop the Service, edit the settings in these two files, then restart the Service in
order for changes to this file to take effect.
Configuration Guide
13
Credant.Server2.WindowsService.exe.Config
Remove the following section:
<!-- Web Services Configuration -->
<system.serviceModel>
<services configSource="Services.config"/>
<behaviors configSource="Behaviors.config"/>
<bindings configSource="Bindings.config"/>
</system.serviceModel>
Spring.config
Remove the following:
Remove all the <object> </object> definitions under AOP Advice, Web Service Target Definition, and Web Service
Host Definition headings.
Enable SMTP Server for License Email Notifications
If using Dell Data Protection | Cloud Edition, these settings are automated by using the Server Configuration Tool. Use
this procedure if you need to enable the SMTP Server for license email notifications for purposes outside of Dell Data
Protection | Cloud Edition.
NotificationObjects.config
To configure your SMTP server for license email notifications, modify the NotificationObjects.config file located at
<Core Server install dir>.
Modify the following:
<object name="EmailNotification" singleton="false" type="Credant.Notification.EmailNotification,
Credant.Notification"> [Do not change this value]
<property name="NotificationDataFactory" ref="NotificationDataFactory"/> [Do not change this value]
<property name="Host" value="test.dell.com"/>
<property name="Port" value="25"/>
<property name="Username" value="username"/>
<property name="Password" value="${SmtpPassword}"/> [Do not change this value]
<property name="Logger" ref="NotificationLogger"/> [Do not change this value]
</object>
Notification.config
If your email server requires authentication, modify the Notification.config file located at <Core Server install dir>.
Modify the following:
<notification>
<add key="SmtpPassword" value="your_email_server_password"/>
</notification>
14
Configuration Guide
Add Compatibility Server’s Folder Location to Core Server Config File
The Core Server, being a .Net application, can sometimes be blocked from accessing registry information, due to
permissions. The issue is that the Core Server, to read the secretkeystore (the database encryption key), needs to access the
Compatibility Server's registry configuration information for the location of the secretkeystore. If the registry permissions
block this access, then the Core Server fails to authenticate Console users. This setting adds the Compatibility Server's
folder location into the Core Server’s config file in case of registry access issues.
1 Navigate to <Core Server install dir>\EntityDataAccessObjects.config.
2 Change the following bold item:
<object id="DomainDataAccess" singleton="false" type="Credant.Entity.DataAccess.DomainDataAccess,
Credant.Entity.DataAccess">
<property name="Logger" ref="DataAccessLogger"/>
<!--<property name="CompatibilityServerPath" value="PATH_TO_COMPATIBILITY_SERVER"/> -->
Uncomment this line and set the fully qualified path to the Compatibility Server.
</object>
3 Save and close the file.
4 Restart the Core Server and Compatibility Server Services.
Allow Core Server to Iterate Through Authentication Methods
The Core Server authentication attempts can be blocked by the domain controller, due to policies being set on the allowed
authentication methods. The enhancement was to implement a “switch” in the Core Server configuration file to allow the
Core Server to iterate through several authentication methods, in an attempt to find one that works.
1 Navigate to <Core Server install dir>\Spring.config.
2 Change the following bold item:
<object id="DomainCache" singleton="true" type="Credant.Authorization.DomainCache.DomainCache,
Credant.Authorization.DomainCache">
<!-- Change this logger? -->
<property name="Logger" ref="DataAccessLogger" />
<property name="DomainDataAccess"
ref="DomainDataAccess" />
<property name="RefreshFrequency" value="300" />
<property name="TryAllAuthTypes" value="false" />
Change this value to “true” to enable this functionality.
<!-- Used to change the AuthType per domain: key is domain's CID and value is the
System.DirectoryServices.AuthenticationTypes value
<property name="DomainAuthType">
<dictionary key-type="string" value-type="int" >
<entry key="5A23TPM2" value="0" />
</dictionary>
</property>
-->
</object>
3 Save and close the file.
4 Restart the Core Server Service.
Configuration Guide
15
16
Configuration Guide
3
Configure the Device Server
This chapter details the parameters that may be changed to tune the Device Server to your environment.
Only change documented parameters in these file. Changing other data in these file, including tags, can cause system
corruption and failure. Dell cannot guarantee that problems resulting from unauthorized changes to these file can be
solved without re-installing the Device Server.
eserver.properties
You may change the following parameters in <Device Server install dir>\conf\eserver.properties.
We recommend that you track your changes in comments at the beginning of the file. This will allow you to easily transfer
your changes to the new file when you upgrade.
eserver.properties
Parameter
Default
Description
eserver.default.host
Device Server Service
FQDN of where the Device Server Service is
installed.
eserver.default.port
v7.7 or later Enterprise Server - 8443
pre-v7.7 Enterprise Server - 8081
eserver.use.ssl
The port that the Device Server will listen
on for incoming activation requests from
devices.
True
SSL is enabled by default. To disable SSL,
change this parameter to False.
eserver.keystore.location
${context['server.home']}/conf/cacerts
Location of the SSL certificate used by the
Device Server.
eserver.keystore.password
changeit
If you modified the cacerts password in the
Configuration Tool, this parameter is
updated accordingly. If you modify your
cacert in the Configuration Tool any time
after the initial configuration, update this
parameter with the Keystore password you
use.
Configuration Guide
17
eserver.properties
Parameter
Default
eserver.ciphers
Description
Sets the list of encryption ciphers. Each
cipher should be separated by a comma. If
left empty, the socket will allow any
available cipher supported by Tomcat.
Uncomment the example below to set the
list of encryption ciphers. Separate each
cipher with a comma. Refer to Sun’s JSSE
reference guide for the list of valid cipher
suite names.
#eserver.ciphers=
SSL_RSA_WITH_RC4_128_MD5,SSL_RS
A_WITH_RC4_128_SHA,SSL_DHE_RSA
_WITH_3DES_EDE_CBC_SHA
run-service.conf
You may change some of the following parameters in <Device Server install dir>\conf\run-service.conf. These parameters
are automatically set at installation. To customize or make configuration changes to any Service:
1 Stop the Service.
2 Remove the Service.
3 Edit and save the run-service.conf file. We recommend that you track your changes in comments at the beginning of the
file.
4 Re-install the Service.
5 Start the Service.
run-service.conf
Parameter
JAVA_HOME
Default
Dell\Java Runtime\jreX.x
wrapper.ntservice.name
EpmDeviceSvr
wrapper.ntservice.displayname
Dell Device Server
wrapper.ntservice.description
Enterprise Device Server
wrapper.ntservice.dependency.1
wrapper.ntservice.starttype
wrapper.ntservice.interactive
18
Configuration Guide
Description
Location of the Java installation directory.
Name of the Service.
Display name of the Service.
Description of the Service.
Service dependencies. Add dependencies as
needed, starting from 1.
AUTO_START
Mode in which the Service is installed:
AUTO_START or DEMAND_START.
false
A setting of true allows the Service to
interact with the desktop.
4
Configure the Security Server
This chapter details the parameters that may be changed to tune the Security Server to your environment.
Only change documented parameters in these files. Changing other data in these files, including tags, can cause system
corruption and failure. Dell cannot guarantee that problems resulting from unauthorized changes to these files can be
solved without re-installing the Security Server.
context.properties
You may change the following parameters in <Security Server install dir>\webapps\xapi\WEB-INF\context.properties.
We recommend that you track your changes in comments at the beginning of the file. This will allow you to easily transfer
your changes to the new file when you upgrade.
context.properties
Parameter
default.gatekeeper.group.remote
xmlrpc.max.threads
Default
Description
CMGREMOTE
Device remote group name. Do not modify.
250
default.auth.upn.suffix
Max number of concurrent threads within
this Device Server.
UPN suffix that is appended to a user login
name if the server requires a fully qualified
login name and one is not provided in the
request.
device.manual.auth.enable
true
Indicates whether manual authentications
are enabled or disabled. Do not modify
service.activation.enable
true
Indicates whether activations are handled
by the Device Server. Do not modify
service.policy.enable
true
Indicates whether policy is enabled or
disabled. Do not modify.
service.auth.enable
true
Indicates whether authentications are
handled by the Device Server.
service.forensic.enable
true
This setting is used with a forensic
integration plug-in. Contact Dell Support if
forensic tool integration is needed.
service.support.enable
true
Enables retrieval of meta information about
the server.
service.device.enable
true
Enables support of Shield services such as
SDE keys storage.
Configuration Guide
19
20
Configuration Guide
5
Configure Encryption Features
This section explains how to independently control encryption features.
Prevent Temporary File Deletion
By default, all temporary files in the c:\windows\temp directory are automatically deleted during DDPE
installation/upgrade. Deletion of temporary files speeds initial encryption and occurs before the initial encryption sweep.
However, if your organization uses a third-party application that requires the file structure within the \temp directory to be
preserved, you should prevent this deletion.
To disable temporary file deletion, create or modify the registry setting as follows:
HKLM\SOFTWARE\CREDANT\CMGShield
DeleteTempFiles (REG_DWORD)=0
Note that not deleting temporary files increases initial encryption time.
Hide Overlay Icons
By default, during installation, all encryption overlay icons are set to be shown. Use the following registry setting to hide
the encryption overlay icons for all managed users on a computer after the original installation.
Create or modify the registry setting as follows:
HKLM\Software\CREDANT\CMGShield
HideOverlayIcons (DWORD value)=1
If a user (with the appropriate privileges) chooses to show the encryption overlay icons, that setting will override this
registry value.
Hide System Tray Icon
By default, during installation, the system tray icon is displayed. Use the following registry setting to hide the system tray
icon for all managed users on a computer after the original installation.
Create or modify the registry setting as follows:
HKLM\Software\CREDANT\CMGShield
HIDESYSTRAYICON (DWORD value)=1
Slotted Activation
Slotted Activation is a feature that allows you to spread activations of Shields over a set time period in order to ease Server
load during a mass deployment. Activations are delayed based on algorithmically generated time slots, to provide a smooth
distribution of activation times.
Configuration Guide
21
Slotted Activation is enabled and configured through the Shield installer or through the Shield workstation.
For users requiring activation through VPN, a slotted activation configuration for the Shield may be required to delay
initial activation for long enough to allow time for the VPN client software to establish a network connection.
CAUTION: Configure Slotted Activation only with the assistance of Customer Support. Improper time slotting configuration could result in
large numbers of clients attempting to activate at once, creating potentially severe performance issues.
The following Registry Keys are used to configure Slotted Activation. Changes to these Registry Keys require a restart of
the Shield workstation in order for the updates to take effect.
•
HKLM\Software\Microsoft\Windows NT\CurrentVersion\Winlogon\CMGShield\SlottedActivation
This setting enables or disables the Slotted Activation feature.
Disabled=0 (default)
Enabled=1
•
HKLM\Software\Microsoft\Windows NT\CurrentVersion\Winlogon\CMGShield\ActivationSlot\CalRepeat
The time period in seconds that your activation slot interval will occur. You can use this property to override the time
period in seconds during which your activation slot interval will occur. 25200 seconds are available for slotting activations
during a seven hour period. The default setting is 86400 seconds, which represents a daily repeat.
•
HKLM\Software\Microsoft\Windows NT\CurrentVersion\Winlogon\CMGShield\ActivationSlot\SlotIntervals
The interval within the repeat, ACTIVATION_SLOT_CALREPEAT, when all activation time slots occur. Only one
interval is allowed. This setting should be 0,<CalRepeat>. An offset from 0 could yield unexpected results. The default
setting is 0,86400. To set a seven hour repeat, use the setting 0,25200. CALREPEAT is activated when a Shield user logs
in.
•
HKLM\Software\Microsoft\Windows NT\CurrentVersion\Winlogon\CMGShield\ActivationSlot\MissThreshold
The number of activation slots that can be missed before the computer attempts to activate upon the next login of the
user whose activation has been slotted. If activation fails during this immediate attempt, the Shield resumes slotted
activation attempts. If activation fails due to network failure, activation is attempted upon network reconnection, even if
the value in MISSTHRESHOLD has not been exceeded. If a user logs out before the activation slot time is reached, a
new slot is assigned upon next login.
•
HKCU/Software/CREDANT/ActivationSlot (per user data)
Deferred time to attempt the slotted activation, which is set when the user logs onto the network for the first time after
Slotted Activation is enabled. The activation slot is recalculated for each activation attempt.
•
HKCU/Software/CREDANT/SlotAttemptCount (per-user data)
Number of failed or missed attempts, when the time slot arrives and activation is attempted but fails. When this number
reaches the value set in ACTIVATION_SLOT_MISSTHRESHOLD, the computer attempts one immediate activation
upon connecting to the network.
To enable Slotted Activation through the command line, use a command similar to the following:
setup.exe /v"SLOTTEDACTIVATION=1 CALREPEAT=25200 SLOTINTERVALS=0,25200 <other parameters>"
NOTE: Be sure to enclose a value that contains one or more special characters, such as a blank space, in escaped quotation marks.
Forced Poll
Use the following registry setting to have the Shield poll the Server for a forced policy update.
Create or modify the registry setting as follows:
HKLM\SOFTWARE\Credant\CMGShield\Notify
PingProxy (DWORD value)=1
22
Configuration Guide
Depending on Shield version, the registry setting will automatically disappear or change from 1 to 0 after the poll is
complete.
Depending on the permission set of an Admin user, a change in permissions may be needed to create this registry setting.
If problems arise when attempting to create a new DWORD, follow the steps below to make the permissions change.
1 In the Windows registry, go to HKLM\SOFTWARE\Credant\CMGShield\Notify.
2 Right-click Notify > Permissions.
3 When the Permission for Notify window opens, select the checkbox for Full Control.
4 Click OK.
You may now create your new registry setting.
Inventory Options
Use the following registry settings to either allow the Shield to send an optimized inventory to the Server, send a full
inventory to the Server, or to send a full inventory for all activated users to the Server.
Send Optimized Inventory to Server
Create or modify the registry setting as follows:
HKLM\SOFTWARE\Microsoft\Windows NT\CurrentVersion\Winlogon\CMGShield
OnlySendInvChanges (REG_DWORD)=1
If no entry is present, optimized inventory is sent to the Server.
Send Full Inventory to Server
Create or modify the registry setting as follows:
HKLM\SOFTWARE\Microsoft\Windows NT\CurrentVersion\Winlogon\CMGShield
OnlySendInvChanges (REG_DWORD)=0
If no entry is present, optimized inventory is sent to the Server.
Send Full Inventory for All Activated Users
Create or modify the registry setting as follows:
HKLM\SOFTWARE\Microsoft\Windows NT\CurrentVersion\Winlogon\CMGShield
RefreshInventory (REG_DWORD)=1
This entry is deleted from the registry as soon as it is processed. The value is saved in the vault, so even if the computer is
rebooted before the inventory upload takes place, the Shield still honors this request the next successful inventory upload.
This entry supersedes the OnlySendInvChanges registry value.
Non-Domain Activations
Enabling non-domain activations is an advanced configuration, with wide-ranging consequences. Contact Customer
Support to discuss your specific environmental needs and to get instructions to enable this feature.
Configuration Guide
23
24
Configuration Guide
6
Configure Components for Kerberos
Authentication/Authorization
This section explains how to configure components for use with Kerberos Authentication/Authorization.
Configure Components for Kerberos Authentication/Authorization
NOTE: If Kerberos Authentication/Authorization is to be used, then the server that contains the Key Server component will need to be part of
the affected domain.
Key Server is a Service that listens for clients to connect on a socket. Once a client connects, a secure connection is
negotiated, authenticated, and encrypted using Kerberos APIs (if a secure connection cannot be negotiated, the client is
disconnected).
The Key Server then checks with the Device Server to see if the user running the client is allowed to access keys. This
access is granted on the Remote Management Console via individual domains.
Windows Service Instructions
1 Navigate to the Windows Service panel (Start > Run... > services.msc > OK).
2 Right-click Dell Key Server and select Properties.
3 Go to the Log On tab and select the This account: option button.
4 In the This account: field, add the desired domain user. This domain user must have at least local admin rights to the
Key Server folder (must be able to write to the Key Server config file, as well as the ability to write to the log.txt file.).
5 Click OK.
6 Restart the Service (leave the Windows Service panel open for further operation).
7 Navigate to <Key Server install dir> log.txt to verify that the Service started properly.
Key Server Config File Instructions
1 Navigate to <Key Server install dir>.
2 Open Credant.KeyServer.exe.config with a text editor.
3 Go to <add key="user" value="superadmin" /> and change the "superadmin" value to the name of the appropriate user
(you may also leave as "superadmin").
The "superadmin" format can be any method that can authenticate to the Server. The SAM account name, UPN, or
domain\username is acceptable. Any method that can authenticate to the Server is acceptable because validation is
required for that user account for authorization against Active Directory.
For example, in a multi-domain environment, only entering a SAM account name such as "jdoe" will likely will fail
because the Server will not be able to authenticate "jdoe" because it cannot find "jdoe". In a multi-domain environment,
the UPN is recommended, although the domain\username format is acceptable.
In a single domain environment, the SAM account name is acceptable.
Configuration Guide
25
4 Go to <add key="epw" value="<encrypted value of the password>" /> and change "epw" to "password". Then change
"<encrypted value of the password>" to the password of the user from Step 3. This password is re-encrypted when the
Server restarts.
If using "superadmin" in Step 3, and the superadmin password is not "changeit", it must be changed here.
5 Save your changes and close the file.
Sample Configuration File:
<?xml version="1.0" encoding="utf-8" ?>
<configuration>
<appSettings>
<add key="port" value="8050" /> [Which TCP port the Server will listen to. Default is 8050, change if needed.]
<add key="maxConnections" value="2000" /> [How many active socket connections the Server will allow.]
<add key="url" value="https://keyserver.domain.com:8081/xapi" /> [Device Server URL. If your Enterprise
Server is v7.7 or later, the format is https://keyserver.domain.com:8443/xapi/ -- if your Enterprise Server is pre-v7.7,
the format is https://keyserver.domain.com:8081/xapi (without the trailing forward slash.]
<add key="verifyCertificate" value="false" /> [True verifies certs/set to false to not verify or if using self-signed
certs]
<add key="user" value="superadmin" /> [User name used to communicate with the Device Server. This user
must have the Forensic Administrator type selected in the Remote Management Console. The "superadmin"
format can be any method that can authenticate to the Server. The SAM account name, UPN, or
domain\username is acceptable. Any method that can authenticate to the Server is acceptable because validation
is required for that user account for authorization against Active Directory. For example, in a multi-domain
environment, only entering a SAM account name such as "jdoe" will likely will fail because the Server will not be
able to authenticate "jdoe" because it cannot find "jdoe". In a multi-domain environment, the UPN is
recommended, although the domain\username format is acceptable. In a single domain environment, the SAM
account name is acceptable.]
<add key="cacheExpiration" value="30" /> [How often (in seconds) the Service should check to see who is
allowed to ask for keys. The Service keeps a cache and keeps track of how old it is. Once the cache is older than the
value (in seconds) it gets a new list. When a user connects, the Key Server needs to download authorized users
from the Device Server. If there is no cache of these users, or the list has not been downloaded in the last "x"
seconds, it will be downloaded again. There is no polling, but this value configures how stale the list can become
before it is refreshed when it is needed.]
<add key="epw" value="encrypted value of the password" /> [Password used to communicate with the Device
Server. If the superadmin password has been changed, it must be changed here.]
</appSettings>
</configuration>
Windows Service Instructions
1 Go back to the Windows Service panel.
2 Restart the Dell Key Server Service.
3 Navigate to <Key Server install dir> log.txt to verify that the Service started properly.
4 Close the Windows Service panel.
26
Configuration Guide
Remote Management Console Instructions
1 If needed, log on to the Remote Management Console.
2 Click Domains and click the Detail icon.
3 Click Key Server.
4 In the Key Server account list, add the user which will be performing the Admin activities. The format is
Domain\username. Click Add Account.
5 Click Users in the left menu. In the search box, search for the username added in Step 4. Click Search.
6 Once the correct user is located, click the Detail icon.
7 Select Forensic Admin. Click Update.
The components are now configured for Kerberos Authentication/Authorization.
Configuration Guide
27
28
Configuration Guide
7
Assign Forensic Administrator Role
By default, Forensic Authorization is enabled on back-end servers and disabled on front-end servers. These settings are
placed appropriately upon installation for both the Device Server and Security Server.
Remote Management Console Instructions
1 If needed, log on to the Remote Management Console.
2 In the left pane, click Manage > Users.
3 On the Search Users page, enter the name of the user you wish to give the Forensic Administrator role, and click Search
(this user’s credentials are provided during execution of the CMGAd, CMGAu, CMGAlu utilities, and Decryption Agent
in Forensic mode).
4 On the User Search Results page, click the Detail icon.
5 On the User Detail for: <Username> page, select Admin.
6 In the User column, check Forensic Administrator, and click Update.
The Forensic Administrator role is now set.
Disable Forensic Authorization
1 On your back-end server, navigate to <Security Server install dir>\webapps\xapi\WEB-INF\context.properties and
change the following property:
service.forensic.enable=true
to
service.forensic.enable=false.
2 Restart the Security Server service.
3 Navigate to <Device Server install dir>\webapps\ROOT\WEB-INF\web.xml and set the forensic parameter:
<init-param>
<param-name>forensic</param-name>
<param-value>@FORENSIC_DISABLE@</param-value>
</init-param>
4 Restart the Device Server service.
5 As a best practice, remove the Forensic Administrator role from any user not actively using the role permissions.
Configuration Guide
29
30
Configuration Guide
8
Cron Expressions
This section explains how to use cron expression formats and special characters.
Introduction to Cron Expressions
Cron is a UNIX tool that has been around for a long time, so its scheduling capabilities are powerful and proven. The
CronTrigger class is based on the scheduling capabilities of cron.
CronTrigger uses cron expressions, which are able to create firing schedules such as at 8:00am every Monday through
Friday or at 1:30am every last Friday of the month.
Cron expressions are powerful, but can be confusing. This document aims to take some of the mystery out of creating a
cron expression, giving you a resource to use before seeking outside help.
Cron Expression Formats
Cron expressions are comprised of 6 required fields and 1 optional field, separated by white space. Fields can contain any
of the allowed values, along with various combinations of the allowed special characters for that field.
Cron expressions can be as simple as * * * * ? *.
Or more complex, such as 0 0/5 14,18,3-39,52 ? JAN,MAR,SEP MON-FRI 2002-2010.
The fields are described as follows.
Field Name
Mandatory?
Allowed Values
Allowed Special Characters
Minutes
Yes
0-59
,-*/
Hours
Yes
0-23
,-*/
Day of month
Yes
1-31
,-*?/LWC
Month
Yes
1-12 or JAN-DEC
,-*/
Day of week
Yes
1-7 or SUN-SAT
,-*?/LC#
Year
No
empty, 1970-2099
,-*/
Special Characters
•
The * character is used to specify all values. For example, * in the minute field means every minute.
•
The ? character (no specific value) is useful when you need to specify something in one of the two fields in which the
character is allowed, but not the other. For example, to trigger a fire on a particular day of the month (the 10th), but you
do not care what day of the week that happens to be, use 10 in the day-of-month field, and ? in the day-of-week field.
•
The - character is used to specify ranges. For example, 10-12 in the hour field means the hours 10, 11, and 12.
•
The , character is used to specify additional values. For example, MON,WED,FRI in the day-of-week field means the
days Monday, Wednesday, and Friday.
Configuration Guide
31
•
The / character is used to specify increments.
0/15 in the seconds field means the seconds 0, 15, 30, and 45.
5/15 in the seconds field means the seconds 5, 20, 35, and 50.
Specifying * before / is equivalent to specifying 0 as the value to start with.
1/3 in the day-of-month field means fire every 3 days starting on the first day of the month.
Essentially, for each field in the expression, there is a set of numbers that can be turned on or off. For seconds and
minutes, the numbers range from 0 to 59. For hours, 0 to 23, for days of the month, 0 to 31. For months, 1 to 12. The /
character simply helps you turn on every ‘nth’ value in the given set. Thus, 7/6 in the month field only turns on month 7,
it does not mean every 6th month.
•
The L character is allowed for the day-of-month and day-of-week fields. This character means last, but it has different
meaning in each of the two fields.
The value L in the day-of-month field means the last day of the month (day 31 for January, day 28 for February on
non-leap years).
If used in the day-of-week field by itself, it means 7 or SAT.
If used in the day-of-week field after another value, it means the last xxx day of the month. For example, 6L means the
last Friday of the month. When using the L option, it is important not to specify lists, or ranges of values, as you will get
confusing results.
•
The W character is allowed for the day-of-month field. This character is used to specify the weekday (Monday-Friday)
nearest the given day. For example, if you were to specify 15W as the value for the day-of-month field, it means the
nearest weekday to the 15th of the month. So if the 15th is a Saturday, the trigger will fire on Friday the 14th. If the 15th
is a Sunday, the trigger will fire on Monday the 16th. If the 15th is a Tuesday, the trigger will fire on Tuesday the 15th.
However, if you specify 1W as the value for day-of-month, and the 1st is a Saturday, the trigger will fire on Monday the
3rd, as it will not ‘jump’ over the boundary of a month's days. The W character can only be specified when the
day-of-month is a single day, not a range or list of days.
The L and W characters can also be combined for the day-of-month expression to yield LW, which means the last
weekday of the month.
•
The # character is allowed for the day-of-week field. This character is used to specify the ‘nth’ xxx day of the month. For
example, the value of 6#3 in the day-of-week field means the third Friday of the month (day 6 = Friday and #3 = the
3rd one in the month).
Other examples:
2#1 = the first Monday of the month
4#5 = the fifth Wednesday of the month.
Note that if you specify #5 and there is not 5 of the given day-of-week in the month, then no firing will occur that
month.
•
The C character is allowed for calendar. Using this character means that values are calculated against the associated
calendar, if any. If no calendar is associated, then it is equivalent to having an all-inclusive calendar. A value of 5C in the
day-of-month field means the first day included by the calendar on or after the 5th. A value of 1C in the day-of-week
field means the first day included by the calendar on or after Sunday.
NOTE: Support for specifying both a day-of-week and a day-of-month value is not complete. Use the ? character in one of these fields.
Support for the features described for the C character is not complete. The legal characters and the names of months and days of the
week are not case sensitive. MON is the same as mon. Pay close attention to the effects of ? and * in the day-of-week and
day-of-month fields.
Be careful when setting fire times between midnight and 1:00 AM. Daylight savings time can cause a skip (or a repeat) depending on
whether the time moves back or jumps forward.
32
Configuration Guide
Examples
Expression
Meaning
0 0 12 * * ?
Fire at 12pm (noon) every day
0 15 10 ? * *
Fire at 10:15am every day
0 15 10 * * ?
Fire at 10:15am every day
0 15 10 * * ? *
Fire at 10:15am every day
0 15 10 * * ? 2005
Fire at 10:15am every day during the year 2005
0 * 14 * * ?
Fire every minute starting at 2pm and ending at 2:59pm, every day
0 0/5 14 * * ?
Fire every 5 minutes starting at 2pm and ending at 2:55pm, every
day
0 0/5 14,18 * * ?
Fire every 5 minutes starting at 2pm and ending at 2:55pm, AND
fire every 5 minutes starting at 6pm and ending at 6:55pm, every
day
0 0-5 14 * * ?
Fire every minute starting at 2pm and ending at 2:05pm, every day
0 10,44 14 ? 3 WED
0 15 10 ? * MON-FRI
Fire at 2:10pm and at 2:44pm every Wednesday in the month of
March.
Fire at 10:15am every Monday, Tuesday, Wednesday, Thursday and
Friday
0 15 10 15 * ?
Fire at 10:15am on the 15th day of every month
0 15 10 L * ?
Fire at 10:15am on the last day of every month
0 15 10 ? * 6L
Fire at 10:15am on the last Friday of every month
0 15 10 ? * 6L
Fire at 10:15am on the last Friday of every month
0 15 10 ? * 6L 2002-2005
0 15 10 ? * 6#3
0 0 12 1/5 * ?
0 11 11 11 11 ?
Fire at 10:15am on every last Friday of every month during the
years 2002, 2003, 2004 and 2005
Fire at 10:15am on the third Friday of every month
Fire at 12pm (noon) every 5 days every month, starting on the first
day of the month.
Fire every November 11th at 11:11am.
Configuration Guide
33
34
Configuration Guide
Create a Self-Signed Certificate Using Keytool and
Generate a Certificate Signing Request
9
NOTE: This section details the steps to create a self-signed certificate for the Java-based components. This process cannot be used to
create a self-signed certificate for .NET-based components.
We recommend a self-signed certificate only in a non-production environment.
If your organization requires an SSL server certificate, or you need to create a certificate for other reasons, this section
describes the process to create a java keystore using the Keytool.
Keytool creates private keys that are passed in the format of a Certificate Signing Request (CSR) to a Certificate Authority
(CA), such as VeriSign® or Entrust®. The CA will then, based on this CSR, create a server certificate that it signs. The
server certificate is then downloaded to a file along with the signing authority certificate. The certificates are then
imported into the cacerts file.
Generate a New Key Pair and a Self-Signed Certificate
1 Navigate to the conf directory of the Compliance Reporter, Console Web Services, Device Server, or Gatekeeper Web
Services.
2 Back up the default certificate database:
Click Start > Run, and type move cacerts cacerts.old.
3 Add Keytool to the system path. Type the following command in a command prompt:
set path=%path%;%dell_java_home%\bin
4 To generate a certificate, run Keytool as shown:
keytool -genkey -keyalg RSA -sigalg SHA1withRSA -alias dell -keystore .\cacerts
5 Enter the following information as the Keytool prompts for it.
NOTE: Back up configuration files before editing them. Only change the specified parameters. Changing other data in these files, including
tags, can cause system corruption and failure. Dell cannot guarantee that problems resulting from unauthorized changes to these
files can be solved without reinstalling the Enterprise Server.
•
Keystore password: Enter a password (unsupported characters are <>;&” ’), and set the variable in the component
conf file to the same value, as follows:
<Compliance Reporter install dir>\conf\eserver.properties. Set the value eserver.keystore.password =
<Console Web Services install dir>\conf\eserver.properties. Set the value eserver.keystore.password =
<Device Server install dir>\conf\eserver.properties. Set the value eserver.keystore.password =
•
First and last name: Enter the fully qualified name of the server where the component you are working with is
installed. This fully qualified name includes the host name and the domain name (example, server.dell.com).
•
Organizational unit: Enter the appropriate value (example, Security).
Configuration Guide
35
•
Organization: Enter the appropriate value (example, Dell).
•
City or locality: Enter the appropriate value (example, Austin).
•
State or province: Enter the unabbreviated state or province name (example, Texas).
•
Two-letter country code:
United States = US
Canada = CA
Switzerland = CH
Germany = DE
Spain = ES
France = FR
Great Britain = GB
Ireland = IE
Italy = IT
Netherlands = NL
•
The utility prompts for confirmation that the information is correct. If so, type yes.
If not, type no. The Keytool displays each value entered previously. Click Enter to accept the value or change the
value and click Enter.
•
Key password for alias: If you do not enter another password here, this password defaults to the Keystore password.
Request a Signed Certificate from a Certificate Authority
Use this procedure to generate a Certificate Signing Request (CSR) for the self-signed certificate created in Generate a
New Key Pair and a Self-Signed Certificate.
1 Substitute the same value used previously for <certificatealias>:
keytool -certreq -sigalg MD5withRSA -alias <certificate-alias> -keystore
.\cacerts -file <csr-filename>
Example:
keytool -certreq -sigalg MD5withRSA -alias dell -keystore .\cacerts -file
credant.csr
The .csr file will contain a BEGIN/END pair that will be used during the creation of the certificate on the CA.
36
Configuration Guide
Figure 9-1. Example .CSR File
2 Follow your organizational process for acquiring an SSL server certificate from a Certificate Authority. Send the contents
of the <csr-filename> for signing.
NOTE: There are several methods to request a valid certificate. An example method is shown in Example Method to Request a Certificate.
3 When the signed certificate is received, store it in a file.
4 As a best practice, back up this certificate in case an error occurs during the import process. This backup will prevent
having to start the process over.
Import a Root Certificate
NOTE: If the root certificate Certificate Authority is Verisign (but not Verisign Test), skip to the next procedure and import the signed
certificate.
The Certificate Authority root certificate validates signed certificates.
1 Do one of the following:
•
Download the Certificate Authority root certificate, and store it in a file.
•
Obtain the enterprise directory server root certificate.
2 Do one of the following:
•
If you are enabling SSL for Compliance Reporter, Console Web Services, Device Server, or Legacy Gatekeeper
Connector, change to the component conf directory.
•
If you are enabling SSL between the Server and the enterprise directory server, change to <Dell install dir>\Java
Runtimes\jre1.x.x_xx\lib\security (The default password for JRE cacerts is changeit).
3 Run Keytool as follows to install the root certificate:
keytool -import -trustcacerts -alias <ca-cert-alias> -keystore .\cacerts -file
<ca-cert-filename>
Example:
keytool -import -alias Entrust -keystore .\cacerts -file .\Entrust.cer
Example Method to Request a Certificate
An example method to request a certificate is to use a web browser to access the Microsoft CA Server, which will be set up
internally by your organization.
1 Navigate to the Microsoft CA Server. The IP address will be supplied by your organization.
Configuration Guide
37
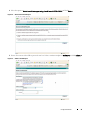
2 Select Request a certificate and click Next >.
Figure 9-2. Microsoft Certificate Services
3 Select Advanced Request and click Next >.
Figure 9-3. Choose Request Type
38
Configuration Guide
4 Select the option to Submit a certificate request using a base64 encode PKCS #10 file and click Next >.
Figure 9-4. Advanced Certificate Request
5 Paste in the contents of the CSR request in the text box. Select a certificate template of Web Server and click Submit >.
Figure 9-5. Submit a Saved Request
Configuration Guide
39
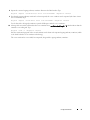
6 Save the certificate. Select DER encoded and click Download CA certificate.
Figure 9-6. Download CA Certificate
7 Save the certificate. Select DER encoded and click Download CA certification path.
Figure 9-7. Download CA Certification Path
40
Configuration Guide
8 Import the converted signing authority certificate. Return to the DOS window. Type:
keytool -import -trustcacerts -file <csr-filename> -keystore cacerts
9 Now that the signing authority certificate has been imported, the server certificate can be imported (the chain of trust
can be established). Type:
keytool -import -alias dell -file <csr-filename> -keystore cacerts
Use the alias of the self-signed certificate to pair the CSR request with the server certificate.
10 A listing of the cacerts file will show that the server certificate has a certificate chain length of 2, which indicates that the
certificate is not self-signed. Type:
keytool -list -v -keystore cacerts
Note the certificate fingerprint of the second certificate in the chain is the imported signing authority certificate (which
is also listed below the server certificate in the listing).
The server certificate has successfully been imported, along with the signing authority certificate.
Configuration Guide
41
42
Configuration Guide
0XXXXXA0X