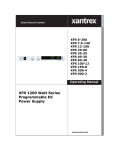
1
Digital TM Video Recorder PROGRESSIVE SCAN TM TM BOOKMARK DISPLAY CH+ ENTER CH- PLAY DVD/TV LIVE 1 2 4 5 3 7 8 9 C-SKIP +10 0 C 6 RECORD TM SOURCE DVD/TV LIVE SOURCE REC SETUP DOWN UP ENTER RETURN S-VIDEO L - AUDIO - R REC MODE TIMER EDIT VIDEO ON / STANDBY Operation Guide CH-DVR 1500 SAFETY INSTRUCTIONS Use only with the cart, stand, tripod, bracket, or table specified by the manufacturer, or sold with the apparatus. When a cart is used, use caution when moving the cart / apparatus combination to avoid injury from tip-over. Unplug this apparatus during lightning storms or when unused for long periods of time. Refer all servicing to qualified service personnel. Servicing is required when the apparatus has been damaged in any way, such as when the power-supply cord or plug is damaged, liquid has been spilled, objects have fallen into the apparatus, the apparatus has been exposed to rain or moisture, or when the unit does not operate normally, or has been dropped. Power cord protection - To avoid any malfunctions of the unit and to protect against electric shock, fire or personal injury, please observe the following: a) Hold the plug firmly when connecting or disconnecting the AC power cord to this unit. b) Do not connect or disconnect the AC power cord with wet hands. c) Keep the AC power cord away from heating appliances. d) Never put any heavy object on the AC power cord. e) Do not attempt to repair or reconstruct the AC power cord in any way. Remove dust, dirt, etc. on the plug at regular intervals. If the unit has been dropped or otherwise damaged, turn off the power and disconnect the AC power cord. If smoke, odors or noises are emitted from the unit, turn off the power and disconnect the AC power cord. Placement - Avoid placing the unit in areas of direct sunlight, heating radiators, closed automobiles, high temperature (over 35° C (95° F)), high humidity (over 90%), excessive dust, vibration, impact or where the surface is tilted, as the internal parts may be seriously damaged. Non-use periods - When the unit is not used, turn the power off. When the unit is unused for a long period of time, the unit should be unplugged from the household AC outlet. No fingers or other objects inside - Touching internal parts of this unit is dangerous and may cause serious damage to the unit. Do not attempt to disassemble the unit. Do not put any foreign object on the disc tray. Keep away from water and magnets. Keep the unit away from flower vases, tubs, sinks, etc. If liquids are spilled into the unit, serious damage could occur. Keep magnetic objects, such as speakers, distant from the player. Stacking - Place the unit in a horizontal position and do not place anything heavy on it. Do not place the unit on amplifiers or other equipment which may become hot. Condensation - Moisture may form on the lens in the following cases: a) immediately after a heater has been turned on b) in a steamy or very humid room c) the unit is moved from a cold environment to a warm one. If moisture forms inside this unit, it may not operate properly. In this case, turn off the power and wait about one hour for the moisture to evaporate. Noise interference while a broadcast is being received depending on the reception condition of the TV, interference may appear on the TV screen while you are watching a TV broadcast, if the unit is switched on. This is not a malfunction of the unit or the TV. To watch a TV broadcast, turn off this unit. Caution - Use of controls or adjustments or performance of procedures other than those specified herein may result in hazardous radiation exposure. CAUTION RISK OF ELECTRIC SHOCK DO NOT OPEN CAUTION: TO REDUCE THE RISK OF ELECTRIC SHOCK, DO NOT REMOVE THE COVER (OR BACK). NO USER-SERVICEABLE PARTS INSIDE. REFER TO QUALIFIED SERVICE PERSONNEL FOR SERVICING. Explanation of warning symbols The lightning flash with arrowhead symbol, within an equilateral triangle, is intended to alert the user to the presence of not isolated dangerous voltage within the inside of the product that may be sufficient magnitude to constitute a risk of electric shock to persons. The exclamation point within an equilateral triangle is intended to alert the user to the presence of important operating and servicing instructions in the literature accompanying the appliance. Read the following instructions carefully WARNING: TO REDUCE THE RISK OF FIRE, ELECTRIC SHOCK OR ANNOYING INTERFERENCE, DO NOT EXPOSE THIS APPLIANCE TO RAIN OR MOISTURE AND ONLY USE THE RECOMMENDED ACCESSORIES. Read these instructions - When using this unit, basic precautions outlined in this section should always be followed. Keep these instructions - Retain this user manual for future reference. Heed all warnings - Follow all warning labels on the product, and the safety instructions in this manual. Follow all instructions - Adhere to the instructions outlined in this manual and on the unit. Clean only with a dry cloth - Unplug the unit before cleaning. Do not use any liquid or detergents for cleaning. Do not block any ventilation opening. Install in accordance with the manufacture's instructions. Do not install near any heat sources such as radiators, heat registers, stoves, or other apparatus (including amplifiers) that produce heat. Do not defect the safety purpose of the polarized plug. A polarized plug has two blades with one wider than the other. The wide blade is provided for your safety. If the provided plug does not fit into your outlet, consult an electrician for replacement of the obsolete outlet. Protect the power cord from being walked on or pinched particularly at plugs, convenience receptacles, and the point where they exit from the apparatus. Only use attachments / accessories specified by the manufacturer. The apparatus shall not be exposed to dripping or splashing and no objects filled with liquids, such as vases, shall be placed on the apparatus. SAVE THESE INSTRUCTIONS 2 CONTENTS INTRODUCTION Features . . . . . . . . . . . . . . . . . . . . . . . . . . . . . . . . . 4 Optical disc compatibility . . . . . . . . . . . . . . . . . . . 5 Caring for optical discs . . . . . . . . . . . . . . . . . . . . . 5 Timer Recording . . . . . . . . . . . . . . . . . . . . . . . . . 28 EDITING YOUR RECORDINGS The EDIT menu . . . . . . . . . . . . . . . . . . . . . . . . . . 30 Erasing a Title . . . . . . . . . . . . . . . . . . . . . . . . . . . 30 Play Full Title . . . . . . . . . . . . . . . . . . . . . . . . . . . 30 Make Compatible . . . . . . . . . . . . . . . . . . . . . . . . 30 Finalize . . . . . . . . . . . . . . . . . . . . . . . . . . . . . . . . 30 Edit Title . . . . . . . . . . . . . . . . . . . . . . . . . . . . . . . 31 Inserting Chapter Markers . . . . . . . . . . . . . . . . . . 31 Deleting Chapter Markers . . . . . . . . . . . . . . . . . . 32 Hiding Chapters. . . . . . . . . . . . . . . . . . . . . . . . . . 32 The HIDE Button. . . . . . . . . . . . . . . . . . . . . . . . . 33 Show Chapters. . . . . . . . . . . . . . . . . . . . . . . . . . . 33 New Picture . . . . . . . . . . . . . . . . . . . . . . . . . . . . . 34 Erasing a DVD+RW disc. . . . . . . . . . . . . . . . . . . 34 GETTING STARTED Checking the package contents . . . . . . . . . . . . . . . 6 Installing batteries in the remote control . . . . . . . . 6 Using the remote control . . . . . . . . . . . . . . . . . . . . 6 FUNCTIONAL OVERVIEW Remote control functions. . . . . . . . . . . . . . . . . . . . 7 Front panel functions . . . . . . . . . . . . . . . . . . . . . . . 8 Front VFD display . . . . . . . . . . . . . . . . . . . . . . . . . 9 Back panel connections . . . . . . . . . . . . . . . . . . . . 10 CONNECTIONS Video connection to TV . . . . . . . . . . . . . . . . . 11-12 Audio output connections . . . . . . . . . . . . . . . . . . 13 Antenna connections . . . . . . . . . . . . . . . . . . . . . . 13 A/V input connections . . . . . . . . . . . . . . . . . . . . . 14 THE DVD RECORDER SETUP MENU Using the Setup Menu . . . . . . . . . . . . . . . . . . . . . 35 Language Settings . . . . . . . . . . . . . . . . . . . . . . . . 35 Video Setup . . . . . . . . . . . . . . . . . . . . . . . . . . . . . 36 Audio Setup . . . . . . . . . . . . . . . . . . . . . . . . . . . . . 36 System Setup . . . . . . . . . . . . . . . . . . . . . . . . . . . . 37 Disc Media Options . . . . . . . . . . . . . . . . . . . . . . . 38 Record Mode Options . . . . . . . . . . . . . . . . . . . . . 38 Timer Record . . . . . . . . . . . . . . . . . . . . . . . . . . . . 38 OPERATION OVERVIEW Powering on the unit . . . . . . . . . . . . . . . . . . . . . . 15 Initial Setup . . . . . . . . . . . . . . . . . . . . . . . . . . . . . 15 PLAYBACK Selecting the DVD function . . . . . . . . . . . . . . . . 16 Using disc menus. . . . . . . . . . . . . . . . . . . . . . . . . 16 Basic disc playback . . . . . . . . . . . . . . . . . . . . . . . 17 Advanced disc playback . . . . . . . . . . . . . . . . . . . 18 Using the ZOOM feature. . . . . . . . . . . . . . . . . . . 19 Multi-angle function . . . . . . . . . . . . . . . . . . . . . . 19 Using subtitles . . . . . . . . . . . . . . . . . . . . . . . . . . . 20 Changing the audio track. . . . . . . . . . . . . . . . . . . 20 Displaying playback information . . . . . . . . . . . . 20 Viewing JPG files . . . . . . . . . . . . . . . . . . . . . . . . 21 Playing MP3 . . . . . . . . . . . . . . . . . . . . . . . . . . . . 22 TROUBLESHOOTING Playback. . . . . . . . . . . . . . . . . . . . . . . . . . . . . . . . 39 Recording. . . . . . . . . . . . . . . . . . . . . . . . . . . . . . . 39 SPECIFICATIONS . . . . . . . . . . . . . . . . . . . . . . . . . . . . . . . . . . . . . . . 40 INDEX . . . . . . . . . . . . . . . . . . . . . . . . . . . . . . . . . . . . . . . 41 RECORDING Intro to recording . . . . . . . . . . . . . . . . . . . . . . . . . 23 Setting recording options. . . . . . . . . . . . . . . . . . . 24 Setting the Time and Date . . . . . . . . . . . . . . . . . . 24 TV Tuner Setup . . . . . . . . . . . . . . . . . . . . . . . . . . 25 The Title Navigator screen . . . . . . . . . . . . . . . . . 26 Types of Recordings . . . . . . . . . . . . . . . . . . . . . . 26 Making a Live Recording . . . . . . . . . . . . . . . . . . 26 3 INTRODUCTION CH-DVR 1500 Personal DVD+R/RW Recorder and Progressive Scan Player TM TM JPG BOOKMARK DISPLAY TM CH+ ENTER PROGRESSIVE SCAN CH- PLAY DVD/TV LIVE 1 2 4 5 7 8 3 9 C-SKIP +10 0 C 6 RECORD TM SOURCE DVD/TV LIVE SOURCE REC SETUP DOWN UP ENTER RETURN S-VIDEO L - AUDIO - R REC MODE two-way TIMER EDIT VIDEO ON / STANDBY compatible TWINWAY The CH-DVR 1500 is a DVD Recorder/Player with Progressive Scan Video Output. DVD+R/RW Recording gives you the ability to create your own DVD discs from your home movies, favorite TV programs and more. Because of the outstanding compatibility of DVD+R/RW discs, the discs you create will be suitable for playback in most DVD players. You can record from the unit's built-in TV Tuner or an external video source like a video camera. And when you're ready to watch your recordings or commercial DVDs, you can enjoy them in the highest quality with the unit's Progressive Scan Video Out and Digital Audio Out. DVD+R/RW Recorder Progressive Scan DVD Player Live, Timer and Scheduled Recording Functions Multiple Recording Modes, HQ, SP, LP, EP, SLP Up to 6 Hours Recording on one DVD+R/RW Disc On-Screen Disc Title Navigator gives you quick, easy access to your Recordings Built-In TV Tuner, Front and Rear A/V Inputs Editing features with Auto, Add/Del, Hide Chapters Your recordings are playable on most DVD Players Progressive Scan Video with 3:2 pulldown Plays DVD, VCD/SVCD, CD-ROM, MP3, JPG and other disc types Component Video, S-Video and Composite Video Outputs 96 kHz / 24 bit D/A converter Stereo Audio out, Optical and Coaxial digital outputs. Advanced playback functions: Slow playback, repeat playback, parental control, MP3 player, JPG player, screen saver, Zoom In/Out, track selection, on-screen display and more 4 INTRODUCTION CD-Audio: An on-screen navigator is provided to select and play tracks when using CD-Audio discs. Optical disc compatibility This unit is compatible with a wide range of available optical discs for recording and playback. Discs suitable for Recording and Playback Video CD - VCD/SVCD: On VCD/SVCD discs, advanced features such as PBC (Playback Control) are available. You must us DVD+R or DVD+RW discs to record on this unit. DVD+R: These discs can only be written to once. Existing recordings can be hidden but not deleted. So, any disc space already used by a recording cannot be regained. DVD+R discs are required to be "Finalized" before they will be compatible with standard DVD Players. Once a disc is finalized, no further recordings can be made. CD-R/RW: This unit features an on-screen navigator for easy access to playable files stored on CD-R/RW discs, such as JPG images and MP3 music. DVD+RW: DVD+RW discs can be written to and erased multiple times. Existing recordings can be deleted and disc space regained. These discs do not require a finalization procedure. As soon as a recording is made, the disc will be compatible with standard DVD Players. Caring for Optical Discs Hold a disc by the rim or with an index finger in the central hole. Never touch the signal surface. Finger prints or stains on the surface of the disc may cause signal loss. Use a soft cloth and wipe in a radiating manner from the center of the disc to the outer rims when cleaning the disc surface. Never add labels or adhesive tapes on the discs and be careful not to scratch or damage the disc surface. To prevent discs from becoming bent or deformed, they should be vertically kept in the disc storage case. To prevent damage, avoid leaving discs in your car, where they may be subject to direct sunlight and high temperature. Do not use any disc accessory to improve the audio quality, disc protective solutions or lens cleaner. These products may damage the disc surface. Discs suitable for Playback Only DVD Video: This unit plays DVDs recorded for a particular region. The region mark on the back of the player must correspond to that on any DVD discs you wish to play. Units sold in North America are coded for Region 1, and are compatible with discs marked accordingly. TM TM 1 ALL DVD-R/RW: These discs can be played back when recorded in standard DVD Video format. Labels TM TM TM TM Tapes Labeling Side Surface DVD-Audio: This unit will playback only the 5.1CH sound track on DVD-Audio discs. TM TM 5 INTRODUCTION Make sure the package contents are complete In addition to the DVD/Receiver, your package should contain the following accessories. Check the contents of the package carefully, as some items may be located under the packing foam. Remote control Batteries (2) AAA Power cord A/V cable (Composite Video, Stereo Audio) This operation manual and warranty card RF Cable for TV TM TM BOOKMARK DISPLAY CH+ ENTER CH- PLAY 1 2 4 5 7 8 9 C-SKIP +10 0 C 3 6 DVD/TV LIVE SOURCE REC Blank DVD+RW Discs (3) & Disc Holder TIMER REC MODE EDIT *Optional Splitter for units without Antenna Passthrough Connector (See page 13) 1 Installing batteries in the remote control Operating the remote control This unit comes complete with batteries for the remote control. When installing batteries, be sure to take note of the polarity markings on the inside of the battery compartment and match them up with those on the batteries. When using the remote control, be sure to stay within a 30 degree angle of the sensor on the receiver. Keep in mind that any obstructions between the remote control and the receiver will effect performance. 1 CH-DVR 1500 DVD PLAYER - RECORDER Slide off the back cover. DVD / TV LIVE / SOURCE / RECORD DOWN ON / STANDBY 2 + - + 30 TM TM BOOKMARK DISPLAY CH+ Notes on batteries ENTER CH- If the remote control functions better when it is closer to the unit, the batteries may be running low. In case of any leakage of batteries, dispose of the batteries right away and avoid touching the chemical discharge. Make sure to clean the remote control’s battery compartment before installing new batteries. Do not mix batteries of different types, or use old batteries with new ones. PLAY 1 2 4 5 7 8 9 C-SKIP +10 0 C DVD/TV LIVE SOURCE REC 6 ENTER REC MODE 3 6 TIMER EDIT / RETURN S-VIDEO IN 2 30 - Install the batteries in the correct orientation as shown to the right and marked on the battery compartment. UP L AUDIO R VIDEO IN 2 FUNCTIONAL OVERVIEW Remote Control 1 STANDBY - Turns the unit on and sends the unit to Standby mode. 2 TM 1 18 3 2 3 19 DISPLAY DIGEST BOOKMARK 4 HIDE AUDIO SUBTITLE 20 DISPLAY - Brings up the onscreen display showing information for the playback session. 5 AUDIO - Selects an audio track on DVD or VCD discs. 6 SUBTITLE - Selects available subtitles on DVD discs. 7 ARROW KEYS (CH+/-) - Use to navigate disc menus, on-screen setup menu, etc. In TV tuner mode, use UP/DOWN to select a channel. 22 6 CH+ 23 21 ENTER 7 24 PLAY 25 26 10 1 2 3 4 5 6 7 8 9 12 C-SKIP 0 C DVD/TV LIVE SOURCE REC 16 17 REC MODE 11 NUMBER KEYS - Use to enter numeric values while setting options. Live Recording mode and DVD Player mode. 15 SOURCE - Selects the input video source for recording. Choices include built-in TV Tuner and AV Inputs. 30 14 15 EDIT 31 25 31 thumbnail images for previewing files on JPG discs. Selects between multiple angles with DVD Discs that support this feature. 22 MUTE - Temporarily cancels audio playback. 23 ENTER - Selects options in menus. Plays a disc, chapter or track with some discs. For other discs, press PLAY. 25 SLOW - Slow motion playback 14 DVD/TV LIVE - Switches between TIMER 21 DIGEST / ANGLE - Displays 10 PAUSE - Use to Temporarily stop screen with DVD and JPG discs. 29 Playback mode, use to store specific locations on a disc for quick navigation. When editing recordings sets start and end points for hiding specific sections. 24 PLAY - Plays a disc, chapter or 13 ZOOM - Press to magnify the 28 13 20 BOOKMARK / HIDE - In DVD NEXT/PREVIOUS - Advanced to the next track or plays previous track on DVD and other disc. second intervals during playback. This function is intended to assist in skipping over commercials during playback of TV recordings. 27 on DVD+R/RW discs, displaying a graphical representation of the recordings and providing easy navigation. 9 12 C-SKIP - Skips ahead in 30 11 19 TITLE - Accesses the title screen FF/FR - Scan in fast forward or reverse on DVD and other discs. play. 9 closes the disc tray. 8 CH- 8 SETUP - Accesses the on-screen Setup Menu for settings adjustment. 4 21 MUTE 5 MENU / PBC - Accesses Menus on DVD Discs. With VCD discs, turns the PBC function On/Off. 18 OPEN / CLOSE - Opens and 16 REC - Press to begin a live recording. 17 REC MODE - Selects the recording quality mode - HQ, SP, LP, SLP, EP. 7 track. mode in ½,1/4 or 1/8 speed. Press PLAY to resume normal playback. 26 STOP - Press once to stop playback and hold the last position in memory. Playback can be resumed where it was left off by pressing PLAY. Press twice to clear the last playback position. 27 CLEAR - When entering input, use to delete characters. 28 A-B REPEAT - Sets the beginning and end points of a section to repeat. 29 REPEAT 1/ALL - Selects a repeat option - Chapter, Title or Disc. 30 TIMER - Accesses the timer menu for scheduled recording setup. 31 EDIT - Accesses the edit menu for DVD+R/RW editing options. FUNCTIONAL OVERVIEW Front Panel 9 7 1 2 3 CH-DVR 1500 DVD PLAYER - RECORDER 4 11 8 6 5 10 PROGRESSIVE SCAN VIDEO DVD / TV LIVE TM RECORD SOURCE DOWN UP ENTER RETURN ON / STANDBY S-VIDEO IN 2 12 1 ON / STANDBY - Turns the unit on and sends the unit to standby mode. The main power switch on the back of the unit must be turned on before using the standby button. In standby mode, the unit will use a minute amount of power to enable power-on by the remote control. 2 VFD DISPLAY - The front Vacuum Flourescent Display shows information about the unit’s operation, such as current chapter and elapsed time during playback and disc tray status. 13 15 14 16 17 L AUDIO R VIDEO IN 2 18 19 10 STOP - Press once to stop playback of a disc and save the location of the stop point. The disc can be played back from the stop point by pressing PLAY. To erase the stop point and reset the play location to the beginning of the disc, press STOP a second time. 11 NEXT/FAST FORWARD - Press to advance to the next chapter or track. Press and HOLD to scan in reverse mode at 2X, 4X, 8X, 16X, 30X or 60X speed. 12 SETUP/TIMER - Accesses the On-Screen Setup Menu and Timer Schedule screen. Use SETUP to change options and settings for the Recorder. Use the Timer for scheduling recordings that will begin automatically. 3 DISC TRAY - Loads DVD+R/RW, DVD, CD-ROM, VCD/SVCD, MP3, JPG and other optical discs. 4 OPEN/CLOSE - Press to open or close the disc tray. 13 DOWN - Navigates downward in menus, etc. 5 RECORD - Begins a Live Recording. 14 UP - Navigates upwards in menus, etc. 6 DVD/TV LIVE - Switches from DVD playback mode to Live Recording Input mode. 15 ENTER - Confirms a choice in menus or settings. 13 16 RETURN - Returns to the previous menu. 7 SOURCE - Selects between available Input Sources when the Recorder is in Live Record mode - TV Tuner, VIDEO IN 1 / 2, S-VIDEO IN 1 / 2. 17 11 S-VIDEO IN 2 - Front S-Video Input for recording. To select, use the SOURCE key and select S-VIDEO IN 2. 8 PLAY/PAUSE - Begins playback of a disc, chapter or track. Press again during playback to pause, and again to resume playback. 18 14 LEFT/RIGHT AUDIO IN 2 - Front Stereo Audio Inputs for recording. These inputs are shared with the VIDEO IN 2 and S-VIDEO IN 2 inputs. 9 PREV/FAST REVERSE - Press to return to the previous chapter or track. Press and HOLD to scan in reverse mode at 2X (twice normal speed). Press and hold again repeatedly to scan at 4X, 8X, 16X, 30X or 60X speed. 15 19 COMPOSITE VIDEO IN 2 - Front Composite Video Input for recording. To select, use the SOURCE key and select VIDEO IN 2. 8 FUNCTIONAL OVERVIEW Front VFD Display 1 2 3 4 6 5 7 5 PROCESSOR INDICATORS These indicators display the status of the surround sound processors and type of sound track currently active. The Dolby Digital processor is active. The DTS Digital processor is active. The PCM Digital Stereo processor is active. Indicates 5.1 Channel or Stereo audio source. The L/R option is active. 1 PLAYBACK INDICATORS These indicators show the playback status of a DVD, CD or other optical disc - Currently Playing: , Paused: , Stopped: 2 TITLE INDICATOR Displays the number of the current Title on a DVD disc. 3 CHAPTER / PRESET INDICATOR Displays the number of the current Chapter or Track on DVDs, Music CDs and other discs. 4 FUNCTION INDICATORS Indicate the status of advanced disc playback functions: Repeat Chapter/Title/Track function is active. Repeat A-B Function is active. PBC (Playback Control) Function is enabled. Multi-Angle Mode is active. The Zoom function is being used. Tracks are being played in RANDOM order. Recording indicator. 6 DISC TYPE INDICATORS Displays the type of optical disc inserted - DVD, SVCD, VCD, CDDA (Music CD), or MP3. 7 MULTI-FUNCTION DISPLAY When playing a DVD or other optical disc, displays the elapsed time of the playback session or track. Also displays disc tray status, system messages and more. When the unit is in Standby Mode, displays the system clock. 9 FUNCTIONAL OVERVIEW Back Panel 1 2 3 4 5 6 7 8 9 ON I AC IN ~100-230V O OFF 10 1 2 11 12 ANTENNA IN / OUT - For Antenna or Cable TV connection. Passthrough connection to TV does not transfer the output signal from the DVD Recorder. *Some units do not have a Passthrough connector. In this case, use the included splitter (See page 13). VIDEO INPUT 1 - Composite Video input for recording. To select this input, use the SOURCE button and choose VIDEO IN 1. 3 S-VIDEO INPUT 1 - S-VIDEO input for recording. To select this input, use the SOURCE button and choose SVIDEO IN 1. 4 COMPONENT/PROGRESSIVE SCAN VIDEO OUTPUT - Use this output with TVs supporting Component Video or Progressive Scan input for best video quality. Select this output in the DVD Recorder’s SETUP MENU. 5 STEREO AUDIO OUTPUT - Connect to TVs or other audio equipment supporting Stereo Audio in. 6 COAXIAL DIGITAL AUDIO OUTPUT - Use a special coaxial digital audio connector to send the raw coded digital signal to devices supporting digital decoding. 10 7 OPTICAL DIGITAL AUDIO OUTPUT - Use to connect to a receiver or other device with 5.1 channel decoders. This output is the coded digital signal. 8 POWER CORD SOCKET - Plug the matching end of the power cord into the unit before connecting the other end to the wall socket. 9 MAIN POWER SWITCH - The main power switch must be set to ON for the unit to function. Make sure all cable connections are complete before switching the main power switch to ON. When the main power switch is turned ON, the unit will enter Standby Mode, where it may be turned on with the remote control or the front power switch. 10 STEREO AUDIO INPUTS - Use with S-VIDEO IN 1 or VIDEO IN 1 for recording. 11 S-VIDEO OUTPUT - Connect to TVs with S-VIDEO in for better picture quality than standard composite video. 12 COMPOSITE VIDEO OUTPUT - Standard Video Output supported by most TVs. CONNECTIONS Connecting the video output to your TV In order to use the DVD Recorder, you’ll need to make a video connection to your TV. The capabilities of your TV and the cables you have on hand will determine the connections you can use. There are 3 possible connection types: Composite Video - The most widely used connection. This unit includes an A/V cable for Composite Video. S-Video - A higher quality connection that requires a special S-Video cable and an S-Video capable TV. Component Video - The highest quality video connection. Supported on high-end TVs and requires a special cable. Composite Video (Typical connection) This unit ships with a composite video (A/V) cable for connection to TVs with a standard video input as shown below. This is the most widely used type of connection. On most TVs, this connector is colored yellow, and is normally accompanied by stereo audio inputs, colored red and white for stereo channels right and left, respectively. 1 First, use the supplied A/V cable to connect to the composite video input on your TV. This is normally a yellow-colored connector that matches the Video output on the back of this unit. If you wish to hear sound through the TV, connect the red and white stereo audio connections as well. Composite Video / Stereo Audio Cable Composite Video Input Jack 2 Turn on the TV and DVD Recorder and select the DVD Playback mode with the remote control. 3 On your TV, select the video input. This is normally done by selecting “Video 1” or “Video Input” with the remote control. On some TVs, this is done by selecting a particular channel. 4 You should now see the DVD Recorder’s splash screen on the TV. VIDEO INPUT STEREO AUDIO IN V L TV with Composite Video Input (Typical Connection) R ON I AC IN ~100-230V O OFF ! Important note for older TV models If your TV does not have a composite video-in jack like that pictured above, you cannot connect this unit directly. If this is so, check to make sure your TV has at least a coaxial connector (used for antenna/cable TV/VCR/etc.) such as that pictured to the right. In this case, you can use a RF Modulator to convert this unit’s video out to the coaxial connection on your TV. RF Modulators are available at major electronics retailers. Older TV with coaxial antenna/cable connector DVD Recorder Composite Video Out RF Modulator 11 Antenna/cable TV coaxial connector on older TVs CONNECTIONS S-Video This is a higher quality connection than standard composite video, and requires a special S-Video cable not included. The S-Video connector is distinguishable by its 4 pins, as shown below. If your TV has an S-Video input, it’s recommended that you use this type of connection for better picture quality. 1 First, obtain a special S-Video cable. Connect the SVideo output from the unit to the corresponding input on your TV. S-Video Input Jack S-Video Cable 2 Turn on the unit and select the DVD mode. 3 On your TV, select the S-Video input. This is normally done by selecting “Video 2” or “AV2” with the remote control. On some TVs, this is done by selecting a particular channel. 4 You should now see the DVD player’s splash screen on the TV. ON I O AC IN ~100-230V OFF S TV with S-Video Input Y Pb TV with Component Video Input / Progressive Scan capability. Pr VIDEO INPUT VIDEO INPUT Component Video The highest quality video connection, component video requires separate cables for the Y, Pb, Pr signals. To use the progressive scan option on this unit, you’ll need to use the component video output. Using the component video output requires these steps: 1 First, use the supplied A/V cable to connect to the composite video input on your TV. Select this input. 2 Enter the player’s Setup Menu by pressing SETUP on the remote control. 4 Press SETUP to exit the SETUP MENU and connect the Component Video cables. Select the correct video input on your TV. Y Pb Pr SETUP DISPLAY DIGEST BOOKMARK HIDE AUDIO SUBTITLE MUTE Language Video Setup Audio Setup System Setup Disc Media Record Mode Timer Record Component Video Cable Component Video Input Jacks ! Resetting the video output 3 If you inadvertently switch the OUTPUT FORMAT setting to PROGRESSIVE while using a standard TV not capable of PSCAN, you will loose video. If this happens, reset the recorder to its default video settings by following these steps: 1) Power the unit Off, then On again with the main power switch on the back. 2) Eject the disc and close the disc tray. 3) Press and hold the STOP button on the front panel for 3 full seconds. Change the VIDEO OUTPUT setting under VIDEO SETUP to COMPONENT. If you are using a Progressive Scan TV, change the OUTPUT FORMAT to PROGRESSIVE. SETUP VIDEO SETUP VIDEO OUTPUT Language Video Setup Audio Setup System Setup Disc Media Record Mode Timer Record Aspect Ratio Video Output Output Format Composite S-Video Component 12 CONNECTIONS Audio Output Connections This unit features a variety of audio line outputs for connection to a receiver or other audio equipment. Use the included A/V cable to connect the stereo audio outputs for connection to a TV or stereo receiver. Optical and Coaxial digital audio outputs send an encoded digital bitstream, suitable for receivers with Dolby or DTS decoding capability. These outputs require special cables not included. STEREO AUDIO IN TV or receiver with stereo audio in L R ON I O AC IN ~100-230V OFF Receiver with Digital Audio Input OPTICAL DIGITAL AUDIO IN COAXIAL DIGITAL AUDIO IN Antenna & TV Connections This unit is available with and without an antenna passthrough connection. For units with only an Antenna input connector, as shown below to the right, use the included Splitter to connect a single RF input signal to the recorder and a TV. With Passthrough Connector Without Passthrough Connector ANTENNA OR CABLE TV CONNECTION ANTENNA OR CABLE TV CONNECTION IN Splitter OR TV with coaxial antenna or cable TV connection 13 OUT OUT TV with coaxial antenna or cable TV connection CONNECTIONS Connecting Audio/Video recording sources to the A/V Inputs Audio/Video inputs are provided on the front and back of the unit for connection of outside audio/video sources such as VCRs, camcorders, DVD Players, etc. External Video Sources must support S-Video, Composite Video and/or Stereo Audio to be suitable for recording. Back AV Inputs (VIDEO IN 1, S-VIDEO IN 1) Audio/Video source such as DVD player or VCR with Composite Video Out COMPOSITE VIDEO / STEREO AUDIO OUTPUT VIDEO IN 1 S-VIDEO / STEREO AUDIO OUTPUT V L R L R S Audio/Video source such as camcorder supporting S-VIDEO Out S-VIDEO IN 1 ON I O AC IN ~100-230V OFF Front AV Inputs (VIDEO IN 2, S-VIDEO IN 2) CH-DVR 1500 DVD PLAYER - RECORDER PROGRESSIVE SCAN VIDEO DVD / TV LIVE TM RECORD SOURCE DOWN UP ENTER RETURN ON / STANDBY L S-VIDEO IN 2 AUDIO R VIDEO IN 2 S-VIDEO IN 2 S Audio/Video source such as camcorder supporting S-VIDEO Out S-VIDEO / STEREO AUDIO OUTPUT COMPOSITE VIDEO / STEREO AUDIO OUTPUT Audio/Video source such as DVD player or VCR with Composite Video Out 14 L R L R V VIDEO IN 2 DVD PLAYER OPERATION Powering on the unit Initial Setup Procedure Only after all connections are complete, connect the power cord and power on the unit. When the unit is first powered on, you'll be prompted to set the time and date as well as TV Tuner options. You can always change any of the settings you choose during the Initial Setup later in the DVD Recorder's SETUP MENU. Using the Menus CH+ AC outlet 100~230V 1 Plug the appropriate end of the power cord into the unit first, then plug the standard jack end into a wall socket or power strip. 2 3 ENTER CH- Turn on the main power switch on the back of the unit. The unit is now in STANDBY MODE. Once this switch has been turned on, the unit will always be either ON, or in STANDBY MODE. Press STANDBY on the remote control or front panel to bring the system out of standby mode. The system is now ready to use. CH-DVR 1500 DVD PLAYER - RECORDER Press ENTER to select an option and/or continue. You may select English, Spanish or French as the language used by the Initial Setup Menus. When the player's on-screen Setup Menu is accessed later by pressing SETUP, this language will be used as well. Press the UP/DOWN keys to select a language, then press ENTER to confirm. / / SOURCE ENTER 2 / DVD / TV LIVE RECORD UP Use the UP/DOWN keys to increase or decrease the value of a selected field or move to a field above or below. Use the LEFT/RIGHT keys to move to the previous or next fields. Setup Language PROGRESSIVE SCAN VIDEO DOWN 1 RETURN ON / STANDBY S-VIDEO IN 2 L AUDIO R VIDEO IN 2 ON / STANDBY Choose English Menus Choose Spanish Menus DISPLAY DIGEST BOOKMARK Press <ENTER> to continue HIDE AUDIO SUBTITLE MUTE Time and Date Setting the Time and Date correctly is important, since Timer recordings depend on an accurate setting. The Time format used is 24HR. This means that 1:00PM will be represented as 13:00, 2:00PM as 14:00, and so on. Use the UP/DOWN keys to increase or decrease the Time or Date and the LEFT/RIGHT keys to move to a different field. When you're done, move to COMPLETED and press ENTER. Notes on power states There are 3 power states for this unit: OFF - The main power switch is turned off. The unit draws no power and cannot be turned on by the remote control. STANDBY - The main power switch has been turned ON, but the unit has not been taken out of standby by pressing either the STANDBY key on the remote control or the ON / STANDBY button on the front panel. The unit draws a slight amount of power to enable the remote control receiving circuit. ON - The main power switch has been turned ON, and either the STANDBY button on the remote control or the ON / STANDBY button on the front panel has been pressed. The unit is ready to use. Please set the Time and Date 00:05:10 01/01/00 Completed The Initial Setup is now complete. Remember, any settings chosen during the Initial Setup can be changed at any time in the DVD Recorder's SETUP MENU. Press ENTER to exit the Initial Setup and begin using your DVD Recorder. 15 DVD PLAYER OPERATION Select the DVD Playback Mode Using Disc Menus 1 Playing a Disc from the “ROOT” Menu Press the DVD/TV LIVE button on the remote control or the receiver’s front panel to select the DVD mode. Most DVDs will automatically display a menu after the disc is inserted. This first menu is the first of possibly many layers, and is therefore known as the “root” menu. FRONT PANEL DVD/TV LIVE SOURCE REC REC MODE TIMER OR CH+ DVD / TV LIVE PLAY MOVIE SOURCE EDIT SPECIAL FEATURES SCENE SELECTION ENTER AUDIO SETUP Inserting a Disc CH- 1 Press the OPEN/CLOSE button on the remote or front panel to open the disc tray. 1 Use the ARROW keys on the remote control to navigate through the menu to the appropriate selection to start the movie. 2 Press ENTER to confirm your selection. FRONT PANEL OR RECORD DISPLAY DIGEST BOOKMARK Accessing a menu after play has started 1 If you wish to re-enter the menu after disc play has HIDE AUDIO SUBTITLE MUTE started, use the MENU key. MENU also exits the menu at any time. 2 With VCD discs, this button functions as PBC (Playback Control), enabling or disabling the PBC function. Insert the disc, being careful not to touch the playing surface. Hold the disc by the sides and with your fore finger through the hold in the middle and insert gently into the tray. DISPLAY DIGEST BOOKMARK HIDE AUDIO Labeling Side SUBTITLE MUTE Surface Using the RETURN Key 1 Use the RETURN key to go back to the previous layer of 3 a menu. This function can be quite handy when using menus with many layers. Close the disc tray by pressing OPEN / CLOSE on the remote or front panel. FRONT PANEL SETUP/TIMER 16 DOWN UP ENTER RETURN DVD PLAYER OPERATION Skipping to the Next or Previous Chapter / Track Basic Disc Playback You can advance or skip back through the chapters or tracks on DVD discs, Audio CDs and other discs with the NEXT and PREVIOUS buttons on the remote or front panel. Starting, Pausing and Stopping Disc Play FRONT PANEL FRONT PANEL PLAY DVD / TV LIVE OR PLAY 1 1 SOURCE 3 SOURCE 2 1 2 3 1 3 1 SKIP NEXT - To advance to the next chapter or track, press the NEXT button on the remote control or front panel. 2 SKIP PREVIOUS - Press the PREVIOUS button on the remote control or front panel to skip back to the previous track. PLAY - To begin playback of a disc, press PLAY/PAUSE. PAUSE - To freeze the video on a single frame, press the PLAY/PAUSE (Front Panel) or PAUSE (Remote Control) key during playback. To resume normal playback, press PLAY/PAUSE (Front Panel) or PLAY (Remote Control). Skipping Ahead 30 Seconds with Commercial Skip The C-SKIP button is useful for skipping over the commercials while viewing TV programs that you have recorded. STOP - To stop playback of a disc, press STOP. The first time STOP is pressed the location where disc play was halted is saved, and you can begin playback where you left off by pressing PLAY. If STOP is pressed twice, the playback location is reset to the beginning of the disc. Fast Forward and Fast Reverse You can scan through DVDs, VCDs and other discs in forward or reverse direction at speeds up to 60X (sixty times normal speed). Fast forward/reverse scanning will only work during disc playback, not when the disc is stopped. 1 FRONT PANEL PLAY 2 1 2 2 DVD / TV LIVE OR 1 1 2 3 4 5 6 7 8 9 C-SKIP 0 C Press the C-SKIP button to jump ahead 30 seconds during playback, bypassing commercials. 2 99 DVD / TV LIVE SOURCE 30 sec HOLD 1 2 ! About the Screen Saver To use the fast forward/reverse function with the remote control, press the FF or FR key repeatedly to cycle through all speeds in the desired direction. Available speeds are 2X, 4X, 8X, 16X, 30X and 60X. To resume normal playback, press the PLAY key. On the front panel, note that the FF and NEXT functions share the same button, and likewise for the FR and PREVIOUS functions. To begin FF or FR scanning, press and HOLD the corresponding button for 2 SECONDS. Repeat this procedure to cycle through all available speeds, and return to normal playback. TM When disc playback remains paused for a period of about 10 minutes, the Screen Saver will load, protecting the television from “screen burn”, which could occur if an unusually bright image is displayed on-screen for an extended period of time. The Screen Saver must be enabled in the recorder’s SETUP MENU. 17 DVD PLAYER OPERATION 4 Advanced Playback To jump to a Time on the disc, use the NUMBER keys to enter the time value, then press ENTER. Slow Motion Playback 1 2 3 4 5 6 7 8 9 C-SKIP 0 C This unit supports slow motion playback to 1/8 normal speed. PLAY T 1 Press the SLOW MOTION button repeatedly to step through all options for slow playback. With DVDs, you can choose from ½,1/4 or 1/8 speed. 001 C 001 __:_9:34 Repeating a Disc, Chapter, Title or Track To repeat a segment of a disc, use the REPEAT 1/ALL key. On DVDs, you can repeat an entire disc, title or chapter. On VCDs, chapter and disc repeat is supported, but PBC must be disabled first (Press the PBC key). Audio CDs also allow repeat of tracks or the entire disc. Jumping to a Specific Title, Chapter or Time Along with displaying playback information, the DISPLAY key also provides a convenient way to navigate DVD, Audio CD and other discs by allowing you to select the Title, Chapter/Track or Time to go to. CH+ DVD/TV LIVE SOURCE TIMER ENTER CH+ REC REC MODE EDIT CH- DISPLAY ENTER DIGEST BOOKMARK HIDE AUDIO SUBTITLE 1 MUTE CH- 1 2 001 C 001 2 00:00:00 001 C 001 3 00:00:00 With the UP/DOWN ARROW keys, select the chapter that you wish to go to and then press ENTER. T 001 C 008 Use the UP/DOWN ARROW keys to select a repeat option and then press ENTER. You can repeat the current chapter, title or the entire disc. 2/4 : Chapter Use the LEFT/RIGHT ARROW keys to select Title, Chapter or Time and press ENTER. In this example we will select Chapter to jump to a chapter on the disc. T 3 1/4 : Off During playback, press the DISPLAY key to bring up the DISPLAY MENU. T Press REPEAT 1/ALL during disc playback to access the REPEAT MENU and then press ENTER. 00:00:00 18 Press REPEAT 1/ALL again to close the REPEAT MENU. DVD PLAYER OPERATION Repeating a Segment You Define Using the Zoom Function Unlike the REPEAT 1/ALL key, which allows you to repeat segments already defined on a disc, such as tracks and chapters, the REPEAT A-B key lets you define your own segments to repeat. Use the zoom function to zoom in or out during disc playback or when a frame is paused on-screen. ZOOM also works when viewing JPG images. CH+ DVD/TV LIVE SOURCE DVD/TV LIVE SOURCE TIMER TIMER ENTER REC REC REC MODE EDIT EDIT REC MODE CH- 1 During playback, when you reach the start of the segment you want to repeat, press the REPEAT A-B button. The following icon is displayed on-screen, letting you know that the segment start point has been saved. 1 A Press the ZOOM key repeatedly to cycle through all the zoom levels - 2X, 4X or 8X. The ZOOM REFERENCE WINDOW appears in the upper left corner of the screen, indicating the ZOOM level and providing a macro view of the “ZOOMED” portion of the screen in reference to normal viewing. B 2 2X ZOOM When you reach the end of the segment you want to repeat, press the REPEAT A-B button again. The repeat icon on-screen changes to the following, reporting that the endpoint of the video segment has been saved. The segment will now begin repeating. A B 3 2 To cancel repeat and resume normal playback, press REPEAT A-B again. The repeat icon disappears from the screen. You can use the ARROW keys to move around the image. This will display the parts of the image that do not appear on-screen when the image is zoomed in. The reference window shows the position of the magnified portion in relation to the rest of the picture. Multi-Angle Function Some DVD discs are recorded with multiple viewing angles for certain scenes. When you are viewing a disc that supports this feature, you can choose among the available angles on the disc with the ANGLE key. DISPLAY 2X ZOOM DIGEST BOOKMARK 3 HIDE AUDIO 1 SUBTITLE MUTE Most discs with multi-angle will display an indicator, or angle mark, that alerts the viewer that multiple angles are available for the current scene. When this mark appears on-screen, press the ANGLE button to select an angle to view. 19 Press the ZOOM key repeatedly to return to normal viewing. DVD PLAYER OPERATION Subtitles Muting the sound 1 Most DVD discs include at least one subtitle track in one language. Subtitles are useful viewing movies in a foreign language or for hearing-impaired viewers. Press the MUTE button on the remote to temporarily cancel the audio signal at any time. Press MUTE again to resume normal audio. CH+ DISPLAY DIGEST BOOKMARK DISPLAY HIDE AUDIO SUBTITLE DIGEST BOOKMARK ENTER HIDE MUTE AUDIO SUBTITLE MUTE CH- Changing the audio track 1 Most DVD discs are recorded with multiple audio tracks. These can contain multiple languages and different audio formats, such as 5.1Channel, 2 Channel and DTS. A director’s commentary track - where the director can be heard discussing the movie - is also common on DVDs. During playback, press the SUBTITLE button to access the SUBTITLE MENU and press ENTER. Subtitles Off 2 CH+ Use the UP/DOWN ARROW keys to select an available language and press ENTER. 2/3 : Spanish DISPLAY DIGEST BOOKMARK 3 ENTER Press SUBTITLE to exit the MENU. HIDE AUDIO SUBTITLE MUTE Displaying Playback Information CH- 1 When playing a DVD, VCD or Music CD, you can display the current title, chapter/track and elapsed playback time on-screen with the DISPLAY key. During playback, press the AUDIO button to access the AUDIO MENU and press ENTER. 1 During playback, press DISPLAY to view available information. In the example below, the current playback is Title 1, Chapter 8 and the elapsed time is 43 minutes, 23 seconds. 2 To cancel the on-screen display, continue pressing DISPLAY until the screen is clear. 1/4 : AC-3, 5.1 Ch. - English 2 Use the UP/DOWN ARROW keys to select an audio track and press ENTER to confirm. 3/4 : DTS, 5.1 Ch. - French 3 Press AUDIO to exit the AUDIO MENU. 20 DVD PLAYER OPERATION 2 Viewing JPG Files Slide Shows Press the ZOOM key repeatedly to zoom in or out. You can zoom in up to 400%, and out to 25% of the original image size. You can view JPG picture files stored on CD-R/RW discs individually or in slide show mode on your TV. JPG is the standard format for pictures stored on digital cameras, the Internet and many other applications. When you insert a disc with JPG files, a Slide Show will automatically begin. Viewing thumbnails of your JPG pictures Rotating and Flipping JPG Images Thumbnails are smaller sized versions of your JPG files that allow you to preview many files on a single page. While a JPG is displayed, you can rotate the image or flip it horizontally or vertically. CH+ 1 To rotate an image in the clockwise direction, press the RIGHT ARROW key. CH+ DISPLAY DIGEST BOOKMARK ENTER HIDE AUDIO SUBTITLE 99 MUTE ENTER CH- 1 During slide show playback, press the DIGEST key at any time to see a thumbnail preview of your JPG files. A maximum of 9 images are shown on each screen. CH- 99 99 Press the LEFT ARROW to rotate the image counter-clockwise. 99 2 To flip the image horizontally, press the UP ARROW key. CH+ 2 Use the PREVIOUS / NEXT keys to navigate to the next or previous screen of thumbnails. 3 Use the ARROW KEYS to navigate the thumbnail screen, moving to the image you wish to display. 4 Press ENTER to display the file on screen. 99 ENTER CH- Using the zoom function with JPGs To flip the image vertically, press the DOWN ARROW key. You can zoom in or out on JPG images. 1 While the picture is displayed, press the ZOOM key. The zoom status is shown in the upper left of the screen. The starting value is 100% normal size. DVD/TV LIVE SOURCE REC REC MODE 99 JPG notes JPG files must be stored on discs with the extension “JPG”, such as “picture1.jpg”, otherwise the files will not be recognized. You can have a maximum of 250 files or folders. CD-R/RW discs containing JPG files should be in ISO/9660, Mode 1, Closed Session format for best compatibility. TIMER EDIT 27 21 DVD PLAYER OPERATION Playing MP3 Files The MP3 Player When you insert a disc containing MP3 files, the player will launch the MP3 Player - an on-screen interface for playing MP3 music files. Track List 1 > 001 A FILE1.MP3 002 A FILE2.MP3 003 A FILE3.MP3 2 FILE1.MP3 3 T: 001/003 E: 00:00:25 1 TRACK LIST - A list of the tracks and folders on the disc. 2 CURRENT FILE - The current file begin played. 3 PLAYBACK INFO - Displays the current track number, total tracks on the disc and elapsed playback time. CH+ ENTER 1 2 3 4 5 6 7 8 9 C-SKIP 0 C CH- 1 Use the UP/DOWN ARROW keys to select a file to play. Alternatively, you can jump to a file directly by using the NUMBER keys to enter the file number, then pressing ENTER. MP3 notes MP3 files must be stored on discs with the extension “MP3”, such as “song1.mp3”, otherwise the files will not be recognized. You can have a maximum of 250 files or folders. CD-R/RW discs containing MP3 files should be in ISO/9660, Mode 1, Closed Session format for best compatibility. 22 RECORDING Although DVD+RW discs are more expensive than DVD+Rs, they can actually be more economical and convenient for certain situations. For example, if you are recording TV programs you may want to "recycle" discs - recording over episodes you have already watched. In this situation, DVD+RW discs are the best choice because a single disc can be used over and over again - there's fewer discs to buy and keep track of. Introduction to Recording You already know that DVD discs provide the highest quality video playback available. Now, with DVD+R/RW recording, you can create your own DVDs from your home movies, favorite TV shows or virtually any other video source. Recording to DVD+R/RW is easy. The process is similar in many ways to your old VCR, but with many new enhancements. You can record live by simply pressing one button, or set the timer for scheduled recordings. And DVD+RW discs can be erased and used again over and over more than one thousand times - with your recordings always looking crystal clear. Try that with VHS tapes! DVD+R A lower-cost alternative to DVD+RW, these "Recordable" discs cannot be erased. Once a recording is made to a DVD+R disc, the disc space used by that recording can never be reclaimed, although the recording itself can be "hidden" so it is not viewable when the disc is played. And there's lots of new editing features with DVD+R/RW that give your recordings a flexibility that you never had with VHS. The Title Screen gives you quick access to your recordings with thumbnail images you can change. You can quickly add or delete Titles or Chapters, or simply hide segments that don't make your "final cut". Best of all, your recordings are TWINWAY COMPATIBLE. This means that the discs you create will play in most standard DVD Players. DVD Recording is truly the next revolution in home video recording. DVD+R discs must be Finalized before they can be played back on standard DVD Players, and once this process is complete, no more recordings can be added. This is an important difference between DVD+R and DVD+RW Discs. While the TOC (Table of Contents) can be written to and updated many times on a DVD+RW disc, the TOC on a DVD+R disc can only be written once. Therefore, you cannot move a DVD+R between the Recorder and a DVD Player as you add recordings to the disc. Instead, you must complete the disc before it is playable on a standard DVD Player. two-way compatible TWINWAY Discs you can Record To Although DVD+R offers less recording flexibility than DVD+RW, the lower cost per disc and the fact that the material cannot be erased or edited make it the best choice for large distributions of recordings to friends or clients. This unit will accept two disc types for Recording: DVD+RW and DVD+R. DVD+RW What you can Record From You can record your own DVDs from the following sources: Think of DVD+RW (DVD+ReWritable) discs as the digital equivalent of your old VHS tapes. Like video tape, DVD+RW discs can be recorded to, erased and re-used. But unlike video tape, DVD+RW discs will retain their crystal-clear digital quality even after being erased and re-recorded over 1000 times! And, this superior quality will not degrade with the passage of time like VHS tapes. TV Tuner - This unit features a built-in TV Tuner that can be connected to a Cable TV hookup or standard Antenna to record your favorite TV shows. You can auto-scan for available channels and add or delete channels from the channel list. AV Inputs (Composite/S-Video) - Use the Audio/Video Inputs to record from consumer electronics devices such as your Camcorder or Video Camera. You can also connect external TV Tuners, DVD Players, etc. to the A/V inputs - basically any video device that has a S-Video or Composite Video Output. Also, unlike DVD+R discs, DVD+RW discs do not require a "Finalization" process for compatibility with standard DVD Players. To understand why this is so, consider the following: In order for your recordings to be compatible with standard DVD Players, a TOC (Table of Contents) must be written to each disc. Since DVD+RW discs are ReWritable, the TOC can be constantly updated as new recordings are made. This means that a DVD+RW disc can be played on a standard DVD Player directly after the first recording, and will remain compatible as new material is added later. ! About Copy Protection You cannot record from a video source that is encoded with Macrovision copy-protection, such as most DVDs produced by major studios. As an example, if you have a DVD player connected to an AV input and attempt to record a DVD, an error message will occur, letting you know that the disc is copy-protected. DVDs not encoded with Macrovision can be used as a recording source. 23 RECORDING Setting the Auto Chapter Option Setting Recording Options You can set the recorder to automatically add a "chapter marker" every 5 minutes during your recordings. During playback, this will allow you to skip forward or back in 5 minute intervals by using the NEXT/PREVIOUS keys on the remote. These chapter markers are compatible with most standard DVD Players as well. There are several recording options and other settings that should be understood and checked before you begin recording. Setting the Record Speed You can also add chapter markers manually. This procedure is covered in EDITING YOUR RECORDINGS. The Record Speed determines the quality of your recordings as well as the maximum amount of video you can record on a disc. Not surprisingly, the higher the quality, the less video can be recorded. 1 CH+ ENTER DISPLAY DIGEST BOOKMARK HIDE AUDIO SUBTITLE MUTE CH- 1 2 SETUP RECORD MODE AUTO CHAP Language Video Setup Audio Setup System System Disc Media Record Mode Timer Record Record Speed Auto Chapter On Off Select an Auto Chapter option with the UP/DOWN keys and press ENTER to confirm. Press SETUP to exit and save changes. SETUP RECORD MODE Checking the Time and Date Language Video Setup Audio Setup System Setup Disc Media Record Mode Timer Record Record Speed Auto Chapter Before you begin recording, you should make sure the Time and Date are both correct. The Time and Date are used not only to schedule recordings, but also to label recordings that you make live. 1 Press ENTER to select the Record Speed menu. Select a Record Speed with the UP/DOWN keys and confirm with ENTER. Press SETUP and navigate with the DOWN key to the SYSTEM INFO menu. Press ENTER. Then, press ENTER again to select DATE AND TIME. SETUP RECORD MODE REC SPEED SETUP SYSTEM SETUP Language Video Setup Audio Setup System Setup Disc Media Record Mode Timer Record Record Speed Auto Chapter HQ SP LP EP SLP Language Video Setup Audio Setup System Setup Disc Media Record Mode Timer Record Channel Search Add/Del Channel Cable/Antenna Date and Time Version Parental Level Record Speed Video/Audio Quality Record Time HQ (High Quality) Highest 1 Hour Max SP (Standard Play) Excellent 2 Hours Max LP (Long Play) Very Good 3 Hours Max EP (Extended Play) Better then VHS 4 Hours Max SLP (Super Long Play) Equal to VHS 6 Hours Max 3 2 Press SETUP to enter the SETUP MENU. Press the DOWN key repeatedly to select the RECORD MODE menu and press ENTER. Press SETUP and navigate with the DOWN key to the RECORDING menu. Press ENTER. Then, navigate to the AUTO CHAPTER menu and press ENTER. 2 3 Press SETUP to exit and save your changes. 24 Use the UP/DOWN keys to increase or decrease the Time/Date value, and the LEFT/RIGHT keys to move to a different field. Press ENTER to save your changes. SETUP DATE & TIME Language Video Setup Audio Setup System Setup Disc Media Record Mode Timer Record Time Date 22:00:00 01/01/00 SAT Press SETUP to exit the SETUP MENU. RECORDING Adding and Deleting Channels TV Tuner Setup After scanning for channels, the TV Tuner holds a list of available channels that are accessible with the CH+ and CHkeys. You can manually edit this list by adding or deleting channels in the DVD Recorder's SETUP MENU. Choose Cable or Antenna It's important that this option is set correctly before scanning for available channels. 1 2 1 Press SETUP and navigate with the DOWN key to the VIDEO SETUP menu. Press ENTER. Then, navigate to the CABLE/ANTENNA option and press ENTER. SETUP SYSTEM SETUP CABLE/ANT Language Video Setup Audio Setup System Setup Disc Media Record Mode Timer Record Channel Search Add/Del Channel Cable/Antenna Date and Time Version Parental Level Password Antenna Cable 2 Select ANTENNA or CABLE and press ENTER to confirm. Scanning for Available Channels 2 3 SETUP SYSTEM SETUP Language Video Setup Audio Setup System Setup Disc Media Record Mode Timer Record Channel Search Add/Del Channel Cable/Antenna Date and Time Version Parental Level Password Use the UP/DOWN keys to navigate to the channel you wish to Add or Delete. To access the next page of channels, press the RIGHT arrow key. CH+ During the Initial Setup, the built-in TV Tuner scanned for available and added these to the channel list. However, if you have switched your input to Cable or Antenna, or moved to a different location, you may wish to perform the channel search again to refresh the store channel list. 1 Press SETUP and navigate with the DOWN key to the SYSTEM SETUP menu. Press ENTER. Then, navigate to the ADD/DEL CHANNEL option and press ENTER. ADD/DEL CHs ENTER Press SETUP and navigate with the DOWN key to the SYSTEM SETUP menu. Press ENTER. Then, navigate to the CHANNEL SEARCH option and press ENTER. SETUP SYSTEM SETUP Language Video Setup Audio Setup System Setup Disc Media Record Mode Timer Record Channel Search Add/Del Channel Cable/Antenna Date and Time Version Parental Level Password CH SEARCH Language Video Setup Audio Setup System Setup Disc Media Record Mode Timer Record Confirm 3 Cancel When the process is completed, press LEFT to exit. SETUP Please wait.... Language Video Setup Audio Setup System Setup Disc Media Record Mode Timer Record Channels searching done! To exit press LEFT key. 010 011 012 013 014 015 016 017 Add Add Add Delete Add Add Add Add CH- Press ENTER to select CONFIRM. The TV Tuner now scans for available channels. SETUP Ch Ch Ch Ch Ch Ch Ch Ch 25 Press ENTER to toggle between ADD and DELETE. Press the LEFT key to exit the menu. RECORDING Automatically Adding Chapter Markers The Title Screen You can set the recorder to automatically add a CHAPTER MARKER every 5 minutes during your recordings. During playback, this will allow you to skip forward or back in 5 minute intervals by using the NEXT/PREVIOUS keys on the remote. These chapter markers are compatible with most standard DVD Players as well. When you insert a DVD+RW or DVD+R disc, the Title Screen will appear. The Title Screen displays thumbnail images and information for each title (recording) on the disc, as well as the amount of free space available for recordings. You can also add chapter markers manually. This procedure is covered in EDITING YOUR RECORDINGS. 1 9 99 9 99 CH 44 8:00:00 PM, Jan 2, 2003 Length: 0:30:00 Quality: HQ Making a Live Recording CH 36 2 6:00:00 PM, Jan 3 2003 Length: 0:30:00 Quality: HQ Selecting the Input Source 5% free After a DVD+RW or DVD+R disc is inserted in the DVD Recorder, you must select the input source that will be recorded. You may choose from the following input sources: 3 TV - The DVD Recorder's built-in TV Tuner allows you to record your favorite TV programs. 4 1 2 1 VIDEO IN 1 - The Composite Video Input located at the back of the unit. Used for any video device with Composite Video Out. THUMBNAIL IMAGE - An image taken from the first frame of the recording, the thumbnail image provides a visual cue to help you identify the titles on the disc. You can replace this image with any frame from the recording - See EDITING YOUR RECORDINGS. S-VIDEO IN 1 - Located on the back panel, S-VIDEO provides a better picture than standard Composite Video. Use this input for camcorders or other video devices when possible. TITLE INFORMATION - Displays information about the recording, including the Date and Time that the recording was made, the Input Source used, the total length of the recording and the Record Speed. 3 1 FREE SPACE - This is the percentage of the total disc space that is available for recordings. 4 1 NEXT/PREVIOUS INDICATOR - The ARROW SYMBOL appears above or below the 3 titles, indicating that a previous or next page of titles exists. VIDEO IN 2 - The Composite Video Input on the Front Panel. S-VIDEO IN 2 - The Front Panel S-Video input. CH+ DVD/TV LIVE SOURCE REC REC MODE TIMER EDIT ENTER Types of Recordings CH- There are two recording methods you can use: LIVE RECORDING - You start a live recording by simply pressing the REC button while viewing video from an input source, such as the TV Tuner or AV Inputs. You control the length of a live recording by pressing REC multiple times for 30 minute intervals or by pressing STOP to end the recording. A live recording will end automatically if the disc is full. TIMER RECORDING - You can also schedule a recording to automatically begin at a particular Date and Time using the DVD Recorder's built-in TIMER function. Recordings can be scheduled to re-occur once a week or daily. The DVD Recorder must be in STANDBY MODE in order for a scheduled Timer Recording to begin. 26 1 To select the Input Source for recording, first press the DVD/TV LIVE button to switch to Recording Input Mode. 2 Next, bring up the Input Source menu using the SOURCE button. RECORDING 3 Use the UP/DOWN ARROW keys to select an Input Source, and press ENTER. 2 You may pause the DVD Recorder during a Live Recording. Simply press PAUSE and the recording will stop temporarily. Press PAUSE again to resume recording. 3 To end recording, press STOP. Keep in mind that the recording will end automatically if the disc runs out of space. There will be a pause while the player updates the disc contents. 4 To return to the Title Screen, press TITLE. You will see a thumbnail image representing your last recording, with information on the details of the recording, including the Date and Time the recording was made, along with the Length and Recording Mode. INPUT SOURCE INPUT SOURCE TV VIDEO IN 1 S-VIDEO IN 1 VIDEO IN 2 S-VIDEO IN 2 TV VIDEO IN 1 S-VIDEO IN 1 VIDEO IN 2 S-VIDEO IN 2 Recording In Live Recording mode, you may record with no specific end point, or specify the length of the recording - in multiples of 30 minutes - using the REC button. FRONT PANEL CH 44 8:00:00 PM, Jan 2, 2003 Length: 0:30:00 Quality: HQ OR DVD/TV LIVE SOURCE TIMER RECORD REC REC MODE 5% free EDIT FRONT PANEL PLAY OR DVD / TV LIVE ! Recording Over Existing Titles SOURCE Normally, a live recording is made with the Recorder in TV LIVE mode and an Input Video Source (such as the TV Tuner or AV Input) being viewed. In this scenario, a new title is created for the recording and existing titles are preserved. 1 Alternatively, you can choose to OVERWRITE existing recordings on a disc. To do this, press the REC key while the Recorder is in DVD playback mode. The Recorder will switch to TV Live mode. Now, press REC again. Using this method, the playback location or title selection will determine where the recording will begin and which titles will be overwritten. To begin recording, press the REC button. This will begin recording without a specific end time. Alternatively, you can set the end time of the recording by pressing REC multiple times to cycle through 30 minute intervals. The stop time options will be dependent on the amount of disc space available, as well as the record mode (quality) setting. Overwriting from a Playback Point If you wish to An icon will appear on the screen letting you know that the recording has begun. The DVD Recorder's front display will show "REC", followed by the elapsed time of the recording. +30 +60 During playback of a recording, press REC, then REC again to begin overwriting existing titles from that point. In FIGURE 1 shown below, the recorder is in playback mode. Once REC is pressed, the player switches to TV LIVE mode, as shown in FIGURE 2. In FIGURE 3, the remainder of the original title will be overwritten with a new title by pressing REC again. Existing titles will also be overwritten depending on the length of the recording. ... REC 1 2 3 REC 99 REC 27 RECORDING Selecting Titles to Overwrite Timer Recordings You can select titles to overwrite by pressing REC from the Title Screen. In the example below, the recorder is in DVD mode with the Title Screen displayed and TITLE 2 selected. When the recording is started from this location by pressing REC twice, a new title will replace TITLE 2 - and TITLE 3 if the recording is of sufficient length. TITLE 1 will be preserved because of it’s position in front of the title that was selected when REC was pressed. You can use the Timer function to schedule recordings to begin and end at specific times. Timer Recordings are designed for unattended operation, and will only work when the recorder is in Standby Mode. During a Timer Recording, the recorder may not be used for any other operations. CH+ 1 99 2 3 99 CH 44 8:00:00 PM, Jan 2, 2003 Length: 0:30:00 Quality: HQ OR DVD/TV LIVE SOURCE CH 36 6:00:00 PM, Jan 3 2003 Length: 0:30:00 Quality: HQ TIMER ENTER REC REC MODE EDIT CH 44 6:00:00 PM, Jan 5 2003 Length: 0:60:00 Quality: CH- OVERWRITE 1 To begin programming a scheduled recording, press the TIMER button on the remote control or front panel. This will access the recorder’s built-in Timer Setup Screen, where you can program up to 8 scheduled recordings. ! DVD+R Discs must be FINALIZED Remember, your recording is not complete on a DVD+R disc until the disc is FINALIZED. Until a DVD+R disc is finalized, it can be recorded to, played back and edited on the DVD Recorder, but it will not be compatible with any other DVD Player. Finalization makes the disc compatible for playback on standard DVD Players. Once a disc is finalized, no more recordings can be added. 1 For more on Finalization, see EDITING YOUR RECORDINGS. ! Title Limit A DVD+R/RW disc may contain up to 48 titles. Attempting to add additional title after this limit has been reached will result in an error. 2 3 4 5 6 Entry Freq Start Length Source Speed 01 02 03 04 05 06 07 08 __/__/__ __/__/__ __/__/__ __/__/__ __/__/__ __/__/__ __/__/__ __/__/__ __:__ __:__ __:__ __:__ __:__ __:__ __:__ __:__ __:__ __:__ __:__ __:__ __:__ __:__ __:__ __:__ ______ ______ ______ ______ ______ ______ ______ ______ __ __ __ __ __ __ __ __ 1 ENTRY - You can input up to 8 independent schedules for Timer Recordings. 2 FREQ - The frequency that the schedule will automatically repeat. The following options are available: SINGLE DATE (No Repeat): The default setting is the current date. This setting will be cleared after the recording is finished, or an error occurs, and will not be repeated. MON-FRI: The recording will take place each week day, Monday through Friday, but not on Saturday or Sunday. DAILY: The recording is repeated every day. WEEKLY (MON, TUE, WED, THU, FRI, SAT, SUN): The recording will take place once each week on the day specified. 28 3 START - The time that the recording will begin, in 24hour time. In this format, 1:00PM is represented as 13:00, 2:00PM as 14:00, etc. 4 LENGTH - The length of the recording. 5 SOURCE - The Video Input Source that will be used for the recording: TV Tuner, Video 1, S-Video 1, Video 2, SVideo 2. 6 SPEED - The Recording Speed (Quality Mode): HQ, SP, LP, EP, SLP. RECORDING 2 ! Timer Recording Messages Use the UP/DOWN ARROW keys to select an entry and press ENTER. SWITCH OFF FOR TIMER RECORDING 3 Entry Freq Start Length Source Speed 01 08/15/05 20:00 1:00 Ch 002 HP For a scheduled Timer Recording to begin, the system must be in STANDBY MODE. You cannot use the recorder for another purpose, for instance to watch TV, and make a Timer Recording at the same time. The only way a Timer Recording can begin, is if the unit is powered down, with the front Standby light ON. Use the UP/DOWN ARROW keys to select option values, and the LEFT/RIGHT ARROW keys to move among the fields. Entry Freq Start Length Source Speed 01 08/15/05 20:00 1:00 Ch 002 HP When you schedule a Timer Recording, you will see the message “SWITCH OFF FOR TIMER RECORDING” appear on screen, reminding you to switch the unit to Standby Mode before the recording is set to begin. This message will also appear on screen 5 MINUTES before a Timer Recording is set to begin. At this point, you must switch the unit to Standby Mode to allow the recording to begin. Mon-Fri Daily Weekly Mon Weekly Tue .... 4 5 6 SCHEDULING OVERLAPPED! This message is letting you know that at least 2 entries have conflicting schedules, where the recording periods overlap. In this case, the Timer Recording that begins first will take precedence, cancelling any entries that occur within it’s recording period. To input numeric values such as START/STOP TIME and SOURCE TV CHANNEL, use the NUMBER keys. 1 2 3 4 5 6 7 8 9 C-SKIP 0 C Length Source Speed 21:00 Ch 036 HP 0 + 3 + 6 To save an entry, press ENTER. The recorder will return to the Timer Schedule Screen and the new entry will be shown in the list: Entry Freq Start Length Source Speed 01 02 03 04 05 06 07 08 Weekly Mon __/__/__ __/__/__ __/__/__ __/__/__ __/__/__ __/__/__ __/__/__ 20:00 __:__ __:__ __:__ __:__ __:__ __:__ __:__ 1:00 __:__ __:__ __:__ __:__ __:__ __:__ __:__ Ch 036 ______ ______ ______ ______ ______ ______ ______ HQ __ __ __ __ __ __ __ To exit the Timer Menu, press TIMER. 29 EDITING YOUR RECORDINGS 3 Editing Overview Your DVD Recorder’s capabilities go far beyond simply recording in Live and Timer modes. A vast array of editing options are also available, allowing you to tailor your recordings to your own personal requirements. To perform any of the above functions in the EDIT MENU, use the UP/DOWN ARROW keys to select a function and press ENTER to confirm. CH+ You can divide your recordings into sections, or Chapters, that provide the user-friendly navigation made popular on motion picture DVDs. You can also choose to “edit out” or bring back sections of your recordings with the HIDE and SHOW CHAPTER functions. Entire titles can be erased, although the space cannot be reclaimed with DVD+R discs. You can also change the Index Picture for any title, using any frame from within the recording. ENTER CH- Lastly, to make your discs compatible for distribution to clients or friends, use the Make Compatible and Finalize options for DVD+RW and DVD+R discs, respectively. These functions assure that all your edits will be “locked in” and your discs will playback just as you wish - on most DVD players! Erase Title Deletes the currently selected Title. The functionality of this option is different with DVD+R & DVD+RW discs. With DVD+RW discs, the title is erased and the disc space freed for use for subsequent recordings. When a title is erased on a DVD+R disc, however, the disc space cannot be reclaimed - the title is essentially “hidden” and the disc space still used. EDIT MENU Functions - Title Screen Play Full Title Use the EDIT MENU to access available editing functions. The EDIT MENU can be accessed in the Title Screen, or during playback of a DVD+R/RW disc. The available editing functions will change depending on the type of disc and where the menu is accessed. This option works in conjunction with HIDE CHAPTER, which is covered in the next section. After a chapter is “hidden”, it will no longer be shown during normal playback. Therefore, to “un-hide” the chapter you will need to first begin playback of the title using this option, making all hidden chapters visible. During playback, the SHOW CHAPTER option is used to make a chapter visible during normal playback again. Access the EDIT MENU from the Title Screen for top level editing functions. These functions deal with the compatibility and playback of an entire disc, rather than with individual titles, which are edited during playback. 1 Make Compatible First bring up the Title Screen by pressing TITLE when the Recorder is in DVD mode. 99 DISPLAY DIGEST BOOKMARK 99 Used with DVD+RW discs only, this function makes your edits - such as hidden chapters - compatible with standard DVD players. Use this option before distributing any recordings that you have edited to clients or friends. Before a DVD+RW disc is made compatible, all edits will only be visible when the disc is used in the DVD Recorder. CH 44 8:00:00 PM, Jan 2, 2003 Length: 0:30:00 Quality: HQ CH 36 6:00:00 PM, Jan 3 2003 Length: 0:30:00 Quality: HQ HIDE AUDIO 2 SUBTITLE MUTE You can use this option multiple times, moving a DVD+RW disc back and forth between the DVD Recorder and a standard DVD player. Each time a disc is edited, it must be made compatible again. CH 44 6:00:00 PM, Jan 5 2003 Length: 0:60:00 Quality: Press EDIT to access the EDIT MENU. Finalize DVD+RW DVD/TV LIVE SOURCE REC REC MODE TIMER This option is only used with DVD+R discs - which must be FINALIZED before being used in a standard DVD player. Unlike DVD+RW discs, DVD+R discs cannot be moved back and forth between the recorder and standard players. You must finish all recordings on a DVD+R and finalize the disc before it will be usable on any other player. EDIT Erase Title Play full title Make Compatible Edit Title EDIT EDIT Erase Title Play full title Finalize Edit Title DVD+R Once a DVD+R disc is finalized, no further recordings can be made on the disc, and no edits can be performed. 30 EDITING YOUR RECORDINGS Edit Title 2 By default, your recordings are named according to the Input Source used. You can change the name of a title using the EDIT TITLE function. 1 Use the UP/DOWN ARROW keys to select the EDIT TITLE option and press ENTER. CHAPTER 1 CHAPTER 2 EDIT Erase Title Play full title Finalize Edit Title Soccer Game EDIT Erase Title Play full title Finalize Edit Title VIDEO IN 1 2 In the example shown below, the title already contains 2 chapters. To insert a Chapter Marker between chapters 1 and 2, press ENTER on the INSERT CHAPTER option of the EDIT MENU at the point you wish the new chapter to begin. 99 99 Use the UP/DOWN ARROW keys to select a Letter or Punctuation, and the LEFT/RIGHT keys to move to the previous/next character. Press ENTER to save. NEW CHAPTER EDIT MENU Functions - Playback Access the EDIT MENU in playback mode to edit individual titles. The edits you make using the EDIT MENU will be immediate while the disc is used with the DVD Recorder. However, to make your edits compatible with other players, you must perform either the Make Compatible (DVD+RW) or Finalize (DVD+R) functions. EDIT Insert chapter Remove chapter Hide chapter Show chapter New picture 99 CH+ 3 DVD/TV LIVE SOURCE TIMER The new Chapter Marker will now become Chapter 2, and the existing chapter marker will move to Chapter 3. The title now contains 3 chapters. ENTER REC REC MODE EDIT CHAPTER 1 CHAPTER 3 CH- Insert Chapter 99 Chapters are a familiar feature on DVD discs. They provide a convenient way to navigate to a particular scene by dividing the disc into sections. Your DVD Recorder can be set to automatically add Chapter Markers to your recordings every 5 minutes in the SETUP MENU. Alternatively, you can add your own Chapter Markers, dividing a title into sections that you specify according to your requirements. CHAPTER 2 ! Chapter Markers Only are Added Once Chapter Markings are added to your recording and the disc is made compatible (DVD+RW) or Finalized (DVD+R), you will be able to use the PREVIOUS and NEXT buttons to move backward or forward through the chapters on any standard DVD Player. 1 99 Remember that when you add a CHAPTER, you are merely adding an additional CHAPTER MARKER to the title that is used for navigation. The actual video contained in the recording is never changed. ! During playback, press EDIT to access the EDIT MENU. Chapter Limit Each title can have a maximum of 99 chapters, with a maximum 124 chapters allowed on a disc. Attempting to add additional chapters after this limit has been reached will result in an error. EDIT Insert chapter Remove chapter Hide chapter Show chapter New picture 31 EDITING YOUR RECORDINGS Remove Chapter Hide Chapter You can delete chapter markers, making one longer chapter out of two. Removing a Chapter Marker is basically like adding a chapter, but in reverse. In the example below, the title contains 3 chapters. If you wish to “edit out” a chapter from a recording, use the HIDE CHAPTER function. 1 If the segment of video you wish to remove is not already defined as a chapter, you must first add Chapter Markers at the beginning and end of the section, then use the HIDE CHAPTER function to remove the new chapter. During playback, press EDIT to access the EDIT MENU. Use the DOWN Arrow Key to select REMOVE CHAPTER. After a chapter is hidden, it will be invisible during playback as if it did not exist on the disc, even though it is still using space on the disc. EDIT Insert chapter Remove chapter Hide chapter Show chapter New picture 2 1 In this example, the section to be removed has not yet been defined as a chapter. In this case, first add Chapter Markers - following the procedures already covered - at the beginning and end of the section. In the example shown below, the title contains 3 chapters. Let’s remove Chapter 2’s marker by pressing ENTER during playback at any point within Chapter 2. 99 99 CHAPTER 1 CHAPTER 2 CHAPTER 3 SECTION TO REMOVE CHAPTER 1 DELETE CHAPTER CREATED 2 The title now has only 2 chapters. Chapter 1 consists of the original Chapter 1 and 2, while the original Chapter 3 is now the 2nd chapter in the title. CHAPTER 1 99 99 EDIT Insert chapter Remove chapter Hide chapter Show chapter New picture 3 CHAPTER 2 To HIDE the newly created chapter, playback the title. Press EDIT and select HIDE CHAPTER. At any point within the chapter you wish to remove, press ENTER. 99 EDIT Insert chapter Remove chapter Hide chapter Show chapter New picture CHAPTER 2 3 ! Chapter Markers Only are Removed The chapter will no longer be visible during playback of the title. To make the chapter playable again, use SHOW CHAPTER, covered in the next section. 99 The REMOVE CHAPTER function removes only the MARKERS for chapters, NOT the actual video contained in a chapter. To actually remove a section of video from a recording, use HIDE CHAPTER, which is covered in the next section. 32 EDITING YOUR RECORDINGS Hiding Video Segments with the HIDE Button Show Chapter You can hide video segments “on the fly” with the HIDE button. Recall that the HIDE CHAPTER function requires that a video segment be defined as a chapter first before it can be hidden. The HIDE button provides a shortcut to this method, by automatically creating chapters as you define the BEGINNING and END points of a video segment you wish to hide. Recall from the previous section that when a chapter is HIDDEN and invisible during playback, it in fact still exists on the disc. The SHOW CHAPTER function provides a way to reverse HIDE CHAPTER, making previously hidden chapters viewable again. ! Use the Play Full Title Option HIDE DISPLAY If you intend to make previously hidden chapters visible again, or simply view all hidden chapters, you must select the PLAY FULL TITLE option using the EDIT MENU from the TITLE SCREEN. This will play ALL chapters in the title, including hidden chapters. 99 DIGEST BOOKMARK HIDE AUDIO SUBTITLE MUTE 99 1 99 Jan 2, 2003 Ch 36 8:00:00 PM 0:30:00 HQ Jan 11, 2003 Ch 44 7:30:00 PM 0:30:00 HQ In this example, the title consists of only one chapter. EDIT Erase Title Play full title Make Compatible Jan 15, 2003 Ch 36 8:00:00 PM 0:30:00 HQ 99 99 1 SECTION TO REMOVE 2 To mark the beginning of the video segment you wish to remove, press HIDE. The HIDE ICON appears onscreen, indicating that the current video will be hidden. Press HIDE again to mark the end of the segment. The HIDE ICON disappears from the screen. BEGIN During playback with the PLAY FULL TITLE option, hidden chapters will be identified by a message on the top right hand corner of the screen. HIDDEN END HIDE 99 3 2 99 EDIT Insert chapter Remove chapter Hide chapter Show chapter New picture The title now contains 3 chapters: Chapter 1 is the chapter before the hidden segment. Chapter 2 is the hidden segment we defined. Chapter 3 is the remaining video after the hidden segment. As with the HIDE CHAPTER option, you must select PLAY FULL TITLE from the TITLE EDIT MENU to view the hidden chapter. CHAPTER 2 99 To make the chapter visible again, simply press EDIT and select SHOW CHAPTER. At ANY POINT within the hidden chapter, press ENTER. CHAPTER 3 99 CHAPTER 1 33 EDITING YOUR RECORDINGS New Picture Erasing a DVD+RW Disc The Index Screen shows a thumbnail image representing each title on the disc. By default, this image is taken from the first frame of the recording. However, you may change this image to that of any frame contained in the title using the NEW PICTURE function. INDEX PICTURE 99 99 DVD+RW discs can be erased, deleting all content on the disc and freeing up all space for new recordings. You must enter the SETUP MENU to erase a DVD+RW disc. CH 44 8:00:00 PM, Jan 2, 2003 Length: 0:30:00 Quality: HQ CH+ CH 36 6:00:00 PM, Jan 3 2003 Length: 0:30:00 Quality: HQ DISPLAY CH 44 6:00:00 PM, Jan 5 2003 Length: 0:60:00 Quality: 1 ENTER DIGEST BOOKMARK HIDE AUDIO SUBTITLE MUTE CH- Press PAUSE to freeze playback on the frame you wish to use as the new Index Picture. 1 Press SETUP to enter the SETUP MENU. SETUP 99 2 99 Language Video Setup Audio Setup System Info Disc Media Recording Timer Record 2 Press EDIT to bring up the EDIT MENU. Use the DOWN ARROW key to select NEW PICTURE and press ENTER. EDIT Insert chapter Remove chapter Hide chapter Show chapter New picture 99 3 3 Press EDIT to exit the EDIT MENU. The Index Picture is now changed. INDEX PICTURE CHANGED 99 CH 44 8:00:00 PM, Jan 2, 2003 Length: 0:30:00 Quality: HQ Use the DOWN key to navigate to the DISC MEDIA menu and press ENTER. SETUP DISC MEDIA Language Video Setup Audio Setup System Info Disc Media Recording Timer Record Finalize Erase Press ENTER to select ERASE, and ENTER again to confirm. SETUP DISC MEDIA Language Video Setup Audio Setup System Info Disc Media Recording Timer Record Finalize Erase ERASE Confirm CH 36 6:00:00 PM, Jan 3 2003 Length: 0:30:00 Quality: HQ CH 44 6:00:00 PM, Jan 5 2003 Length: 0:60:00 Quality: 34 Cancel THE DVD RECORDER SETUP MENU Using the SETUP MENU Language Settings The DVD Recorder’s SETUP MENU is where various settings are configured, including Recording Options, Playback Options, Languages, Parental Control Settings and more. CH+ DISPLAY SUBTITLE MUTE CH- 1 2 3 4 SETUP SYSTEM SETUP Channel Search Add/Del Channel Cable/Antenna Date and Time Version Parental Level Password Factory Reset Screen Saver Auto Shutdown OSD DVD Menu Audio Subtitles DVD MENU Press SETUP to enter the SETUP MENU. Use the UP/DOWN ARROW keys to select a sub-menu and press ENTER. Language Video Setup Audio Setup System Setup Disc Media Record Mode Timer Record Language Video Setup Audio Setup System Setup Disc Media Record Mode Timer Record Default setting: ENGLISH Sets the language used by the SETUP MENU and ONSCREEN DISPLAY. ENGLISH (Default) and SPANISH are supported. HIDE AUDIO LANGUAGE OSD ENTER DIGEST BOOKMARK SETUP Default setting: ENGLISH Sets the default language used by DVD Menus. As an example, if a DVD disc contains multiple menu languages, such as Spanish and English, and this setting is set to SPANISH, then the Spanish menu will be used. Of course, the DVD must support multiple menu languages for this setting to work. Choices are: ENGLISH, SPANISH, GERMAN, ITALIAN, FRENCH, CHINESE, ORIGINAL (Default on DVD), USER-DEFINED (With specific Code). AUDIO Default setting: ENGLISH Sets the default audio track used by DVDs. For example, if a DVD disc contains multiple audio tracks, such as Spanish and English, and this setting is set to SPANISH, then the Spanish audio track will play as the default. Of course, the DVD must support multiple menu languages for this setting to work. Choices are: ENGLISH, SPANISH, GERMAN, ITALIAN, FRENCH, CHINESE, ORIGINAL (Default on DVD), USER-DEFINED (With specific Code). Use the UP/DOWN ARROW keys to select the option you wish to change and press ENTER. SETUP SYSTEM SETUP SCREEN SAVER Language Video Setup Audio Setup System Setup Disc Media Record Mode Timer Record Channel Search Add/Del Channel Cable/Antenna Date and Time Version Parental Level Password Factory Reset Screen Saver Auto Shutdown On Off SUBTITLES Default setting: ON Sets the default subtitle language used by DVDs. For example, if a DVD disc supports multiple subtitle languages, such as Spanish and English, and this setting is set to SPANISH, then Spanish subtitles will be displayed by default. Of course, the DVD must support the language selected for this setting to work. Choices are: ENGLISH, SPANISH, GERMAN, ITALIAN, FRENCH, CHINESE, ORIGINAL (Default on DVD), USER-DEFINED (With specific Code). Select the new value with the UP/DOWN ARROW keys and press ENTER to confirm. SCREEN SAVER SCREEN SAVER On Off On Off To EXIT the SETUP MENU, press SETUP. Your changes will be saved. 35 THE DVD RECORDER SETUP MENU Most TVs scan only half the lines of an image in one pass. This scanning method is known as “interlaced” mode, as the odd and even lines are interlaced together in alternate scans, and is the default setting with the NTSC and PAL options. Progressive scan, set with the PROGRESSIVE option, is a scanning method offered on high-end TVs. Progressive scan TVs scan all the lines of an image in one pass, creating a more film-like quality to DVD movies. Note: All progressive scan TVs require component video inputs. Video Setup SETUP VIDEO SETUP Language Video Setup Audio Setup System Setup Disc Media Record Mode Timer Record Aspect Ratio Video Output Output Format ASPECT RATIO ! Resetting the video output Default setting: 4:3 PanScan You can setup your DVD Player to work with normal and wide screen televisions. If you are using a wide screen TV, set this option to 16:9 WIDE to match the aspect ratio of your TV. When used with a normal TV (4:3 aspect ratio), the 4:3 PANSCAN setting results in the typical “Pan & Scan” display, where a movie is clipped on the sides to fit into the TV screen. The 4:3 LETTERBOX setting will enable the “Letterbox” format, where the movie is presented in wide screen format with black lines at the top and bottom of the screen. The 4:3 PANSCAN and 4:3 LETTERBOX settings usually will have no effect, since very few movies support both options. DVDs are generally recorded with either PS or LB and do not allow switching between the two. So, viewing a widescreen DVD on a standard TV will result in black bars on the top and bottom of the screen. If you inadvertently switch the OUTPUT FORMAT setting to PROGRESSIVE while using a standard TV not capable of PSCAN, you will loose video. If this happens, reset the recorder to its default video settings by following these steps: 1) Power the unit Off, then On again with the main power switch on the back. 2) Eject the disc and close the disc tray. 3) Press and hold the STOP button on the front panel for 3 full seconds. Audio Setup Options VIDEO OUTPUT Default setting: COMPOSITE COMPOSITE: Composite Video is supported on the majority of televisions. It is identified by a yellow-colored phono-type jack. S-VIDEO: A higher quality picture than standard COMPOSITE VIDEO, S-VIDEO requires a special cable (not included). COMPONENT: This setting is used for TVs supporting component video out and progressive scan. To activate the component video outputs, you must first connect the unit using the COMPOSITE VIDEO connector and cable in order to enter SETUP and change this setting. Next, connect the unit using the COMPONENT VIDEO cables and unplug the COMPOSITE video cable. Adjust the TV’s Video Input setting to correspond to the COMPONENT Input. SETUP AUDIO SETUP Language Video Setup Audio Setup System Setup Disc Media Record Mode Timer Record Audio Output SPDIF AUDIO OUTPUT Default setting: LR STEREO This setting controls the audio output to the L/R stereo output connectors. Generally, this setting would not be changed, unless you plan to use the unit with a MONO audio device, in which case both stereo channels with be output through each jack. SPDIF Default setting: SPDIF / RAW SPDIF (Sony/Philips Digital InterFace) refers to the digital audio format used by most consumer electronics equipment, as well as the Coaxial and Optical Digital Audio Output connectors on this unit. If you are using only the Stereo Audio Outputs, this setting is not applicable. The DIGITAL setting is used with receivers capable of Dolby Digital 5.1 or DTS 5.1 channel decoding, while the PCM setting is usually reserved for two channel equipment. OUTPUT FORMAT Default setting: NTSC Your DVD Player will work with TVs based on the NTSC and PAL standards, as well as TVs designed to function with both standards, or “Multi” models. NTSC is the standard TV system used in the USA, Canada, Japan and many other countries. The PAL TV system is used in Europe, Africa and the Middle East, among other places. Refer to your TV’s documentation to make sure which model you have. 36 THE DVD RECORDER SETUP MENU PASSWORD System Setup SETUP SYSTEM SETUP Language Video Setup Audio Setup System Setup Disc Media Record Mode Timer Record Channel Search Add/Del Channel Cable/Antenna Date and Time Version Parental Level Password Factory Reset Screen Saver Auto Shutdown You must setup a PASSWORD to use the Parental Level options. When you FIRST attempt to use the Parental Control, you are prompted to create a NEW PASSWORD. Choose any 5Digit number for your password and press ENTER. Enter the password again to confirm. After your password is setup, use the PASSWORD menu option to change your existing password. You will be prompted to enter the OLD password, then the NEW password twice to confirm. If you should forget your password, you may use the MASTER PASSWORD of 98201 in place of the old password. ! Note on Parental Security CHANNEL SEARCH Default setting: CONFIRM Confirm the Channel Search to automatically scan for available channels. The unit saves those channels received at sufficient signal strength. To cancel Channel Search, choose CANCEL. Remember to keep in mind that since the MASTER PASSWORD is listed above, your player may not be secure if this manual is accessible by your children. FACTORY RESET ADD/DEL CHs Default setting: CONFIRM Use this option to RESET the unit to FACTORY DEFAULTS. All settings will be reset, including the DATE and TIME. All stored CHANNELS will be lost. Choose CANCEL to maintain your settings. Allows you to manually add or delete channels from the tuner’s channel list. Press the RIGHT ARROW key for subsequent pages of channel choices. CABLE/ANT Default setting: ANTENNA Choose your TV connection. The default is ANTENNA, used with a typical air antenna receiving local stations. If you are using a Cable TV provider, choose CABLE. SCREEN SAVER Default setting: OFF You can enable the built-in SCREEN SAVER. When enabled by choosing ON, the Screen Saver will start if the unit remains paused for a period of about 5 minutes, protecting your TV from possible “screen burn” that could occur when a still image is displayed for too long. DATE AND TIME Set the Date and Time used by the unit for Timer Recording purposes. Use the UP/DOWN ARROW keys to increase or decrease the Date/Time values and LEFT/RIGHT ARROW keys to move to a different field. Press ENTER to confirm and save. AUTO SHUTDOWN Default setting: OFF With AUTO SHUTDOWN enabled, the unit will automatically go into STANDBY mode after a period of about 30 minutes of inactivity. Choose ON to enable. *This setting requires that the SCREEN SAVER be enabled. VERSION Displays information about the unit’s Firmware and Hardware versions. This information may be asked for by Tech Support for trouble-shooting purposes. PARENTAL LEVEL Default setting: NO LIMIT The Parental Level allows you to limit the use of your DVD Player to only those DVD discs that do not exceed the rating you specify. Choices include G, PG, PG-13, R, NC-17 and NO LIMIT (All discs play). When the parental level is set, DVD discs that support Parental Control will play only after the correct password has been entered. Non-supporting discs, however, will be “immune” to lockout. The FIRST TIME you attempt to change the parental level setting, you are prompted to setup a password. After this, you will be prompted to enter the password you created in order to change the parental level. For more info, see PASSWORD, covered next. 37 THE DVD RECORDER SETUP MENU Disc Media Options SETUP DISC MEDIA Language Video Setup Audio Setup System Setup Disc Media Record Mode Timer Record Finalize Erase Timer Record Entry 01 02 03 SETUP 04 05 Language 06 Video Setup07 Audio Setup08 System Setup Disc Media Record Mode Timer Record FINALIZE Default setting: CONFIRM This option is only available when a DVD+R disc is being used. DVD+R discs must be FINALIZED before they will be playable in standard DVD Players. You must make all recordings on a disc BEFORE Finalization, since no more recordings can be added after this process. Choose CONFIRM to Finalize a disc, or CANCEL to abort. Default setting: CONFIRM Available only with DVD+RW discs, use ERASE to completely clear all recordings from the disc. Choose CONFIRM to erase the disc’s contents, or CANCEL to abort. Record Mode Options RECORD MODE Language Video Setup Audio Setup System Setup Disc Media Record Mode Timer Record Record Quality Auto Chapter Start Length Source Speed 20:00 __:__ __:__ __:__ __:__ __:__ __:__ __:__ 1:00 __:__ __:__ __:__ __:__ __:__ __:__ __:__ Ch 036 ______ ______ ______ ______ ______ ______ ______ HQ __ __ __ __ __ __ __ The TIMER RECORD screen allows you to setup 8 scheduled recordings. You can choose the FREQ (when the recordings take place), the START time and LENGTH, the SOURCE used, and the SPEED, or quality mode. For more on setting up Timer Recordings, see the RECORDING chapter. ERASE SETUP Freq Weekly Mon __/__/__ __/__/__ __/__/__ __/__/__ __/__/__ __/__/__ __/__/__ RECORD QUALITY Default setting: HQ Sets the QUALITY mode for recording. The default setting of HQ - HIGH QUALITY - is the highest quality setting, resulting in the best Video and Audio quality, but the shortest maximum recording time. You can choose from a variety of modes, each offering slightly less Video and Audio quality, but more maximum recording time: SP, LP, EP, SLP. For more on the RECORD QUALITY setting, see the RECORDING chapter. AUTO CHAPTER Default setting: OFF You can set the unit to automatically add a CHAPTER MARKER approximately every 5 minutes during your recordings by changing this setting to ON. Chapter Markers make your recordings more usable by providing a way to skip to next or previous video segments. Alternatively, you may manually create your own Chapter Markers - see EDITING YOUR RECORDINGS. 38 TROUBLESHOOTING The Disc Doesn’t Eject Common Problems & Solutions If the player is in Standby Mode with the glowing LED to the left of the disc tray, the disc will not eject. Turn the player on with the Remote Control and then eject the disc. Playback Distorted Picture when Connected to a VCR The DVD Recorder Does Not Power On This DVD Player is built with Macrovision copyprotection. This will distort the signal when used with VCRs. Connect the player directly to the TV. The AC Power cord may be loose or not plugged in. Make sure the power cord is secure in the AC socket and the connector on the back of the player. The unit may be in Standby Mode. Turn the player on with the remote POWER button, or turn the unit off with the back power switch, wait for a few seconds, then turn the unit back on. There must be a pause between powering the unit down and back on of a few seconds. Recording Recording Will Not Start The Video Input Source may be protected with MacroVision Copy Protection. The disc may already contain recordings of a different TV System type - PAL or NTSC. If the disc already contains a PAL recording, you cannot record from an NTSC source, and vice versa. The maximum number of titles - 48 - may have been reached. If the disc is a DVD+R, it may already be FINALIZED. A Specific Disc Does Not Play The disc may be dirty. Try cleaning the disc. Make sure the disc is not in upside-down The REGION CODE of the disc may not match that of the player. In this case, the disc cannot be used. The Remote Control Does Not Function Make sure you’re aiming the remote directly at the player’s remote sensor, located in the front display. Make sure there are no obstacles between the remote and the player. The batteries may be drained. Try changing the batteries in the remote. You could be using the remote too far away. Try within 4 meters of the player. The Disc Cannot be Erased The disc is not a DVD+RW disc. The disc may be dirty. Try cleaning the disc. Recordings Do Not Play on Other DVD Players If the disc is a DVD+R, make sure it has been FINALIZED. The DVD Player may not support DVD+R/RW discs. There is No Picture on the TV Screen Timer Recording Does Not Start. Make sure the connections from the player to the TV are secure. Verify that the TV’s channel is set to match the video input you’re using. Refer to the TV’s documentation. On most TVs the “Aux In”, “Video In” or “A/V In” channel should match the video input connector. If you’re using the S-Video connector, the TV may have a separate input channel for this type. The Time/Date is invalid or conflicts with another schedule. The Time/Date settings of the Recorder are incorrect. Set the Time/Date in SETUP. The specified Video Input Source is unavailable. The disc is out of space. Hidden Chapters Cannot be Edited. You must select PLAY FULL TITLE from the EDIT MENU in the Title Screen to have access to Hidden Chapters. The Picture Appears Stretched or Squeezed The Video Aspect Ratio may be set wrong for your Television type. Enter the SETUP MENU and select the VIDEO OUTPUT MENU. Try changing the ASPECT setting to 4:3 PanScan (Pan & Scan) if you are using a standard TV, or 16:9 Wide if your TV is a Wide-Screen type. 39 SPECIFICATIONS DISC TYPES SUPPORTED DVD+RW. . . . . . . . . . . . . . . . . . . . . . Playback, Recording DVD+R . . . . . . . . . . . . . . . . . . . . . . . Playback, Recording DVD-RW . . . . . . . . . . . . . . . . . . . . . . . . . . . . . . . Playback DVD-R . . . . . . . . . . . . . . . . . . . . . . . . . . . . . . . . . Playback DVD-Video . . . . . . . . . . . . . . . . . . . . . . . . . . . . . . Playback VCD/SVCD . . . . . . . . . . . . . . . . . . . . . . . . . . . . . Playback CD-Audio . . . . . . . . . . . . . . . . . . . . . . . . . . . . . . . Playback CD-R/RW . . . . . . . . . . . . . . . . . . . . . . . . . . . . . . . Playback VIDEO PERFORMANCE Resolution . . . 720x480 NTSC, 720x576 PAL in HQ Mode DA Converter . . . . . . . . . . . . . . . . . . . . . . . . . . . . . . . 10-bit AD Converter. . . . . . . . . . . . . . . . . . . . . . . . . . . . . . . . 9-bit Video Outputs. . . . . . . . . Composite, S-Video, Component Scanning. . . . . . . . . . . . . . . . . Progressive Scan, Interlaced Laser . . . . . . . . . . . . . . . . . . . . . . . . . . . . . . . . . . . . . 650nm AUDIO PERFORMANCE DA Converter . . . . . . . . . . . . . . . . . . . . . . . . . . . . . . . 24 bit AD Converter . . . . . . . . . . . . . . . . . . . . . . . . . . . . . . . 24 bit DVD Linear Sound RECORDING Media . . . . . . . . . . . . . . . . . . . . . . . . . DVD+R, DVD+RW Diameter . . . . . . . . . . . . . . . . . . . . . . . . . . . . . . . . . . . 12cm Capacity . . . . . . . . . . . . . . . . . . . . . . . . . . . . . . . . . . 4.7GB Recording Time . . . . . . . . Maximum 6 Hours (SLP Mode) TV Systems . . . . . . . . . . . . . . . . . . . . . . . . . . . . NTSC/PAL Digital Compression . . . . . . . . . . . . . . . MPEG 2, MPEG 1 Recording Types . . . . . . . . . . . . . . . . . . . . . . . . Live, Timer Max Simultaneous Timer Recordings . . . . . . . . . . . . . . . . 8 Recording Features . . . . . . . . . . . . . . . . . . . . . . . . . . . . . . . 48kHz Sampling . . . . . . . . . . . . . . . . . . . . . 4Hz to 22kHz 96kHz Sampling . . . . . . . . . . . . . . . . . . . . . 4Hz to 44kHz Audio CD . . . . . . . . . . . . . . . . . . . . . . . . . . 4Hz to 20kHz Signal to Noise Ratio . . . . . . . . . . . . . . . . . . . . . . . . >90dB Audio Dynamic Range . . . . . . . . . . . . . . . . . . . . . . . >90dB Harmonic Distortion . . . . . . . . . . . . . < 0.001% (W.PEAK) OUTPUT CONNECTIONS Component Video Out . . . . . . . . . . . . . . . . . . . . . . . . . . . . Pause Record, Auto-Insert Chapter, Index Screen Navigator, Auto-Hide Chapter, Multi Record Modes Editing Features. . . . . . . . . . . . . . . . . . . . . . . . . . . . . . . . . . Erase Disc, Change Index Picture, Hide Chapter, Show Chapter, Edit Title Name PLAYBACK MP3 & JPG Navigator Fast Forward / Reverse to x60 Slow Motion Playback Repeat Playback (Chapter/Title/Disc & A-B) Commercial Skip Function Zoom to x4 with Panning Y . . . . . . . . . . . . . . . . 1.0Vp-p (75 Ohm), Negative Sync Pb/Pr . . . . . . . . . . . . . . . . . . . . . . . . . . .7Vp-p (75 Ohm) S-Video Out. . . . . . . . . . . . . . . . Mini DIN 4-Pin (75 Ohm) Composite Video Out . . . . One Pin Jack, 1Vp-p (75 Ohm) Coaxial Digital Out. . . . . . One Pin Jack, .5Vp-p (75 Ohm) Optical Digital Out . . . . . . . . . Standard Optical Connector Analog Audio Out. . . . . . . . . . . . . . . 2.0VRMS (470 Ohm) INPUT CONNECTIONS S-Video In (Front/Rear). . . . . . . Mini DIN 4-Pin (75 Ohm) Composite Video In (Front/Rear) . Cinch, 1Vp-p (75 Ohm) Stereo Audio In (Front/Rear) . . . . . . . 1.2VRMS (47 Ohm) PHYSICAL Operating Conditions . . . . . . . . . . . . . . . . . . . . 5°C to 35°C Power Supply. . . . . . . . . . . . . . . AC 100V~230V, 50/60Hz Power Consumption. . . . . . . . . . . . . . . . . . . . . . . . . . . 60W Dimensions . . . . . . 65mm x 429mm x 348mm (H x L x D) Weight. . . . . . . . . . . . . . . . . . . . . . . . . . . . . . . . . . . . 4.88kg *Specifications subject to change without notice. Part#: 1500C 40 INDEX a-b repeat . . . . . . . . . . . . . . . . . . . . . . . . . . . . . . . . . . . . 19 angles (multi-angle playback) . . . . . . . . . . . . . . . . . . . . 19 antenna. . . . . . . . . . . . . . . . . . . . . . . . . . . . . . . . . . . . . . 13 audio button . . . . . . . . . . . . . . . . . . . . . . . . . . . . . . . . . . 20 audio outputs . . . . . . . . . . . . . . . . . . . . . . . . . . . . . . . . . 13 audio settings . . . . . . . . . . . . . . . . . . . . . . . . . . . . . . . . . 36 auto insert chapter . . . . . . . . . . . . . . . . . . . . . . . . . . . . . 24 a/v inputs . . . . . . . . . . . . . . . . . . . . . . . . . . . . . . . . . . . . 14 make compatible . . . . . . . . . . . . . . . . . . . . . . . . . . . . . . 30 menu button . . . . . . . . . . . . . . . . . . . . . . . . . . . . . . . . . . 16 messages (recording) . . . . . . . . . . . . . . . . . . . . . . . . . . . 29 mp3 files . . . . . . . . . . . . . . . . . . . . . . . . . . . . . . . . . . . . 22 mute button . . . . . . . . . . . . . . . . . . . . . . . . . . . . . . . . . . 20 number buttons . . . . . . . . . . . . . . . . . . . . . . . . . . . . . . . . 7 overwriting titles . . . . . . . . . . . . . . . . . . . . . . . . . . . . . . 27 batteries . . . . . . . . . . . . . . . . . . . . . . . . . . . . . . . . . . . . . . 6 back panel . . . . . . . . . . . . . . . . . . . . . . . . . . . . . . . . . . . 10 parental level . . . . . . . . . . . . . . . . . . . . . . . . . . . . . . . . . 37 password . . . . . . . . . . . . . . . . . . . . . . . . . . . . . . . . . . . . 27 play full title. . . . . . . . . . . . . . . . . . . . . . . . . . . . . . . . . . 30 power . . . . . . . . . . . . . . . . . . . . . . . . . . . . . . . . . . . . . . . 15 power cord . . . . . . . . . . . . . . . . . . . . . . . . . . . . . . . . . . . 15 chapters auto insert . . . . . . . . . . . . . . . . . . . . . . . . . . . . . . . . . . 24 remove . . . . . . . . . . . . . . . . . . . . . . . . . . . . . . . . . . . . 32 hide . . . . . . . . . . . . . . . . . . . . . . . . . . . . . . . . . . . . 32-33 coaxial output. . . . . . . . . . . . . . . . . . . . . . . . . . . . . . . . . 13 commercial skip. . . . . . . . . . . . . . . . . . . . . . . . . . . . . . . 17 component video . . . . . . . . . . . . . . . . . . . . . . . . . . . . . . 12 composite video . . . . . . . . . . . . . . . . . . . . . . . . . . . . . . . 11 connections antenna . . . . . . . . . . . . . . . . . . . . . . . . . . . . . . . . . . . . 13 audio outputs. . . . . . . . . . . . . . . . . . . . . . . . . . . . . . . . 13 recording inputs . . . . . . . . . . . . . . . . . . . . . . . . . . . . . 14 TV . . . . . . . . . . . . . . . . . . . . . . . . . . . . . . . . . . . . . 11-12 contents (package) . . . . . . . . . . . . . . . . . . . . . . . . . . . . . . 6 copy protection . . . . . . . . . . . . . . . . . . . . . . . . . . . . . . . 23 c-skip button . . . . . . . . . . . . . . . . . . . . . . . . . . . . . . . . . 17 recording . . . . . . . . . . . . . . . . . . . . . . . . . . . . . . . . . . . . 23 record quality . . . . . . . . . . . . . . . . . . . . . . . . . . . . . . . . . 24 region code. . . . . . . . . . . . . . . . . . . . . . . . . . . . . . . . . . . . 5 remote control preparing . . . . . . . . . . . . . . . . . . . . . . . . . . . . . . . . . . . . 6 buttons. . . . . . . . . . . . . . . . . . . . . . . . . . . . . . . . . . . . . . 7 using . . . . . . . . . . . . . . . . . . . . . . . . . . . . . . . . . . . . . . . 6 repeat playback . . . . . . . . . . . . . . . . . . . . . . . . . . . . . . . 18 reset factory defaults . . . . . . . . . . . . . . . . . . . . . . . . . . . . . . 37 video settings . . . . . . . . . . . . . . . . . . . . . . . . . . . . . . . 12 rf modulator . . . . . . . . . . . . . . . . . . . . . . . . . . . . . . . . . . 11 discs . . . . . . . . . . . . . . . . . . . . . . . . . . . . . . . . . . . . . . . . . 5 display button . . . . . . . . . . . . . . . . . . . . . . . . . . . . . . 18,20 display (VFD) . . . . . . . . . . . . . . . . . . . . . . . . . . . . . . . . . 9 dvd+r . . . . . . . . . . . . . . . . . . . . . . . . . . . . . . . . . . . . . . . 23 dvd+rw. . . . . . . . . . . . . . . . . . . . . . . . . . . . . . . . . . . . . . 23 safety instructions . . . . . . . . . . . . . . . . . . . . . . . . . . . . . . 2 scanning channels . . . . . . . . . . . . . . . . . . . . . . . . . . . . . 25 screen saver . . . . . . . . . . . . . . . . . . . . . . . . . . . . . . . . . . 17 setup menu . . . . . . . . . . . . . . . . . . . . . . . . . . . . . . . . 35-38 skip ahead/back . . . . . . . . . . . . . . . . . . . . . . . . . . . . . . . 17 slow motion . . . . . . . . . . . . . . . . . . . . . . . . . . . . . . . . . . 18 specifications . . . . . . . . . . . . . . . . . . . . . . . . . . . . . . . . . 40 standby power . . . . . . . . . . . . . . . . . . . . . . . . . . . . . . . . 15 still picture . . . . . . . . . . . . . . . . . . . . . . . . . . . . . . . . . . . 17 stop. . . . . . . . . . . . . . . . . . . . . . . . . . . . . . . . . . . . . . . . . 17 storing channels . . . . . . . . . . . . . . . . . . . . . . . . . . . . . . . 25 subtitles . . . . . . . . . . . . . . . . . . . . . . . . . . . . . . . . . . . . . 20 s-video . . . . . . . . . . . . . . . . . . . . . . . . . . . . . . . . . . . . . . 12 editing recordings . . . . . . . . . . . . . . . . . . . . . . . . . . . . . 30 enter button . . . . . . . . . . . . . . . . . . . . . . . . . . . . . . . . . . . 7 erase disc. . . . . . . . . . . . . . . . . . . . . . . . . . . . . . . . . . . . . 34,38 title . . . . . . . . . . . . . . . . . . . . . . . . . . . . . . . . . . . . . . . 30 fast forward . . . . . . . . . . . . . . . . . . . . . . . . . . . . . . . . . . 17 features. . . . . . . . . . . . . . . . . . . . . . . . . . . . . . . . . . . . . . . 4 finalize . . . . . . . . . . . . . . . . . . . . . . . . . . . . . . . . . . . 30,38 front panel . . . . . . . . . . . . . . . . . . . . . . . . . . . . . . . . . . . . 8 table of contents. . . . . . . . . . . . . . . . . . . . . . . . . . . . . . . . 3 timer recordings . . . . . . . . . . . . . . . . . . . . . . . . . . . . . . . 28 troubleshooting . . . . . . . . . . . . . . . . . . . . . . . . . . . . . . . 39 tv tuner setup . . . . . . . . . . . . . . . . . . . . . . . . . . . . . . . . . 25 hide button . . . . . . . . . . . . . . . . . . . . . . . . . . . . . . . . . . . 33 hide chapters. . . . . . . . . . . . . . . . . . . . . . . . . . . . . . . 32-33 insert chapter . . . . . . . . . . . . . . . . . . . . . . . . . . . . . . . . . 31 video outputs . . . . . . . . . . . . . . . . . . . . . . . . . . . . . . 11-12 video settings . . . . . . . . . . . . . . . . . . . . . . . . . . . . . . . . . 36 jpg images . . . . . . . . . . . . . . . . . . . . . . . . . . . . . . . . . . . 21 zoom . . . . . . . . . . . . . . . . . . . . . . . . . . . . . . . . . . . . . . . 19 language settings . . . . . . . . . . . . . . . . . . . . . . . . . . . . . . 35 live recording . . . . . . . . . . . . . . . . . . . . . . . . . . . . . . . . . 26 41