1
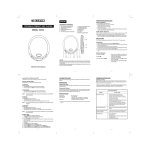
DIGITAL ANTI-SHOCK OPERATION TROUBLE SHOOTING GUIDE The digital ELECTRONIC SHOCK PROTECTION function uses semiconductor memory to prevent the second from skipping when the unit is subjected to shocks and vibration during play. Cleaning the Disc When the PLAY/PAUSE button is pressed and the power turns on, the digital Electronic Shock Protection function turns on automatically. and the function is initialized, when The display will show display, the data buffer is full. shows in the When a disc becomes dirty, clean it with a cleaning cloth. Wipe the disc from the center out. Note - Do not use solvents such as benzine, thinner, commercially available cleaners or anti-static spray intended for analogue discs. CD 290 ** Should you experience difficulties in the use of this player please refer to the following chart before contacting your dealer or the place of purchase. It will give approximately 45 seconds of protection against interruption of sound output, if the player is subjected to shocks of more than 45 seconds duration, some interruption of sound output will occur, this is normal and to be expected, the sound will resume once the player has stabilized from the shock. PORTABLE COMPACT DISC PLAYER WITH 45 SECONDS ANTI-SHOCK SYSTEM AND PLL AM/FM STEREO RADIO To turn this function off, press ASP button once, the ESP indicator will disappear. MAINTENANCE Cleaning the Lens If the lens becomes dusty, clean it with camera lens blower. Be careful not to scratch the surface of the lens. Cleaning the Cabinet From time to time, clean the cabinet with a soft dry cloth. For more stubborn stains, slightly moisten the cloth with water or a mild detergent solution. Never use benzene, alcohol or other solvents as they may damage the finish of the cabinet. SPECIFICATIONS RADIO Frequency range CD Output Power Freq. Response Power Dimensions : AM 531 - 1611kHz FM 88 - 108MHz : 20MW (32 ) : 100 ~ 20000 Hz : DC 4.5V external and size “AA” batteries 1.5V x 2, UM-3, HP-7, R6 : 130mm(W) x 138mm(D) x 30mm(H) ** For improvement purposes, specification and design are subject to change without notice. ** INSTRUCTION MANUAL — 6 — —7— — 1 — LOCATION OF CONTROLS PREPARATIONS BEFORE USING 4. Repeat steps 1 to 3 to store a radio station into the rest of the Preset Memories. 1. Battery Installation B. To Recall a Station 1. Press the BAND BUTTON for the AM or FM radio band. 2. Press MEM UP or MEM DN buttons to recall preset stations. 2. 3. 4. 5. 6. 7. 8. SKIP / SEARCH DOWN / TUN DN BUTTON SKIP / SEARCH UP / TUN UP BUTTON PROGRAM / MEMORY BUTTON MODE/STEREO/MONO BUTTON BAND BUTTON MEMORY UP BUTTON DC JACK PLAY / PAUSE BUTTON 9. 10. 11. 12. 13. 14. 15. STOP / OFF BUTTON MEMORY DOWN BUTTON OPEN SWITCH HEADPHONE JACK VOLUME CONTROL B.B.S. SWITCH (BASS BOOS SWITCH) HOLD SWITCH AC Power Adaptor $ 1. Plug the DC output of the adaptor to the DC Jack. 2. Connect the adaptor (4.5V/600mA) to a power outlet. Make sure the voltage is compatible. % ' _ + # B A ND O D M ! ./M ST E PO G R O. + M EM. ! " _ TU N. UP # This CD player is designed to play the 8cm and 12cm compact disc without using adaptor. RADIO RECEPTION Getting Start 1. Insert the plug of your headphone into the PHONE JACK. 2. Press the BAND BUTTON for the AM or FM radio band as shown on the LCD Panel. The frequency reading will be displayed. 3. Press the TUN DN BUTTON or TUN UP BUTTON briefly to tune in the desired radio station manually. 4. Keep the TUN DN BUTTON or TUN UP BUTTON depressed for more than 1 second and then release will activate the auto-tuning function of the digital tuner. When a radio station of sufficient strength is found, auto-tuning will stop automatically and the radio station will be tuned in. The Frequency Reading of the radio station will be displayed on the LCD Panel . When a FM stereo program is being received, the STEREO INDICATOR will appear. 5. Press MODE/STEREO/MONO BUTTON cyclically to select FM MONO MODE or STEREO MODE. 6. Adjust the VOLUME CONTROL to obtain the desired sound level. 7. Slide the BASS BOOST SWITCH to 'ON' for enhanced bass effect of the radio program. 8. When you wish to turn the Digital Tuner 'OFF', press the STOP BUTTON. IMPORTANT : Since movement of the CD mechanism and the sensitive circuitry may cause interference to the radio tuner nearby, switch this unit off while operating other radio devices. — 2 — 1. Insert the headphone/earphone plug to PHONE JACK. 2. Push the open switch to right side, and then the door open, put a disc into the CD compartment with label side upward. 3. Push the disc gently around the centre area until it clicks so that the disc fits into the pivot. (To remove the disc : Pick up the disc, holding the edge, while pressing the pivot gently.) 4. Close the door and press the Play/Pause Button once. 5. The Display will show the total number of tracks of the disc, then begin to play the first track. General Operation Play/Pause Buttons Stop Button Skip / Search Buttons The digital tuner has a capacity of 10 random preset stations for AM and 20 random preset stations for FM bands which allow you to store and recall your favourite AM or FM radio stations at the touch of a button. A. To Store a Station 1. Tune in the station you want to store in preset memory by manual or auto tuning. 2. Press the PROG / MEM BUTTON and the PROG INDICATOR will flash in the LCD panel.(Press again for cancel) 3. Press MEM UP or MEM DN BUTTON to select channel no. #1 to #10 for AM and #1 to #20 for FM, press the PROG / MEM BUTTON again to store the current radio station into the preset memory. — ENGLISH 2 — — 3 — NOTE -To cancel REPEAT simply press the MODE button until the repeat indicator disappears. B. Intro Scan In STOP mode • Press the MODE button three times. • The INTRO indicator will appear in the display. • Press the PLAY button to play the first 10 seconds of each track on the disc. NOTE -To cancel INTRO SCAN simply press the MODE button until the INTRO indicator disappears. Set the Hold Switch to “ON” position, all the buttons will be locked. Before operation, be sure to set the switch to “OFF” position, for normal operation. Storing and Recalling Radio Stations in Preset Memory CAUTION USE OF CONTROLS OR ADJUSTMENTS OR PERFORMANCE OF PROCEDURES OTHER THAN THOSE SPECIFIED HEREIN MAY RESULT IN HAZARDOUS RADIATION EXPOSURE. THIS SHOULD NOT BE ADJUSTED OR REPAIRED BY ANYONE EXCEPT QUALIFIED SERVICE PERSONNEL. NOTES - The headphone cord works as a FM antenna. To insure maximum FM tuner sensitivity, always keep the headphone cord fully extended. Do not wind or fold the headphone cord while listening to the radio. - When tuning in AM reception, be sure to place the unit in a horizontal position. For maximum AM sensitivity, keep turning the unit slowly while keeping it horizontal until the best reception is obtained. DISC PLAYING Hold Switch & " 1. Open Battery Compartment cover. 2. Insert 2 batteries (LR6, “AA” size, or equivalent) in the correct polarity as indicated. (Heavy duty batteries are recommended.) 3. Close the cover properly. During PLAY mode • Press the MODE button twice to play the entire disc repeatedly. • The repeat indicator will appear in the display. — Press once to start playback in the original order. Press again to stop the disc play temporarily. — Press once to stop playback. Press again to turn off power C. Random Play In STOP mode • Press the MODE button four times. • The SHUF indicator will appear in the display. • Press the PLAY button, all the tracks on a disc to be played in a random sequence. NOTE -To cancel RANDOM PLAY simply press the MODE button until the SHUF indicator disappears. Program Play 1. 2. 3. 4. 5. 6. Press the PROG button when the unit is in the stop mode until PROG show on the display. * The PROG indicator flashing appears on the display. Press or to select the desired track. Press the PROG button to enter the track into memory. The program numbers which will be increment one step. Repeat step 2 and 3 to program the order of more tracks can be programmed into memory. Press to start the program play. To erase the program, open the door or turn off the power. — Press once to skip to next track or back to previous track . — Press continuiously to search forward or backward . Various Playing Modes MODE Button — There are 3 kind of function : A. Repeat Play During PLAY mode • Press the MODE button once to play single track repeatedly. • The repeat indicator 1 will appear in the display. — 4 — — 5 — CD 290 MODE DEMPLOI 6 7 1 AVANT DE METTRE LUNITE EN MARCHE LOCALISATION DES COMMANDES 1. SAUT / RECHERCHE VERS LARRIERE / SYNTONISATION VERS LARRIERE. 2. SALTO / RICERCA AVANZATA / SINTONIZZAZIONE IN AVANTI. 3. BOUTON DE MODE ET PROGRAMMATION 4. MODE STEREO / MONO 5. BANDE (AM/FM) 6. MEMOIRE VERS LE HAUT 7. ENTREE DE LADAPTATEUR 8. BOUTON PLAY (MISE EN MARCHE) ET PAUSE. 9. STOP / OFF 10. MEMOIRE VERS LE BAS 11. INTERRUPTEUR POUR OUVRIR LE CD 12. ENTREE DES ECOUTEURS 13. REGLAGE DU VOLUME 14. INTERRUPTEUR DE REGLAGE DES GRAVES (B.B.S) 15. INTERRUPTEUR DE BLOCAGE. $ Installation des piles 1. Ouvrez le couvercle du compartiment à piles. 2. Introduisez 2 piles (LR6, de taille AA, ou équivalent) avec la polarité correcte comme indiqué (Les piles de haut rendement sont recommandées). 3. Fermez le couvercle correctement. & ' B. Lire une fréquence enregistrée 1. Appuyez sur le bouton de AM ou FM pour sélectionner la bande. 2. Appuyez sur les boutons de mémoire vers le haut ou vers le bas pour rechercher les fréquences antérieurement enregistrées. Adaptateur dalimentation AC 1. Branchez la sortie DC de ladaptateur dans lentrée DC de lunité. 2. Connectez ladaptateur (4.5V / 500mA) à une prise de courant dalimentation. Assurez-vous que le voltage soit compatible. % 2. Appuyez sur le bouton de mémoire / programmation (4) et lindicateur de programmation clignotera à lécran (appuyer une deuxième fois pour annuler). 3. Appuyez sur les boutons de mémoire vers le haut ou vers le bas pour sélectionne un canal de 1 à 10 pour AM et de 1 à 20 pour FM. Appuyez une deuxième fois sur le bouton de mémoire / programmation pour garder la fréquence sélectionnée en mémoire. 4. Refaites les étapes de 1 à 3 pour garder plus de fréquences radio en mémoire. REMARQUES : Interrupteur de blocage Réglez linterrupteur de blocage sur la position on. Tous les boutons seront bloqués. Avant de mettre lappareil en marche, assurez-vous de régler linterrupteur de blocage sur la position off. - RECEPTION DE LA RADIO _ + # O M ! ./M ST D E 1. 2. PO R G O. 3. + M EM. ! " _ TU N. UP B A ND " 4. # PRECAUTION LUTILISATION DES COMMANDES OU MODIFICATIONS OU FONCTIONNEMENT DES PROCEDURES DISTINCTES DE CELLES SPECIFIEES DANS LA PRESENTE POURRAIT ABOUTIR A UNE EXPOSITION DE RADIATION DANGEREUSE. CE MODELE NE DEVRAIT ETRE NI REGLE NI REPARE PAR UNE PERSONNE NAPPARTENANT PAS A UN PERSONNEL DE SERVICE QUALIFIE. IMPORTANT : Le mouvement du mécanisme du CD et la sensibilité de son circuit peut provoquer des interférences sur les appareils de radio se situant à proximité. Veuillez donc déconnecter cette unité lorsque vous utilisez dautres appareils de radio. 2 5. 6. 7. 8. Introduisez les écouteurs dans lentrée des écouteurs du CD. Appuyez sur le bouton de Bande pour sélectionner AM ou FM comme indiqué à lécran. La lecture des fréquences safficher aussi à lécran. Appuyez sur le bouton de syntonisation (vers lavant ou vers larrière) pour sélectionner la fréquence que vous désirez. Maintenez le bouton de syntonisation appuyé (vers lavant ou vers larrière) pendant plus dune seconde puis lâchez le bouton. La fonction de syntonisation automatique du tuner digital numérique sera activée. Lorsquune fréquence radio a une syntonisation suffisamment forte, la syntonisation automatique sarrêtera et la radio se mettra en marche sur cette fréquence. La fréquence radio saffichera à lécran. Lorsque vous recevrez une fréquence FM stéréo, lindicateur stéréo silluminera. Appuyez sur le bouton Mode stéréo / mono pour sélectionner le mode FM stéréo ou FM mono. Réglez le volume pour obtenir le volume souhaité. Faites glisser linterrupteur des basses sur la position on pour régler les sons de basse fréquence. Lorsque vous désirez éteindre le tuner numérique, appuyez sur le bouton STOP. Mémoriser les fréquences radio Le tuner numérique a une capacité de 10 fréquences AM et 20 FM vous permettant denregistrer et postérieurement récupérer vos fréquences favorites. A. Enregistrer une fréquence 1. Syntonisez la fréquence que vous souhaitez garder en mémoire manuellement ou par le biais de la recherche automatique numérique. 3 - Le câble des écouteurs fonctionne comme une antenne FM. Pour vous assurer la meilleure réception en FM, maintenez le câble de lécouteur toujours allumé. Ne le pliez pas pendant lécoute de la radio. Lorsque vous syntonisez en AM, assurez-vous de bien positionner lunité en position horizontale. Pour obtenir une meilleure réception AM, déplacez lentement lunité en la maintenant en position horizontale jusquà ce que vous obteniez la meilleure réception. LECTURE DE DISQUES Ce lecteur CD a été conçu pour lire des disques compact de 8 cm et 12 cm sans utiliser dadaptateur. Début 1. Introduisez lécouteur dans lentrée écouteurs de lunité. 2. Faites glisser le bouton douverture jusquau côté droit. La porte du CD souvrira. Placez un disque à lintérieur du compartiment de CD avec le côté de létiquette vers le haut. 3. Appuyez doucement sur le disque autour de la surface centrale jusquà ce que vous entendiez un click pour que le disque soit bien bloqué dans laxe. (Pour extraire le disque : Prenez le disque par le bord, tout en appuyant doucement sur le centre). 4. Fermez le couvercle et appuyez une fois sur le bouton Play / Pause. 5. Lécran affichera le nombre total de chansons du disque puis commencera à lire la première chanson. Fonctionnement Général Boutons Play / Pause : - Appuyez une fois pour commencer la lecture dans lordre original. 4 - Appuyez une deuxième fois pour arrêter la lecture du disque temporairement. Bouton Stop : - Appuyez une fois pour arrêter la lecture. - Appuyez une deuxième fois pour éteindre lunité. Boutons Saut / Recherche : - Appuyer une fois pour sauter à la chanson suivante ou revenir à la chanson antérieure. - Appuyer sans vous arrêter pour rechercher vers lavant ou vers larrière. PLUSIEURS MODES DE LECTURE Bouton de Mode / Programmation Il existe 3 types de fonctions : A. Lecture répétée Pendant le mode Play · Appuyez sur le bouton de Mode une fois pour lire la chanson actuelle en boucle. 1 apparaîtra à lécran. Lindicateur de répétition Pendant le mode Play · Appuyez deux fois sur le bouton Mode pour lire le disque complet en boucle. ALL apparaîtra à lécran. · Lindicateur de répétition REMARQUE : Pour annuler la fonction de Répétition, appuyez sur le bouton de Mode jusquà ce que disparaisse lindicateur de Répétition. B. Intro Scan Pendant le mode STOP · Appuyez 3 fois sur le bouton Mode · Lindicateur INTRO apparaîtra à lécran. · Appuyez sur le bouton Play pour écouter les 10 premières secondes de chaque chanson du disque. REMARQUE : Pour annuler INTRO SCAN appuyez sur le bouton Mode jusquà ce que lindicateur INTRO disparaisse. C. Lecture aléatoire Pendant le mode STOP · Appuyez 4 fois sur le bouton Mode · Lindicateur SHUF apparaîtra à lécran. · Appuyez sur le bouton Play. Toutes les chansons du disque seront jouées de façon aléatoire. REMARQUE : Pour annuler la fonction Random (lecture aléatoire), appuyez sur le bouton Mode jusquà ce que lindicateur SHUF disparaisse. LECTURE DU PROGRAMME (POUR CDs) 1. En mode Stop, appuyez sur le bouton Mode pour faire une mémoire de programme. PROG apparaîtra à lécran 5