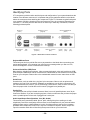
1
User Manual
Congratulations! Your new CTL Computer System is a powerful, state-of-the-art electronic
product that can both increase your productivity and provide you with a new level of
entertainment and educational opportunities.
Your CTL Computer System has been individually hand-assembled and tested by a highly trained
CTL Production Technician. Given proper care and maintenance, your CTL Computer System will
provide you with years of reliable operation. Although you are no doubt eager to get your system
set up and running, spending a few minutes familiarizing yourself with this User Manual will help
to ensure that your system is set up correctly and that you are aware of the resources contained
within should you have any questions at a later point.
NOTE The next few pages contain important information on notational conventions, license
agreements, system configuration, and system warranty. Please read them before doing anything
else with your new CTL computer.
Copyright 1999, 2000, 2001 CTL Corporation.
All Rights Reserved.
Version: 4.7 Last Revision: December 15, 2001
CTL strives to ensure the accuracy and completeness of its documentation. However, CTL Corporation shall not be held
liable for technical or editorial omissions or errors made herein, nor for incidental or consequential damages resulting from
use of this material. CTL reserves the right to make changes to its products and/or documentation without notice or
obligation to previous customers. This document contains proprietary information protected by copyright. No part of this
document may be photocopied or reproduced by any means in any form without prior written permission of CTL
Corporation. CTL and the CTL logo are trademarks of CTL Corporation. IBM, XT, and AT are registered trademarks of
International Business Machines Corporation. Intel and Pentium are registered trademarks, and Celeron and MMX are
trademarks of Intel Corporation. Microsoft and Windows are registered trademarks of Microsoft Corporation in the U.S.
and other countries. Other trade names are the trademarks or registered trademarks of their respective holders.
Important Information
Notes, Cautions, and Warnings
Throughout this guide, blocks of text will be displayed inside two parallel bold lines to indicate a
Note, Caution, or Warning, described below:
NOTE A NOTE details important information to keep in mind. No personal injury or equipment
damage will occur from disregarding a note.
CAUTION! A CAUTION indicates potential damage to hardware or loss of data and how to avoid
the problem.
WARNING!
WARNING! A WARNING indicates the potential for physical injury and the steps you should take
to avoid the problem.
-2-
Typographical and Listing Conventions
The following list defines typographical conventions used to depict specific elements of text used
in this manual:
•
Titles of windows, names of buttons and icons, and menu options that appear on the
display screen are presented in bold.
Example: Click Start
•
Labels that appear on the keyboard keys are enclosed in brackets.
Example: [Enter]
•
Certain functions require you to press a series of keys simultaneously.
Example: [Alt]+[F4]
•
Commands that must be typed are displayed in Courier New font.
Example: cd\letters\business\legal [Enter]
•
•
Lists of items, points to consider, or procedures that do not need to be performed in a
specific order are presented in bullet format:
o
Item 1
o
Item 2
Procedures that must be followed in a specific order are presented in numbered steps:
1. Perform this step first
2. Perform this step second
License Agreements
By turning on your CTL computer you acknowledge that you have read and accepted the license
agreements for all installed software, including but not limited to the operating system,
applications, utilities, and device drivers. If you have not already done so, stop now and read the
license agreements, generally located in the software’s documentation or enclosed with the
software packages.
-3-
System Configuration
Your CTL computer comes fully tested and configured for optimum performance and
compatibility. CTL’s engineers have used considerable expertise and spent a great deal of time in
the installation, configuration, and optimization of your hardware and software. It is important that
you take steps to protect your investment.
Please note the following items:
•
You are responsible for any changes made to the original configuration.
•
You are responsible for reconstructing the original configuration.
•
CTL is specifically not obligated to support any configuration that deviates from the initial
configuration approved by CTL and delivered to you.
•
CTL is specifically not obligated to return the system to its original CTL-approved
configuration or otherwise reconfigure the system except when CTL deems the original
configuration to be faulty. CTL can, for a fee, return your system to its initial configuration
or can integrate additional hardware or software acquired from CTL. Please contact your
Dealer or CTL Representative for more information.
Warranty
CTL’s No Hassle Warranty is designed to be simple and straightforward to make your life easier
should you ever have an issue with a product that you purchase from CTL Corporation or an
Authorized CTL Reseller. CTL Corporation (CTL) warrants this computer to be free from material
defects for the specified warranty period from the purchase date.
Service Under Warranty
Product warranties begin on the date of the original purchase of a specific product from CTL
Corporation or an Authorized CTL Reseller. Any product defect not originating from that of
materials or workmanship will not be considered covered under warranty. Warranty work will not
be covered if the product is not returned in original packaging and with a CTL issued Returned
Merchandise Authorization Number (RMA).
In the event of the failure of a product purchased from CTL within it’s warranty period due to a
defect in material or workmanship, CTL will, at it’s discretion, repair or replace the original product
with a new, refurbished or similar product at no charge to the customer except that the customer
will cover one way freight charge via UPS Ground to a specified CTL center. The product must be
returned in its original packaging and with a copy of the original invoice. In the event that a copy
of the original invoice is not available, if applicable, the warranty period will default to the original
product’s date of manufacture.
This warranty is contingent upon proper use of the product in question and does not cover
products which have been modified or which have been subjected to unusual physical or
electrical stress. Warranty for third party hardware and software, if any, is subject to the third
party's warranty policy. This limited warranty does not include service or repair for damage from
improper installation, abuse or modifications to the product not approved in writing by CTL
Corporation. Any service repair outside the scope of this limited warranty shall be at the rates and
terms of CTL Corporation or its Authorized Service Provider.
This warranty is valid only within the United States.
-4-
Exclusions from CTL Corporation Limited Warranty Programs
All other expressed and implied warranties for CTL products purchased from CTL after January 1,
2002 are hereby disclaimed. If this product is not in good working order as warranted above, CTL
Corporation’s sole and exclusive remedy shall be repair or replacement as stated above. In no
event will CTL Corporation be liable to the customer or any third party for any damages in excess
of the purchase price of the product. This limitation applies to damages of any kind including any
direct or indirect damages, lost profits, lost savings or other special, incidental or consequential
damages. This holds true for situations even if CTL Corporation or an authorized CTL
Corporation representative or dealer has been advised of the possibility of such damages or of
any claim by another party. Some states do not allow the exclusion or limitation of incidental or
consequential damages for some products, so the above limitation or exclusion may not apply to
you. CTL Corporation’s authorized resellers and service providers/partners may be changed,
added or deleted, without notice or liability. CTL Corporation disclaims any authorized resellers
and service provider/partner to the program. This warranty gives you specific legal rights and you
may also have other rights, which may vary from state to state.
Certain Terms and Conditions govern each CTL issued invoice and each CTL dealer application,
and can be found on those documents. Those Terms and Conditions may supercede this
warranty at the sole discretion of CTL Corporation.
Warranty Procedures
A customer that has an issue with a CTL Computer System should first thoroughly read this User
Manual and complete the troubleshooting procedures starting on page 31. The next step is to visit
www.ctlcorp.com/support to check for information and/or updated device drivers. If the issue
remains unresolved after visiting CTL’s web support page, CTL Technical Services should then
be contacted either by visiting www.ctlcorp.com/tech and filling out an issue resolution request
form, or by calling 800.645.8670.
Compatibility
CTL computers have been thoroughly tested to perform in various configurations. Due to the wide
variety of available hardware, operating systems, and software, CTL cannot be held responsible
for incompatibilities that may occur between your CTL computer and other products.
-5-
Your Serial Numbers
Please use the space below to write your system’s serial number.
System Serial Number: ________________________________
Warranty Number:
________________________________
These numbers are located on the back of your computer. Should you ever need to call CTL
Technical Services, you must have this number readily available so that diagnostic information
about your computer can be pulled up.
If You Have Problems
Your system left our facilities in perfect working order. All components have been burned in and
tested. Although unlikely, it is possible for connectors to come lose or for components to become
damaged in shipment. Please contact CTL if you believe your system has been damaged during
shipment.
Problem Resolution
Step 1:
Read this manual and complete the troubleshooting procedures starting on page
31.
Step 2:
Visit www.ctlcorp.com/support to check for information and/or updated device
drivers.
Step 3:
Fill out an Issue Resolution Request form at www.ctlcorp.com/tech. Once we
receive your Issue Resolution Request Form, a technician who will work with you
to resolve your problem will promptly contact you. If you do not have Internet
access, call 800.645.8670 to request Issue Resolution.
CTL Contact Information
24/7 Product Support Web Site
www.ctlcorp.com/support
Issue Resolution Request Form
www.ctlcorp.com/tech
Technical Services [M-F 8AM – 6PM PST]
800.645.8670
Operator [M-F 8AM – 6PM PST]
800.642.3087
Email Address for support issues
[email protected]
Computer Technology Link Corp.
Corporate Offices
9315 SW Nimbus Ave.
Beaverton, OR 97008
-6-
Federal Communications Commission
Radio Frequency Interference
Statement
This equipment generates and uses radio frequency and if not installed and used properly (that
is, in strict accordance with the manufacturer's instructions) may cause interference to radio and
television reception. It has been tested and found to comply with the limits for a Class B FCC
computing device in accordance with the specifications in Subpart J of Part 15 of FCC rules,
which are designed to provide reasonable protection against such interference in a commercial
installation. However, there is no guarantee that interference will not occur in a particular
installation.
If this equipment does cause interference to radio or television reception, which can be
determined by turning the equipment off and on, the user is encouraged to try to correct the
interference by one or more of the following measures:
•
Re-orient the receiving antenna.
•
Relocate the computer with respect to the receiver.
•
Move the computer away from the receiver.
•
Plug the computer into a different outlet so that the computer and receiver are on
different branch circuits.
If necessary, the user should consult the dealer or an experienced radio/television technician for
additional suggestions. The user may find the following booklet prepared by the Federal
Communications Commission helpful:
"How to Identify and Resolve Radio/TV Interference Problems"
This booklet is available from the U.S. Government Printing Office, Washington DC
20402. Stock No. 004-000-00345-4.
NOTE The user must use shielded interface cables in order to maintain FCC compliance.
Changes or modifications not expressly approved by the party responsible for compliance could
void the user's authority to operate the equipment.
-7-
Table of Contents
Chapter 1 CTL Models . . . . . . . . . . . . . . . . . . . . . . . . . . . . . . . . . . . . . . . . . . . . . . . . . . . 10
Valeo™, Vision™ & Vista™
10
Vector™
10
Meridian™
10
Nexus™
10
Chapter 2 Getting Started . . . . . . . . . . . . . . . . . . . . . . . . . . . . . . . . . . . . . . . . . . . . . . . . . 11
Computer Workspace
11
The Ergonomic Workspace
11
Electrical Outlets
12
Unpacking Your System
13
Identifying Ports
14
Making Connections
16
Chapter 3 Using Your Computer . . . . . . . . . . . . . . . . . . . . . . . . . . . . . . . . . . . . . . . . . . . 18
Turning Your System On
18
Turning Your System Off
18
Restarting Your System
18
Should You Leave Your Computer On?
19
General Controls and Indicators
20
Floppy Disks
21
CD-ROM Drive
21
CD-R/CD-RW Drive
23
DVD-ROM Drive
23
CD-RW / DVD Combo Drive
24
Other Media
24
Video Display
24
Universal Serial Bus (USB)
25
-8-
FireWire™ IEEE 1394
26
Small Computer Systems Interface (SCSI)
26
Network Interface Card (NIC)
26
FAX/Modem
27
Operating System
27
Security
28
Power Management
28
Chapter 4 Getting the Most From Your System . . . . . . . . . . . . . . . . . . . . . . . . . . . . . . . 29
How to Get Maximum Performance From Your Computer
29
Chapter 5 Troubleshooting . . . . . . . . . . . . . . . . . . . . . . . . . . . . . . . . . . . . . . . . . . . . . . . 31
Basic Troubleshooting Procedure
31
Operating System Tools
32
System and Hard Drive
32
Display
33
Floppy Drive
33
CD-ROM, CD-RW, DVD-ROM, DVD-RAM & CD-RW / DVD Combo Drives
35
Audio
35
Keyboard
36
Mouse
36
Network Interface Card
37
FAX/Modem
37
Advanced Troubleshooting
38
Quick Restore CD
39
Opening Your Computer Case
40
Index . . . . . . . . . . . . . . . . . . . . . . . . . . . . . . . . . . . . . . . . . . . . . . . . . . . . . . . . . . . . . . . . . . 42
-9-
1. CTL Models
CTL Corporation desktop systems are available in six distinct series: Valeo™, Vision™,
Vista™, Vector™, Meridian™ and Nexus™. The systems in each series have been designed with
specific functions in mind and are geared towards various computing environments.
Valeo, Vision and Vista
The computer systems in the Valeo, Vision and Vista series are highly flexible computer systems
designed to be used in a wide variety of environments including Home, Industrial and Small
Offices.
Vector
Vector Series systems are designed as high performance Engineering workstations. These
systems are full featured and include high-end graphics cards for Computer Assisted Design.
Meridian
The Meridian Series is designed for the professional who needs high availability and ample
processing power for demanding business applications.
Nexus
The CTL Nexus Series of Computer Systems feature our highest level of desktop processing
power for power users who run demanding multiple concurrent applications.
- 10 -
2. Getting Started
This chapter contains information needed to set up your computer for the first time. It includes
information on planning your workspace, ergonomics, unpacking your new computer, and
connecting components and peripherals.
Computer Workspace
It is important that your computer be properly set up in order to protect your system and provide a
comfortable workspace. Some important questions to ask when designating a location for your
new computer:
•
Do you have sufficient grounded power outlets nearby? (Refer to “Electrical Outlets”
found later in this chapter)
•
Do you have a telephone outlet nearby? (Necessary if you purchased a modem)
•
Do you have sufficient workspace for your keyboard, mouse, and monitor?
•
Is your workspace free of excess dust, static, heat, and moisture?
•
Is your workspace ergonomic? (Described under “The Ergonomic Workspace” in the next
section)
CAUTION! It is strongly recommended that you use a multi-outlet power strip with built-in surge
protection. Voltage spikes caused by phenomena such as storms, transmission problems, and
appliances can easily damage your computer.
The Ergonomic Workspace
An ergonomic workspace allows you to work efficiently and comfortably for longer periods of time.
Here are some general ergonomic guidelines and recommendations to keep in mind when setting
up your system:
•
Position your system so that the monitor and keyboard are directly in front of you.
Contact your CTL Dealer or Representative if you need to order items such as keyboard
shelves and monitor stands to aid in proper placement of the keyboard and monitor.
•
The monitor should be at a comfortable viewing distance, typically 20 to 24 inches.
•
The monitor screen should be at (or slightly below) eye level when you are sitting in front
of it.
•
Adjust the monitor's brightness, contrast, color balance, and tilt as well as surrounding
lamps and curtains to minimize reflections and glare on the screen. It is generally
advisable to adjust the monitor's brightness as low as possible while still maintaining a
clear view of the screen and its contents. You may also wish to purchase a glare guard.
Please contact your CTL Dealer or Representative.
- 11 -
•
Your chair should provide good lumbar (lower back) support.
•
Your forearms should be horizontal and wrists in a comfortable neutral position while
typing or using the mouse.
•
There should be space to rest your hands on your desk while using the keyboard/mouse.
•
Allow your upper arms to hang naturally at your sides.
•
Sit erect, keeping your feet flat on the floor and your thighs level.
•
Make sure your feet are supporting the weight of your legs and not the front edge of your
seat. Adjust your seat and/or use a footrest to maintain proper posture.
•
Vary your work activities or, if this is impossible, take frequent short breaks to stretch
your arms and legs, focus on objects at varying distances, and relax.
Electrical Outlets
Computers can be damaged from power fluctuations. Grounded outlets can help reduce the
possibility of personal injury and damage to your computer. They may also allow surge
suppressors to safely discharge voltage spikes and prevent damage to your computer. Not all
three-pronged outlets are grounded, nor are all two-pronged outlets non-grounded. If in doubt,
you may purchase an outlet tester from a hardware or electrical supply store. Always connect
your computer to a properly grounded outlet.
WARNING! If the outlets in your chosen location are not grounded, either move your computer to
a different location or have a qualified electrician ground your outlets.
Make sure that the wall outlet you select for your computer does not share the same circuit with
any major appliance such as a refrigerator or washing machine. The voltage drop caused by a
major appliance powering “on” can lock up, reset, or even damage your computer. If in doubt, you
may test the selected outlet before setting up your computer. Do this by plugging a lamp into the
selected outlet, turning it on and turning on the appliance(s) that you think may share the same
circuit. Next, shut off the breaker or remove the fuse that supplies power to the appliance(s). If the
lamp remains lit, the wall outlet is on a separate circuit and may be used. If the lamp shuts off,
consider moving your computer to a different location. Alternatively, you may contact a qualified
electrician to transfer the wall outlet to a different circuit. Always call a qualified electrician to
perform any electrical test or electrical work that you are not comfortable or qualified to do.
CAUTION! Do not connect your computer to any wall outlet that shares its circuit with a major
appliance. The voltage sags caused by appliances such as a refrigerator powering on can lock
up, reset, or even damage your system.
CTL strongly recommends the use of a surge suppressor with all computers and computer
components. Phenomena such as lightning and switching transformers at the utility station can
cause the normal 115-volt current in your wiring to spike, possibly as high as 4,000 volts or more.
These extreme voltages can cause damage to your computer. The consistent use of a quality
surge suppressor that is plugged into a properly grounded electrical outlet that does not share the
same circuit as any major appliance will help ensure that your computer remains unharmed by
fluctuations in the power supply.
- 12 -
Unpacking Your System
Make sure the location you select for your new computer has room for the monitor, keyboard,
mouse, case, speakers, printer, and other components. Be sure the electrical outlets are
grounded and that you are using a surge suppressor.
Examine shipping containers for holes, smashed corners, dents, watermarks, or other damage
that may have occurred during shipping. Notify CTL immediately if any of these signs of damage
are present.
WARNING! Do not install or attempt to connect to a wall outlet any device that appears damaged
in any way. Personal injury or damage to your computer may result.
Unpack each container and place all system components, cables, and manuals in a place where
they may be easily inventoried. Save the packing materials in case you need to ship your
system at a later date.
Verify each item that you unpack with the Packing List included with your system to ensure that
you have received all ordered items, including cables, manuals, and disks. If there are any
discrepancies, contact CTL immediately.
Sample Checklist
The following items typically comprise a computer system. Since each CTL computer is built-toorder, the components shipped with your specific system may vary.
•
•
•
•
•
•
•
•
•
•
Computer
Monitor (if applicable)
Keyboard
Power cord
Keys (if applicable)
Manuals
Telephone cord (if you purchased a modem)
Speakers (if applicable)
Software
Mouse
- 13 -
Identifying Ports
CTL computers are built-to-order and the layout and configuration of your system determines the
location of the different connectors. It is important that you pay particular attention to the labels
above the connectors when attaching the components. Figure 2-1 illustrates a typical back panel
on a computer. While the locations of the connectors may vary, the connectors themselves are
universal, i.e., all serial ports are alike and so on. Before you make any connections, read the
following port descriptions.
Mouse Port
(Green)
Keyboard Port
(Purple)
Parallel Port - Printer
(Magenta)
USB
Ports
Serial Port 1
(Turquoise)
Video Port - Optional
(Blue)
Game/Joystick/MIDI Port
(Yellow)
Line Out
(Green)
Line In
(Blue)
Mic
(Pink)
Figure 2-1. Back Panel Connector Locations
Keyboard/Mouse Ports
These two ports look very similar. Be sure to pay attention to the labels when connecting your
mouse and keyboard. Your computer may return an error message when you first turn it on,
which could happen if the two connections are mixed up.
Universal Serial Bus (USB) Ports
Many devices, including some printers, video cameras, keyboards, mice and joysticks use USB
Ports. Multiple USB devices can be connected to a USB Hub that is connected to one of the USB
Ports on your computer. Please refer to the motherboard manual for more instructions on USB
ports.
Serial Ports
Some devices, such as serial mice, plug into 9-pin connectors. Others, such as printers and
modems, plug into 25-pin connectors. Adapters are available to convert 9-pin connectors to 25pin connectors and vice versa. If you are connecting a serial device, check to make sure that you
have the proper cable. A serial device will not work if plugged into a parallel port.
Parallel Port
The parallel port has a 25-pin female connector. Most, but not all, parallel printers use a 36-pin
Centronics interface. If you are connecting a printer, check to make sure that you have the proper
cable. A parallel printer will not work if plugged into a serial port.
Audio Input/Output Ports (Speakers, Line, Mic, Audio)
These small ports (sometimes called “phone” jacks, although they have nothing to do with
telephones) receive the small jacks similar to those on the headphones of your personal stereo
(although there may be a slight difference in size). Use these ports to connect your computer
speakers and microphones, to send “line” output to a recorder or amplifier, and to accept “line”
input from another audio device. Most likely these ports will be on your sound card.
- 14 -
Game, Joystick, or MIDI Port
The game port, also sometimes referred to as the MIDI or joystick port, uses a 15-pin female
connector to connect a joystick or game pad. This port is on the front control panel of some
computers. Be aware that the standard Thick Ethernet connector is identical to the game port
connector.
VGA Monitor Port
Externally, the VGA monitor port connector is the same size as a 9-pin serial port, but is female
and has 15 pins arranged in three rows. Be careful when plugging in your monitor. Do Not Force!
Trying to force it in the wrong way will damage the pins.
S Video Out
This port is designed for specialized video output. Chances are you’ll connect the other end of
this cable to a video recorder, high-resolution video monitor, or other type of specialized video
equipment.
S Video In
This port is the counterpart of S Video Out (the two ports look exactly the same - the signal simply
passes in the opposite direction). Again, you might use this port to receive video output from a
specialized video setup, which you can use to create video movies.
Composite Video Out
This port (commonly referred to as an RCA plug) looks just like a standard speaker jack. The
output from this port is exactly what the name suggests: A basic video signal, which can be
picked up by your VCR, a monitor, or a video camera.
Composite Video In
This port is the exact counterpart of Composite Video Out, again in the form of a standard
speaker jack. You might receive a signal from your video camera through this port so that you
can create video movies on your computer.
AC3 Out
High-end audio output, again in the form of a speaker jack.
TV Antenna Input/Coaxial Cable
This port serves the same purpose as the cable connector on the back of your TV, VCR, or cable
converter box. It accepts TV signals, either from a standard TV antenna or from cable. This port
appears on the television tuner adapter and other high-end video cards.
Network Interface Port
This port is used to connect your computer to a network. If you need to use this port, you may
have a “network administrator” to help you make the connection. This port looks similar to the
connection jack in your telephone, but there are eight connection pins instead of only four. Do not
attempt to plug your phone cord here or you could cause damage to the port and to your
telephone!
Modem
If you have an internal modem, you will plug a regular telephone wire into this port, and plug the
other end into a wall phone jack. Most modems have two of these ports: One is connected to the
wall phone jack; the other goes to a telephone.
- 15 -
Making Connections
Please read the following warning and cautionary notes before making any connections.
WARNING! Route all cables where no one will trip on them and where the cables will not be
subject to abrasion or other damage. Frayed cables could cause personal injury and/or damage
to your computer.
CAUTION! To avoid damage, make sure your computer is completely powered off before
connecting or disconnecting an electronic device such as a peripheral.
CAUTION! Do not FORCE any connection! Forcing a connection may cause permanent damage
to the connector pins.
Refer to Figure 2-1, illustrated earlier in this chapter, to connect the system components and
peripherals.
1. Locate all the connectors on the computer for each component and peripheral you
are going to connect.
2. Place each component’s cable (case, keyboard, monitor, mouse, printer, etc.) near
the appropriate port.
3. Connect the keyboard cable to the connector marked Keyboard Port, color-coded
purple. Connect the mouse cable to the 9-pin serial port marked Serial Port, colorcoded turquoise or to the PS/2 connector marked Mouse, color-coded green.
4. Connect the VGA monitor cable to the 15-pin port marked Video Port, color-coded
blue.
5. Connect the accessories listed below:
•
Speakers to Line Out, color-coded light green.
•
Microphone to Mic, color-coded pink.
•
You may connect your computer to another audio component such as a
receiver or tape deck using the Line Out and Line In connections, colorcoded light green and light blue, respectively. Doing so requires that you
purchase a stereo 1/8" earphone to RCA jack converter for both sound card
connections (available at most electronic supply retailers).
•
Modem and Telephone. Be sure to connect the cord from the wall jack to the
jack labeled Line (or Telco), and the cord from the telephone (if any) to the
jack labeled Phone.
•
Joystick to Game, Joystick, or MIDI, color-coded yellow.
•
Printer to Parallel Port, color-coded magenta.
- 16 -
•
Network. Will vary according to the type of card - could be coaxial cable
(BNC) or twisted-pair (RJ-45).
6. Connect one end of the monitor power cord to the monitor and the other end to a
surge suppressor.
7. Connect one end of the system power cord to the system and the other end to a
surge suppressor. Make sure the power supply’s voltage selector is set to 115V and
the emergency switch is pressed down to the negative (-) symbol.
8. Before you turn your computer on, be sure to read and accept the license
agreements for your operating system. These are usually found on the diskette or
CD-ROM packaging. Turn on your computer and monitor using the Power buttons on
the front of the respective units.
Congratulations!
Welcome to the world of high performance CTL computing! If your system does not start up
properly, please review “Identifying Ports” and “Making Connections,” found earlier in this
chapter, or consult Chapter 5, “Troubleshooting.”
- 17 -
3. Using Your Computer
This chapter contains information on using your new CTL system and its components, as well as
some tips on how to achieve maximum performance from your computer.
Turning Your System On
The Power and Reset buttons for most systems are located on the front of the computer case
and are clearly marked. Refer to “General Controls and Indicators,” described later in this chapter
for more information on the operation of these buttons.
Turning Your System Off
To turn your system off, always use the shutdown procedure described below.
CAUTION! Failure to follow the shutdown procedure as outlined below could cause loss of data
and possible damage to the system files that are required to boot (start) the computer.
Shutdown Procedure
1. Save your work.
2. Make sure all jobs such as printing, faxing, or file transfers have finished.
3. Exit (close) all open applications.
4. If you are using Windows® XP, Windows® 98, Windows® 2000 Professional or
Windows® ME, click Start at the bottom left of your screen, then select Shut Down. Click
Shut Down from the menu that appears.
5. If you are using Windows® NT® 4.0, follow the directions in step 4. After you click Shut
Down, wait until you see It is now safe to shut off your computer, and then press
Power on the front of your computer.
NOTE Some computers require you to press and hold Power for about four seconds to turn off
the computer. In this case, pressing and releasing Power too quickly will cause the computer to
go into "suspend" mode.
Restarting Your System
There may be times when you may need to restart (reboot) the system without shutting it down,
such as when you add certain software to your computer. If you wish to restart your computer,
make sure you follow Steps 1-3 of the Shutdown Procedure, described above, before restarting.
There are four basic Restart Procedures. The one you use depends on the situation that best
- 18 -
applies to you.
Restart Procedures
•
If you are using Windows XP, Windows 98, Windows NT 4.0, Windows 2000
Professional, or Windows Me, click Start at the bottom left of your screen, then select
Shut Down. Click Restart from the menu that appears. Your computer will reboot.
•
Press [Ctrl]+[Alt]+[Del]. If you are in DOS, this will cause your computer to reboot. In
Windows XP, Windows 98, or Windows NT 4.0, Windows 2000 Professional or Windows
Me, this will open a window that lists all open applications, with the options End Task,
Shut Down, and Cancel listed. If this occurs, click Cancel and follow the method above
to restart your Windows system.
•
Press Reset. Only do this when in DOS and when Steps 1-3 of the Shutdown Procedure
are complete. Pressing Reset within Windows may corrupt critical system boot files.
•
Press Power. Only do this after completing the entire Shutdown Procedure above and
heeding all notes and warnings.
If your computer has locked up, the above procedures may not work to restart the system. If this
is the case, you will need to bypass the above procedures and use the following Emergency
Restart Procedure instead.
Emergency Restart Procedure
If the typical restart procedures listed above do not allow you to restart your system, follow the
procedure below:
1. If you are using Windows XP, Windows 98, or Windows NT 4.0, Windows 2000
Professional or Windows Me, press [Ctrl]+[Alt]+[Del]. When the Task List appears, select
any tasks shown as Not Responding and click End Task. This may shut down the
affected application and avoid having to reset your system.
2. If Step 1 does not work, repeat the procedure and when the Task List appears, select
Shut Down.
3. If Step 2 does not work, press and hold Power for a few seconds until the system shuts
off.
4. If this fails to shut down the system, then press Reset. The computer will reboot. All
unsaved data will be lost.
Should You Leave Your Computer On?
Hard drives spin up when you power on your computer and stop spinning when the computer is
shut down. This process could eventually reduce the life of your computer or some of its
components, especially if the computer is cycled on and off repeatedly during the day. Though
leaving the system on maintains a constant temperature, mechanical components such as your
hard drive, which is always spinning when the computer is on, will have a shorter life. Generally,
the wear incurred by your hard drive from being left on is less than the wear incurred by your
computer from starting and stopping. Consider the following environments when deciding whether
to leave your computer on or off:
- 19 -
•
Powering the system off after completing your work - This alternative is best if you use
the computer infrequently, especially where the periods of use are short.
•
Leaving the system on and only powering off at the end of the day - If you use your
computer many times a day or for long periods, it is probably better to leave it on.
Applications such as voicemail and fax may require that the system be constantly on.
Most office computers fall into this category. Some tips:
•
o
If your computer is not required to run applications such as fax or voicemail
software after hours, you should shut down at the end of the day to conserve
energy.
o
Enable the power management settings of your system and monitor to save
energy and to save your monitor screen. Power management settings can be
accessed through the Windows Control Panel. Enabling power management
and leaving your system on constantly might be your best alternative. Many
computers also support spinning down the hard drives to save wear and energy.
o
Make sure you use a screen saver or turn the monitor off. This prevents the
possibility of “burning” any screen images on the phosphor coating of the tube,
which could result in permanent shadows on the display.
Never powering the system off - This approach is necessary for computers supporting
24-hour access to voicemail or fax, or for network servers. However, systems should be
reset at least once a week using the appropriate Restart Procedure, above, to reload a
clean operating system, close open files that are not needed, and recover any memory
held by processes that are no longer in use. You may want to research the impact, if any,
that enabling your computer's power management features has on your computer's
required functionality. The monitor may be turned off when not in use.
NOTE If you leave your computer on all the time, you may wish to purchase one of the many
types of auxiliary cooling fans that fit inside your computer's case. Please contact your CTL
Dealer or Representative if you need to purchase additional fans.
General Controls and Indicators
This section describes your system’s controls and indicators. Note that some of these may not
appear on your computer case.
Power Button and Indicator Light
The Power button turns the system on and off. Many newer computer systems support an option
where the user can place the computer in suspend mode. Suspend mode places the CPU and
peripherals into their lowest available power-consumption modes while preserving all open
applications in a frozen state.
Computers equipped with this advanced option typically require the user to rapidly press and
release Power to place the system in suspend mode. Shutting down the system requires
pressing and holding Power for about four seconds.
Please refer to the motherboard and operating system documentations included with your system
for details on all power management options supported by your computer. Always remember to
- 20 -
follow the shutdown procedure described in “Turning Your System Off,” found earlier in this
chapter.
The power indicator light illuminates whenever the system is on.
Reset Button
Pressing Reset forces the computer to reboot. Reset should only be used as described under
“Emergency Restart Procedure,” found earlier in this chapter to avoid losing data and possible
corruption of system boot files.
Hard Disk Access Indicator
The hard disk access indicator light flashes every time a hard disk performs either a read or write
operation.
Floppy Disks
Your system may come with a 3.5” floppy disk drive. Most 3.5" floppy disks store up to 1.44MB
(megabytes) of data, though some older diskettes only store 760KB (kilobytes). You must take
several precautions when using floppy disks to avoid losing stored data:
•
Do not expose the floppy disk to extreme heat, cold, sun, moisture, or dust.
•
Keep your floppy disks away from magnetic fields (such as speakers or transformers).
•
Never bend or twist your floppies.
•
Do not open the metal door that shields the magnetic disk within the floppy assembly.
You may damage it.
•
Be sure to take any other environmental or security precautions you feel necessary to
safeguard your floppies and their data.
•
Remember: If your computer can read your floppy, so can anyone else's!
To access a floppy disk, insert it with the metal door facing up and towards the computer and the
round metal spindle facing down. Slide it smoothly into the floppy drive slot until it clicks into
place. To remove the disk, press the button on the floppy drive. Grasp the edge of the floppy and
slide it smoothly out of the drive.
To protect the data on floppies against accidental deletion or modification, find the small sliding
plastic tag in the corner on the underside of the floppy and press it towards the middle of the
diskette. This enables the write-protect feature that prevents data from being added, modified, or
deleted from the disk. Write-protected diskettes may be read and their data accessed. To remove
the write-protect feature, slide the small plastic tab towards the edge of the diskette.
CD-ROM Drive
Your system may include a CD-ROM drive. A CD-ROM disk provides approximately 650MB of
non-volatile read-only storage and is an ideal delivery medium for many of today’s large
applications. All CD-ROM drives also have the ability to play standard audio CDs, and many CD-
- 21 -
ROM drives have an earphone jack and volume control. This allows you to enjoy CD audio even
if your computer does not have a sound card and/or speakers.
NOTE Unlike most stereo systems, plugging earphones into the CD-ROM will not disable any
external speakers attached to your system.
Basic Controls
Figure 3-5 illustrates the front of a typical CD-ROM drive. Controls may vary slightly depending on
your specific model.
•
Earphone Jack: Use this with headphones to listen to sounds coming from the CD-ROM
only, such as an audio CD or a CD-ROM application. Note that you will not hear sound
from your sound card through headphones connected to your CD-ROM drive.
•
Volume Control: This controls the volume of the CD-ROM earphone jack only.
•
Busy Indicator Light: This LED flashes when the CD-ROM drive is busy or being
accessed.
•
Stop/Eject Button: Press Stop/Eject to open and close the CD-ROM door during normal
operation.
•
Manual Eject: This is a small hole that allows access to the unit’s mechanical ejection
lever. When a small, thin object, such as a straightened paper clip, is inserted into the
hole and gently pushed in, the disk, caddy, or tray is ejected. Use this procedure as a last
resort!
Loading a Disk
Most CD-ROMs use a simple tray to hold CDs. A few CD-ROMs use special CD caddies while
others are equipped with a slot mechanism. Always be sure to grasp your CD by the edges to
avoid getting fingerprints on the CD data area.
Slot-equipped CD-ROM
These types of CD-ROMs dispense with trays and caddies. Instead of a door, these CDROMs have a slot running across the face of the unit. Simply insert your CD into the slot,
writing side up, and push gently. The drive will accept your CD. When the disk ejects, it
- 22 -
will slide partway out of the drive. Grasp it by the edges, and lift it gently out of the slot.
Tray-equipped CD-ROM:
Use the following procedure to load a CD into a tray-equipped CD-ROM:
1. Press Eject to open the CD-ROM tray.
2. Pick up the CD-ROM by the edges and identify the side with writing on it.
3. Gently lay the CD-ROM in the tray with the writing side facing up.
4. Press Eject to close the CD-ROM tray.
Caddy-equipped CD-ROM
CD-ROMs equipped with caddies operate much like the slot CD-ROMs, except the disk
must first be placed in a protective “caddy.” The caddy has a spring-loaded door similar
to a floppy disk and opens when a disk is inserted in the CD-ROM drive. While most
caddy equipped CD-ROM drives have internal spring-actuated covers to protect the front
slot opening, some require that a front cover be “flipped down” manually prior to inserting
the caddy.
Manually Ejecting a Compact Disk
For the manual ejection procedure, please refer to Manual Eject under “Basic Controls,”
described earlier in this chapter.
CD-RW Drive
Standard CD-ROM drives only allow you to read the audio or coded data contained in the CD.
With CD-R (CD-Recordable) technology, content can be “burned” or recorded onto CDs. This
allows individuals and businesses to download content onto CDs, including, but not limited to
backup archives, new products, or personalized audio compilations. CD-R technology is limited
because content burned onto CDs cannot be edited or deleted.
CD-RW technology (CD-Re-writeable) allows you to use special CDs in the same way you might
use a floppy disk, except with a far larger storage capacity. With CD-RW technology you can add,
edit, and delete information on CDs with the same ease as on a hard or floppy disk. Unlike a hard
or floppy disk, burned CD-RW data is non-volatile, meaning it is impervious to magnetic fields and
other phenomena that can adversely impact data stored on floppy or hard disks.
Most CD-R and CD-RW drives closely resemble standard CD-ROM drives and use the same
loading and ejecting procedures outlined above for CD-ROM drives. If your CTL computer
includes a CD-R or CD-RW drive, please refer to the unit's documentation for complete
information on its use. External controls and disk loading procedures on these drives are similar
to the controls on a CD-ROM drive described previously.
DVD-ROM Drive
A DVD disk can hold up to 8.5GB of video, audio or data on each side. This provides enough
storage capacity for over four hours of high quality video with multiple audio tracks as well as
subtitles and interactive menus. Some DVD disks are double-sided, bringing the total storage to
- 23 -
17GB. Also, DVD-ROM drives can read standard audio or data CDs. If your CTL computer comes
with a DVD-ROM drive, please refer to the unit's documentation for complete information on
using your DVD capabilities. External controls and disk loading procedures on these drives are
similar to the controls on a CD-ROM drive described previously.
CD-RW / DVD-ROM Combo Drive
CD-RW / DVD-ROM Combo Drives combine the features of CD-RW and DVD-ROM’s into one
drive that can utilize both types of Media (see the each of these categories above for more
information. External controls and disk loading procedures on these drives are similar to the
controls on a CD-ROM drive described previously.
Other Media
Your CTL computer may include other types of drives and storage media. These may include
tape drives, which are typically used for backup storage due to their high capacity and slow
speed. Your computer might include removable backup drives, such as the Iomega® Zip® or
Jaz® drive. These combine high capacity with high speed and are suited to such tasks as
archiving data, working storage, or applications. Your CTL computer may also contain a DVDRAM Drive or a DVD-R drive that can read and write large amounts of information to special DVD
disks. For more information, please refer to the documentation for the specific unit(s) included
with your CTL computer.
Video Display
Computer systems are equipped with video display adapters and, depending on the use(s) of
your new computer, you may have ordered yours with advanced graphics capabilities. There are
two primary pieces in a computer's video/graphics system: the monitor and the video card.
The Monitor
All monitors include the following specifications:
•
Overall size - Monitors are primarily defined by size, such as 15", 17", 19", etc. This figure
is the physical size (measured diagonally) of the picture tube.
•
Viewable area - The viewable area reflects the diagonal measurement of the visible part
of the screen itself. For example, most 15" monitors have a viewable area of 13.5" to
13.9".
•
Dot pitch - The dot pitch specification for a display monitor indicates how sharp the image
can be displayed. It is measured in fractions of millimeters and the smaller the number,
the sharper the image. In a cathode ray tube display with a shadow mask, the dot pitch is
the distance between the holes in the shadow mask. The shadow mask is a metal screen
filled with holes through which the electron beams pass to focus on a single point on the
tube’s phosphor surface.
•
Refresh rate - Refresh means to update with new data. Display monitors must be
refreshed many times per second. Higher refresh rates mean less flickering and thus
reduced eyestrain. Note that the actual refresh rate depends on several variables,
including your current resolution and the capabilities of your video card.
•
Maximum resolution - Standard monitors have resolutions ranging from 640 x 480 to
- 24 -
1024 x 768. Some monitors can achieve resolutions as high as 2048 x 1536. The higher
you set the resolution on your monitor, the larger the viewable desktop, with the limit
dictated by the physical size of your screen. WYSIWIG (What-You-See-Is-What-You-Get)
resolutions are resolutions that correspond 1:1 to the printed output. For a 15” screen,
this translates into 800 x 600; for a 17” screen – 1024 x 768; a 19” screen – 1280 x 1024,
and so on. Most monitors can generally support the next higher resolution from their
WYSIWIG resolution. Setting the resolution on a monitor is a matter of preference. Some
users opt for the most comfortable viewing resolution, while others prefer the higher
resolution as it affords a larger desktop space at the expense of smaller images, icons,
and text. Most monitors come with controls allowing you to set the brightness, contrast,
horizontal size, vertical size, overall size, center point, color balance, and other
parameters. Please refer to your monitor documentation for complete information on
these adjustments.
The Video Card
The video card, also referred to as the graphics adapter or video adapter, processes display
information received from other system components, translates it into a form readable by the
monitor, and transmits the information to the monitor. Some important variables that affect video
performance are:
•
Amount of RAM on the card - Generally, the more available RAM on a card, the higher
the resolution it can support, and the higher the possible color depth (number of colors
that can be displayed simultaneously). However, there are factors that limit the amount of
video RAM that can be used for display functions. Most new video cards have built-in 3D
graphics accelerators and the RAM on these cards is used for display memory (used to
set up the resolution and color depth of the display), and texture/z-buffer memory (used
to hold 3D texture and object-sorting data). Because a 3D application requires a certain
amount of memory to set up the texture and z-buffers, the maximum resolution and color
depth of its display is lower than that of a 2D application, which can use the total amount
of video RAM available.
•
Type of video RAM - Newer types of RAM access data far more rapidly. Older RAM types
include DRAM, VRAM and WRAM. Newer cards incorporate higher speed memory such
as SDRAM, SGRAM and DDR-DRAM.
•
Video chipset - Newer chipsets incorporate faster processing and more advanced
functions such as full screen MPEG playback and 3D acceleration. Chipsets from
companies such as 3dfx. (Voodoo3, 4 and 5), NVIDIA® (TNT2., GeForce 256. and
GeForce2 GTS.), and ATI Technologies, Inc. (RAGE 128 PRO. and RADEON.) are used
in high performing 3D accelerators. Other manufacturers, like 3Dlabs. and Intergraph,
have specialized products for professional CAD or 3D animation markets.
•
Card bus type - Video cards interface with the computer through either the PCI or the
AGP bus. Most new 3D accelerators use the AGP bus, which was specifically designed
to address the performance required by today’s intensive 3D applications.
Universal Serial Bus (USB)
Many peripherals such as mice, printers, scanners, joysticks, and digital cameras require the user
to shut down the computer, plug in the peripheral, and then restart the computer to use the
device. USB changes that. Newer models of these same devices that support USB can be
plugged in and unplugged at will, without restarting the computer. USB provides a data transfer
rate of 12Mbps (megabits per second). USB ports are standard on new CTL computers and are
- 25 -
supported by Windows XP, Windows 98, Windows Me, and Windows 2000. Please refer to the
device-specific documentation for information on using devices with USB.
FireWireTM – IEEE 1394
FireWire provides a plug-and-socket connection on which up to 63 devices can be attached with
data transfer speeds up to 400 Mbps. This standard describes a serial bus or pathway between
one or more peripheral devices and your computer's microprocessor. In the next few years, you
can expect to see many peripheral devices equipped to meet this new standard. FireWire (or
IEEE 1394) implementations provide:
•
A simple common plug-in serial connector on the back of your computer and on many
different types of peripheral devices.
•
A very high-speed rate of data transfer that will accommodate multimedia applications
(400 Mbps today, with higher rates later).
•
Hot plugging and Plug and Play capabilities without disrupting your computer.
•
The ability to chain devices together in a number of different ways without terminators or
complicated setup requirements.
Your CTL computer will have a FireWire adapter, if so ordered. If your computer did not come
with a FireWire adapter, you may opt to install one. Upgrading your computer requires technical
expertise and should only be performed by a qualified technician or under supervision of such a
person. Please contact your CTL Dealer or Representative for guidance if you are considering
any upgrades.
Small Computer Systems Interface
(SCSI)
A SCSI host adapter allows you to connect several peripherals, such as storage devices (hard
drives, CD-ROMs, tape drives, etc.), scanners, and high-end printers to a single port. Up to fifteen
devices may be connected to a SCSI channel and some host adapters have as many as four
built-in channels for a total of sixty possible devices. The SCSI standard has evolved over the
years to support the multitasking and high performance computing necessary in servers and highend workstations. Currently Ultra160 devices offer the maximum performance, with Ultra320
adapters and hard drives just around the corner.
Network Interface Card
A Network Interface Card (NIC) connects your computer to a network. Networks can be as small
as two computers sharing devices or data, or as large as thousands of computers sharing file
servers, mainframes, and Internet access connections. Please refer to your NIC card
documentation, network software documentation (if any), network hardware documentation (if
any), and your operating system manuals for complete details and instructions on networking.
Network Architecture
- 26 -
Networks may use third-party software such as Novell® or Banyan to configure individual NICs as
well as the network itself, or they may rely on Windows' built-in networking capabilities. A typical
network connection allows your computer to access additional remote drives/devices as if they
were local drives, i.e., on your computer. For example, your computer might have access to
network drives P, Q, and R, which could be accessible by more than one user. Most networks
also allow computers to share printers, modems, and other system resources.
There are two basic types of networks:
•
Peer-to-peer - Peer-to-peer networks are typically found on small networks such as in a
small computer lab or office. All computers on a peer-to-peer network share devices and
data equally. For example, one computer might have a shared printer attached to it, while
another computer has a shared modem for Internet connections. No computer is
designated as the “server” or “client.”
•
Client-server - On a client-server network, one or more computers are designated as
“servers,” while the rest of the computers (usually the majority) are classified as “clients.”
Depending on the physical wiring of the network, client computers may share the server’s
data. Servers act as file or application repositories, run shared printers, or serve as a
gateway to external resources, such as the Internet.
Network Connections
Most network cards use one of the following types of connections:
•
Coaxial cable with a BNC connector - This wiring resembles a TV cable and uses twistlock connectors to secure the various components. In a coaxial cable network, computers
branch off the main line using “T” connectors. The last computer in line must use a
special “T” connector with a terminator.
•
Twisted Pair - Twisted pair network wiring resembles an oversized telephone cable.
Individual network computers connect to the network via one or more hubs. Instead of
running to the next computer, network cables from various networked computers are
plugged into a hub. Twisted pair networks allow greater installation flexibility.
Fax/Modem
A fax/modem provides your computer with a gateway to the outside world. Many fax/modems
also have voice capability, allowing them to be used as telephones and full-featured voice mail
systems when combined with software such as Symantec's WinFax. Other software, such as
Symantec's PCAnywhere, allows you to access your computer remotely and control it as though
you were sitting in front of it. You may also remotely access networks and the Internet.
Please refer to “Identifying Ports” in Chapter 2 for instructions on connecting your modem. Your
modem documentation and modem software contain complete information on using your
modem's capabilities.
Operating System
For complete information on using Windows, please refer to the specific operating system
documentation included with your CTL computer.
- 27 -
Security
Physical security involves placing the computer in an inherently safe location (for example, in a
secured building). Security personnel or your supervisor may have complete information
regarding physical security issues.
Access-control security protects your computer from unauthorized use. Windows contains
numerous security features including passwords, user-level access control (users may access
more or less of the system and/or network depending on their permissions), shared-level control
(users having the same permissions may not be able to access each other's network areas), and
system/network monitoring to detect unauthorized use. Many software packages also allow you
to set up passwords to prevent access to your data within the specific application.
Please refer to your Windows or application-specific documentation and your System
Administrator for security measures appropriate to the use of your computer. Below are brief
descriptions of two of the most common types of password protection.
Power-On Password
Most systems can be set up to use a password that must be entered before the system
will boot up. This is one of the best ways to prevent unauthorized access, because the
operating system and files cannot be accessed without the password. Setting up your
computer to use a power-on password requires you to enter your computer's BIOS
Setup. Please refer to your motherboard manual for the exact names, locations, and uses
of security features contained in your BIOS code.
Screen Saver Password
If you have minimal security concerns, a simple screen saver password might provide
sufficient protection. This can be activated through the Display icon inside Windows
Control Panel (all versions). Please refer to your Windows documentation for more
information. Remember that this method is not secure! For example, depending on your
operating system, your files could be accessed by rebooting your system and running in
DOS mode.
Power Management
Your CTL computer includes power management features that minimize your system’s power
consumption when idle. Microsoft Windows XP, Windows 98, Windows NT 4.0, Windows 2000
and Windows ME feature Advanced Power Management capabilities that allow you to access and
customize the power management settings of your system. Click Power Options inside the
Windows Control Panel to review and select the settings that best fit your computing
environment.
- 28 -
4. Getting the Most
From Your System
Like an automobile, a computer gets out of tune with use. This chapter describes how to maintain
your computer for maximum performance. Maintaining your system is an ongoing process
requiring conscious thought and effort, but the time invested will pay off in increased performance
and reliability.
How to Get Maximum Performance
From Your Computer?
The following recommendations may help you maintain your computer at optimal performance:
•
Resist the urge to load programs that run in the background - There are many programs
that run “behind the scenes.” These programs do everything from monitoring your
computer for viruses to allowing you to write “sticky notes” on your computer's screen.
These programs consume system resources, so load them judiciously.
•
Keep your drives in order - A well-organized hard drive directory system helps you
reduce wasteful clutter on your drives, freeing up space for important applications and
data.
•
Defragment your hard drives - Hard drives store files by placing pieces of them in random
clusters and keeping a list of the clusters that store each file. Using the box and
cubbyhole analogy, the hard drive places some of the file in a cubbyhole, notes the file
and location on a master list, places the next piece, and so on. It is obvious that retrieving
the file is a cumbersome affair since the hard drive must consult the master list, find the
first piece of a needed file, consult the list again, and repeat this procedure for every
piece of each accessed file. Defragmenting a hard drive takes all the pieces of a file and
places them in consecutive clusters. This can greatly improve hard drive and the overall
system performance.
•
Do not open more applications than necessary - Each open application occupies system
RAM, leaving less room for other applications to run. In Windows systems, this means
that Windows will increasingly resort to using the hard drive as virtual (emulated)
memory. Hard drives are slow compared to system RAM, so overall system performance
is degraded.
•
Delete old files and applications - Applications that are no longer being used may be
impacting system performance. Many Windows applications alter the Windows Startup
files and may allocate resources for themselves even when they are not running. Deleting
unused applications cleans up your Windows Startup files, saves hard drive space, and
may provide more system resources for current work.
•
Avoid the use of needless enhancements - Animated cursors, animated icons, sound,
trailing mouse pointers, etc. consume resources. If your system has plenty of available
resources and you wish to add these items, feel free to do so. If your system is taxed
even without these items, it is best not to use them.
- 29 -
•
Make regular backups of system files, applications, and data - You may inadvertently
install software that negatively affects your system and is impossible to uninstall, or make
a mistake in critical operating system settings that can take hours to repair. Periodic
backups of system files and applications, and updating these backups before adding
software or modifying operating system settings will protect your files. Windows ME and
Windows XP have a special feature called System Restore. You can use this feature to
undo harmful changes to your computer and restore its settings. Investing in a backup
storage device is also a good idea. This device provides automatic, scheduled backups
of the system.
Following the guidelines above and paying close attention to your computer and its performance
may help to alert you to serious problems before they cause data loss or hardware failure.
- 30 -
5. Troubleshooting
Although your computer system is designed to provide you with trouble-free operation, any
system can malfunction. Incorrectly setting up or configuring your system during hardware or
operating system upgrades is the cause of most malfunctions. Loose mechanical connections
such as cards, cables, or components are also frequent troublemakers. These can occur during
upgrades, repairs, or simply while moving the computer from one location to another. You can
probably correct most problems quite easily.
Should a hardware failure occur, you will most likely need to have the machine serviced by a
professional technician. Contact your CTL Dealer or CTL for repairs during your warranty period.
This chapter covers some of the procedures you should follow if your machine does not operate
as you expect. If the recommended procedures do not solve the problem, please call CTL
Technical Support at 800-645-8670. Prior to attempting any of the troubleshooting procedures
listed in this chapter, please read the following WARNING.
WARNING! FOR YOUR PERSONAL SAFETY AND PROTECTION OF YOUR
EQUIPMENT
Some troubleshooting procedures may require you to work inside the computer. It is important
that you perform the following steps before working on your computer:
1. Turn off your computer and all devices.
2. Touch an unpainted metal surface on the computer case to discharge static
electricity.
3. Disconnect the power cable to your computer.
4. Disconnect any devices connected to the computer from their electrical outlets to
reduce the potential for shock or personal injury.
Basic Troubleshooting Procedure
To identify a problem, it helps to be familiar with normal system operation. A normal boot up
consists of the hard disk drive(s) beginning to spin, the monitor displaying the amount of system
RAM (you may hear a ticking noise during the RAM verification), the floppy drive being accessed
(the indicator light comes on briefly), and a single audio beep signifying successful conclusion of
the Power-On Self-Test (POST). The computer then attempts to load the operating system from
the floppy drive, CD-Drive, hard drive, or the network drive, depending on your BIOS settings.
Troubleshooting is a process of elimination. If you have just performed a hardware or software
upgrade, undo the upgrade to see if the problem goes away. If it does, the problem is with your
upgrade. If not, first check any system components that could have been affected by the upgrade
such as expansion cards, cables, or jumpers. If the problem persists, or if you have not performed
any recent hardware or software changes, please refer to the appropriate section of this chapter
or further guidance.
- 31 -
Operating System Tools
Windows XP, Windows 98, Windows ME, Windows NT 4.0 and Windows 2000 Professional all
include a variety of tools that can be of great help in troubleshooting problems. Simply searching
for a particular topic in the Help system of Windows can yield a lot of information about the
problem. Various tools and troubleshooting wizards can also be found by searching the Help
system. The help system can typically be accessed from the Start menu in the bottom left corner
of the screen.
Windows XP and Windows ME feature a tool of particular interest when faced with some types of
computer problems. System Restore keeps track of certain aspects of your computer’s
configuration and can be used to revert your computer’s configuration to an earlier, trouble free
state. Access this tool by searching for “System Restore” in the help system. CTL Computer
Systems with Microsoft Windows XP or ME have a Restore Point created after the computer is
built. Users can revert to this Restore Point in order to solve some types of computer problems.
A feature of Windows XP that can solve device driver related problems is Device Driver
Rollback. This tool can be used after a user installs a device driver on the computer that causes
instability. The Device Driver Rollback tool can remove the newly installed driver and revert to a
previously installed device driver that did not cause instability.
Refer to your operating system documentation for more information about specific tools and
trouble shooting techniques.
Common Questions and Possible Fixes
The following is a list of commonly asked questions and possible fixes. Whenever possible,
perform the suggested isolation tasks in the order given.
System and Hard Drive
System will not boot - Power LED is OFF.
Most likely cause: no power supply.
One or more of the steps described below may require you to work inside your computer. Please
read the WARNING at the beginning of this chapter before you proceed.
1. Verify that the power supply fan is spinning. If so, go to step 4.
2. Make sure that your power cable is properly connected at both ends. If not, plug it in
securely.
3. Verify that the surge protector strip or wall outlet is on and providing power.
4. Remove the cover (see “Opening Your Computer Case,” page 40) and check that the
power supply is connected to the motherboard securely.
System will not boot - Power LED is On.
Most likely cause: bad component or card. Record and verify any beep codes during this process.
- 32 -
This procedure requires you to work inside your computer. Please perform the steps listed in the
WARNING at the beginning of this chapter before you proceed.
1. After performing the steps listed in the WARNING at the beginning of this chapter,
remove the case (see “Opening Your Computer Case,” page 6-10). Reseat all cards and
reconnect all cables.
2. Discharge static electricity again. Press in all chips on the system boards that seat in
sockets.
3. Check for a bad card or component by removing one card at a time and rebooting after
each card is removed. Leave the video and hard drive controller (if equipped with a SCSI
controller) for last.
System will not boot from the hard disk
Most likely cause: corrupted boot files.
One or more of the steps described below may require you to work inside your computer. Please
read the WARNING at the beginning of this chapter before you proceed.
1. Does the hard drive(s) spin up when the system is turned on? Listen for the rising whine
characteristic of the hard drive coming up to speed. If you are certain that the drive(s)
is/are not spinning, skip to Step 5.
2. Run BIOS Setup, and verify that the hard disk drive setting(s) is/are defined correctly.
Refer to the motherboard User Manual for instructions on running BIOS Setup or contact
CTL Technical Services for help.
3. Boot up using a bootable floppy disk. You should create an emergency boot disk at the
first opportunity. Besides the necessary boot files, COMMAND.COM, etc., this disk
should also contain the following files: FDISK.EXE, FORMAT.COM and SYS.COM. Type
C: [Enter] at the DOS prompt. Type A:SYS C: [Enter] to copy the MS-DOS boot files to
the hard drive. Remove the floppy and restart your computer.
4. Run the CHKDSK or SCANDISK utilities on your DOS system or Windows Startup disk to
check for and repair possible hard drive errors. Scan your system for computer viruses.
5. Remove the system’s cover (see “Opening Your Computer Case,” page 6-10) and check
the hard disk ribbon cable to ensure it is properly connected. Check the hard drive's
power cable.
Display
System appears to be booting - monitor is blank.
Most likely cause: monitor does not have power or is turned off.
One or more of the steps described below may require you to work inside your computer. Please
read the WARNING at the beginning of this chapter before you proceed.
1. Make sure that your monitor is turned on (LED is lit).
2. Make sure that your power cable is properly connected at both ends.
- 33 -
3. Adjust your monitor's brightness and contrast controls.
4. Ensure that the video cable is properly connected to the video port at the back of the
computer.
5. Remove the cover (see “Opening Your Computer Case,” page 6-10) and ensure all
cards, cables, and components are properly seated or connected.
Display is on but flickering or garbled - all resolutions
Most likely cause: bad connection.
1. Check that the video cable is properly connected to the video port at the back of the
computer.
2. Check the pins inside the monitor cable's connector to see if any of them are bent and/or
broken.
3. With the computer and monitor on, wiggle the monitor cable. If the display changes, there
is a flaw in the monitor cable. Call CTL Technical Support.
Display is on but flickering or garbled - some resolutions
Most likely cause: incorrect video driver or monitor type.
1. Ensure that you have the correct video driver installed. Refer to your video card
documentation for instructions on verifying the driver and obtain the latest version from
the manufacturer.
2. Make sure that the correct monitor type is selected. Contact the monitor's manufacturer if
the monitor type is not included in the operating system or in the video card driver library.
Floppy Drive
System will not read floppy disks
Most likely cause: bad floppy disks or loose cables.
One or more of the steps described below may require you to work inside your computer. Please
read the WARNING at the beginning of this chapter before you proceed.
1. Make sure you are using the proper type of disk and that you are orienting the disk
properly when inserting it in the drive (refer to “Floppy Disks” in Chapter 3).
2. Has the disk been formatted? If not, you will see the message General failure reading
drive A: (A)bort, (R)etry, (F)ail. Press F [Enter].
3. If the Floppy Access LED is constantly illuminated, then the data cable is improperly
attached.
4. If the Floppy Access LED does not illuminate when trying to read or write to a disk, then
remove the cover (see “Opening Your Computer Case,” page 6-10) and check the floppy
ribbon cable for proper connection to the controller card and floppy disk drive. Check the
power connection to the floppy drive.
- 34 -
5. Run BIOS Setup to verify that the drive is defined correctly. Refer to the motherboard
User Manual for instructions on running BIOS Setup.
CD-ROM, CD-RW, DVD-ROM, DVDRAM & CD-RW/DVD Combo Drives
The CD-ROM, CD-RW, DVD-ROM, DVD-RAM or CDRW/DVD-Combo Drive does not work
Most likely cause: CD-ROM drivers are not loaded or are conflicting with other drivers.
One or more of the steps described below may require you to work inside your computer. Please
read the WARNING at the beginning of this chapter before you proceed.
1. Verify that the CD-ROM was not inserted upside down and that you are using the correct
type of CD Media for your Drive (see “CD-ROM Drive,” Chapter 3). For example, a DVD
disk will not function in a CD-ROM or CD-RW drive and a CD-ROM drive cannot write
data to a CD-R disk. See your Drive’s documentation for information about media
compatibility.
2. Verify that the CD Media has a clean surface, and try another data CD/DVD that you
know works properly.
3. In Windows, open My Computer to check that Windows recognizes your Drive. If your
drive does not appear skip to Step 5.
4. Remove any recently installed hardware (see “Opening Your Computer Case,” page 610) or software to see if the new installation is causing a conflict.
5. Verify that the Master/Slave jumper on the Drive is properly configured. Note that this
step requires powering down your computer and opening the case.
Audio
No sound when playing .WAV or .MID files
Most likely cause: improperly connected speakers or improperly configured software driver.
1. Check the volume control on your speakers and computer screen to ensure the volume is
high enough.
2. Check your speakers to ensure they are plugged into the correct output jack on your
sound card. Speakers should be connected either to the Line Out or Speaker jacks.
3. Check to see if your speakers are receiving power. Is the Power or On LED on?
4. Check your speakers by hooking them to another computer or your CD drive headphone
output jack and playing an audio CD.
5. If you have Windows XP, Windows 98, Windows Me, Windows NT, or Windows 2000,
- 35 -
check both the System and Multimedia in Control Panel to ensure that you have the
proper settings for your sound card (consult your sound card/audio subsystem manual
and your Windows documentation). Check your software to verify that the volume
settings are not turned off.
No sound when playing audio CDs
Most likely cause: software driver not loaded.
One or more of the steps described below may require you to work inside your computer. Please
read the WARNING at the beginning of this chapter before you proceed.
1. If you have Windows XP, Windows 98, Windows Me, Windows NT, or Windows 2000
check both the System and Multimedia in Control Panel to ensure that you have the
proper settings for your sound card (consult you sound card/audio subsystem manual
and your Windows documentation). Check your software to verify that the volume
settings are not turned off.
2. Make sure your audio CD is not upside-down (see “CD-ROM Drive,” Chapter 3).
3. Remove the system cover (see “Opening Your Computer Case,” page 6-10) and verify
that you have a small audio cable connecting your CD-ROM and sound system. This
cable is different than the large flat ribbon cable that connects your CD-ROM to the
controller. Refer to your CD-ROM and/or sound card documentation for more information.
Keyboard
System does not recognize the keyboard
Most likely cause: improper keyboard connection.
1. Verify that the keyboard cable is properly installed (see “Identifying Ports” in Chapter 2).
2. Try another keyboard (if possible) to isolate the problem.
Mouse
The mouse cursor does not move or moves erratically
Most likely cause: loose mouse cable or mouse driver is not loaded.
1. Ensure the mouse cable is securely connected to the mouse port or COM port (see
Identifying Ports” in Chapter 2). If you have a loose connection, reseat the cable. Serial
mice should function properly at this point. You will need to reboot your computer if you
have a PS/2 mouse.
2. If the mouse is the type that has a mouse ball underneath it, remove the mouse ball and
clean it and the rollers. Use a cotton swab moistened with rubbing alcohol to clean your
mouse rollers. Do not use water.
3. Some mice include software that extends their functionality. This software may conflict
with other software or hardware in the system. Un-install this software and restart the
- 36 -
system. Windows recognizes a standard PS/2 or Serial mouse and installs generic
drivers. If this solves the problem, then there is a conflict between the mouse software
and some other program or hardware in the system. Call CTL Technical Support for help.
4. Try a different mouse or try it on another computer to see if it is defective.
Network Interface Card
System detects card, but you cannot access the network
Most likely cause: bad network connection, improperly configured network protocol, or defective
network card.
1. Make sure that the network cable is properly connected. Make sure that the hub is
powered on and that the connected ports are operational. Switch ports and cables to
isolate possible defective ports/cables. Refer to your network hub documentation for
further information.
2. Make sure that your network protocols are configured according to the network
requirements. Refer to your Windows documentation, network card documentation, and
hub documentation for further information or contact your System Administrator.
3. Check the LED next to the network connector on the card. If it is not indicating network
activity by blinking, the network card or hub may be defective.
Fax/Modem
System does not recognize the fax/modem
Most likely cause: improperly configured fax/modem.
1. For Plug and Play operation, make sure the modem is set to Plug and Play mode. If your
modem does not have jumpers, use the utility program that came with your modem to
configure it. Refer to your modem documentation for further details.
2. If your modem is not Plug and Play, make sure the resource settings such as IRQ and
I/O address do not conflict with other system devices. Use the Windows Device Manager
to check and adjust your settings. You may also need to adjust your modem jumpers.
Refer to your Windows and modem documentation for instructions.
System recognizes fax/modem, but cannot dial-out
Most likely cause: incorrect fax/modem driver or bad fax/modem.
1. Make sure the telephone line is functioning properly, is not in use by another party, and
that it is plugged into the modem's LINE (or TELCO) jack and into a TELCO jack tying
into your phone system.
2. Make sure the correct fax/modem drivers are installed. Obtain the latest version of this
driver from the manufacturer if possible. Refer to your modem documentation for details.
- 37 -
3. In Windows, open the Control Panel and select Modem/Diagnostic. Select the
modem's COM port, and then click More Info. Make sure Windows reports the correct
modem information. Refer to your modem and Windows documentation for further
information.
4. If these tests fail, the fax/modem may be defective.
System dials out but does not connect at maximum speed
Most likely cause: incorrect speed setting or poor quality telephone line.
1. Ensure that the fax/modem is set to run at optimum speed. Most fax/modems will
automatically slow down if the optimum speed fails to establish a connection. Telephone
line quality may drastically limit connection speed to well below the fax/modem's
capabilities.
2. Try dialing multiple times at different times of the day and to different destinations to see
if the connection speed remains the same or if it improves.
3. If the fax/modem sometimes connects at maximum speed, the low connection speeds
could be due to limitations on the receiving side of the call or intermittent variations of line
quality.
4. If you cannot achieve maximum connection speed using the above, try the fax/modem
using a different line.
5. If these tests fail, the fax/modem may be defective.
Advanced Troubleshooting
Incompatible, damaged, or conflicting device drivers are a frequent cause of problems. Isolating
this problem requires identifying the offending driver(s). The following procedure applies if your
system is running Windows 95 or Windows 98:
1. Boot system and press [F8] as soon as Starting Windows 9x appears on the display
screen.
2. A Boot Options menu appears. Select Option 2: Logged (\BOOTLOG.TXT)
3. Let the system boot. During this boot process, the system will reboot, freeze, or otherwise
fail.
4. Reboot the system and press [F8] again to get to the Boot Option menu
5. This time select Option 6: Safe Mode Command Prompt Only.
6. At the C:\> prompt type the command: TYPE BOOTLOG.TXT
7. This log shows the exact order in which device drivers were loaded during startup. By
looking at the last few lines of the log you may be able to detect the driver that Windows
is not able to load. Replacing that particular driver may fix the problem.
8. Restart the computer using the [F8] key again and select Option 3: Safe Mode.
- 38 -
9. Windows will boot without installing any specific drivers. Once in Windows, remove and
then re-install the offending driver(s).
The procedure for Windows ME is similar to the procedure outlined above, except the Command
Prompt or Safe Command Prompt Only options have been removed. In this case, boot into
Safe Mode directly instead of a Safe Mode Command Prompt, and use Notepad to read the
BOOTLOG.TXT file
In Windows NT 4.0, Windows 2000 and Windows XP, a WARNING dialog box opens up
indicating that some services could not be started. Use the Event Viewer in Administrative
Tools to determine which drivers/services were not initialized. Should either of these two
operating systems crash on startup, they will provide information on a blue or black screen as to
which driver or application caused the crash.
Intermittent problems are much harder to isolate. If drivers do not appear to be the problem,
check your CMOS BIOS Setup configuration. If you find nothing apparently wrong with your
settings, choose Load BIOS Defaults in BIOS Setup so you can rule out the BIOS settings.
Quick Restore CD
Some CTL Computer Systems ship with a Quick Restore CD. The Quick Restore CD is a
bootable CD that can be used to restore a computer’s originally installed operating system. Quick
Restore CD’s are “BIOS LOCKED,” which means they only work with specific CTL Computer
Systems. Before performing a Quick Restore, you should back up your files.
CAUTION! The Quick Restore CD will overwrite all existing non-operating system programs on
the designated hard disk drive and can destroy all files and data on the designated hard disk
drive. Before performing a Quick Restore, you should back up your files.
How to Use Your Quick Restore CD
1. First insert the Quick Restore CD in the CD Drive.
2. Reboot/restart the computer. For instructions on the various methods of restarting the
computer, see section 3-2.
3. When the computer prompts to boot from the CD, press any key on the keyboard. This
will start the setup process. If a key is not pressed, the computer will skip the CD and will
try to boot up from the hard drive as normal. If this happens, reboot/restart the system
and press a key when prompted to boot from the CD.
4. Once the computer successfully boots to the Quick Restore CD and the setup process
begins, you will be asked where you want to install the software. You have two options:
Option 1. Install into current directory. This will install the operating system over the
previously installed operating system. You will need to reinstall non-operating system
programs.
Option 2. Delete Partition, then install in a new Partition. WARNING! While this is the
preferred way of performing a Quick Restore of the operating system, it will delete all
files and programs on the hard drive. Make sure that you have backed up your files
before you perform this step.
- 39 -
5. After the process of installing from the Quick Restore CD is completed, the computer will
reboot automatically. At this point, you need to either remove the Quick Restore CD from
the CD Drive or, alternatively, you can refrain from pressing a key when prompted so that
the computer can boot the new installation of the operating system on the hard drive.
6. End User License Agreement. Select yes to accept the EULA and continue, or select no
if you do not wish to continue.
7. The Quick Restore CD may not install the latest drivers for all of the devices incorporated
into the computer. For additional drivers, visit www.windowsupdate.com or
www.ctlcorp.com/support.
8. The Quick Restore process is now completed.
Opening Your Computer Case
Some troubleshooting procedures described earlier in this chapter require you to work inside your
computer. This section describes how to open the case and remove the cover. Before you
proceed with any of the steps described here, please read the following WARNING.
WARNING! FOR YOUR PERSONAL SAFETY AND PROTECTION OF YOUR
EQUIPMENT
It is important that you perform the following steps before opening your computer case:
1. Turn off your computer and all devices.
2. Touch an unpainted metal surface on the computer case to discharge static electricity.
3. Disconnect the power cable to your computer.
4. Disconnect any devices connected to the computer from their electrical outlets to reduce
the potential for shock or personal injury.
Opening the Mid-tower Case (CTL CS05D/CS05P4)
Step 1:
Please read the above WARNING before proceeding). Facing the back
of the case, unscrew and remove the two thumbscrews located on the
top corners.
Step 2:
Gently slide back the top panel.
Step 3:
To remove each side panel once the top panel has been removed, grab
the extended lip on the top of the side panel midway between the front
and back of the case. Gently pull up to remove.
Opening the ATX Desktop Case (CTL CS00005/CS03P4)
Step 1:
(Please read the WARNING at the beginning of the section “Opening
Your Computer Case” before proceeding). Facing the back of the case,
remove the top middle screw and the right and left screws using a
- 40 -
Phillips screwdriver.
Note: Only three screws must be removed to open the case.
Step 2:
Gently slide the cover straight back.
- 41 -
Index
A
AC3 Out, 15
Advanced Power Management, 28
audio
port, 14
troubleshooting, 35,36
B
backup devices, 24
backups
data, 30
system restore, 32
C
CD-ROM disk
loading a disk, 22
manual ejection, 23
CD-ROM drive
front panel illustration, 22
controls, 22, 23
CD-RW drive, 23
CD-RW / DVD Combo Drive, 24
coaxial cable
network connection, 27
tv antenna input, 15
compatibility
cd media, 35
system configurations, 4,5
composite Video In/Out, 15
configuration, 4,5
connections
audio jacks, 14
back panel connector locations illustration, 14
making connections, 16
keyboard, 14
MIDI/joystick game port, 15
modem, 15
mouse port, 14
network interface port, 15
parallel port, 14
s video, 15
serial port, 14
speakers, 14
USB port, 14
video/vga monitor port, 15
D
DVD-ROM drive, 23, 35
DVD-R drive, 24
DVD-RAM drive, 24, 23
F
Federal Communications Commission, 7
FireWire – IEEE1394, 26
floppy disk
data protection, 21
- 42 -
troubleshooting, 34
use, 21
G
game port, 14, 15
grounding
electrical outlets, 12
H
hard drive
defragmentation, 21
maintenance, 21
troubleshooting, 31, 32, 33
J
joystick, 14,15
K
keyboard
ergonomics, 11
port, 14, 15
troubleshooting, 36
L
license agreements, 3, 40
M
maintenance, 29
MIDI port, 14, 15
modem
connecting, 16
definition, 27
port, 14, 15,
troubleshooting, 37
monitor
connecting, 16, 17
display troubleshooting, 33, 34
ergonomics, 11
monitor related terms and definitions, 24
port, 14, 15
power management, 20
screen saver, 28
Mouse
connecting, 16
port, 14
troubleshooting, 36, 37
N
network
architecture, 27
coaxial cable connection, 27
twisted pair connection, 27
network interface card (NIC), 26
connecting, 16
network interface port, 15
notes, cautions, and warnings, 2
O
other media, 24
P
parallel port, 14
ports
descriptions, 14, 15
illustrations, 14
- 43 -
power button, 20
power management, 19, 20
printer
connecting, 14, 16
Q
quick restore CD
use of, 39, 40
R
reset button, 19, 21
restart
restart procedure, 19
emergency restart procedure, 19
S
S Video In/out, 15
SCSI, 26
security
power-on password, 28
screen saver password, 28
serial number, 6
serial port, 14
shutdown procedure, 18
speakers
jacks, 14
connecting, 16
surge suppression, 11, 12, 13
T
troubleshooting
basic procedure, 31
CD-ROM drive, 35
CD-RW drive, 35
display, 33
dvd-rom, 35
floppy drive, 34
keyboard, 36
modem, 37, 38
mouse, 36
network interface card, 37
operating system tools, 31
sound, 35
system & hard drive, 32
TV antenna input, 7, 15
typographical conventions, 3
U
Unpacking your system, 13
USB
definition, 25
port, 14
V
video cards
description, 25
W
warranty, 4
warranty number, 6
Z
Zip drive, 24
- 44 -