1
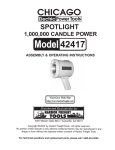
SPOTLIGHT
1,000,000 CANDLE POWER
93366
ASSEMBLY & OPERATING INSTRUCTIONS
Due to continuing improvements, actual product may differ slightly from the product described herein.
®
3491 Mission Oaks Blvd. / Camarillo, CA 93011
Copyright © 2005 by Horbor Freight Tools®. All rights reserved. No portion of this manual
or any artwork contained herein may be reproduced in any shape or form without the
express written consent of Harbor Freight Tools.
For Technical questions and replacement parts, please call 1-800-444-3353.
THANK YOU for choosing a HARBOR FREIGHT TOOLS product. For future reference, please
complete the owner’s record below:
Model__________
Serial No.__________
Purchase Date_________
SAVE THE RECEIPT, WARRANTY AND THESE INSTRUCTIONS. It is important that you
read the entire manual to become familiar with the unit before you begin assembly.
Technical Specifications
Tool Name:
Item Number:
Housing Diameter:
Battery:
Lens Adapter:
Lens Construction:
Candle Power:
Light Source:
Handle:
Trigger:
Power Adapter:
Charger:
Car Adapter:
Tool Weight:
Spotlight, 1,000,000 Candle Power
93366
6”
6 VDC (U.L. Listed)
5”
1/8” Glass
1,000,000
Quartz Halogen Bulb (55W)
Pistol Grip
Squeeze Type with Trigger Hold
120 VAC / 60 Hz <-> 9 VDC
U.L. Listed
Lighter Type with 5-1/2” Cord
3 Lbs.
WARNING: The warnings, cautions, and instructions discussed in this instruction manual cannot cover all
possible conditions and situations that may occur. It must be understood by the operator that common sense
and caution are factors which cannot be built into this product, but must be supplied by the operator.
THE OPERATOR
PLEASE REMEMBER:
Never look directly into the Spotlight.
Avoid touching the Lens as it may become hot during operation.
Do not disassemble the Battery or remove any parts from the Battery and surrounding connections.
Do not allow the Spotlight to be exposed to fire or high heat as this may result in an explosion.
Grounding/Voltage Warning:
Common household current is 110-120 volts. As long as the outlet used with the tool is rated from 110-120 V
there will be no complications using it with household receptacles. Plug the Power Adapter into a 110-120V
properly grounded outlet protected by a 15-amp, dual element time delay or circuit breaker.
NEVER try to plug a 110-120V tool into a 220-240V circuit or serious complications and possible injury to the
operator may occur. The plugs have different shapes to prevent this.
REV 01/07
SKU 93366
Page 2
ASSEMBLY
Your Spotlight comes completely assembled. When unpacking your Spotlight, check to make sure that all the
parts are included. If any parts are missing or broken, please call HARBOR FREIGHT TOOLS at
1-800-444-3353.
OPERATION
To assist you with operating your Spotlight, please refer to Figure 1 on page 4.
CHARGING
Your Spotlight Battery (8) is rechargeable. It can be charged by either using the Power Adapter (26) or the Car
Adapter (25).
To recharge your Battery (8) using the AC/DC Adapter (26).
Step 1) Insert the cord end of the AC/DC Adapter (26) into the outlet on the back of the Spotlight. Plug the
Power adapter (26) into an electrical outlet.
Step 2) The red light on the side of the Left Trim (4) piece will light, indicating that the unit is properly plugged
in. For the initial charge of the Spotlight, leave the Power Adapter (26) plugged in for between 14 and 16 hours
until the Spotlight is fully charged. The red light will shut off automatically when the battery is fully charged.
Subsequent charges of the Battery will take approximately 12 to 14 hours.
IMPORTANT: Always unplug the Power Adapter (26) from the Spotlight after the Spotlight is charged.
The Spotlight will not function properly if the Power Adapter is plugged into the Spotlight.
Note: After each use of the Spotlight, always fully recharge the battery.
Note: This unit is equipped with an automatic shutoff. If the Battery’s Power is running low,
the unit will automatically stop operating to protect the battery. Charge the battery
immediately.
To recharge your Battery (8) using the Car Adapter (25)
Step 1) Insert the cord end of the Car Adapter (25) into the outlet on the back of the Spotlight. Plug the plug
end of the Car Adapter (25) into your car’s lighter. For the initial charge, the Spotlight must be charged for
between 8 and 11 hours. The red light will shut off automatically when the battery is fully charged. Subsequent
charges of the Battery will take approximately 4 to 7 hours.
Note: When charging the Spotlight, only place the Spotlight on a non-flammable surface.
IMPORTANT: Always unplug the Car Adapter (25) from the Spotlight after the Spotlight is charged.
The Spotlight will not function properly if the Car Adapter is plugged into the Spotlight.
Tripod Adapter
Your Spotlight can be mounted onto a tripod or workstand (neither is included). At the bottom of the Trigger Grip
Handle there is a Tripod Adapter (21). Thread the tripod or workstand into this Tripod Adapter.
On/Off Switch
Press the switch the first time and either spotlight or flood light will go on. Press the switch again to turn off the
light. Press the switch again and you will get the opposite light that went on after pressing the switch the first
time (either the spotlight or flood light). Press switch again and light will go off. Push the Trigger Lock (19) on
the side of the handle to lock the Trigger ON, or lock the Trigger OFF.
IF THERE IS ANY QUESTION ABOUT A CONDITION BEING SAFE, DO NOT OPERATE THE TOOL.
SKU 93366
REV 01/07
Page 3
Replacing the Battery: When the Battery (8) is dead, it can be easily replaced. To replace the Battery,
take out the screw on the back of the lamp, slide off Battery Cover (9) and pull out the Battery. Remove red
and black wire connections from the old battery. Attach these two wire connections to the new replacement
battery.
Note: Make sure red battery wire connects to red battery terminal and black battery wire connects to black
battery terminal. Carefully slide the new Battery into Battery Box (7 & 11), making sure that the wires are
not damaged. Slide Battery Cover (9) back into place.
COVER OF BATTERY (9)
FIGURE 1
RED CHARGING LIGHT
TRIGGER LOCK (19)
TRIPOD ADAPTER (21)
REPLACING THE BULB
WARNING: Always wear ANSI approved safety goggles and work gloves when replacing the bulb.
1) Gently pull off the Black PVC Cover.
NOTE: When putting the cover back on, make sure it is put in the correct position so it fits perfectly on the
housing.
2) Remove the 2 Plastic Glass Holders (18 & 24).
Pull
NOTE: When putting plastic Glass Holders back in place, make
sure the groove on each holder is properly aligned with the housing.
3) Carefully remove the Glass (2).
Pull
4) Pull out the Reflector (3).
5) Remove the pin on the back of the Reflector, and take out
the bulb assembly.
6) To replace the bulb, pull the two bulb wire leads away from
the connecting wires. Do not attempt to pull on the bulb to
remove it; the bulb may break causing personal injury.
7) Connect the two wire leads of the new bulb to the
connecting wires of the Spotlight. Put the bulb back into the
reflector and lock the bulb in place by securing with the pin.
8) Carefully put the glass back in place, and secure with the 2
Plastic Glass Holders. Make sure groove on each holder is
properly aligned with the housing.
9) Fit the Black PVC cover back in place.
SKU 93366
Page 4
WARNING - BATTERY DISPOSAL
The Spotlight is powered by a battery which will have a long life span. When the battery is no longer
functioning, it should be removed from the Spotlight and properly recycled. Many states require recycling.
Contact your local solid waste authority for information on recycling. Before disposing of the battery, wrap
exposed terminals with heavy tape to prevent a shorting condition, which could cause fire and/or injury.
NEVER EXPOSE THE BATTERY TO HIGH HEAT OR FIRE; BATTERY MAY EXPLODE UNDER THESE
CONDITIONS.
PLEASE READ THE FOLLOWING CAREFULLY
THE MANUFACTURER AND/OR DISTRIBUTOR HAS PROVIDED THE PARTS DIAGRAM IN THIS MANUAL AS A
REFERENCE TOOL ONLY. NEITHER THE MANUFACTURER NOR DISTRIBUTOR MAKES ANY REPRESENTATION OR
WARRANTY OF ANY KIND TO THE BUYER THAT HE OR SHE IS QUALIFIED TO MAKE ANY REPAIRS TO THE PRODUCT
OR THAT HE OR SHE IS QUALIFIED TO REPLACE ANY PARTS OF THE PRODUCT. IN FACT, THE MANUFACTURER
AND/OR DISTRIBUTOR EXPRESSLY STATES THAT ALL REPAIRS AND PARTS REPLACEMENTS SHOULD BE
UNDERTAKEN BY CERTIFIED AND LICENSED TECHNICIANS AND NOT BY THE BUYER. THE BUYER ASSUMES ALL
RISK AND LIABILITY ARISING OUT OF HIS OR HER REPAIRS TO THE ORIGINAL PRODUCT OR REPLACEMENT
PARTS THERETO, OR ARISING OUT OF HIS OR HER INSTALLATION OF REPLACEMENT PARTS THERETO.
SKU 93366
Page 5
PARTS DIAGRAM
25
9
10
8
7
26
11
5
12
6
4
13
14
2
3
1
24
23 22
21 20
18
16
19 17
15
PARTS LIST
1
2
3
4
5
6
7
8
9
10
11
12
13
BLACK PVC COVER
GLASS
REFLECTOR
LEFT TRIM PIECE
3*12BT
RIGHT HOUSING
UPPER SHELL OF BATTERY
BATTERY
COVER OF BATTERY
M4*10 BOLT
DOWN SHELL OF BATTERY
HANDLE
BRASS QUAD
14
15
16
17
18
19
20
21
22
23
24
25
26
ROTATION BUTTON OF HANDLE
SOFT GRIP
CIRCUIT BOARD
RIGHT TRIM PIECE
PLASTIC GLASS HOLDERS A
TRIGGER LOCK
LEFT HOUSING
TRIPOD ADAPTER
SWITCH
TRIGGER
PLASTIC GLASS HOLDERS B
CAR ADAPTER
AC/DC ADAPTER
NOTE: Some parts are listed and shown for illustration purposes only and are not available individually as
replacement parts.
SKU 93366
Page 6