1
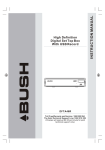
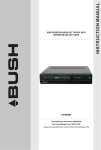
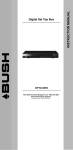
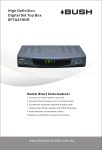
DFTA49DVD
Toll Free Warranty and Service: 1800 509 394
Gold Technical Support Line: 1902 215 259
(Charges will apply at $2.95 per minute for Gold Technical Support Only)
INSTRUCTION MANUAL
DVD Player With Integrated High Definition
Digital Set Top Box
Safety Instructions
Always read the safety instructions carefully
Keep this Instruction Manual for future reference
Keep this device away from humidity
Lay this device on a reliable flat sur face before setting it up
Do not stand it on soft furnishings
If any of the following situation arises, get the Set Top Box checked by
a service technician:
It has been exposed to moisture
It has been dropped and damaged
It has obvious sign of breakage
It has not been working well or you cannot get it to work according
to the Instruction Manual
Warning
To prevent the risk of electric shock, do not open the cover or the back of the
receiver.
Do not block the ventilation holes of the device. Leave appropriate gap above
and around it to allow for adequate ventilation.
Do not place the device in an unventilated cabinet or on top of a unit which
emits heat.
Copyright Statement
No par t of this publication may be reproduced in any form by any means without the
prior written permission. Other trademarks or brand names mentioned herein are
trademarks or registered trademarks of their respective companies.
This product incorporates copy protection technology that is protected by U.S.
patents and other intellectual proper ty rights of Rovi Corporation. Reverse
engineering and disassembly are prohibited.
This symbol indicates that this product incorporates double insulation
between hazardous mains voltage and user accessible par ts. When servicing
use only identical replacement par ts.
WARNING: To reduce the risk of fire or electric shock,do not expose this
apparatus to rain or cords.
Introduction
Thank you for buying this Bush product, which is designed to give you many
years of trouble-free service.
You may already be familiar with using a similar unit, but please take time to
read these instructions. They are designed to familiarise you with the units’
m any features and to ensure you get the very best from your purchase.
Safety is important
Your safety and the safety of others is impor tant. Please therefore, ensure you
read the “Safety Instructions” before you operate this unit.
Warranty
In the unlikely event that your product fails to work normally, please call the
below Bush warranty number for suppor t.
Australia
Bush Warranty: 1800 509 394
New Zealand
Bush Warranty: 0800 450 259
About the High Definition Digital Set Top Box with Integrated DVD Player
This DVB-T TV Receiver allows you to access Free-to-Air Digital TV
Channels and Radio Broadcasts on your TV set. Its digital reception
covers VHF & UHF band. Digital TV eliminates noise and inter ference
and offers high quality video and audio.
An easy to use on-screen installation guide is provided. In addition,
a fully featured Remote Control is included that offers you access
to every feature with a simple press of a button.
Main Features
Compliant with Australian DVB-T Standards
Bandwidth of 7/8MHz Suppor ted
COFDM Demodulator
Receives All High Definition Digital Free to Air Channels
Integrated DVD Player
DVD Player Suppor ts Multi Format Play Back (DVD/MP3/CD/CD-R/CDRW/DVD+/-R/DVD+/-R,RW/ KODAK PICTURE CD and MPEG4 Picture Formats)
On Screen 7 Day Program Guide with Now and Next Event Info
HDMI Output (up to 1080i) for Per fect Picture Quality
Composite Video Output
Digital Audio via SPDIF Coaxial Output for Connection to a Surround Sound
Amplifier
Teletext (where applicable) with Subtitle Suppor t for the Hard of Hearing
Picture Zoom In/Out Whilst Watching a DVD
Automatic/Manual Channel Search
Multiple-Language OSD
Suppor ts Multi-Subtitle
USB Input Suppor ts JPEG Files, Music Files, Video Files
Tuner RF In/Loop Through
Parental Lock
Remote Control
Package Contents
Before installation, please check the items of the package.
The package should contain the following items:
~ Set Top Box
x1 pc
~ Remote Control
x1 pc
~ AAA Battery for the Remote Control x1 pair
~ Instruction Manual
x1 pc
~ Composite RCA Cable
x1 pc
Table of Contents
Front Panel and Rear Panel Illustration----------------------------------------------1
Remote Control ----------------------------------------------------------------------2
Connecting to a TV Set---------------------------------------------------------------4
Set Top Box Menu Set Up ------------------------------------------------------------5
DVD Player Menu Set Up------------------------------------------------------------16
MP3/WMA/JPEG/MPEG4 Playback-------------------------------------------------20
Picture CD Playback-----------------------------------------------------------------21
Troubleshooting---------------------------------------------------------------------22
Specifications-----------------------------------------------------------------------23
Warranty-----------------------------------------------------------------------------24
Front Panel and Rear Panel Illustration
Front panel
1
2
4 5
3
6
78
1 Disc Tray: Once you press the Eject Button the Disc Tray will open and you can
load your DVD.
2 STANDBY INDICATOR: Standby Indicator will be red if the Set Top Box is in
Standby Mode or Green if the unit is on.
3 REMOTE CONTROL SENSOR: Receives the Signal from the Remote Control.
4 EJECT BUTTON: Used to open or close the disc tray in DVD mode.
5 PLAY/PAUSE BUTTON: Used to playback or pause the program being viewed .
6 Stop Button: Press the Stop Button to stop play in DVD.
7 USB Input : USB Input Suppor ts JPEG Files, Music Files, Video Files and Software
Upgrade
8 POWER BUTTON: Press the Power Button to turn the unit on or off.
Rear panel
1
2
3 4 5
6
7 8
AC 230V
~50Hz
CAUTION
DFTA49DVD
RISK OF ELE CTRIC SHO CK
DO NOT OPE N COV ER
RF IN
DVD Player with Integrated High Definition
Digital Set Top Box
POWER SUPPLY: AC 230V ~50Hz
MAX POWER CONSUMPTION: 15W
BUSH WARRANTY: 1800 509 394 AUSTRALIA
BUSH WARRANTY: 0800 450 259 NEW ZEALAND
RF LOOP
THROUGH
MADE IN PRC
HDMI OUT
SERIAL NO.:
Digital
Audio
4
2010/11
N14119
Coaxial
1 RF IN : This socket connects to your external Aerial.
2 RF LOOP THROUGH: This socket will bypass the RF signal to either your TV or
another video system.
3 HDMI :High definition audio and video output used to connect to a HDMI device
4 VIDEO: This socket outputs composite video signal.
5 COMPONENT VIDEO OUT: These sockets connect to your TV component input
terminals.
6 AUDIO L/R: This socket outputs Analog Audio L/R signal.
7 COAXIAL: This socket connects to a Coaxial cable on your surround sound system.
8 MAINS CABLE: This is used to connect to your main power supply.
1
Remote Control
1. OPEN/CLOSE:In DVD mode, press the
OPEN/CLOSE
Button to immediately eject or
1
close
the
disc
tray. NOTE: The OPEN/CLOSE
2
Button
has
no
effect in DVB mode.
3
2. PLAY/PAUSE: In DVD mode, press the
4
PLAY/PAUSE Button to pause or play the DVD
23
5
you are watching.
SETUP
CH+
SOURCE
24
6
3.REV: In DVD mode, press the REV Button to
7
rewind play of the DVD you are watching.
4. STOP: In DVD mode, press the Stop Button
VOL
VOL
OK
8
+
to during play of the DVD you are watching.
25
5. FWD: In DVD mode, press the FWD Button
to Fast Forward play of the DVD you are
9
26
CHINFO
RETURN/EXIT
watching.
1
2
3
10
6. SOURCE: Press the Source Button to
SLOW
switch between DVD mode and Set Top Box
4
5
6
11
mode.
GOTO
12
7. CH+/CH-: In the Set Top Box mode, press
7
8
9
0
27
13
the CH+/CH- to scroll through the channel
28
14
list.
TITLE/TTX AUDIO SUBTITLE
29
15
8. VOL+/VOL-: Press the VOL+/VOL- Button
30
MENU
ANGLE
REPEAT
A-B
16
to increase or decrease the Volume Level.
31
17
9. RETURN/EXIT: In DVD mode, press the
EPG FAVOURITETV/RADIO ZOOM
32
18
RETURN Button to return the main menu of
the disc. In the DVB mode, press the RETURN
Button to return to the previous channel
viewed.
10. SLOW: Press the SLOW Button to select slow playback.
11. GOTO: During DVD playback, press the GOTO Button to show the current time
counter position.
12. NUMBER KEYS: Press to select channel numbers or input numbers in menus.
13. AUDIO: Press to select the available audio languages or set the sound mode.
14. SUBTITLE: Press to switch among different subtitles that are broadcasted.
15. MENU/Yellow: Press the Menu Button select the Main Menu. In DVB mode press
the Yellow Button to select options in the Teletext Menu.
16.ANGLE/Blue: In DVD mode, press the ANGLE Button to switch the viewing angle for
DVDs that suppor t this feature. Press the Blue Button in Set Top Box mode to select
options in the Teletext Menu.
17. ZOOM: Press the Zoom Button to Zoom In and out in DVD mode.
19
20
21
22
STANDBY
MUTE
P/N
OPEN/CLOSE
2
18. TV/RADIO: Press the TV/Radio Button to switch between TV and Radio modes.
19. MUTE: Press the Mute Button to turn the sound on or off.
20. STANDBY: Press the Standby Button to switch the unit on and off.
21. P/N: Press the P/N Button to switch between PAL and NTSC TV output formats.
22. PREV: Press the PREV Button to skip to the previous chapter or track
23.NEXT: Press the Next Button to skip to the next chapter or track.
24. SETUP: Press the Setup Button to enter the Main Menu or press again to to exit the setup
menu.
25. OK: Press the OK Button to confirm a selections within a menu or setting.
26. INFO: Press the Info Button to display the information about the program you are watching.
27. TITLE/TTX: Press the Title/TTX Button to open the Teletext Menu.
28. PROG: In DVD mode, press the Program Button to display the Program options. In Set Top
Box mode, press the Program Button to enter the Rec list Menu.
29. A-B/Green: Press the A-B Button once to set the starting point for repeat segment in DVD
mode. Press it again to set an end point, and the player will repeat the segment from the start
to end point. Press it once more to turn off repeat segment. In Set Top Box mode the Green
Button will select different functions in Teletext menu.
30. REPEAT/Red: Press the Repeat Button to select the repeat mode. Press the Repeat Button
multiple times to cycle between Title Repeat, Chapter Repeat, and Repeat Off. In Set Top Box
mode the Red Button will select different functions in Teletext menu.
31. EPG: Press the EPG Button to display the EPG menu.
32. FAVOURITE: Press the Favourite Button to access your favourite channels.
Note:Some of the remote buttons have multiple functions, which can be used in DVD
and Set Top Box Mode.
3
Connecting to a TV Set
TV Aerial
AC 230V
~50Hz
CAUTION
DFTA49DVD
RISK OF ELE CTRIC SHO CK
DO NOT OPE N COV ER
RF IN
SERIAL NO.:
DVD Player with Integrated High Definition
Digital Set Top Box
POWER SUPPLY: AC 230V ~50Hz
MAX POWER CONSUMPTION: 15W
BUSH WARRANTY: 1800 509 394 AUSTRALIA
BUSH WARRANTY: 0800 450 259 NEW ZEALAND
RF LOOP
THROUGH
Digital
Audio
MADE IN PRC
4
2010/11
HDMI OUT
Coaxial
N14119
Coaxial
VOLUME
INPUT SELECTOR
POWER
YELLOW
(Video)
(Audio)
BYPASS
PRO LOGIC
3 STEREO
MODE
TEST
CHANNEL
KARAOKE
2
1
MIC VOL
2
EXCITE
VIDEO IN
Pb
HDMI
VCR
4
UP
DOWN
MIC
Composite
Pr
MUTE
BASS
1
MIC
TREBLE
ECHO
Set Top Box Menu Set Up
First Time Installation
Once you have connected your Set Top Box to your TV correctly and the Mains Power
is connected and switched on, you can now turn on your TV. Press the Power Button
on your remote to turn on your Set Top Box. If you are using the receiver for the first
time or have conducted a Factory Reset, the on-screen Installation Guide will
be displayed and will assist you in setting up your Set Top Box.
When the on-screen Installation Guide begins you will be asked to confirm the
following settings:
(1) Confirm the OSD(On Screen Display) language. Use the navigation buttons to
select your desired language.
(2) Confirm your country of residence. Use the navigation buttons to select your
desired country.
(3) You will then select Channel Search, this will begin the Automatic Channel
Search that will source and store all the available channels. Press the Right
Arrow Button or the OK Button to select and begin the Automatic Channel Search.
Once the Automatic Channel Search has been completed all channels will appear in the
Channel List and you will be able to begin watching your favourite channels.
Basic Operation
Managing your Program Settings
To access the Program Menu, press the Setup Button to enter the Main Menu and then
select the Program option. The Program Menu provides you with options to adjust the
Program Settings. Select an option as shown below and press OK or Right to adjust the
setting. Press the Exit Button to exit the Menu.
5
Program Edit
In the Program Menu you are able to select Program Edit. This will allow you to edit
your program preferences; lock, skip, favourite, move or delete programs. To
enter the Program Edit Menu you will need to enter either your set password
or the default password ' 0 0 0 0 0 0 ' .
Setting a Favourite Program
You can create a shor tlist of favourite programs that you can easily access by
pressing the Favourite Button.
To set a favourite TV or Radio program:
1. Select the preferred program from the channel list and then press the FAVOURITE
Button on your remote. A hear t shaped symbol will appear and the program will be
marked as a favourite.
2. Repeat step 1 to select more Favourite programs.
3. To confirm and exit the Menu, press the EXIT key.
To disable a favourite TV or Radio Program:
Select the program again and then press the FAVOURITE button for a second time
this will remove the hear t shaped symbol and disable the favourite setting.
Viewing a Favourite Program
1. Press the Favourite Button and then Favourite Menu will appear.
2. Press the Up or Down Buttons to select your favourite program.
3. Press the OK Button to select and watch your favourite program.
Deleting a TV or Radio Program
You can delete TV or Radio Programs from the channel list, if you desire.
To delete a TV or Radio program:
1. Select the program you wish to delete and then press the BLUE Button. A
message will appear, asking you to condirm if you wish to delete this program.
Press the OK Button to confirm.
2. Repeat Step 1 delete more programs.
3. To confirm and exit the Menu, press the EXIT key.
6
Skipping a TV or Radio Program
You can set your Set Top Box to skip a TV or Radio program, if you desire.
To skip a TV or Radio program:
1. Select the program you would like to skip and press the Green Button. A skip
symbol will be displayed and the program will be set to skip.
2. Repeat step 1 to set more programs to skip.
3. To confirm and exit the menu, press EXIT key.
Disable a skip TV or Radio program:
Select the program with a skip symbol and then press the Green Button again to
disable the skip function and remove the skip symbol.
Move a TV or Radio Program
You can rearrange/move the programs in your channel list.
To move a program:
1. Select the preferred program and then press the Red Button and a move symbol will
appear.
2. Press the Up or Down Buttons to move the program to your desired location.
3. Press the OK Button to confirm.
4. Repeat the above steps to move more channels
Lock Program
You can lock selected programs for restricted viewing.
To lock a TV or Radio Program:
1.Select the preferred program then press the Yellow Button. A lock- shaped symbol
will be displayed. The program is now marked as locked.
2.Repeat step 1 to lock more programs.
3.To confirm and exit the menu, press the Exit Button.
4.To view the locked program, you will be require to enter either the default password
'000000' or your last set password. Once this is entered you will be able to watch the
program.
5. To disable the lock function,press the YELLOW button. You will also need to enter
your password.
EPG (Electronic Program Guide)
The EPG is an on-screen TV guide that displays the scheduled programs for the next
seven days for every tuned channel (when available from the broadcaster). Press the
EPG Button on the Remote Control to access guide.
7
EPG (Electronic Program Guide)
The EPG is an on-screen TV guide that displays the scheduled programs for the next
seven days for every tuned channel (when available from the broadcaster). Press the
EPG Button on the Remote Control to access guide.
Once you have pressed the EPG Button on the remote control, you can use the Up or
Down Button to select the program you wish to view more information about.
In the EPG Menu, press the Red Button to view the previous day's (-24 hours) program
list and press the Green Button to view the next day's (+24hours)
program list. Press the Blue Button to get the detailed information of the selected
program in full screen.
Setting a Reminder:
You can use the remider function to let you know when a programme is going to star t.
Use the Up,Down button to select a programme.Press the OK button to set the
remider.
8
When booking a reminder you must select the program you wish to set a
reminder message for and then press ENTER to confirm. The program will be
displayed in the booking list.
Note: In DTV mode, press the Blue Button to view the scheduled reminders in the
booking list. In the booking list window the program status is marked in green
which is view mode.
Sor t
You can set you channels to be sor ted in the below order:
[ LCN ] - Sor t the channels in ascending order
[ Name ] - Sor t the channels in alphabetical order
[ Service ID ] - Sor t the channels according to the station
[ ONID ] - Sor t the channels according to ONID .
9
LCN (Logical channel number)
In the Program Menu you can set the LCN to on or off.
Managing your Picture Settings
To access the Picture Menu, press the Setup Button and then select Picture. The
Picture Menu allows you to manage your picture settings as shown below. Press the
Up or Down Buttons to select an option and then press the Right or Left Buttons to
adjust that setting . Press the Exit Button to exit the menu , when you
have finished .
Note: The unit doesn't suppor t the video output through HDMI and RCA at the same
time as this is not required. If the HDMI connection is being used you will not need to
use the RCA also and the Set Top Box will not output through RCA.
Aspect Ratio
You must set the display format to either 4:3 PanScan, 4:3 Letter Box,16:9
Widescreen or Auto to get the maximum display when watching TV.
Resolution
If the video does not appear correctly, change the setting. This setting is to
match the most common setting for HDMI.
TV format
If the video does not appear correctly, you need to change the settings. This should
match the most common setting for TVs in your country.
[ NTSC ] : for NTSC system TV .
[ PAL ]: for PAL system TV .
10
Channel Search
To manage your channel list and to conduct a channel scan you have to enter the
Channel Search Menu. To access the menu, press the Setup Button and then select
Channel Search. The Channel Search Menu allows you to automatically or manually
search for channels and provides you with options to adjust the search settings.
Then use the Right and Left Buttons to adjust the setting.
Press EXIT to exit the M enu.
1 . Auto Search
The Auto Search option allows you conduct a full automatic search for all available
channels. All channels that are found will be stored in the channels. Please note that
when you conduct a channel search it will clear all preset channels. To conduct an
automatic search select the Auto Search option and then press the OK Button to star t
channel search. To cancel, press the Exit Button.
2. Manual Search
You can also conduct a manual search for specific channels. This option allows you
to add new channels without changing the current channels list. To conduct a Manual
Channel Scan select the Manual Search option. The press the OK Button and the
channel search screen will appear. Use the Right or Left Button to select the channel
frequency you are looking for. Then press OK to confirm. Once a channel is found it
will be store in the channel list.
11
Country
You are able to change your country of residence in this section if you need to.
Antenna Power
If you have an external active antenna, this option will allow you to connect and use
this antenna.
Time Setting
The time setting menu allows you to manage the time function on your set top box.
To access the Time Setting Menu select the Time option in the Main Menu. The Time
Setting Menu provides you with options to adjust the time. Use the Right and Left
Button to then adjust each setting. To exit, press the Exit Button.
Time
Auto
Time Offset
Country Region
western Australia
Time Zone
GMT +1
Sleep
off
EXIT
Return
OK
Confirm
Time offset
The Time Offset can be set to auto or manual. If set to auto the Set Top Box will
automatically change day light savings time etc.
Country Region
The Country Region option also you to set the state time in which you live. Select the
Country Region option when Time Offset is set to Auto.
Time Zone
You can also change the Time Zone, this is best used when the Time Offset is set to
Manual.
Sleep
If this setting is off, the sleep function will not work. When you have set the Sleep
setting a pop up message will appear after the set amount of time. This will inform you
that the unit is about to be turned off.
The Sleep Function can be set to a time period of 0-12 hours. Standard setting is 3
hours. Press the Standby Button to exit sleep / auto-off mode.
Option
The Option Menu allows you to adjust the language settings. To access the Option
Menu, press the Setup Button to select the Main Menu and select the Option Setting. To
adjust an Option Setting use the Right and Left Buttons and then press OK. To exit the
menu press the Exit Button.
12
1. OSD Language
The OSD Language is the language that will be used in the Menu and displayed on the
screen. Use the Navigation Buttons and the OK Button to select the language you
would like to display.
2. Audio Language
The Audio Language allows you to select your preferred audio language. If the
language is not available, the default program language will be used.
3. Subtitle Language
The Subtitle Language option allows you to set the subtitle language.
4. Digital Audio
The Digital Audio allows you to select your preferred digital audio language.
System Setting
The System Setting Menu allows you to adjust the System Settings. To access the
System Menu, press the Set Up Button to enter the Main Menu and then select the
System Option. To adjust the settings use the Navigation Buttons and the press the OK
Button. Press the Exit Button to exit.
1. Parental Guidance
In the System Menu you can set the Parental Guidance settings to restrict access to
unsuitable channels. To restrict/lock the selected channels you will need to enter
either the default password '000000' or your own password and then follow the
prompts.
2. Setting your Password
In the System Menu you are able to set your own password. Enter your old password
or the default password '000000' to unlock this setting. Then you will then be asked to
enter your new password. To confirm re-enter your new password. Once it is
confirmed, press the Exit Button to exit the Menu.
13
3. Factory Default
You can select the Factory Default Function in the System Menu. The Factory Default
Setting will allow you to reset your Set Top Box to the Default Factory Settings. In
Main Menu select [Factory Default] and press OK or RIGHT to select. Enter your
password or the default password " 000000 " and press OK to confirm .
This option will delete all preset channels and settings .
4.Information
The information option in the System Menu allows you to view the units model,
hardware and software information.
(11)USB support movie playback :
To access the Menu, press the SETUP button and select [USB] using the
RIGHT/LEFT keys. The menu provides options to playback Music, Photo and
Multimedia files. It can suppor t AVI, WMA, JPEG and BMP formats.
The unit will only suppor t USB device with FAT32 file system.
It will not suppor t NTFS file system.
(a) Multimedia: When a USB device is attached you can select from the Music, Photo
or Movie options in this menu using the RIGHT/LEFT keys and OK to select. If a USB
device is not connected, the warning message "No USB device is Found" will appear.
14
(b) Photo configure:
-Slide Time: adjust slide show interval to 1~8 seconds.
-Slide Mode: adjust slide show effect as mode 0~59 or random.
-Aspect Ratio: Keep displays the picture as its original aspect,
Discard displays the picture in full screen mode.
(c) Movie Configure
- Aspect Ratio:
[Keep]: Play movie as its original aspect.
[Discard]: Play movie in full screen mode.
- Subtitle Specific:
[Small]: Displays the subtitle as small mode.
[Normal]: Displays the subtitle as normal mode.
[Big]: Displays the subtitle as big mode.
- Subtitle BG:
[White]: Displays the subtitle in white background.
[Transparent]: Displays the subtitle in transparent background.
[Grey]: Displays the subtitle in grey background.
[Yellowgreen]: Displays the subtitle in yellowgreen background.
[White]: Displays the subtitle in White background.
- Subtitle Font Color:
[Red]: Displays Subtitle in red font.
[Blue]: Displays Subtitle in blue font.
[Green]: Displays Subtitle in green font.
[White]: Displays Subtitle in white font.
[Black]: Displays Subtitle in black font.
Note:
- We cannot guarantee compatibility (operation and/or bus power) with all
USB mass storage devices and assumes no responsibility for any loss of
data that may occur when connected to this unit.
- With large amounts of data, it may take longer for the system to read the
contents of a USB device.
- Some USB devices may not be properly recognized.
- Even when they are in a suppor ted format, some files may not play or
display depending on the content.
15
DVD Menu Set Up
DVD Menu Operation
To enter the DVD Function of the unit, press the Source Button to change from Set Top
Box mode to DVD mode. Then press the SETUP Button to enter the Main Menu. Then
use the Navigation Buttons to scroll through the menu to select the relevant option you
wish to select. Then press OK to confirm.
LANGUAGE SETUP
Select Language in the setup menu, and display the Language submenu:
OSD Language
Use this item to select the language of the setup menu and screen
display.
Subtitle
This option provides the preset subtitle language.
MPEG4 Subtitle(optional)
Select different MPEG4 subtitle encoding option.
Note: Not all players support this item.
Audio
Select the built-in disc dubbing language options.
DVD Menu
This option provides the film's menu language options.
VIDEO SETUP
Select Video in the setup menu, and display the Video submenu.
16
Aspect Ratio
Select the aspect ratio.
Notes:
The image display ratio is related to the recorded disc format.
Some disc can not display images in the aspect ratio you choose.
If you play a disc recorded in 4:3 format on a wide screen TV, black bars will appear
on the left and right side of the screen.
You must adjust the screen setting depending on the type of the television you have.
TV System
Select the different TV system.
Note: The DVD player setting should be matched to your TV set.
For more information of output format, refer to the instructions or your TV set.
Video Out
Select the video output format wanted.
Note: Only HDMI DVD player has “HD” selection.
HD Resolution (optional)
After you set the video output to HD output, you can choose the
resolution of HDMI output.
Note: Only HDMI DVD player has this item.
AUDIO SETUP
Select Audio in the setup menu, and display the Audio submenu.
17
Digital output(Optional)
Adjust the audio output on Coaxial por ts to work in harmony with the audio
equipment (e.g.receiver, amplifier) connected to the player.
Off Digital audio output is disabled.
PCM Transfer stereo 2 channels signals
RAW: Transfer the DVD original audio track
Note: This item is only for the player with coaxial output.
Down sampling
Select down sampling function on or off.
ON: System will down sampling rate for high sampling rate audio(more than 96K).
OFF: Disable this function.
Smart sound(Optional)
Select different music effect whiling listening music.
Note: Not all player has this item.
RATING SETUP
Select Rating in the setup menu, and display the Rating submenu.
18
Parental Control
Set the parental control feature of the player
Note: Password is needed before setting Parental Control.
Set Password
Input four digits (password), then press OK to confirm.
Note: If you forget your password, please use the universal password 6666
to unlock.
MISC SETUP
Select MISC in the setup menu, and display the submenu:
Use Default Settings
Reset setup data to factory default value.
Screen Saver(Optional)
Enable/disable the screen saver function.
Note: Not all player has this item.
19
MP3/WMA/JPEG/MPEG4 PLAYBACK
The MP3/WMA/MPEG4 disc has such a directory structure as shown picture above .
Press Direction key to choose the root directory and then press OK button to enter
into the sub directory. Press Direction key to choose the desired track and then
press OK or PLAY to enjoy the music or movie. If you want to return to the upper
menu, press Direction key to choose
the icon and press OK button.
Filter: Allows selecting the categories of files displayed in the browser list.
Repeat: To switch different repeat playing mode
Mode: Select different playing mode as follows.
Normal: Shuffle mode is cancelled.
Shuffle: Shuffle mode enabled. When playback reaches the end of the current
chapter/track, playback jumps to a random chapter/track.
As the end of each chapter/track is reached, another random chapter/track will be
played until all tracks/chapters have been played or the Shuffle mode is cancelled
by toggling to a different Mode Option.
Music Intro: In this mode, the media will play 10 seconds and then skip to next
media.
Edit Mode: To enable programmed playback mode. When you select the mode,
press LEFT Direction key to directory and press OK to choose the desired track
and press Add to program to start program playback.
Program view: Display program track.
Brower view: Display track directory.
Add to program: Choice the track press Add to program to add the track of the
program play directory.
Clear program: In the complete stop state(press the STOP button twice), choose
the track press Clear program to delete the track of the program play directory.
20
PICTURE CD PLAYBACK
The PICTURE CD disc has such a directory structure structure as shown in the
following picture.
Press Direction key to choose the root directory and then press OK button to enter
into the sub directory. Press Direction key to choose the desired picture and then
press OK or PLAY to enjoy the picture.
If you want to return to the upper menu, press Direction key to choose the icon
and press OK button.
Image rotation
In picture play state, press Direction key to rotate the pict ure, press ANGLE button
to change the picture scan mode.
21
Troubleshooting
If you experience problems with your Set Top Box/DVD Player, we recommend you follow
the below suggestions first which are outlined to assist you with any basic issues. If you
continue to have problems we recommend you contact the Bush service and Warranty Toll
Free Number - 1 8 0 0 5 09 394 .
Problem
Possible cause
What to do
The unit standby light is Mains lead unplugged
not on
Make sure that the mains power
is connected firmly and that the
power is switched on.
No signal found
Aerial is not connected correctly
correctly, then contact a local antenna
or has been damaged or misaligned repair consultant to check your aerial
Check your aerial has been connected
No sound
Mute function maybe on, your audio
connections may not be connected
firmly or you may need to adjust the
volume.
properly.
Tur n off Mut e function if it is activated.
Che ck that your audio cables are connected
firmly and correctly and ensure the volume
level and setting are set to appropriate levels.
Mosaic blocks in picture Aerial may not be compatible
or picture freezes
Check aerial
Scrambled channel
message
Locked out
Channel is scrambled
Conduct a Factory Reset and then
rescan for all available channels.
No response to
remote control
Set Top Box is off
No disc is displayed
Ensure you have put the disc on the tray.
Ensure the disc is not upside down.
Ensure the disc is not distor ted, stained or scratched.
Forgotten channel
lock code
Enter the universal password “ 000000” and
this will unlock your Set Top Box and allow
you to enter a new password.
Plug in and turn on Set Top Box
Aim Remote Control at front
Remote Control not aimed
panel
correctly
Check for obstructions
Front panel obstructed
Remote control batteries are Check batteries direction
inser ted incorrectly
Replace remote control
Remote Control batteries
batteries
exhausted
Try a direct feed from the
After moving your Set Top The aerial feed may come
through a distribution system antenna
Box to another room,
which may reduce the digital
you find that you have
lost the reception signal. signal now received by the
receiver
BAD disc is displayed
Ensure the disc is not warped, damaged or deformed.
Ensure the disc is not badly stained or damaged.
Ensure the disc format is compatible with the player.
Please check whether you have tried to play a software CD.
If so, please restar t the player.
22
Specifications
Item
Specification
Tuner
Frequency Range
Input impedance
Demodulation
Connectors
Power
Display
Decoding
Others
VHF: 174MHz to 230MHz
UHF: 470MHz to 862 MHZ
75 Ohms unbalanced
Signal input level
Bandwidth
-78 ~ -25DBM
Demodulator
COFDM
OFDM Modulation
Packet Carries
2K, 8K FFT, SFN and MFN
Guard interval
RF IN
1/4, 1/8, 1/16, 1/32
RF Loop Through
IEC 165-2 male connector
Video
Video output, Pr/Pb/Y, audio L/R
7/8MHz
2K/8K
IEC 169-2 female connector
Coaxial
RCA,for SPDIF digital audio output
Output
HDMI
Input
230V ~50Hz
Consumption
15W max
Decorder module
PAL, NTSC
Resolution
720x576(PAL), 720x480(NTSC)
Aspect Ratio
4:3(Letterbox, Pan&Scan), 16:9
Video
MPEG2 Transpor t MP@ML
Audio
MPEG2 Audio layer I&II
Compliance
ETSI EN 300 744 DVB-T Compliance
Sound Mode
Right, Left, Stereo
*Specifications are subject to change without fur ther notice.
This marking indicates that this product should not be disposed with other household
wastes throughout the EU. To prevent possible harm to the environment or human
health from uncontrolled waste disposal, recycle it responsibly to promote the
sustainable reuse of material resources. To return your used device, please use the
return and collection systems or contact the retailer where the product was purchased.
They can take this product for environmental safe recycling.
23
24
PO BOX 6287,
SILVERWATER NSW 1811
www.bushaustralia.com.au