1
BHAS01UR
POWER
CH-
CH+
VOL-
VOL+
MENU
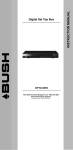
User Guide for
Digital TV Receiver
Warranty: 1800 022 960
BHAS01UR
2
BHAS01UR
Contents
Introduction . . . . . . . . . . . . . . . . . . . . . . . . . . . . . . . . . . . . . . . . . . 4
Main features and functions . . . . . . . . . . . . . . . . . . . . . . . . . . . . . . 4
Features:......................................................................................4
Remote control............................................................................5
Battery installation.......................................................................7
Programming your learning remote control..................................8
Front and rear panels . . . . . . . . . . . . . . . . . . . . . . . . . . . . . . . . . . 10
Rear panel.................................................................................10
Front panel.................................................................................11
Installation . . . . . . . . . . . . . . . . . . . . . . . . . . . . . . . . . . . . . . . . . . 11
Connecting the receiver.............................................................11
Installation guide . . . . . . . . . . . . . . . . . . . . . . . . . . . . . . . . . . . . . 16
Basic operation . . . . . . . . . . . . . . . . . . . . . . . . . . . . . . . . . . . . . . 17
Program settings........................................................................17
Picture setting...........................................................................19
Channel search..........................................................................21
Time setting...............................................................................23
Option........................................................................................25
System setting..........................................................................26
USB...........................................................................................28
Specifications . . . . . . . . . . . . . . . . . . . . . . . . . . . . . . . . . . . . . . . . 30
Learning remote control codes . . . . . . . . . . . . . . . . . . . . . . . . . . . 33
Product warranty . . . . . . . . . . . . . . . . . . . . . . . . . . . . . . . . . . . . . 39
3
BHAS01UR
Introduction
This user manual is intended to guide you through the operation for the Bush BHAS01UR
High Definition DVBT Terrestrial Receiver.
The password may be required when you attempt to modify some advanced settings. The
default password is “000000”.
Main features and functions
This product is a high definition digital set top box. It fully complies with DVB-T receiver
requirement specifications. It provides users with free to air high definition and standard
definition digital terrestrial television and radio signals being broadcast.
Features:
1
Fully compatible with DVB-T FTA digital standard
2
Fully compatible with MPEG-4 H.264/AVC High Definition Digital TV
3
Fully compatible with MPEG-2 High Definition and Standard Definition Output
4
Fully compatible with MPEG-1 Layer I & II, Dolby Digital Audio
5
Complies with Australian Standards and MEPS requirements
6
Universal Remote Control – capable of operating the set top box and performing
basic functions once programmed to a TV
7
Integrated RF Modulator
8
VHF & UHF Input and Loop Out
9
Fully supported 7 Day Electronic Program Guide(EPG)
10 Automatic and Manual search
11 Parental Control
12 Plug and Play installation with an easy to use Menu System
13 Coaxial SPDIF Digital audio output interface
14 576i, 576P, 720P, 1080i Video Resolution supported
15 Supports 4:3 and 16:9 Aspect Ratios
4
BHAS01UR
16 Supports Teletext (where broadcast)
17 Subtitles supported based upon availability on the network
18 Channel editing functions (Favorites, Move, Lock, Delete)
19 Supports HDMI High Definition Multimedia Interface (HDMI 1.)
20 USB 2.0 Input supports mp3, wma, jpeg and bmp media playback and Software
Upgrade.
21 Audible feedback supported
Remote control
The remote control is shown below and the button functions are listed in the table on
page 6.
5
BHAS01UR
Key legend
Home
TV:
STB
TV/Radio
Swap
TV Input
Vol +
Vol P+
P-
OK
Guide
Back
Info
Exit
Help
Text
Menu
Colour Buttons
(red, green,
yellow, blue)
Numbers (0-9)
FAV
SUB
6
Description
Press at any time to return to the first scanned in Channel
Once programmed to TV will switch the TV between On and
Standby
Switches the Set Top Box between On and Standby: Press to Mute
all audio
Switch between TV and Radio mode
Reverts to the previously viewed channel
Once programmed to TV will switch between TV input being viewed
Increases the set top box volume, or may be programmed to
increase the TV volume.
Decreases the set top box volume, or may be programmed to
decrease the TV volume.
Changes the channel up.
Changes the channel down.
Moves the cursor up/left/right/down and scrolls through menus.
Press to confirm selection
Accesses Electronic Programme Guide
When accessing the menu, returns to previously displayed screen.
Displays information of the current channel being viewed
Exits the item being viewed
Press to display basic remote control function information.
Displays teletext (where available)
Accesses the set top box menu
To select different options in the menu.
For direct channel input, or selection of sub menus in the menu.
Press to display the list of selected favourite TV channels.
Turns subtitles on or off.
BHAS01UR
Battery installation
Insert the batteries while observing the correct (+) and (-) polarities as illustrated below:
About the batteries:
• If the remote control unit fails to work even when it is operated near the set top box,
please replace the batteries.
• Use size 2 x (AA) batteries.
Notes:
• Do not use rechargeable batteries.
• Do not place the batteries near a heat source such as a heater or fireplace.
• Do not mix old and new batteries.
• If the remote control unit is not going to be used for a long time, remove the
batteries.
Caution. Keep batteries out of children’s reach. If batteries are swallowed, contact a
physician immediately.
7
BHAS01UR
Programming your learning remote control
Your remote control is set to work your digital set top box only. However, it is
possible to programme it to also control your TV set, so that you only need to use
one remote control.
When you have programmed your remote control, the following buttons will control your
, and .
TV ,
Programming your remote control using the four digit code
Find the make of your TV in the code table listed from page 33 of this instruction manual.
Keep the four digit codes for your TV close to hand while programming your remote
control.
If there is no code for your TV, or the supplied codes fail to work, please refer to the
the ‘Programming using the search facility’ section on the following page.
1
Make sure that you are pointing the remote control at the TV and not at your digital
box.
2
button and the
button (at the same time) until the
Press both the
button flashes twice. Release the keys.
3
Enter the first four digit code from the list of codes for your make of TV. The top left
will flash once every time you press a button and then twice after you
button
press the fourth button, to confirm that you have entered a valid code.
4
button and the TV should switch off. If it doesn’t, repeat the whole
Press the
process trying another code from the table.
5
If none of the codes work, try using the search facility explained below.
6
When the TV switches off, you will know that you have found the correct code.
Your remote control will remember this code even if you replace the batteries.
7
Once you have programmed your remote control to switch your TV on and off you
can programme it to control your TV volume and mute functions (to turn the sound
off completely). Before you can do this, make sure that you have not turned down
or muted the volume from your digital box.
button (at the same time) and hold them
a) Press both the button and the
button flashes twice. Your remote control will
down until the light under the
now work the volume and mute functions of your TV.
8
BHAS01UR
b) If you ever want to change these buttons back to controlling the volume and
mute of your digital box, press both the button and the button (at the same
button flashes four times.
time) and hold them down until the light under the
Your remote control will now work the volume and mute functions of your digital
box.
Programming using the search facility
1
Make sure that you are pointing the remote control at the TV and not your digital
box.
2
button (at the same time) until the
Press both the button and the
flashes twice. Release the buttons.
3
Press and release 9, then 9 again, then 1. The button will flash twice.
4
Press the
5
Now press the button, and release it. Each time you press the button, the
remote control is searching for the correct code. Soon your TV will turn off. When it
does turn off, press the button to confirm this code.
6
Your remote control will remember this code even if you replace the batteries.
7
Once you have programmed your remote control to switch your TV on and off you
can programme it to control your TV volume and mute functions by following step 7
shown under ‘Programming your learning remote control’ using the four digit code.
button and release it. The
button
button will flash once.
9
BHAS01UR
Front and rear panels
Rear panel
R
L
CVBS
CAUT ON
R SK OF E ECTR C SHOCK
DO NOT O EN
ON
TO TV
RF OUT
RF IN
RF IN Pr
Pb
Y
S/PDIF
HDMI
OFF
USB
Aerial Input
RF OUT Output of Digital Terrestrial TV Broadcast signal – e.g. to VCR/DVD Recorder
TO TV
RF Modulated Output – Connect an aerial from this socket to the TV if the TV has no other inputs other than the aerial input
USB USB 2.0 Port for media playback and firmware upgrade
HDMI High Definition Digital video and audio output for use with televisions with a HDMI input. HDMI version 1.4.
CVBS Composite Video signal output
YPbPr High Definition Component video output
S/PDIF Digital audio output
R (Audio) Audio Output for the right speaker, to be used when either CVBS video output or YPbPr video output is used.
L (Audio) Audio Output for the left speaker, to be used when either CVBS video output or YPbPr video output is used.
On/Off Switch off when the set top box is not in use for a long period of time in order to conserve power.
AC Power Cable: 230V AC, 50Hz.
230V/50Hz
10
MENU
BHAS01UR
Connect the STB receiver via composite video and audio
(for standard definition viewing)
1
Connect the antenna to the ANT IN socket on the receiver.
2
Connect the receiver to the TV set via the red, white and yellow composite AV
cables.
TERRESTRIAL
ANTENNA
TV CONNECTION PANEL
RF IN
L
R
Video
Pr Pb
SET TOP BOX
CONNECTION PANEL
R
L
CVBS
CAUTION
SK F L C R S OCK
ON T P N
ON
TO TV
RF N
12
RF OUT
Pr
Pb
Y
S/PDIF
HDMI
USB
OFF
Y
HDMI
BHAS01UR
Connect the STB receiver via YPbPr output and audio output
(for high definition viewing)
1
Connect the antenna to the ANT IN socket on the receiver.
2
Connect the receiver to the TV set via the green, red and blue component AV
cables (this will provide video), and the composite red and white cables (which will
provide audio).
TERRESTRIAL
ANTENNA
TV CONNECTION PANEL
RF IN
L
R
Video
Pr Pb
Y
HDMI
SET TOP BOX REAR PANEL
R
L
CVBS
CAUTION
SK F L C R S OCK
ON T P N
ON
TO TV
RF N
RF OUT
Pr
Pb
Y
S/PDIF
HDMI
OFF
USB
13
BHAS01UR
Connect the STB receiver via HDMI
(for optimum high definition viewing)
1
Connect the antenna to the ANT IN socket on the receiver.
2
Connect the receiver to the TV set via a HDMI cable. This will provide both video
and audio.
TERRESTRIAL
ANTENNA
TV CONNECTION PANEL
RF IN
R
L
L
R
CVBS
Video
CAUTION
SK F L C R S OCK
ON T P N
ON
TO TV
RF N
RF OUT
Pr
Pb
Y
S/PDIF
HDMI
USB
SET TOP BOX REAR PANEL
14
Pr Pb
OFF
Y
HDMI
BHAS01UR
Connect the STB receiver via RF Modulator (for basic viewing)
Note. This method is used when the TV has no other input other than the Antenna
Input.
1
Connect the antenna to the ANT IN socket on the receiver.
2
Connect an antenna cable to the TO TV socket on the receiver from the set top box
to the antenna input on the TV.
TERRESTRIAL
ANTENNA
TV CONNECTION PANEL
RF IN
L
R
Video
Pr Pb
Y
HDMI
SET TOP BOX REAR PANEL
R
L
CVBS
CAUTION
ON
TO TV
RF N
RF OUT
Pr
Pb
Y
S/PDIF
HDMI
OFF
USB
Once you have connected the set top box to the TV you will need to locate the channel
that the set top box is connected to. This will involve performing a scan of your television
channels via the television remote control..
15
BHAS01UR
Installation guide
Ensure that all connections have been made properly, turn on the TV and make sure the
receiver is connected to the Main Power. Make sure that the on/off switch on the back
panel of the set top box is switched to on. Press the Power button on the front panel
of the receiver to switch receiver on. If you are using the receiver for the first time or
restored to Factory Default, the Installation Guide Menu will appear on your TV screen.
1
Select the On Screen Display language (OSD Language). Press the RIGHT/LEFT key
to modify the language.
2
Select the Country. Press the RIGHT/LEFT key to select your country of residence.
3
Select Channel Search and press RIGHT or OK key to begin Automatic channel
search.
4
Once channel tuning is complete, you are now ready to watch TV.
16
BHAS01UR
Basic operation
Program settings
To access the Menu,
1
Press the MENU button.
To access the program settings,
1
Select Program
2
Press OK.
The Menu provides options to adjust the Program settings.
1
Select an option.
2
Press OK or RIGHT to adjust that setting.
3
Press the EXIT button to exit the Menu.
17
BHAS01UR
Program Edit
To edit your program preferences (Move, Skip, Lock, Delete or set as a Favourite), you
will need to enter the Program Edit Menu. This Menu requires a password to access.
Enter the default password ‘000000’.
EPG (Electronic program guide)
The EPG is an on-screen TV guide that shows scheduled programs seven days in
18
BHAS01UR
advance for every tuned channel (when broadcast). Press the EPG button on the Remote
Control to access guide directly.
You can use the LEFT/RIGHT to view what is on other channels. Press the green key
to skip forward 24 hours, and the red key to skip back 24 hours. Press the INFO key to
book programme reminders and the blue key to view more information on the selected
programme.
Sort
Sort your channels from the following options:
[LCN] Sort the channels in ascending order
[ONID] Group the channels by broadcaster
[Service Name] Sort the channels in alphabetical order
[Service ID] Sort the channels according to the station
LCN (Logical channel number)
Set LCN on or off.
Picture setting
1
Press MENU then select Picture, and then press OK.
19
BHAS01UR
2
The Menu provides options to adjust the video settings.
3
Press UP/DOWN to select an option.
4
Press RIGHT/LEFT to adjust that setting.
5
Press EXIT to exit the menu.
Aspect Ratio
Set the display format to one of the following to select the best display for your television
4:3 Full
4:3 Pan & Scan
4:3 Letter Box
16:9 Full Screen
Auto.
Resolution
If the video does not appear correctly, change the setting. The default setting is to match
the most common setting for HDMI, is 1080i.
The resolution options include 576i, 576P, 720P and 1080i.
TV Format
If the video does not appear correctly, you need to change the settings. PAL is the
standard format for Australia. NTSC is the other settings option.
20
BHAS01UR
Channel search
1
Press MENU and select Channel.
2
Press OK.
The Menu provides options to adjust the channel search settings.
3
Select an option and press RIGHT/LEFT to adjust the settings.
4
Press EXIT to exit the Menu.
Auto search
21
BHAS01UR
This option will search and install all channels automatically. This option overwrites all
preset channels.
1. Select Auto Search and press OK or RIGHT to start channel search.
2. To cancel channel search at any time, press EXIT.
Manual search
This option allows you to install new channels manually. This option adds new channels
without changing the current channels list.
1
Select Manual Search then press OK or RIGHT. The channel search screen will
appear.
2
Press the RIGHT/LEFT key to select the channel frequency.
3
Press OK to start searching channels.
If a channel is found, it is saved and added to the channels list.
22
BHAS01UR
Country
Select your country of residence in the list displayed.
Antenna power
This function allows you to enable Antenna Power if an external active antenna is
connected.
Time setting
1
Press MENU
2
Select Time, and then press OK.
The menu provides options to adjust the time settings.
3
Press UP/DOWN to select an option.
4
Press RIGHT/LEFT to adjust the setting.
5
Press EXIT to exit the menu.
Time offset
Selecting auto will automatically set the offset based upon the Country Region, whilst
selecting manual allows the user to customise GMT offset settings.
23
BHAS01UR
Country region
Modify based on the region where the set top box is installed.
Time zone
May be customised when the time offset is set to manual.
Sleep
Allows the set top box to be programmed to switch off automatically after a set period
of time.
Daylight time
May be modified when the time offset is set to manual to indicate whether the daylight
saving time is active or not.
Info timeout
Customises the period of time that information boxes will appear on screen.
24
BHAS01UR
Option
1
Press MENU and then select Option.
2
Press OK.
The menu provides options to adjust multiple language and user settings.
3
Select an option and press RIGHT/LEFT to adjust the setting.
4
Press EXIT to exit the Menu.
OSD language
This setting allows you to customise the On Screen Display (OSD) Language from the
nine languages available.
Subtitle language
If subtitles are broadcast in another language, you may select the language used to
broadcast subtitles.
Audio language
If audio is broadcast in another language, you may select the language used to broadcast
subtitles. If the language is not available, the default program language will be used.
25
BHAS01UR
Digital audio
Modify the format of digital audio being output between PCM, RAW and Off.
OSD Transparency
Customises the transparency of the on screen display including information and the
menu.
Audible Feedback
When turned on this function provides a beep via the audio to advise the user that the
set top box has received the remote control command.
System setting
1
Press MENU and select System.
2
Press OK.
The menu provides options to adjust the system settings.
3
Press the UP/DOWN key to select an option.
4
Press RIGHT/LEFT to adjust the setting.
5
Press EXIT to exit the Menu.
26
BHAS01UR
Parental Guidance
You can restrict access to channels by rating that are unsuitable for children.
To restrict/lock the channel you will need to enter either the default password ‘000000’
or your own password (if you have modified it).
Set Password
1
Select this option to change the password.
2
Enter your ‘old’ password or the default password ‘000000’.
You will then be asked to enter a new password.
3
Re-enter your new password to confirm.
4
After it is confirmed, press EXIT to exit the Menu.
Restore Factory Default
This option will delete all preset channels and settings and return the box to the initial
initial installation screen.
To reset your Set Top Box to the default factory settings,
1
In Main Menu select [Restore Factory Default]
2
Press OK or RIGHT to select.
3
Enter your password or the default password ‘000000’
4
Press OK to confirm and reset the settings.
Information
Select to view model, software and hardware information.
Software Update
When set to ‘’On’’, the set top box will begin searching for new software from over air
broadcasts according to your set time in ‘’Start Time’’.
27
BHAS01UR
Menu Lock
When set to “On” each time the menu is accessed the password will need to be used.
The default password is ‘000000’.
USB
This function provides the ability to playback multimedia or upgrade the set top box via
the USB port.
1
Press MENU and select USB
2
Press OK.
28
BHAS01UR
Multimedia
Select to play back multimedia including music and photo files via USB.
Photo Configure
This allows the user to customise slide time, the mode that the slides appear via, and
the image aspect ratio.
29
BHAS01UR
USB Upgrade
Allows the unit to be upgraded via USB (if required).
Specifications
Tuner
Input Connector
Input Frequency Range
Number of RF Inputs
Input impedance
RF output Connector
Loop through
IEC 16902. Female
VHF&UHF
1
75 ohm
(bypass)IEC 169-2 Male
47-862 MHz
Demodulation
Standard
Guard interval Modes
FEC Modes Rate
Carriers/Constellation
Demodulation
Network
Channel bandwidth
ETSI EN300 744
1/32,1/16,1/8 Active Symbol duration
All modes supported including non hierarchical
(bypass)IEC 169-2 Male
COFDM(QPSK/QAM16/QAM64) 2K and 8K
MFN/SFN
7 and 8 MHz wide channel 21-68PLL
System Resources
SDRAM memory
FLASH memory
Display Planes
Graphic resolution
30
128 MB DDR2 SDRAM (2×64MB )
8 MB NOR FLASH
4 SEGMENTS LED
ARGB8888
BHAS01UR
Video Decoder
Standard
Transport stream
Video decoding
DivX
Aspect ratio
ISO/IEC 13818-2 and ISO/IEC 14496-10
ISO/IEC 13818-1
MPEG-2 SD/HD (MP@ML and MP@HL),
MPEG-4 H.264/AVC SD/HD
3.X ~ 6.X
JPEG,BMP,PNG, Motion JPEG
4:3, 16:9
Audio Decoder
Standard
Audio decoding
Dolby Digital (AC-3)
Sample rate
ISO/IEC13818-3 TR1011154
MPEG-1 and MPEG-2 Layer I & II, Dolby Digital Audio, E-AC3,WMA and HE-AAC Digital Audio
Stereo down-mixing to analog and digital audio outputs (including HDMI). For digital outputs, L-PCM stereo
encoding is provided.
32 kHz, 22.1 kHz, 44.1KHz,48 kHz
Subtitles & Teletext
Subtitle
Teletext
DVB Subtitle
EBU TELETEXT
Rear Panel
CVBS outputs
Audio CINCH
Optical S/PDIF
YPbPr outputs
HDMI
USB
1 CVBS video output
2 Analog Audio L/R connectors (white/red color)
Digital Audio output
Analog HDTV video output
Digital HDTV video output. HDMI version 1.4
USB2.0
31
BHAS01UR
Front Panel
bi-colored LED
4-segments LED
Keys
Red / Green to indicate the various states of the STB
To display the time, channel number or/and other
information.
POWER, MENU, P+, P-, VOL+ and VOL- keys.
Accessories
Remote control unit
Batteries
User Manual
Quick Start Guide
RCA cable
Learning Remote Control
2 x AA
1 in English
1 in English
1
Physical
Operating Temperature
Storage Temperature
Size (W x H x D) (mm)
32
+5 ~ 45 °C
-10 ~ +70 °C
230x165x40 mm
BHAS01UR
Learning remote control codes
The codes below are for use with the BHAS01UR learning remote control. Identify your
brand of television for use in programming the remote control.
Acer
1339 1509
Aiko
0269 0009 0037 0069 0556 0371 0216 1681 0433 0880 0072
0361 0191 0264 0217
Aiwa
0705 0701 1904 1916 1908 1955 1505
Akai
0361
0696
0516
0264
1074
Audiosonic
0037 0820 0556 1681 0109 0714 0715 0217 0370 0337 0264
0218 0486 0428 1983
AWA
0011 0036 0009 0157 0374 0451 0412 0037 0556 0216 0606
0217 0108 0264 1376 0178 0698 1681
0269
0009
0715
0448
1248
0208
0072
0075
0178
1935
0371
0753
0602
0329
1308
1537
0218
0556
0377
0803
0729
0548
0606
0037
0714
0581
0586
0433
0826
0480
1037
0745
0163
0217
1908
0191
0706
0631
0473
0672
0698
0216
0648
Bang & Olufsen 0565 0620 0087 0275
Base
0780
Baumann Meyer 1267
Beko
0714 0486 0715 0037 0418 0428 0370 0556 0606 1308 0808
1652
BenQ
1212 1562 1574
Blaupunkt
0554 0195 0191 0535 0200 0301 0327 0448 0455 0170 0036
Bush
1037
0036
0211
1900
1682
0614
0371
0204
1904
0587
0660
0235
0208
1908
1308
0714
0282
0217
1667
1983
0037
0272
1556
0778
1211
0668
0355
0617
1668
1652
0374
0698
1982
0218
0519
0581
1248
0163
0264
0294
1243
0349
0361
0677
1916
0009
0487 0556 1634 33
BHAS01UR
Celestial
0819 0820 0821 0767
Centrex
0780 0826 0891 0698
Changhong
1243
Conia
0754 0821 0894 1645 0820 1211
Daewoo
0634 0661 0499 0624 0374 1909 0037 0556 0009 0216 0218 0217 0451 0039 1137 1902 1908 0841 0880 1218 1307 1598 0876 1612 0865 0698 0714 0706 0778
Digitor
0037 0556 0888 0861 1497
DSE
0888 0861 1556 1497 0820 0767 0698 1682
Erae
1371 1191
Fujitsu
0179 0683 0853 0186 0809 0206 0072 0102 0314 0217 0163 0009 0352 0037 0556 0361 0259
Fujitsu General
0186 0009 0217 0206 0163
Fujitsu Siemens 1666 1298 1248 1373 1163 0808 0809
GE
0343 0735 0174 0178 0282 0451 0560 0109 0335 0625
General Electric 0343
Grundig
0195
0443
0740
1981
Haier
1615 0698 0264 1560
Hannspree
1613
Highlander
1531
34
1371
0706
1935
1667
1191 1223 0535 0191 0554 0070 1037 0487 0037
0205 0237 0556 0215 0587 0009 0036 0077 0370
1908 0260 0630 0757 1916 1308 0178 1376 0343 1372
BHAS01UR
Hisense
0848 1363 1314 0208 0698 0891 0860 0780
Hitachi
1576
1037
0163
0194
0548
Humax
1295 1535 1539
JVC
0653 1153 0606 1653 0371 1053 0731 0683 0036 0190 0192 0193 0218 0418 0069 0093 0650
Konka
0037 0556 0371 0714 0418 0218 0641 0587 0754 0779 0894 0606
Lenoxx
1189
LG
0056 0178 1663 0037 0876 0377 0032 0009 0556 0714 0001 0217 0216 0431 0163 0606 0109 1934 0698 0715 0823 0829 1637 1146 1148 1191 1252 0247 0361 1718 1681
Loewe
0512 0633 0790 0556 0655 0370 0087 0075 0292 0362 0516 0791
Marantz
0037 0556 0412 1532
Matsui
0037
0036
0257
0335
1667
Metz
1533 0746 0388 0447 0367 0368 0087 1163 0195 0535 0554 0191 0239 0037 0556 0275 0668 1037 1668
Mitsubishi
0108 0150 0512 0093 0178 0037 0354 0087 0036 0201 0237 0193 0535 0556 0691 0208 1934 1037
MTC
0060 0370 0349 0512 0056 0163 0216 0361 0448
0056
1484
0343
0777
0178
1163
0211
0272
0714
0481
1481
0196
0480
1137
0556
0217
0349
0260
0578
0044
1163
0276
0105
0487
0354
0516
0544
0719
1667
0576
0516
0492
0443
0294
0075
1908
0225
1225
1194
0075
0359
0009
0371
0431
1037
0150
0634
0499
0072
0361
0235
0433
0208
0629
0108
1045
1149
0037
0629
0177
0269
0045
1916
0349
0473
0032
0469
0737
0011
0579
0588
1666
0744
0036
0797
0556
0877
0355
0455
0195
0880
1585
0563
0043
0109
0217
0072 0163 0191 1471 35
BHAS01UR
NAD
0056 0166 1156 0178 0865 0361 0163
NEC
0170 1174 0587 1170 1270 0036 0320 1519 0876 0056 0455 0009 0374 0217 0037 0556 0011 0704 0245 0237 1704 0499 0653 0771 1370 1135 0661 0882 1398
Nordmende
0109 0891 0501 0399 0196 0560 0343 0568 0195 0037 0556 0335 0163 0471 1248 0714 2001 0490 0443 1585 1667 1163 1308
NU-TEC
0455 0698 0820 0037 0556 0821 0706 0264
Orion
0179 0037 0443 0355 0714 0235 0556 0655 0294 0177 0320 0011 0009 0321 0211 0314 0102 0269 0077 0264 0412 0516 0531 0544 1916 1908 0880 1196 2001 1954
Palsonic
0264 0412 0037 0217 0377 0218 0698 0556 0448 0773 0779 0001 0418 0778 1196 1507 1269 1681
Panasonic
0650 1636 1650 0226 1310 1210 0340 0214 0361 0853 0237 1930 0850 0367 0368 0516 0075 0037 0556 0163 0548 0771 0001 0108
Philips
0556 0037 0238 0721 1506 0639 1495 0012 0605 0772 1246 0013 0323 1304 0554 0043 0087 0193 0423 0343 0374 0009 0200 0690 0361 1521
Pioneer
1260 0011 0170 0166 0679 0037 0556 0423 0428 0370 0343 0361 0109 0163 0486 0512
Princess
0698
Proview
1645 1211
Pye
0037 0556 0012 0013 0087 0554 0374 0349 0412
Rank Arena
0036 0157 0602 0753
Samsung
0056 0178 0618 0587 0093 1619 1458 0556 1249 0644 1584 1235 0009 0037 0217 0448 0482 0370 0060 0766 0814 0072 0264 0682 0329 0216 0290 0032 0039 0519 0163
Sansui
0037 0729 0556 0706 0655 0371 0727 1935 0602 0421 0455 36
BHAS01UR
0861 0888 0753 1371 1191 1531 0826 1553 1594 1243 0698 0264 0714 1537 1384 1964 1248 1681 1556
Sanyo
0208 1208 0157 0292 0721 0036 0011 0370 1507 0339 0072 0216 0217 0104 0045 0555 0146 0009 0544 0163 0037 0108 0556 0486 0735 0893 0170 0704 1037 1667 1149 1163 1585
Schaub Lorenz
0548 1267 0714 0361 0349 0606 0486 0374 1191 1324 1194 1363 1371 1667
Sharp
0093 1193 0039 1586 1393 0157 0036 0491 1587 0818 0294 0653 0256 0193 0186 0516 0200
Sherwood
1399
Siemens
0191 0535 0554 0200 0195 0301 0327 0157 0032 0146 0037 0556 0361
Soniq
1298
Sony
1505 1651 1010 0011 0353 1551 0834 0036 1317 0102 0742 0157
Tatung
1720 0621 0037 1553 1248 1556 0556 0072 0516 0075 0217 0272 0011 0629 1908 1756 1371 1191 1719 1372 1324
TCL
1916 0625
Teac
0698
0706
0336
1363
Teco
1040 1313
Telefunken
0056
0896
0335
0714
Tempest
0009 0037 0556 0264
1645 0037 1437 1037 0556 0512 0712 0668 0455 0217 0264 0544 0624 1909 0178 0009 0412 0349 0721 0282 0418 0431 0755 0170 0714 1668 1149 1755 1203 1529 0587
0625
0754
1681
0490
0560
0501
1243
1556
0587
1504
0073
0346
0074
1626
0196
0821
0109 0698 0712 0343 0498 0820 0471 0399 0780 0891 0819 0101 0753 0037 0706 0556 0486 0568 1585
37
BHAS01UR
Tevion
0894 1248 1298 1645 1556 0767 0808 1667 0865 1211 1585
Toshiba
1508 0508 0060 1656 0714 1945 0036 0502 0204 1935 0070 0102 0241 1164 1704 0217 0109 0490 0077 0195 0191 0618 1916 1908 0009 0698 0037 0736 0832 1556 0650 1156 1037
Toyoda
0009 0371 0276 0493 0264
ViewSonic
1755 1330 1542 1513 1511
Voxson
0087 0037 0556 0418 0163 0178
Yamaha
0650 0797 1526 1576
38
BHAS01UR
Product warranty
Keep your receipt or proof of installation as proof of purchase. This product is warranted
for any defect in materials or workmanship for one year after the original date of
purchase. This product is for normal domestic and office use only.
This warranty does not cover damage from misuse or neglect, accidental damage,
vermin infestation, excessive voltages such us lightning or power surges or any
alternation that affects the performance or reliability of the product.
In the unlikely event that your product fails to work normally, please contact the
Warranty Helpline on 1800 022 960 and have your receipt of purchase or proof of
installation on hand.
This guarantee is subject to the following provisions:
1
It is only valid within boundaries of the country of purchase;
2
The product must be correctly assembled and operated in accordance with the
instructions contained in the manual;
3
This product must be used solely for domestic purposes;
4
The guarantee does not cover accidental damage;
5
The guarantee will be rendered invalid if the product is resold or has been damaged
by inexpert repair;
6
The manufacturer disclaims any liability for incidental or consequential damaged.
PO BOX 6287
Silverwater NSW 1811
www.bushaustralia.com.au/has
Warranty Helpline:1800 022 960
39
BHAS01UR
www.bushaustralia.com.au/has
40