1
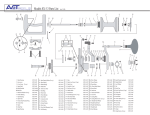
INITIAL INSTALLATION PREPARATION 1. If necessary, carefully remove the manual or automatic slack adjuster currently installed, including the brake chamber yoke assembly. 2. Before mounting the ASA‑5® slack adjuster on the camshaft, check the brake chamber push rod length to determine whether shortening or replacement is required. To accomplish this: A. With the brake chamber in the released position, place a square (or equivalent object) so that one edge is parallel to the actuator push rod while the other edge bisects the brake camshaft. Measure the distance from the push rod end to the vertical edge of the square and compare it to the values in Figure 5. B. If the measurement is less than the minimum shown in Figure 5, the brake actuator push rod must be shortened. If the measurement is greater than the maximum values, the brake actuator push rod may require replacement. The extended adapter, available as a separate service part (5/8"-18 pc. no. 297700 and 1/2"‑20 pc. no. 297701) may avoid the need to replace the brake actuator push rod. The extended adapter is available for the easy‑on yoke assembly only. Note: Installing any other type of push rod extender is not recommended, because these devices may loosen over time and result in an improperly adjusted brake. BRAKE ACTUATOR PUSH ROD SQUARE 3. Inspect the foundation brake, brake chamber and related components. Make certain the camshaft bushings and seals are not excessively worn. Lubricate the camshaft bushings. Check the brake chamber bracket for cracks and excessive corrosion. The brake actuator push rod should not be loose or bent and the return spring should be firm. Replace parts that are suspect. 4. Wire brush the foundation brake camshaft to loosen contamination and wipe clean. Depending on environmental conditions, an application of anti-seize compound to both the camshaft and worm gear spline may facilitate later slack removal. INSTALLATION 1. Select the proper ASA‑5® slack adjuster. 2. Install the ASA‑5 ® slack adjuster on the brake camshaft. 3. If the ASA‑5® slack adjuster has the easy‑on yoke (see Figure 3), position the brake actuator push rod jam nut approximately 1‑5/16 inches from the end of the brake actuator push rod. Thread the easy‑on yoke adapter on the brake actuator push rod until it is approximately 3/8 inch from the end of the brake actuator push rod end. Turn the ASA‑5® slack adjuster manual adjustment hex clockwise until the adapter extends into the threaded bore of the yoke approximately 1/8 inch. Thread the adapter into the yoke and tighten to 10 foot pounds. The installation angle of a properly installed ASA-5® slack adjuster: 4. If the ASA‑5® slack adjuster has the quick connect yoke (see Figure 4), position the brake actuator push rod jam nut approximately 1 inch from the end of the brake actuator push rod. Thread the quick connect adapter bushing on the brake actuator push rod until it is flush DISTANCE "A" MOUNTING STUD SLACK ADJUSTER ARM LENGTH 5" 5-1/2" 6" "A" STD. QUICK CONNECT OR EASY-ON ADAPTER 1-15/16" - 3-1/32" 1-15/16" - 3-3/16" 1-3/16" - 3-3/16" "A" EXTENDED EASY-ON ADAPTER 2-7/16" - 3-17/32" 2-7/16" - 3 11/16" 1-11/16" - 3-11/16" FIGURE 5 - MEASURING THE BRAKE ACTUATOR PUSH ROD 4 FIGURE 6 - INSTALLATION ANGLE Slack Adjuster Arm Length Angle 5" 99°-113° 5.5" 98°-111° 6" 90°-109°