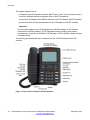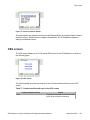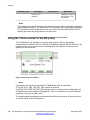
1
SIP Software for Avaya 1200 Series IP
Deskphones-Administration
Release 4.3 SP2
NN43170-601
Issue 05.02.Standard
September 2013
© 2013 Avaya Inc.
Heritage Nortel Software
All Rights Reserved.
“Heritage Nortel Software” means the software that was acquired by
Avaya as part of its purchase of the Nortel Enterprise Solutions
Business in December 2009. The Heritage Nortel Software currently
available for license from Avaya is the software contained within the list
of Heritage Nortel Products located at http://support.avaya.com/
LicenseInfo under the link “Heritage Nortel Products”. For Heritage
Nortel Software, Avaya grants Customer a license to use Heritage
Nortel Software provided hereunder solely to the extent of the
authorized activation or authorized usage level, solely for the purpose
specified in the Documentation, and solely as embedded in, for
execution on, or (in the event the applicable Documentation permits
installation on non-Avaya equipment) for communication with Avaya
equipment. Charges for Heritage Nortel Software may be based on
extent of activation or use authorized as specified in an order or invoice.
Notice
While reasonable efforts have been made to ensure that the
information in this document is complete and accurate at the time of
printing, Avaya assumes no liability for any errors. Avaya reserves the
right to make changes and corrections to the information in this
document without the obligation to notify any person or organization of
such changes.
Documentation disclaimer
“Documentation” means information published by Avaya in varying
mediums which may include product information, operating instructions
and performance specifications that Avaya generally makes available
to users of its products. Documentation does not include marketing
materials. Avaya shall not be responsible for any modifications,
additions, or deletions to the original published version of
documentation unless such modifications, additions, or deletions were
performed by Avaya. End User agrees to indemnify and hold harmless
Avaya, Avaya's agents, servants and employees against all claims,
lawsuits, demands and judgments arising out of, or in connection with,
subsequent modifications, additions or deletions to this documentation,
to the extent made by End User.
Link disclaimer
Avaya is not responsible for the contents or reliability of any linked
websites referenced within this site or documentation provided by
Avaya. Avaya is not responsible for the accuracy of any information,
statement or content provided on these sites and does not necessarily
endorse the products, services, or information described or offered
within them. Avaya does not guarantee that these links will work all the
time and has no control over the availability of the linked pages.
Warranty
Avaya provides a limited warranty on its hardware and Software
(“Product(s)”). Refer to your sales agreement to establish the terms of
the limited warranty. In addition, Avaya’s standard warranty language,
as well as information regarding support for this Product while under
warranty is available to Avaya customers and other parties through the
Avaya Support website: http://support.avaya.com. Please note that if
you acquired the Product(s) from an authorized Avaya reseller outside
of the United States and Canada, the warranty is provided to you by
said Avaya reseller and not by Avaya. “Software” means computer
programs in object code, provided by Avaya or an Avaya Channel
Partner, whether as stand-alone products or pre-installed on hardware
products, and any upgrades, updates, bug fixes, or modified versions.
Copyright
Except where expressly stated otherwise, no use should be made of
materials on this site, the Documentation, Software, or hardware
provided by Avaya. All content on this site, the documentation and the
Product provided by Avaya including the selection, arrangement and
design of the content is owned either by Avaya or its licensors and is
protected by copyright and other intellectual property laws including the
sui generis rights relating to the protection of databases. You may not
modify, copy, reproduce, republish, upload, post, transmit or distribute
in any way any content, in whole or in part, including any code and
software unless expressly authorized by Avaya. Unauthorized
reproduction, transmission, dissemination, storage, and or use without
the express written consent of Avaya can be a criminal, as well as a
civil offense under the applicable law.
Third Party Components
“Third Party Components” mean certain software programs or portions
thereof included in the Software that may contain software (including
open source software) distributed under third party agreements (“Third
Party Components”), which contain terms regarding the rights to use
certain portions of the Software (“Third Party Terms”). Information
regarding distributed Linux OS source code (for those Products that
have distributed Linux OS source code) and identifying the copyright
holders of the Third Party Components and the Third Party Terms that
apply is available in the Documentation or on Avaya’s website at: http://
support.avaya.com/Copyright. You agree to the Third Party Terms for
any such Third Party Components.
Note to Service Provider
The Product may use Third Party Components that have Third Party
Terms that do not allow hosting and may need to be independently
licensed for such purpose.
Licenses
Preventing Toll Fraud
THE SOFTWARE LICENSE TERMS AVAILABLE ON THE AVAYA
WEBSITE, HTTP://SUPPORT.AVAYA.COM/LICENSEINFO ARE
APPLICABLE TO ANYONE WHO DOWNLOADS, USES AND/OR
INSTALLS AVAYA SOFTWARE, PURCHASED FROM AVAYA INC.,
ANY AVAYA AFFILIATE, OR AN AUTHORIZED AVAYA RESELLER
(AS APPLICABLE) UNDER A COMMERCIAL AGREEMENT WITH
AVAYA OR AN AUTHORIZED AVAYA RESELLER. UNLESS
OTHERWISE AGREED TO BY AVAYA IN WRITING, AVAYA DOES
NOT EXTEND THIS LICENSE IF THE SOFTWARE WAS OBTAINED
FROM ANYONE OTHER THAN AVAYA, AN AVAYA AFFILIATE OR
AN AVAYA AUTHORIZED RESELLER; AVAYA RESERVES THE
RIGHT TO TAKE LEGAL ACTION AGAINST YOU AND ANYONE
ELSE USING OR SELLING THE SOFTWARE WITHOUT A LICENSE.
BY INSTALLING, DOWNLOADING OR USING THE SOFTWARE, OR
AUTHORIZING OTHERS TO DO SO, YOU, ON BEHALF OF
YOURSELF AND THE ENTITY FOR WHOM YOU ARE INSTALLING,
DOWNLOADING OR USING THE SOFTWARE (HEREINAFTER
REFERRED TO INTERCHANGEABLY AS “YOU” AND “END USER”),
AGREE TO THESE TERMS AND CONDITIONS AND CREATE A
BINDING CONTRACT BETWEEN YOU AND AVAYA INC. OR THE
APPLICABLE AVAYA AFFILIATE (“AVAYA”).
“Toll Fraud” is the unauthorized use of your telecommunications
system by an unauthorized party (for example, a person who is not a
corporate employee, agent, subcontractor, or is not working on your
company's behalf). Be aware that there can be a risk of Toll Fraud
associated with your system and that, if Toll Fraud occurs, it can result
in substantial additional charges for your telecommunications services.
2
Avaya Toll Fraud intervention
If you suspect that you are being victimized by Toll Fraud and you need
technical assistance or support, call Technical Service Center Toll
Fraud Intervention Hotline at +1-800-643-2353 for the United States
and Canada. For additional support telephone numbers, see the Avaya
Support website: http://support.avaya.com. Suspected security
vulnerabilities with Avaya products should be reported to Avaya by
sending mail to: [email protected].
Trademarks
The trademarks, logos and service marks (“Marks”) displayed in this
site, the Documentation and Product(s) provided by Avaya are the
registered or unregistered Marks of Avaya, its affiliates, or other third
SIP Software for Avaya 1200 Series IP Deskphones-Administration
Comments? [email protected]
September 2013
parties. Users are not permitted to use such Marks without prior written
consent from Avaya or such third party which may own the Mark.
Nothing contained in this site, the Documentation and Product(s)
should be construed as granting, by implication, estoppel, or otherwise,
any license or right in and to the Marks without the express written
permission of Avaya or the applicable third party.
Avaya is a registered trademark of Avaya Inc.
All non-Avaya trademarks are the property of their respective owners,
and “Linux” is a registered trademark of Linus Torvalds.
Downloading Documentation
For the most current versions of Documentation, see the Avaya
Support website: http://support.avaya.com.
Contact Avaya Support
See the Avaya Support website: http://support.avaya.com for product
notices and articles, or to report a problem with your Avaya product.
For a list of support telephone numbers and contact addresses, go to
the Avaya Support website: http://support.avaya.com, scroll to the
bottom of the page, and select Contact Avaya Support.
SIP Software for Avaya 1200 Series IP Deskphones-Administration
September 2013
3
4
SIP Software for Avaya 1200 Series IP Deskphones-Administration
Comments? [email protected]
September 2013
Contents
Chapter 1: New in this release........................................................................................... 13
Features.................................................................................................................................................... 13
Failover support in centralized deployment (IP Office 8.0, ABG 5800 6.2)...................................... 13
DHCP enhancements....................................................................................................................... 14
Server profiles (IP Office 8.0, ABG 5800 6.2).................................................................................. 15
Check-synch enhancement (IP Office 8.0)....................................................................................... 16
Answer-after parameter (IP Office 8.0, ABG 5800 6.2).................................................................... 16
Remote control talk and hold (IP Office 8.0).................................................................................... 17
Hotline option configuration in User Preferences (IP Office 8.0)...................................................... 17
Hide “Emergency calls only” banner (IP Office 8.0)......................................................................... 17
Volume adjustment for paging call beep.......................................................................................... 17
Customize feature/line key labels..................................................................................................... 18
SIP 4.3 Service Pack 2 (SP2).......................................................................................................... 18
Other changes........................................................................................................................................... 18
SIP Domain DNS Lookup feature..................................................................................................... 19
HTTP 503 response enhancement.................................................................................................. 19
Revision history......................................................................................................................................... 19
Chapter 2: Customer Service............................................................................................. 23
Navigation................................................................................................................................................. 23
Getting technical documentation............................................................................................................... 23
Getting product training............................................................................................................................. 23
Getting help from a distributor or reseller.................................................................................................. 23
Getting technical support from the Avaya Web site.................................................................................. 24
Chapter 3: Introduction to this guide................................................................................ 25
Subject...................................................................................................................................................... 25
Intended audience.................................................................................................................................... 25
Acronyms.................................................................................................................................................. 25
Related publications.................................................................................................................................. 28
Chapter 4: Overview........................................................................................................... 29
Introduction............................................................................................................................................... 29
SIP overview............................................................................................................................................. 29
Avaya 1200 Series IP Deskphones with SIP Software............................................................................. 29
Related documentation............................................................................................................................. 31
Installation overview.................................................................................................................................. 31
Chapter 5: Before installation............................................................................................ 35
Introduction............................................................................................................................................... 35
Preinstallation............................................................................................................................................ 35
Chapter 6: Configure the provisioning server.................................................................. 39
How provisioning works............................................................................................................................ 39
Download the SIP software to the provisioning server............................................................................. 40
Create the SIP provisioning file on the provisioning server...................................................................... 40
Setting the default language on the IP Deskphone to French......................................................... 46
Create the device configuration file........................................................................................................... 47
Device configuration commands...................................................................................................... 51
SIP Software for Avaya 1200 Series IP Deskphones-Administration
September 2013
5
Server and network configuration commands..................................................................................
Feature configuration commands.....................................................................................................
QoS and ToS commands.................................................................................................................
Tone configuration commands.........................................................................................................
NAT configuration commands..........................................................................................................
VQMon configuration commands.....................................................................................................
System commands...........................................................................................................................
IP Deskphone bug logging/recovery commands..............................................................................
Create the IP Deskphone-specific configuration file on the provisioning server.......................................
User Login commands..............................................................................................................................
Create the Dialing Plan file on the provisioning server.............................................................................
Dialing function description..............................................................................................................
Dialing plan.......................................................................................................................................
DRegex............................................................................................................................................
Downloadable WAV files...........................................................................................................................
51
55
78
79
81
82
84
84
85
86
87
88
88
90
92
Chapter 7: Configure the DHCP Server............................................................................. 93
Normal DHCP........................................................................................................................................... 93
IP Deskphone DHCP VLAN Phase........................................................................................................... 93
DHCP options........................................................................................................................................... 94
IP Deskphone to Server options............................................................................................................... 94
Server to IP Deskphone options............................................................................................................... 95
Multiple DHCP Servers............................................................................................................................. 96
Chapter 8: Install the IP Deskphone.................................................................................. 97
Chapter 9: Install the SIP software.................................................................................... 99
Boot loader file format............................................................................................................................... 99
Downloading the 12xxBoot.cfg file............................................................................................................ 100
Automatic TFTP/FTP/HTTP 12xxBoot.cfg download on Bootup using DHCP................................. 100
Manual TFTP 12xxBoot.cfg file download........................................................................................ 101
Chapter 10: Upgrade and convert the IP Deskphone software...................................... 105
Introduction............................................................................................................................................... 105
Upgrade the SIP Software on the IP Deskphone...................................................................................... 105
Download the SIP software to the provisioning server..................................................................... 105
Modify the SIP provisioning file........................................................................................................ 106
Upgrade to the minimum UNIStim Software............................................................................................. 106
Identify the current version of UNIStim software.............................................................................. 107
Upgrade UNIStim software to the minimum required UNIStim software.......................................... 108
Convert UNIStim software to SIP software on the IP Deskphone............................................................ 111
Chapter 11: Voice Quality Monitoring............................................................................... 115
Feature overview....................................................................................................................................... 115
VQMon set-up........................................................................................................................................... 115
Server set-up............................................................................................................................................. 116
How VQMon works................................................................................................................................... 116
End of call report....................................................................................................................................... 117
Session interval report.............................................................................................................................. 117
Alert interval report.................................................................................................................................... 118
Chapter 12: Device Settings on the IP Deskphone with SIP Software........................... 119
Introduction............................................................................................................................................... 119
6
SIP Software for Avaya 1200 Series IP Deskphones-Administration
September 2013
802.1x (EAP) Port-based network access control.................................................................................... 120
Authorization............................................................................................................................................. 121
Device ID................................................................................................................................................... 121
Password.................................................................................................................................................. 122
802.1ab Link Layer Discovery Protocol.................................................................................................... 122
TLVs.......................................................................................................................................................... 122
DHCP........................................................................................................................................................ 126
NO DHCP mode........................................................................................................................................ 127
SET IP....................................................................................................................................................... 127
Net Mask................................................................................................................................................... 127
Gateway.................................................................................................................................................... 128
DNS IP1 and DNS IP2.............................................................................................................................. 128
Ntwk Port Speed....................................................................................................................................... 128
Ntwk Port Duplex...................................................................................................................................... 128
Disable Voice 802.1Q............................................................................................................................... 129
Voice VLAN............................................................................................................................................... 129
VLAN Filter................................................................................................................................................ 129
Ctrl Priority bits.......................................................................................................................................... 130
Media Priority bits...................................................................................................................................... 130
Disable PC Port......................................................................................................................................... 130
Data VLAN................................................................................................................................................ 130
Data Priority bits........................................................................................................................................ 131
PC-Port Untag all...................................................................................................................................... 131
Cached IP................................................................................................................................................. 132
Port Speed and Duplex............................................................................................................................. 132
Ignore GARP............................................................................................................................................. 132
Provisioning............................................................................................................................................... 133
PVQMon IP............................................................................................................................................... 133
NAT Traversal........................................................................................................................................... 133
Configure the device settings.................................................................................................................... 134
Chapter 13: Multiple Appearance Directory Number....................................................... 145
Communication Server 1000..................................................................................................................... 145
Communication Server 2000 and Communication Server 2100............................................................... 147
Vertical services............................................................................................................................... 147
Privacy.............................................................................................................................................. 148
Privacy access codes....................................................................................................................... 148
Feature dependencies and restrictions............................................................................................ 148
Chapter 14: Multiuser......................................................................................................... 149
Navigation................................................................................................................................................. 150
Configuration............................................................................................................................................. 150
Initial logon................................................................................................................................................ 151
Additional logons....................................................................................................................................... 152
Automatic logon........................................................................................................................................ 152
Logging off................................................................................................................................................ 153
Primary account logout..................................................................................................................... 153
Secondary account logout................................................................................................................ 154
Server failover........................................................................................................................................... 154
SIP Software for Avaya 1200 Series IP Deskphones-Administration
September 2013
7
Cable unplugged....................................................................................................................................... 154
Line keys................................................................................................................................................... 155
Making a call............................................................................................................................................. 156
Receiving a call......................................................................................................................................... 156
Being in a call............................................................................................................................................ 157
Instant messages...................................................................................................................................... 158
Menu features........................................................................................................................................... 158
Modifying settings..................................................................................................................................... 158
Per-account call notification options................................................................................................. 159
IM settings........................................................................................................................................ 159
Voice Mail settings........................................................................................................................... 159
Remembering settings after logout........................................................................................................... 159
Programmable keys.................................................................................................................................. 160
Inbox, outbox, and instant message log................................................................................................... 160
Address Books.......................................................................................................................................... 161
User status................................................................................................................................................ 162
Do Not Disturb.................................................................................................................................. 162
Call Forwarding................................................................................................................................ 163
Presence.......................................................................................................................................... 164
Notifications............................................................................................................................................... 165
Account selection...................................................................................................................................... 165
Feature dependencies and restrictions..................................................................................................... 166
Performance characteristics...................................................................................................................... 166
CS 1000: Several keys with the same DN on a TN.................................................................................. 166
Chapter 15: Features.......................................................................................................... 167
Customizable banner for login.................................................................................................................. 167
Speed Dial List.......................................................................................................................................... 169
Administration and use of the Speed Dial List feature..................................................................... 170
Speed Dial List screen..................................................................................................................... 171
Auto retrieve flag.............................................................................................................................. 172
Busy Lamp Field....................................................................................................................................... 174
Configuration flags for Busy Lamp Field.......................................................................................... 176
Roaming profiles....................................................................................................................................... 176
Address book file.............................................................................................................................. 177
Custom keys file............................................................................................................................... 177
Speed Dial List file............................................................................................................................ 183
Roaming profile limitations............................................................................................................... 183
Default names.................................................................................................................................. 184
SIP Domain DNS Lookup feature............................................................................................................. 184
How DNS lookup works.................................................................................................................... 184
Server Profiles........................................................................................................................................... 185
Chapter 16: Hotline service................................................................................................ 189
Making a Hotline call................................................................................................................................. 189
Hotline service restrictions........................................................................................................................ 189
Provisioning............................................................................................................................................... 190
Service Package....................................................................................................................................... 190
Device configuration file............................................................................................................................ 190
8
SIP Software for Avaya 1200 Series IP Deskphones-Administration
September 2013
Chapter 17: Session Timer Service................................................................................... 193
Session-Expires header............................................................................................................................ 193
Min-SE header.......................................................................................................................................... 193
Provisioning............................................................................................................................................... 194
Chapter 18: Emergency Services...................................................................................... 197
Overview................................................................................................................................................... 197
Location information.................................................................................................................................. 198
Dialing plan configuration.......................................................................................................................... 198
Feature impact on configuration tasks...................................................................................................... 200
Network Element....................................................................................................................................... 201
Characteristics of emergency calls........................................................................................................... 201
Shut down and restart............................................................................................................................... 202
Chapter 19: IP Deskphone restrictions............................................................................. 203
Service package restrictions..................................................................................................................... 203
Distinctive Ringing feature........................................................................................................................ 203
Chapter 20: NAT firewall traversal..................................................................................... 205
Chapter 21: Three-port switch and VLAN functionality................................................... 207
System overview....................................................................................................................................... 207
Chapter 22: SIP messages supported by the IP Deskphone.......................................... 211
SIP methods.............................................................................................................................................. 211
SIP responses........................................................................................................................................... 212
1xx Response—Information Responses................................................................................................... 212
2xx Response—Successful responses..................................................................................................... 213
3xx Response—Redirection responses.................................................................................................... 213
4xx Response—Request failure responses.............................................................................................. 214
5xx Response—Server failure responses................................................................................................. 216
6xx Response—Global responses............................................................................................................ 217
Default error handling................................................................................................................................ 217
SIP header fields....................................................................................................................................... 218
Session description protocol usage.......................................................................................................... 220
SDP and Call Hold.................................................................................................................................... 220
Transport layer protocols.......................................................................................................................... 220
SIP security authentication........................................................................................................................ 221
SIP DTMF Digit transport.......................................................................................................................... 221
Supported subscriptions............................................................................................................................ 221
Supported instant messaging................................................................................................................... 222
Chapter 23: Audio codecs.................................................................................................. 223
Overview................................................................................................................................................... 223
VQMON Codec configuration.................................................................................................................... 224
Network layer for the SDP negotiations.................................................................................................... 224
Codec preference through Device Configuration...................................................................................... 224
Codec preference selection on the IP Deskphone.................................................................................... 226
Codecs preferences on the IP Deskphone............................................................................................... 227
Chapter 24: Certificate-based authentication................................................................... 229
Certificate-based authentication overview................................................................................................ 229
Certificates overview................................................................................................................................. 230
Root certificate installation........................................................................................................................ 231
SIP Software for Avaya 1200 Series IP Deskphones-Administration
September 2013
9
Signing a resource file............................................................................................................................... 232
Device certificate installation..................................................................................................................... 233
Device certificate profiles.......................................................................................................................... 234
SCEP........................................................................................................................................................ 239
Device Certificate Authentication Considerations for SCEP..................................................................... 240
PKCS 12 download................................................................................................................................... 242
Installing a device certificate using PKCS 12............................................................................................ 242
Certificate Trust Line (certificate verification)............................................................................................ 243
Validating a certificate using the Certificate Trust List.............................................................................. 244
Certificate Administration.......................................................................................................................... 246
Certificates Administration main menu...................................................................................................... 247
Trusted Certificates screen....................................................................................................................... 248
Device Certificates screen........................................................................................................................ 250
CRL screen............................................................................................................................................... 251
CTL screen................................................................................................................................................ 252
EAP Authentication................................................................................................................................... 254
EAP Disabled............................................................................................................................................ 256
EAP-MDS.................................................................................................................................................. 256
EAP-TLS................................................................................................................................................... 257
EAP-PEAP................................................................................................................................................ 257
EAP Re-authentication.............................................................................................................................. 257
Provisioning configuration file download................................................................................................... 258
Provisioning configuration files download through HTTPS....................................................................... 258
Single Authentication................................................................................................................................ 258
Mutual Authentication................................................................................................................................ 258
Security and error logs.............................................................................................................................. 259
Security policy file updates........................................................................................................................ 261
Certificate Admin option in the user interface........................................................................................... 263
Installation................................................................................................................................................. 263
Device Certificate Installation.................................................................................................................... 264
CTL download........................................................................................................................................... 265
Upgrade and rollback tasks....................................................................................................................... 266
SIP configuration file (12xxSIP.cfg)........................................................................................................... 266
PKCS12 Import......................................................................................................................................... 266
CTL download........................................................................................................................................... 267
Customer root certificate download........................................................................................................... 267
Security policy file..................................................................................................................................... 267
Diagnostic logs.......................................................................................................................................... 267
Fault management behavior..................................................................................................................... 269
Chapter 25: Security........................................................................................................... 271
SIP over TLS............................................................................................................................................. 271
Connection persistence............................................................................................................................. 271
SSH and secure file transfer..................................................................................................................... 272
TCP/TLS operation overview.................................................................................................................... 273
SRTP......................................................................................................................................................... 285
Last successful or unsuccessful logon...................................................................................................... 288
Enhanced administrative password security............................................................................................. 291
10
SIP Software for Avaya 1200 Series IP Deskphones-Administration
September 2013
Chapter 26: Licensing......................................................................................................... 293
Licensing framework................................................................................................................................. 294
Characteristics of the licensing framework................................................................................................ 294
License file download................................................................................................................................ 295
[LICENSING] section................................................................................................................................ 297
License information for the IP Deskphone................................................................................................ 298
Licensable features................................................................................................................................... 299
Node-locked license mode........................................................................................................................ 301
Time-based token............................................................................................................................. 301
Standard token................................................................................................................................. 303
Invalid or no license file............................................................................................................................. 305
Evaluation period...................................................................................................................................... 306
Alarms....................................................................................................................................................... 307
License not available warning.......................................................................................................... 307
License expiry warning..................................................................................................................... 308
Evaluation period expiry warning..................................................................................................... 308
Evaluation threshold warning........................................................................................................... 309
Licensing expiry threshold warning........................................................................................................... 310
Licensed features...................................................................................................................................... 310
Chapter 27: PC Client Softphone interworking................................................................ 313
Pre-granting authorization for the Answer-Mode...................................................................................... 313
Answer-Mode Settings screen.................................................................................................................. 314
Allow-Mode Settings screen...................................................................................................................... 315
Allow Addresses screen............................................................................................................................ 316
Automatically answering a call.................................................................................................................. 319
Configuration of the PC Client Softphone................................................................................................. 319
Chapter 28: Maintenance.................................................................................................... 321
Convert SIP Software to UNIStim Software.............................................................................................. 321
Reset Factory Settings support................................................................................................................. 322
Chapter 29: Diagnostics and troubleshooting................................................................. 325
IP Deskphone diagnostics........................................................................................................................ 325
Local diagnostic tools................................................................................................................................ 327
How to access the Diagnostics menu....................................................................................................... 328
IP Set and DHCP information................................................................................................................... 330
Network Diagnostic Tools......................................................................................................................... 332
Ethernet Statistics..................................................................................................................................... 334
Ethernet Statistics (PC Port) screen......................................................................................................... 337
IP Network Statistics................................................................................................................................. 338
Advanced Diag Tools................................................................................................................................ 340
Port Mirroring.................................................................................................................................... 341
Test key..................................................................................................................................................... 342
Logging Systems....................................................................................................................................... 344
Problem Determination Tool (PDT)........................................................................................................... 345
Error Logging framework........................................................................................................................... 345
ECR Watchdog................................................................................................................................. 346
Task Monitor..................................................................................................................................... 346
CPU Load Monitor............................................................................................................................ 346
SIP Software for Avaya 1200 Series IP Deskphones-Administration
September 2013
11
Stack Overflow Monitor....................................................................................................................
Traffic Monitor..................................................................................................................................
PDT commands........................................................................................................................................
Device configuration file............................................................................................................................
Diagnostic logs..........................................................................................................................................
ECR-log file......................................................................................................................................
SIP-log file........................................................................................................................................
HTTP server logs......................................................................................................................................
Installation logs.........................................................................................................................................
Configuration server logs..........................................................................................................................
PC Client Softphone interworking with the IP Deskphone........................................................................
Index.....................................................................................................................................
12
SIP Software for Avaya 1200 Series IP Deskphones-Administration
346
346
347
351
353
353
359
362
362
363
363
365
September 2013
Chapter 1: New in this release
SIP Software for Avaya 1200 Series IP Deskphones- Administration , NN43170-601 supports SIP
Software Release 4.3 andSIP Software Release 4.3 Service Pack 2 (SP2). This document contains
administration information for the Avaya 1220 IP Deskphone and Avaya 1230 IP Deskphone.
Features
SIP Software Release 4.3 introduces support for the following:
• Failover support in centralized deployment (IP Office 8.0 ABG 5800 6.2) on page 13
• DHCP enhancements on page 14
• Server profiles (IP Office 8.0 ABG 5800 6.2) on page 15
• Check-synch enhancement (IP Office 8.0) on page 16
• Answer-after parameter (IP Office 8.0 ABG 5800 6.2) on page 16
• Remote control talk and hold (IP Office 8.0) on page 17
• HTTP 503 response enhancement on page 19
• Hotline option configuration in User Preferences (IP Office 8.0) on page 17
• Hide “Emergency calls only” banner (IP Office 8.0) on page 17
• Volume adjustment for paging call beep on page 17
• Customize feature line key labels on page 18
• SIP Domain DNS Lookup feature on page 19
SIP 4.3 SP2
SIP Software Release 4.3 Service Pack 2 (SP2) provides further enhancements. See SIP 4.3
Service Pack 2 (SP2) on page 18.
Failover support in centralized deployment (IP Office 8.0, ABG 5800
6.2)
There are two failover mechanisms available in a centralized deployment:
1. In Regular mode, the IP Deskphone is configured with IP addresses for a primary
server and a secondary server. The IP addresses can be configured using the
configuration file or using DNS. The IP Deskphone will failover to the second server
SIP Software for Avaya 1200 Series IP Deskphones-Administration
September 2013
13
New in this release
when it detects that the current server is unreachable. The IP Deskphone stays with
the new server, not switching back unless the new server fails.
2. In Survivable Branch mode, the IP Deskphone is configured with IP addresses for
a primary server and a secondary server. When the primary server is unreachable,
the IP Deskphone switches to the secondary server. The IP Deskphone continues
to monitor the primary server and switches back to the primary server as soon as
it is back on line.
To enable this functionality, the following configuration parameter is introduced:
FAIL_BACK_TO_PRIMARY YES/NO (default is NO)
Note:
Before falling back to the primary server, the IP Deskphone checks if there is an active call
and defers switching until the call is terminated.
Important:
Multiple user login is not supported in failover mode.
DHCP enhancements
Configurable DHCP discovery and timeout:
Some IP Deskphones operate in PoE environments where power is applied to the IP
Deskphones and the network at the same time. The DHCP server may not be ready before
the IP Deskphone times out. SIP 4.3 provides the ability to configure the number of times the
IP Deskphone can attempt to contact the DHCP server and the time interval between
attempts.
Two new parameters are introduced.
DHCP_NUMBER_OF_RETRIES (default value is 4)
DHCP_INITIAL_TIMEOUT (default value is 4 seconds).
If the DHCP server does not respond, the IP Deskphone sends several requests one after
another in different timeout intervals, based on the formula “timeout[i]=2* timeout[i-1] +- 1sec”,
where :’ i’ is number of retries and timeout[0]= DHCP_INITIAL_TIMEOUT.
The maximum timeout between Discovery requests cannot be greater than 64 seconds. If the
value of the next timeout becomes greater than 64 seconds, the DHCP client stops increasing
the timeout interval and keeps the timeout value of 64 seconds.
Cached IP address:
14
SIP Software for Avaya 1200 Series IP Deskphones-Administration
Comments? [email protected]
September 2013
Features
If an IP Deskphone fails to obtain an IP address from the DHCP process, SIP 4.3 enables the
IP Deskphone to use the phone's previously-used IP address, as long as there is not an IP
address conflict.
The following configuration parameter is introduced:
CACHED_IP_ENABLED [YES|NO] (default value is NO)
If DHCP=YES on the IP Deskphone, then the cached IP parameter can also be modified
through the IP Deskphone's UI in the Network > Diagnostics menu.
DHCP untag:
SIP 4.3 introduces the configuration parameter DHCP_UNTAG_ENABLED [YES|NO] (default
value is NO).
When this parameter is enabled, DHCP Untag functionality operates in the following manner:
the IP Deskphone attempts to obtain an IP address in a VLAN (DHCP discovery frames are
tagged). If the DHCP server is unreachable, then after the pre-defined number of Discovery
attempts the IP Deskphone begins sending Discovery frames in non-VLAN mode. If the IP
Deskphone still does not receive an Offer, then after a pre-defined number of Discovery
attempts, the IP Deskphone reverts to VLAN tag mode again.
IP address conflict check:
SIP 4.3 provides the ability for the IP Deskphone to check for an IP address conflict after
obtaining a DHCP lease. Once the IP address is obtained from the DHCP server, the IP
Deskphone sends an ARP request to verify that the new address is unique on the network.
Server profiles (IP Office 8.0, ABG 5800 6.2)
A System Configuration file allows the administrator to specify a list of domains to which the
IP Deskphone can connect. The administrator can specify up to five different SIP domains.
Each SIP domain supports 2 SIP servers: the Primary (S1) and the Secondary (S2). The
System Configuration file contains the SIP server-specific configuration parameters that are
applied to any SIP server specified in the list of SIP domains.
SIP 4.3 introduces the ability to support two different sets of configuration parameters: one
specific to the Primary SIP server and the other specific to the Secondary SIP server.
To support this option, the following configuration parameters are introduced:
• PRIMARY_SERVER_PROFILE <filename>
• SECONDARY_SERVER_PROFILE <filename>
For more information, see Server Profiles on page 185
SIP Software for Avaya 1200 Series IP Deskphones-Administration
September 2013
15
New in this release
Check-synch enhancement (IP Office 8.0)
The Remote Check for Update feature allows SIP servers to start a check for an update
remotely using the event called check-sync. This feature enables the IP Deskhones to be
updated with the latest firmware/configuration files present on the provisioning server. This
feature is enabled/disabled using the REMOTE_CHECK_FOR_UPDATE parameter in the
Device Configuration file.
SIP 4.3 provides the following check-sync functionality enhancements:
• allows a server to upgrade configuration files separately on request from the server
• firmware updates are performed transparently for a user (the old mechanism required
user confirmation before performing the firmware update)
• Changes to the [LANGUAGE] or [DIALING_PLAN] section of the Provisioning file trigger
a NOTIFY message to the IP Deskphone. If REMOTE_CHECK_FOR_UPDATE is
enabled, then a firmware download occurs. The user is able to use the IP Deskphone
while dialing plans and language files are updated.
Answer-after parameter (IP Office 8.0, ABG 5800 6.2)
To support Click-to-Dial and Push-to-Talk applications, an application platform such as OneX portal must be able to originate calls that force the endpoint off-hook, without end-user
intervention
To support this functionality, SIP 4.3 introduces the answer-after parameter. When present
in the Call-Info header of an incoming INVITE request, it indicates how many alert cycles are
applied before the call is automatically answered. If the answer-after value is 0, then the call
is automatically answered without applying any alert tones.
The answer-after parameter is ignored if:
• the IP Deskphone that does not support speakerphone; it cannot automatically answer
the call, and must wait for the user to actively answer the call.
• the IP Deskphone has a speakerphone, but the user has enabled a local privacy policy
that rejects or ignores all answer-after requests
To activate the answer-after parameter, the INTERCOM_PAGING parameter must be
enabled.
The IP Deskphone should not ring when the answer-after event has an attribute configured as
0. The tone is played from the IP OOffice / ABG 5800.
16
SIP Software for Avaya 1200 Series IP Deskphones-Administration
Comments? [email protected]
September 2013
Features
Remote control talk and hold (IP Office 8.0)
In SIP 4.3, when providing CTI-based applications such as desktop call control clients, the IP
Office One-X™ application can remotely request:
• an endpoint answer an incoming call without local user intervention
• remotely retrieving a call that has been previously held
• a call be put on hold without local user intervention
Hotline option configuration in User Preferences (IP Office 8.0)
SIP 4.3 provides the ability for IP Office 8.0 to designate a hotline option for a specific user.
When a user is configured with the Hotline option, this means that no matter what number the
user dials, the call is directed to the hotline.
The hotline url is defined in the custom keys file in the [prefs] section. If the hotline URL
parameter is given a value, then for that current profile the Hotline option is enabled and the
URL is the one defined by this command.
Hide “Emergency calls only” banner (IP Office 8.0)
SIP 4.3 introduces a new configuration parameter to configure the display of the “Emergency
calls only” prompt :
E911_HIDE_MESSAGE Y/[N]
If E911_HIDE_MESSAGE=Y, the Emergency calls only message is not displayed on the IP
Deskphone display screen when a user is not logged in and the phone goes off-hook. The
default value for E911_HIDE_MESSAGE is NO.
Volume adjustment for paging call beep
SIP 4.3 provides a mechanism to allow IP Deskphone users to adjust the volume of the paging
tone that is used to alert an incoming paging call.
For more information, see the User Guide for the appropriate IP Deskphone model.
SIP Software for Avaya 1200 Series IP Deskphones-Administration
September 2013
17
New in this release
Customize feature/line key labels
SIP 4.3 provides the ability to create and edit a label for a line key through the IP Deskphone
user interface.
If the IP Deskphone user enters a blank label, and a default key label had been created in the
custom keys file, then the default key label overrides the blank key label.
For more information, see the User Guide for the appropriate IP Deskphone model.
SIP 4.3 Service Pack 2 (SP2)
SIP 4.3 SP2 introduces the following changes.
CONTACT_HDR_PORT_CS1K parameter
The CONTACT_HDR_PORT_CS1K parameter configures SIP IP Deskphones to register to
a Communication Server 1000 server using TLS and to be able to receive calls using TLS.
Starting with SP2, this parameter is always treated as enabled ("YES").
PREFER_CUSTOMIZED_RBT parameter
SIP 4.3 SP2 introduces the PREFER_CUSTOMIZED_RBT feature configuration parameter.
This parameter configures the opportunity to not stop the customized ringback tone when a
180 Ringing message is received.
If configured as YES, the media stream is not closed and the customized ringback tone
continues to play.
If configured as NO, the media stream is closed and local ringback tone is generated
(default).
Other changes
The HTTP 503 response enhancement was introduced in SIP Software Release 4.1 Service
Pack 1 (SP1).
HTTP 503 response enhancement on page 19
The SIP Domain DNS Lookup feature is introduced.
SIP Domain DNS Lookup feature on page 19
18
SIP Software for Avaya 1200 Series IP Deskphones-Administration
Comments? [email protected]
September 2013
Revision history
SIP Domain DNS Lookup feature
The DNS Lookup feature enables the IP Deskphone to discover IP addresses for a specified
SIP domain using DNS.
See SIP Domain DNS Lookup feature on page 184.
HTTP 503 response enhancement
SIP 4.3 introduces the following parameter for the Device Configuration file:
HTTP_RETRY_NUMBER
If the IP Deskphone receives a HTTP 503 response from the server (server unavailable), the
IP Deskphone performs up to HTTP_RETRY_NUMBER attempts to connect to the server
again. The IP Deskphone stops trying to connect to the server after HTTP_RETRY_NUMBER
unsuccessful attempts have been made, or if any other response except HTTP 503 is received
from the server.
The default value is 5.
If HTTP_RETRY_NUMBER is not specified in the Device Configuration file, the default number
of attempts is applied.
If HTTP_RETRY_NUMBER is set to 0 in the Device Configuration file, the IP Deskphone
performs HTTP retries continuously until it receives a response other than HTTP 503. If the
HTTP_RETRY_NUMBER is configured as a negative value, the default number of attempts is
applied.
Revision history
September 2013
Standard 05.02. This document is up-issued to reflect
changes in technical content for the DEF_AUDIO_QUALITY
parameter, and a note has been added to Codecs
preferences on the IP Deskphone. on page 227
June 2013
Standard 05.01. This document is up-issued to support SIP
Software Release 4.3 Service Pack 2 (SP2).
April 2013
Standard 04.05. This document is up-issued to reflect
changes in technical content in the section "IP Deskphone
bug logging/recovery commands".
SIP Software for Avaya 1200 Series IP Deskphones-Administration
September 2013
19
New in this release
November 2012
Standard 04.04. This document is up-issued to remove
references to Broadsoft content,
April 2012
Standard 04.03. This document is up-issued for changes to
the Multiuser and Multiple Appearance Directory Number
sections, the IP Deskphone to Server Options section and
the IP Deskphone Security section.
February 2012
Standard 04.02. This document is up-issued to include
revised content in the section IP Deskphone to Server
options on page 94.
December 2011
Standard 04.01. This document is up-issued to support SIP
4.3.
September 2011
Standard 03.07. This document is up-issued to reflect
changes in technical content for the inclusion of the
FAIL_BACK_TO_PRIMARY configuration parameter.
August 2011
Standard 03.06. This document is up-issued to to reflect
changes in technical content for Troubleshooting.
August 2011
Standard 03.05. This document is up-issued to reflect
changes in technical content. References to the Software
Web Manager have been removed.
May 2011
Standard 03.04. This document is up-issued to reflect
changes in global power supply information and information
on supported languages.
May 2011
Standard 03.03. This document is up-issued to reflect
changes in technical content for:
• AUTOLOGIN_ID_KEY parameters
• reset codecs to default
• modifying the SIP provisioning file
20
April 2011
Standard 03.02. This document is up-issued to reflect
changes in technical content for Diagnostics and
Troubleshooting information.
April 2011
Standard 03.01. This document is up-issued to support SIP
Software Release 4.1.
August 2011
Standard 02.07. This document is up-issued to reflect
changes in technical content. References to the Software
Web Manager have been removed.
January 2011
Standard 02.03. This document is published to support SIP
Software Release 4.0.
January 2011
Standard 02.02. This document is up-issued to support SIP
Software Release 4.0.
October 2010
Standard 02.01. This document is up-issued to support SIP
Software Release 4.0.
SIP Software for Avaya 1200 Series IP Deskphones-Administration
Comments? [email protected]
September 2013
Revision history
October 2010
Standard 01.03. This document is up-issued to reflect
changes in the configuration of TLS for SIP.
September 2010
Standard 01.02. This document is up-issued with minor
revisions to support SIP Software Release 3.2.
August 2010
Standard 01.01. This document is a new document and is
issued to support SIP Software Release 3.2.
SIP Software for Avaya 1200 Series IP Deskphones-Administration
September 2013
21
New in this release
22
SIP Software for Avaya 1200 Series IP Deskphones-Administration
Comments? [email protected]
September 2013
Chapter 2: Customer Service
Visit the Avaya Web site to access the complete range of services and support that Avaya provides. Go
to http://www.avaya.com or go to one of the pages listed in the following sections.
Navigation
• Getting technical documentation on page 23
• Getting product training on page 23
• Getting help from a distributor or reseller on page 23
• Getting technical support from the Avaya Web site on page 24
Getting technical documentation
To download and print selected technical publications and release notes directly from the
Internet, go to http://www.avaya.com/support.
Getting product training
Ongoing product training is available. For more information or to register, you can access the
Web site at http://www.avaya.com/support. From this Web site, you can locate the Training
contacts link on the left-hand navigation pane.
Getting help from a distributor or reseller
If you purchased a service contract for your Avaya product from a distributor or authorized
reseller, contact the technical support staff for that distributor or reseller for assistance.
SIP Software for Avaya 1200 Series IP Deskphones-Administration
September 2013
23
Customer Service
Getting technical support from the Avaya Web site
The easiest and most effective way to get technical support for Avaya products is from the
Avaya Technical Support Web site at http://www.avaya.com/support.
24
SIP Software for Avaya 1200 Series IP Deskphones-Administration
Comments? [email protected]
September 2013
Chapter 3: Introduction to this guide
Subject
This document describes how to install, configure, and provision the Avaya 1220 IP Deskphone
and Avaya 1230 IP Deskphone for use on a SIP network. The Avaya 1220 IP Deskphone and
Avaya 1230 IP Deskphone are collectively known as Avaya 1200 Series IP Deskphones. In
this document, the Avaya 1220 IP Deskphone and Avaya 1230 IP Deskphone are referred to
as IP Deskphones.
Intended audience
This administration guide is intended for system administrators of the Avaya 1220 IP
Deskphone and Avaya 1230 IP Deskphone with a basic understanding of SIP. This guide is
not intended for end users of the Avaya 1220 IP Deskphone and Avaya 1230 IP Deskphone.
Many of the tasks outlined in the guide influence the function of the IP Phone on the network
and require an understanding of telephony and Internet Protocol (IP) networking.
Acronyms
This guide uses the following acronyms:
Table 1: Acronyms used
AAA
Authentication, Authorization, and Accounting
ALG
Application Layer Gateway
BER
Bit Error Rate
CA
Certificate Authority
CN
Common Name
CRL
Certificate Revocation List
CTL
Certificate Trust List
SIP Software for Avaya 1200 Series IP Deskphones-Administration
September 2013
25
Introduction to this guide
26
DCP
Device Certificate Profile
DET
Distinguished Encoding Rules
DHCP
Dynamic Host Configuration Protocol
DN
Distinguished Name
DND
Do Not Disturb feature
DNS
Domain Name System
DRegex
Digit Regular Expression
DSCP
Differentiated Services Code Point
EAP
Extensible Authentication Protocol
ECR
Error Collection and Recovery
EJBCA
Enterprise Java Bean Certificate Authority
ERE
Extended Regular Expressions
FQDN
Fully Qualified Domain Name
FTP
File Transfer Protocol
GARP
Gratuitous Address Resolution Protocol
GUI
Graphical User Interface
HTTP
Hyper Text Transfer Protocol
HTTPS
Hyper Text Transfer Protocol over SSL
IAS
Internet Authentication Service
ICMP
Internet Control Message Protocol
IETF
Internet Engineering Task Force
ISDN
Integrated Services Digital Network
IM
Instant Message
IP
Internet Protocol
ITU-T
Telecommunications Standardization sector of the International
Telecommunications Union
LAN
Local Area Network
LED
Light Emitting Diode
MAC
Media Access Control
MADN
Multiple Appearance Directory Number
MAS
Media Application Server
MD5
Message Digest v5
MS
Avaya Media Server
SIP Software for Avaya 1200 Series IP Deskphones-Administration
Comments? [email protected]
September 2013
Acronyms
NAT
Network Address Translator
NetConfig
Configuration screens available after an IP Deskphone resets
NDU
Network Diagnostic Utility
OAM
Operation, Administration (and) Maintenance
PDT
Problem Determination Tool
PEAP
Protected Extensible Authentication Protocol
PEC
Product Engineering Code
PKCS#12
Public Key Cryptographic Standard #12
POE
Power Over Ethernet
POSIX
Portable Operating System Interface
PRACK
Provisional Acknowledgement
PSTN
Public Switched Telephone Network
PVQMon
Proactive Voice Quality Monitoring
QoS
Quality of Service
RADIUS
Remote Authentication Dial In User Service
RTCP
Real-time Control Protocol
RTCP XR
RTP Control Protocol Extended Reports
RTP
Real-time Transfer Protocol
SAN
Subject Alternate Name
SCA
Single Call Arrangement
Shared Call Appearance
SCEP
Simple Certificate Enrollment Protocol
SDP
Session Description Protocol
SFS
Security File System
SIMPLE
SIP for Instant Messaging and Presence Leveraging Extensions
SIP
Session Initiation Protocol
SKS
Special Key Sequence
SMTP
Simple Mail Transfer Protocol
SOAP
Simple Object Access Protocol
STUN
Simple Traversal of UDP through NAT devices
TCP
Transport Control Protocol
TFTP
Trivial File Transport Protocol
TLS
Transport Level Security
SIP Software for Avaya 1200 Series IP Deskphones-Administration
September 2013
27
Introduction to this guide
TPS
Terminal Proxy Server
TTL
Time-to-live
UDP
User Datagram Protocol
UFTP
UNIStim File Transfer Protocol
UI
User Interface
UNIStim
Unified Network IP Stimulus Protocol
VoIP
Voice over IP
VLAN ID
Virtual Local Area Network Identification
VLAN IP
Virtual Local Area Network Internet Protocol
VQMon
Voice Quality Monitoring
Related publications
Other publications related to the SIP Software for Avaya 1200 Series IP Deskphones
administration include the following:
• Avaya 1220 IP Deskphone with SIP Software User Guide , NN43170-101
• Avaya 1230 IP Deskphone with SIP Software User Guide , NN43170-102
• Avaya 1200 Series Expansion Module (SIP Software) User Guide, NN43170-103
• Avaya 1200 Series IP Deskphones product bulletins on http://support.avaya.com/css/
appmanager/public/support.
28
SIP Software for Avaya 1200 Series IP Deskphones-Administration
Comments? [email protected]
September 2013
Chapter 4: Overview
Introduction
This chapter describes the hardware and software features of the Avaya 1200 Series IP
Deskphones and provides a brief overview of Session Initiation Protocol (SIP). In this
document, Avaya 1200 Series IP Deskphones are referred to as IP Deskphones.
SIP overview
Session Initiation Protocol (SIP) is a signaling protocol used for establishing multimedia
sessions in an Internet Protocol (IP) network.
SIP is a text-based protocol similar to HTTP and SMTP. With the introduction of SIP to IP
Deskphones, telephony integrates easily with other Internet services. SIP allows the
convergence of voice and multimedia.
Avaya 1200 Series IP Deskphones with SIP Software
The Avaya 1200 Series IP Deskphones connect to an IP network using an Ethernet connection.
All voice and signaling information is converted into IP packets and sent across the network.
IP Deskphones can be ordered with UNIStim software installed or with SIP software installed.
UNIStim software and SIP software use the same hardware, but the order number of an IP
Deskphone with UNIStim software is different from the order number of an IP Deskphone with
SIP software.
If you have an IP Deskphone with UNIStim software, you can convert the software to SIP
software. For information on how to convert the UNIStim software to SIP software and
download the most recent version of SIP software, see Upgrade and convert the IP Deskphone
software on page 105).
SIP Software for Avaya 1200 Series IP Deskphones-Administration
September 2013
29
Overview
This chapter explains how to:
• configure the provisioning server and the DHCP server. Note: The provisioning server is
where the software and the configuration files for the IP Deskphones.
• convert an IP Deskphone with UNIStim software to an IP Deskphone with SIP software
• provision the Device Settings parameters on the IP Deskphones with SIP software
Important:
Converting the software on an IP Deskphone from UNIStim software to SIP software
overwrites the UNIStim software. The IP Deskphone cannot operate in both modes
simultaneously. A switch from UNIStim to SIP software or SIP to UNIStim software requires
a software reload.
The following figure shows the main components of the 1230 IP Deskphone with SIP
software.
Figure 1: Avaya 1230 IP Deskphone with SIP Software
30
SIP Software for Avaya 1200 Series IP Deskphones-Administration
Comments? [email protected]
September 2013
Related documentation
Related documentation
The Avaya 1200 Series IP Deskphones with SIP Softphone User Guide explains how to do
the following:
• use the context-sensitive soft keys and Navigation key cluster
• enter text
• use the address book
• access and use the call inbox and call outbox
• configure and use instant messaging
• receive, identify, answer, redirect, decline, or ignore an incoming call
• operate hold, three-way calling, call transfer, and call park
• use other features such as speed dial, call forward, do not disturb, and setting up
conference calls
• use the Multi line appearance/Bridged line appearance feature
For more information about using the IP Deskphones, see Avaya 1220 IP Deskphone with SIP
Software User Guide, NN43170-101, Avaya 1230 IP Deskphone with SIP Software User
Guide , NN43170-102 .
The Avaya 1200 Series IP Deskphones Getting Started Card included in the box with the IP
Deskphone explains how to do the following:
• connect the AC power adapter
• control the volume when answering a call
• make a call using the handset
• make a call with the headset or using handsfree
• use hold and mute
• set the contrast
• set the language
Installation overview
To install the IP Deskphone with SIP Software, three basic steps are required.
1. Configure the provisioning server and, optionally, the DHCP server. The function of
the provisioning server is to provide configuration options to every IP Deskphone
throughout the network. The DHCP server can be configured to provide basic
SIP Software for Avaya 1200 Series IP Deskphones-Administration
September 2013
31
Overview
network-configuration data or a more comprehensive set of network-configuration
data for the IP Deskphone with SIP Software.
2. Load SIP Software on the IP Deskphone.
3. Configure the initial network-configuration parameters on the IP Deskphone with
SIP Software.
32
SIP Software for Avaya 1200 Series IP Deskphones-Administration
Comments? [email protected]
September 2013
Installation overview
Figure 2: Installation of Avaya 1230 IP Deskphone with SIP Software, page 1 of 2
SIP Software for Avaya 1200 Series IP Deskphones-Administration
September 2013
33
Overview
Figure 3: Installation of Avaya 1230 IP Deskphone with SIP Software, page 2 of 2
34
SIP Software for Avaya 1200 Series IP Deskphones-Administration
Comments? [email protected]
September 2013
Chapter 5: Before installation
Introduction
This chapter features a checklist of tasks you must complete before you install SIP Software
on the Avaya 1200 Series IP Deskphone.
Preinstallation
Complete the following checklist.
Preinstallation checklist
1. Read and become familiar with your IP Deskphone User Guide.
2. Ensure there is one IP Deskphone boxed package for each IP Deskphone being
installed.
3. Ensure that the IP Deskphone box includes the following:
Table 2: IP Deskphone box contents
Item
Avaya 1220 IP
Deskphone order
number
Avaya 1230 IP
Deskphone order
number
IP Deskphone Graphite
with icon keys without PS
(SIP) (RoHS)
IP Deskphone Graphite
with English keys without
PS (SIP) (RoHS)
Handset, Charcoal
NTYS09AA70
Handset cord, Charcoal
NTYS10AA70
Footstand kit, Charcoal
NTYS11AA70
Phone number label and
lens kit
NTYS12AA
SIP Software for Avaya 1200 Series IP Deskphones-Administration
September 2013
35
Before installation
Item
Avaya 1220 IP
Deskphone order
number
2.3 m (7 ft) CAT5
Ethernet cable
Avaya 1230 IP
Deskphone order
number
NTYS13AA
The IP Deskphone can be powered either by Power Over Ethernet (POE) or through
an external AC power adapter. Order the external AC adapter global power supply
separately.
Warning:
Do not use the AC power adapter if you are connected to a Power over the
Ethernet (PoE) connection. Only use the AC power adapter when you do not
have a PoE connection.
Table 3: Avaya 1200 Series IP Deskphones parts list (order separately)
CPC code
PEC code
Product description
NTYS17xxE6
IP Deskphone Global Power Supply (2000 series,
1100 series, 1200 series) (RoHS)
N0089603
NTYS14AAE6
Standard IEC Cable - North America (RoHS)
A0781922
NTTK15AA
Standard IEC Cable – Australia / NZ (Note: RoHS
not required)
N0114986
NTTK16ABE6
Standard IEC Cable – Europe
N0109787
NTTK17ABE6
Standard IEC Cable – Switzerland
N0109881
NTTK18ABE6
Standard IEC Cable – UK
N010978
NTTK22ABE6
Standard IEC Cable – Denmark
A0814961
A0814961
Standard IEC Cable - Argentina (Note: RoHS not
required)
N0118951
NTTK26AAE6
Standard IEC Cable - Japan
Caution:
The IP Deskphone must be plugged into a 10/100-BaseT Ethernet jack. Severe
damage occurs if this IP Deskphone is plugged into an ISDN connection.
4. Ensure that the location meets the network requirements:
• a DNS server and a DHCP server with DHCP relay agents installed,
configured, and running. Using DHCP and DNS servers with a CS 2000
network is recommended but not mandatory.
• An Ethernet connection to a network with an appropriate SIP proxy server.
36
SIP Software for Avaya 1200 Series IP Deskphones-Administration
Comments? [email protected]
September 2013
Preinstallation
• One of the following file servers used as a Provisioning server:
- TFTP server
- FTP server
- HTTP server
Only a TFTP server can be used for an initial UNIStim-to-SIP Software
conversion. An IP Deskphone with SIP Software can operate with a TFTP,
FTP, or HTTP file server.
SIP Software for Avaya 1200 Series IP Deskphones-Administration
September 2013
37
Before installation
38
SIP Software for Avaya 1200 Series IP Deskphones-Administration
Comments? [email protected]
September 2013
Chapter 6: Configure the provisioning
server
Important:
If you have UNIStim software on your IP Deskphone, the software must be converted from UNIStim to
SIP before you proceed with the following instructions. See the chapter Upgrade and convert the
IP Deskphone software on page 105 for instructions on how to convert the software on an
IP Deskphone from UNIStim to SIP.
If the IP Deskphone is installed with SIP Software, further SIP Software upgrades can be done with a
TFTP, an FTP, or an HTTP server.
How provisioning works
Provisioning is performed without interaction with the Call Server. The Avaya 1200 Series IP
Deskphone with SIP Software connects directly with the provisioning server in order to retrieve
software files and configuration files. In this case, the provisioning server is not to be confused
with the IP Client Manager on the Call Server. The methods of provisioning are as follows:
• Automatic provisioning at power-up: After the IP Deskphone powers up or is reset, it
checks the provisioning server for the latest files.
• Provisioning through user interaction: The end user can manually check for updates by
pressing the Services context-sensitive soft key and selecting Check for Updates.
• Automatic provisioning at a preconfigured time: The IP Deskphone with SIP Software
checks for updates every 24 hours, at a time specified by a parameter in the device
configuration file.
The following is the sequence of events when provisioning updates occur.
The IP Deskphone with SIP Software:
1. connects to the provisioning server
2. retrieves the provisioning file (for example, 1230SIP.cfg) from the provisioning
server
3. reads and acts upon the content of the provisioning file and decides whether any
other file is needed, based on a set of rules. If files need to be downloaded to the
IP Deskphone, a new file transfer session starts for each file to be downloaded. The
SIP Software for Avaya 1200 Series IP Deskphones-Administration
September 2013
39
Configure the provisioning server
provisioning file (for example, 1230SIP.cfg) can contain commands that prompt for
confirmation before a file is downloaded.
Download the SIP software to the provisioning server
To download the SIP software, perform the following procedure.
Downloading SIP software for the IP Deskphone
1. Go to http://www.avaya.com/support.
2. Log on to the Avaya Web site with a valid Avaya User ID and Password.
The Support page appears.
3. Enter the IP Deskphone type in the Knowledge and Solution Engine box.
4. Select Software in the All types scroll-down menu.
5. Press the gray arrow at the end of the Knowledge and Solution Engine box to
obtain the Search Results.
6. From Search Results, select and download the appropriate version of the SIP
software for the IP Deskphone; for example, SIP IP Deskphone 1230 Release
SIP12x004.01.03.00.bin.
7. Place the selected software on the provisioning server.
Create the SIP provisioning file on the provisioning server
The provisioning file is downloaded from the provisioning server to the IP Deskphone every
time the IP Deskphone checks for updates. The provisioning file is a clear text file that has the
naming convention 12xxSIP.cfg. The following is an example of the IP Deskphone provisioning
file:
40
SIP Software for Avaya 1200 Series IP Deskphones-Administration
Comments? [email protected]
September 2013
Create the SIP provisioning file on the provisioning server
SIP Software for Avaya 1200 Series IP Deskphones-Administration
Figure 4: Sample provisioning file
September 2013
41
Configure the provisioning server
Table 4: Provisioning file supported sections
[DEVICE_CONFIG]
Device configuration file
[FW]
Firmware image
[DIALING_PLAN]
Dialing plan
[LANGUAGE]
Downloadable language files (more than one can be
specified in each section)
[IMAGES]
Downloadable images
[TONES]
Downloadable tones (.wav files)
[LICENSING]
License files
[POLICY]
License policy files
[DEV_CERT]
Device certification files
[USER_KEYS]
User keys files
[LOGIN_BANNER]
Login banner
[USER_CONFIG]
IP Deskphone-specific configuration files
Provisioning is performed using the commands in the 12xxSIP.cfg configuration file. The
configuration file can have multiple sections.
Note:
The maximum length of a line item in the configuration file is 80 characters. If a line item
with more than 80 characters is encountered when parsing the configuration file, the
remaining portion of the file following that line item is ignored.
The '#' symbol is used to indicate a comment. Anything before a '#' symbol is a comment.
Each section in the configuration file defines rules for different file types. A section starts with
a [SECTION NAME] to specify rules for each file type. For example: [FW].
A section is a mandatory field. Parsing of download rules for each file type starts with finding
this key word. Currently, the following sections are supported by the IP Deskphone with SIP
Software:
• [DEVICE_CONFIG] — used to configure various parameters in the IP Deskphone.
• [FW] — image files originate from Avaya only and are authenticated during software
download. If the FW authentication fails, the IP Deskphone displays an error message
and continues operation with the existing FW image.
• [DIALING_PLAN] — used for configuring dialing patterns and the format of originated
URIs in the SIP message.
• [LANGUAGE] — simple text files containing all text prompts used by the IP Deskphone.
Language files are used for the localization of the IP Deskphone without software
upgrade. Each language file has a header that contains a software load version with which
42
SIP Software for Avaya 1200 Series IP Deskphones-Administration
Comments? [email protected]
September 2013
Create the SIP provisioning file on the provisioning server
this file is associated. Language files are signed by Avaya and are authenticated by the
software for security reasons.
Supported languages include:
- Czech
- Danish
- Dutch
- Finnish
- French
- German
- Hungarian
- Italian
- Japanese (Katakana character set)
- Latvian
- Norwegian
- Polish
- Portuguese
- Russian
- Spanish
- Swedish
- Turkish
- Slovenian
• [IMAGES] — section for the images files
• [TONES] — standard in the Telecommunications Standardization sector of the
International Telecommunications Union (ITU-T). The IP Deskphone supports custom
tone files. The tone files must be WAV files with the following specification: A-law or ulaw (8.0 kHz, 8-bit, mono or 16.0 kHz, 16 bit mono). The WAV files can be created and
downloaded to the IP Deskphone. These files are not authenticated by the IP
Deskphone.
• [LICENSING] — section for the licensing files
• [SEC_POLICY] — section for downloading a file, which contains rules that define the
security policy for the IP Deskphone. After the file downloads, the IP Deskphone verifies
that the file is signed by a trusted entity before it accepts the values in the security policy
file.
• [DEV_CERT] — section to enable an IP Deskphone to import the PKCS# 12 file.
• [CTL] — section to enable an IP Deskphone to download the Certificate Trust List.
• [USER_KEYS] — section to enable an IP Deskphone to download a customer root
certificate.
SIP Software for Avaya 1200 Series IP Deskphones-Administration
September 2013
43
Configure the provisioning server
• [LOGIN_BANNER] — section for the log in banner files
• [USER_CONFIG] — section for IP Deskphone-specific configuration file
IP Deskphone-specific configuration files support customizing the IP Deskphone on a per
IP Deskphone/user level. Parameters in the device configuration file can be overwritten
with a IP Deskphone-specific configuration file.
Mandatory keywords in the Provisioning file are:
• VERSION [xxxxxx] — where xxxxxx is a six- to ten-digit number representing the version
of the file on the server. The version of the module is specified in this field. The command
is used for version comparison in AUTO mode. VERSION is mandatory for all sections.
In the FW section, the software version of the load located on the provisioning server must
be entered in this field. For all other sections, VERSION is just a counter that can be
incremented if it is necessary to download a new file version.
Note:
The version number of the firmware [FW] can be longer, up to 19 characters, and must
follow this format:
Example: SIP12x004.01.03.00
Caution:
The version number is stored permanently on the IP Deskphone until a higher version
number is downloaded. However, if the Forced option is in the 12xxSIP.cfg file, then
the file is forced to download and the version number in the IP Deskphone is overwritten
with the version number in the 12xxSIP.cfg file.
• DOWNLOAD_MODE [AUTO | FORCED] — defines whether the version is checked. This
command is optional. If this command is not present, AUTO mode is used as the
default.
- AUTO - This mode compares the version of the module from the VERSION field and
the version of the module version stored in the FLASH memory of the IP Deskphone.
The file download is initiated only if the version specified is higher than the current
version stored in the IP Deskphone. If the version is not applicable, as in the case
of language files, the date of the file must be used for the decision.
Caution:
The version number stored in the FLASH is permanent until a higher number is
downloaded from the Provisioning file or you select Srvcs > System > Erase User
Data on the IP Deskphone.
- FORCED - This mode forces the software download process. FORCED can be used
for software downgrade procedures.
44
SIP Software for Avaya 1200 Series IP Deskphones-Administration
Comments? [email protected]
September 2013
Create the SIP provisioning file on the provisioning server
Note:
In FORCED or AUTO DOWNLOAD_MODE, the version number is overwritten with
each software download.
• FILENAME [filename] — specifies the file name to be downloaded for this section. For
the language and tone section, the use of multiple filenames is allowed.
Optional keywords in the Provisioning file are:
• PROMPT [YES | NO] — used to indicate if the IP Deskphone should prompt the user for
an update before the operation is performed. This command is optional with the default
configured as NO.
- YES - enables the prompt
- NO - disables the prompt
• PROTOCOL [TFTP | FTP | HTTP] — defines the protocol used to download the file. The
IP Deskphone with SIP Software supports TFTP, FTP and HTTP protocols for file
download. This command is optional. If it is not present, the default protocol TFTP is
used.
Important:
When using the TFTP protocol to transfer the software image, the average round trip
time must be < 75 ms. The IP Deskphone times out and aborts the software download
if the total download time is less than 10 minutes.
If the average round trip time is less than 75 ms, use the FTP or HTTP protocol to
transfer the software image.
If using FTP or HTTP, then SRV_USER_NAME and SRV_USER_PASS are also key
words. These commands specify the credentials used to log on to the file server for file
download. If not present, the protocol default credentials are used (no credentials for
TFTP and HTTP and anonymous with no password for FTP).
• SERVER_IP [address] — allows the IP Deskphone to connect to the specified IP address
or name of the server for which the file can be downloaded. If the address is not specified,
the SERVER_IP that is used is the same SERVER_IP that is used to download the
provisioning file.
• DELETE_FILES [YES | NO] — if present, erases the language and tone files stored in
the IP Deskphone before new files are downloaded. Otherwise, new files with different
names are added without erasing existing files. This command is optional. Note that there
is a hard limit of 5 language files and 5 tone files that can be stored in the IP Deskphone.
When the limits are exceeded, no new file can be accepted for download.
- YES - erases the existing language and tone files
- NO - does not erase existing language and tone files
SIP Software for Avaya 1200 Series IP Deskphones-Administration
September 2013
45
Configure the provisioning server
• SRV_USER_NAME [username] — If the protocol is FTP or HTTP, this keyword specifies
the user name to log on to the server.
• SRV_USER_PASS [password] — If the protocol is FTP or HTTP, this keyword specifies
the password to log on to the server.
The downloading of these files is initiated when an IP Deskphone is powered on, when an
automatic check for updates is invoked, or when you select Srvcs > System > Erase User
Data. Any of these actions causes the IP Deskphone to contact the provisioning server and
attempt to read the Provisioning file. A Soft Reset (Srvcs > System > Reset Phone) does not
cause the IP Deskphone to retrieve the Provisioning file.
Setting the default language on the IP Deskphone to French
To configure the default language on a new IP Deskphone, or an IP Deskphone that has not
been logged into by an end user, include the following in the [DEVICE_CONFIG] and
[LANGUAGE] sections of the 12xxSIP.cfg configuration file.
[DEVICE_CONFIG]
DOWNLOAD_MODE AUTO
VERSION 000002
FILENAME DeviceConfig.dat
[LANGUAGE]
DOWNLOAD_MODE AUTO
VERSION 0000000001
FILENAME French_d24.lng
The DeviceConfig.cfg file should contain the following.
DEF_LANG
French_d24
On a new IP Deskphone, the language switches to French after downloading and processing
the configuration files. The login menu displays in French. On a subsequent bootup, the login
menu and all boot messages are in French.
For a new user login, the IP Deskphone creates a new user profile. All menus remain in French.
When a new user is created, the default language used is obtained from the DeviceConfig
setting and stored as a user preference, after which the user preference for language is always
used.
If a user has already logged in and either defaulted or chosen English as the user language
preference, changing the configuration files does not affect the user's language display.
46
SIP Software for Avaya 1200 Series IP Deskphones-Administration
Comments? [email protected]
September 2013
Create the device configuration file
Create the device configuration file
After the IP Deskphone downloads the provisioning file from the provisioning server, the
IP Deskphone reads the [DEVICE_CONFIG] section and is directed to download the device
configuration file from the provisioning server.
The device configuration file is a clear text file and the naming convention is defined by the
administrator. See the FILENAME keyword in the [DEVICE_CONFIG] section of the SIP
provisioning file.
The following is an example of a device configuration file.
Figure 5: Sample device configuration file
The next table provides a summary of the commands that can be used in the device
configuration file. A description and the exact syntax of each command is given in Device
configuration commands on page 51.
SIP Software for Avaya 1200 Series IP Deskphones-Administration
September 2013
47
Configure the provisioning server
Table 5: Device configuration commands
Configuration
command type
48
Configuration commands
Server and
network
configuration
commands
SIP_DOMAIN1
SIP_DOMAIN2
SIP_DOMAIN3
SIP_DOMAIN4
SIP_DOMAIN5
SERVER_IP1_1
SERVER_IP1_2
SERVER_IP2_1
SERVER_IP2_2
SERVER_IP3_1
SERVER_IP3_2
SERVER_IP4_1
SERVER_IP4_2
SERVER_IP5_1
SERVER_IP5_2
SERVER_PORT1_2
SERVER_PORT2_2
SERVER_TCP_PORT2_2
SERVER_TCP_PORT3_2
SERVER_TCP_PORT4_2
SERVER_TCP_PORT5_2
SERVER_TLS_PORT1_2
SERVER_TLS_PORT2_2
SERVER_TLS_PORT3_2
SERVER_TLS_PORT4_2
SERVER_TLS_PORT5_2
CACHED_IP_ENABLED
DHCP_UNTAG_ENABLED
IPV6_ENABLE
SERVER_PORT3_2
SERVER_PORT4_1
SERVER_PORT4_2
SERVER_PORT5_1
SERVER_PORT5_2
DNS_DOMAIN
SIP_PING
FAIL_BACK_TO_PRIMARY
PCPORT_ENABLE
DHCP_NUMBER_OF_RETRIES
DHCP_INITIAL_TIMEOUT
LLDP_ENABLE
CACHED_IP_ENABLED
HTTP_RETRY_NUMBER
SERVER_PORT1_1
SERVER_PORT2_1
SERVER_PORT3_1
SERVER_TCP_PORT1_1
SERVER_TCP_PORT1_2
SERVER_TCP_PORT2_1
SERVER_TCP_PORT3_1
SERVER_TCP_PORT4_1
SERVER_TCP_PORT5_1
SERVER_TLS_PORT1_1
SERVER_TLS_PORT2_1
SERVER_TLS_PORT3_1
SERVER_TLS_PORT4_1
SERVER_TLS_PORT5_1
Feature
configuration
commands
VMAIL
VMAIL_DELAY
IP_OFFICE_ENABLE
IPOFFICE_MSG_CODE
IPOFFICE_CONF_CODE
IPOFFICE_CONF_CODE
LLDP_WAITING_TIME
AUTOLOGIN_ENABLE
AUTOLOGIN_AUTHID_KEYxx
PROMPT_AUTHNAME_ENABLE
AUTO_UPDATE
AUTO_UPDATE_TIME
AUTO_UPDATE_TIME_ RANGE
ENABLE_PRACK
SELECT_LAST_INCOMING
MAX_LOGINS
MAX_INBOX_ENTRIES
MAX_OUTBOX_ENTRIES
MAX_REJECTREASONS
MAX_CALLSUBJECT
MAX_PRESENCENOTE
USE_PUBLISH_FOR_PRESENCE
DEF_LANG
MAX_IM_ENTRIES
MAX_ADDR_BOOK_ENTRIES
ADDR_BOOK_MODE
DEF_AUDIO_QUALITY
TRANSFER_TYPE
REDIRECT_TYPE
TECH_SUPPORT_LABEL
TECH_SUPPORT_ADDRESS
SIP Software for Avaya 1200 Series IP Deskphones-Administration
Comments? [email protected]
September 2013
Create the device configuration file
Configuration
command type
Configuration commands
SERVICE_PACKAGE_PROTOC
OL
Feature
configuration
commands
(continued)
PROXY_CHECKING
ENABLE_BT
AUTH_METHOD
BANNER
FORCE_BANNER
DST_ENABLED
TIMEZONE_OFFSET
FORCE_TIME_ZONE
IM_MODE
IM_NOTIFY
FAST_EARLY_MEDIA_ENABLE
DEF_DISPLAY_IM
CALL_WAITING
DISTINCTIVE_RINGING
USE_RPORT
TOVM_SOFTKEY_ENABLE
TOVM_VOICEMAIL_ALIAS
TOVM_VOICEMAIL_PARAM
MAX_RING_TIME
ENABLE_UPDATE
E911_TERMINATE_ENABLE
E911_USERNAME
E911_PASSWORD
HOLD_TYPE
ENABLE_3WAY_CALL
DISABLE_PRIVACY_UI
DISABLE_OCT_ENDDIAL
FORCE_OCT_ENDDIAL
SNTP_ENABLE
SNTP_SERVER
MADN_TIMER
MADN_DIALOG
DEFAULT_CFWD_NOTIFY
FORCE_CFWD_NOTIFY
DISPLAY_CALL_SNDR_IM_KEY
RTP_MIN_PORT
RTP_MAX_PORT
SCA_HOLD_BEHAVIOR
SCA_APPEARANCES
SCA_BROADWORKS
SCA_LINE_SEIZE_EXPIRES
EXP_MODULE_ENABLE
PROMPT_ON_LOCATION_OTHE
R
E911_PROXY
E911_TXLOC
E911_HIDE_MESSAGE
Feature
configuration
commands
(continued)
MENU_AUTO_BACKOUT
AUTOCLEAR_NEWCALL_MSG
LOGIN_BANNER_ENABLE
SECURE_UI_ENABLE
PRIMARY_SERVER_PROFILE
SECONDARY_SERVER_PROFI
LE
FM_PROFILES_ENABLE
FM_LANGS_ENABLE
FM_SOUNDS_ENABLE
FM_IMAGES_ENABLE
FM_CONFIG_ENABLE
BG_IMAGE_ENABLE
BG_IMG_SELECT_ENABLE
USE_BG_IMAGE
SPEEDLIST_KEY_INDEX
SPEEDLIST_LABEL
MAX_BLFCALLS
BLF_ENABLE
BLF_RESOURCE_LIST_URI
FM_CERTS_ENABLE
FM_LOGS_ENABLE
Feature
configuration
commands
(continued)
ATA_REGION
HOTLINE_ENABLE
HOTLINE_URL
SESSION_TIMER_ENABLE
SESSION_TIMER_DEFAULT_SE
SESSION_TIMER_MIN_SE
LOGSIP_ENABLE
DOS_LOCK_TIME
SET_REQ_REFRESHER
SET_RESP_REFRESHER
ENABLE_INTERWORKING
MAX_ALLOWEDADDRESSES
PORT_MIRROR_ENABLE
MEMCHECK_PERIOD
DOS_PACKET_RATE
DOS_MAX_LIMIT
SIP Software for Avaya 1200 Series IP Deskphones-Administration
September 2013
49
Configure the provisioning server
Configuration
command type
50
Configuration commands
Feature
configuration
commands
(continued)
CUST_CERT_ACCEPT
CERT_ADMIN_UI_ENABLE
SEC_POLICY_ACCEPT
SECURITY_LOG_UI_ENABLE
KEY_SIZE
KEY_ALGORITHM
TLS_CIPHER
SIGN_SIP_CONFIG_FILES
FP_PRESENTED
FP_ENTERED
ADHOC_ENABLED1
ADHOC_ENABLED2
ADHOC_ENABLED3
ADHOC_ENABLED4
ADHOC_ENABLED5
PREFER_CUSTOMIZED_RBT
SUBJ_ALT_NAME_CHECK_ENA
BLE
SECURITY_POLICY_PARAM_CH
ANGE
CERT_EXPIRE
AUTO_PRV_ACCEPT
DWNLD_CFG_ACCEPT
AUTO_PRV_SIGNING
DWNLD_CFG_SIGNING
FTP_PASSWORD
INTERCOM_PAGING
CONFERENCE_URI1
CONFERENCE_URI2
CONFERENCE_URI3
CONFERENCE_URI4
CONFERENCE_URI5
ALPHA_ORDER_LOC_LIST
QoS and ToS
commands
DSCP_CONTROL
802.1P_CONTROL
DSCP_MEDIA
802.1P_MEDIA
DSCP_DATA
802.1P_DATA
Tone
configuration
commands
DIAL_TONE
RINGING_TONE
BUSY_TONE
FASTBUSY_TONE
CONGESTION_TONE
NAT
configuration
commands
NAT_SIGNALLING
NAT_MEDIA
NAT_TTL
STUN_SERVER_IP1
STUN_SERVER_IP2
STUN_SERVER_PORT1
STUN_SERVER_PORT2
Voice Quality
Monitoring
(VQMon)
configuration
commands
VQMON_PUBLISH
VQMON_PUBLISH_IP
LISTENING_R_ENABLE
LISTENING_R_WARN
LISTENING_R_EXCE
PACKET_LOSS_ENABLE
PACKET_LOSS_WARN
PACKET_LOSS_EXCE
JITTER_ENABLE
JITTER_WARN
JITTER_EXCE
DELAY_ENABLE
DELAY_WARN
DELAY_EXCE
SESSION_RPT_EN
SESSION_RPT_INT
System
commands
ADMIN_PASSWORD
ADMIN_PASSWORD_EXPIRY
ENABLE_LOCAL_ADMIN_UI
HASHED_ADMIN_PASSWORD
Audio Codecs
commands
G729_ENABLE_ANNEXB
G723_ENABLE_ANNEXA
DEF_AUDIO_QUALITY
AUDIO_CODEC1
AUDIO_CODEC2
AUDIO_CODEC7
AUDIO_CODEC8
AUDIO_CODEC9
AUDIO_CODEC10
AUDIO_CODEC11
SIP Software for Avaya 1200 Series IP Deskphones-Administration
Comments? [email protected]
September 2013
Create the device configuration file
Configuration
command type
Configuration commands
AUDIO_CODEC3
AUDIO_CODEC4
AUDIO_CODEC5
AUDIO_CODEC6
Deskphone
bugs logging/
Recovery
commands
AUDIO_CODEC12
AUDIO_CODEC13
AUDIO_CODEC14
AUDIO_CODEC15
RECOVERY_LEVEL
LOG_LEVEL
Device configuration commands
Caution:
The syntax of the device configuration file is case sensitive. Verify that the commands
entered follow the case defined in this document.
Important:
Parameters in the device configuration file with empty values are not allowed and cause
write failure.
Server and network configuration commands
• SIP_DOMAIN[x] [domain_name] — preconfigures the proxy domain name for all
servers. The same configuration can be done through the domain configuration menu on
the IP Deskphone.
- x - the number of the SIP domain number from 1 to 5.
- domain_name - the proxy domain name for all servers.
Note:
SIP_DOMAIN[x] is provisioned after user logout.
• SERVER_IP[x]_[y]_ip_address] — configures the primary and secondary IP address
for each domain, two proxies for each domain.
- x - the domain number from 1 to 5.
- y - the corresponding primary and secondary IP addresses. y=1 indicates the
primary address and y=2 indicates the secondary address.
- ip_address - the IP address of the SIP proxy server.
SIP Software for Avaya 1200 Series IP Deskphones-Administration
September 2013
51
Configure the provisioning server
• SERVER_PORT[x]_[y] [port_number] — configures the signaling ports for each
proxy.
- x - the domain number.
- y - the corresponding primary and secondary IP addresses. y=1 indicates the
primary address and y=2 indicates the secondary address.
- port_number - the SIP proxy signaling port (default is 5060).
• SERVER_TCP_PORT[x]_[y] [port_number] — This parameter configures the signaling
TCP ports for each proxy.
- x — the domain number.
- y — the corresponding primary or secondary IP addresses. y=1 indicates the primary
IP address and y=2 indicates the secondary IP address.
- port_number – the SIP proxy signaling TCP port (default is 5060).
• SERVER_TLS_PORT[x]_[y] [port_number] — This parameter configures the signaling
TLS ports for each proxy.
- x — the domain number.
- y — the corresponding primary or secondary IP addresses. y=1 indicates the primary
IP address and y=2 indicates the secondary IP address.
- port_number – the SIP proxy signaling TLS port (default is 5061).
• DNS_DOMAIN [domain] — the DNS domain of the IP Deskphone.
• SIP_PING [YES | NO] — The SIP_PING configuration value is used to maintain server
heartbeat detection and to keep a firewall pinhole open.
When used for server heartbeat detection, the IP Deskphone periodically pings the SIP
Proxy and awaits a response. When three attempts to ping the SIP Proxy fail, the
IP Deskphone begins a failover process and attempts to connect to the next configured
SIP Proxy IP in the same domain.
When a NAT TRAVERSAL method is selected, the SIP_PING configuration value also
helps keep a firewall pinhole open.
Important:
Decide carefully whether SIP_PING usage is appropriate for your environment. Even
when SIP_PING is not used for NAT TRAVERSAL, it is highly likely that you must keep
SIP_PING enabled for server heartbeat detection.
If the IP Deskphone is behind a firewall, it is very likely that you must keep SIP_PING
enabled, unless an alternate method of keeping the firewall pinhole open is used.
52
SIP Software for Avaya 1200 Series IP Deskphones-Administration
Comments? [email protected]
September 2013
Create the device configuration file
The default value is YES if not specified in the device configuration file. If SIP_PING is
changed in the Device configuration file, the IP Deskphone must be rebooted for the
change to take effect.
- YES - enables pinging
- NO - disables pinging
• IPV6_ENABLE [YES] [NO] — This parameter must be applied at boot time prior to the
network being enabled. The default value is NO. When this parameter is enabled, IPv4/
IPv6 are supported on the IP Deskphone. When this parameter is not enabled only IPv4
is supported on the IP Deskphone.
- YES – enables IPv6 functionality in a dual mode
- NO – disables IPv6 functionality (default)
When the protocol is changed, the IP Deskphone automatically restarts and updates the
Device Settings on the IP Deskphone.
• FAIL_BACK_TO_PRIMARY [YES | NO] — This parameter allows you to enable/disable
the Fail Back to Primary feature.
- YES - enables the fail back.
- NO - disables the fail back (default).
• CACHED_IP_ENABLED [YES | NO] — This parameter configures the cached IP feature.
The parameter defines whether the IP Deskphone uses the IP address information
previously configured if the IP Deskphone is not able to reach DHCP server or if it should
interrupt regular work and wait for a DHCP response. The default is NO.
- YES — the last IP address information is used if the DHCP server is not reached.
- NO — Must receive a response to assign the IP Deskphone an IP address
(default).
• PCPORT_ENABLE [YES | NO] — This parameter enables/disables the PC port. The
default is YES.
- YES — PC port is active (default).
- NO — PC port is disabled.
• LLDP_ENABLE [YES | NO] —
- YES – 802.1ab (LLDP) is enabled.
- NO – 802.1ab (LLDP) is disabled (default).
• HTTP_RETRY_NUMBER [x] — This parameter configures the number of times the IP
Deskphone attempts to contact the server when an HTTP 503 (server is unavailable)
response is received. The IP Deskphone stops trying to connect to the server after
HTTP_RETRY_NUMBER unsuccessful attempts have been made, or if any other
response except HTTP 503 is received from the server.
x = positive integer. The default is 5.
SIP Software for Avaya 1200 Series IP Deskphones-Administration
September 2013
53
Configure the provisioning server
If HTTP_RETRY_NUMBER is not specified in the Device Configuration file, the default
number of attempts is applied.
If HTTP_RETRY_NUMBER is set to 0 in the Device Configuration file, the IP Deskphone
performs HTTP retries continuously until it receives a response other than HTTP 503. If
the HTTP_RETRY_NUMBER is configured as a negative value, the default number of
attempts is applied.
• DHCP_NUMBER_OF_RETRIES [x] — This parameter configures the number of times
the IP Deskphone attempts to contact the DHCP server.
The default value is 4.
- minimum value is 1
- maximum value is 10
If the value defined in the System Configuration file is incorrect, the default value is
used.
• DHCP_INITIAL_TIMEOUT [x] — This parameter configures the initial time interval
between attempts by the IP Deskphone to contact the DHCP server.
The default value is 4 seconds.
If the DHCP server does not respond, the IP Deskphone sends several requests one after
another in different timeout intervals, based on the formula
timeout[i]=2* timeout[i-1] +- 1second
where “i” is the number of retries and timeout[0]= DHCP_INITIAL_TIMEOUT. The
maximum timeout between Discovery requests cannot be greater than 64 seconds. If the
value of the next timeout becomes greater than 64 seconds, the DHCP client stops
increasing the timeout interval and keeps the timeout value of 64 seconds.
- minimum value is 4 seconds
- maximum value – 10 seconds
If the value defined in the System Configuration file is incorrect, the default value is
used.
• DHCP_UNTAG_ENABLED [YES | NO] — When this parameter is enabled, the IP
Deskphone attempts to obtain an IP address in a VLAN (DHCP discovery frames are
tagged), and the DHCP server is unreachable, then after the pre-defined number of
Discovery attempts the IP Deskphone begins sending Discovery frames in non-VLAN
mode. If the IP Deskphone still does not receive an Offer then, after a pre-defined number
of Discovery attempts, the IP Deskphone reverts to VLAN tag mode again.
The default is NO.
• SRTP_ENABLED [YES | NO] — This parameter configures SFTP configuration values.
The default value is NO.
- YES – enables SRTP.
54
SIP Software for Avaya 1200 Series IP Deskphones-Administration
Comments? [email protected]
September 2013
Create the device configuration file
- NO – disables SRTP (default).
• HASH_ALGORITHM [SHA1 | MD5] — This parameter provides the hash algorithm. The
default value is SHA1.
- SHA1 – algorithm is Secure HASH Algorithm 1
- MD5 – algorithm is Message-Digest algorithm 5
• SSHPWD — This parameter configures SSH and SFTP passwords. The maximum limit
is 49 characters.
Feature configuration commands
• TOVM_SOFTKEY_ENABLE [YES | NO]
- YES - enables the toVM soft key on the IP Deskphone.
- NO - disables the toVM soft key on the IP Deskphone.
• TOVM_VOICEMAIL_ALIAS <string> — customizes the user ID of the SIP URI of the
voice mail system. The default is transfertovm.
• TOVM_VOICEMAIL_PARAM<string> — customizes the parameter name of the SIP
URI of the voice mail system. The default is mbid.
• SCA_APPEARANCES — configures the maximum number of appearances used for
outgoing calls by the Shared Call Appearance (SCA) group. The valid range for this
parameter is 2 to 24. The default value is 12.
• SCA_HOLD_BEHAVIOR [PRIVATE | PUBLIC] — configures the default behavior of the
hold button when user-determined behavior does not exist. When a user creates a new
profile, the default behavior is taken from this setting. After the creation of a new profile,
this configuration setting is not used. The default option is PUBLIC.
• SCA_LINE_SEIZE_EXPIRES [timeout] — This parameter allows the administrator to
specify expiration time in seconds for line-seize subscriptions (Single Call Appearance).
Allowed values are from 10 to 30 seconds. The default value is 15 seconds.
— timeout - expiration time for line-seize subscriptions in seconds.
• RTP_MIN_PORT
The minimum RTP port value is an integer between 1024 and 65535, exclusive of the
restricted SIP ports between 5059 and 5080. The default value is 50000.
• RTP_MAX_PORT
The maximum RTP port value is an integer between 1024 and 65535, exclusive of the
restricted SIP ports between 5059 and 5080. The default value is 50100.
SIP Software for Avaya 1200 Series IP Deskphones-Administration
September 2013
55
Configure the provisioning server
Note:
The RTP port configuration parameters must satisfy the constraints that
(RTP_MAX_PORT - RTP_MIN_PORT) is greater than or equal to 10 and less than
1000.
Note:
If there is a provisioning error, RTP_MIN_PORT is reset to the default value of 50000
and RTP_MAX_PORT is reset to the default value of 50100. An error message is
logged. The SystemConfig file stores 50000 and 50100, rather than the erroneous
configuration values, to indicate that the configuration attempt has been rejected.
• CALL_WAITING [SPEAKER | STREAM]
- SPEAKER - the call waiting tone is played on the IP Deskphone speaker. This is the
default option.
- STREAM - the call waiting tone is injected into the stream played on the transducer
in use for the active call
• DISTINCTIVE_RINGING [YES | NO]
- YES - turns on the distinctive ringing feature. This is the default option.
- NO - turns off the distinctive ringing feature.
• USE_RPORT [YES | NO]
- YES - allows the IP Deskphone to work from behind and/or in front of a symmetrical
NAT with servers and/or clients that support RFC3581.
- NO - disables implementation of support for RFC3581. This is the default option.
Note:
To provision USE_RPORT, the IP Deskphone must be rebooted after the device
configuration file is updated.
• EXP_MODULE_ENABLE [YES | NO]
- YES - the IP Deskphone detects and enables an Expansion Module.
- NO - the IP Deskphone does not detect an Expansion Module. This is the default
option.
• MAX_RING_TIME [x] — an integer between 30 and 600 that configures the number of
seconds for incoming calls to ring before ignoring them. The default value is 120.
• ENABLE_UPDATE [YES | NO]
- YES - enables UPDATE message support and adds “UPDATE” to ALLOW header.
This is the default option.
- NO - disables UPDATE message support.
56
SIP Software for Avaya 1200 Series IP Deskphones-Administration
Comments? [email protected]
September 2013
Create the device configuration file
Note:
ENABLE_UPDATE is provisioned after user logoff.
• PROMPT_ON_LOCATION_OTHER [YES | NO]
- YES - prompt the user to select new location if location “other” was previously
selected.
- NO - do not prompt the user to select new location if location “other” was previously
selected. This is the default option.
• VMAIL [vmail_number] — is the voice mail address, which can be the URI or the DN
number of the voice mail server. This command takes a string as a parameter. This is the
default link for a new user profile only. Individual users can customize the link through
Prefs > Message Options > Voice Mail Settings. This command has no effect on the
user profiles after it is created.
- vmail_number - the number or URI of the voicemail server.
• VMAIL_DELAY [x] — is a delay, configured in milliseconds, between when the voice mail
server answers the call and the start of dialing the voice mail user ID. The default value
is 1000ms.
- x - the delay in milliseconds
• LLDP_WAITING_TIME [timeout_sec] — This parameter allows the administrator to
configure the timeout in seconds the IP Deskphone should wait for the LLDP response.
The allowed values of the parameter are from 30 to 300 seconds. The default value is 30
seconds.
— timeout_sec – timeout value in seconds
• IP_OFFICE_ENABLE [YES | NO] — This parameter is a command that specifies if IP
Office-specific features are active on the IP Deskphone or not. The default value is NO.
- YES – IP Office-specific features are active.
- NO – IP Office-specific features are not active.
• IPOFFICE_CONF_CODE [opt_string] — This parameter allows the administrator to
configure the Conf soft key. If the parameter is configured, the IP Deskphone user is able
to call the IP Office option "Conference".
— opt_string = code of the Conference option
Example:
IPOFFICE_CONF_CODE *3
Note:
The option is available if IP_OFFICE_ENABLE is YES.
SIP Software for Avaya 1200 Series IP Deskphones-Administration
September 2013
57
Configure the provisioning server
The code of the option is specified in the IP Office Administration Guide.
• IPOFFICE_MSG_CODE [opt_string] — This parameter allows the administrator to
configure the Msgs soft key. If the parameter is configured, the IP Deskphone user is
able to call the IP Office option "Send Message”.
— opt_string = code of the Send Message option
Example:
IPOFFICE_MSG_CODE *5
Note:
The option is available if IP_OFFICE_ENABLE is YES.
The code of the option is specified in the IP Office Administration Guide.
• IPOFFICE_REDIAL_CODE [opt_string] — This parameter allows the administrator to
configure the Redial soft key. If the parameter is configured, the IP Deskphone user is
able to call the IP Office option "Redial”.
— opt_string = code of the Redial option
Example:
IPOFFICE_REDIAL_CODE *6
Note:
The option is available if IP_OFFICE_ENABLE is YES.
The code of the option is specified in the IP Office Administration Guide.
• AUTOLOGIN_ENABLE [YES | NO | USE_AUTOLOGIN_ID] or [1 | 0 | 2] — controls
whether the IP Deskphone attempts to automatically log on to the proxy server.
- YES - turns on the auto login feature.
- NO - turns off the auto login feature.
- USE_AUTOLOGIN_ID - enables the auto login id feature using the userid specified
in AUTOLOGIN_ID_KEY01 and the password specified in
AUTOLOGIN_PASSWD_KEY01 to register and authenticate. Both userid and
password must be specified.
The AUTOLOGIN_ID_KEY01 and AUTOLOGIN_PASSWD_KEY01 parameters are
defined in the IP Deskphone-specific configuration file.
Note:
When using this setting, the user is prevented from logging off the
IP Deskphone.
58
SIP Software for Avaya 1200 Series IP Deskphones-Administration
Comments? [email protected]
September 2013
Create the device configuration file
OR
- 1 - turns on the Autologin feature.
- 0 - turns off the Autologin feature.
- 2 - enables the Autologin ID feature using the User ID specified in
AUTOLOGIN_ID_KEY01 and the password specified in
AUTOLOGIN_PASSWD_KEY01 to register and authenticate. Both userid and
password must be specified.
The AUTOLOGIN_ID_KEY01 and AUTOLOGIN_PASSWD_KEY01 parameters are
defined in the IP Deskphone-specific configuration file.
Note:
When using this setting, the user is prevented from logging off the
IP Deskphone.
Note:
If Autologin ID is enabled in the IP Deskphone-specific configuration file, it is
recommended that AUTOLOGIN_ENABLE be configured as either Yes/No or 1/0 in
the device configuration file.
This recommendation facilitates migrating an IP Deskphone that uses the
IP Deskphone-specific configuration file to not using the IP Deskphone-specific
configuration file. The migration to just using the device configuration file can be done
by deleting the IP Deskphone-specific configuration file. If the device configuration file
does not have the matching parameters in the IP Deskphone-specific configuration file,
the IP Deskphone continues to use the previously assigned settings after the
IP Deskphone-specific configuration file is deleted. This recommendation applies to
other parameters in the IP Deskphone-specific configuration file.
• AUTOLOGIN_AUTHID_KEYxx — is used for auto login when the
AUTOLOGIN_ENABLE method is configured to USE_AUTOLOGIN_ID.
If the config file does not contain AUTOLOGIN_AUTHID_KEYxx, the client uses the
value from AUTOLOGIN_ID_KEYxx.
• PROMPT_AUTHNAME_ENABLE — is used to determine if the authentication ID screen
is presented to the user. The default value is NO.
- YES - after the user login name is entered, the authentication ID screen appears.
- NO - after the user login name is entered, the password screen appears.
• AUTO_UPDATE [YES | NO] — is a command to enable or disable the automatic updating
of the IP Deskphone with SIP Software configuration files from the provisioning server.
Enabling this command causes the IP Deskphone with SIP Software to check for updates
once every day. The default is disabled.
- YES - turns on the AUTO_UPDATE feature.
SIP Software for Avaya 1200 Series IP Deskphones-Administration
September 2013
59
Configure the provisioning server
- NO - turns off the AUTO_UPDATE feature.
Note:
If the IP Deskphone encounters any Major or Critical error in memory during the Auto
update process, the IP Deskphone reboots based on the recovery level configured.
• AUTO_UPDATE_TIME [x] — is the actual time in seconds, starting from midnight, before
an automatic update occurs. Each IP Deskphone adds random numbers to the time
specified by this command so that every IP Deskphone does not try to access the
provisioning server at the same time. By default, the automatic update feature is disabled
(see AUTO_UPDATE_RANGE).
- x - the time after midnight that the automatic update occurs.
• AUTO_UPDATE_TIME_RANGE [x] — is the range in hours, from the
AUTO_UPDATE_TIME where an IP Deskphone checks for updates from the server. The
default range is 1 hour.
- x — the range in hours when the IP Deskphone checks for updates from the server.
The range can be from 1 to 6 hours.
• TRANSFER_TYPE [MCS | STANDARD] — is used to configure the IP Deskphone to
activate Avaya conference server-assisted attended transfers, instead of the industry
standard method of attended transfers. The default setting is Standard.
- MCS - the typical attended transfer used by Avaya proxies. MCS uses a conference
server to do the attended transfer.
- STANDARD - the standard method of a transfer. This method does not involve a
conference server.
• REDIRECT_TYPE [MCS | RFC3261] — is a command used to select different protocols
for IP Deskphone redirection. The default setting is MCS.
- MCS - when the IP Deskphone receives either 301 (moved permanently) or 302
(moved temporarily) during registration, it is assumed the IP Deskphone is moved
to a new system (proxy+registrar) and all subsequent messages are sent to the new
address.
- RFC3261 - the IP Deskphone assumes that, if during registration, a 301 (moved
permanently) is received, the message contains a new registrar address. The
IP Deskphone tries to register to the registrar using the existing proxy.
• ENABLE_PRACK [YES | NO]
PRACK is utilized to make some SIP messages reliable and requires that an ACK be sent
with many SIP messages. ENABLE_PRACK is often utilized to verify that early media is
being received. See RFC3262 for details.
60
SIP Software for Avaya 1200 Series IP Deskphones-Administration
Comments? [email protected]
September 2013
Create the device configuration file
Note:
ENABLE_PRACK must be configured as NO when connected to the MCS 5100
Release 3.5 system.
Note:
ENABLE_PRACK is provisioned after user logoff.
- NO - disables PRACK and is the default value.
- YES- enables PRACK.
• ENABLE_INTERWORKING [YES | NO]
This command is used to enable the interworking feature to pre-authorize users or groups
of users to access automatic call answer. The configuration values are YES and NO. The
default value is NO.
- NO - the interworking feature is disabled.
- YES- the interworking feature is enabled.
• PROXY_CHECKING [YES | NO] — enables and disables extra security checking when
incoming requests are sent to the IP Deskphone. The IP Deskphone with SIP Software
always sends requests through an outgoing proxy. However, it is possible, through this
configuration, to be able to accept an incoming request directly or through an incoming
proxy.
- YES - means that the request must come directly from the proxy server. YES is the
default to enable proxy checking.
- NO - means the request can be sent directly to the IP Deskphone. (NO is only
suitable in a few situations).
• AudioCodec <n><codec id><description> — is a command that specifies the codecs
that are available for the user to select. You can configure up to 15 codecs.
- n - means the codec number. The value is 1 to 15.
- codec ID - means the codec identifiers are as follows:
• PCMA
• PCMU
• G729
• G723
- text description - a text description of the codec. For more information about audio
codec configuration, see Audio codecs on page 223
• DEF_AUDIO_QUALITY [Low | Medium | High] — This parameter is used to configure
the default audio quality by setting the preferred audio codec order. If this parameter is
not present in the device configuration file, the IP Deskphone uses High quality as the
default value. The possible parameters for this command are High, Medium, and Low. If
SIP Software for Avaya 1200 Series IP Deskphones-Administration
September 2013
61
Configure the provisioning server
any other parameter is entered or if these commands are misspelled, the IP Deskphone
uses High as the default setting. This parameter is used only if the audio codecs are not
configured in the device configuration file.
The following codecs are used for each selection:
- High – G711 (PCMU), G711 (PCMA), G729
- Medium – G711 (PCMA), G711 (PCMU), G729
- Low – G729, G711 (PCMA), G711 (PCMU)
• AUTH_METHOD [AUTH | AUTH_INT] — is used to configure the SIP authentication
method.
- AUTH - only authenticates (username/password)
- AUTH_INT - authentication plus integrity checking (an MD5 hash of the entity is also
computed and checked).
• BANNER [banner_text] — preconfigures the banner on the IP Deskphone. Use a text
string to configure the banner. For example, BANNER ABC Company configures the
banner to ABC Company. The text string can have a maximum of 24 characters.
- banner_text - an ASCII string displayed on the screen of the IP Deskphone with SIP
Software.
• FORCE_BANNER [YES | NO] — is configured by the system administrator through the
configuration file. If FORCE_BANNER is configured as YES, the banner from the
configuration file is reloaded each time the IP Deskphone powers up, even if the user
changes the banner manually.
- YES - causes the banner configured by the administrator to override any banner
configured by the user.
- NO - allows the user to configure the banner.
• DST_ENABLED [YES | NO] — enables and disables the Daylight Savings Time (DST)
mechanism. The time received from the server is GMT and is converted to the proper
timezone by the IP Deskphone. If the Daylight Savings Time feature is enabled, the
IP Deskphone automatically calculates the DST time at the appropriate date and converts
the time to and from DST. The calculations used are based on the new rules applicable
to DST in 2007. The IP Deskphone is programmed to use the North American DST
scheme.
- YES - enables Daylight Savings Time.
- NO - disables Daylight Savings Time.
• TIMEZONE_OFFSET [x] — is used to configure the current time zone offset from GMT
in seconds. TIMEZONE_OFFSET takes a number as a parameter. For example,
TIMEZONE_OFFSET -25200 configures the time zone offset to MST, which is GMT-7
(-7*3600 = -25200 seconds).
62
SIP Software for Avaya 1200 Series IP Deskphones-Administration
Comments? [email protected]
September 2013
Create the device configuration file
Table 6: Time zone offset
Location
Time zone offset (seconds)
(GMT-10:00) Hawaii
-36000
(GMT-09:00) Alaska
-32400
(GMT-08:00) Pacific time (US and Canada)
-28800
(GMT-07:00) Mountain time (US and Canada)
-25200
(GMT-06:00) Central time (US and Canada)
-21600
(GMT-05:00) Eastern time (US and Canada)
-18000
(GMT-04:00) Atlantic time (US and Canada)
-14400
(GMT-03:00) Brasilia, Buenos Aires
-10800
(GMT+00:00) Greenwich, Dublin, Lisbon,
London
0
(GMT+01:00) Amsterdam, Berlin, Rome,
Stockholm, Madrid, Paris
3600
(GMT+02:00) Athens, Istanbul, Cairo, Helsinki, 7200
Jerusalem
(GMT+03:00) Moscow, St. Petersburg
10800
(GMT+05:30) Bombay, Calcutta, Madras, New
Delhi
18000
(GMT+08:00) Beijing, Chongqing, Hong Kong,
Singapore, Taipei
28800
(GMT+09:00) Osaka, Sapporo, Tokyo, Seoul
32400
(GMT+10:00) Canberra, Melbourne, Sydney
36000
(GMT+12:00) Auckland, Wellington
43200
• FORCE_TIME_ZONE [YES | NO] — allows you to force the timezone offset on each
user's IP Deskphone. The default is NO.
- YES - forces the IP Deskphone to use the TIMEZONE_OFFSET specified in the
device configuration file.
- NO - uses the value stored in the user preferences.
• IM_MODE [ENCRYPTED | TEXT | SIMPLE | DISABLED] — is used to configure the
mode of Instant Messaging (IM). The default setting is ENCRYPTED.
- ENCRYPTED - Instant Messages are sent encrypted.
- TEXT - Instant Messages are sent as text.
- SIMPLE - Instant Messages are sent using SIP for Instant Messaging and Presence
Leveraging Extensions (SIMPLE) protocol.
SIP Software for Avaya 1200 Series IP Deskphones-Administration
September 2013
63
Configure the provisioning server
- DISABLED - Instant Messaging is turned off and no Instant Messages can be sent
or received.
Note:
According to Federal Requirements:
- If the parameter FIPS_MODE=NO and IM_MODE=TEXT, the IM_MODE is
changed to ENCRYPTED by force.
- If the parameter FIPS_MODE=YES, the IM_MODE is changed to TEXT by force
• IM_NOTIFY [YES | NO] — is used to turn on or off the Blue LED indicator upon receipt
of an Instant Message.
- YES - the Blue LED functions when an Instant Message is received.
- NO - the Blue LED does not function when an Instant Message is received.
Note:
If IM_NOTIFY is disabled, the Blue LED continues to operate for other features.
• DEF_DISPLAY_IM [YES | NO] — enables or disables the display of Instant Messages
(IM). The default setting is NO.
- YES - enables display of IMs.
- NO - disables display of IMs.
• SELECT_LAST_INCOMING — is used to determine which call is selected when there
are multiple calls ringing (or active). The default value is 0.
- 0 — leaves the last selected call static as new calls come in or are dropped.
- 1 — the selected call in the call list jumps to the most recent ringing call after it is
added to the list.
• SERVICE_PACKAGE_PROTOCOL [proto_string] — This parameter specifies which
protocol is to be used for obtaining the service package.
The supported values are HTTP or HTTPS.
The default value is HTTP.
• MAX_LOGINS [x] — is used to determine the maximum number of user accounts that
can be logged in at the same time. Numbers higher than the number of line keys on the
IP Deskphone are equivalent to no limit other than the line keys. A value of 1 allows a
single user at a time. A value of 0 is treated the same as a value of 1 because you cannot
restrict the IP Deskphone to 0 logins. The number of concurrent logins can never exceed
24, regardless of the value configured on MAX_LOGINS. The default is unlimited.
- x - the maximum number of user accounts that can be logged in at the same time.
64
SIP Software for Avaya 1200 Series IP Deskphones-Administration
Comments? [email protected]
September 2013
Create the device configuration file
• MAX_INBOX_ENTRIES [x] — used to restrict the maximum number of inbox entries and
takes a number as a parameter. For example, MAX_INBOX_ENTRIES 100 limits the
number of entries in the inbox to 100. The default limit is 100.
- x - the maximum number of in box entries.
• MAX_OUTBOX_ENTRIES [x] — used to restrict the maximum number of outbox entries
and takes a number as a parameter. For example, MAX_OUTBOX_ENTRIES 100 limits
the number of entries in the outbox to 100. The default limit is 100.
- x - the maximum number of outbox entries.
• MAX_REJECTREASONS [x] — used to restrict the maximum number of Call Decline
Reasons (Prefs > Feature Options > Call Decline Reasons) and takes a number as a
parameter. The default limit is 20.
- x - the maximum number of reject reasons.
• MAX_CALLSUBJECT [x] — used to restrict the maximum number of call subjects (Prefs
> Feature Options > Call Subject) and takes a number as a parameter. The default limit
is 20.
- x - the maximum number of call subject reasons.
• MAX_PRESENCENOTE [x] — used to restrict the maximum number of presence notes
and takes a number as a parameter. The default limit is 20.
- x - the maximum number of presence notes that an IP Deskphone can receive.
• USE_PUBLISH_FOR_PRESENCE [YES|NO] — This parameter specifies whether to
send the PUBLISH request when changing the Presence state.
- YES - send the PUBLISH request
- NO - do not send the request
• DEF_LANG [language] — a command used for configuring the default language file
(without filename extension). Note that the corresponding language file must be
downloaded and stored in the IP Deskphone through the [LANGUAGE] section in
Provisioning. If the language file is not stored in the IP Deskphone, the default language
English is used.
- language - name of language file used by default (without filename extension).
Note:
To update the default language of an IP Deskphone already configured as English to
any other language, use the following steps:
a. Update the Device Configuration file with DEF_LANG configured as the
Language file name.
b. In the 12xxSIP.cfg file, make the Download mode FORCED
c. Incrementally increase the version number of the 12xxSIP.cfg file.
SIP Software for Avaya 1200 Series IP Deskphones-Administration
September 2013
65
Configure the provisioning server
• MAX_IM_ENTRIES [x] — used to configure the maximum number of Instant Message
(IM) entries and takes a number as a parameter. Once the maximum number is reached,
the oldest IM is deleted without any user notification. The default limit is 999.
- x - the maximum number of instant messages.
• MAX_ADDR_BOOK_ENTRIES [x] — used to configure the maximum number of entries
in the address book and takes a number as a parameter. The default limit is 100.
- x - the maximum number of address book entries.
• ADDR_BOOK_MODE [NETWORK | LOCAL | BOTH] — a command to choose the
address book that is used to search for other users. The default setting is NETWORK.
- NETWORK - downloads the user's address book from the network. New address
book entries are uploaded to the network.
- LOCAL - creates a user address book and stores it locally on the IP Deskphone.
- BOTH - attempts to download a network address book and keep a copy on the
IP Deskphone. If a network address book is available, the IP Deskphone functions
as if NETWORK mode has been selected.
• HOLD_TYPE [RFC2543 | RFC3261] — used to select the protocol to hold a call. The
default setting is RFC3261.
- RFC2543 - RFC2543 is a standard protocol of the Internet Engineering Task Force
(IETF).
- RFC3261 - RFC3261 is a standard protocol of the IETF.
• ENABLE_3WAY_CALL [YES | NO] — a flag to enable or disable local IP Deskphonebased three-way calling for three-party conferences.
- YES - enables local (IP Deskphone-based) three-way calling for three-party
conferences. YES is the default.
- NO - disables local (IP Deskphone-based) three-way calling.
• DISABLE_PRIVACY_UI [YES | NO] — a flag to disable the privacy setting in UI menus.
Disabling the privacy setting in UI menus disables the user's ability to configure privacy
options.
- YES - disables the privacy setting in the UI menus.
- NO - enables the privacy setting in the UI menus. NO is the default.
• DISABLE_OCT_ENDDIAL [YES | NO] — a flag used to configure the pound (#) key. The
default setting is YES.
- YES - the pound (#) key initiates dialing when pressed after a phone number is
entered.
66
SIP Software for Avaya 1200 Series IP Deskphones-Administration
Comments? [email protected]
September 2013
Create the device configuration file
- NO - the pound (#) key functions as any other digit or character on the dial pad typically
used in networks that use vertical service codes or access codes.
• FORCE_OCT_ENDDIAL [YES | NO] — a flag used to override attempts to change the
function of the pound (#) key on the Graphical User Interface (GUI). The default setting is
NO.
- YES - overrides attempts to change the function of the pound (#) key on the GUI.
- NO - does not override a change of the function of the pound (#) key on the GUI.
• SNTP_ENABLE [YES | NO] — allows the IP Deskphone to obtain the time and date from
an NTP server. The default is NO.
The IP Deskphone updates the time once every 24 hours from the NTP server. If the
IP Deskphone cannot contact the server, the IP Deskphone tries every 15 minutes up to a
maximum of 6 attempts, and then hourly attempts are made. If SNTP_ENABLE is configured
as NO, the IP Deskphone tries to retrieve the time and date from the SIP proxy server.
However, not all SIP proxy servers support this method of retrieving the time and date.
- YES - enables NTP.
- NO - disables NTP.
• SNTP_SERVER [ip_address] — the IP address or FQDN of the NTP server that provides
the time and date to the IP Deskphone. If this is not specified, the IP Deskphone does not
generate any NTP requests.
- ip_address - the IP address of the NTP server in either Fully Qualified Domain Name
(FQDN) or non-FQDN format.
• MADN_TIMER [x] — used to configure the MADN polling timer interval (the interval at
which the IP Deskphone attempts to determine the MADN group of the logged-in user).
The minimum value for the polling interval is 900 seconds (15 minutes). The default value
is 1800.
- x - the time delay (in seconds) between queries to find the MADN group DN of a user.
The minimum value 900.
• MADN_DIALOG [YES | NO] — used to configure the SIP URI or the GROUP DN for the
subscription to the dialog event. The default value is NO.
- YES- su bscribes to the dialog event using the SIP URI of the user.
- NO - subscribes to the dialog event using the group of the user.
• DEFAULT_CFWD_NOTIFY [YES | NO] — used to configure the "ring splash" which
occurs when either local call forwarding or network-based call forwarding have been
enabled. If this configuration value is enabled, the IP Deskphone plays an abbreviated
ring tone to remind the user that a call has been forwarded. This configuration value only
effects users when their user profile is first created, unless the FORCE_CFWD_NOTIFY
flag is also used. The default setting is NO
- YES - a brief ring splash plays when a call is forwarded.
SIP Software for Avaya 1200 Series IP Deskphones-Administration
September 2013
67
Configure the provisioning server
- NO - the ring splash does not play.
• DISPLAY_CALL_SNDR_IM_KEY [YES|NO] — This parameter allows the administrator
to display or hide the Call soft key when viewing Instant Messages (IMs). The default
setting is YES.
- YES – the Call soft key is displayed
- NO – the Call soft key is not displayed
• FORCE_CFWD_NOTIFY [YES | NO ] — allows the administrator to force the behavior
of the DEFAULT_CFWD_NOTIFY value on all users who login to the IP Deskphone. The
default setting is NO.
- YES - the DEFAULT_CFWD_NOTIFY configuration value is forced into effect for
the user.
- NO - the configuration value is not forced into effect for the user.
• ALPHA_ORDER_LOC_LIST [YES | NO] — This parameter allows the administrator to
specify whether the Location list should be sorted or not. The default value is YES.
- YES - the list should be sorted
- NO - the list is displayed as is
• ENABLE_SERVICE_PACKAGE [YES | NO] — toggles the subscription to the Call
Server service package. When the IP Deskphone connects to a Call Server that does not
recognize the service package, the subscription for the service package fails. If this
happens, ad hoc conferencing is not available, even if the Call Server supports ad hoc
conferencing. You can configure values for ad hoc conferencing when the service
package is not retrieved. The IP Deskphone retrieves the service package based on a
configurable Boolean value.
- YES - the IP Deskphone downloads the service package.
- NO - the IP Deskphone does not download the service package.
MAX_ADHOC_PORTS1 [0–4] indicates the maximum number of users supported for ad
hoc conferencing on the server. This value must be the same as the value configured on
the server. When ENABLE_SERVICE_PACKAGE is enabled, the preceding parameters
are ignored.
• CONFERENCE_URI[x] contains the conference Uniform Resource Identifier (URI); for
example, CONFERENCE_URI1 [email protected].
— x – the SIP domain number from 1 to 5.
• ADHOC_ENABLED [YES | NO] — This parameter configures support for ad hoc
conferencing for the Call Server. The default value is NO. If a service package is used
then this is provided by the service package.
- x – the SIP domain number from 1 to 5
- YES – the Call Server supports ad hoc conferencing.
68
SIP Software for Avaya 1200 Series IP Deskphones-Administration
Comments? [email protected]
September 2013
Create the device configuration file
- NO – the Call Serverr does not support ad hoc conferencing.
• MAX_ADHOC_PORTS[x] [max_ports_number] — This parameter configures the
maximum number of adhoc conference participants that can join the conference on the
IP Deskphone.
- x – the SIP domain number from 1 to 5
- max_ports_number - number of participants from 0 to 4. The default value is 0.
• INTERCOM_PAGING [YES | NO] — allows the IP Deskphone to belong to a paging
group. When a page group call is received, a one-way speech path is created to the IP
Deskphone, and the IP Deskphone automatically goes to a hands-free intercom state.
- YES - intercom/paging functionality is enabled.
- NO - intercom/paging functionality is disabled.
• LOGOUT_WITHOUT_PASSWORD [YES | NO] — allows the user to log off without
entering their password if the administrator enables LOGOUT_WITHOUT_PASSWORD
feature.
- YES - enables the user to logout without a password.
- NO - does not allow the user to logout without a password.
• REMOTE_CHECK_FOR_UPDATE [YES | NO] — provides the functionality to start a
check to remotely update the IP Deskphone with the latest software present on the Trivial
File Transfer Protocol (TFTP) server. You can enable or disable this feature with the flag
present in the Device Configuration file. By default, this flag is set to NO.
- YES - prompt the user about the scheduled event and the user can accept or reject
the scheduled software update check by pressing the YES or NO soft key.
- NO - disables the remote check for update option.
• SECURE _INCALL_DIGITS [YES | NO] — shows the typed digits as asterisks when the
user makes a call into the voice mail. When this feature is enabled, the most recentlypressed key is displayed but is overwritten by an asterisk (*) when the next key is pressed.
The user has the option to Hide or Unhide the digits typed.
- YES - provides the secure digits while in call functionality.
- NO - disables the secure digits while in call functionality.
• E911_TERMINATE_ENABLE [YES | NO] — specifies whether a 911 call can be
terminated by the calling party or not. The default value is NO.
- YES — the caller can terminate the emergency call.
- NO — the caller cannot terminate the emergency call once the call has been
established.
• E911_USERNAME — an emergency username used for making an emergency call that
does not require login. The proxy must be configured with the same emergency
username; otherwise, the emergency call fails.
SIP Software for Avaya 1200 Series IP Deskphones-Administration
September 2013
69
Configure the provisioning server
• E911_PROXY — a default emergency proxy. This variable must contain the value that
matches the value defined by one of the following variables specified in the same config
file:
- SIP_DOMAIN1
- SIP_DOMAIN2
- SIP_DOMAIN3
- SIP_DOMAIN4
- SIP_DOMAIN5
If E911_PROXY does not match the value defined by these five variables, or the variable
E911_PROXY is not defined, then the value of SIP_DOMAIN1 is used as the emergency
proxy.
• E911_PASSWORD — the password for the emergency username that is used for making
an emergency call that does not require login. The proxy must be configured with the
same password; otherwise the emergency call fails.
• E911_TXLOC is the variable that describes location information that must be sent with
the REGISTER SIP message, or with the INVITE SIP message.
• E911_HIDE_MESSAGE [Y | N] — This parameter configures whether or not the message
“Emergency Calls Only” is displayed when no user is logged in and the IP Deskphone is
taken off-hook.
The default is NO, which means that the Emergency Calls Only message is not hidden;
it is displayed on the IP Deskphone when no user is logged in and the IP Deskphone is
taken offhook.
• KEEP_ALIVE_TYPE [type_string] — This parameter indicates if OS keep-alive on the
connection is enabled.
The supported values are OS or CRLF (or any string). The default value is OS.
— type_string - the keep-alive mode value
• CONN_KEEP_ALIVE [conn_keep] — This parameter configures the time in seconds to
use for the keep-alive.
The values are from 5 to 1800 seconds. The default value is 120 seconds.
— conn_keep - keep-alive time in seconds
• MENU_AUTO_BACKOUT — a menu auto back-out time preference configuration used
to configure the auto back-out time on newly created profiles (not for profiles that already
exist). The values, in seconds, are 0, 15, 30, 60, 120, 300, 600. The default value is 30.
Example:
MENU_AUTO_BACKOUT 15
70
SIP Software for Avaya 1200 Series IP Deskphones-Administration
Comments? [email protected]
September 2013
Create the device configuration file
Note:
There are some application screens that do not time out. Some menus, such as the
administration menus, require the user to press the Back or Quit key to exit the
screen.
• AUTOCLEAR_NEWCALL_MSG [YES | NO] — used to configure the missed calls
notification mode. Y means that the notification is cleared as soon as the inbox is entered
without needing to visit all missed entries. The values are Y and N. The default value is
N.
- YES — configures missed calls notification mode
- NO – missed calls notification mode is not configured
This configuration value only affects users when a user profile is first created. It does not
affect a user profile which already exists. A user can modify the feature parameter by
using the Preferences menu on the IP Deskphone and then selecting the Feature
Options > Missed Call Notification menu item.
• LOGIN_BANNER_ENABLE [Y | N] — used to enable or disable the customizable login
banner. If configured as enable, the flag causes the login of the primary user to display
the provisioned banner text as part of the login process. The banner text file is a separate
file downloaded by provisioning. The banner text file is specified much like the current
dialing plan is specified (file name listed in 12xxSIP.cfg, under section
[LOGIN_BANNER]), and is downloaded when enabled or disabled. To be accepted, the
file must contain at least one byte and must be no bigger than 2048 bytes. The encoding
of the file must be UTF-8, or compatible with UTF-8, to ensure that all the characters are
displayed properly. The values are Y and N. The default value is N.
• SECURE_UI_ENABLE [YES | NO] — used to disable access to the IP Deskphone
Information details screen, and the context-sensitive soft key that invokes it. The values
are YES and NO. The default value is NO.
- YES — disables access to the IP Deskphone Information details screen and the
context-sensitive soft key that invokes it.
- NO — enables access to the IP Deskphone Information details screen and the
context-sensitive soft key that invokes it.
• BG_IMAGE_ENABLE [Y | N] — used to configure the background image file for the
display in newly created profiles, and can completely disable the background image
feature and disable the corresponding user interface. If the specified file does not exist in
the images folder of the IP Deskphone, no background image is used for the display. The
values are Y and N. The default value is Y.
• BG_IMG_SELECT_ENABLE [Y | N] — used to change the selected background image
for the display. If the flag is configured to N, the UI to change the background image is
hidden from the user, locking the currently configured image as the background image
on the IP Deskphone. The values are Y and N. The default value is Y.
SIP Software for Avaya 1200 Series IP Deskphones-Administration
September 2013
71
Configure the provisioning server
• USE_BG_IMAGE <image filename> — used to configure the background image for the
display of newly created profiles by specifying a file name available on the FFS.
BG_IMAGE_ENABLE must be configured as Y in order to select a background image.
Note:
Image files for the IP Deskphone must be in PNG format.
• SPEEDLIST_KEY_INDEX <feature key index> — used to specify the programmable
key used for displaying the Speed Dial List. If the specified index does not exist on the
IP Deskphone, or is invalid, the speed dial list is not displayed on the IP Deskphone.
The IP Deskphone retrieves the device configuration through provisioning. If the
SPEEDLIST_KEY_INDEX flag is configured to a valid programmable key that can be
used for the feature, for example, >1 and less than or equal to available number of
programmable keys, then the IP Deskphone verifies if it has previously loaded a "Speed
Dial List" file (a file containing the contents of the speed dial list). This file is similar to the
dialing plan file. It needs to be properly configured and uploaded to the IP Deskphone
through provisioning. The IP Deskphone parses the file, and configures the feature key
specified by SPEEDLIST_KEY_INDEX to hold the Speed Dial List. If the key defined for
use by the Speed Dial List is already in use, the key is overwritten and the key is assigned
speed dial list functionality. The Speed Dial List feature key then uses the label that is
provisioned in SPEEDLIST_LABEL which cannot be modified by the end user.
• SPEEDLIST_LABEL <text> — a feature key label used by the speed dial list feature key.
The default value is SDL.
• MAX_APPEARANCE [x] — defines the maximum number of possible active calls on the
IP Deskphone. The values are 1 to 12. . The default value is 10.
- x – the maximum number of possible active calls
• MAX_BLFCALLS [x] — defines the maximum number of available Busy Lamp Field
(BLF) calls on the IP Deskphone. The values are 1 to 10. The default value is 10.
- x – the maximum number of available Busy Lamp Field (BLF) calls
The MAX_BLFCALLS parameter value cannot be greater than the
MAX_APPEARANCE parameter value. If the value of the MAX_BLFCALLS parameter
is greater than the value of the MAX_APPEARANCE parameter, the value of the
MAX_BLFCALLS parameter is reduced by force and takes the value of the
MAX_APPEARANCE parameter (MAX_BLFCALLS = MAX_APPEARANCE).
• BLF_ENABLE [Y | N | SCS | SIPX] — used to enable or disable the Busy Lamp Field
(BLF) feature support. If configured as Y, the flag BLF_RESOURCE_LIST_URI is not
ignored and the BLF feature is used. The values are Y, N, SCS, and SIPX. The default
is N.
When BLF_ENABLE has the SCS or SIPX value, the BLF_RESOURCE_LIST_URI
parameter is ignored and the IP Deskphone autogenerates an URI of the following format:
~~rl~C~<username>@<domain>
72
SIP Software for Avaya 1200 Series IP Deskphones-Administration
Comments? [email protected]
September 2013
Create the device configuration file
• BLF_RESOURCE_LIST_URI <blf uri> — used to configure the Busy Lamp Field (BLF)
resource list URI for the BLF feature. You must use the URI provided by the proxy when
properly configuring the user for BLF.
The <blf uri> is the server provided URI to subscribe for BLF notifications, for
example, [email protected] .
• FM_PROFILES_ENABLE [YES | NO] — This parameter allows the user to perform
actions on User Profiles using the file manager. The default value is YES.
- YES – allows the user to perform actions on User Profiles using the file manager
(default). - .
- NO – does not allow the user to delete or copy User Profiles on the IP Deskphone
or USB drive using the file manager
• FM_LANGS_ENABLE — This parameter allows the user to perform actions on
Languages files using the file manager. The default value is YES.
- YES – allows the user to perform actions on Language files using the file manager
(default). - .
- NO – does not allow the user to delete or copy Language files on the IP Deskphone
or USB drive using the file manager
• FM_SOUNDS_ENABLE [YES | NO] — allows the user to act on WAV files using the file
manager. If the value is configured as NO, the IP Deskphone cannot perform any actions
on WAV files, such as delete or copy a wav file, through the file manager. If the user
selects a WAV file on the IP Deskphone and presses the Delete or Send Contextsensitive softkey, an error message appears. If the value is configured as YES, the user
can delete or copy WAV files with the file manager interface (this applies to WAV files on
the IP Deskphone). The values are YES and NO. The default value is YES.
- YES — allows the user to delete or copy WAV files on the IP Deskphone through
the file manager
- NO — does not allow the user to delete of copy WAV files on the IP Deskphone
through the file manager
• FM_IMAGES_ENABLE [Y | N] — allows the user to act on JPG and PNG files using the
file manager. The values are Y and N. The default value is Y.
• FM_CERTS_ENABLE [Y | N] — allows the user to act on CER and PEM files using the
file manager. The values are Y and N. The default value is N.
• FM_CONFIG_ENABLE [Y | N] — allows the user to act on CFG files using the file
manager. The values are Y and N. The default value is N.
• FM_LOGS_ENABLE [Y | N] — allows the user to act on CFG files using the file manager.
The values are Y and N. The default value is Y.
• HOTLINE_ENABLE [Y | N] — indicates if Hotline Service is enabled or disabled. The
values are Yes and No. The default value is No.
• HOTLINE_URL — used as the To field of INVITE message by the SIP IP Deskphone to
notify the Proxy Server that this is a call from a Hotline Deskphone. The HOTLINE_URL
SIP Software for Avaya 1200 Series IP Deskphones-Administration
September 2013
73
Configure the provisioning server
is not a real URL of the Hotline target. The IP Deskphone has no idea about the Hotline
target. The Proxy server replaces the To field of INVITE request message with a real
Hotline target when it receives an INVITE request from the Hotline Phone. The default
value is Hotline.
• SESSION_TIMER_ENABLE [YES | NO] indicates if the session timer service is enabled
or disabled. The values are Yes and No. The default value is Yes.
- YES — the Session Timer Service for the IP Deskphone is enabled, and the behavior
of the IP Deskphone complies with RFC4028.
- NO — the Session Timer Service is disabled.
• SESSION_TIMER_DEFAULT_SE — indicates the default session expiration in seconds.
The Session-Expires header, in a request, informs the terminating endpoint and proxies
of the Session-Expires interval value that the originating endpoint requires for the session
timer duration, in units of delta seconds. The default value is 1800.
• SESSION_TIMER_MIN_SE — indicates the minimum session expiration in seconds. The
default value is 1800.
• SET_REQ_REFRESHER [0 | 1| 2] — indicates what refresher value is configured in the
initial session request. The values are 0, 1, and 2. The default value is 0.
- 0 — indicates that the refresher is omitted
- 1 — indicates that the refresher is configured to UAC
- 2 — indicates that the refresher is configured to UAS
• SET_RESP_REFRESHER [0 | 1 | 2] — indicates what refresher value is configured in
the 200 OK response. The values are 0, 1, and 2. The default value is 2.
- 0 — indicates that the refresher is omitted (only valid when
SET_REQ_REFRESHER is not equal to 0)
- 1 — indicates that the refresher is configured to UAS
- 2 — indicates that the refresher is configured to UAC
• ENABLE_INTERWORKING — used to enable the interworking feature to pre-authorize
users or groups of users to access automatic call answer. The configuration values are
YES and NO. The default value is NO.
- YES — the interworking feature is enabled.
- NO — the interworking feature is disabled.
• PORT_MIRROR_ENABLE [YES | NO] — used to enable or disable the Port Mirroring
feature. The values are YES and NO. The default value is NO.
- YES — The Port Mirroring prompt in the Advanced Diag Tools dialog is enabled and
can be modified.
- NO — The Port Mirroring prompt in the Advanced Diag Tools dialog is disabled
(dimmed) and cannot be modified.
74
SIP Software for Avaya 1200 Series IP Deskphones-Administration
Comments? [email protected]
September 2013
Create the device configuration file
• MEMCHECK_PERIOD <nnnnn> — used to determine the time period in seconds when
the Memory monitor wakes up (after re-start or the last memory check attempt). The
values are 1800 (0.5 hrs) to 86400 (24 hrs). The default value is 86400 (24 hrs).
• DOS_PACKET_RATE — determines the maximum number of packets per second that
is allowed.
• DOS_MAX_LIMIT — specifies how many packets past the DOS_PACKET_RATE the IP
Deskphone can receive before packets are dropped. If packets are received at a rate of
DOS_PACKET_RATE +1, then packets are dropped after the time specified in
DOS_MAX_LIMIT (in seconds).
• DOS_LOCK_TIME — specifies the amount of time (in seconds) that the IP Deskphone
stops processing packets after DOS_MAX_LIMIT is reached. If DOS_PACKET_RATE is
< 1, other values are ignored and packets are not dropped.
• LOGSIP_ENABLE [YES | NO] — used to enable or disable SIP-logging. The values are
YES and NO. The default value is NO.
- YES — the SIP-logging Manager is active and starts to log SIP incoming and
outgoing packages into the log file in FFS.
- NO — the SIP-logging Manager is not active and cannot log SIP incoming and
outgoing packages into the log file in FFS.
• CUST_CERT_ACCEPT — a Security Policy parameter that controls further signing of a
customer root certificate (not the first one). The values are VAL_NO_MANUAL,
VAL_MANUAL_A, and VAL_MANUAL_B. The default value is VAL_MANUAL_A.
• CERT_ADMIN_UI_ENABLE [YES | NO] allows you to access the Certificate
Administration User Interface. The values are YES and NO. The default value is NO.
• SEC_POLICY_ACCEPT allows you to accept security policy. The default value is
VAL_MANUAL_A. Following are the acceptable parameters:
- VAL_MANUAL_A — If the resource file is not signed and if there are no customer
certificates, then Finger Print Display and Accept/Reject options appear .
- VAL_MANUAL_B — If the resource file is not signed and if there are no customer
certificates, enter the Finger Print Value manually and then select Accept option.
• SECURITY_LOG_UI_ENABLE [YES | NO] — allows you to access the Security and
Error Logs User Interface. The values are YES and NO. The default value is No.
• KEY_SIZE — the default key size that is used when generating keys on the IP
Deskphone, and acts at the minimum allowed key size that is enforced when loading
certificates from the IP Deskphone. The values are 1024, 1536, and 2048. The default
value is 1024.
• KEY_ALGORITHM — the preferred key generation algorithm. The accepted value is
KEY_ALG_RSA.
• TLS_CIPHER — the preferred TLS Cipher used for HTTPS to configure a stronger cipher
preference when available. The values are RSA_WITH_AES_128_CBC_SHA, and
SIP Software for Avaya 1200 Series IP Deskphones-Administration
September 2013
75
Configure the provisioning server
RSA_WITH_AES_256_CBC_SHA. The default value is
RSA_WITH_AES_256_CBC_SHA.
• SIGN_SIP_CONFIG_FILES [YES | NO] — overrides the file signing of files (resource
files such as the device configuration file and the dial plan) other than the Security Policy
and Customer Certificates. The values are YES and NO. The default value is NO.
- YES — Signing is required.
- NO — No authentication check is performed.
• FP_PRESENTED — allows you to accept or reject a Finger Print if the resource file is not
signed and if there are no customer certificates.
• FP_ENTERED — allows you to manually enter and accept a Finger Print value if the
resource file is not signed and if there are no customer certificates.
• SUBJ_ALT_NAME_CHECK_ENABLE [YES | NO] — allows you to verify the Subject
Alternative Attribute in the presented certificate. Only the IPv4 IP address is supported
for this attribute. The values are YES and NO. The default value is NO.
• SECURITY_POLICY_PARAM_CHANGE — allows the IP Deskphone to enter changes
that are made to the security policy file in the security log file.
• CERT_EXPIRE — allows you to select Certificate Expiration Policy. The default value is
LOG_EXPIRE. Following are the acceptable parameter values:
- DELETE_CERT — A certificate is deleted when it expires and a security log entry
is added.
- LOG_EXPIRE — A certificate is not deleted when it expires and a security log entry
is added. Even if the certificate is not deleted, it cannot be used to authenticate a
file.
- NO_EXPIRE_LOG — A certificate is not deleted when it expires and security log
entry is not added. Even if the certificate is not deleted, it cannot be used to
authenticate a file.
• DWNLD_CFG_ACCEPT — defines how all TFTP configuration files are authenticated
when there are no customer certificates on the phone. The parameter does not come to
effect when a customer certificate installed. The default value of the parameter is
VAL_ACCEPT Following are the acceptable parameter values:
- VAL_ACCEPT — Unsigned and signed files are always accepted if there are no
valid customer certificates.
- VAL_MANUAL_A — If the resource file is not signed and if there are no customer
certificates, then Finger Print Display and Accept/Reject options prompt appears.
- VAL_MANUAL_B — If the resource file is not signed and if there are no customer
certificates, then enter Finger Print Value and select Accept option manually.
• DWNLD_CFG_SIGNING [YES | NO] — defines if configuration files (12xxSIP.cfg) are
forced to sign if a customer certificate installed. This parameter does not come into effect
76
SIP Software for Avaya 1200 Series IP Deskphones-Administration
Comments? [email protected]
September 2013
Create the device configuration file
if the customer certificates are installed. The default parameter value is no. The following
are the acceptable values for this parameter:
- NO — If there is a customer certificate installed, the downloaded file is automatically
accepted without authentication.
- YES — If there is a customer certificate installed, the downloaded file must be signed
and fully authenticated.
• PRIMARY_SERVER_PROFILE [FILENAME] — This parameter is the set of Server
Profile configuration parameters to be applied for the Primary (S1) SIP server.
- filename — the name of the Server Profile file to be applied for the Primary server; for
example, profile01.dat
• SECONDARY_SERVER_PROFILE [FILENAME] — This parameter is the set of Server
Profile configuration parameters to be applied for the Secondary (S2) SIP server.
- filename — the name of the Server Profile file to be applied for the Secondary server;
for example, profile02.dat
• TECH_SUPPORT_LABEL [label_string] — This parameter configures the label used
for the Support soft key on the licensing screen. The user can call the Technical Support
service by pressing this soft key. The default value of the label is "Support" .
— label_string - label characters. Maximum length of the string is 6 alpha-numerics
characters.
Note:
The label appears if the TECH_SUPPORT_ADDRESS parameter is defined.
• TECH_SUPPORT_ADDRESS [addr_string] — This parameter configures the URI of
the Technical.Support service. If the IP Deskphone licensing verification fails, then special
dialog appears where the IP Deskphone user can press the Support soft key to call to
the Technical Support service (see the preceding command
TECH_SUPPORT_LABEL).
The default value is [email protected].
• FAST_EARLY_MEDIA_ENABLE [YES|NO] — This parameter allows the administrator
to activate and deactivate the Fast Early Media option (according to RFC 3264).
The default value is NO.
- YES - activate the Fast Early Media option
- NO - deactivate the Fast Early Media option
• ENABLE_ANSWER_MODE [YES | NO] — This parameter allows the administrator to
specify if Answer-Mode is supported when registering with the proxy. The default value
is NO.
- YES - the Answer-Mode is allowed. The IP Deskphone adds the "answermode" tag
to the Support header in the REGISTER request.
SIP Software for Avaya 1200 Series IP Deskphones-Administration
September 2013
77
Configure the provisioning server
- NO - the Answer-Mode is not supported (default).
• ANSWER_MODE_MAXALLOWADDR [max_addr] — This parameter specifies the
maximum number of addresses that can be white-listed for Answer-Mode support.
The allowed values are from 0 to 200. The default value is 100.
— max_addr - maximum number of addresses
• ANSWER_MODE_MICMUTE [YES | NO] — This parameter specifies if the microphone
is muted when a call is auto-answered by the Answer-Mode functionality.
- YES - mute the microphone
- NO - do not mute the microphone (default value)
• PREFER_CUSTOMIZED_RBT [YES | NO] — This parameter configures the opportunity
to not stop the customized ringback tone when a 180 Ringing message is received.
- YES – after receiving a 180 Ringing message without SDP body, the media stream
is not closed and the customized ringback tone continues to play.
- NO – after receiving a 180 Ringing message without SDP body, the media stream
is closed and local ringback tone is generated (default).
• FIPS_MODE [YES | NO] — FIPS mode is used in a Federal environment. This parameter
verifies that the IP Deskphone is in Federal Information Processing Standards (FIPS)
certified mode.
Note:
The FIPS_MODE parameter has an interaction with the IM_MODE parameter. Refer
to the IM_MODE parameter description.
QoS and ToS commands
• AVAYA_AUTOMATIC_QoS [YES | NO] — provides a better treatment for signaling and
media packets after you deploy the IP Deskphones with the Avaya switches. All the
devices use private Differentiated Services Code Point (DSCP) values to give better
treatment to the traffic coming from peer Avaya devices.
- YES - the IP Deskphone uses private DSCP values, unless overridden.
- NO - the IP Deskphone uses either one of the configured DSCP values or the system
default values.
• DSCP_CONTROL [x] — a value entered in decimal format between -1 and 63. If the
value is -1, the DSCP value is picked up by the Service Package. The default value is
40.
- x - a value from -1 to 63 indicating the DSCP value.
78
SIP Software for Avaya 1200 Series IP Deskphones-Administration
Comments? [email protected]
September 2013
Create the device configuration file
• 802.1P_CONTROL [x] — a value entered in decimal format between -1 and 7
representing the 802.1P value in the SIP signaling packets. If the value is -1, the 802.1P
value is retrieved from the Service Package. The default value is 6.
- x - the value from -1 to 7 indicating the 802.1P value.
• DSCP_MEDIA [x] — a value entered in decimal format between -1 and 63 representing
the DSCP value in the Real-time Transfer Protocol packets. If the value is -1, the DSCP
value is retrieved from the Service Package. The default value is 44.
- x - a value from -1 to 63 indicating the DSCP value.
• 802.1P_MEDIA [x] — a value entered in decimal format between -1 and 7 representing
the 802.1P value in the IP Deskphone Media (RTP) packets. If the value is -1, then the
802.1P value is retrieved from the Service Package is the 802.1 setting for media Realtime Transport Protocol (RTP). The default value is -1.
- x - a value from -1 to 7 indicating the 802.1P value.
• DSCP_DATA [x] — a value entered in decimal format between -1 and 63 representing
the DSCP value in the provisioning packets. If the value is -1, the DSCP value is retrieved
from the Service Package. The default value is 40.
- x - a value from -1 to 63 indicating the DSCP value.
• 802.1P_DATA [x] — a value entered in decimal format between -1 and 7 representing
the 802.1P value in the provisioning packets. If the value is -1, the 802.1P value is
retrieved from the Service Package. The default value is 6.
- x - a value from -1 to 7 indicating the 802.1P value.
Tone configuration commands
• DIAL_TONE [frequency1 | frequency2 | on_time | off_time] — used to select the tone
advising the caller that the exchange is ready to receive call information and invites the
user to start sending call information. You can select the country-specific tone. The default
tone is the North American tone.
- frequency1 - the frequency of tone 1.
- frequency2 - the frequency of tone 2.
- on_time - the duration of the tone when it is on. A -1 indicates a continuous tone.
- off_time - the duration when no tone is played.
The following is an example of DIAL_TONE:
350,440;-1 (350 and 440 Hz continuous tone)
• RINGING_TONE [frequency1 | frequency2 | on_time | off_time] — used to select the
tone advising the caller that a connection is made and a calling signal is applied to a
SIP Software for Avaya 1200 Series IP Deskphones-Administration
September 2013
79
Configure the provisioning server
telephone number or service point. You can select the country-specific tone. The default
tone is the North American tone.
- frequency1 - the frequency of tone 1.
- frequency2 - the frequency of tone 2.
- on_time - the duration of the tone when it is on. A -1 indicates a continuous tone.
- off_time - the duration when no tone is played.
The following is an example of RINGING_TONE:
440,480; 2000,4000 (440 and 480 Hz with 2 seconds on, 4 seconds off)
• BUSY_TONE [frequency1 | frequency2 | on_time | off_time] — used to select the tone
advising the caller that the telephone number is busy. You can select the country-specific
tone. The default tone is the North American tone.
- frequency1 - the frequency of tone 1.
- frequency2 - the frequency of tone 2.
- on_time - the duration of the tone when it is on. A -1 indicates a continuous tone.
- off_time - the duration when no tone is played.
• FASTBUSY_TONE [frequency1 | frequency2 | on_time | off_time] — used to select
the tone advising the caller that the telephone number is busy. It is fast in cadence or
frequency. You can select the country-specific tone. The default tone is the North
American tone.
- frequency1 - the frequency of tone 1.
- frequency2 - the frequency of tone 2.
- on_time - the duration of the tone when it is on. A -1 indicates a continuous tone.
- off_time - the duration when no tone is played.
• CONGESTION_TONE [frequency1 | frequency2 | on_time | off_time] — used to select
the tone advising the caller that the groups of lines or switching equipment necessary for
setting up the required call, or for the use of a specific service, are temporarily engaged.
You can select the country-specific tone. The default tone is the North American tone.
- frequency1 - the frequency of tone 1.
- frequency2 - the frequency of tone 2.
- on_time - the duration of the tone when it is on. A -1 indicates a continuous tone.
- off_time - the duration when no tone is played.
The IP Deskphone supports using WAV files to replace the ringtone Frequency/Cadence
pattern. For a system-wide setting, the country default values can be used.
80
SIP Software for Avaya 1200 Series IP Deskphones-Administration
Comments? [email protected]
September 2013
Create the device configuration file
NAT configuration commands
• NAT_SIGNALLING [NONE | SIP_PING | STUN] — indicates the type of protocol used
for NAT traversal in the signaling port. The IP Deskphone with SIP Software supports two
methods of NAT traversal of the signaling path: SIP_PING and STUN.
- NONE - If the value is not configured as None, this parameter overrides the value
of the parameter SIP_PING in the device configuration file.
- SIP_PING - an Avaya proprietary NAT traversal protocol. Note that SIP_PING only
supports NAT traversal in the signaling port.
- STUN - the most common NAT traversal method.
• NAT_MEDIA [NONE | STUN] — indicates the type of protocol used for NAT traversal in
the media ports. The default is NONE.
- NONE - is the default and disables NAT_MEDIA.
- STUN - the most common NAT traversal protocol for the media (RTP and Real-time
Control Protocol [RTCP]) port.
- x - is the binding lifetime in seconds.
Important:
NAT_TTL [x] is used for future development. Currently, the default value is 2
minutes (120 seconds) and IP Deskphones do not process or use the value
defined in NAT_TTL [x]. The IP Deskphone always pings the ports at regular
intervals of 60 seconds regardless of the NAT_TTL value.
• STUN_SERVER_IP1[ip_address] — NAT traversal using STUN protocol requires a
STUN server in the public internet. Two STUN server IP addresses can be provisioned.
- — ip_address - is the IP address of STUN Server 1.
• STUN_SERVER_IP2[ip_address] — NAT traversal using STUN protocol requires a
STUN server in the public internet. Two STUN Server IP addresses can be
provisioned.
- — ip_address - is the IP address of STUN Server 2.
• STUN_SERVER_PORT1[port_number] — the port number used corresponding to
STUN_SERVER_IP1. The default port number is 3478.
- — port_number - is the port number.
• STUN_SERVER_PORT2[port_number] — the port number used corresponding to
STUN_SERVER_IP2. The default port number is 3478.
- — port_number - is the port number.
SIP Software for Avaya 1200 Series IP Deskphones-Administration
September 2013
81
Configure the provisioning server
VQMon configuration commands
It is important to read How VQMon works on page 116 before configuring the VQMON
parameters.
• VQMON_PUBLISH [YES | NO] — the command that is used to enable or disable the
publish message containing the voice quality monitoring metrics sent to the Proactive
Voice Quality Monitoring (PVQMoN) collecting server.
- YES - enables VQMoN.
- NO - disables VQMoN. NO is the default.
• VQMON_PUBLISH_IP [xxx.xxx.xxx.xxx] — used to configure the IP address of the
PVQMoN server that collects voice quality monitoring metrics from the publish
message.
This IP address is used only within the report.
• LISTENING_R_ENABLE [YES | NO] — used to enable or disable the alerts based on
the Listening R Minor and Major Thresholds. The default value is vocoder-dependent,
using a scale from 1 (lowest quality) to 100 (highest quality). Currently, default values are
used based on VOCODER on a per-call basis as summarized below.
- YES - enables the sending of the alert report based on the Listening R Value.
- NO - disables the sending of the alert report based on the Listening R Value.
VOCODER_G711_ULAW
VOCODER_G711_ULAWPLP
LISTENING_R_WARN = 80
LISTENING_R_EXCE = 70
VOCODER_G723
VOCODER_FLAG_G723_RATE_53
VOCODER_FLAG_G723_RATE_63
LISTENING_R_WARN = 60
LISTENING_R_EXCE = 50
VOCODER_G729
VOCODER_PCM8
vqmonVocoderTypeUnknown
LISTENING_R_WARN = 70 (default if not
configured and unknown type)
LISTENING_R_EXCE = 60
• LISTENING_R_WARN [xx] — the threshold to send a report on Listening R less than
[xx]. The default value is 70. Using 0 resets it to default based on far end VOCODER.
- xx - is an INTEGER value used as threshold.
• LISTENING_R_EXCE [xx] — the threshold to send a report on Listening R less than [xx].
The default value is 60. Using 0 resets it to default based on far-end VOCODER.
- xx - is an INTEGER value used as threshold.
• PACKET_LOSS_ENABLE [YES | NO] — used to enable or disable the alerts based on
the packet loss thresholds. Packet loss is the fraction of RTP data packets from the source
82
SIP Software for Avaya 1200 Series IP Deskphones-Administration
Comments? [email protected]
September 2013
Create the device configuration file
lost since the beginning of reception. The value is an integer scaled by 256. The range is
1 to 25600.
- YES - enables the sending of alert report based on the packet loss
- NO - disables the sending of alert report based on the packet loss
• PACKET_LOSS_WARN [xx] — the threshold to send a report on Packet Loss greater
than [xx]. The default is 256 (1%). Using 0 resets the threshold to default.
- xx - is an INTEGER value scaled by 256 that is used as threshold. The range is 1 to
25600.
• PACKET_LOSS_EXCE [xx] — the threshold to send a report on Packet Loss greater
than [xx]. The default is 1280 (5%). Using 0 resets the threshold to default.
- xx - is an INTEGER value scaled by 256 that is used as threshold. The range is 1 to
25600.
• JITTER_ENABLE [YES | NO] — used to enable or disable alerts based on the interarrival Jitter on incoming RTP packets inter-arrival time. The value is represented in
1/65536 of a second.
- YES - enables the sending of alert report based on jitter detection
- NO - disables the sending of alert report based on jitter detection
• JITTER_WARN [xx] — the threshold to send a report on Inter-arrival Jitter greater than
[xx]. 1 second is broken up into 65535 (0xffff hex) parts. [xx] / 65535 is the threshold in
seconds. The default is 3276 (50 ms). Using 0 resets the threshold to default.
- xx - is an INTEGER value used as threshold
• JITTER_EXCE [xx] — the threshold to send a report on Inter-arrival Jitter greater than
[xx]. 1 second is broken up into 65535 (0xffff hex) parts. [xx] / 65535 is the threshold in
seconds. The default is 32760 (500 ms). Using 0 resets the threshold to default.
- xx - is an INTEGER value used as threshold
• DELAY_ENABLE [YES | NO] — used to enable or disable the alerts based on the
excessive delay detection. This is the one-way delay (including system delay) for the call,
measured in milliseconds.
- YES - enables Excessive delay detection.
- NO - disables Excessive delay detection.
• DELAY_WARN [xx] — the threshold to give warning on Excessive Delay greater than
[xx]. The default is 150 ms. Using 0 resets the threshold to default.
- xx - is an INTEGER value used as a threshold measured in 1/1000 of a second.
• DELAY_EXCE [xx] — the threshold to report unacceptable Excessive Delay greater than
[xx]. The default is 175 ms. Using 0 resets the threshold to default.
- xx - is an INTEGER value used as a threshold measured in 1/1000 of a second.
SIP Software for Avaya 1200 Series IP Deskphones-Administration
September 2013
83
Configure the provisioning server
• SESSION_RPT_EN [YES | NO] — used to enable or disable periodic VQMon session
reports. The default is disabled.
Both session report enable and session report interval must be configured if the
IP Deskphone software has been upgraded to SIP Release 3.0 or later. Otherwise, the
SESSION_RPT_INT default of 60 seconds is used automatically.
- YES - enables periodic VQMon session reports.
- NO - disables periodic VQMon session reports. Default is NO.
• SESSION_RPT_INT [xx] — used to specify the interval for the periodic VQMon session
report in seconds. The minimum acceptable value is 60 seconds. The maximum
acceptable value is 600 seconds. The default is 60 seconds.
- xx - is an INTEGER value in seconds.
System commands
• ADMIN_PASSWORD [password] — used to change the default administrator password
of the IP Deskphone that is used for unlocking network menus. The default is
26567*738.
- — password - the administrator password.
• ADMIN_PASSWORD_EXPIRY [seconds] — This parameter configures the date when
the ADMIN_PWD is no longer valid and requires a new password to be downloaded from
the provisioning server.
The value specifies the expiry date in seconds (Unix Timestamp format). A simple Unix
Timestamp format converter is available at http://www.unixtimestamp.org/.
To reset the expiry date value, use the following format:
ADMIN_PASSWORD_EXPIRY 0
• HASHED_ADMIN_PASSWORD [YES | NO] — This parameter indicates whether the
Admin password is hashed or not. The default value is NO.
- YES – Admin password is hashed.
- NO – Admin password is not hashed.
IP Deskphone bug logging/recovery commands
• RECOVERY_LEVEL — controls the IP Deskphone recovery if the IP Deskphone hits any
Major or Critical error. The following values are used for configuring the recovery level on
the IP Deskphone:
- 0 - IP Deskphone never recovers from any error
84
SIP Software for Avaya 1200 Series IP Deskphones-Administration
Comments? [email protected]
September 2013
Create the IP Deskphone-specific configuration file on the provisioning server
- 1 - IP Deskphone recovers from Critical error
- 2 - IP Deskphone recovers from Major and Critical errors
Default is 255, which is equivalent to the recovery level of 2.
• LOG_LEVEL [x] — This parameter defines which IP Deskphone bugs are logged in the
ECR file. The following values are used for configuring the logging level on the IP
Deskphone.
x - level of bugs from 0 to 255. The default value is 2.
- 0 - logging is blocked
- 1 - log only Critical bugs
- 2 - log Critical / Major bugs
- 3- log Critical / Major / Minor bugs
- if >= 4 – log all information and bugs
Note:
LOG_LEVEL 4 is intended for debug purposes only. Do not set LOG_LEVEL to 4 or a higher
value unless you are instructed to do so by Avaya support.
Create the IP Deskphone-specific configuration file on the
provisioning server
If the IP Deskphone encounters a [USER_CONFIG] section while parsing the 12xxSIP.cfg
configuration file, the IP Deskphone downloads the IP Deskphone-specific configuration file
SIP<mac id>.cfg.
IP Deskphone-specific configuration files support customizing the IP Deskphone on a
IP Deskphone/user level. Parameters in the device configuration file can be overwritten with
a IP Deskphone-specific configuration file.
Most of the parameters in the IP Deskphone configuration file are saved on the IP Deskphone.
Removing a parameter from the IP Deskphone configuration file does not change the
parameters saved on a configured IP Deskphone. If a parameter is configured only in the
IP Deskphone-specific configuration file, removing the IP Deskphone-specific configuration file
does not clear the setting.
Important:
If the 12xxSIP.cfg configuration file contains a [USER_CONFIG] section, Avaya
recommends that DOWNLOAD_MODE be configured as FORCED. This is a global setting
for all IP Deskphones used to determine if the mac id file should be read. Alternatively, if the
user wants to use DOWNLOAD_MODE configured to AUTO, when a change is made to
any mac id file the version number should be incremented so that all IP Deskphones read
the file.
SIP Software for Avaya 1200 Series IP Deskphones-Administration
September 2013
85
Configure the provisioning server
Table 7: IP Deskphone configuration commands on page 86 provides a summary of the
commands that can be used in the IP Deskphone configuration file. The syntax of each
command is summarized in User Login commands on page 86.
Table 7: IP Deskphone configuration commands
Auto login
AUTOLOGIN_ID_KEY01
AUTOLOGIN_PASSWD_KEY01
User Login commands
• AUTOLOGIN_ID_KEY01 [* | xx] [userID@domain name] — This parameter is located
within the IP Deskphone-specific configuration file. This is the ID that the IP Deskphone
uses to register and authenticate. The default User ID "user1" is used if an ID is not
supplied and the IP Deskphone is not logged in.
- * - indicates that the IP Deskphone should use its mac address (lower case) as the
User ID
- xx - an ASCII string that corresponds to the User ID.
- userID@domain name – the user ID must be followed by the domain name; for
example, [email protected]; [email protected]
Note:
To provision AUTOLOGIN_ID_KEY01, the IP Deskphone must be rebooted after the
IP Deskphone configuration file is updated. To force a hard reboot after the
IP Deskphone configuration file is updated, configure FORCE_REBOOT YES in the
device configuration file.
• AUTOLOGIN_PASSWD_KEY01 — This parameter is located within the IP Deskphonespecific configuration file. There is no default password. If this parameter is blank and
AUTOLOGIN_ENABLE is configured to USE_AUTOLOGIN_ID (or 2) in the device
configuration file, the IP Deskphone does not log on.
Note:
To provision AUTOLOGIN_PASSWD_KEY01, the IP Deskphone must be rebooted
after the IP Deskphone configuration file is updated. To force a hard reboot after the
IP Deskphone configuration file is updated, configure FORCE_REBOOT YES in the
device configuration file.
86
SIP Software for Avaya 1200 Series IP Deskphones-Administration
Comments? [email protected]
September 2013
Create the Dialing Plan file on the provisioning server
Create the Dialing Plan file on the provisioning server
A dialing plan essentially describes the number and pattern of digits that a user dials to reach
a particular telephone number. Access codes, area codes, specialized codes, and
combinations of the number of digits dialed are all part of a dialing plan.
The purpose of the dialing plan is so that the end user does not have to press the send or
pound key (#) to have the IP Deskphone with SIP Software send the initial message to start
the call.
Dialing a telephone number on an IP Deskphone that supports SIP can be different than dialing
a number from a traditional telephone. SIP signaling is communicated through a SIP URI to
get to the far end. For example, you can key in the SIP address, jsmith@company_name.com
to reach John Smith. When the IP Deskphone with SIP Software receives this address, the
dialing plan is bypassed and the IP Deskphone uses the SIP URI to send a SIP INVITE to
jsmith@company_name.com (INVITE sip: jsmith@company_name.com).
Entering a SIP URI address, however, is inconvenient for an IP Deskphone with SIP Software.
Also, the user must explicitly press the send key (or use some method to indicate the end of
the URI) to indicate the completion of the SIP address. This is not something that the user is
accustomed to in a traditional PBX environment.
The alternative is to use a URI where numbers are used to reach the far end. Using different
access codes, the IP Deskphone with SIP Software translates the digits entered into something
that the server can understand and remaps the number entered into different URIs. Some of
the numbers are mapped as intercom calls, some numbers are mapped as local Public
Switched Telephone Network (PSTN) calls, and some numbers are mapped as public longdistance calls.
The issue is that until the IP Deskphone itself can determine the type of call, no SIP INVITE
message is sent. This is where the dialing plan comes into effect. The call type is determined
by the dialing plan. Based on the rules defined in the dialing plan, once a match has been
identified, the IP Deskphone with SIP Software sends the invite without the need to press the
send key. This behavior closely matches the traditional PBX operation.
The IP Deskphone with SIP Software design places no restriction in the format of the SIP URI.
The dialing plan is a scheme to match the user experience with traditional PBX operation. It
does not restrict the type of URI that the user can use.
The IP Deskphone with SIP Software uses a dialing plan to recognize a call as an call when
it sends an INVITE. The dialing plan can have multiple emergency numbers. See the chapter
Emergency Services on page 197 for information on the handling of Emergency calls by the
IP Deskphone with SIP software.
The following is an example of a dialing plan.
SIP Software for Avaya 1200 Series IP Deskphones-Administration
September 2013
87
Configure the provisioning server
Figure 6: Sample dialing plan
Dialing function description
Dialing plan
If the IP Deskphone encounters a [DIALING_PLAN] section while parsing the 12xxSIP.cfg
configuration file, the IP Deskphone downloads the specified dialing plan configuration file from
the provisioning server.
88
SIP Software for Avaya 1200 Series IP Deskphones-Administration
Comments? [email protected]
September 2013
Create the Dialing Plan file on the provisioning server
As most IP Deskphone users are used to dialing digits to indicate the address of the destination,
there is a need to specify the rule by which digits are transformed into a URI. The IP Deskphone
with SIP Software dialing plan contains two sections delimited by two percent signs (%%).
Figure 7: Sample dialing plan declarations section
In the declaration section, the administrator can define the variables. The variables must start
with a dollar ($) sign, followed by a number or a character, such as $1 or $a. There are two
variables that are reserved by system. They are as follows:
$$ : used for the collected digits if they match the pattern
$t : default timer
There must be a domain name defined and the domain name can be represented by any
variable. In Figure 6: Sample dialing plan on page 88, the domain name is represented by
$n.
The variable definitions take the form:
Figure 8: Sample dialing plan variable definitions
For example:
$1="avaay.com"
$2="Avaya"
$3="."
$4="com"
$5="Avaya.com"
$t=10000 (default timer is 10 seconds)
$a=Avaya.com
The second section of dialing plan contains the digit map. The digit map section has three
subsections that are divided by a separator of two ampersands (&&).
SIP Software for Avaya 1200 Series IP Deskphones-Administration
September 2013
89
Configure the provisioning server
Figure 9: Sample dialing plan digit map section
The first part of a dialing plan contains a pattern defined with DRegex, which is used for
matching the dialed number. The patterns are separated by the pipe (|) sign. The second part
contains the result string used in the dial step. The third part defines the parameters used by
UA in dialing action.
The following parameter is currently defined:
t=xxxx: After this timer expires, the number entered is automatically dialed. The timer starts
after the first digit is entered and after it expires, the collected digits are automatically dialed
out. xxxx is a decimal number in msec. The default timer is used when t is not specified in the
digit map.
For example:
X{4} && sip:$$; phone-context=avaya.com;user=phone && t=7000
When the user presses any 4 digits, such as 4567, the following SIP URIs are generated
because of the translation rule:
Sip:4567; phone-context=avaya.com;user=phone. The timeout of stopping the collection of
digits is 7 seconds.
The pound sign (#) at the end of the digit map causes the IP Deskphone to dial the matched
dialing plan immediately.
DRegex
The Digit Regular Expression (DRegex) syntax is a telephony-oriented mapping of Portable
Operating System Interface (POSIX) Extended Regular Expressions (ERE). Users must take
care not to confuse the DRegex syntax with POSI EREs, as they are not identical. In particular,
there are many features of POSIX EREs that DRegex does not support. The dialing plan uses
DRegex instead of ERE. The following rules demonstrate the use of DRegex.
90
SIP Software for Avaya 1200 Series IP Deskphones-Administration
Comments? [email protected]
September 2013
Create the Dialing Plan file on the provisioning server
Figure 10: DRegex rules
SIP Software for Avaya 1200 Series IP Deskphones-Administration
September 2013
91
Configure the provisioning server
Downloadable WAV files
It is possible to customize the ring tones on the IP Deskphone with SIP Software. Up to five
special ring tones can be downloaded from the provisioning server and stored on the
IP Deskphone. The end user can select which ring tone they would like to implement.
In order to download these special files, the files must reside on the provisioning server and
be specified in the SIP provisioning file. For more information, see Download the SIP software
to the provisioning server on page 40. The WAV files have a maximum size of 512 KB each
for the IP Deskphone.
The file format is restricted to ITU-T A-law or u-law (8.0 kHz, 8-bit, mono or 16.0 kHz, 16 bit
mono).
After the WAV files are downloaded to the IP Deskphone, the WAV file names appear in Pref,
Audio, Tones, Ring Pattern (1 to 8 are standard ring tones, and 9 and above are WAV ring
tones) and the WAV ring tones can then be selected to replace the standard ring tones.
For further information about downloadable WAV files, see the applicable IP Deskphone User
Guide.
92
SIP Software for Avaya 1200 Series IP Deskphones-Administration
Comments? [email protected]
September 2013
Chapter 7: Configure the DHCP Server
The Avaya 1200 Series IP Deskphones support two basic Dynamic Host Configuration Protocol (DHCP)
mechanisms to provide configuration information to the IP Deskphones. These mechanisms are the
following:
• Normal DHCP
• DHCP VLAN phase
Normal DHCP
The normal DHCP is used to configure standard IP parameters such as IP address, NetMask,
default gateway, and DHCP lease parameters. The message sequence consists of Discover,
Offer, Request, and Acknowledge. The IP Deskphones can also insert an optional phase. To
include an optional phase, the first phase is used to discover and configure the voice VLAN
using a Avaya proprietary method. The second phase then proceeds normally on the
discovered VLAN. If the DHCP VLAN discovery is not used, then there is only a single
phase.
IP Deskphone DHCP VLAN Phase
The DHCP site and vendor specific options contain VLAN information to configure VLANs. The
VLAN parameters are text string embedded in the standard DHCP Vendor and Site Specific
options. You can acquire the VLAN parameters using 802.1ab and acquire IP address
parameters using DHCP.
If the IP Deskphone does not contain VLAN configuration provisioned manually or through
LLDP, the IP Deskphone attempts to determine the VLAN during DHCP VLAN Phase. If the
IP Deskphone does find a VLAN configuration, it proceeds to the DHCP Configuration Phase.
If the VLAN Phase (VLAN configured through DHCP) is successful, then the VLAN Phase
finishes with a final DHCP. A release message appears after the completion of the
Configuration Phase.
The following is the procedure to configure the Voice VLAN using DHCP, assuming VLAN is
not configured using any other method:
1. The IP Deskphone sends a DHCP request using an untagged (no VLAN) packet
during any of the following scenarios:
• The customer network is configured to handle untagged packets; for example,
retag them to a specific VLAN.
SIP Software for Avaya 1200 Series IP Deskphones-Administration
September 2013
93
Configure the DHCP Server
• The DHCP request contains standard IP Deskphone IP DHCP option requests
from the point when the IP Deskphone does not receive the VLAN information.
These options include the Vendor Specific and all Site Specific options.
2. The DHCP server receives the request. If the server is configured, the DHCP server
returns a DHCP Offer message with a special text string in the Vendor Specific
option or one of the Site Specific options.
The following is the format of the text in the option:
VLAN-A:XXX+YYY+ZZZ+…
where VLAN-A is a substring followed with VLAN information. XXX, YYY, ZZZ are
the numbers of the supported VLANs. There can be from 1 to 10 different VLANs.
Each VLAN is separated with a symbol +.
3. After receiving the DHCP Offer message, the IP Deskphone scans each Vendor
and Site Specific option for the VLAN-A string.
4. If the IP Deskphone finds the VLAN-A string, it tries each VLAN and in turn XXX,
YYY, ZZZ searches for a DHCP server.
5. The search is done by sending a DHCP Discover message looking for a DHCP Offer
message as a response.
6. If the IP Deskphone finds a response, it discontinues its DHCP exchange on the
untagged channel and continues its DHCP exchange on the “discovered” VLAN.
7. If there is no response, the initial untagged Discover message assumes there is no
VLAN configuration information available from the DHCP server and continues
using untagged packets. When the IP Deskphone sends its first DHCP Discover
message, it does not know if it can find VLAN configuration information. If it does
discover VLAN information, it continues the VLAN configuration as described
above. If it does not find any VLAN information, it assumes there is only a
Configuration Phase.
DHCP options
The DHCP protocol provides options mechanisms for the client and server to exchange
information in addition to the standard Bootstrap Protocol (BOOTP) information. This section
describes the client and server options supported by the IP Deskphone.
• IP Deskphone to Server options on page 94
• Server to IP Deskphone options on page 95
IP Deskphone to Server options
When a DHCP client sends DHCP Discover and Request messages, it includes a list of options
as part of the request. The IP Deskphone DHCP client sends the following options:
94
SIP Software for Avaya 1200 Series IP Deskphones-Administration
Comments? [email protected]
September 2013
Server to IP Deskphone options
Option
Description
12
Specifies the Hostname. By default, the Hostname is “T”+MAC
Address; for example, T001765FDBF1D. The Hostname can be
manually provisioned using the keypad.
53
Specifies the DHCP Message Type.
55
Specifies the messages to tell the server which options the IP
Deskphone is requesting. It appears in the Discover and Request.
The SIP software requests the following options
• 1 - IPv4 Subnet Mask
• 3 - Router
• 6 - Domain Name Server
• 15 - Domain Name
• 28 - Broadcast Address
• 43 - Vendor Specific Information
• 58 - Renewal Time
• 59 - Rebinding Time
• 66 - TFTP Server Name. The client treats this more generically
as a request for the provisioning server name and protocol.
• 99 - Must not be included
• 128, 131, 144, 157, 188, 191, 205, 219, 223 - Specifies old site
specific options. Recovered by IANA according to RFC 3942 and
must not be used for new installations.
• 224, 227, 230, 232, 235, 238, 241, 244, 247, 249, 251, 254Specifies site specific options.
57
Specifies maximum DHCP message size. The maximum message
size is 1190 bytes.
60
Sends “Nortel-SIP-Phone-A” as the Vendor Identifier.
61
Specifies Client Identifier (MAC Address).
Server to IP Deskphone options
The DHCP server can send any option to the IP Deskphone as part of the DHCP Offer
message. The IP Deskphone accepts the following options:
DHCP Option
Description
IPv4 Address
SIP Software for Avaya 1200 Series IP Deskphones-Administration
September 2013
95
Configure the DHCP Server
DHCP Option
Description
Net mask
1
Router Option
3
Domain Name Server
6
Domain Name
15
Broadcast Address
28
Vendor Specific
Option
43
DHCP Renewal Time
58
DHCP Rebinding
Time
59
TFTP Server Name
66
Old Site Specific
Options
128, 131, 144, 157, Options are supported, but not recommended
188, 191, 205, 219, for new installations. These options are
223
reclaimed according to RFC 3942.
Site Specific Options
128, 131, 144, 157,
188, 191, 205, 219,
223
Accepts the first two DNS addresses.
Two forms of the server name are supported.
If a dotted-decimal IP address is returned, it
is assumed to point to a TFTP server. A full
URL can also be provided to specify a
protocol and FQDN.
Multiple DHCP Servers
It is possible that two or more DHCP servers can respond to the DHCP Discover message.
When the IP Deskphone sends a Discover message, it waits for 1 second to collect all the
responses. If there is more than one response, the IP Deskphone selects the response with
the longest lease time. If the lease time is identical, the first response is selected.
96
SIP Software for Avaya 1200 Series IP Deskphones-Administration
Comments? [email protected]
September 2013
Chapter 8: Install the IP Deskphone
Complete instructions to install the Avaya 1200 Series IP Deskphone, including detailed figures and
applicable warnings, are given in the Avaya IP Deskphones User Guides.
The steps for installing the Avaya 1200 Series IP Deskphone are summarized in the following
procedure.
Installing the IP Deskphone
1. Remove the stand cover. Pull upward on the center catch and remove the stand cover. The
cable routing tracks are now accessible.
2. Connect the AC power adapter (optional). Connect the adapter to the AC adapter jack in the
bottom of the IP Deskphone. Form a small bend in the cable, and then thread the adapter cord
through the channels in the stand.
3. Install the handset. Connect the end of the handset cable with the short straight section into
the handset. Connect the end of the handset cable with the long straight section to the back of
the IP Deskphone, using the RJ-9 handset jack. Form a small bend in the cable, and then
thread the handset cord through the channels in the stand so that it exits behind the handset
on the right side, in the handset cord exit in the stand base.
4. Install the headset (optional). If installing a headset, plug the connector into the RJ-9 headset
jack on the back of the IP Deskphone, and thread the headset cord along with the handset cord
through the channels in the stand, so that the headset cord exits the channel.
5. Install the Ethernet cable. Connect one end of the supplied Ethernet cable to the back of the
IP Deskphone using the RJ-45 connector and thread the network cable through the channel.
6. Install the Ethernet cable connecting the PC to the IP Deskphone (optional). If connecting PC
Ethernet through the IP Deskphone, connect one end of the PC Ethernet cable to the
IP Deskphone using the RJ-45 connector and thread it through the channel. Connect the other
end to the LAN connector on the back of the PC.
7. Install additional cables. Connect the Ethernet cable to the LAN Ethernet connection. If using
an AC power adapter, plug the adapter into an AC outlet.
8. Wall-mount the IP Deskphone (optional). The IP Deskphone can be mounted either by: (method
A) using the mounting holes on the bottom of the IP Deskphone stand, or (method B) using a
traditional-style wall-mount box with RJ-45 connector and 15-cm (6-inch) RJ-45 cord (not
provided).
9. Replace the stand cover. Ensure that all cables are neatly routed and press the stand cover
into place until a click is heard.
10. Put the IP Deskphone in the wall-mount position (optional). If the IP Deskphone is to be
mounted on the wall, put it in the wall-mount position by holding the tilt lever and pressing the
IP Deskphone towards the base until the IP Deskphone is parallel with the base. Release the
tilt lever and continue to push the IP Deskphone towards the base until an audible click is
heard. Ensure the IP Deskphone is securely locked in position.
SIP Software for Avaya 1200 Series IP Deskphones-Administration
September 2013
97
Install the IP Deskphone
The following figure shows the connections on the IP Deskphone.
Figure 11: IP Deskphone connections
98
SIP Software for Avaya 1200 Series IP Deskphones-Administration
Comments? [email protected]
September 2013
Chapter 9: Install the SIP software
This chapter provides information on installing SIP software on a new 1200 Series IP Deskphone (1220
IP Deskphone and 1230 IP Deskphone). If the IP Deskphone already has SIP software installed, see
Upgrade the SIP Software on the IP Deskphone on page 105. If the IP Deskphone has UNIStim software
installed, see Convert UNIStim software to SIP software on the IP Deskphone on page 111.
The 1200 Series IP Deskphones are shipped from the factory with only boot loader software.
The boot loader software is designed to work with DHCP and Option 66 to automatically obtain its IP
information and the provisioning server IP address, and to read the 12xxBoot.cfg file from the provisioning
server. Based on the information in the 12xxBoot.cfg file, the IP Deskphone downloads and installs a
specific SIP software load.
The IP Deskphone reads and acts on the instructions in the 12xxBoot.cfg file.
You must create the 12xxBoot.cfg file as a standard text file, using the format described in Boot loader
file format on page 99, and place the file on the root directory of your provisioning server.
Boot loader file format
The 12xxBoot.cfg file has the following options and configurations:
Field name
Field value
[FW]
Description
Section header for software
download information.
DOWNLOAD_MODE
AUTO
The software is always downloaded;
this field is ignored.
VERSION
SIP12x004.04.09.00
The version of the software.
This field is ignored.
FILENAME
SIP12x004.04.09.00.bin
Image file name.
It must match the file name of the
actual software .bin file.
PROTOCOL
TFTP
FTP
HTTP
Download protocol.
Choose the appropriate protocol for
your server type.
SERVER_IP
xxx.xxx.xxx.xxx
IP Address of the provisioning server
in dotted decimal format.
SIP Software for Avaya 1200 Series IP Deskphones-Administration
September 2013
99
Install the SIP software
The following is an example of a 12xxBoot.cfg file for TFTP protocol.
[FW]
DOWNLOAD_MODE AUTO
VERSION SIP12x004.04.09.00
FILENAME SIP12x004.04.09.00.bin
PROTOCOL TFTP
SERVER_IP 192.168.1.123
Downloading the 12xxBoot.cfg file
There are two methods to download the 12xxBoot.cfg file to the IP Deskphone:
• Automatic TFTP/FTP/HTTP 12xxBoot.cfg download on Bootup using DHCP.
• Manual TFTP/FTP/HTTP 12xxBoot.cfg download.
Related topics:
Automatic TFTP/FTP/HTTP 12xxBoot.cfg download on Bootup using DHCP on page 100
Manual TFTP 12xxBoot.cfg file download on page 101
Automatic TFTP/FTP/HTTP 12xxBoot.cfg download on Bootup
using DHCP
If you have a network with DHCP that supports Option 66, then Avaya recommends using this
method of downloading the 12xxBoot.cfg file to the IP Deskphone.
DHCP Option 66
The DHCP Option 66 supports TFTP, FTP and HTTP.
The DHCP option 66 URL is entered in the following format:
[<protocol name>://[<login>[:<password>]@]]<IP address or server
name>[:<port>][/<path>]
The square brackets [ ] indicate optional elements. The default protocol is TFTP, so if no
protocol precedes the IP address, TFTP is used. If the domain name of a server is used, then
the DNS IP address must also be defined.
Examples:
http://some_login@one_more.server.ca:80/config_folder
100
SIP Software for Avaya 1200 Series IP Deskphones-Administration
Comments? [email protected]
September 2013
Downloading the 12xxBoot.cfg file
http://192.168.33.50
tftp://192.168.33.50
tftp://some.server.com
ftp://my_login:[email protected]
12xxBoot.cfg file download
Assemble the components of the new IP Deskphone, as described in Install the
IP Deskphone on page 97 or in the user guide of the appropriate IP Deskphone model. Plug
in the IP Deskphone.
The IP Deskphone retrieves its IP address and provisioning information from DHCP. The IP
Deskphone reboots and then attempts to read the 12xxBoot.cfg from the provisioning server
whose IP address was supplied by DHCP. After reading the 12xxBoot.cfg file information, the
IP Deskphone downloads and installs the specified SIP software using the specified protocol
and provisioning server IP address. This can be the same provisioning server as the one where
the 12xxBoot.cfg file is located.
Once the software image is installed, the IP Deskphone reboots again and looks for the
standard SIP config files listed in the following table. The IP Deskphone then follows the
12xxSIP.cfg file instructions.
Model
Config file name
1220 IP Deskphone
1220SIP.cfg
1230 IP Deskphone
1230SIP.cfg
Manual TFTP 12xxBoot.cfg file download
Use the following procedure to perform a manual download of the 12xxBoot.cfg file to the IP
Deskphone.
Note:
Only a TFTP server can be used for a manual download.
1. Assemble the components of the new IP Deskphone, as described in Install the
IP Deskphone on page 97 or in the user guide of the appropriate IP Deskphone
model.
2. Plug in the IP Deskphone.
The IP Deskphone Message Waiting LED is lit and the message
…Loading BootC…
is displayed.
SIP Software for Avaya 1200 Series IP Deskphones-Administration
September 2013
101
Install the SIP software
In a few seconds, the following simple non-graphic text menu on white background
is displayed.
12x0 IP Phone
Manual Configuration
Avaya
3. Press the soft keys (1,2,3,4) in sequence from left to right.
BootC goes to manual configuration and the following menu is displayed on the IP
Deskphone screen.
The End of Menu
Apply
Auto
Cancel
Note:
If you miss this screen and the IP Deskphone begins to look for DHCP, unplug
the IP Deskphone, and repeat Step 2.
4. Press the Auto soft key.
The following menu is displayed.
01 EAP Settings
Man
Cfg
AllMan
Cancel
5. Use the down arrow in the Navigation keys to scroll down and select 02 LLDP
Enable.
02 LLDP Enable
Man
Cfg
AllMan
Cancel
6. Press the Man soft key to manually configure LLDP.
7. Press the Cfg soft key.
8. Configure the following:
• DHCP = 0
• IP = <IP Deskphone IP address>
Press * to enter a “.” (period) for the dotted decimal format.
• NETMSK: = <IP Deskphone network mask>
102
SIP Software for Avaya 1200 Series IP Deskphones-Administration
Comments? [email protected]
September 2013
Downloading the 12xxBoot.cfg file
• DEF GW := < IP Deskphone default gateway>, and then press the OK soft
key.
9. Use the down arrow in the Navigation keys to scroll down and select 12.
Provisioning Server.
12 Provisioning Server
Man
Cfg
AllMan
Cancel
10. Press the Man soft key to indicate a manual entry for the TFTP provisioning server,
then press the Cfg soft key.
11. Press the OK soft key until Prov:0.0.0.0 is displayed.
12. Enter the IP address of the TFTP provisioning server where the 12xxBoot.cfg file is
located.
13. Press the OK soft key until the following menu is displayed.
The End of Menu
Apply
Auto
Cancel
14. Press the Apply soft key.
The IP Deskphone reboots and searches for the 12xxBoot.cfg file at the IP address
of the TFTP provisioning server that you entered manually.
After reading the 12xxBoot.cfg file information, the IP Deskphone downloads and installs the
specified SIP software using the specified protocol and provisioning server IP address. This
can be the same provisioning server as the one where the 12xxBoot.cfg file is located.
Once the software image is installed, the IP Deskphone reboots again and looks for the
standard SIP configuration files listed in the following table. The IP Deskphone then follows
the 12xxSIP.cfg file instructions.
Model
Config file name
1220 IP Deskphone
1220SIP.cfg
1230 IP Deskphone
1230SIP.cfg
SIP Software for Avaya 1200 Series IP Deskphones-Administration
September 2013
103
Install the SIP software
104
SIP Software for Avaya 1200 Series IP Deskphones-Administration
Comments? [email protected]
September 2013
Chapter 10: Upgrade and convert the
IP Deskphone software
Introduction
This chapter describes how to upgrade an Avaya 1200 Series IP Deskphone with UNIStim
software to SIP Software.
In order to upgrade an IP Deskphone with UNIStim software, first determine if you have the
minimum UNIStim software release on the IP Deskphone (062AC5L ). If your IP Deskphone
is installed with the minimum version of UNIStim software, proceed to the section Convert
UNIStim software to SIP software on the IP Deskphone on page 111. If your IP Deskphone
is not installed with the minimum version of UNIStim Software, proceed to the section Upgrade
to the minimum UNIStim Software on page 106.
To convert the firmware on the IP Deskphone from SIP to UNIStim, see the section
Maintenance on page 321.
Upgrade the SIP Software on the IP Deskphone
Use the following procedures to upgrade existing SIP Software to new SIP Software on the
IP Deskphone.
Download the SIP software to the provisioning server
To download the SIP software, perform the following procedure.
Downloading SIP software for the IP Deskphone from the Avaya Web site
1. Go to http://www.avaya.com/support.
2. Log on to the Avaya Web site with a valid Avaya User ID and Password.
The Avaya Support page appears.
3. Enter the IP Deskphone type in the Knowledge and Solution Engine box.
4. Select Software in the scroll down menu.
SIP Software for Avaya 1200 Series IP Deskphones-Administration
September 2013
105
Upgrade and convert the IP Deskphone software
5. Press the gray arrow at the end of the Knowledge and Solution Engine box to
obtain the .
6. From Search Results, select the appropriate version of the SIP software for the
IP Deskphone; for example; SIP IP Phone 11230 Release
SIP12x004.01.03.00.bin.
7. Place the selected software on the provisioning server.
Modify the SIP provisioning file
Use the following procedure to modify the SIP provisioning file, which exists on the provisioning
server.
Modifying the SIP provisioning file
1. Under the firmware [FW] section of the SIP Provisioning file, increase the VERSION
number (for example 06A5C39d26).
2. Under the firmware [FW] section of the SIP Provisioning file, modify the FILENAME
of the new file you want to upload to the IP Deskphone.
Important:
The VERSION number must be the same as the FILENAME (do not include
the .bin extension).
For example, if the FILENAME is SIP12xx03.00.33.04.bin, then the VERSION
must be SIP12xx03.00.33.04
3. Invoke the upgrade mechanism.
Use one of the next three methods to invoke a software upgrade on the
IP Deskphone with SIP Software.
a. Power off and power on the IP Deskphone.
b. Select Services > System > Check For Updates on the
IP Deskphone.
c. Allow for an automatic check for updates to occur. (See AUTO_UPDATE
under Feature configuration commands on page 55).
Any of these actions causes the IP Deskphone to contact the provisioning server
and attempt to read the Provisioning file. A Soft Reset (Srvcs > System >, Reset
Phone) does not cause the IP Deskphone to retrieve the Provisioning file and
therefore does not cause a software upgrade.
Upgrade to the minimum UNIStim Software
The Avaya 1200 Series IP Deskphone can be ordered with UNIStim software installed or with
SIP Software installed. You can convert the software on an IP Deskphone from UNIStim to
106
SIP Software for Avaya 1200 Series IP Deskphones-Administration
Comments? [email protected]
September 2013
Upgrade to the minimum UNIStim Software
SIP. To successfully convert the software from UNIStim to SIP, the UNIStim software version
on your IP Deskphone must be 062AC5L or higher.
Identify the current version of UNIStim software
For a new Avaya 1200 Series IP Deskphone, follow Identify the current version of UNIStim
software to determine the version number of the UNIStim software on an IP Deskphone.
For an IP Deskphone already in use, follow Checking the UNIStim software version on a new
IP Deskphone on page 107 to determine the version number of UNIStim software on an
IP Deskphone.
Checking the UNIStim software version on a new IP Deskphone
1. After assembling the IP Deskphone and turning it on, the display on the
IP Deskphone goes through the following sequence:
• Avaya splash screen appears
• Avaya sonic sound plays
• Avaya banner appears
Following the Avaya banner, the software version appears in the display (F/W
version).
2. Note the UNIStim software version number and write it down. Compare the version
number to the minimum-required UNIStim software version (062AC5L ).
If the version number is equal to or higher than 062AC5L, see Convert UNIStim
software to SIP software on the IP Deskphone on page 111.
If the number is lower than 062AC5L, go to the section Upgrade UNIStim software
to the minimum required UNIStim software on page 108 and follow the instructions
to upgrade an IP Deskphone to the minimum-required version of UNIStim software
before a conversion to SIP Software.
Checking the UNIStim software version on an IP Deskphone already in use
1. Press the Globe/Services key on the IP Deskphone twice quickly.
If the admin password prompt appears, enter the password 26567*738.
The Local Tools menu appears:
Table 8: Local Tools menu
1. Preferences
2. Local Diagnostics
3. Network Configuration
4. Lock Menu
SIP Software for Avaya 1200 Series IP Deskphones-Administration
September 2013
107
Upgrade and convert the IP Deskphone software
To make a selection, press the number associated with the menu item, or use the
Navigation key cluster
to scroll through the menu items. Press the Select key to select the highlighted
menu item.
Table 9: Using the Navigation key cluster to navigate in the Local Tools menu
Key
Action
Down
Moves highlight down
Up
Moves highlight up
Right
Selected current menu item
Left
Closes menu
Select key (center of cluster)
Selects current menu item
To close this menu, use the Quit key.
2. Select 2. Local Diagnostics in the Local Tools menu by pressing the Select key
in the Navigation key cluster or by pressing the number 2.
3. Select IP Set and DHCP Information by pressing the Select key in the Navigation
key cluster or by pressing the number 2.
4. Use the down arrow in the Navigation key cluster to scroll down the menu to
Software Version.
5. Note the UNIStim software version number and write it down.
Compare the version number to the minimum-required UNIStim software version
(062AC5L ).
UNIStim software version names contain numbers and letters. Use the last three
characters in a version to compare the version of UNIStim on an IP Deskphone with
the minimum required version for the upgrade.
If the version number is equal to or higher than 062AC5L , go to the section Convert UNIStim
software to SIP software on the IP Deskphone on page 111.
If the number is lower than 062AC5L , see Upgrade UNIStim software to the minimum required
UNIStim software on page 108 and follow the instructions to upgrade an IP Deskphone to the
minimum-required version of UNIStim software before you convert to SIP Software.
Upgrade UNIStim software to the minimum required UNIStim
software
Use either of the following two methods to upgrade UNIStim software.
108
SIP Software for Avaya 1200 Series IP Deskphones-Administration
Comments? [email protected]
September 2013
Upgrade to the minimum UNIStim Software
1. UFTP download initiated by the server if the server supports this method of
upgrading UNIStim software. Refer to the appropriate documentation for your Call
Server for instructions on using this method.
2. TFTP download on bootup.
If necessary, use the following procedure to configure the TFTP server.
Configuring the TFTP server
1. The Avaya 1200 Series IP Deskphone always executes the TFTP download at
bootup if a TFTP IP address is configured on the IP Deskphone after being initiated
by the telephony Call Server.
2. Go to the TFTP server and create the 12xx.cfg provisioning file. The 12xx.cfg
provisioning file is a clear text file. Create the provisioning file as shown in the next
table.
Table 10: Sample 12xx.cfg provisioning file
[FW]
DOWNLOAD_MODE FORCED
VERSION 0625C23
FILENAME 0625C23.bin
This configuration file forces the software download of 0625C23.bin.
3. Download and copy the software to the TFTP server directory.
To download the UNIStim software for the IP Deskphone from the Avaya Web site:
a. Go to http://www.avaya.com/support.
b. Log on to the Avaya Web site with a valid Avaya User ID and
Password.
The Support page appears.
c. Enter the IP Deskphone type in the Knowledge and Solution Engine
box.
d. Select SOFTWARE in the ALL TYPES scroll-down menu.
e. Press the gray arrow at the end of the Knowledge and Solution
Engine box to obtain the Search Results.
f. From Search Results, select the appropriate version of the UNIStim
software for the IP Deskphone; for example, IP Phone 1230 Release
0625C23.
g. Place the selected software in the correct directory on the provisioning
server.
4. In the IP Deskphone Network Configuration menu, change the TFTP server
address, and enter the correct TFTP server address.
SIP Software for Avaya 1200 Series IP Deskphones-Administration
September 2013
109
Upgrade and convert the IP Deskphone software
This can be the provisioning server as defined in the chapter Configure the
provisioning server on page 39.
5. Select the Apply&Reset context-sensitive soft key to save the configurations and
reset the IP Deskphone.
The IP Deskphone downloads the software file. The display shows [FW]
reading….
If the download is successful, the display shows [FW] writing… and the blue LED
flashes.
After the software image is downloaded to the IP Deskphone, the display shows
[FW] finished..., the blue LED stops flashing, and the IP Deskphone resets.
The IP Deskphone registers to the TPS with the new software version.
If the upgrade is unsuccessful, see the chapterDiagnostics and troubleshooting on
page 325 in the section Download failures.
Follow the next procedure to download the minimum required version of UNIStim software
automatically through TFTP on bootup.
Downloading UNIStim software automatically through TFTP on bootup
1. Press the Globe/Services key on the IP Deskphone twice quickly.
If the admin password prompt appears, enter the password 26567*738.
The Local Tools menu appears:
Table 11: Local Tools menu
1. Preferences
2. Local Diagnostics
3. Device Settings
4. Lock Menu
2. Select 3. Device Settings from theLocal Tools menu.
The Device Settings screen appears.
3. If you are using DHCP, select Yes.
If you are manually configuring the IP address, netmask, and gateway address,
select No.
4. If the DHCP option is configured, the IP address is automatically obtained.
5. Configure the TFTP IP address within the IP Deskphone Device Settings menu.
110
SIP Software for Avaya 1200 Series IP Deskphones-Administration
Comments? [email protected]
September 2013
Convert UNIStim software to SIP software on the IP Deskphone
This can be the provisioning server as defined in the chapter Configure the
provisioning server on page 39.
6. Select the Apply&Reset context-sensitive soft key to save the settings and reset
the IP Deskphone.
The IP Deskphone downloads the software file. The display shows [FW]
reading….
If the download is successful, the display shows [FW] writing… and the blue LED
flashes.
After the software image is downloaded to the IP Deskphone, the display shows
[FW] finished..., the blue LED stops flashing, and the IP Deskphone resets.
If the upgrade is unsuccessful, see the chapter Maintenance on page 321 in the
section Download failures.
Convert UNIStim software to SIP software on the
IP Deskphone
The Avaya 1200 Series IP Deskphone can be ordered with UNIStim software installed or with
SIP software installed. If an IP Deskphone is installed with UNIStim software, it runs with SIP
software only if the software is converted from UNIStim to SIP. If the procedure to determine
the UNIStim version number is completed, and, if necessary, the procedure to upgrade the
UNIStim software is completed, an IP Deskphone can be converted from UNIStim software to
SIP software.
Compare the version number to the minimum required UNIStim software version
(062AC5L ).
The conversion must be performed using TFTP.
Warning:
The TFTP download and upgrade of the Flash memory on the IP Deskphone can take a
significant amount of time (possibly up to 10 minutes). Do not unplug or reboot the
IP Deskphone during the process.
The following procedure explains how to download the SIP Software from the Avaya Web
site.
Downloading SIP software for the IP Deskphone from the Avaya Web site
1. Go to http://www.avaya.com/support
2. Log on to the Avaya Web site with a valid Avaya User ID and Password.
The Support page appears.
SIP Software for Avaya 1200 Series IP Deskphones-Administration
September 2013
111
Upgrade and convert the IP Deskphone software
3. Enter IP Deskphone type in the Knowledge and Solution Engine box.
4. Select SOFTWARE in the ALL TYPES scroll-down menu.
5. Press the gray arrow at the end of the Knowledge and Solution Engine box to
obtain the Search Results.
6. From the Search Results, select the appropriate version of the SIP software for
the IP Deskphone; for example, IP Phone 1230 Release
SIP12x004.01.03.00.bin.
7. Place the selected software on the provisioning server.
Perform the following procedure to convert the UNIStim software to SIP software on the
IP Deskphone.
Converting UNIStim software to SIP software using TFTP
1. Run the TFTP server (for example Tftpd32.exe).
2. Place software and configuration files in the folder of the TFTP server (for example
12xx.img F/W file and 12xx.cfg file) that contains the following lines:
Table 12: Sample 12xx.cfg configuration file
[FW]
DOWNLOAD_MODE AUTO
VERSION SIP12x004.01.03.00.bin
FILENAME 12xx.img
3. Configure the IP Deskphone Device Settings TFTP IP address to the IP address
where your TFTP server is running.
After you are finished the configuration, the IP Deskphone reboots and sends a
request to the TFTP server.
4. Select the Apply&Reset context-sensitive soft key to save the settings and reset
the IP Deskphone.
The following messages display on the IP Deskphone as the IP Deskphone cycles
through the conversion process, one after the other:
a. [FW] Reading...
b. [FW] Writing...
c. [FW] Finished...
The IP Deskphone then boots up with SIP Software.
If the conversion is unsuccessful, see the chapter Maintenance on page 321.
1. TFTP file transfer takes approximately 15 seconds.
2. File writing takes 2.5 minutes. The IP Deskphone displays the message [FW]
writing… and the blue Data Waiting LED flashes.
112
SIP Software for Avaya 1200 Series IP Deskphones-Administration
Comments? [email protected]
September 2013
Convert UNIStim software to SIP software on the IP Deskphone
3. After the new SIP software writing is finished, the blue LED stops flashing and
the IP Deskphone displays [FW] Finished.... and then reboots.
4. The first time the SIP software boots, the SIP software performs a Flash File
System conversion that takes 2.5 minutes.
SIP Software for Avaya 1200 Series IP Deskphones-Administration
September 2013
113
Upgrade and convert the IP Deskphone software
114
SIP Software for Avaya 1200 Series IP Deskphones-Administration
Comments? [email protected]
September 2013
Chapter 11: Voice Quality Monitoring
Feature overview
Proactive Voice Quality Monitoring (PVQMon or VQMon) allows an Avaya 1200 Series IP
Deskphone with SIP Software to report voice quality statistics to a server in the network. The
IP Deskphone with SIP Software collects various voice quality statistics, for example, packet
loss, and sends the voice quality statistics to the server at regular intervals during a call. A
subset of these statistics is also available for the user to view on the IP Deskphone by selecting
the Audio soft key and then the Monitor Audio Quality menu item.
VQMon set-up
Configure the following parameters on the IP Deskphone with SIP Software to connect to the
server and send the PVQMon statistics.
1. Enable the feature. To enable the feature, configure the VQMON_PUBLISH
parameter in the device configuration file (see VQMon configuration commands on
page 82).
2. Configure the IP address of the PVQMon server. Configure the IP address of the
PVQMon server in either of the following settings:
a. Configure VQMON_PUBLISH_IP through the device configuration file
(see VQMon configuration commands on page 82).
b. Configure PVQMon IP in Device Settings (see Table 46: PVQMon IP
configuration on page 143)
3. Configure the remainder of the VQMon parameters in the device configuration file
(see VQMon configuration commands on page 82). These parameters provide
threshold information to the IP Deskphone with SIP Software. A report is sent to the
server when these thresholds are exceeded.
SIP Software for Avaya 1200 Series IP Deskphones-Administration
September 2013
115
Voice Quality Monitoring
Server set-up
The IP Deskphone with SIP Software works with Telchemy server software. The name of the
software is SQmediator and is available through Telchemy (http://www.telchemy.com). The
minimum version required is release 1.0.
How VQMon works
The IP Deskphone with SIP Software gathers statistics about the current call when VQMon is
enabled. Statistics are also gathered regarding the quality metrics of the current call. The callrelated statistics contain condensed information about the SIP Session Description Protocol
(SDP), the Call ID, the local and remote address, voice quality-related statistics, Zulu times for
start-time and the time the report was sent.
The voice quality-related statistics include jitter, packet loss, delay, burst gap loss, listening Rfactor, R-LQ, R-CQ, MOS-LQ and MOS-CQ. See Table 13: Glossary of RTCP XR metrics on
page 116. More information on each of these metrics is provided in RFC3611 “RTP Control
Protocol Extended Reports (RTCP XR)”.
When the IP Deskphone detects that a particular voice quality metric has exceeded a threshold
(defined in the Device Configuration file), the IP Deskphone sends a message to the server
indicating that there is an issue. If the issue persists, then the IP Deskphone sends another
message indicating that there is an exceeded value at regular intervals. This happens
continuously until the voice quality metric falls below the threshold value. As well, the
IP Deskphone can send regular reports of the voice quality at time intervals defined in the
Device Configuration file.
Table 13: Glossary of RTCP XR metrics
Metric
116
Description
Burst
A period of high packet losses and / or
discards. A burst is calculated in
milliseconds.
Conversational R-factor
Voice quality metric based on burst packet
loss and vocoder selection.
Delay
One way delay which includes end-to-end
delay, jitter buffer delay and packetization
delay. Delay is calculated in milliseconds.
Inter-arrival jitter
The variation in packet arrival times due to
transmission (routing, queuing delay)
through the network. Jitter is calculated in
milliseconds.
SIP Software for Avaya 1200 Series IP Deskphones-Administration
Comments? [email protected]
September 2013
End of call report
Metric
Description
Listening R-factor
Voice quality metric based on burst packet
loss, transmission delay and burst loss.
MIU
Media Information Unit. MIU is a concept
from VQMon. An MIU can be any size down
to a 10 millisecond (8 sample) block. An MIU
means a frame in the i200x implementation.
MOS
Mean Opinion Score. A subjective
measurement of the voice quality of a voice
call.
MOS_CQ
The VQMon conversational quality MOS
score calculated for a call channel.
MOS_LQ
The VQMon listening quality MOS score
calculated for a call channel.
Packet loss rate
The percentage of total packets loss versus
packets received.
R-factor
A measurement of voice quality based on
network impairments including burst packet
loss, delay and encoding/decoding algorithm
selection.
End of call report
The IP Deskphone sends a report using VQMON Publish message to the proxy. The proxy
redirects the publish ID described within the report. An end-of-call report is always generated
if VQMON is enabled. The IP Deskphone does not negotiate or exchange messages with the
device defined using PUBLISH_IP options.
Session interval report
The IP Deskphone can send voice quality reports at time intervals defined in the Device
Configuration file. The minimum and default time interval is 60 seconds. If the IP Deskphone
sends session interval reports more frequently, then a threshold violation has occurred.
SIP Software for Avaya 1200 Series IP Deskphones-Administration
September 2013
117
Voice Quality Monitoring
Alert interval report
When the IP Deskphone detects that a voice quality metric has exceeded a threshold, the
IP Deskphone initiates a timer which sends a message to the server every 5 seconds. When
all voice quality metrics fall below the threshold values, the IP Deskphone stops sending
VQMON Publish messages with the report. The alert interval report does not differ from the
session interval reports or end-of-call reports.
118
SIP Software for Avaya 1200 Series IP Deskphones-Administration
Comments? [email protected]
September 2013
Chapter 12: Device Settings on the
IP Deskphone with SIP
Software
Important:
An Avaya 1200 Series IP Deskphone with SIP Software displays different menus than an IP Deskphone
with UNIStim software.
Introduction
This chapter describes how to configure the Device Settings parameters on the IP Deskphone
with SIP Software. This includes items such as the IP address, the subnet mask, and the
gateway IP address of the IP Deskphone.
The Device Settings parameters are listed below in the order they appear on the Device
Settings menu of the IP Deskphone with SIP Software. Read the section at the end of this
chapter that explains how to provision the Device Settings parameters. If you are familiar with
the Device Settings parameters, skip the last section in the chapter and proceed to the
provisioning instructions.
• Enable 802.1x (EAP)
• Device ID
• Password
• Enable 802.1ab (LLDP)
• DHCP: Yes, No
• SET IP
• Net Mask
• Gateway
• DNS IP1
• DNS IP2
• Ntwk Port Speed: Auto, 10BT, 100BT
• Ntwk Port Duplex: Auto, Force Full, Force Half
• Disable Voice 802.1Q
SIP Software for Avaya 1200 Series IP Deskphones-Administration
September 2013
119
Device Settings on the IP Deskphone with SIP Software
• Voice VLAN: No VLAN, Manual
• VLAN Filter
• Ctrl Priority bits: Auto, 0–7
• Media Priority bits: Auto, 0–7
• Disable PC Port
• PC Port Speed: Auto, 10BT, 100BT
• PC Port Duplex: Auto, Force Full, Force Half
• Disable Data 802.1Q
• Data VLAN: No VLAN, Manual (value from 1 to 4094)
• Data Priority bits: Auto, 0–7
• PC-Port Untag al
• Cached IP
• Ignore GARP
• Provisioning: Server URL, Protocol (TFTP/FTP/HTTP), Device ID, Password
• PVQMon IP
• NAT Traversal: NAT Signal (None/ SIP Ping/ STUN), NAT Media (None/ STUN), NAT
TTL, STUN S1 IP, STUN S2 IP
• SSH: Yes, No
• SFTP: Yes, No
802.1x (EAP) Port-based network access control
Extensible Authentication Protocol (EAP) supports multiple authentication methods and
represents a technology framework that facilitates the adoption of Authentication,
Authorization, and Accounting (AAA) schemes, such as Remote Authentication Dial In User
Service (RADIUS). RADIUS is defined in RFC2865. The IP Deskphone with SIP Software
supports only the MD5 authentication method.
802.1x defines the following three roles:
1. Supplicant—an IP Deskphone that requires access to the network to use network
services.
2. Authenticator—the network entry point to which the supplicant physically connects
(typically a Layer 2/3 switch). The authenticator acts as the proxy between the
supplicant and the authentication server. The authenticator controls access to the
network based on the authentication status of the supplicant.
3. Authentication server—performs authentication of the supplicant.
Enable and disable Network-level authentication through the EAP configuration menu.
120
SIP Software for Avaya 1200 Series IP Deskphones-Administration
Comments? [email protected]
September 2013
Authorization
The RADIUS server is the authentication server and performs the actual authentication of the
supplicant. The following EAP methods are supported:
• EAP-MDS on page 256
• EAP-TLS on page 257
• EAP-PEAP on page 257
The following options are available for the administrator:
• When EAP-MD5 is selected, the administrator is prompted to enter ID1 and Password
• When EAP-PEAP is selected, the administrator is prompted to enter ID1, ID2, and
Password. If the administrator enters only ID1, then ID2 contains same value of ID1.
• When EAP-TLS is selected, the administrator is prompted to enter ID1. If SCEP is used
to install the device certificate, the administrator is required to enter CA Server (URL of
the SCEP service), the Domain Name which the IP Deskphone belongs to and optionally
the Hostname.
• When Disabled mode is selected, the existing IDs and Passwords are erased.
Authorization
If 802.1x is configured and the IP Deskphone is physically connected to the network, the
IP Deskphone (supplicant) initiates 802.1x authentication by contacting the Layer 2/3 switch
(authenticator). The IP Deskphone also initiates 802.1x authentication after the Ethernet
connection (network interface only) is restored following a network link failure.
However, if the IP Deskphone resets, it assumes the Layer 2 link has remained in service and
is authenticated.
The IP Deskphone fails to authorize if the DeviceID and the IP Deskphone passwords do not
match the DeviceID and IP Deskphone passwords provisioned on the RADIUS Server. The
Layer 2 switch (authenticator) locks out the IP Deskphone and network access is denied. If
this happens during reauthorization, all phone services are lost. The connected PC operates
as normal.
Device ID
The Device ID is for use with the 802.1x (EAP) protocol. If the 802.1x (EAP) is not used, then
there is no prompt to enter the Device ID.
SIP Software for Avaya 1200 Series IP Deskphones-Administration
September 2013
121
Device Settings on the IP Deskphone with SIP Software
Password
The Password is for use with the 802.1x (EAP) protocol. If the 802.1x (EAP) is not used, there
is no prompt to enter the Password.
802.1ab Link Layer Discovery Protocol
802.1ab Link Layer Discovery Protocol (LLDP) is a standard for discovering the physical
topology between neighboring devices. 802.1ab LLDP defines a standard method for Ethernet
network devices, such as switches, routers, and IP Deskphones to advertise information about
themselves to other nodes on the network and to store the information they discover in a
Management Information Base (MIB).
802.1ab (LLDP) takes advantage of the VLAN Name and Network Policy TLVs, and provides
an automatic configuration of the IP Deskphone network policy parameters. Key parameters,
such as VLAN ID, L2 priority, and DSCP values are received from the switch and are
automatically configured in the IP Deskphone.
802.1ab Link Layer Discovery Protocol (LLDP) provides the following functionality
• Periodic transmission of advertisements containing device information, device
capabilities and media specific configuration information to neighbors attached to the
same network.
• Reception of LLDP advertisements from its neighbors.
• Implementation of behavioral requirements specified by Link Layer Discovery Protocol
Media Endpoint Discovery (LLDP-MED).
• Storage of received data in local data structures, for example, in MIB modules.
TLVs
The information fields in each MIB are contained in a Link Layer Discovery Protocol Data Unit
(LLDPDU) as a sequence of short, variable-length, information elements known as TLVs that
each include type, length, and value fields. Each LLDPDU includes several mandatory TLVs
plus optional TLVs. Optional TLVs may be inserted in any order.
The IP Deskphone supports both the transmit and receive LLDP mode.
Transmit direction:
An LLDPDU transmitted by the IP Deskphone supports the following TLVs:
122
SIP Software for Avaya 1200 Series IP Deskphones-Administration
Comments? [email protected]
September 2013
TLVs
1. Chassis ID
2. Port ID
3. Time To Live
4. End of LLDPPDU
5. Port Description
6. System Description
7. System Capabilities
8. Port VLAN ID
9. Port And Protocol VLAN ID
10. VLAN Name
11. Protocol Identity
12. MAC/PHY Configuration Status
13. Power Via MDI
14. Link Aggregation
15. Maximum Frame Size
16. LLDP-MED Capabilities
17. Network Policy
18. Extended Power-via MDI
19. Inventory Software Revision
20. Inventory Manufacturer Name
21. Inventory Model Name
Receive direction:
The IP Deskphone expects to receive the following TLVs:
1. Chassis ID
2. Port ID
3. Time To Live
4. End of LLDPPDU
5. System Capabilities
6. VLAN Name
7. MAC/PHY Configuration Status
8. LLDP-MED Capabilities
SIP Software for Avaya 1200 Series IP Deskphones-Administration
September 2013
123
Device Settings on the IP Deskphone with SIP Software
9. Network Policy
10. Location Identification
Table 14: TLV formats
TLV
Fields
Chassis ID
Length = 6
Chassis Subtype = 5 [IP Address]
Chassis ID = IP Deskphone IP Address
Port ID
Length = 7
Port Subtype = 3 [MAC Address]
Port ID = IP Deskphone MAC address
Time To Live
Length = 2
TTL= 180 [seconds]
End Of LLDPDU
Length = 0
Port Description
Length = 15
Port Description = “ IP Deskphone”
System Description
Length = the length of the system description string
System Description = “IP Deskphone, xxx, Software:
0604D97”
where: xxx = 1220, 1230
Software = software version. “0604D97” is an example
only.
System Capabilities
Length = 4
System capabilities = 0x24
[Deskphone + Bridge] Enabled capabilities = 0x24
If you disable the PC Ethernet port, the advertised
enabled capabilities configured to IP Deskphone only.
Port VLAN ID
PVID = 0
The IP Deskphone does not support port-based VLAN
operation.
Port And Protocol VLAN ID
PPVID = 0
Port and Protocol VLAN is not supported and not
enabled.
VLAN Name
VLAN name field is configured to “data” and “voice”.
Protocol Identity
1. STP: Protocol identity = the first 8 bytes of an STP
PDU starting with the Ethertype field.
Length = 8
Protocol Identity = 0x00 0x26 (type/length field of
Ethernet packet, size=38)
0x42 0x42 0x03 (LLC header indicating STP)
0x00 0x00 (Protocol Identity field from STP BPDU)
0x00
2. 802.1x: Length = 3
124
SIP Software for Avaya 1200 Series IP Deskphones-Administration
Comments? [email protected]
September 2013
TLVs
TLV
Fields
Protocol identity = 0x888E—(802.1x Ethertype)
0x01—(Version field from 802.1x frame)
3. LLDP: Length = 2
Protocol identity = 0x88CC—(LLDP Ethertype)
MAC/PHY Configuration/Status
Auto-negotiation support/status =
Bit 0 = 1 [Auto-negotiation supported]
Bit 1 = 1 or 0, depending on the current auto-negotiation
status, for example, either enabled or disabled.
PMD auto-negotiation advertised capability =
0x4000 - 10BASE-T half duplex mode
0x2000 - 10BASE-T full duplex mode
0x0800 - 100BASE-TX half duplex mode
0x0400 - 100BASE-TX full duplex mode
Operational MAU Type =
10 – UTP MAU, 10BT, half duplex mode
11 – UTP MAU, 10BT, full duplex mode
15 - 2-pair Category 5 (CAT5) UTP, 100BT, half duplex
mode
16 - 2-pair CAT5 UTP, 100BT, full duplex mode
Power Via MDI
MDI power support = 0:
Bit 0 = 0 – Powered Device
Bit 1 = 0 – PSE MDI power not supported
Bit 2 = 0 – PSE MDI power state disabled
Bit 3 = 0 – PSE pair selection can not be controlled
PSE power pair = 1
Power Class = 2 for /1220/1230 IP Deskphones
Power Class = 3 for 1120E/1140E/1165E IP
Deskphones
Link Aggregation
Aggregation status = 0; the link is not capable of being
aggregated, and currently is not in aggregation.
Aggregated Port ID = 0
Maximum frame size
The MAC/PHY supports an extension of the basic MAC
frame format for Tagged MAC frames. The maximum
frame size is configured to 1522.
LLDP-MED System Capabilities
Bit 0 = 1—LLDP-MED Capabilities–supported
Bit 1 = 1—Network Policy–supported
Bit 2 = 1—Location Identification–supported
Bit 3 = 0—Extended Power using MDI-PSE–not
supported
Bit 4 = 1—Extended Power using MDI-PD–supported
Bit 5 = 1—Inventory–supported
The Class Type field can be configured to 3 -Telephone
Network Policy Discovery
Application Type-1—voice
SIP Software for Avaya 1200 Series IP Deskphones-Administration
September 2013
125
Device Settings on the IP Deskphone with SIP Software
TLV
Fields
Unknown Policy Flag (U)—1 only if the policy is
unknown
Tagged Flag (T)—configure accordingly Reserved
(X)-0
VLAN ID—configure accordingly
L2 Priority—configure accordingly
DSCP Value—configure accordingly
Location Identification Discovery
Coordinate-based LCI–16 bytes
Civic Address LCI I–variable length
This format can have more than one address element
and one address element can range from a minimum of
7 to 256 bytes.
ECS ELIN I–variable between 10 and 25 bytes
Although location is received, it is not available to end
user in this release of the SIP Software.
Extended Power-via MDI
Discovery
Power Type = 01–PD Device
Power Source = 00–Unknown
There is no hardware support for determining the power
source.
Power Priority = 0010–High
Power Value = Maximum power required as shown
below:
1220 =
1230 =
Software Revision
Configure to the software version being used; for
example, 0604D97.
Manufacturer Name
“avaya-xy”,
where: xy is a 2-digit manufacturer code as shown
below:
1220: Code 04
1230: Code 04
Model Name
Contains a string, which specifies the IP Deskphone
model, for example, “IP Deskphone xxx”, where, xxx is
one of the following values: 1220, 1230.
DHCP
There are two methods of provisioning DHCP.
126
SIP Software for Avaya 1200 Series IP Deskphones-Administration
Comments? [email protected]
September 2013
NO DHCP mode
1. No DHCP (Manual configuration): All the Device Settings parameters are
configured manually on the IP Deskphone with SIP Software.
2. Yes: The IP Deskphone with SIP Software is configured to get a standard set of
Device Settings parameters from the DHCP server.
NO DHCP mode
No DHCP mode is also known as Manual Device Settings. In this mode, the IP Deskphone
does not need a DHCP server because no DHCP requests are sent during startup. All
necessary parameters must be configured manually or through the device configuration file.
The minimum following parameters must be configured to achieve normal operation:
• SET IP
• Net Mask
• Gateway
• DNS IP
• Provisioning server IP, protocol, and, if user authentication is required to access the
provisioning server, the user credentials
Note: TFTP protocol does not require user authentication. Device ID and password are
ignored. FTP protocol requires user authentication and the default Device ID is
anonymous with no password.
HTTP protocol can operate with or without user authentication. If no authentication is
required, make sure to clear the Device ID and password fields in the configuration
dialogue.
SET IP
Select SET IP in the Device Settings menu to configure the IP address.
Net Mask
Enter a subnet mask In the Net Mask field.
SIP Software for Avaya 1200 Series IP Deskphones-Administration
September 2013
127
Device Settings on the IP Deskphone with SIP Software
Gateway
Enter an IP address of the local gateway in the Gateway field.
DNS IP1 and DNS IP2
Configure the Domain Name Servers (DNS) IP addresses DNS IP1 and DNS IP2.
Ntwk Port Speed
There are three options to provision the network port speed.
• Auto – Link speed is auto negotiated with the network device and attached PC.
• 10BT – Link speed is available for up to 10 Megabit Full Duplex on the network and the
PC port.
• 100BT – Link speed is available for up to 100 Megabit Full Duplex on the network and
the PC port.
Ntwk Port Duplex
There are three options available to provision the Network Port Duplex for Network Port Speed
of 10BT or 100BT.
• Auto – duplex is autonegotiated. Avaya recommends that Auto Negotiate mode is used
on the network and the IP Deskphone.
• Force Full – duplex is forced to FULL. Use Force Full mode only when the network is
forced Full Duplex. Otherwise a duplex mismatch results.
• Force Half – duplex is forced to HALF. Use Force Half mode only when the network is
forced Half Duplex. Otherwise a duplex mismatch results.
128
SIP Software for Avaya 1200 Series IP Deskphones-Administration
Comments? [email protected]
September 2013
Disable Voice 802.1Q
Disable Voice 802.1Q
If 802.1Q is disabled, standard Ethernet frames are transmitted. If 802.1Q is enabled, all frames
transmitted by the Ethernet driver have the 802.1Q tag bytes inserted between the source MAC
address and the protocol type field.
Voice VLAN
Configure the Voice VLAN.
Table 15: Telephony Port (incoming)
Voice VLAN Setting
Result
No VLAN (default setting)
All telephony traffic that is transmitted on the
telephony port is forwarded untagged.
Manual (value from 1 to 4094)
All telephony traffic that is transmitted on the
telephony port has an 802.1q header
appended and its Voice VLAN ID is set to the
value manually configured here.
Enter a value from 1 to 4094.
VLAN Filter
Configure the VLAN Filter (not available if Voice VLAN is configured as No).
Table 16: VLAN Filter
VLAN Filter Setting
Enabled (box is checked)
Result
Traffic is forwarded to the IP Deskphone port,
based on a review of the MAC address of the
packet as well as the 802.1q tag value.
Traffic is forwarded through the
IP Deskphone port, (to the network stack of
the IP Deskphone), only if the packet
matches the MAC address of the
IP Deskphone and contains the Voice VLAN
tag. If the Automatic VLAN Discovery feature
is used, the filter is adjusted dynamically as
SIP Software for Avaya 1200 Series IP Deskphones-Administration
September 2013
129
Device Settings on the IP Deskphone with SIP Software
VLAN Filter Setting
Result
the IP Deskphone validates the VLAN
suggested by DHCP.
Disabled
The VLAN filter is disabled by default. If the
VLAN filter is disabled, traffic is forwarded to
the IP Deskphone port based only on a
review of the MAC address of the packet.
The IP Deskphone accepts traffic addressed
to the MAC address of the IP Deskphone as
well as any broadcast or multicast packets
from any VLAN.
Ctrl Priority bits
802.1Q priority bits for the control or signaling stream. There is not a control priority bit prompt
if 802.1Q is not enabled.
Media Priority bits
802.1Q priority bits for the media (audio) stream There is not a media priority bit prompt if
802.1Q is not enabled.
Disable PC Port
With a disabled PC Port, the IP Deskphone with SIP Software does not receive or send packets
to or from the PC port. No device can use the PC port to connect to the network.
Data VLAN
Configure the Data VLAN (the VLAN applicable to the PC port). The behavior of the PC port
is summarized in the following table.
130
SIP Software for Avaya 1200 Series IP Deskphones-Administration
Comments? [email protected]
September 2013
Data Priority bits
Table 17: PC Port (incoming traffic from PC)
Data VLAN
Result
No VLAN
All traffic received on the PC port is
forwarded based on the MAC address. The
packets are not modified in any way.
Manual (value from 1 to 4094)
All untagged packets received from the PC
have an 802.1q header appended and the
VLAN ID is configured to the value that is
manually provisioned in this field. Any packet
arriving on the PC port that is already tagged
with matching VLAN ID is forwarded as is.
Packets tagged with different VLAN IDs are
dropped.
Enter a value from 1 to 4094.
Table 18: PC Port (outgoing)
Data VLAN
No
Result
All traffic received on the network port and
telephony port is forwarded to the PC port
based on MAC address only. The packets
are not modified in any way.
4095 (Note that the value 4095 is not a valid Traffic is forwarded to the PC port based on
VLAN ID. This is intentional to ensure a
a review of the MAC address of the packet,
proper VLAN ID is entered.)
as well as the value configured in the Data
VLAN field. Traffic is forwarded out the PC
port (to the PC) only if the packets contain
the Data VLAN tag. Untagged traffic and
traffic with a VLAN tag other than the Data
VLAN are dropped.
Data Priority bits
There is not a prompt for data priority bits if 802.1Q is not enabled.
PC-Port Untag all
Configure PC-Port Untag-All, which configures PC-Port VLAN Tag Stripping.
SIP Software for Avaya 1200 Series IP Deskphones-Administration
September 2013
131
Device Settings on the IP Deskphone with SIP Software
When enabled, all outgoing traffic to the PC has the VLAN tag removed. When disabled,
packets are sent to the PC as is if Data VLAN is configured as No or if Data VLAN is enabled
and the VLAN tag matched. Packets with different VLAN ID are discarded.
Cached IP
Leave unchecked to conform to the DHCP standard and to obtain an IP address from the
DHCP server. Only check Cached IP to force the IP Deskphone to start with a cached IP
address in the event that the IP Deskphone cannot connect to the DHCP server and obtain an
IP address.
Port Speed and Duplex
In the Network menu, Auto Negotiation mode is the default setting for initial startup. Typically,
the IP Deskphone is connected to a network that supports Auto Negotiation, and the
IP Deskphone selects the best speed and duplex mode available. There is no intervention
required under normal operation.
Important:
Avaya recommends that Auto Negotiation mode is used on the network and the
IP Deskphone. Use Full Duplex mode only when the entire network is running in Full Duplex
mode. Otherwise, a duplex mismatch results.
If the IP Deskphone is connected to a network configured for Full Duplex mode only, the
IP Deskphone cannot automatically negotiate the proper configuration. Therefore, in this
instance, to allow the IP Deskphone to work at the optimum speed and duplex mode, Full
Duplex mode must be enabled.
Ignore GARP
Gratuitous Address Resolution Protocol (GARP) Protection prevents the IP Deskphone with
SIP Software from GARP spoof attacks on the network.
The IP Deskphone with SIP Software provides the ability to ignore GARP messages.
132
SIP Software for Avaya 1200 Series IP Deskphones-Administration
Comments? [email protected]
September 2013
Provisioning
Provisioning
The next four menu items apply to configuring the provisioning parameters.
Server URL
Enter the numeric IP address, name, or URL of the provisioning server in the Server URL
box.
Protocol
Select the protocol used to access the provisioning server, either TFTP, FTP, or HTTP.
Device ID
Enter the Device ID (User ID) used by the provisioning server for authentication of the
IP Deskphone with SIP Software.
Password
Enter the password used by the provisioning server for authentication of the IP Deskphone
with SIP Software.
PVQMon IP
If the Proactive Voice Quality Monitor (PVQMon) server is available on the network, enter the
PVQMon IP address.
NAT Traversal
The next five menu items apply to configuring the NAT Traversal Method if the IP Deskphone
with SIP Software is connected to the network through a Network Address Translation device
or a firewall.
NAT Signal
The IP Deskphone with SIP Software supports two methods of NAT traversal of signaling path:
SIP_PING and STUN.
The default NAT traversal method is None.
SIP_PING is a legacy Avaya Proprietary protocol for NAT Traversal for SIP signaling only.
STUN is an Internet standard for NAT traversal.
If the value for NAT traversal is not configured as None, this parameter overrides the value of
the parameter SIP_PING specified by the device configuration file for NAT_SIGNALLING.
SIP Software for Avaya 1200 Series IP Deskphones-Administration
September 2013
133
Device Settings on the IP Deskphone with SIP Software
If the value for NAT traversal is set to None, the value of SIP_PING, if specified by the device
configuration file for NAT_SIGNALLING, is used instead.
NAT_SIGNALLING is required for networks that use STUN or SIP_PING for NAT traversal.
NAT Media
The IP Deskphone with SIP Software supports STUN for media path the NAT traversal. The
NAT Media feature can be disabled by setting the NAT_Media field in Device Settings menu
to NONE.
Note:
STUN protocol cannot coexist with Application Layer Gateway (ALG), Media Portals, or RTP
Proxy servers. If STUN is selected, ensure none of these devices are configured in the SIP
Proxy server.
NAT TTL
Enter the Time to Live (TTL) in seconds for the NATport if STUN is enabled. The IP Deskphone
with SIP Software pings the open ports on an interval less than the TTL to prevent the NAT
from tearing down the ports.
STUN S1 IP
Enter an IP address for the STUN S1 IP device. The STUN server must reside in the public
Internet for STUN protocol to be effective.
STUN S2 IP
Enter an IP address for the STUN S2 IP device. The STUN server must reside in the public
Internet for STUN protocol to be effective.
Configure the device settings
This section describes how to provision the Device Settings parameters regardless of DHCP
mode (Yes or No DHCP). Parameters that are not needed in Yes DHCP mode are grayed out
on the IP Deskphone screen and cannot be modified.
Perform the following procedure to provision theDevice Settings parameters on the
IP Deskphone with SIP Software.
Provisioning the Device Settings parameters
1. Press the Globe/Services key on the IP Deskphone quickly twice. The Network
menu appears:
Table 19: Network menu
1. Server Settings
2. Device Settings
134
SIP Software for Avaya 1200 Series IP Deskphones-Administration
Comments? [email protected]
September 2013
Configure the device settings
3. Diagnostics
4. Lock
2. To navigate in the Network menu, use the Navigation key cluster:
Table 20: Using the Navigation key cluster to navigate in the Network menu
Key
Action
Down
Moves highlight down
Up
Moves highlight up
Right
Selected current menu item
Left
Closes menu
Select key (center of cluster)
Selects current menu item
Menu items can also be accessed through the IP Deskphone keypad. Press the
number (1 to 4) corresponding to a menu item to highlight that menu item. Press
the Select key to select the highlighted menu item.
To close this menu, use the Quit key.
3. In the Network, choose 2. Device Settings.
4. Enter the admin password. Press the OK context-sensitive soft key.
5. Use the Navigation key cluster to edit an item:
Table 21: Using the Navigation key cluster to navigate in the Device Settings
menu
Key
Action
Down
Opens list or moves highlight down list.
Up
Moves highlight up list.
Right
Selects the next item or moves the cursor
right in an edit item.
Left
Selects the previous item or deletes a
character in the edit field.
Select key (center of cluster)
Selects the highlighted item in the combo
box or ends edit mode.
In Edit mode, the first field of the item is highlighted.
Press the Apply&Reset context-sensitive soft key to save settings in the Device
Settings menu after all the necessary changes are made. This action resets the
IP Deskphone.
SIP Software for Avaya 1200 Series IP Deskphones-Administration
September 2013
135
Device Settings on the IP Deskphone with SIP Software
Press the Return context-sensitive soft key to exit the Device Settings menu without
saving any changes.
6. Navigate to the first item in the Device Settings menu to configure EAP.
Table 22: EAP configuration
Enable 802.1x (EAP): □
Device ID:
Password:
A check mark appears in the check box if the item is active.
7. If the Enable 802.1x (EAP) check box is checked, fill in the Device ID and the
Password.
8. Configure 802.1ab Link Layer Discovery Protocol Data (LLDP) in the Enable
802.1ab (LLDP) menu.
Use the right arrow in the Navigation key cluster to highlight the Enable 802.1ab
(LLDP) box.
A check mark appears in the check box if the item is active.
Table 23: 802.1ab configuration
Enable 802.1ab (LLDP): □
9. Configure DHCP in the Device Settings menu.
Use the right arrow in the Navigation key cluster to highlight the DHCP box. Press
the Select key to access a list of DHCP mode choices:
• Yes
• No
Scroll through the list with the Up/Down arrows and select the appropriate
parameter. Press the Select key to select No.
Table 24: DHCP configuration
DHCP :
No
▼
No
Yes
10. If DHCP is disabled, select SET IP in the Device Settings menu to configure the IP
address.
Table 25: SET IP configuration
SET IP : 0.0.0.0
136
SIP Software for Avaya 1200 Series IP Deskphones-Administration
Comments? [email protected]
September 2013
Configure the device settings
11. If DHCP is disabled, configure Net Mask and Gateway. Enter a subnet mask in the
Net Mask field and enter the IP address of the local gateway in the Gateway field.
Table 26: Net Mask and Gateway configuration
Net Mask : 0.0.0.0
Gateway : 0.0.0.0
12. If DHCP is not Full DHCP, to configure the DNS enter the IP address of the local
DNS servers DNS IP1 and DNS IP2.
Table 27: DNS configuration
DNS IP1 : 0.0.0.0
DNS IP2 : 0.0.0.0
13. Configure Ntwk Port Speed in the Device Settings menu.
Use the right arrow in the Navigation key cluster to highlight the Ntwk Port Speed
box. Press the Select key to access a list of Ntwk Port Speed choices:
• Auto
• 10BT
• 100BT
Scroll through the list with the Up/Down arrows and select the appropriate
parameter. Press the Select key to select a Ntwk Port Speed.
Table 28: Ntwk Port Speed configuration
Ntwk Port Speed :
Auto
▼
Auto
10BT
100BT
14. Configure Ntwk Port Duplex in the Device Settings menu.
Use the right arrow in the Navigation key cluster to highlight the Ntwk Port Duplex
box. Press the Select key to access a list of Ntwk Port Duplex choices:
• Auto
• Force Full
• Force Half
Scroll through the list with the Up/Down arrows and select the appropriate
parameter. Press the Select key to select Ntwk Port Duplex.
Table 29: Ntwk Port Duplex configuration
Ntwk Port Duplex :
Auto
SIP Software for Avaya 1200 Series IP Deskphones-Administration
▼
September 2013
137
Device Settings on the IP Deskphone with SIP Software
Auto
Force Full
Force Half
15. Disable Voice 802.1Q . Press the Select key to disable Voice 802.1Q.
A check mark in the Disable Voice 802.1Q box indicates that Voice 802.1Q is
disabled.
Table 30: Voice 802.1Q configuration
Disable Voice 802.1Q: □
16. Configure Voice VLAN.
Use the right arrow in the Navigation key cluster to highlight the Voice VLAN box.
Press the Select key to access a list of Voice VLAN mode choices.
Scroll through the list with the Up/Down arrows and select the appropriate
parameter. Press the Select key to select the parameter.
Voice VLAN:
No VLAN
▼
17. Enable or disable the VLAN Filter. Press the Select key to enable the VLAN
Filter.
A check mark in the VLAN Filter box indicates that the VLAN Filter is enabled.
Table 31: VLAN Filter configuration
VLAN Filter : □
18. If 802.1Q is enabled, configure Ctrl Priority bits.
Use the right arrow in the Navigation key cluster to highlight the Ctrl Priority bits
box. Press the Select key to access a list of Ctrl Priority bits choices.
Scroll through the list with the Up/Down arrows and select the appropriate
parameter. Press the Select key to select the parameter.
Table 32: Ctrl Priority bits configuration
Ctrl Priority bits :
Auto
▼
Auto
Value from 0 to 7
19. If 802.1Q is enabled, configure Media Priority bits.
Use the right arrow in the Navigation key cluster to highlight the Media Priority bits
box. Press the Select key to access a list of Media Priority bits choices.
138
SIP Software for Avaya 1200 Series IP Deskphones-Administration
Comments? [email protected]
September 2013
Configure the device settings
Scroll through the list with the Up/Down arrows and select the appropriate
parameter. Press the Select key to select the parameter.
Table 33: Media Priority bits configuration
Media Priority bits :
Auto
▼
Auto
Value from 0 to 7
20. Disable PC Port configuration. Press the Select key to turn off the PC port on the
IP Deskphone.
A check mark in the Disable PC Port box indicates the PC port is disabled.
Disable PC Port can be used in an environment where administrators do not want
users accessing the data network through the built-in PC port.
Table 34: Disable PC Port configuration
Disable PC Port : □
21. If the PC port is not disabled, configure PC Port Speed in the Device Settings
menu.
Use the right arrow in the Navigation key cluster to highlight the PC Port Speed
box. Press the Select key to access a list of PC Port Speed choices:
• Auto
• 10BT
• 100BT
Scroll through the list with the Up/Down arrows and select the appropriate
parameter. Press the Select key to select a PC Port Speed.
Table 35: PC Port Speed configuration
PC Port Speed :
Auto
▼
Auto
10BT
100BT
22. If the PC port is not disabled, configure PC Port Duplex in the Device Settings
menu.
Use the right arrow in the Navigation key cluster to highlight the PC Port Duplex
box. Press the Select key to access a list of PC Port Duplex choices:
• Auto
• Force Full
SIP Software for Avaya 1200 Series IP Deskphones-Administration
September 2013
139
Device Settings on the IP Deskphone with SIP Software
• Force Half
Scroll through the list with the Up/Down arrows and select the appropriate
parameter. Press the Select key to select PC Port Duplex.
Table 36: PC Port Duplex configuration
PC Port Duplex :
Auto
▼
Auto
Force Full
Force Half
23. Disable Data 802.1Q . Press the Select key to disable Data 802.1Q.
A check mark in the Disable Data 802.1Q box indicates that Data 802.1Q is
disabled.
Table 37: Data 802.1Q configuration
Disable Data 802.1Q: □
24. Configure the Data VLAN.
It is possible to Enable or disable separate VLAN for anything other than voice and
signaling.
Use the right arrow in the Navigation key cluster to highlight the Data VLAN box.
Press the Select key to access a list of Data VLAN mode choices:
Scroll through the list with the Up/Down arrows and select the appropriate
parameter. Press the Select key to select the parameter.
Table 38: Data VLAN Configuration in Device Settings menu
Data VLAN :
LLDP VLAN NAME
▼
No VLAN
LLDP VLAN NAME
Value from 1 to 4094
If 802.1ab (LLDP) is disabled, Data VLAN cannot be automatically configured. LLDP
VLAN NAME does not appear in the in the list of Data VLAN mode choices.
25. If 802.1Q is enabled, configure Data Priority bits.
Use the right arrow in the Navigation key cluster to highlight the Data Priority
bits box. Press the Select key to access a list of Data Priority bits choices:
Scroll through the list with the Up/Down arrows and select the appropriate
parameter. Press the Select key to select the parameter.
140
SIP Software for Avaya 1200 Series IP Deskphones-Administration
Comments? [email protected]
September 2013
Configure the device settings
Table 39: Data Priority bits configuration
Data Priority bits :
Auto
▼
Auto
Value from 0 to 7
26. Configure PC-Port Untag-All, which configures PC-Port VLAN Tag Stripping. Check
the check box by pressing the Select key in the Navigation key cluster to enable
this item.
If the check box is not checked, tag stripping is disabled and the packet is sent to
the PC port unmodified. If the check box is checked, tag stripping is enabled and
the 802.1q header is removed (assuming one exists) from the packet before it is
forwarded through the PC port.
If Data VLAN is enabled in step 15, PC-Port Untag All is enabled and the check box
is checked by default. In this case, the outgoing tag is stripped. Override the default
by pressing the Select key to remove the checkmark.
If Data VLAN is disabled, PC-Port Untag All is disabled and the check box is not
checked by default. In this case, the ingress tag is not stripped. The default can be
overridden by pressing the Select key, which places a checkmark in the box.
Table 40: PC-Port Untag-All Configuration in Device Settings menu
PC-Port Untag all : □
27. Configure Cached IP.
Leave unchecked to conform to the DHCP standard and to obtain an IP address
from the DHCP server. Only check Cached IP to force the IP Deskphone to start
with a cached IP address in the event that the IP Deskphone cannot connect to the
DHCP server and obtain an IP address.
To force the IP Deskphone to start with a cached IP address, press the Select
key.
A check mark in the Cached IP box indicates that the IP Deskphone is forced to
start with a cached IP address.
Table 41: Cached IP configuration
Cached IP: □
28. Configure the Ethernet port mode.
• Ignore GARP: GARP requests handling. The default can be overridden by
pressing the Select key, which places a check mark in the box.
Table 42: Ethernet port mode configuration
Ignore GARP: □
SIP Software for Avaya 1200 Series IP Deskphones-Administration
September 2013
141
Device Settings on the IP Deskphone with SIP Software
29. Enter Provisioning Parameters: Server URL, Protocol, Device ID, and Password.
The next four tables show menu items in the Device Settings menu that apply to
configuring the Provisioning parameters.
• Server URL: Enter the URL of the provisioning server in the Provisioning
Server URL box.
Provisioning Server URL: 0.0.0.0
• Protocol: Select either TFTP, FTP, or HTTP used for provisioning in the
Protocol box.
Table 43: Protocol configuration
Protocol:
TFTP
TFTP
FTP
HTTP
• Device ID: Enter the Device ID used by the provisioning server for
authentication of the IP Deskphone.
Note:
TFTP does not require a Device ID. If FTP or HTTP are used, enter the
information for a Device ID
Note:
Enter your User ID as the Device ID.
Table 44: Device ID configuration
Device ID :
XXXXXXXXX
• Password: Enter the password used by the provisioning server for
authentication of the IP Deskphone.
Note:
TFTP does not require a password. FTP and HTTP do require a
password.
Table 45: Password configuration
Password :
XXXXXXXXX
30. Configure the PVQMon IP address.
142
SIP Software for Avaya 1200 Series IP Deskphones-Administration
Comments? [email protected]
September 2013
Configure the device settings
If this server is available on the network, enter the PVQMon IP address.
Table 46: PVQMon IP configuration
PVQMon IP :
0. 0. 0. 0
31. Configure the NAT Traversal Method. Use one of the following methods to traverse
Network Address Translation (NAT) devices for the IP Deskphone with SIP
Software.
The next five tables show menu items in the Device Settings menu that apply to
configuring the NAT Traversal Method.
• NAT Signal
Select either None, SIP_PING, or STUN to define the NAT traversal mode for
SIP signaling.
Table 47: NAT Signal configuration
• NAT Media
Select either None or STUN to define NAT traversal mode for signaling.
Table 48: NAT media configuration
NAT
Media :
STUN
None
STUN
• NAT TTL:
Enter the Time to Live (TTL) in seconds for the NAT traversal.
Table 49: NAT TTL configuration
NAT TTL :
000
• STUN S1 IP:
Enter an IP address for the STUN S1 IP device.
Table 50: STUN S1 IP configuration
STUN S1 IP :
00. 00. 00. 00
SIP Software for Avaya 1200 Series IP Deskphones-Administration
September 2013
143
Device Settings on the IP Deskphone with SIP Software
• STUN S2 IP:
Enter an IP address for the STUN S2 IP device.
Table 51: STUN S2 IP configuration
STUN S2 IP :
144
00. 00. 00. 00
SIP Software for Avaya 1200 Series IP Deskphones-Administration
Comments? [email protected]
September 2013
Chapter 13: Multiple Appearance Directory
Number
The Multiple Appearance Directory Number (MADN) feature operates differently depending on the type
of Communication Server. For instance, the MADN feature operates differently on the Communication
Server 2000 than the Communication Server 1000. For more information about the MADN feature and
how it operates on the communication servers, see the following sections:
• Communication Server 1000 on page 145
• Communication Server 2000 and Communication Server 2100 on page 147
Communication Server 1000
CS 1000 Multiple Appearance Directory Numbers (MADN) provides the following features:
• Several devices (TNs) share a common Directory Number (DN).
• When the DN receives a call, all devices ring.
• You can configure two call arrangements; Single Call Arrangement (SCA) and Multiple
Call Arrangement (MCA).
Single Call Arrangement
Single Call Arrangement (SCA) MADN allows only a single active call on the DN, regardless
of the number of DN appearances:
• A call on a DN appearance makes all other appearances busy (they cannot receive or
make calls).
• Activity on one DN appearance reflects on other appearances; this is achieved by using
the Event Dialog SIP feature. For more information, refer to RFC 4235.
• SCA MADN provides Automatic Privacy for telephones that share a DN. When a call is
in progress on the DN, no other telephone on which the DN appears can bridge into the
call, unless the call is put on hold
• Telephones with a Privacy Override Allowed (POA) Class of Service can bridge into an
established call on an SCA MADN. However, you cannot bridge into a call until the call
establishes.
• Any user with the MADN SCA feature can put a call on hold. Any other user in the group
can pick up the held call by accessing the line key with SCA provisioned.
• The state of the user’s group is reflected in the line key icon. Three states are available;
idle, active, and held. For more information about line key icons, see the applicable IP
Deskphone User Guide.
SIP Software for Avaya 1200 Series IP Deskphones-Administration
September 2013
145
Multiple Appearance Directory Number
Figure 12: SCA MADN
Multiple Call Arrangement
Multiple Call Arrangement (MCA) MADN allows as in-progress calls as there are appearances
of the DN:
• A call on a DN appearance does not make other appearances busy (they can receive or
make calls).
• Activity on one DN appearance does not reflect on other appearances.
• There is no simple method for a DN appearance to bridge into or pick up a call on another
DN appearance.
Figure 13: MCA MADN
The MADN SCA feature for CS 1000 requires you to configure PROMPT_AUTHNAME_ENABLE
to YES in the device configuration file. This prompts the end user to enter an Authentication ID
that is different from the Login ID.
The following example shows a TN configured for SCA MADN:
TN 100 0 0 1
UEXT/SIPL
With:
SIPU user1
SCPW xxxx
146
SIP Software for Avaya 1200 Series IP Deskphones-Administration
Comments? [email protected]
September 2013
Communication Server 2000 and Communication Server 2100
KEY 0 SCR 8000
KEY 1 HOT U xxxx
The following example shows a TN configured for MCA MADN:
TN 100 0 0 2
UEXT/SIPL
With:
SIPU user2
SCPW xxxx
KEY 0 MCR 8001
KEY 1 HOT U xxxx
Note:
You must enter 8000/8001 as the Login ID and user1/user2 as the Authentication ID when
you register to a corresponding user on an IP Deskphone.
Communication Server 2000 and Communication Server
2100
The MADN feature allows a Directory Number (DN) to appear on more than one IP Deskphone
with SIP Software. The MADN with Single Call Arrangement (SCA) feature allows multiple IP
Deskphones to appear as a single line to a caller. Any one of the IP Deskphone phones in a
group with MADN can initiate or answer a call, but only one call can be active at any given
time. Any other user in the group can join the active call by picking up the handset of the IP
Deskphone with SIP Software.
With the MADN SCA feature configured on multiple phones of different registered SIP users,
the phones share one single DN. An incoming call to this DN causes all the phones in the group
to ring.
Any user of an IP Deskphone with the MADN SCA feature can put a call on hold or can prevent
others from joining in the active call.
If a user’s group is active (as seen by line icon being off-hook) and the user picks up the
handset, the user is automatically joined to an ongoing MADN call (unless the server restricts
this feature for privacy or other factors).
Vertical services
Vertical services are CS 2000 and CS 2100 features that can be activated or deactivated by
dialing a defined code; for example, Privacy. Even though no more than one active session
can be established for the MADN SCA group, members of the group can still enter certain
vertical services.
Currently, the available vertical service is Privacy.
SIP Software for Avaya 1200 Series IP Deskphones-Administration
September 2013
147
Multiple Appearance Directory Number
Privacy
A user can activate the privacy service by putting the current session on hold and dialing the
privacy code. The CS 2000 connects the IP Deskphone to the Avaya Media Server (MS) to
hear a confirmation for its request and terminates the session. The user takes the original
session off hold.
Privacy access codes
The privacy access codes are: PRV, PRLA, PRLC. For example: PRV = 191 PRLA = 192
PRLC = 193 If the initial state of the MADN group is nonprivate , the PRV access code is used
to toggle between privacy on and privacy off. If the initial state of the MADN group is private,
the PRLA access code allows bridging and PRLC closes it.
Feature dependencies and restrictions
The minimum release to support MADN SCA feature is 1.1. Multi-User login is not
supported.
148
SIP Software for Avaya 1200 Series IP Deskphones-Administration
Comments? [email protected]
September 2013
Chapter 14: Multiuser
The Multiuser feature allows multiple SIP user accounts to be in use on the IP Deskphone at the same
time. Multiple users, each with their own account, can share a single IP Deskphone allowing each user
to receive calls without logging off other users. One user can have multiple user accounts (for example,
a work account and a personal account) active at the same time on the same IP Deskphone. You can
register each account to a different server, and for each account, the IP Deskphone exposes the
functionality available to that account.
One account is considered a primary account and is used by default for most IP Deskphone operations.
Each account is associated to a line key; the primary account is always on the bottom right line key of the
IP Deskphone, and an arbitrary key (including a key on an Expansion Module) can be selected for
additional accounts.
You can use the line key to do the following:
• start dialing
• place a call using the corresponding user account
• to answer an incoming call targeted to that account
Initiating a call without pressing a line key (for example, by dialing digits at the idle screen and lifting the
handset) uses the primary account.
A running IP Deskphone is associated to a single profile that represents one configuration of the IP
Deskphone with all relevant persistent data such as preferences and call logs. A different profile is
associated to each account used as a primary account. The IP Deskphone can store up to five different
profiles; the IP Deskphone takes data from the profile associated to the current primary account. A number
of configurations are independent of profiles and tied directly to an account making them available to that
account regardless of the primary account you use (for example, voice mail ID).
The IP Deskphone receives and answers calls targeted at any of the registered accounts; the incoming
call screen indicates who the call is for. You can place an outgoing call using any of the accounts; the
account that you use is displayed on the dialing screen. When a call is active, information from both local
and remote parties appear on the screen.
Regardless of which account receives the call, incoming call logs, outgoing call logs, and instant messages
appear in a single list. The IP Deskphone indicates the local user in the detailed view of the entry.
Some features are only available to the primary account, such as instant messaging, retrieving parked
calls by token, and establishing ad-hoc conference calls.
If you log off of the primary account, the IP Deskphone unregisters all other accounts at the same time.
These accounts are registered automatically after you log on the primary account (it is possible to use a
different primary account to log on) again. When the IP Deskphone restarts, all accounts that were logged
in before the IP Deskphone restarted, are automatically logged back on. The provisioning server can also
configure the users who are allowed to log on to the IP Deskphone.
SIP Software for Avaya 1200 Series IP Deskphones-Administration
September 2013
149
Multiuser
Navigation
• Configuration on page 150
• Initial logon on page 151
• Additional logons on page 152
• Automatic logon on page 152
• Logging off on page 153
• Primary account logout on page 153
• Secondary account logout on page 154
• Server failover on page 154
• Cable unplugged on page 154
• Line keys on page 155
• Making a call on page 156
• Receiving a call on page 156
• Being in a call on page 157
• Instant messages on page 158
• Menu features on page 158
• Modifying settings on page 158
• Programmable keys on page 160
• Inbox, outbox, and instant message log on page 160
• Address Books on page 161
• User status on page 162
• Notifications on page 165
• Account selection on page 165
• Feature dependencies and restrictions on page 166
• Performance characteristics on page 166
• CS 1000 Several keys with the same DN on a TN on page 166
Configuration
Depending on server policy, the Multiuser feature can require you to configure the
PROMPT_AUTHNAME_ENABLE value to YES in the device configuration file. This enables a
150
SIP Software for Avaya 1200 Series IP Deskphones-Administration
Comments? [email protected]
September 2013
Initial logon
prompt that requires you to enter an Authentication ID that is different from the Login ID. For
example, CS 1000 requires an Authentication ID to find a corresponding TN and a Login ID to
find a key; enabling PROMPT_AUTHNAME_ENABLE creates a prompt for the authentication
ID.
When you configure Multiuser, consider the following parameters:
• MAX_LOGINS represents the number of user accounts that can log on at the same time.
Configure MAX_LOGINS to any value greater than one; the default is 24.
• Configure DOD_ENABLE to NO; a secondary user cannot log on if DOD_ENABLE is enabled.
The default value is NO.
• The SELECT_LAST_INCOMING parameter determines call selection when multiple calls
are in the Ringing state. If you configure SELECT_LAST_INCOMING to NO, the first
selected call remains the selected call as new calls are added to or drop from the list of
ringing calls. If you configure this value to YES, the selected call becomes the ringing call
last added to the list. The default value is NO.
Initial logon
To logon for the first time, you must enter a user name and password, and specify if the logon
is permanent or not. On the logon screen, you can choose which domain you want to access,
and change the language you want to use. You can use the Domain key only to select a domain
from the configured list; you cannot modify domains.
Figure 14: Primary logon screen
After you log on, the idle screen appears on the IP Deskphone. If there is no profile for the
primary account, the IP Deskphone automatically creates a profile. You can create up to five
profiles. If you exceed the limit of five profiles, the IP Deskphone automatically deletes the least
recently-used profile.
Similarly, configurations for each user of the primary account are loaded after a user logs on
to the IP Deskphone. The configurations are independent of the profile; if the account you use
is registered as the secondary account (not the primary account), the IP Deskphone uses the
configurations of the primary account. The IP Deskphone keeps up to 24 sets of configurations
SIP Software for Avaya 1200 Series IP Deskphones-Administration
September 2013
151
Multiuser
(one set for each user). If you exceed the limit of 24 sets of configurations, the IP Deskphone
automatically deletes the least recently-used set, and a new account is registered.
Additional logons
The Login command in the System menu allows you to register additional accounts. If you log
on as a secondary user, you cannot change the language selection.
The following figure shows the secondary logon screens.
Figure 15: Example of secondary logon screens
You can specify a Line Key for a new account. By default, the IP Deskphone selects the first
unused key. If the IP Deskphone reaches the configured limit on concurrent logons and you
select the Login command, an error message appears.
During the logon operation, a login in progress message appears on the IP Deskphone
screen. The IP Deskphone can receive calls for user accounts that are registered; however,
other features are not available until the logon process is complete. The IP Deskphone does
not display a profile selection prompt and does not create a profile for the secondary
account.
Automatic logon
Use the following configuration options to determine the behavior of the automatic logon
feature:
• AUTOLOGIN_ENABLE NO: This configuration requires you to enter the Login ID,
Authentication ID, and password for each user every time there is a restart of the IP
Deskphone.
• AUTOLOGIN_ENABLE YES: If the IP Deskphone is switched off, you are automatically
logged back on when you restart the IP Deskphone. If multiple users are logged on when
152
SIP Software for Avaya 1200 Series IP Deskphones-Administration
Comments? [email protected]
September 2013
Logging off
the IP Deskphone is switched off, the IP Deskphone automatically logs all users back on
when you restart the IP Deskphone.
• AUTOLOGIN_ENABLE USE_AUTOLOGIN_ID: You do not enter user credentials; the
system administrator pre-configures the IP Deskophone using an IP Deskphone-specific
file. The following example shows a SIP provisioning file:
[USER_CONFIG]
DOWNLOAD_MODE FORCED
VERSION 000001
PROMPT NO
IP Deskphone-specific configuration file
AUTOLOGIN_ID_KEY01 [email protected]
AUTOLOGIN_AUTHID_KEY01 user1
AUTOLOGIN_PASSWD_KEY01 1234
The IP Deskphone uploads a phonespecific file in the format SIP{MAC Id}.cfg
AUTOLOGIN_ID_KEY02 [email protected]
AUTOLOGIN_AUTHID_KEY02 user1
AUTOLOGIN_PASSWD_KEY02 1234
Logging off
The Logout command in the System submenu, prompts you to select an account, asks for
confirmation, and then proceeds to log off the account. Logging off an account frees the
corresponding Line key and does not require a password.
Figure 16: Example of log off screens
Primary account logout
Logging off the primary account causes all other accounts to log off automatically and the IP
Deskphone to display the logon screen. The IP Deskphone logs back in the secondary
accounts automatically after you register a new primary account or the same primary
account.
SIP Software for Avaya 1200 Series IP Deskphones-Administration
September 2013
153
Multiuser
If you restart the IP Deskphone after you logged off the primary account, the logon screen
appears on the IP Deskphone. Logging on a new primary account leads to automatic logon of
the secondary accounts.
The list of programmed feature keys is part of the IP Deskphone profile. Logging off one primary
account and logging on a different account can change the set of feature keys. If a secondary
account is assigned to a key that is also in the new set of feature keys, the secondary account
takes precedence; the secondary account is logged on and the feature key acts as a Line key.
If the account is logged off manually, the programmed feature key becomes available.
Secondary account logout
If you log off a secondary account by selecting the secondary account in the Logout Select
User screen, the IP Deskphone removes the secondary account from the autologon list. After
you restart the IP Deskphone, the IP Deskphone does not logon the secondary account.
Server failover
If the connection to your account proxy is lost, the IP Deskphone notifies your account and
periodically attempts to reconnect. Some features, such as incoming calls, remain accessible
for other accounts, but other features are not available until connection is reestablished or you
cancel the reconnection. Cancelling the connection to your account is the same as logging off.
If you are using the primary account, the IP Deskphone returns you to the initial logon screen.
If you are using a secondary account, that secondary account is removed from the list of
secondary accounts that are logged on automatically.
If more than one account loses connection, the IP Deskphone attempts to reconnect to each
account in sequence. The IP Deskphone tries to reconnect the first account to lose connection
until that account reregisters or you cancel the attempt. Then the IP Deskphone attempts to
reconnect the next account that lost connection. Cancelling the reconnection of the primary
account immediately abandons reconnection of all other accounts, logs off secondary accounts
that are still connected, and returns the IP Deskphone to the logon screen.
The IP Deskphone uses a single logon queue for automatic logons and failover. This means
that if automatic logons are still pending when an account cannot connect, a reconnection
attempt for that account can only begin after all automatic logons are complete or cancelled.
Cable unplugged
If the IP Deskphone detects that the network cable is unplugged while accounts are logged
on, the IP Deskphone assumes that all accounts have lost their connection to the server. When
154
SIP Software for Avaya 1200 Series IP Deskphones-Administration
Comments? [email protected]
September 2013
Line keys
the cable is reconnected, the IP Deskphone proceeds to reregister all accounts, starting with
the primary account.
Line keys
Each registered user is associated to a separate line key. Each line key displays the name of
the registered account and some basic state information for the account.
The primary account is associated to the first bottom-right line key of the IP Deskphone. If you
are using a secondary account, the order of the next available line key is from bottom to top
and right to left on the IP Deskphone, followed by the keys on the Expansion Module from
bottom to top and right to left. You can select a different available line key for secondary
accounts during the logon process.
The following figure is an example of the IP Deskphone with and Expansion Module and
multiple accounts.
Figure 17: IP Deskphone with Expansion Module and multiple accounts
Pressing a line key brings up a dialing prompt, initiates a call to a preselected target, or answers
an incoming call. See Making a call on page 156.
At select account prompts, such as the Logout screen or User Settings screen, pressing a line
key highlights the corresponding account. See Account selection on page 165.
SIP Software for Avaya 1200 Series IP Deskphones-Administration
September 2013
155
Multiuser
The icon for each line key reflects the state of the account associated with that line key.
• If there is a call for the account, a IP Deskphone icon displays the state of the call, such
as when the call is on hold or is ringing.
• If there is more than one call, the state of the most active call is displayed.
• Missed incoming calls and new voice mail messages for the account are indicated with
an icon. The icon supplements the NN missed calls message on the idle screen and
the red LED which cannot provide per-account information.
• The MADN, do-not-disturb, and call forwarding features also affect the appropriate line
key icon of the account.
Making a call
You can place a call using any of the registered user accounts. The account that you select
determines:
• the proxy used
• the domain name used for the call target (if none was specified)
• the caller the target sees is calling
• the service-package-dependent features that are available
Receiving a call
When you receive an incoming call, the account that the call is intended for is displayed on the
IP Deskphone. The line key of that account displays the icon for an incoming call. You cannot
use a different account to answer the call.
If you are receiving multiple calls at the same time, a list of all active and incoming calls appears.
If you select a specific call in the list, you can choose to answer or process that specific call.
The IP Deskphone sorts the list by the most recent incoming call first. If there are numerous
calls to process, you can configure the selected call to automatically select the last incoming
call to make it easier to answer, or to leave the selected call static. The selected call does not
jump as new calls come in, but remains on the same call, as new calls are added, to make it
easier for the user to process that call.
If the calls are for different accounts, the line keys associates with the accounts receiving the
incoming calls display an incoming-call icon.
156
SIP Software for Avaya 1200 Series IP Deskphones-Administration
Comments? [email protected]
September 2013
Being in a call
Being in a call
When a single call is active, the screen displays the local account in use and the remote user.
If multiple calls are active, each call appears on a single line. The local account for the active
call appears on the context line. Each line key reflects the most active call state of the account
the line key is associated with.
The active call is affected by operations such as transfer or call parking. One exception is the
New Call action which uses the primary account by default, but can be overridden by pressing
another line key to initiate a call.
You can use your account to transfer or park an active call that is received on that account.
The exception is the New Call action because it uses the primary account by default. You can
override the New Call action by pressing another line key to initiate a call.
Joining calls into an ad-hoc conference always uses the conference server of the primary
account. Calls that are on accounts that cannot access the server cannot be joined. After you
create an ad-hoc conference, you can join additional calls into the same conference. You
cannot create more than one ad-hoc conference at a time.
You can join any two calls with the 3-way call feature, regardless of the account. The service
package of the account to which a call is associated determines which operations, such as
Call Park, are available on that call. After you establish a 3-way call, the join functionality
becomes unavailable until the 3-way call is terminated.
The following figure is an example of the IP Deskphone with one call.
Figure 18: Example of the IP Deskphone with one call
The following figure is an example of the IP Deskphone with multiple calls.
SIP Software for Avaya 1200 Series IP Deskphones-Administration
September 2013
157
Multiuser
Figure 19: Example of the IP Deskphone with multiple calls
Instant messages
You can only receive or send instant messages from the primary account. Incoming messages
for secondary accounts are rejected, are not displayed on the screen, and are not added to
the instant message logs.
Menu features
The menus displayed on the IP Deskphone are customized to match the service package of
the active account that is accessing the menu. Menus are accessed from the Idle screen when
the primary account is active. For example, you can only use the Retrve Context-sensitive soft
key to retrieve a parked call if call parking is allowed by the service package of the primary
user.
Similarly, accessing the Address Book through the Directory hard key displays the Address
Book of the primary account. However, accessing the address book in select mode (for
example, while dialing or selecting an item for a speed dial key) accesses the address book
of the user account that is in use on the address-input screen.
Modifying settings
Preferences, such as Voice Mail and IM settings, are available for each account. The main
Preferences menu includes a User Settings entry. If you select User Settings, you are
prompted to select a registered account. After you select a registered account, a menu appears
that lets you modify the settings of the account you selected.
158
SIP Software for Avaya 1200 Series IP Deskphones-Administration
Comments? [email protected]
September 2013
Remembering settings after logout
Per-account call notification options
The Call Settings entry in the User Settings menu provides you with a number of configuration
options relating to how incoming calls for a particular account are treated.
The configuration options are:
• what kind of audio alert you want to use (ring tone, beep, or nothing)
• whether you want the red LED to blink
• whether you want the call to be added to the Incoming Call logs
IM settings
IM Settings is located in the User Settings menu. Any change in settings on the primary
account takes effect immediately. You can also modify settings for a secondary account, but
the modifications do not take effect until you register the secondary account as the primary
account.
Voice Mail settings
Voice Mail Settings is located in the User Settings menu. You can program different voice
mail addresses and IDs for each account. To access the voice mail of a secondary account,
press the line key of the secondary account to obtain a dial prompt, and then press the VMail
soft key.
Waiting messages are reported in the following two ways:
• The red LED lights up if any account has a waiting message.
• A shaded envelope icon appears on the line key of each account that has a waiting
message (unless the account is in a call).
Remembering settings after logout
The IP Deskphone remembers up to 24 sets of configurations for each profile. If you configure
settings for an account and you log off the account, the settings are restored after you log back
onto the account (as either a primary account or a secondary account).
If you log on an account that you did not save the settings in a profile for, the IP Deskphone
creates a new set of default settings for that account. If there are already 24 sets of
configurations in the profile, the IP Deskphone discards one set that is not currently registered
SIP Software for Avaya 1200 Series IP Deskphones-Administration
September 2013
159
Multiuser
with the account, and replaces the discarded set with the new set that is saved in the account
profile.
Programmable keys
You cannot use a line key associated with a registered account for programmable features.
The Program Key screen lists all the line keys associated to an account. If you select a line
key associated to an account, an error message appears.
The Do Not Disturb, Call Forward, and Presence keys are associated to a specific user account
that you create, and determine which account status to affect. See User status on
page 162..
By default, pressing a Speed Dial programmed key initiates a call using the primary account.
If you press a line key to obtain a dialing prompt, and then press a speed dial key, the
IP Deskphone uses the account associated with that line key. When accounts are registered
on different domains, you can program and use speed dial keys with targets that are only
reachable on the domain of a secondary account.
Important:
The Speed Dial keys always use the primary account to determine the presence state of the
target.
The Instant Message keys always use the primary account, because IM support is disabled
for secondary accounts.
Inbox, outbox, and instant message log
Each profile has a single inbox, a single outbox and a single instant message log. The detailed
view of the call log entry indicates the local account associated to each entry; that is, the source
of outgoing calls and the target of received call.
The following figure is an example of the Inbox call details view.
160
SIP Software for Avaya 1200 Series IP Deskphones-Administration
Comments? [email protected]
September 2013
Address Books
Figure 20: Example of the Inbox call details
Call logs and IM logs provide many ways of initiating a call to the address identified by the
selected entry, such as lifting the handset. In most cases, the primary account is used.
However, if you press a line key to initiate the call, the call uses the account associated with
the line key.
If call logs and IM logs are invoked in the selection mode, you cannot initiate a call directly
because the Select Context-sensitive soft key populates a dial prompt or other input field with
the selected target. The operation already in progress determines which account you can
use.
For example:
If you press the line key to obtain a dial prompt, press the Inbox key to select a target, press
Select, and then press Send; the line key that you originally pressed determines the account
you can use.
Address Books
Each registered account can have a network-based address book. Each profile contains a
local address book that is independent from all network address books.
Accessing the Address Books, by pressing the Directory hard key from the Idle screen, displays
the address book of the primary account. If the primary account does not have a network
address book, the local address book is accessed.
Accessing the Address Book in Selection mode always accesses the address book of the
current account. For example, after obtaining a dial prompt by pressing Line Key 2, you can
press the Directory key to access the address book of the account associated to Line Key 2.
You can access the network-based directory of the appropriate account if it is available;
otherwise, the IP Deskphone accesses the local address book.
You can only access the network-based address book of secondary users in selection mode.
You cannot modify the address book of a secondary account on the IP Deskphone. However,
modifications that you make to the address book remotely, such as using a different client of
the Personal Agent, are reflected on the IP Deskphone.
SIP Software for Avaya 1200 Series IP Deskphones-Administration
September 2013
161
Multiuser
The local address book is shared by all accounts that do not have a network-based address
book. You can modify the local address book if the primary account does not have a networkbased address book. Changes to the network-based address book of the primary account are
not reflected in the local address book.
If you use the Friends view, you can always access and modify the address book of the primary
account (local or network-based). There is no selection mode for the Friends view. You can
only monitor and view the presence information of Friends of the primary account in the Friends
view.
User status
The features associates with the User status include the following:
• Do Not Disturb
• Call Forwarding
• Presence
Do Not Disturb
Selecting the Do Not Disturb (DND) command from the Services menu prompts you to specify
which account you want to place in the DND mode. The option all allows you to place all
accounts in the DND mode (the all option is highlighted by default). By selecting an option, the
IP Deskphone prompts you to confirm the operation before proceeding.
Activating DND for a specific account automatically causes calls to that account to be rejected
with a busy signal. However, the IP Deskphone can still receive calls to other accounts. After
DND mode is active for an account, the label of the account line key periodically displays a
DND indicator.
The following scenarios apply to DND.
• If you select a single account that is in DND mode, the IP Deskphone displays a prompt
that asks if you want to deactivate the DND mode.
• If you select a single account that has Call Forwarding active, an error message appears
to indicate that DND cannot be activated.
• If you select the option all, and at least one account is not in DND mode, DND mode is
activated for all accounts. If an account is in Call Forward mode, Call Forward is
disabled.
• If you select all and all accounts are in DND mode, DND mode is deactivated for all
accounts.
If you use a programmed DND feature key, the account that is affected by the DND feature
key is determined when the feature key is configured. After you press the DND feature key,
162
SIP Software for Avaya 1200 Series IP Deskphones-Administration
Comments? [email protected]
September 2013
User status
the IP Deskphone behaves as described in the preceding scenarios, except that there is no
confirmation prompt displayed. The IP Deskphone performs the operation immediately, and a
message appears to indicate what was done.
The DND mode for each account is persistent. If you restart the IP Deskphone, or log off the
account and log the account back on, the account maintains the original state.
Call Forwarding
After you select the Call Forward command from the Services menu, the IP Deskphone
prompts you to specify the account that you want to place in Call Forward mode. The option
forward all places all accounts in Call Forward mode in one operation, and the option forward
none deactivates Call Forward for all accounts at the same time.
The following scenarios apply to Call Forward:
• If you activate call forwarding for a specific account, the IP Deskphone automatically
redirects all calls to the selected account to the address that you specify. The target
address must be reachable from the domain of the account. Other accounts can still
receive calls. The line key label periodically indicates that Call Forward mode is active.
• If you select a single account that does not have Call Forward or DND active on it, the IP
Deskphone prompts you to specify a forwarding target, and the mode you select is then
enabled. If DND is already active, a message appears indicating that Call Forward cannot
be activated. If Call Forward is already active, a message appears asking you if you want
to deactivate Call Forward.
• If you select the forward all option, all accounts are in Call Forward mode using the
provided target, and DND is deactivated for all accounts. If accounts are already in Call
Forward mode for a different target, the accounts are updated to use the new target.
• If you select the forward none option, the Call Forward feature is deactivated for all
accounts for which the Call Forward feature is currently active.
After you press a single account Call Forward programmed key:
• If the account is already forwarding calls to the programmed target, call forwarding is
deactivated.
• If the account is not forwarding calls to the programmed target, the account is set to
forward calls to the given target, disabling DND if necessary, and overriding any other call
forward target that is active for the account.
After you press a forward all programmed key:
• If all accounts are already set to forward calls to the key target, call forward is disabled
for all accounts (behaves like the forward none option).
• If all accounts are not configured to forward calls to the key target, call forwarding is
activated for all accounts using the key target (behaves like the forward all option).
SIP Software for Avaya 1200 Series IP Deskphones-Administration
September 2013
163
Multiuser
If you do not perform any Call forwarding or DND operations, you can press the single and all
keys to switch one or all accounts between forwarding to key's target and not forwarding
states.
The Call Forward mode and target is persistent for each account. If you restart the IP
Deskphone, or log off the account and log the account back on, the account maintains the
original state.
Presence
After you select the Presence command from the Services menu, you are prompted to specify
which presence state of the account you want to modify. The option all lets you set all accounts
to the same presence in one operation.
If you select a single account, the current state of the account is displayed. You can change
the current state of the account by entering the new presence state and note. After you confirm
the operation, the new presence state is applied.
If the all option is selected, no current state is displayed, and you are immediately prompted
to select the new state. The new state is applied to all registered accounts.
If you use a programmed Presence feature key, the account that is impacted by the Presence
feature key is determined after the feature key is configured.
After you press a single account Presence programmed key:
• If the account is already set to the programmed presence state, the account is set back
to the Connected presence state.
• If the account is not already set to the programmed presence state, the account is set to
the programmed presence state.
After you press the all accounts Presence programmed key:
• If all accounts are already set to the programmed presence state, all accounts are set to
the Connected presence state.
• If all accounts are not already set to the programmed presence state, all accounts are set
to the programmed presence state.
As like the Call Forwarding keys, if you do not perform any Presence operation, you can use
the single and all keys as toggles. However, the presence states are not entirely under your
control. Some states are applied automatically (for example, On The IP Phone), and all states
are applied by sending a message to the SIP proxy which can choose to not accept the change.
As a result, it is possible for a set all presence operation to not configure all accounts to the
programmed presence; if you press the Presence key again, another attempt is made to apply
the programmed presence to all accounts. It is more effective to program a separate Presence
key to set all accounts to the Connected state.
Events that update presence states automatically occur for each account. For example, the
On The Phone state is applied to any account that has at least one call active.
164
SIP Software for Avaya 1200 Series IP Deskphones-Administration
Comments? [email protected]
September 2013
Notifications
Account presence is not retained after logging off or restarting the IP Deskphone.
Notifications
The IP Deskphone can spontaneously display messages on the screen to report events that
you did not initiate. This includes events such as failure to retrieve a service package and
availability of a new location list.
These spontaneous notifications do not indicate which account is affected by the event. A
message appears to indicate the affected account.
The following figure is an example of an account notification.
Figure 21: Example of an account notification
It is possible for the same event to occur for multiple accounts at the same time, or in quick
succession. In the preceding figure, the accounts are displayed one after the other.
Account selection
There are a number of scenarios where you are prompted to select an account (for example,
logoff, per-account settings, programming keys).
The scenarios fall into the following two categories:
• Prompts where you must select exactly one account. If only one account is logged on,
the prompt does not appear. The IP Deskphone selects the single account automatically,
and immediately displays the next screen. Otherwise, the primary account is always at
the top of the list, and is highlighted when the prompt first appears.
• Prompts where an all or none option is available.
Pressing an account line key highlights the corresponding item in the account list. If no
selection is made in a certain amount of time, the prompt acts as if you pressed the Back
Context-sensitive soft key, canceling whichever operation required selection of an account.
SIP Software for Avaya 1200 Series IP Deskphones-Administration
September 2013
165
Multiuser
Feature dependencies and restrictions
The number of line keys on the IP Deskphone limits the number of accounts that you can
register simultaneously. The IP Deskphone is limited to six accounts. Connecting an Expansion
Module to the IP Deskphone increases the limit by 18, allowing for 24 registered accounts.
Additional Expansion Modules do not increase the limit further.
These are hard limits. Further restrictions may be imposed by the administrative policy. See
Configuration on page 150
Performance characteristics
Because the multiuser feature can allow the IP Deskphone to have multiple users logged on
to the IP Deskphone at the same time, the chances of numerous multiple calls increase. The
IP Deskphone can handle five simultaneous incoming calls at a time without any noticeable
impact. But as the number of simultaneous incoming calls increase, there is a noticeable delay
in ringing and updating the display to present all the calls to the user. It may take up to five
seconds for 10 simultaneous incoming calls, and this time increases as the IP Deskphone
receives more simultaneous incoming calls.
CS 1000: Several keys with the same DN on a TN
CS 1000 allows you to simultaneously make or receive a maximum of 2 calls. To overcome
this limitation you can configure several Multiple Call Ringing (MCR) keys with the same DN
on one TN and register from the IP Deskphone to each configured key. This applies to systems
using Meridian Communications Adapter (MCA) – Multiple Appearance DN (MADN).
Each registration must have the same Login ID and Authentication ID. The first registration
maps to the lowest numbered DN key. Subsequent registrations are assigned DN keys in
ascending order of the key numbers.
The following example shows several MCR keys configured on the same DN, on one TN:
TN 100 0 0 1
UEXT/SIPL
With:
SIPU user1
SCPW xxxx
KEY 0 MCR 5000
KEY 1 HOT U xxxx
KEY 2 MCR 5000
KEY 3 MCR 5000
166
SIP Software for Avaya 1200 Series IP Deskphones-Administration
Comments? [email protected]
September 2013
Chapter 15: Features
This chapter contains the following topics:
• Customizable banner for login on page 167
• Speed Dial List on page 169
• Busy Lamp Field on page 174
• Roaming profiles on page 176
• SIP Domain DNS Lookup feature on page 184
• Server Profiles on page 185
Customizable banner for login
SIP Software allows the IP Deskphone to display a customizable banner when you log on to
the IP Deskphone. When the login banner is provided with login banner text and is configured
as "enable", the IP Deskphone displays the banner text on the screen when the user logs
on.
The banner text is only displayed in the language that is provisioned (changing the
IP Deskphone configured language does not change the banner text language). The banner
appears only for the primary user of the IP Deskphone. In a multiuser configuration, a
secondary user logon does not cause the banner to appear, even if the login banner is
configured as enable.
If the login banner is configured a enabled, the banner screen on the IP Deskphone is displayed
after the final step of the logon process.
The following image is an example of the Login Banner screen which displays the provisioned
banner text.
Figure 22: Login Banner
SIP Software for Avaya 1200 Series IP Deskphones-Administration
September 2013
167
Features
The following table describes the function of the context-sensitive soft key for the Login Banner
screen.
Table 52: Context-sensitive soft key for the Login Banner screen
Context-sensitive soft key
Ok
Action
Completes the login process and dismisses
the login screen.
The following table describes the function of the Navigation keys for the Login Banner
screen.
Table 53: Navigation
Key
Action
Up and down arrows
Allows you to scroll up and down the banner
text.
Left and right arrows
No action (the text is word-wrapped
automatically).
Enter
No action.
The following table describes the outside actions on content for the Login Banner screen.
Table 54: Outside actions on content
Key or action
168
Result
Inbox
No action.
Outbox
No action.
Directory (Address book)
No action.
Goodbye
No action.
Expand (IM Box)
No action.
Copy
No action.
Services
Press once, no action. Press twice invokes
the Network menu.
Quit
No action.
Headset
Brings up the dial prompt (in case the user
wants to place an emergency call).
Hold
No action.
Dialpad
No action.
SIP Software for Avaya 1200 Series IP Deskphones-Administration
Comments? [email protected]
September 2013
Speed Dial List
Key or action
Result
Handsfree
Brings up the dial prompt (in case the user
wants to place an emergency call).
Off Hook
Brings up the dial prompt (in case the user
wants to place an emergency call).
Mute
No action.
Volume up and volume down
No action.
User-defined feature keys
No action.
Incoming call
Incoming calls get a Do Not Disturb (DND)
response while the banner is displayed.
The user must explicitly dismiss the banner screen (like a location list), and the IP Deskphone
goes in DND mode until the banner is dismissed. The IP Deskphone cannot make or receive
any calls, other than an emergency call, until the banner is dismissed.
If any other pop up messages or prompts, such as a location prompt, occur while the banner
is displayed, the pop up messages or prompts appear below the banner screen, and are viewed
by the user only after the user dismisses the login banner.
The following configuration flag is used for enabling or disabling the customized login
banner.
LOGIN_BANNER_ENABLE Y/N (Default: N)
The banner text is defined in a separate text file that is linked from the original configuration
file.
The banner text file is a separate file downloaded by provisioning. The banner text file is
specified much like the current dialing plan is specified (file name listed in 12xxSIP.cfg, under
section [LOGIN_BANNER]), and is downloaded when enabled or disabled.
To be accepted, the file must contain at least one byte and must be no larger than 2048 bytes.
The encoding of the file must be UTF-8, or compatible with UTF-8, to ensure that all the
characters are displayed properly.
Speed Dial List
When configured by provisioning, a feature key can be used as a "Speed Dial List". The feature
key and the contents of the Speed Dial List must be specified by the provisioning mechanism.
The user cannot modify or delete the feature key used by the Speed Dial List and cannot modify
the content of the Speed Dial List.
Invocation of the Speed Dial List is similar to any other feature key invocation. The Speed Dial
List key causes a full screen list to appear on the IP Deskphone and the user can automatically
dial one of the offered choices.
SIP Software for Avaya 1200 Series IP Deskphones-Administration
September 2013
169
Features
The contents of the Speed Dial List can vary (context-sensitive) based on the current call state
of the IP Deskphone and the type of Speed Dial List entry configured. Only entries in the Speed
Dial List can be context-sensitive; not all speed dial keys or individual features keys are contextsensitive.
A Speed Dial key, or one included in a Speed Dial List, can cause any call that it placed on
hold (when invoked) to be unheld automatically when the call completes, based on a new value
that must be configured when a Speed Dial key is created or configured.
Administration and use of the Speed Dial List feature
Provisioning the device configuration provides the IP Deskphone with the following features:
• Index of key to use as Speed Dial List. You can use the following flag to disable the Speed
Dial List feature by configuring the key index to less than two (2).
SPEEDLIST_KEY_INDEX <key index>
• Label to use for the Speed Dial List key.
SPEEDLIST_LABEL <text>
The IP Deskphone retrieves the device configuration through provisioning, and if the
SPEEDLIST_KEY_INDEX flag is configured to a valid programmable key that can be used for
the feature (greater than one (1) and less than or equal to the available number of
programmable keys), the following events occur:
1. The IP Deskphone checks for a previously loaded "Speed Dial List" file (a file
containing the contents of the speed dial list), which must be properly configured
and uploaded to the IP Deskphone through provisioning.
2. The IP Deskphone parses the file, and configures the feature key specified by
SPEEDLIST_KEY_INDEX to hold the Speed Dial List.
3. If the key defined for use by the Speed Dial List is already in use, the defined key
is overwritten and is assigned Speed Dial List functionality.
4. The Speed Dial List feature key uses the label that is provided in
SPEEDLIST_LABEL, and cannot be modified by the end user.
The following screen describes the feature key used by the Speed Dial List in the feature key
programming interface.
170
SIP Software for Avaya 1200 Series IP Deskphones-Administration
Comments? [email protected]
September 2013
Speed Dial List
Figure 23: Main feature key programming screen showing Speed Dial List provisioned on key 6
A feature key provisioned for use as a Speed Dial List has a similar appearance to all other
programmed feature keys on the idle screen (or in-call screen). The label used for that key is
provided through provisioning.
When the user presses the feature key provisioned as a Speed Dial List, the list of speed dials
configured appears on the screen, and the user can select an item from the list to invoke Speed
Dial.
If the Speed Dial List is empty, or ends up empty due to context-sensitive hiding of contents,
the error message, "Not available", is displayed on the screen with a "Dial List" context line.
Speed Dial List screen
The Speed Dial List screen for the IP Deskphone is where the user can select or invoke one
of the provisioned Speed Dial List entries.
The following image is an example of the screen that appears after the user presses the feature
key that is provisioned as the Speed Dial List for the IP Deskphone.
Figure 24: Example of a Speed Dial List
The Speed Dial List screen displays all the Speed Dial List entries provisioned for the user.
The listed items displayed are based on the provisioned list as well as the current Idle or Midcall state of the IP Deskphone. When the Speed Dial List is invoked while the IP Deskphone
is idle, only Speed Dial List entries that are configured as IDLE are displayed. Similarly, only
items marked as MID CALL are displayed if the Speed Dial List is invoked while the IP
Deskphone is in a call.
SIP Software for Avaya 1200 Series IP Deskphones-Administration
September 2013
171
Features
The following table describes the function of the context-sensitive soft keys for the Speed Dial
List screen.
Table 55: Context-sensitive soft keys for the Speed Dial List screen
Context-sensitive soft key
Action
Dial
Invokes the selected speed dial.
Exit
The screen is dismissed without invoking a
Speed Dial List entry.
Auto retrieve flag
Because the auto retrieve behavior is added to the regular speed dial keys (programmed keys)
instead of just speed dial list entries, the auto retrieve flag is configured for programmed speed
dial keys.
The following screen appears as the last step, after the "Enter Subject" prompt, in the creation
or modification of a Speed Dial key to allow the user to configure the auto retrieve behavior for
the Speed Dial function.
Figure 25: Speed Dial Key creation — last step
The following table describes the function of the context-sensitive soft keys for the Auto
Retrieve screen.
Table 56: Context-sensitive soft keys for the Auto Retrieve screen
Context-sensitive soft key
172
Action
Yes
Enables the Speed Dial Auto Retrieve
behavior.
No
Disables the Speed Dial Auto Retrieve
behavior.
Back
Dismisses the screen and returns you to the
previous key programming screen.
SIP Software for Avaya 1200 Series IP Deskphones-Administration
Comments? [email protected]
September 2013
Speed Dial List
If the auto retrieve behavior is enabled on a Speed Dial key (programmed keys) or Speed Dial
List entry that is invoked, and a call is placed on hold to invoke the current key or entry, the IP
Deskphone attempts to remove the call on hold after the key or entry call is complete.
The following is a description of how the auto retrieve function operates.
1. A is talking to B when A invokes the Speed Dial List and selects an entry.
2. The call between A and B is placed on hold, and A places another outgoing call to
C (a URI specified in the Speed Dial List entry).
3. When the call between A and C is complete, if the auto retrieve flag is enabled for
the Speed Dial, then the IP Deskphone attempts to take the call between A and B
off hold.
If another call comes in during the call between A and C, or if the state of the call
between A and B changes when the call between A and C is active, the reconnection of the call between A and B may not always happen.
The following is an example of a Speed Dial List file that must be loaded through
provisioning.
[key]
label=S1
[email protected]
retrieve=YES
mode=MidCallOnly
type=spdial
[key]
label=S2
retrieve=NO
mode=IdleOnly
subject=subject2
[email protected]
type=spdial
[key]
label=S3
retrieve=NO
[email protected]
type=spdial
SIP Software for Avaya 1200 Series IP Deskphones-Administration
September 2013
173
Features
Busy Lamp Field
The Busy Lamp Field (BLF) is an alternate presence-monitoring mechanism for the IP
Deskphone that allows presence functionality on proxies that support BLF.
BLF is an icon state for a corresponding Speed Dial key on an IP phone; the icon state tells
you if another extension connected to the same SIP server is busy. If configured, the IP
Deskphone subscribes to a resource list available on the server and receives information about
other extensions. BLF works through the SIP protocol by making use of SUBSCRIBE and
NOTIFY messages; the IP Deskphone is the subscriber and the SIP server is the notifier.
How it works
If you configure an IP Deskphone to monitor a list of zero or more extensions, it sends a
SUBSCRIBE SIP message to the server. A NOTIFY SIP message, which includes XML in
the message body, is sent to the subscriber to advise the subscriber of the current state of the
extension being monitored. Once the status of the monitored extension changes, the
subscriber receives a NOTIFY SIP message from the server. The subscriber must
acknowledge the NOTIFY SIP message by responding with a 200 OK SIP message.
BLF is based on an Event Dialog package. Dialog refers to the SIP relationship that two SIP
peers establish. Dialogs can be created by many methods, although RFC 3261 defines only
one: the INVITE method. In other words, as soon as two SIP peers establish a new call/dialog,
modify a call/dialog, or cancel a call/dialog, the monitoring party receives notification about that
event. For more information, refer to RFC 4235.
Note:
Dialog Package (BLF) differs from Presence package. Refer to RFC3856 for more
information on Presence.
Use the command BLF_ENABLE to enable the BLF feature on an IP Deskphone. In order to
use BLF it must be activated, properly provisioned, and connected to the server that supports
this feature.. It is used whenever a speed dial key is provisioned on the IP Deskphone; an icon
assigned to the speed dial key reflects the new status of the monitored peer, which is extracted
from a NOTIFY message. You can configure speed dial keys for as many parties as you want
to monitor; the parties must exist on the configured Resource List Uniform Resource Identifier
(URI). Figure 26: Call states and corresponding Presence icons on page 175 shows the
various call states and corresponding icons.
174
SIP Software for Avaya 1200 Series IP Deskphones-Administration
Comments? [email protected]
September 2013
Busy Lamp Field
Figure 26: Call states and corresponding Presence icons
Resource List URI
The SIP-specific event notification mechanism allows the subscriber to request to be notified
of changes in the state of a particular resource. Users often subscribe to multiple resources;
without an aggregating mechanism, the user would have to generate a SUBSCRIBE request
for each resource they monitor.
A resource list is identified by a URI, and it represents a list of zero or more URIs (SIP
endpoints). Each URI is an identifier for an individual resource to which the user can subscriber.
The configuration of URI is done on the server and an IP Deskphone requires only to be
configured with the desired Resource List URI; the URI can even be configured automatically
if the server supports auto-generation. For more information, refer to RFC 4662.
If BLF_ENABLE = YES , then use BLF_RESOURCE_LIST_URI to configure the Resource List
URI. You must use the URI provided by the proxy when you configure the user for BLF.
If BLF_ ENABLE = SCS|SIPX, the Resource List URI auto generates in the following format:
~~rl~C~<username>@<domain></domain></username>
BLF call pickup
The Call Pickup feature allows a user to pick up a call by pressing the corresponding speed
dial key when the indicator for a monitored line flashes. The IP Deskphone must send an
INVITE with the Replaces header. Target uri, call-id, to-tag and from tag in the Replaces
header are taken from the NOTIFY message. The Replaces header is specified in RFC
3891.
Use the MAX_BLFCALLS parameter to configure this feature. This parameter specifies the
maximum number of available BLF(picked up) calls on an IP Deskphone. The actual value of
MAX_BLFCALLS correlates with the value of MAX_APPEARANCE, which specifies the maximum
number of available calls of any type. MAX_BLFCALLS must always be less than or equal to
SIP Software for Avaya 1200 Series IP Deskphones-Administration
September 2013
175
Features
MAX_APPEARANCE. If initial value of the MAX_BLFCALLS parameter is greater than the value
of MAX_APPEARANCE, the value of the MAX_BLFCALLS parameter is forcibly reduced.
BLF Call Pickup is only supported for IP Office. Therefore, IP_OFFICE_ENABLE must equal
YES for Call Pickup to work.
Configuration flags for Busy Lamp Field
The provisioning must provide a configuration flag, containing relevant URI, to the
IP Deskphone in order to use the Busy Lamp Field (BLF).
The following table describes the configuration flags used to configure the BLF.
Table 57: BLF configuration commands
Configuration command
BLF_ENABLE Y/N/SCS/SIPX (default: N)
Description
Enables or disables the BLF.
When BLF_ENABLE has the SCS or SIPX
value, the BLF_RESOURCE_LIST_URI
parameter is ignored and the IP Deskphone
autogenerates an URI of the following
format:
~~rl~C~<username>@<domain>
BLF_RESOURCE_LIST_URI <BLF URI>
Configures the BLF resource list URI for the
BLF feature. <BLF URI> is the serverprovided URI used to subscribe to BLF
notifications (for example, [email protected]).
Roaming profiles
Roaming profiles enable the user to obtain the same settings when they are logged on to
multiple IP Deskphones for features such as Address Book, Programmable keys, and Speed
Dial List.
The updatable data is split into 3 text files for these features:
• address book
• custom keys
• speed dial list
The user configuration file is used to specify the specific names of the feature files to be
downloaded. The IP Deskphone requests a user configuration file using the name
176
SIP Software for Avaya 1200 Series IP Deskphones-Administration
Comments? [email protected]
September 2013
Roaming profiles
<username@domain>.cfg, where <username@domain> is the address of the primary user;
for example [email protected].
The USER_FILE_ENABLE device configuration file parameter is used to determine whether
to download the user.cfg file on user login and to check for updates.
Filemames to be downloaded are specified in a [files] section. An example of the syntax is
provided below:
[files]
addressbook=abook.txt
customkeys=keys.txt
speeddiallist=sdl.txt
For more information about the Device Configuration file, see Create the device configuration
file on the provisioning server on page 47.
Address book file
The Address book file represents each contact [contact] and each group [group] (name only).
A contact provides attributes to specify nickname, SIP address, group and whether it is a friend.
An example of the syntax is provided below.
[version]
id=12345
[contact]
nickname=lpg
[email protected]
group=macadamian
buddy=1
[group]
name=macadamian
Custom keys file
The Custom keys file enables programmable keys to be provisioned for the IP Deskphone.
This file consists of multiple sections:
SIP Software for Avaya 1200 Series IP Deskphones-Administration
September 2013
177
Features
• index — index of the physical key on which the feature is made available. This uses the
same numbering as on the IP Deskphone user interface (right hand keys, then left hand
keys, then Expansion Module keys).
• label — the text which appears next to the key on the IP Deskphone screen.
• type — the feature programmed on the key.
• audiocodecs — priority-order list of codecs
• autoanswer — allowed addresses for acceptance of auto-answer requests
• key — configuration for programmable keys
• prefs — main profile preferences
• reasons — list of reject reasons
• subjects — list of call subjects
• versions
The sections in the custom keys file can be in any order. Each section contains parameters
and values. All parameters should contain values, except for the following:
• banner
• screensvrText
• screensvrImage
• backgroundImage
• hotlineURL
If a parameter has no value, its previous value is restored. For parameters which are allowed
blank values, if the parameter is blank then the value is cleared.
The custom keys file supports sections which contain user preferences. This file has the same
format as the prefs.txt file which is stored on the flash of the IP Deskphone. After downloading
the custom keys file, this information is merged with information from the user profile (file
prefs.txt). If the parameter has a new value in the custom keys file, then the old value is
replaced. If any parameter is not provisioned through the custom keys file, the old parameter
with its corresponding value is used. After the merge, the new data is written on the flash to
the prefs.txt file. This information is then used by the profile manager.
Note:
The label for a programmable key can be modified by the IP Deskphone end-user through
the phone UI in the Feature Options > Feature Keys menu. If the end-user enters a blank
label for a key that has a default label defined in the custom keys file, then that default label
overrides the blank label and is applied to the key
The following table describes the sections and keys, and provides examples.
178
SIP Software for Avaya 1200 Series IP Deskphones-Administration
Comments? [email protected]
September 2013
Roaming profiles
Section name
Key
Value example
[audiocodecs]
Description
The priority-ordered list of
codecs
str-0
PCMU
str-1
G729
str-0
3007@mycompan
y.com
The key consists of prefix “str“ and the sequence number
0,1…
The value can be any
supported codec.
[autoanswer]
[key]
The list of allowed addresses
from whom auto-answer
requests should be accepted.
Contains special section(s) for
describing configuration for the
programmable keys.
icon
5
Icon number; codes are
defined in the “Tab. 1. Icon
definition”
index
3
Key number; sequential,
starting with the IP Deskphone,
then the Expansion Module(s)
label
CallForward
Text to be displayed for the key
target
*4
Information number to be sent
to IP Office
type
feature
Key type
[prefs]
Contains the main profile
preferences.
alertPattern
4
Default ringtone pattern, 0-7
alertVolume
6
Volume of ringtones, 0-7
handsetVolume
8
In-call volume of handset, 0-19
handsfreeVolume
10
In-call volume of handsfree
speaker, 0-19
headsetVolume
8
In-call volume of headset, 0-19
pagingVolume
3
Volume of beeps, 0-7
alphaDialing
0
Defines if dial prompt should
start up in Alpha mode (0 –
digits mode, 1 – alpha mode)
autoAnswerMode
0
Determines when to accept
auto-answer requests in calls.
0 = autoAnswerWhiteList only
SIP Software for Avaya 1200 Series IP Deskphones-Administration
September 2013
179
Features
Section name
Key
Value example
autoClearMissed
Calls
0
backgroundImage
180
Description
Determines if entering the
inbox (without selecting each
missed call) clears the "xx new
calls” message
Filename of image to use for
the background (can be blank)
backlightTimeout
60
Time to wait before dimming
screen, in minutes
banner
Avaya
Text to show on idle screen
(can be blank)
dateFmt
2
Display format for dates
2 –m/d/y, 3 – d/m/y
timeFmt
0
Display format for time
0 – 12hrs (5:45pm), 1 – 24hrs
(17:45), 2 – 24hrs French
(5h45)
globalIgnore
0
Designates whether the Ignore
key terminate all forks of a
call.
Value = 0 or 1
hotlineURL
2600@mycountry
.gov
Target url for a hotline call.
language
English
User interface language.
Value = language filename
without extension
menuAutoBackout 30
Delay before the menus
timeout
Valid values:
0,15,30,60,120,200,600
seconds
notifyCallForward
0
Specifies whether serverforwarded calls make the IP
Deskphone beep
Value = 0 or 1
octEndsDialing
1
Specifies if # causees dial
prompts to place call
Value = 0 or 1
outgoingPrivacy
0
Anonymization setting to use
for outgoing messages
0 = none
incomingPrivacy
0
Anonymization setting for
remote user information
SIP Software for Avaya 1200 Series IP Deskphones-Administration
Comments? [email protected]
September 2013
Roaming profiles
Section name
Key
Value example
Description
0 = none
publicScaHold
0
Specifies whether others can
retrieve calls a user pus on hold
Value = 0 or 1
screensvrActive
0
Specifies if screensaver is
activated immediately on auto
login
Value = 0 or 1
screensvrDelay
10
Time to wait before displaying
the screensaver, in minutes
screensvrImage
Filename of image to use for
the screensaver (can be blank)
screensvrMode
0
0=ssmDISABLE
1=ssmENABLE_NO_PASS
2=ssmENABLE_PASS
screensvrText
My Company
Text to show on screensaver
screen (may be blank)
searchMethod
0
Search mode for searchable
menus
Values: 0 =
UKNOWN_SEARCH
1 = INDEX_SEARCH
2=
FIRST_CHARCTER_SEARC
H
3 = NAME_SEARCH
[reasons]
This section contains the list of
reject reasons
str-1
Out of office
str-2
Busy
str-0
Hello!!
str-1
Hi!
The key consists of prefix “str“and the sequence number 0,
1…
The value can be any string.
[subjects]
The key consists of prefix “str“and the sequence number 0,
1…
The value can be any string.
The following rules apply to the [key] section:
SIP Software for Avaya 1200 Series IP Deskphones-Administration
September 2013
181
Features
1. In non-IP Office mode, any keys defined as “feature” have no effect and are
ignored.
2. If the “type” field is omitted, the key is considered as the “spdial” key by default.
3. If the [type] field has the incorrect paramete,r the [key] section is considered to be
incorrect and is ignored (appropriate ECR record is registered in the ECR file).
Feature key types
The following attributes depend on the type of key being programmed:
• spdial – Speed Dial key
• cfwd – Call Forward key
• dnd – Do Not Disturb key
• im – Send an Instant Message key
• presence – Change-my-presence key
The following attributes are type-specific attributes:
• target – for cfwd, spdial, im keys. The SIP address to target when the key is pressed. This
is a mandatory attribute for spdial and im. Omitting this attribute from a cfwd key creates
a "disable call forward" key.
• user – for cfwd, dnd, presence keys. The SIP address of the logged-in user whose state
should be modified. Omitting this attribute creates "apply to all users" key.
• subject – for spdial. Optional. This is for the call subject to send on the call.
• retrieve – for spdial key. Optional. If this key is configured to Yes, the autoretrieve mode
is enabled.
• state – for presence keys. Mandatory. The state to apply when the key is pressed;
CONNECTED or UNAVAILABLE.
• note – for presence keys. Optional. The note to configure when the presence is changed;
arbitrary text.
An example of the syntax is provided below:
[key]
index=2
label=label1
[email protected]
type=spdial
subject=my first call subject
[key]
index=4
label=label22
note=on vacation
state=UNAVAILABLE
type=presence
182
SIP Software for Avaya 1200 Series IP Deskphones-Administration
Comments? [email protected]
September 2013
Roaming profiles
Speed Dial List file
The Speed Dial List file is used to populate the menu which appears when a Speed Dial List
custom key is pressed.
The SDL key itself is provisioned using the device configuration file, not the custom keys file.
The Speed Dial List file format is similar to Custom keys file format, except for the following:
• Only keys of type spdial are supported; the "type=" attribute can be omitted.
• The index attribute is ignored.
• Mode attributed is supported to specifies in which context the SDL entry should be visible.
The value options are IdleOnly, MidCall, and Always (default).
An example of the syntax is as follows:
[key]
label=label11
[email protected]
retrieve=YES
subject=my second call subject
mode=MidCall
Roaming profile limitations
Roaming profiles have the following limitations:
• Changes made on the IP Deskphone cannot be uploaded to the Call Server.
• The user cannot edit the downloaded Speed Dial List.
• Profiles are downloaded for the primary user only.
• If a file is downloaded that places a custom key on a key that is already in use as a user’s
login Line key, the Line key takes precedence. The custom key is restored if the user logs
off.
• If a file is downloaded that places a custom key on a non-existent key - for example, Key
10 - and the IP Deskphone does not have an Expansion Module attached, then the key
is not shown. The key appears only when an Expansion Module is attached.
Roaming profiles and service packages
If the IP Deskphone supports roaming profiles that have a service package and that service
package has the network address book enabled, then when the service package arrives, the
service package-enabled network address book replaces the Address Book. The roaming
profile and the network address book are mutually exclusive. To prevent this from happening,
disable the network address book in the user's service package.
SIP Software for Avaya 1200 Series IP Deskphones-Administration
September 2013
183
Features
Default names
Default names can also be provisioned in the Device Configuration file if per-user files are not
required. Default names are overridden by names specified in the user.cfg file.
• DEFAULT_ADDRESSBOOK_FILE
• DEFAUT_SPEEDDIAL_LIST
• DEFAUT_CUSTOMKEYS_FILE
For more information about the Device Configuration file, see Feature configuration
commands on page 55.
SIP Domain DNS Lookup feature
The DNS Lookup feature enables the IP Deskphone to discover IP addresses for a specified
SIP domain using DNS.
There are two ways the DNS Lookup feature can provide SIP domain IP addresses to the IP
Deskphone:
1. using DNS SRV records (refer to RFC2782)
2. using DNS A/AAAA records (IPv4/IPv6 address records)
How DNS lookup works
One or two IP addresses can be configured for a particular SIP domain - primary and secondary
IP addresses:
• SERVER_IP[x]_1
• SERVER_IP[x]_2
where x = the domain number from 1 to 5.
If the IP Deskphone attempts to log on using these configured addresses and fails to do so,
the IP Deskphone then tries to discover the IP addresses using DNS. If there is no primary or
secondary SIP domain IP address configured, then the IP Deskphone uses DNS to determine
the IP address. If only SERVER_IP[x]_2 is configured (SERVER_IP[x]_1 is 0.0.0.0), then DNS
Lookup is used first; if DNS Lookup fails, only then is the secondary IP address tried.
The DNS Lookup feature tries to obtain SIP domain IP addresses through DNS SRV records,
using the domain name as a parameter for UDP, TCP, and TLS. Multiple SRV records can be
configured for each domain and for each transport protocol (UDP, TCP and TLS). The
184
SIP Software for Avaya 1200 Series IP Deskphones-Administration
Comments? [email protected]
September 2013
Server Profiles
hostname is returned instead of the IP address. The hostname must point to an address record
(A or AAAA record).
SRV record example:
_sip._tcp.example.com. 86400 IN SRV 0 5 5060 sipserver.example.com
where:
• sip = the desired service
• tcp = the transport protocol
• example.com = the configured domain name
• 5060 = the port to be used
• sipserver.example.com = the SIP proxy to be used (hostname is replaced by the IP
address using A/AAAA records)
The DNS Lookup feature then tries to find the IP address of the SIP domain in A/AAAA records
on the DNS Server. Only the IP address is returned; therefore, default ports are used — 5060
for UDP/TCP and 5061 for TLS.
Important:
If the Fail Back to Primary feature is enabled, then DNS lookup is not used. In this case, you
must configure both primary and secondary IP addresses for a domain.
Caution:
If DNS servers are not properly configured or do not respond, DNS Lookup can take a long
time until all necessary requests are sent and corresponding timers expire.
Server Profiles
A System Configuration file allows the administrator to specify a list of domains to which the
IP Deskphone can connect. The administrator can specify up to five different SIP domains.
Each SIP domain supports 2 SIP servers: the Primary (S1) and the Secondary (S2). The
System Configuration file contains the SIP server-specific configuration parameters that are
applied to any SIP server specified in the list of SIP domains.
The Server Profiles option supports two different sets of configuration parameters: one specific
to the Primary SIP server and one specific to the Secondary SIP server. Each server can be
configured separately by updating configuration parameters contained in the System
Configuration file with values taken from the Server Profile configuration file. Server Profile
parameters are always applied on top of the System Configuration file.
The Server Profile file format is similar to the System Configuration file format, excluding the
following configuration parameters:
SIP Software for Avaya 1200 Series IP Deskphones-Administration
September 2013
185
Features
Table 58: Parameters not included in Server Profile configuration file
SIP_DOMAIN1
SERVER_TCP_PORT2_2
CONFERENCE_URI1
SIP_DOMAIN2
SERVER_TLS_PORT2_2
ADHOC_ENABLED1
SIP_DOMAIN3
SERVER_PORT3_1
MAX_ADHOC_PORTS1
SIP_DOMAIN4
SERVER_TCP_PORT3_1
CONFERENCE_URI2
SIP_DOMAIN5
SERVER_TLS_PORT3_1
ADHOC_ENABLED2
SERVER_IP1_1
SERVER_PORT3_2
MAX_ADHOC_PORTS2
SERVER_IP1_2
SERVER_TCP_PORT3_2
CONFERENCE_URI3
SERVER_IP2_1
SERVER_TLS_PORT3_2
ADHOC_ENABLED3
SERVER_IP2_2
SERVER_PORT4_1
MAX_ADHOC_PORTS3
SERVER_IP3_1
SERVER_TCP_PORT4_1
CONFERENCE_URI4
SERVER_IP3_2
SERVER_TLS_PORT4_1
ADHOC_ENABLED4
SERVER_IP4_1
SERVER_PORT4_2
MAX_ADHOC_PORTS4
SERVER_IP4_2
SERVER_TCP_PORT4_2
CONFERENCE_URI5
SERVER_IP5_1
SERVER_TLS_PORT4_2
ADHOC_ENABLED5
SERVER_IP5_2
SERVER_PORT5_1
MAX_ADHOC_PORTS5
SERVER_PORT1_1
SERVER_TCP_PORT5_1
DNS_DOMAIN
SERVER_TCP_PORT1_1
SERVER_TLS_PORT5_1
DHCP_ENABLE
SERVER_TLS_PORT1_1
SERVER_PORT5_2
ENABLE_USB_PORT
SERVER_PORT1_2
SERVER_TCP_PORT5_2
USB_HEADSET
SERVER_TCP_PORT1_2
SERVER_TLS_PORT5_2
ENABLE_BT
SERVER_TLS_PORT1_2
AUTOLOGIN_ID_KEYxx
PCPORT_ENABLE
SERVER_PORT2_1
AUTOLOGIN_AUTHID_KE
Yxx
EAP
SERVER_TCP_PORT2_1
AUTOLOGIN_PASSWD_K
EYxx
EAPID1
SERVER_TLS_PORT2_1
AUTOLOGIN_ENABLE
EAPID2
SERVER_PORT2_2
LLDP_ENABLE
EAPPWD
All Server Profile files are uploaded to the IP Deskphone through the standard upgrade
mechanism. When switching from one server to another server, the IP Deskphone applies the
configuration parameters for the appropriate server.
The Server Profile option is implemented using the following command parameters:
186
SIP Software for Avaya 1200 Series IP Deskphones-Administration
Comments? [email protected]
September 2013
Server Profiles
• PRIMARY_SERVER_PROFILE <filename>
• SECONDARY_SERVER_PROFILE <filename>
The commands are processed as follows:
1. If the x_SERVER_PROFILE command is specified and contains the x Server Profile
<filename>, the Server Profile file is downloaded to the IP Deskphone during the
standard upgrade mechanism after downloading the System Configuration file.
If the Server Profile file is specified but cannot be downloaded, the IP Deskphone
uses the old Server Profile file, if it exists in the Flash File System (FFS). If there is
no old Server Profile file, the IP Deskphone applies the parameters from the System
Configuration file by default.
For example: PRIMARY_SERVER_PROFILE profile01.dat — applies values from
the profile01.dat file for the Primary server
2. If the x_SERVER_PROFILE command is specified, but the parameter is absent,
the IP Deskphone applies the parameters from the System Configuration file by
default for this server. The old Server Profile file is removed from the FFS.
For example: PRIMARY_SERVER_PROFILE <blank> — uses configuration
parameters taken from the System Configuration file and removes the old Server
Profile file designated for the Primary Server
3. If the „x_SERVER_PROFILE’ command is not specified or is skipped, the IP
Deskphone applies the configuration values obtained from the old Server Profile
file, if it exists. Otherwise, the configuration values are taken from the System
Configuration file by default.
Note:
If the IP Deskphone is reset to factory default, all profiles are removed.
The Primary and Secondary Server Profile file names are displayed in the Server Settings
menu of the IP Deskphone.
Limitations:
Only one server profile can be active at time; this means that in Multi-User mode, the logic is
applied for only the Primary User.
IP Deskphone soft reboot
When a different server profile is applied, changes to certain parameters can cause the IP
Deskphone to perform a soft reboot.
Changes to the following parameters initiate a soft reboot.
FIPS_MODE
ENABLE_UPDATE
SFTP_WRITE_PATTERNS
SESSION_TIMER_ENABLE USB_HEADSET
SIP Software for Avaya 1200 Series IP Deskphones-Administration
ENABLE_USB_PORT
September 2013
187
Features
SFTP_READ_PATTERNS
SESSION_TIMER_DEFAUL ENABLE_BT
T_SE
MLPP_NETWORK_DOMAI
N
SESSION_TIMER_MIN_SE
PCPORT_ENABLE
MLPP_PRECEDENCE_DO
MAIN
SET_REQ_REFRESHER
LLDP_ENABLE
SNTP_ENABLE
SET_RESP_REFRESHER
EAP
IPV6_ENABLE
DOD_ENABLE
EAPID1
IPV6_STATELESS
SLOW_START_200OK
EAPID2
SIP_TCP_PORT
MAX_APPEARANCE
EAPPWD
SIP_TLS_PORT
USE_PUBLISH_FOR_PRE
SENCE
Managing Server Profile files
To download a new Server Profile file, the Server Profile parameters must first be configured
in the System Configuration file and provisioned in the Device Configuration file. The IP
Deskphone downloads the new Server Profile file on startup, or the download can be initiated
through pressing the Services key on the IP Deskphone, and selecting Check for Updates
> Upgrade [DEVICE_CONFIG] from the menu
Information about profiles is presented in the IP Deskphone File Manager. If a Server Profile
file is downloaded on the IP Deskphone, the file name (profile1.dat or profile2.dat) is displayed
in the System folder of the File Manager.
To delete a Server Profile on the IP Deskphone, press the Delete soft key; the profile is
completely removed from flash and main memory. When a server profile is deleted, if
parameters in the server profile have corresponding parameters in the System Configuration
file, then those System Configuration file parameters are implemented after the server profile
parameters are deleted.
The content of each file can be viewd by using the prtcfg command in the PDT shell or by
using the printProfConfig <n> command in the vxshell where <n> is one of the following
values:
• 0 — root System Configuration file
• 1 — first profile
• 2 — second profile
• 3 — all profiles
• any other value — all profiles
188
SIP Software for Avaya 1200 Series IP Deskphones-Administration
Comments? [email protected]
September 2013
Chapter 16: Hotline service
The Hotline service allows you to provision a SIP IP Deskphone to a Hotline Phone. From a Hotline Phone,
you can automatically make a call to a designated number.
A Hotline Phone is a dedicated IP Deskphone that has only one target. You cannot make a call to any
other destinations; even emergency calls, such as E911 are not permitted. A Hotline Phone does not know
the Hotline target and relies on the server to replace the To field of all INVITE messages sent from the
Hotline Phone with the Hotline target to complete the call.
Important:
You cannot place calls if the server is unavailable during an upgrade.
Making a Hotline call
A call to a Hotline target is automatically placed when an off-hook condition occurs, or when
you press digits during idle on-hook, and then lift the handset.
Hotline Service allows only one hotline user to login to the Hotline Phone. The Multi-user Login
feature is restricted to one user only.
Hotline service restrictions
Because the Hotline Phone is a dedicated IP Deskphone used only for Hotline service, certain
features are restricted on the Hotline Phone.
The following is a list of features, on the IP Deskphone, that are restricted on the Hotline
Phone.
• Call Transfer
• Call Forward
• Voice Mail
• Call Park
• Instant Messaging
SIP Software for Avaya 1200 Series IP Deskphones-Administration
September 2013
189
Hotline service
• MLPP
• E911 call
The display of each feature that is restricted on the Hotline Phone is blocked.
Provisioning
Hotline Service configuration is obtained from the Hotline Service Enable parameter from the
service package or the device configuration file. The service package takes precedence over
the device configuration file.
Service Package
You can turn Hotline Service, on or off, through the Service Package or the device configuration
file. If the Hotline Service Enable parameter from the service package is configured as true,
the Hotline Service is enabled (available) from the service package.
Device configuration file
The IP Deskphone uses the configuration parameters for the Hotline Service to indicate if
Hotline Service is available and if a hotline call is in progress.
The following table describes the two configuration parameters in the device configuration file
for Hotline Service.
Table 59: Hotline Service configuration parameters
Parameter name
190
Description
Default
HOTLINE_ENABLE
Indicates if Hotline Service is No (indicates that Hotline
enabled or disabled.
Service is disabled)
HOTLINE_URL
Used as To field of INVITE
Hotline
message by the SIP IP
Deskphone to notify the
Proxy Server that this is a call
from a Hotline Phone. The
HOTLINE_URL is not a real
URL of the Hotline target.
The IP Deskphone has no
idea about the Hotline target.
SIP Software for Avaya 1200 Series IP Deskphones-Administration
Comments? [email protected]
September 2013
Device configuration file
Parameter name
Description
Default
The Proxy server replaces
the To field of INVITE request
message with a real Hotline
target when it receives an
INVITE request from the
Hotline Phone.
SIP Software for Avaya 1200 Series IP Deskphones-Administration
September 2013
191
Hotline service
192
SIP Software for Avaya 1200 Series IP Deskphones-Administration
Comments? [email protected]
September 2013
Chapter 17: Session Timer Service
The Session Timer for the Session Initiation Protocol (SIP) feature (RFC4028) allows the Avaya 1200
Series IP Deskphone to support a keep-alive mechanism for SIP sessions. SIP sessions are periodically
refreshed by UPDATE requests (or re-INVITES for the IP Deskphones that do not support UPDATE). The
UPDATE requests are sent during an active call to allow endpoints or proxies to determine the status of
a SIP session.
The Session Timer Service contains the following elements:
• Session-Expires header
• Min-SE header
• response message (422—Session interval too small)
• tag (timer) for existing headers
The SIP IP Deskphone generates, processes and handles the SIP messages that include the preceding
elements.
Session-Expires header
The SIP Session-Expires header delivers the Session-Expires interval and provides
information about the entity performing the refreshes. A value of "uac" indicates that the
originating endpoint performs the refresh; a value of "uas" indicates that the terminating
endpoint performs the refresh. The session interval is the maximum amount of time that occurs
between session refresh requests in a dialog box before the session times-out. The minimum
for this field is 90 seconds; the recommended value is 1800 seconds (30 minutes).
Min-SE header
The Min-SE header indicates the minimum value for the session expiration in units of deltaseconds. When a call is made, the presence of the Min-SE header informs the terminating
endpoint, and proxies, of the minimum value that the originating endpoints accept for the
session timer duration in units of delta seconds. When present in a 422 response, the Min-SE
header indicates the minimum session value the terminating endpoint accepts.
When present in a request or response, the value of the Min-SE header is 90 seconds or more.
If the Min-SE header is not present, the default value is 90 seconds. It is a configurable
parameter.
SIP Software for Avaya 1200 Series IP Deskphones-Administration
September 2013
193
Session Timer Service
Provisioning
The IP Deskphone uses the configuration parameters for the Session Timer Service to indicate
if the Session Timer Service is available, and to configure the duration of the session timer.
The following table describes the five configuration parameters in the device configuration file
for Session Timer Service.
Table 60: Session Timer Service configuration parameters
Parameter name
194
Description
Default value
SESSION_TIMER_ENABLE
Indicates if the session timer
service is enabled or disabled. If
configured as Yes, the Session
Timer Service for the IP
Deskphone is enabled, and the
behavior of the IP Deskphone
complies with RFC4028. If
configured as No, the Session
Timer Service is disabled.
SESSION_TIMER_DEFAULT_SE
1800
Indicates the default session
expiration in seconds. The
Session-Expires header, in a
request, informs the terminating
endpoint and proxies of the
Session-Expires interval value that
the originating endpoint requires
for the session timer duration, in
unites of delta seconds.
SESSION_TIMER_MIN_SE
Indicates the minimum session
expiration in seconds.
SET_REQ_REFRESHER
Indicates what refresher value is
0
configured in the initial session
request. Value 0 indicates that the
refresher is omitted; value 1
indicates that the refresher is
configured to UAC; value 2
indicates that the refresher is
configured to UAS.
SET_RESP_REFRESHER
Indicates what refresher value is
2
configured in the 200 OK response.
Value 0 indicates that the refresher
is omitted (only valid when
SET_REQ_REFRESHER is not
equal to 0); value 1 indicates that
SIP Software for Avaya 1200 Series IP Deskphones-Administration
Comments? [email protected]
Yes
1800
September 2013
Provisioning
Parameter name
Description
Default value
the refresher is configured to UAS;
value 2 indicates that the refresher
is configured to UAC.
SIP Software for Avaya 1200 Series IP Deskphones-Administration
September 2013
195
Session Timer Service
196
SIP Software for Avaya 1200 Series IP Deskphones-Administration
Comments? [email protected]
September 2013
Chapter 18: Emergency Services
Overview
You can use the Avaya 1200 Series IP Deskphone to make an emergency call to the Public
Safety Answering Point (PSAP), from any screen, without a user logon. When you connect to
the PSAP, the IP Deskphone conveys the caller's location information to the PSAP. If you are
not logged on to the IP Deskphone and you pick up the handset or press the handsfree or
headset button, the message "Emergency calls only" appears on the screen of the
IP Deskphone.
If you hang up before the connection is established, the IP Deskphone goes back to the initial
state. After the connection is established, in most cases the call can only be ended by the
Public Safety Answering Point (PSAP). If you hang up, the IP Deskphone switches to
loudspeaker. If the IP Deskphone is already on the loudspeaker mode, and you press the hang
up button, nothing happens. The call is still connected and can only be disconnected by the
emergency operator.
Note:
If E911_TERMINATE_ENABLE is provisioned for the IP Deskphone, then the caller can
terminate the call to emergency services even after the call is established.
Emergency calls originate on the IP Deskphone and are completed by the Call Server. The
Call Server communicates with the emergency network or emergency systems for routing, call
control, and location information. Although the IP Deskphone allows the user to enter location
information, this location information is not used by all Call Servers. Some Call Servers derive
the location information based on the number and location databases. Characteristics of
emergency calls and limitations of emergency calls using the IP Deskphone are as follows:
• Making calls without logging on is only allowed for emergency calls (according to the
defined dialing plan).
• Transmission of the location information depends on M5T SIP Stack version 4.1 (because
it must be able to transmit multiple MIME types).
SIP Software for Avaya 1200 Series IP Deskphones-Administration
September 2013
197
Emergency Services
Location information
Effective Emergency services also rely on accurate location information. The IP Deskphone
supports the inclusion of the x-nt-location header in SIP messages that provide location
information to a Avaya Call Server. The location information is selected by the user during
registration, and must be correctly provisioned at the Call Server level (see appropriate NTP
specific to your Call Server).
Dialing plan configuration
To allow operator control of disconnect during an emergency call, the IP Deskphone must
identify an emergency call as soon as an emergency call is initiated. The IP Deskphone uses
an emergency flag in the dialing plan to identify an emergency call. When the dialing plan
detects that an emergency number is dialed, it automatically switches to operator controlled
disconnect mode when the call is answered. The dialing plan can have multiple emergency
numbers.
The following outline describes the format for the dialing plan rules.
1. The first part contains one or more patterns. The patterns are used to match against
the dialed number. Multiple patterns are separated by the | character.
2. The second part contains the resulting string used in the dial step.
3. The third part defines the parameters used by the UA to trigger specific dialing
actions. The following parameters are defined in the third part and are separated
by the | character if both are used.
• t=xxxx: timer to stop collecting digits or perform automatic dialing out after the
user enters the first digit. The xxx is a decimal number for the timer value in
msec. The default timer is used if the timer is not specified in the digit map.
• emergency: if specified, special call features are enabled to handle the call as
an emergency call.
The following is an example of an emergency flag in the dialing plan:
911|911#
&& sip:[email protected] && t=1000|emergency
This feature requires configuring the values for additional variables in the IP Deskphone config
file.
The following table describes the configuration values for the emergency dialing plan.
198
SIP Software for Avaya 1200 Series IP Deskphones-Administration
Comments? [email protected]
September 2013
Dialing plan configuration
Table 61: E911 Configuration in the IP Deskphone Config file
E911_USERNAME
The emergency user name used for making
an emergency call that does not require a
logon. You must configure the proxy with the
same emergency user name, otherwise, the
emergency call fails.
E911_PROXY
Default emergency proxy. This variable must
contain the value that matches the value
defined by one of the following variables
specified in the same config file:
• SIP_DOMAIN1
• SIP_DOMAIN2
• SIP_DOMAIN3
• SIP_DOMAIN4
• SIP_DOMAIN5
If E911_PROXY does not match the value
defined by these five variables, or the
variable E911_PROXY is not defined, the
value of SIP_DOMAIN1 is used as the
emergency proxy.
E911_PASSWORD
The password for emergency username that
is used for making an emergency call that
does not require login. The proxy must be
configured with the same password,
otherwise the emergency call fails.
E911_TXLOC
The variable that describes location
information that must be sent with the
REGISTER SIP message, or with the INVITE
SIP message.
Important:
You must add a set of numbers (regular expressions) marked as "emergency" to the
IP Deskphone dialing plan. Only these numbers are allowed for emergency calls that do not
require logon.
SIP Software for Avaya 1200 Series IP Deskphones-Administration
September 2013
199
Emergency Services
Feature impact on configuration tasks
1. Configuring the SIP Proxy
• The IP Deskphone must have an emergency user in order to make an
emergency call without a user logon.
• The IP Deskphone must have the necessary configurations values for
automatic REGISTER of the emergency user (if you choose this
implementation method).
• You must add the emergency user to the proxy.
2. Adding the emergency user to the IP Deskphone config file
• The IP Deskphone must have E911_USERNAME, E911_PROXY, and
E911_PASSWORD configured for making emergency calls.
• The IP Deskphone must have a specified proxy that contains a user record
with the specified user name and password.
• The IP Deskphone must have these values for automatic REGISTER of the
emergency user (if you choose this way of implementation).
• You must add specified variables to the IP Deskphone config file.
3. Adding an emergency number
• You must specify an emergency number for emergency calls to:
- define the numbers that you can use for an emergency call that does not
require logging on.
- trigger emergency functionalities, such as the inability of an emergency
call originator to hold or hang up the call after the call is established.
• You can only dial these numbers if there is no user log on (or the IP Deskphone
is blocked).
• You must add the emergency number to the dialing plan. The emergency flag
is mandatory. For more information on the format for dialing plan rules, see
Dialing plan configuration on page 198.
4. Configuring Layer 2 switch of the DHCP server to provide the IP Deskphone with
location information
• You must configure the Layer 2 switch or DHCP server to provide the
IP Deskphone with location information.
• You must provide the IP Deskphone with location information because the
IP Deskphone sends it to the PSAP when making an emergency call.
200
SIP Software for Avaya 1200 Series IP Deskphones-Administration
Comments? [email protected]
September 2013
Network Element
• You must configure the Layer 2 switch or DHCP server.
Network Element
Configure the domain list and proxy set up
• You must properly configure the domain list, and the active proxy must be correct, valid,
and support current features.
• You must properly configure the proxy to support current features.
• The proxy must be able to transmit mixed MIME-types (for successful transferring of the
location information).
Setup and configure Layer 2 switch or DHCP server to provide the IP Deskphone with
location informationSetup and configure Layer 2 switch or DHCP server to provide the
IP Deskphone with location information
• You must properly configure the Layer 2 switch or DHCP server to provide the SIP
IP Deskphone with location information through LLDP-MED or DNCP protocols
respectively.
• You must properly configure the Layer 2 switch or DHCP server to provide the
IP Deskphone with location information.
Configure the proxy with emergency user name and password
• You must have configuration access to the proxy to arrange for an emergency user (if
this manner of implementation is chosen).
• The emergency user and password at the proxy side must be identical to the emergency
user and password that every IP Deskphone is configured with. Otherwise, you cannot
make an emergency call without logging on.
Characteristics of emergency calls
The user does not have to log on to make an emergency call.
During an emergency call, the user:
• cannot make outgoing calls.
• is not notified of incoming calls and cannot accept incoming calls. Incoming calls receive
a call waiting tone.
• cannot transfer, join, or conference the emergency call, place the emergency call on hold,
or park the emergency call.
SIP Software for Avaya 1200 Series IP Deskphones-Administration
September 2013
201
Emergency Services
• cannot receive an incoming call.
• cannot auto-retrieve a parked call and auto-retrieval of parked calls is not displayed.
• cannot disconnect the emergency call in most cases. Only an emergency center or
operator can disconnect the emergency call. If the user attempts to disconnect after the
call has been made, the IP Deskphone switches to loudspeaker. If the loudspeaker mode
is already on, the connection remains.
Note:
If E911_TERMINATE_ENABLE is provisioned, then the caller can terminate the call to
emergency services even after the connection has been made.
• cannot change Audio Quality.
• can reply to IM pop-ups, which are operational during an emergency call.
During an emergency call, the keys function as follows:
• the Services, Inbox, Outbox, and Address Book keys are all disabled.
• a right click of the mouse does not show the services menu.
• the conspicuous keys are disabled.
• the mute key and hold key are disabled.
• the increase and decrease volume keys remain functional.
• the feature keys are visible and all except the speed-dial keys are functional.
Shut down and restart
If the IP Deskphone turns on or off, the IP Deskphone restarts in the usual way, reads the
config file, and receives the location information through LLDP-MED or DHCP protocols (from
the Layer 2 switch or DHCP server, which must be available and properly configured).
Otherwise, the IP Deskphone is not provided with valid location information and cannot transmit
that information when making an emergency call.
202
SIP Software for Avaya 1200 Series IP Deskphones-Administration
Comments? [email protected]
September 2013
Chapter 19: IP Deskphone restrictions
Service package restrictions
Individual features and feature restrictions are sent to the IP Deskphone as a part of the service
package every time a particular user logs on to the IP Deskphone. If the Call Server does not
support service packages, or if the Call Server restricts some of the features in the service
package, functionality of some features is restricted.
If functionality is restricted, the associated buttons and Context-sensitive soft keys are not
accessible or do not respond.
Distinctive Ringing feature
The IP Deskphone does not support the CS 2000 and CS 2100 Distinctive Ringing feature.
SIP Software for Avaya 1200 Series IP Deskphones-Administration
September 2013
203
IP Deskphone restrictions
204
SIP Software for Avaya 1200 Series IP Deskphones-Administration
Comments? [email protected]
September 2013
Chapter 20: NAT firewall traversal
The objective of putting devices behind a Network Address Translator (NAT) is to protect the devices from
external interruption and to extend the public IP address space. However, the shield to stop unsolicited
incoming traffic also has the drawback of breaking a number of IP applications, including SIP.
If a device is behind a NAT, transport addresses obtained are not publicly routable, and therefore, not
useful in a number of multimedia applications. The limited lifetime of the NAT port mapping can also cause
the SIP signaling to fail. If a port mapping is idle, it can be released by the NAT and reassigned to other
applications.
The STUN protocol lets an IP Deskphone discover the presence and type of NATs between the
IP Deskphone and the public Internet. In addition, an IP Deskphone can discover the mapping between
the private IP address and port number and the public IP address and port number. Typically, a service
provider operates a STUN server in the public Internet, with STUN-enabled IP Deskphones embedded in
end-devices, which are possibly behind a NAT.
A STUN server can be located using DNS SRV records using the domain of the service provider as the
lookup. STUN typically uses the well-known port number 3478. STUN is a binary encoded protocol with
a 20-octet header field and possibly additional attributes. The STUN protocol learns the public IP
addresses, and therefore, some security is necessary.
To initiate a STUN lookup, the IP Deskphone sends one or more Binding Request packets using UDP to
the STUN server. These packets must be sent from the same IP address that the IP Deskphone uses for
the other protocol, because this is the address translation information that the IP Deskphone tries to
discover.
The server returns Binding Response packets, which tell the IP Deskphone the public IP address and port
number from which it received the Binding Request. The IP Deskphone knows the private IP address and
port number it used to send the Binding Request, and therefore, it learns the mapping between the private
and public address space being performed by the NAT. If the Binding Response packets indicate the
same address and port number as the request, the IP Deskphone knows no NATs are present.
The IP Deskphone supports two methods for NAT traversal of the signaling path:
• SIP_PING
• STUN
The NAT traversal method can be selected manually through the Device Settings menu or configured
through the device configuration file. The default NAT traversal method is NONE.
The IP Deskphone can conduct SIP dialogs through a Symmetric NAT using UDP. This allows the
IP Deskphone to work from behind and/or in front of a symmetrical NAT with servers and/or clients that
support RFC3581. For this feature to work properly, the receiving end device must support RFC3581.
This feature is enabled or disabled through the USE_RPORT parameter in the device configuration file.
Note:
RFC3581 does not address NAT traversal for media or voice.
SIP Software for Avaya 1200 Series IP Deskphones-Administration
September 2013
205
NAT firewall traversal
206
SIP Software for Avaya 1200 Series IP Deskphones-Administration
Comments? [email protected]
September 2013
Chapter 21: Three-port switch and VLAN
functionality
System overview
The Full VLAN support feature can create an IP Deskphone Voice VLAN and PC Data VLAN
on the three-port switch manually or automatically (see Figure 27: Voice-VLAN and Data
VLAN on page 208).
If both Data and Voice VLANs are enabled on a three-port switch, only the frames with Data
and Voice VLAN tagged go to the networks. The IP Deskphone receives only the frames with
Voice VLAN tagged and sends the frames with Voice VLAN tagged, while PC or Local
Networks receive all kinds of frames.
When only voice VLAN is enabled on the three-port switch, all kinds of frames go to the
Network, the IP Deskphone receives only the frames with Voice VLAN tagged and sends all
frames with Voice VLAN tagged. PC or Local Networks receive all kinds of frames.
SIP Software for Avaya 1200 Series IP Deskphones-Administration
September 2013
207
Three-port switch and VLAN functionality
Figure 27: Voice-VLAN and Data VLAN
Table 62: Port functions on the three-port switch when VLAN is enabled
Ports
Network
Port
(Port 0)
208
Voice VLAN
enabled
N/A
Data VLAN enabled
N/A
SIP Software for Avaya 1200 Series IP Deskphones-Administration
Comments? [email protected]
Both Voice and Data VLAN
enabled
N/A
September 2013
System overview
Ports
Voice VLAN
enabled
Data VLAN enabled
Both Voice and Data VLAN
enabled
IP Deskpho
ne Port
(SMP)
Receiving the
frames with Voice
VLAN tagged only.
Sending the frames
with Voice VLAN
tagged.
N/A
Receiving the frames with
Voice VLAN tagged only.
Sending the frames with
Voice VLAN tagged.
PC Port
(Port 1)
N/A
Tagging the incoming
frame untagged and
forwarding it to the
network port.
Replacing the incoming
frame tagged with
VLAN other than DataVLAN and forwarding it
to the network port.
Sending all kinds of
frames.
Tagging the incoming frame
untagged and forwarding it
to the network port.
Replacing the incoming
frame tagged with VLAN
other than Data-VLAN and
forwarding it to the network
port.
Sending all kinds of frames.
VLAN configuration can be done either manually or through DHCP. Refer to Device Settings
on the IP Deskphone with SIP Software on page 119 for more detail on configuring VLANs.
SIP Software for Avaya 1200 Series IP Deskphones-Administration
September 2013
209
Three-port switch and VLAN functionality
210
SIP Software for Avaya 1200 Series IP Deskphones-Administration
Comments? [email protected]
September 2013
Chapter 22: SIP messages supported by the
IP Deskphone
SIP methods
The table below provides a list of SIP messages supported by the Avaya 1200 Series IP
Deskphone.
Table 63: SIP methods
Method
Supported?
Comments
INVITE
Yes
Mid-call re-invites for media changes also supported.
ACK
Yes
BYE
Yes
CANCEL
Yes
OPTIONS
Response
only
INFO
Yes
Optionally used for in-session DTMF signaling, and Avaya
Call Server specific NAT detection
PING
Yes
Proxy detection, monitoring and Avaya Call Server
specific firewall traversal
REGISTER
Yes
For user registration
REFER
Yes
For transfer
NOTIFY
Yes
SUBSCRIBE
Yes
PUBLISH
Yes
For VQMon Publish
PRACK
Yes
No support for PRACK-specific early-media negotiation
scenarios
MESSAGE
Yes
UPDATE
Yes
UPDATE messages received in an early dialog state
require reliable provisional responses. If PRACK is
disabled, or not used by a local or remote party, some
SIP Software for Avaya 1200 Series IP Deskphones-Administration
September 2013
211
SIP messages supported by the IP Deskphone
Method
Supported?
Comments
UPDATE operations fail as described in RFC3311. The
support of UPDATE messages is not a configurable
feature.
SIP responses
The following SIP responses are also supported:
• 1xx Response—Information Responses
• 2xx Responses—Successful Responses
• 3xx Response—Request Failure Responses
• 4xx Response—Server Failure Responses
• 6xx Response—Global Responses
1xx Response—Information Responses
1xx Response
212
Send
Receive
Comments
100 Trying
Yes
Yes
The IP Deskphone can generate
this response for an incoming
INVITE if it has taken too long to
generate a 180 response. Upon
receiving this response, the
IP Deskphone waits for a 180
Ringing, 183 Session Progress, or
200 OK responses.
180 Ringing
Yes
Yes
The IP Deskphone begins local
ringing through the active
transducer.
181 Call is being
forwarded
No
Yes
See 183.
182 Queued
No
Yes
See 183.
183 Session
progress
No
Yes
The IP Deskphone accepts a 183
response with SDP to allow for
early-media negotiation.
SIP Software for Avaya 1200 Series IP Deskphones-Administration
Comments? [email protected]
September 2013
2xx Response—Successful responses
2xx Response—Successful responses
2xx Response
Send
Receive
200 OK
Yes
Yes
202 Accepted
Yes
Yes
Comments
3xx Response—Redirection responses
3xx Response
Send
300 Multiple Choices No
301 Moved
permanently
302 Moved
temporarily
305 Use Proxy
No
Yes
Yes
380 Alternate service No
Receive
Comments
Yes
When receiving this response, the
IP Deskphone redirects the original
request to next contact specified.
Yes
When receiving this response, the
IP Deskphone redirects the original
request to the new contact
specified. However, the
IP Deskphone takes no additional
special consideration of the
"permanent" status of this change.
Yes
This response is sent to an
incoming invite if the IP Deskphone
has local call-forwarding enabled.
When receiving this response, the
IP Deskphone redirects the original
request to the new contact
specified.
Yes
The IP Deskphone generates
these responses when receiving
requests that did not come through
the configured SIP proxy. When
receiving this request, the
IP Deskphone contacts the new
address in the Contact header
field.
Yes
When receiving this request the
IP Deskphone contacts the new
SIP Software for Avaya 1200 Series IP Deskphones-Administration
September 2013
213
SIP messages supported by the IP Deskphone
3xx Response
Send
Receive
Comments
address in the Contact header
field.
4xx Response—Request failure responses
4xx Response
400 Bad request
Yes
Receive
Comments
Yes
The IP Deskphone generates a
400 Bad Request response for
various failure conditions generally
when a request is invalid, and a
more specific error response does
not apply.
401 Unauthorized
No
Yes
Receiving a 401 response results
in the IP Deskphone re-issuing the
request using HTTP digest
authentication.
402 Payment
required
No
Yes
See Default error handling on
page 217.
403 Forbidden
No
Yes
SeeDefault error handling on
page 217.
Yes
The IP Deskphone generates this
response for requests to unknown
users. Receiving this response
falls through to the default
handling.
Yes
The IP Deskphone ends this
response to a known method if it is
received at a time when the
IP Deskphone is not prepared to
handle or the request is missing
necessary information. Receiving
this response falls through to the
default handling.
Yes
The IP Deskphone can send this
response when receiving a REFER
request which has an unsupported
URI. Receiving this response falls
through to the default handling.
404 Not found
405 Method not
allowed
406 Not acceptable
214
Send
Yes
Yes
Yes
SIP Software for Avaya 1200 Series IP Deskphones-Administration
Comments? [email protected]
September 2013
4xx Response—Request failure responses
4xx Response
407 Proxy
authentication
required
Send
Receive
Comments
No
Yes
See 401.
408 Request timeout No
Yes
See default handling.
410 Gone
Yes
See Default error handling on
page 217.
No
413 Request entity
too large
No
Yes
See Default error handling on
page 217. The IP Deskphone
does not automatically retry if a
retry-after header is present.
414 Request---URL
too long
No
Yes
See Default error handling on
page 217.
Yes
The IP Deskphone can send this
response when an incorrect
content-type is detected for a
request. Receiving this response
falls through to the default
handling. See Default error
handling on page 217.
415 Unsupported
Media
Yes
420 Bad Extension
Yes
Yes
The IP Deskphone can respond
with a 420 when checking required
extensions of incoming requests.
When receiving a 420, see default
handling. The IP Deskphone does
not retry the request.
480 Temporarily
unavailable
No
Yes
See Default error handling on
page 217.
481 Call leg/
transaction does not
exist
Yes
Yes
Incoming requests are matched
against existing dialogs. If a
request appears to be in-dialog,
but does not have an existing
dialog, the IP Deskphone responds
with a 481. For incoming 481
responses, the default handling is
used. See Default error
handling on page 217.
482 Loop detected
Yes
Yes
Default handling is used when this
response is received. See Default
error handling on page 217.
483 Too Many Hops
No
Yes
See Default error handling on
page 217.
484 Address
Incomplete
No
Yes
See Default error handling on
page 217.
SIP Software for Avaya 1200 Series IP Deskphones-Administration
September 2013
215
SIP messages supported by the IP Deskphone
4xx Response
485 Ambiguous
Send
No
Receive
Comments
Yes
See Default error handling on
page 217. The IP Deskphone
does not attempt to retry the
request.
486 Busy Here
Yes
Yes
The IP Deskphone can respond
with this if the user is on the
IP Deskphone, and the
IP Deskphone has reached its
maximum number of allowed calls
and cannot present the incoming
call to the user. When this
message is received by the
IP Deskphone an error is displayed
and a busy tone is played.
487 Request
Canceled
Yes
Yes
See default handling.
488 Not Acceptable
Yes
Yes
The response is used by the
IP Deskphone when a failed media
negotiation occurs.
491 Request
Pending
Yes
Yes
The IP Deskphone sends and
receive this message in GLARE
conditions.
5xx Response—Server failure responses
5xx Response
216
Send
Receive
Comments
500 Internal Server
Error
Yes
Yes
The IP Deskphone can send this
response when a request is
received but the IP Deskphone
software is not in a correct state to
handle it. When receiving this
message, the IP Deskphone
displays an error for the user.
501 Not
Implemented
No
Yes
See Default error handling on
page 217.
502 Bad Gateway
No
Yes
See Default error handling on
page 217.
503 Service
Unavailable
Yes
Yes
SIP Software for Avaya 1200 Series IP Deskphones-Administration
Comments? [email protected]
September 2013
6xx Response—Global responses
5xx Response
Send
Receive
504 Gateway timeout No
Yes
505 Version Not
Supported
Yes
Yes
Comments
See Default error handling on
page 217.
6xx Response—Global responses
6xx Response
600 Busy
Everywhere
Send
Yes
Receive
Comments
Yes
The IP Deskphone can send this
response when the IGNORE
setting is configured to
NETWORK, and the user chooses
to ignore an incoming call. When
received, this response falls
through the default handling. See
Default error handling on
page 217.
603 Decline
Yes
Yes
The IP Deskphone can send this
response when the user declines
an incoming call. An optional
reason can be supplied.
604 Does Not Exist
Anywhere
No
Yes
SeeDefault error handling on
page 217.
606 Not Acceptable
No
Yes
See Default error handling on
page 217.
Default error handling
All 4xx/5xx/6xx responses (with the exception of 401/407) received by the IP Deskphone, when
attempting to initiate a call, result in the display of an error on the screen, and typically results
in fast or regular busy tone.
If a media negotiation fails during dialog setup, the IP Deskphone terminates the dialog.
If an in-dialog failure occurs during media (re)negotiation, the IP Deskphone falls back to
previously-negotiated media settings. When a failure occurs that makes this impossible, the
IP Deskphone attempts to clear the call by terminating the dialog.
SIP Software for Avaya 1200 Series IP Deskphones-Administration
September 2013
217
SIP messages supported by the IP Deskphone
SIP header fields
The following table contains the supported SIP headers.
Header field
218
Supported?
Accept
Yes
Accept-Encoding
Yes
Accept-Language
Yes
Alert-Info
Yes
Allow
Yes
Allow-Events
Yes
Authentication-Info
Yes
Authorization
Yes
Call-Id
Yes
Call-Info
Yes
Contact
Yes
Content-Disposition
Yes
Content-Encoding
Yes
Content-Length
Yes
Content-Type
Yes
Cseq
Yes
Date
Yes
Expires
Yes
Error-Info
Yes
Max-Forwards
Yes
Mime-Version
Yes
Organization
Yes
P-Access-Network-Info
Yes
P-Asserted-Identity
Yes
P-Associated-URI
Yes
P-Called-Party-ID
Yes
SIP Software for Avaya 1200 Series IP Deskphones-Administration
Comments? [email protected]
September 2013
SIP header fields
Header field
Supported?
P-Charging-Function-Addresses
Yes
P-Charging-Vector
Yes
P-Media-Authorization
Yes
P-Preferred-Identity
Yes
P-Visited-Network-ID
Yes
Path
Yes
Priority
Yes
Privacy
Yes
Proxy-Authenticate
Yes
Proxy-Require
Yes
RAck
Yes
Reason
Yes
Record-Route
Yes
Refer-To
Yes
Referred-By
Yes
Remote-Party-ID
Yes
Replaces
Yes
Reply-To
Yes
Require
Yes
Resource-Priority
Yes
Retry-After
Yes
Route
Yes
RSeq
Yes
Server
Yes
Service-Route
Yes
Subject
Yes
Supported
Yes
Timestamp
Yes
To
Yes
Unsupported
Yes
User-Agent
Yes
SIP Software for Avaya 1200 Series IP Deskphones-Administration
September 2013
219
SIP messages supported by the IP Deskphone
Header field
Supported?
Via
Yes
Warning
Yes
WWW-Authenticate
Yes
Session description protocol usage
SDP Headers
Supported?
v--Protocol version
Yes
o--Owner or creator and session identifier
Yes
s--Session name
Yes
t--Time description
Yes
c--Connection information
Yes
m--Media name and transport address
Yes
a--Media attribute lines
Yes
SDP and Call Hold
The IP Deskphone can support sending and receiving of hold using the method specified by
RFC2543 and RFC3261/3264.
Transport layer protocols
Protocol
220
Supported?
Unicast UDP
Yes
Multicast UDP
No
TCP
No
SIP Software for Avaya 1200 Series IP Deskphones-Administration
Comments? [email protected]
September 2013
SIP security authentication
SIP security authentication
Authentication
Supported?
Digest Authentication
Yes
Proxy-to-User
Authentication
Yes
User-to-User
Authentication
No
S/MIME
No
AKA
No
Comments
The IP Deskphone responds to
a 401, but never challenges
incoming requests with a 401
response.
SIP DTMF Digit transport
Transport type
Supported?
RFC2833
Yes
In-band tones
Yes
Out-of-band tones
Yes (vnd.avaya.digits)
Supported subscriptions
Subscription type
Supported
Avaya Call Server specific
address-book
Yes
Yes
call-park
Yes
Yes
dialog
Yes
Yes
presence
Yes
Yes
message-summary
Yes
No
SIP Software for Avaya 1200 Series IP Deskphones-Administration
September 2013
221
SIP messages supported by the IP Deskphone
Subscription type
Supported
Avaya Call Server specific
ua-profile
Partial
Yes
service-package
Yes
Yes
network-redirectionreminder
Yes
Yes
Supported instant messaging
Message type
222
Supported?
plain text
Yes
Avaya unencrypted
Yes
Avaya encrypted
Yes
SIP Software for Avaya 1200 Series IP Deskphones-Administration
Comments? [email protected]
September 2013
Chapter 23: Audio codecs
Overview
The optional audio codecs feature allows you to select the audio compression or
decompression algorithm (codec) used on the Avaya IP Deskphone. You provision codecs
using the Device Configuration file, and then the user can select from the provisioned codecs
using the Audio menu on the Avaya 1200 Series IP Deskphone.
When the user selects an audio codec, that codec is used for both incoming and outgoing
calls.
The following table lists the audio codecs supported by IP Deskphone.
Table 64: Audio codecs supported by IP Deskphone
Codecs
Description
G.723.1
This codec is a compressed, nonwideband audio codec. It
provides high-quality audio with less network connection
requirements. This codec is ideal for bandwidth-conscious
environments that do not support higher quality encoding.
Expanded support of the existing G.729a codec with Annex
allows for two byte Silence Insertion Descriptor (SID) frame for
CNG.
G.711 a-law
PCMA
G.711 mu-law
PCMA
G.729
In the case of an upgrade from a UNIStim IP Deskphone or an earlier version of the SIP
firmware, Avaya recommends that you specify the preferred codec in the Device Configuration
file; otherwise the default value is used.
The G.711 codec (PCMU and PCMA) is always used to place the codec list for emergency
911 calls. The G.711 codec is always used to receive incoming calls from the emergency
operator. If the administrator disables this codec, the SIP IP Deskphone can make outgoing
non emergency calls.
You can configure a maximum of 15 codecs. You can enable or disable the use of specific
codecs for incoming and outgoing calls, though incoming and outgoing calls are not specifically
independent.
SIP Software for Avaya 1200 Series IP Deskphones-Administration
September 2013
223
Audio codecs
VQMON Codec configuration
You can enable the VQMON feature through the Device Configuration file to send an SIP
Publish message with the VQMON report as text content, and use this report for QoS
monitoring.
Network layer for the SDP negotiations
The following table contains static payload types and other parameters for the supported
codecs.
Table 65: Static payload types and other parameters for for the supported codecs for
the IP Deskphone
Codec
Payload
type
SDP
Clock
encoding rate (HZ)
name
G.711 alaw
8
PCMA
8000
ePCMA
20
1
G.711 ulaw
0
PCMU
8000
ePCMU
20
1
G729
8000
eG729
20
1
G.729A + 18
40ms
ptime
G.729B
18
G.723.1
4
G.723.1A 4
G723
Bit rate
(kbps)
M5T
name
ptime
Channel
(milisec)
s
8000
8
eG729
20
1
8000
5.3
6.3
eG723
30
1
8000
5.3
6.3
eG723
30
1
The annexes selection for G.729 and G.723.1 are not available to the user, and the
administrator is responsible for enabling or disabling annexes using Device Configuration
flags.
Codec preference through Device Configuration
Use the Device Configuration file to specify a list of codecs, and the preferred order in which
they are used for incoming and outgoing calls. You can also use the Device Configuration file
224
SIP Software for Avaya 1200 Series IP Deskphones-Administration
Comments? [email protected]
September 2013
Codec preference through Device Configuration
to enable or disable AnnexB support by G.729 and AnnexA support by G.723.1. You can add
a text descriptor to the technical name of the audio codec; these descriptors appear on the
user interface of the IP Deskphone.
You can specify, by name, the exact codecs to offer in the Device Configuration file. This grants
the administrator full control over the audio settings used for inbound and outbound calls. The
following table is a sample of Device Configuration file entries for audio codec configuration.
Table 66: Sample Device Configuration file codec entries
AUDIO_CODEC1
AUDIO_CODEC2
AUDIO_CODEC3
AUDIO_CODEC7
PCMA
PCMU
G729
G723
standard a-law
standard u-law
729 codec
high-compression codec
The following table lists the codec identifiers for the Device Configuration file.
Table 67: Codec identifiers for the Device Configuration file
PCMA
PCMU
G729
G723
The IP Deskphone displays the codecs listed in the exact order that they are listed in the Device
Configuration file.
The list of codecs specified in the Device Configuration file determines the list of codecs that
are available for selection on the IP Deskphone.
Two fields in the device configuration file, G729_ENABLE_ANNEXB and
G723_ENABLE_ANNEXA are used to enable or disable AnnexB and AnnexA support by G729
and G723 codecx, respectively. These flags can have the following values: YES, NO (No is
the default value).
Important:
If codecs are not specified, the default list used by the current version of the IP Deskphone
is PCMU, PCMA, G.729.
To stop the IP Deskphone from using a specific codec, you must change the its entry in the
Device Configuration file to a different codec, and then clear the value, which disables the
codec entry. If you remove all codecs from the allowed list, the IP Deskphone resets to the
default list of codecs.
Important:
To reset the phone to the default list of codecs, it is necessary to remove the values against
each AUDIO_CODECx item in the Device Configuration file.
SIP Software for Avaya 1200 Series IP Deskphones-Administration
September 2013
225
Audio codecs
For example:
AUDIO_CODEC1 PCMA standard a-law
AUDIO_CODEC2 PCMU standard u-law
AUDIO_CODEC3 G729 729 codec
AUDIO_CODEC4 G722 wideband codec
AUDIO_CODEC5 G723 high-compression codec
would become
AUDIO_CODEC1
AUDIO_CODEC2
AUDIO_CODEC3
AUDIO_CODEC4
AUDIO_CODEC5
If the ordered list of codecs is small and no matching codec is found during negotiations, the
call drops, as the audio stream cannot be established. For backward compatibility with SIP
Firmware Release 1.X, the Device Configuration file supports the DEF_AUDIO_QUALITY
parameter as long as no codec is allowed using the parameter AUDIO_CODECN, in which case
the DEF_AUDIO_QUALITY parameter is ignored and has no effect.
Specifying the DEF_AUDIO_QUALITY as High or Medium has the same effect as omitting the
parameter altogether and without specifying codec through the parameters.
If set to Low, then the list of default codecs is reversed before being sent in the SDP
negotiations. When you do not provide a text description in the Device Configuration file, the
application uses the default text description from the language file.
The AUDIO_CODECN parameters specifies the order of preference for audio codecs. If there
are no valid entries provided, then the parameter uses the default list of codecs. If you enter
a codec that is not recognized by the IP Deskphone then the parameter considers the codec
as a blank entry. To remove a codec from the list, you must first blank the entry, or change it
to an invalid codec name in the Device Configuration file.
Codec preference selection on the IP Deskphone
The Audio Quality Settings screen on the IP Deskphone allows the user to select an exact
codec by name. This grants the user full control over the audio settings used for inbound and
outbound calls.
The list of codecs is populated with the names of the codecs provided during Device
Configuration. If a text descriptor is provided for a codec in the Device Configuration file, it
appears after the codec name. The Audio Codec Ordering screen allows the user to modify
the order of preference of the codecs. To change the list of available codecs, you must perform
an update through Device Configuration. The IP Deskphone creates the ordered list from the
list of codecs in the Device Configuration file. The user can reorder the list using the
226
SIP Software for Avaya 1200 Series IP Deskphones-Administration
Comments? [email protected]
September 2013
Codecs preferences on the IP Deskphone
Preferences menu on the IP Deskphone. On subsequent Device Configuration updates, at
start time, or during other updates, the ordered codec list of the user is synchronized with the
list in the Device Configuration file. This synchronization makes both lists equal. If the user
creates an order that is different from the one in the Device Configuration file, the IP Deskphone
appends it to the end of the list.
Codecs preferences on the IP Deskphone
The user cannot modify the text descriptors through the IP Deskphone; the text descriptors
can only be read by the user. After the system loads the Device Configuration file, the user
preference selections are synchronized with the system codecs specified in the Device
Configuration file. This ensures that the codecs available to the user are always set according
to user preferences.
If the user modifies the order through the IP Deskphone, then the user-defined order is saved
for the codecs that are defined as system codecs in the Device Configuration file. Codecs are
appended at the end of the list in their relative order from the Device Configuration file. Until
the user modifies the order of the codecs, the list of ordered codecs reflects the order specified
in the Device Configuration file.
The following table shows examples of the list of codecs provided by Device Configuration,
user configuration, and resulting list of codecs that the system uses for presentation and codec
negotiation purposes.
Table 68: Examples of the ordered lists of Codecs
Codecs Supported
Ordered list of
Ordered list of
Ordered list of
by the IP
codecs provided by codecs provided by codecs used by the
Deskphone
Device
user configuration
IP Deskphone
Configuration
A, B, C, D, E, F, G
A, B, C, D, E
N/A
A, B, C, D, E
A, B, C, D, E
E, D, C, B, A
E, D, C, B, A
A, B, C, D, E
A, D, E
A, D, E, B, C
A, C, D, E
A, B, C, D, E
A, C, D, E
A, C, D, E
A, B, C, E
A, C, E, D
Note:
The user-defined order of the codecs can be specified/changed by means of the Custom
keys file through the section [audiocodecs]. See Custom keys file on page 177. When the
IP Deskphone downloads the Custom keys file, the IP Deskphone performs the following
actions:
• The IP Deskphone parses the section [audiocodecs] from the Custom keys file. If the
codec specified within the file exists in the list of codecs in the Device Configuration
SIP Software for Avaya 1200 Series IP Deskphones-Administration
September 2013
227
Audio codecs
file, then the codec is added to the list of the supported codecs. Otherwise, the codec
is rejected.
• The IP Deskphone adds the last codecs, presented in the Device Configuration file, to
the list of supported codecs.
228
SIP Software for Avaya 1200 Series IP Deskphones-Administration
Comments? [email protected]
September 2013
Chapter 24: Certificate-based
authentication
Certificate-based authentication overview
Certificate-based authentication allows the administrator to ensure that the IP Deskphone is
authorized to access the enterprise LAN environment. Certificate-based authentication
supports three types of Extensible Authentication Protocols (EAP):
• EAP-MD5—User ID/password-based authentication
• EAP-PEAP—certificate-based authentication
• EAP-TLS—certificate-based authentication
Trusted root certificates and device certificates must be installed before using EAP-TLS, EAPPEAP or HTTPS.
Certificate-based authentication supports two types of device certificates: one is used by EAPTLA, and the other is used by SIP-TLS, but the administrator can also have a third device
certificate for HTTPS. The user must connect to a Certificate Authority (CA) to retrieve or sign
certificates. A CA is a trusted third party; components of a system agree to trust the CA to verify
the necessary information.
When the CA validates the user information, it issues the user a certificate that contains a
variety of data, including:
• the identity of the issuing CA
• how much the CA trusts the user
• an expiry date for the certificate
Other components of the system can read the user's certificate to determine if the certificate,
and the identity it represents, are valid.
The administrator can install and manage the certificates on the IP Deskphone. The certificates
authenticate the IP Deskphone to an authentication server before the IP Deskphone can
access the enterprise network.
Certificate-based authentication includes the following features:
• EAP Authentication
SIP Software for Avaya 1200 Series IP Deskphones-Administration
September 2013
229
Certificate-based authentication
The supplicant can be authenticated to an authentication server using one of these EAP
methods:
- EAP-MD5
- EAP-PEAP
- EAP-TLS
• Device certificate management
The administrator can install a device certificate on the IP Deskphone by using SCEP or
PKCS#12 import file. The IP Deskphone can verify the imported device certificate by
checking the availability of the IP Deskphone against the Certificate Trust List (CTL)
stored in the IP Deskphone. CTL is a predefined list of trusted certificates including CAs,
intermediate CAs, and server certificates which the IP Deskphone views as trust anchors.
The administrator can also view and delete a certificate on the IP Deskphone.
• Provisioning configuration file
The provisioning configuration file, such as 12xxSIP.cfg and all other configuration files
referred by 12xxSIP.cfg, specifies software and resource files that are downloaded to the
IP Deskphone from a provisioning server by using the secure provision method
HTTPS.
• Security and error logs
The administrator can view security and error logs that occurred during the operation of
the IP Deskphone. This feature is accessed through the Diagnostics screen.
• Security policy file updates
The security policy file defines a set of rules to determine the required actions taken by
the IP Deskphone.
Certificates overview
Certificates bind an identity to a pair of electronic keys that are used to encrypt and sign digital
information, and make it possible to verify someone's claim that they have the right to use a
given key. Certificates provide a complete security solution, assuring the identity of all parties
involved in a transaction. Certificates are issued by a Certification Authority (CA) and are
signed with the CA's private key.
A certificate contains the following information:
• Owner's public key
• Owner's name
• Expiration date of the public key
• Name of the issuer (the CA that issued the certificate)
230
SIP Software for Avaya 1200 Series IP Deskphones-Administration
Comments? [email protected]
September 2013
Root certificate installation
• Serial number of the certificate
• Digital signature of the issuer
Root certificate installation
The customer root certificate is a self-signed certificate (a self-issued certificate where the
subject and issue fields contain identical DNs, and are not empty). The customer root certificate
must be installed on the IP Deskphone and stored in the IP Deskphone trusted store for the
following reasons:
• to verify the identity of the various servers that the IP Deskphone may attempt to establish
secure connections with (such as TLS and HTTPS)
• to authenticate the signatures on software and configuration files that you download onto
the IP Deskphone.
You can install a customer root certificate by using Simple Certificate Enrollment Protocol
(SCEP) or by using the configuration file (for example 12xxSIP.cfg.).
If you use SCEP, you must first configure the URL of the CA SCEP server and the domain
name, and then you can connect to the CA and download a CA root certificate to the IP
Deskphone.
• The IP Deskphone sends the GetCACert request to the SCEP-enabled interface for a CA
server.
• The IP Deskphone waits for a response. If an error is received (such as timeout or server
unreachable), the registration process ends.
• The IP Deskphone accepts the reply which contains the CA root certificate. The reply may
also include one or two Registration Authority (RA) certificates which are stored
temporarily for use during the request for a device certificate.
• If the CA root certificate is not already on the IP Deskphone, the fingerprint is computed
and displayed. The computed fingerprint is the thumbprint of the certificate (the SHA1
hash of the public key of the certificate).
• You must Accept or Reject the fingerprint.
• If the CA root certificate is rejected, the registration process ends.
• If the CA root certificate is already in the trusted store, no prompt appears.
• If the fingerprint is accepted, the CA root certificate is added to the trusted store on the
IP Deskphone.
If you use the configuration file (for example, 11xxe.cfg), you can download one or more CA
root certificates to the IP Deskphone.
• The [USER_KEYS] section is added to the configuration file (for example 12xxSIP.cfg),
where the FILENAME attribute points to the file name of a customer root certificate in
Privacy Enhanced Mail (PEM) format. The PROTOCOL attribute of the [USER_KEYS]
SIP Software for Avaya 1200 Series IP Deskphones-Administration
September 2013
231
Certificate-based authentication
section can be assigned to one of the IP Deskphone supported protocols, such as HTTP,
TFTP, HTTPS and FTP.
• After the configuration file is downloaded and parsed by the IP Deskphone, the
[USER_KEYS] section is processed and the root certificate is downloaded to the IP
Deskphone.
• After the certificate file is downloaded, you must authenticate the contents of the certificate
file before installing it on the IP Deskphone. There are two possible situations.
- If there are no existing customer root certificates on the IP Deskphone, a fingerprint
for the file is computed. Depending on the value that is configured in the Security
Policy parameter, CUST_CERT_ACCEPT, the user can either be prompted to
accept this fingerprint, or prompted to enter the fingerprint for verification.
- If there is one or more customer root certificate on the IP Deskphone, the certificate
file must be digitally signed with a signing certificate. In this case, there is no
interaction with the user. The signature is internally verified and the signing certificate
is verified to be issued by a customer root certificate that is already installed on the
IP Deskphone.
• If the authentication of the file is successful, the customer root certificate is installed on
the IP Deskphone in the trusted certificate store.
Important:
Although the certificate file usually contains a single customer root certificate, it is possible
that the certificate file may contain more than one certificate and CRL. This occurs where
the PEM encoding for each certificate or CRL is appended in the file with a blank line
between each file. If the authenticity of the file is successfully verified, all entities in the file
are installed on the IP Deskphone.
When the IP Deskphone tries to establish a secure connection (for example, HTTPS, SIP TLS)
with a server, the server provides its certificate which then must be verified by the IP
Deskphone.
The following are the possible configurations (depending on the server configuration):
1. Server can provide only its Server certificate.
2. Server can provide the entire certificate chain (up to the Root CA certificate).
In the first scenario, the IP Deskphone only needs the CA certificate which was used to sign
the Server certificate. The certificate file must be PEM encoded.
In the second scenario, every certificate in the chain must be verified. Root and Intermediate
CA certificates of the chain must be installed in the IP Deskphone Trusted Certificates store.
Certificates must be PEM encoded and combined into one file.
Signing a resource file
The following is the command to sign a resource file using openssl .
232
SIP Software for Avaya 1200 Series IP Deskphones-Administration
Comments? [email protected]
September 2013
Device certificate installation
openssl smime –sign –in unsigned_file –signer sign_cert_file –outform
PEM –binary –inkey sign_cert_pk_file –out tmp_signature_file
The first customer root certificate must either be signed by a Avaya Trusted Certificate or
Fingerprint accepted. To control further signing of a customer root certificate, and prevent
security risks, the following Security Policy parameter must be configured.
CUST_CERT_ACCEPT — VAL_NO_CHECK
Device certificate installation
A device certificate is a certificate used to prove the identity of the IP Deskphone to a server
while establishing various secure connections, such as TLS and HTTPS, between the
IP Deskphone and a server. Each device certificate is associated with a specific usage
purpose. It is possible for one or two device certificates to be installed on the IP Deskphone
(for example, one for all TLS connections and one for VPN). A Device Certificate Profile (DCP)
allows for various combinations of sharing device certificates among different applications.
Within the DCP, you can identify one of more uses (or purposes) for the device certificate
associated with each profile, to provide a flexible model for the sharing of device certificates
among IP Deskphone applications.
The following sections describe the process used to install a device certificate on the
IP Deskphone. This process starts with defining a DCP for each device certificate that must
be installed on the IP Deskphone. See Device certificate profiles on page 234.
The two methods used to install a device certificate on the IP Deskphone are:
• SCEP
• PKCS#12 download
SCEP is a protocol that allows the IP Deskphone to send a device certificate request to a CA
server based on a locally generated private key to provide more security for the private key
(because the private key is never transmitted, even in an encrypted form). See SCEP on
page 239
PKCS#12 is an industry standard for exchanging certificate and private keys. A device
certificatd downloaded to the IP Deskphone in a PKCS#12 file contains the complete certificate
including the private key of the device certificate which is generated offline by a Certificate
Authority (CA). The PKCS#12 file is encrypted using password at the time of generation to
protect the private key. See PKCS 12 download on page 242.
For more information on defining a device certificate profile, see Device certificate profiles on
page 234.
SIP Software for Avaya 1200 Series IP Deskphones-Administration
September 2013
233
Certificate-based authentication
Device certificate profiles
You can determine the method used to install a device certificate on the IP Deskphone. Each
device certificate installed on the IP Deskphone is attached to a Device Certificate Profile
(DCP). The configuration of the profiles allows you to determine the method used to install a
device certificate and provides you with some control over the device certificate attributes.
You can do the following:
• Specify the method used to obtain a device certificate for the IP Deskphone (SCEP or
PKCS#12).
• Specify the purpose of a device certificate; whether the certificate is used for EAP-TLS,
or HTTPS (for example, allow sharing of device certificates).
• Renew a device certificate obtained by SCEP.
• Customize attributes requested from a SCEP server such as the Distinguished Name
(DN).
The following table defines the profile attributes and the allowed values for a device certificate
profile.
Table 69: Device Certificate Profile Attribute
Name
234
Type
Index
Int
Version
String
Source
Int
Active
Int
Value(s)
>0
Default
PKCS#12
Required
Description
Pre-defined [1MAX_PROFILE
S]
✔
Device
Certificate Profile
index.
""
✔
String containing
version of last
installed PKCS12
file.
0 = SCEP
1 = PKCS12
Index 1 = 0
Index 2+ = 1
✔
SCEP is default
for the first profile.
PKCS12 is
default for the
other profiles.
0 = Inactive
1 = Device
2 = User
(future)
Index 1 = 0
Index 2+ = 1
✔
Specifies if the
profile is active
and if the profile is
used for device or
user
authentication.
The value 0
indicates that the
device certificate
SIP Software for Avaya 1200 Series IP Deskphones-Administration
Comments? [email protected]
September 2013
Device certificate profiles
Name
Type
Value(s)
Default
PKCS#12
Required
Description
with this index is
not used
(regardless of the
Source value).
Purpose
Int
Bit flags
–1 (ALL)
✔
Covers all feature
usages plus
special cases for
All(=–1).
Delete
Int
0 = No
1 = Yes
0
✔
Used to force a
device certificate
to be deleted.
Automatically
resets to 0 after a
certificate is
deleted.
CAServerNam String
e
AdminCA1
✘
AdminCA1 is a
default for
backward
compatibility with
previous UNIStim
versions.
HostnameOve String
rride
""
✘
Override
hostname for this
certificate only
(only for SCEP).
The default is
empty because
the default is not
used.
Renew
Int
-1 = Never
30
0 = Immediate
>0 = # Days
✘
Number of days
remaining to
request a new
device certificate.
AutoCN
Boo1
0 = Manual 1
= Auto
✘
Auto means that
the common
name (CN) is
automatically
populated with
the UPN as in
UNIStim 3 (for
example:
hostname@dom
ainname). This is
provided for
1
SIP Software for Avaya 1200 Series IP Deskphones-Administration
September 2013
235
Certificate-based authentication
Name
Type
Value(s)
Default
PKCS#12
Required
Description
backward
compatibility.
CN
String
""
✘
Common Name
O
String
""
✘
Organization
OU
String
""
✘
Organizational
Unit
S
String
""
✘
Province/State
C
String
""
✘
Country
Key Usage
Int
0x00a0
✘
For example:
Digital Signature
+ Key
Encipherment.
Default is TLS
compatible.
Extended Key
Usage
Int
2 (clientAuth)
✘
For example:
clientAuth.
Default is TLS
client compatible.
✘
Following are
Subject
Alternative Name
fields that must
be specified.
SubjAltName
236
FQDN
Boo1
0
✘
Include in SCEP
request if
configured.
Content from
current hostname
and domain
name
configurations.
USER_FQDN
Boo1
0
✘
Include in SCEP
request if
configured.
Content from
current hostname
and domain
name
configurations.
IPAddress
Boo1
0
✘
Include in SCEP
request if
configured.
SIP Software for Avaya 1200 Series IP Deskphones-Administration
Comments? [email protected]
September 2013
Device certificate profiles
Name
Type
Value(s)
Default
PKCS#12
Required
Description
Content from
current hostname
and domain
name
configurations.
With the exception of the version, all the DCP configurations described in the preceding table
apply to SCEP-requested device certificates. The PKCS#12 column identifies the limited set
of parameter that apply to a DCP configured for PKCS#12. Many of the parameters apply only
to the configuration of a certificate request, which is why the parameters apply only to
SCEP.
The following describes the key profile attributes:
• Index
The Index is the index of the device certificate profile. For each type of IP Deskphone,
there is a fixed number of profiles available in the range of 1 to MAX_PROFILES. The
index also identifies a priority. When a device certificate is requested for a specific
purpose, such as EAP-TLS, the IP Deskphone searches through the device certificates
to find the first one that is defined, active and can be used for the requested purpose.
• Source
The Source identifies if the IP Deskphone requests the device certificate using SCEP or
if the device certificate is downloaded using PKCS#12. If PKCS#12 is specified, direct
action is not taken. This allows a downloaded device certificate to be installed in this
profile.
• Active
If the Active attribute is not active, the IP Deskphone assumes that there is no device
certificate associated with the profile and takes no action to request one (even if SCEP
is specified as the source).
• CAServerName
CAServerName is the name of a CA server that is sent in the initial SCEP request to get
the CA root certificate. Although some SCEP servers ignore the CAServerName, the
CAServerName is important for EJBCA, and to differentiate between multiple CAs on a
single server.
Important:
CAServerName must not be confused with the URL specified for the CA server which
is used to make the SCEP connection.
• AutoCN
The AutoCN parameter indicates if the CN in an SCEP certificate request should be
automatically populated based on the Hostname and Domain Name configuration
SIP Software for Avaya 1200 Series IP Deskphones-Administration
September 2013
237
Certificate-based authentication
parameters. The Hostname and Domain Name parameters are part of the overall IP
Deskphone configuration and are not configurable within each DCP.
- If AutoCN is configured as 1 (True), then the CN is constructed as
Hostname@Domainname.
- If AutoCN is configured as 0 (False), then the CN is configured as the value of the
CN parameter in the DCP.
• Purpose The Purpose attribute uses bit masks to identify what features a particular device
certificate is used for. Two bytes allows for any combination of up to 16 uses. For example,
a certificate that is used for EAP-TLS, DTLS and SCR have the purpose value of 97
(1+32+64).
The following table defines the values of the device certificate profile purposes.
Table 70: Device certificate profile purpose definitions
Application purpose of
usage
Value (hexidecimal)
Value
EAP-TLS
0x0001
1
SIP-TLS
0x0002
2
HTTPS
0x0004
4
LICENSING
0x0080
128
ALL
0xffff
-1
The default configurations for DCP #1 allow DCP #1 to be active and to use SCEP to retrieve
a device certificate that can be shared among all applications (purpose is ALL). All remaining
profiles are configured for PKCS#12 and to be inactive by default. The default configurations
are compatible with UNIStim 4 software. SIP 3.0 supports two profiles; SCEP and PKCS12.
To configure applications on the IP Deskphone, you must know which certificates are required
and what methods of device certificate installation are available. You can use this knowledge
to determine which profiles must be configured and how the certificates are shared among the
different applications. You must als
To configure applications on the IP Deskphone, you must know the following information:
• the required certificates
• the methods of device certificate installation
• the profiles that must be configured
• the method of sharing certificates among different applications
• the certificate attribute requirements (such as, subject, subjAltName, and key usage) for
each use
The profile index is part of the provisioning parameter name. For example, the parameter to
assign the source (SCEP or PKCS#12) for DCP #2 is the following: dcpsource2
238
SIP Software for Avaya 1200 Series IP Deskphones-Administration
Comments? [email protected]
September 2013
SCEP
The following is an example of the provisioning file, system.prv, that shows some of the device
certificate profile attributes that are provisioned when SCEP is used to install a device
certificate.
Figure 28: Example of the provisioning file, system.prv
SCEP
Simple Certificate Enrollment Protocol (SCEP) is a process used to obtain a certificate. This
process occurs between the IP Deskphone that requires a certificate and a trusted CA that is
responsible for providing certificates.
Figure 29: SCEP Client-Server interaction
The IP Deskphone can require several device certificates. You can request an individual device
certificate for each application, or you can request a device certificate to be shared among
applications.
The following describes the enrollment process for the IP Deskphone for which a device
certificate profile is properly configured for SCEP. The following process is executed by the IP
Deskphone for every active Device Certificate Profile (DCP) on the IP Deskphone that is
configured for SCEP.
SIP Software for Avaya 1200 Series IP Deskphones-Administration
September 2013
239
Certificate-based authentication
1. After the IP Deskphone starts up, the IP Deskphone automatically generates a
private-public key pair for each Device Certificate Profile configured on the IP
Deskphone for SCEP.
2. The IP Deskphone uses the SCEP GetCACert command to retrieve a customer root
certificate from the CA server and prompts the administrator to validate the
certificate fingerprint before the IP Deskphone stores the root certificate
permanently on the IP Deskphone.
3. The IP Deskphone prompts the user to enter a password to be included in the
certificate request the IP Deskphone is about to generate. A password may or may
not be required depending on the configuration of the SCEP/CA server.
4. The IP Deskphone generates a device certificate request which is forwarded to the
certificate authority using the SCEP command PKCSReq.
5. After the device certificate request is approved, the CA signs the device certificate
request with the CA private key and returns the completed certificate to the
IP Deskphone.
6. The IP Deskphone stores the device certificate and the IP Deskphone private key
into the IP Deskphone memory with the matching private key.
7. The IP Deskphone can now verify the identity of the device certificate when
requested by a server.
During the enrollment process, and before the IP Deskphone sends the device certificate
request to the CA server, the IP Deskphone prompts the administrator to enter a challenge
password. The use of a password is optional depending on the configuration of the SCEP
server. If the SCEP server is configured to not require a password, the administrator does not
enter a value and presses the OK Context-sensitive soft key.
The name included in the device certificate request is constructed using the hostname and
domain name shown in the Network Configuration screen immediately under the CA server.
If there is no hostname entered, a hostname is created using the IP Deskphone MAC address
according to the form NTIPP012345, where NTIPP is an acronym for IP Deskphone and
012345 are the last six hex digits of the MAC address. By default, the certificate request
includes a Subject Common Name in the form of hostname@domainname. The SCEP
configuration fields in each DCP provide more flexibility in the form and location of this
name.
Device Certificate Authentication Considerations for SCEP
An important aspect of the device certificate request is the format and location of the name
that is requested for the device certificate. The server presented with a device certificate by
the IP Deskphone always confirms the authenticity of the certificate by verifying that the issuer
of the device certificate is trusted by the server and that the signature on the device certificate
is authentic by performing certificate chain validation. A server also performs verification based
on the name contained in the device certificate. Therefore, the name contained in the device
240
SIP Software for Avaya 1200 Series IP Deskphones-Administration
Comments? [email protected]
September 2013
Device Certificate Authentication Considerations for SCEP
certificate must be appropriate to the type of authentication that the server uses. The Subject
Common Name (CN), the full Subject Distinguised Name (DN), or the Subject Alternate Name
(SAN) is used to determine if the entity has the necessary permissions.
For example, if Microsoft IAS is used as the RADIUS server for EAP-TLS authentication, the
CN in the certificate must be the User Principle Name (UPN) of a valid user registered in the
Active Directory configured for remote access. Other RADIUS or TLS servers can impose
different conditions on the certificate name.
Important:
Before deploying any solution, you must identify what certificate validation criteria is
enforced so that the correct certificate name is requested by the IP Deskphone.
Important:
Some SCEP servers reject all SCEP certificate signing requests that include a Subject
Alternate Name (SAN). The Microsoft Windows 2003 Server version of SCEP is an example
where a certificate request which includes a SAN is always rejected.
During the enrollment process and before the IP Deskphone sends the device certificate
request to the CA server, the IP Deskphone prompts you to enter a challenge password. If the
password feature is disabled in the SCEP server, you do not require a password.
A certificate requested by SCEP is stored in Profile 0 and uses some hard-coded attributes for
requested certificates.
The following table lists additional provisioning file parameters for SCEP support in addition to
UI parameters in the Device settings window.
Table 71: SCEP provisioning parameters
Parameter
Purpose
Default
Empty
Allowed
CA
SCEP server
String
Example:
http://47.11.15.206/certsrv/mscep/msceperr.dll
CA_DOMAI
N
Domain
Empty
information
used in SCEP
request
String
Example:
IpClients.com
HOST_NA
ME
Host name
Empty
information
used in SCEP
request
String
Example:
1234
SIP Software for Avaya 1200 Series IP Deskphones-Administration
September 2013
241
Certificate-based authentication
PKCS 12 download
PKCS#12 is an industry standard for importing and exporting keys and their related certificates.
On the IP Deskphone, this method is only used to import the IP Deskphone device certificate
and private key.
The IP Deskphone can download a PKCS#12 file from the provisioning server. The
provisioning configuration file (for example, 11xxe.cfg), contains the [DEV_CERT] section
where the FILENAME attribute points to the PKCS#12 file name. The file name must include
the * symbol which is substituted with the IP Deskphone MAC address to allow the definition
of unique filenames for the PKCS#12 files containing the device certificates for each IP
Deskphone.
The following is an example of the [DEV_CERT] section:
Figure 30: Example of the [DEV_CERT] section
The administrator is responsible for creating the PKCS#12 file with the required device
certificate associated with the private key of the device certificate. The PKCS#12 file must be
in Distinguished Encoding Rules (DER) or BER format. If you are creating the certificate for
the first time, you must mark the private key of the certificate as exportable. If you export a
certificate to a PKCS#12 file, you must enter a password.
Important:
The PKCS#12 password cannot exceed 12 characters in length and must include only
characters that you can enter on the IP Deskphone. These characters include all numbers,
upper and lower case letters, and the following special characters: _ - . ! @ $ % & + : ^
Installing a device certificate using PKCS 12
The high level sequence of procedures for installing a device certificate using a PKCS#12 file
is as follows:
1. The PROFILE Index can range from 1 to the maximum number of supported Device
Certificate Profiles (DCP) for the IP Deskphone type.
242
SIP Software for Avaya 1200 Series IP Deskphones-Administration
Comments? [email protected]
September 2013
Certificate Trust Line (certificate verification)
Configure the DCP for the specified index for a PKCS#12 downloaded certificate,
otherwise the file is rejected. By default, profile 1 is configured for SCEP and all
other profiles are configured for PKCS#12.
2. The IP Deskphone checks the version in the [DEV_CERT] section against the
version stored in the specified PROFILE. If the version in the specified profile is
missing or is older, the device certificate file is downloaded. The profile index is 1.
3. Download the file.
4. Enter the PKCS#12 protected password.
5. Validate the device certificate to ensure that you entered the correct password.
6. Extract the private key and device certificate.
7. Validate the device certificate to ensure the following:
• the correct password is entered
• Key size is >= to the value specified in the Security Policy File
• Key Algorithm is DSA
• the certificate is not revoked
• the certificate is not expired
8. If the IP Deskphone has correctly validated the device certificate, the IP Deskphone
stores the device certificate and private key in the device certificate profile specified
in the [DEV_CERT] section of the IP Deskphone memory (SFS).
• The version specified in the [DEV_CERT] section is stored in the profile for future
reference when determining if a new device certificate is available for
download.
The PKCS#12 imported certificate is stored in Profile 1.
Certificate Trust Line (certificate verification)
There are two methods to validate a certificate before the IP Deskphone can use it:
• Certificate Revocation List (CRL) — The Certificate Revocation List method has a
limitation in the number of CRL entries used due to the limitation of the IP Deskphone
memory. It supports up to 100 CRL entries.
• Certificate Trust List (CTL) — The Certificate Trust Line is a collection of certificates
bundled together into a file and downloaded into the IP Deskphone. The file is signed and
all of the certificates in the bundle are inherently trusted by the IP Deskphone (id the file
signature is verified). You can use the CTL in place of a CRL because in the IP
Deskphone, the CTL is much smaller than the CRL.
SIP Software for Avaya 1200 Series IP Deskphones-Administration
September 2013
243
Certificate-based authentication
The IP Deskphone uses CTL to verify the various network elements such as proxy servers and
provisioning servers. For the IP Deskphone to trust any network element, the certificate of the
IP Deskphone must be added to the CTL.
The use of CTL is optional. If CTL is not installed on the IP Deskphone, the authentication of
the network element reverts back to the default which is to authenticate the certificate chain
to a root certificate trusted by the IP Deskphone.
A file is signed by appending a digital signature which is created using a Signing Certificate.
The Signing Certificate must either be directly issued by a CA root certificate installed on the
IP Deskphone, or there must be a certificate chain that can be followed which ends with a CA
root certificate installed on the IP Deskphone. In either case, the IP Deskphone must have a
trust anchor which can verify the authenticity of the Signing Certificate.
The file Signing Certificate requires the following minimum attributes:
• Version—3
• Key usage—Digital Signature
• Extended key usage—Code signing and secure email
• Key—1024 or 2048 bits
In addition, the Signing Certificate cannot be a self-signed root certificate and must have a
valid Subject Key Identifier and an Authority Key Identifier (which uniquely identifies the issuing
certificates).
Validating a certificate using the Certificate Trust List
The high level sequence of procedures for validating a certificate using the Certificat Trust List
is as follows:
1. Create the CTL file including start date, expire date and a list of certificates
concatenated together in PEM format so that the entire file can be signed by a
trusted entity. A signed CTL file consists of the following:
• Validity fields
• NOT_VALID_BEFORE: 23/11/2007 11:12:13
• NOT_VALID_AFTER: 25/10/2011: 22:23:24
• Original unsigned file content
• Digital signature
The parts are appended together with the Validity periods first, followed by the
certificates, and then by the digital signature. The signature must be in the form of
a PKCS7 detached signature of the file in PEM format. A detached signature is a
signature that does not embed the content that is signed.
244
SIP Software for Avaya 1200 Series IP Deskphones-Administration
Comments? [email protected]
September 2013
Validating a certificate using the Certificate Trust List
The IP Deskphone does not accept unsigned CTL files. After a CTL file is accepted,
the included certificates are added to the trusted certificate store of the IP
Deskphone.
Important:
Do not insert additional characters between the Certificate and the Digital
Signature. Otherwise, the validation fails. Do not change any information from
the original file content that was used to create the signature. Otherwise the
signature becomes invalid and you must create a new signature.
2. The CTL is provisioned to the IP Deskphone in a secure way. Avaya recommends
that you use HTTPS as the secure method to download the CTL file to the IP
Deskphone.
3. The IP Deskphone checks the validity periods as follows:
• Not Valid Before—Not used
• Not Valid After—The IP Deskphone checks this when
- The CTL file is downloaded.
- Every 24 hours.
- When a remote certificate is presented to the IP Deskphone.
- The CTL is expired; the CTL is deleted and an event is logged in the
security log.
4. After the IP Deskphone starts a TLS channel with a server (EAP or TLS) and
receives a server certificate, the IP Deskphone validates the certificate by checking
the availability of the certificate in the CTL and to decide whether to trust the
certificate or not. If the server certificate is not in the CTL, the server certificate is
rejected and a TLS channel is not established.
The administrator has to ensure that the CTL is up-to-date. If a new CTL is downloaded to the
IP Deskphone, the old CTL file is overwritten by the new one.
The IP Deskphone can trust up to ten server certificates in the CTL file.
The following is an example of a CTL file.
SIP Software for Avaya 1200 Series IP Deskphones-Administration
September 2013
245
Certificate-based authentication
Figure 31: Example of a CTL file
Certificate Administration
The administrator can view and delete certificates. Because a certificate can be deleted, it is
critical that the administrator password to access this function is protected and limited only to
those individuals who absolutely require it.
Certificate administration is accessed through the Diagnostics menu .
To view Certificate Administration option in Diagnostics menu, configure the following
parameter in Security Policy:
CERT_ADMIN_UI_ENABLE YES
The default value is NO.
After the Security Policy file is enabled, to access the Certificate Administration screen, from
the Network screen, choose, Device Settings, Diagnostics, and then Certificate
Administration.
246
SIP Software for Avaya 1200 Series IP Deskphones-Administration
Comments? [email protected]
September 2013
Certificates Administration main menu
Figure 32: Diagnostics main menu
The following table describes the function of the Navigation keys for the Diagnostics menu.
Table 72: Navigation
Key
Action
Up and down arrows
Use the up and down arrows to change the
selected item in the list.
Enter
Invokes the Select Context-sensitive soft
key.
Digital keys (number associated with option) Invokes an appropriate option.
*
Selects the first option Server Settings, but
does not activate it.
#
Selects the last option Lock, but does not
activate it.
Certificates Administration main menu
The certificates administration screen displays the following options:
• Trusted Certificates
• Device Certificates
• CRL
• CTL
SIP Software for Avaya 1200 Series IP Deskphones-Administration
September 2013
247
Certificate-based authentication
To access the Certificates Administration screen, from the Diagnostics menu, select
Certificates Administration.
Figure 33: Certificates administration main menu
The following table describes the function of the Context-sensitive soft keys for the Certificates
Administration screen.
Table 73: Context-sensitive soft keys for the Certificates Administration screen
Context-sensitive soft key
Action
Select
Selects the required option.
Back
Returns you to the Diagnostics menu.
Trusted Certificates screen
The Trusted Certificates screen displays a list of subject Common Name (CN) of the trusted
certificates as shown in the following figure:
Figure 34: Trusted Certificates screen
The following table describes the function of the Context-sensitive soft keys for the Trusted
Certificates screen.
248
SIP Software for Avaya 1200 Series IP Deskphones-Administration
Comments? [email protected]
September 2013
Trusted Certificates screen
Table 74: Context-sensitive soft keys for the Trusted Certificates screen
Context-sensitive soft key
View
Action
Displays the information of the selected
Trusted Certificate which includes the
following:
• Common Name (CN)
• Serial Number (SN#)
• Expiry Date
• Certificate Status (such as OK or Expired)
Back
Returns you to the previous screen.
Figure 35: Trusted Certificates details
The administrator can delete the certificate in the "Detailed Mode" by using the Delete Contextsensitive soft key. Deletion does not happen automatically; the IP Deskphone displays a
warning confirmation screen.
The following table describes the function of the context-sensitive soft keys for the Trusted
Certificates Details screen.
Table 75: Context-sensitive soft keys for the Trusted Certificates Details screen
Context-sensitive soft key
Action
Delete
Displays a warning confirmation. Deletes the
selected certificate.
Back
Returns you to the previous screen.
SIP Software for Avaya 1200 Series IP Deskphones-Administration
September 2013
249
Certificate-based authentication
Device Certificates screen
The Device Certificates screen displays a list of subject Common Name (CN) of device
certificates as shown in the following figure:
Figure 36: Device Certificates screen
The following table describes the function of the Context-sensitive soft keys for the Device
Certificates screen.
Table 76: Context-sensitive soft keys for the Device Certificates screen
Context-sensitive soft key
View
Action
Displays the information of the selected
Device Certificate which includes the
following:
• Common Name (CN)
• Serial Number (SN#)
• Usage
• Expiry Date
• certificate profile index
• Status (such as, OK or Expired)
Back
250
Returns you to the previous screen.
SIP Software for Avaya 1200 Series IP Deskphones-Administration
Comments? [email protected]
September 2013
CRL screen
Figure 37: Device Certificate details
The administrator can delete the certificate in the "Detailed Mode" by using the Delete Contextsensitive soft key. Deletion does not happen automatically; the IP Deskphone displays a
warning confirmation screen.
CRL screen
The CRL screen displays a list of CA issued CRLs stored in the IP Deskphone, as shown in
the following figure:
Figure 38: CRL screen
The following table describes the function of the Context-sensitive soft keys for the CRL
screen.
Table 77: Context-sensitive soft keys for the CRL screen
Context-sensitive soft key
View
Action
Displays the information on the selected CRL
Issuer which includes the following:
SIP Software for Avaya 1200 Series IP Deskphones-Administration
September 2013
251
Certificate-based authentication
Context-sensitive soft key
Action
• CRL Issuer
• Issued date
• List of serial numbers that belong to the
CRL associated with the revocation date.
Back
Returns you to the previous screen.
The following figure is an example of the CRL Details screen for the CRL Issuer
www.ca1.com.
Figure 39: CRL details
If you delete a Trusted Anchor Certificate, the CRL issued by the anchor is also deleted.
CTL screen
The CTL screen displays a list of subject Common Name (CN) of the CTL certificates as shown
in the following figure:
Figure 40: CTL certificate screen
252
SIP Software for Avaya 1200 Series IP Deskphones-Administration
Comments? [email protected]
September 2013
CTL screen
The following table describes the function of the Context-sensitive soft keys for the CTL
screen.
Table 78: Context-sensitive soft keys for the CTL screen
Context-sensitive soft key
View
Action
Displays information on the selected
certificate which includes the following:
• Common Name CN)
• Serial Number (SN#)
• Expiry Date
• Certificate Status (such as, OK or Expired)
•
Delete
Displays a warning confirmation. Deletes the
CTL.
Back
Returns you to the previous screen.
After you press the View Context-sensitive soft key on the required certificate, information
about the certificate you selected appears on the screen.
The following figure is an example of the CTL Certificate Details screen for the certificate
www.ctlserver1.com.
Figure 41: CTL Certificate details screen
You can use the PDT shell command to view an installed CTL.
The following is an example command with the output of the command.
SIP Software for Avaya 1200 Series IP Deskphones-Administration
September 2013
253
Certificate-based authentication
Figure 42: Example of command output
Important:
The CTL file size must not exceed 20 Kbytes.
EAP Authentication
EAP-enabled networks allow the administrator to ensure that individual devices or users are
authorized to access the enterprise's LAN environment.
The following diagram shows the network architecture for 802.1x and EAP.
Figure 43: 802.1x and EAP network architecture
IEEE 802.1x defines three roles:
• a supplicant—an entity that requires access to the network for use of its services.
• an authenticator—the network entry point to which the supplicant physically connects,
typically a Layer 2 switch. The authenticator acts as a proxy between the supplicant and
254
SIP Software for Avaya 1200 Series IP Deskphones-Administration
Comments? [email protected]
September 2013
EAP Authentication
the authentication server and controls the access to the network based on the
authentication status of the supplicant.
• an authentication server—typically a RADIUS server; performs the actual authentication
of the supplicant.
There are three supported EAP methods:
• EAP-MD5
• EAP-TLS
• EAP-PEAP/MD5
The administrator selects the EAP method from the EAP configuration menu, as shown in the
following figure:
Figure 44: EAP configuration menu
The administrator can do the following:
• When EAP-MD5 is selected, the administrator is prompted to enter ID1 and Password.
• When EAP-PEAP is selected, the administrator is prompted to enter ID1, ID2 and
Password. If the administrator enters only ID1, then ID2 has the same value of ID1.
• When EAP-TLS is selected, the administrator is prompted to enter ID1. If SCEP is used
to install the device certificate, the administrator is required to enter the CA Server (URL
of the SCEP service), the Domain Name which the IP Deskphone belongs to, and the
Hostname (optional).
• When Disable is selected, the existing IDs and passwords are erased.
The following is a list of additional provisioning file parameters for EAP support in addition to
the UI parameters on the Device Settings screen
SIP Software for Avaya 1200 Series IP Deskphones-Administration
September 2013
255
Certificate-based authentication
Table 79: EAP Provisioning Parameters
Parameter
Purpose
Default
Allowed
EAP
EAP mode
DISABLED
DISABLED/MD5/
PEAP
EAPID1
Device ID1
Empty
String (4 to 20
characters)
EAPID2
Device ID2
Empty
String (4 to 20
characters)
EAPPWD
Password
Empty
String (4 to 12
characters)
EAP Authentication failures are logged using event 1033.
The following is an example of a TLS authentication failure
1033 [Minor][FRI MAY 15 13:48:06 2009][10223][n:/fw/build/../bsp/
vxWorks/common/dot1x/Supplicant/moceap_tls.c:147] - EAP-TLS Failed
to Authenticate
The following sections describe the behavior of each method:
EAP Disabled
EAP disabled is the factory default setting. The IP Deskphone does not send a message to
the authenticator upon startup, and normal network access is attempted. If the IP Deskphone
receives a Request-Identity message from the Layer 2 switch, the Request-Identity is ignored.
If the Layer 2 switch requires 802.1x authentication, the IP Deskphone is blocked from the
network, and the administrator must enable the EAP feature on the IP Deskphone and
configure a DeviceID and Password (if required) to access the network after the IP Deskphone
is successfully authenticated. Or, the administrator can plug the IP Deskphone to an EAP
disabled port on the Layer 2 switch.
EAP-MDS
EAP-MD5 allows the IP Deskphone to authenticate to the RADIUS server before the
IP Deskphone can access the network. This procedure requires a user ID and password. If
the IP Deskphone fails to authenticate to the RADIUS server, the IP Deskphone displays a
"EAP Authenticate-Fail" message, and the IP Deskphone cannot access the network.
256
SIP Software for Avaya 1200 Series IP Deskphones-Administration
Comments? [email protected]
September 2013
EAP-TLS
EAP-TLS
EAP-TLS allows the IP Deskphone to authenticate to the RADIUS server before the
IP Deskphone can access the network. This procedure requires a user ID, root certificate, and
device certificate. The root and device certificates must be installed on the IP Deskphone
before using this feature. The customer root certificate can be installed using SCEP or SIP
configuration file. For more information, see Root certificate installation on page 231 and Table
71: SCEP provisioning parameters on page 241.
The device certificate can be installed using one of two methods:
• SCEP on page 239
• PKCS 12 download on page 242
If the IP Deskphone fails to authenticate to the RADIUS server or to install the required
certificates, the IP Deskphone displays a "EAP Authenticate-Fail" message, and the
IP Deskphone cannot access the network.
EAP-PEAP
EAP-PEAP allows the IP Deskphone to authenticate to the RADIUS server before the
IP Deskphone can access the network. This procedure requires a user ID1, root certificate,
user ID2, and password. EAP-PEAP is the outer authentication protocol that requires a user
ID1 and root certificate to establish a TLS channel. EAP-MD5 is the inner authentication
protocol that requires a user ID2 and password to pass through this channel in a secure mode.
The customer root certificate can be installed using SCEP or SIP configuration file. For more
information, see Root certificate installation on page 231.
If the IP Deskphone fails to authenticate to the RADIUS server or to install the required
certificates, the IP Deskphone displays a "EAP Authenticate-Fail" message, and the
IP Deskphone cannot access the network.
EAP Re-authentication
The re-authentication process proceeds in the background without disturbing the ongoing
operation of the IP Deskphone. If the re-authentication fails or times out, the IP Deskphone
becomes inoperable. Re-authentication interval is controlled by the Layer 2 switch reauthentication interval parameter. The minimum supported re-authentication interval when
EAP-MD5 and EAP-PEAP are configured is 10 seconds; for EAP-TLS, the minimum interval
is 20 seconds.
SIP Software for Avaya 1200 Series IP Deskphones-Administration
September 2013
257
Certificate-based authentication
Provisioning configuration file download
Securely download provisioning configuration files through HTTPS.
Provisioning configuration files download through HTTPS
The IP Deskphone can contact a provisioning server and download an 12xxSIP.cfg file to
identify additional files and protocols used. When a file is identified, and the protocol specified
in the "protocol" parameter is HTTPS, the IP Deskphone contacts the target server and
negotiates a TLS connection. Then, the IP Deskphone downloads the specified file and
terminates the connection.
HTTP connection over TLS is established by using single or mutual authentication.
Single Authentication
A server certificate, user name, and password are required to establish TLS connection
between the IP Deskphone and the provisioning server. The server certificate must be signed
by a certificate authority. The IP Deskphone uses the server certificate to validate the identity
of the provisioning server that the IP Deskphone is connected to; the provisioning server uses
the user name and password to authenticate the IP Deskphone. The IP Deskphone must be
preloaded with the root certificate used in signing the server certificate. The root certificate is
downloaded to the IP Deskphone by connecting to a provisioning server through EAP-MD5,
and using one of the insecure protocols supported by the IP Deskphone, such as HTTP, TFTP
or FTP. EAP-MD5 ensures that the connection between the IP Deskphone and the provisioning
server is secure. The user name and password are required to authenticate the IP Deskphone
to the provisioning server and must be loaded in a secure manner before the IP Deskphone
establishes the HTTPS connection with the provisioning server. There is no mechanism for
getting a user name and password on the IP Deskphone in a secure "no-touch" manner; the
IP Deskphone must be deployed to a secure network where the TFTP download of insecure
files is not transmitted over an insecure network.
Mutual Authentication
A device certificate and server certificate are required to establish TLS connection between
the IP Deskphone and the provisioning server. The server certificate must be signed by a
258
SIP Software for Avaya 1200 Series IP Deskphones-Administration
Comments? [email protected]
September 2013
Security and error logs
certificate authority. The IP Deskphone uses the server certificate to validate the identity of the
provisioning server that the IP Deskphone is connected to; the provisioning server uses the
device certificate to validate the identify of the IP Deskphone. The IP Deskphone must be
preloaded with the root certificate used in signing the server certificate. The root certificate is
downloaded to the IP Deskphone by connecting to a provisioning server through EAP-MD5,
and using one of the insecure protocols supported by the IP Deskphone, such as HTTP, TFTP
or FTP. EAP-MD5 ensures that the connection between the IP Deskphone and the provisioning
server is secure. The administrator can use the existing device certificates, such as EAP-TLS
or SIP-TLS device certificate, instead of having a special device certificate for HTTPS, to
establish mutual authentication. For details about device certificate installation and certificate
profiles, see Device certificate installation on page 233.
Security and error logs
You can access the Security Log and the Error Log to view errors and failures that may have
occurred during the operation of the IP Deskphone.
Before you can access the Security and Error Logs, you must configure the Security Policy file
with the following parameter:
SECURITY_LOG_UI_ENABLE YES
If configured as yes, you can access the Security and Error Logs from the Network screen,
by choosing CTL download error: Device Settings > Diagnostics > Security and Error
Logs.
The Security and Error Logs are stored in the Logs folder. To access the Security and Error
Logs, select File Manager > Logs folder, and then press the Services key.
The Logs main menu lets you choose one of the following options:
1. Security Log
2. Error Log
SIP Software for Avaya 1200 Series IP Deskphones-Administration
September 2013
259
Certificate-based authentication
Figure 45: Logs main menu
When the user selects a log file, the screen displays each log item on a full screen, as shown
in the following figure:
Figure 46: Log item screen
The following table describes the function of the Context-sensitive soft keys for the log item
screen.
Table 80: Context-sensitive soft keys for the log item screen
Context-sensitive soft key
260
Action
Next
Navigates to the next log entry.
Prev
Navigates to the previous log entry.
Back
Returns you to the Logs main menu.
SIP Software for Avaya 1200 Series IP Deskphones-Administration
Comments? [email protected]
September 2013
Security policy file updates
Security policy file updates
The security policy file contains a set of rules for certificate-based authentication on the
IP Deskphone. The rules include the following:
• CERT_ADMIN_UI_ENABLE Determines if the Certificate Administration user interface is
enabled on the IP Deskphone. The acceptable values are YES and NO; the default value
is NO.
• SECURITY_LOG_UI_ENABLE Determines if the Security Log user interface is enabled
on the IP Deskphone. The acceptable values are YES and NO; the default value is NO.
• KEY_SIZE The default size used when generating keys on the IP Deskphone. Acts as
the minimum allowed key size that should be enforced when loading certificates from the
IP Deskphone. The acceptable values are:
- KEY_SIZE_1024
- KEY_SIZE_1536
- KEY_SIZE_2048
The default value is KEY_SIZE_1024.
• KEY_ALGORITHM The preferred key generation algorithm. The acceptable value is:
- KEY_ALG_RSA
• DWNLD_CFG_SIGNING defines if configuration files are forced to be signed when a
customer certificate is installed.
- NO - automatically accept the downloaded file without authentication
- YES - file must be signed and fully authenticated
The default is NO.
• CUST_CERT_ACCEPT_VAL_NO_CHECK is added to the existing values
(VAL_NO_MANUAL, VAL_MANUAL_A, VAL_MANUAL_B.
The default value is VAL_MANUAL_A).
• SEC_POLICY_ACCEPT is for Security Policy File acceptance ( VAL_MANUAL_A,
VAL_MANUAL_B.
The default value is VAL_MANUAL_A)
• SIGN_SIP_CONFIG_FILES Overrides the file signing of a file, such as the device
configuration file and the dial plan file. You cannot override the file signing of the Security
Policy and Customer Certificates. The acceptable values are:
- YES—Signing is required.
- NO—No authentication check is performed.
The default value is NO.
SIP Software for Avaya 1200 Series IP Deskphones-Administration
September 2013
261
Certificate-based authentication
• FP_PRESENTED If the resource file is not signed and if there are no customer
certificates, then you are prompted with a Finger Print display with the option to accept
or reject
• FP_ENTERED If the resource file is not signed and if there are no customer certificates,
then you must manually enter the Finger Print value and then select Accept.
• SUBJ_ALT_NAME_CHECK_ENABLE Checks the Subject Alternative Attribute in the
presented certificate. The acceptable values are YES and NO. The default value is NO.
• CERT_EXPIRE is for certification expiration policy. The acceptable values are:
- DELETE_CERT
- LOG_EXPIRE
- NO_EXPIRE_LOG
• DWNLD_CFG_ACCEPT defines how TFTP configuration authenticates when there are
no customer certificates on the phone. The default value is VAL_ACCEPT The acceptable
values are:
- VAL_ACCEPT
- VAL_MANUAL_A
- VAL_MANUAL_B
• DWNLD_CFG_SIGNING defines if configuration files are forced to be signed when a
customer certificate is installed. The default is NO. The acceptable values are:
- NO - automatically accept the downloaded file without authentication
- YES - file must be signed and fully authenticated
Changes made to the security policy file have an entry in the security log file.
SECURITY_POLICY_PARAM_CHANGE
0x1055
The security log file stores only the non-sensitive information. For example, if the password is
changed, the security log file indicates this change without storing the password value.
You can use the PDT shell command to view the output of the security policy command.
The following is the output of the securitypolicy command from the PDT shell.
-> securitypolicy
CUST_CERT_ACCEPT = VAL_MANUAL_A
SEC_POLICY_ACCEPT = VAL_MANUAL_A
SIGN_SIP_CONFIG_FILES = NO
CERT_EXPIRE = DELETE_CERT
SEC_POLICY_TEXT = YES
AUTO_PRV_ACCEPT = VAL_ACCEPT
262
SIP Software for Avaya 1200 Series IP Deskphones-Administration
Comments? [email protected]
September 2013
Certificate Admin option in the user interface
DWNLD_CFG_ACCEPT = VAL_ACCEPT
AUTO_PRV_SIGNING = NO
DWNLD_CFG_SIGNING = NO
CERT_ADMIN_UI_ENABLE = YES
SECURITY_LOG_UI_ENABLE = YES
KEY_SIZE = KEY_SIZE_1024
KEY_ALGORITHM = KEY_ALG_RSA
TLS_CIPHER = RSA_WITH_AES_256_CBC_SHA
SUBJ_ALT_NAME_CHECK_ENABLE = NO
FTP_PASSWORD = ****
Certificate Admin option in the user interface
The following procedure provides the steps to view the Certificate Admin option in the user
interface.
Viewing the Certificate Admin option in the user interface
1. Create a text file; for example, SecurityPolicy.txt.
2. Add CERT_ADMIN_UI_ENABLE YES in the text file.
3. Sign the file using a signing certificate. For example, SecurityPolicy.txt.sig file is
created.
4. Download the file using the [SEC_POLICY] section in the 12xxSIP.cfg file. An
example of the SEC_POLICY section is as follows:
[SEC_POLICY]
DOWNLOAD_MODE FORCED
PROTCOL HTTP
Installation
This section describes the following:
• Device certificate installation using PKCS#12
• CTL download
SIP Software for Avaya 1200 Series IP Deskphones-Administration
September 2013
263
Certificate-based authentication
Device Certificate Installation
SCEP and PKCS#12 are two methods used to install device certificates. If SCEP is used to
install device certificates, see SCEP on page 239 for more information.
The following describes the process of using PKCS#12 to install device certificates.
1. The administrator adds a [DEV_CERT] section to 12xxSIP.cfg to let the
IP Deskphone import a PKCS#12 file. The following is an example of the format of
the [DEV_CERT] section:
Figure 47: Example of [DEV_CERT] section
• The "*" pointed by the FILENAME attribute is substituted with the
IP Deskphone MAC address before the IP Deskphone requests the PKCS#12
file. If the IP Deskphone has multiple PKCS#12 files, the administrator must
add another ID beside "*". This ID can be the profile index.
• The VERSION attribute determines if the file should be downloaded by
comparing this VERSION with the VERSION stored in the corresponding
device certificate profile.
• The PROFILE attribute points to the device certificate profile index. The
certificate profile index identifies the file name where the profile is stored in the
IP Deskphone memory (SFS), and identifies the device certificate profile.
• The PURPOSE attribute identifies device certificate usage. The purpose
attribute is a bit mask that lets a device certificate be used for multiple
purposes; for example, sharing of device certificates. These purposes can be:
- EAP-TLS
- SIP-TLS
- HTTPS (optional)
2. After 12xxSIP.cfg is downloaded to the IP Deskphone from the provisioning server,
the IP Deskphone executes the [DEV_CERT] section and downloads the PKCS#12
file.
3. After the PKCS#12 file is downloaded, the IP Deskphone prompts the administrator
to enter the PKCS#12 protected password as shown in the following figure.
264
SIP Software for Avaya 1200 Series IP Deskphones-Administration
Comments? [email protected]
September 2013
CTL download
Figure 48: PKCS12 password prompt
Important:
The password can be empty, but the use of an empty password is not
recommended except under very controlled conditions.
4. After the password is validated, the IP Deskphone extracts the private key and
device certificate from the PKCS#12 file.
5. The IP Deskphone validates the device certificate to ensure that the device
certificate is signed by a trusted CA, is not revoked, and that the key size meets the
minimum requirement.
6. If the device certificate is validated correctly, the IP Deskphone stores the device
certificate and the private key in the IP Deskphone memory (SFS) in the device
certificate profile specified in the [DEV_CERT] section.
CTL download
This section describes the process of downloading a CTL file on the IP Deskphone.
1. The administrator adds the [CTL] section to 12xxSIP.cfg to allow the IP Deskphone
to download a CTL file. The following is an example of the format for the [CTL]
section:
[CTL]
DOWNLOAD_MODE AUTO
PROTOCOL HTTPS
FILENAME ctl.pem
2. After 12xxSIP.cfg is downloaded to the IP Deskphone from the provisioning server,
the IP Deskphone executes the [CTL] section and downloads the CTL file.
3. After the CTL file is downloaded, the IP Deskphone validates the CTL file to ensure
that the CTL file is signed by a trusted entity. If the CTL file is validated correctly,
the CTL file is stored in the IP Deskphone memory (SFS).
SIP Software for Avaya 1200 Series IP Deskphones-Administration
September 2013
265
Certificate-based authentication
Upgrade and rollback tasks
The IP Deskphone loaded with secure software cannot downgrade to a previous insecure
framework.
SIP configuration file (12xxSIP.cfg)
PKCS12 Import
The [DEV_CERT] section is added to 12xxSIP.cfg to let the IP Deskphone import a PKCS#12
file. The following is an example of the format of the [DEV_CERT] section:
Figure 49: Example of [DEV_CERT] section
• The "*" pointed by the FILENAME attribute is substituted with the IP Deskphone MAC
address before the IP Deskphone requests the PKCS#12 file. If the IP Deskphone has
multiple PKCS#12 files, the administrator must add another ID beside "*". This ID can be
the profile index.
• The VERSION attribute determines if the file should be downloaded by comparing this
VERSION with the VERSION stored in the corresponding device certificate profile.
• The PROFILE attribute points to the device certificate profile index. The certificate profile
index identifies the file name where the profile is stored in the IP Deskphone memory
(SFS), and identifies the device certificate profile.
• The PURPOSE attribute identifies device certificate usage. The purpose attribute is a bit
mask that lets a device certificate be used for multiple purposes; for example, sharing of
device certificates. These purposes can be:
- EAP-TLS
- SIP-TLS
- HTTPS (optional)
266
SIP Software for Avaya 1200 Series IP Deskphones-Administration
Comments? [email protected]
September 2013
CTL download
CTL download
The [CTL] section is added to 12xxSIP.cfg to allow the IP Deskphone to download a CTL file
from a provisioning server. The following is an example of the format for the [CTL] section:
[CTL]
DOWNLOAD_MODE AUTO
PROTOCOL HTTPS
FILENAME ctl.pem
Customer root certificate download
The [USER_KEYS] section is added to 12xxSIP.cfg to allow the IP Deskphone to download a
customer root certificate from a provisioning server. The following is an example of the format
for the [USER_KEYS] section:
[USER_KEYS]
DOWNLOAD_MODE AUTO
PROTOCOL HTTPS
FILENAME custroot.pem
Security policy file
The security policy file defines a set of rules to determine the required actions taken by the
IP Deskphone. The following is an example of security policy file rules and default actions:
CERT_ADMIN_UI_ENABLE NO SECURITY_LOG_UI_ENABLE NO KEY_SIZE 1024
KEY_ALGORITHM KEY_ALG_RSA TLS_CIPHER RSA_WITH _AES_256_CBC_SHA
The format of the security policy file, as shown in the preceding example, is parameter-value
paired. The parameter name and value are separated by a space.
Diagnostic logs
All EAP failures are logged in the security log which include the following EAP error messages:
SIP Software for Avaya 1200 Series IP Deskphones-Administration
September 2013
267
Certificate-based authentication
EAP_MD5_AUTH_FAILURE
0x1030
EAP_INVALID_DEVICE_CERTIFICATE
0x1031
EAP_INVALID_ROOT_CERTIFICATE
0x1032
EAP_TLS_AUTH_FAILURE
0x1033
EAP_PEAP_AUTH_FAILURE
0x1034
The following is a list of certificate-related events and failures logged in the Security Log.
SLC_AVAYA_CERTIFICATE_IMPORTED
0x0006
SLC_SERVICE_PROVIDER_CERTIFICATE_IMPORTED
0x0007
SLC_AVAYA_CERTIFICATE_REVOKED
0x0008
SLC_SERVICE_PROVIDER_CERTIFICATE_REVOKED
0x0009
SLC_AVAYA_CERTIFICATE_EXPIRED
0x000A
SLC_SERVICE_PROVIDER_CERTIFICATE_EXPIRED
0x000B
SLC_CERTIFICATE_DELETED
0x000C
SLC_CRL_IMPORTED
0X000D
SLC_OLDER_CRL_REMOVED
0x000E
SLC_FACTORY_DEFAULTS_RESTORED
0x000F
SLC_DEVICE_CERTIFICATE_CREATED
0x0010
SLC_CRL_SIGNATURE_REJECTED
0x0011
SLC_CTL_CERTIFICATE_EXPIRED
0x0012
SLC_AVAYA_CERTIFICATE_DELETED
0x0013
SLC_SERVICE_PROVIDER_DELETED
0x0014
SLC_CTL_DELETED
0x0015
SLC_CRL_DELETED
0x0016
SLC_DEVICE_CERTIFICATE_DELETED
0x0017
SLC_DEVICE_CERTIFICATE_REVOKED
0x0018
SLC_DEVICE_CERTIFICATE_EXPIRED
0x0019
SLC_CTL_EXPIRED
0x0020
SLC_CTL_DOWNLOAD_ERROR
0x0021
The following is a list of minor errors that are logged in the Security Log.
268
SIP Software for Avaya 1200 Series IP Deskphones-Administration
Comments? [email protected]
September 2013
Fault management behavior
SLC_AVAYA_CERTIFICATE_EXPIRED_AUTH
0x1002
SLC_SERVICE_PROVIDER_CERTIFICATE_EXPIRED_
AUTH
0x1003
SLC_PROVIDER_CERTIFICATE_IN_AVAYA_KEYS_FI
LE
0x1004
SLC_PKI_MGMT_INIT_FAILURE
0x1005
The following is the Security Policy parameter change event.
SECURITY_POLICY_PARAM_CHANGE
0x1055
Any changes made to the security policy file has an entry in the security log file. For more
information, seeSecurity policy file updates on page 261.
Fault management behavior
Authentication failures are indicated by a failure message on the IP Deskphone screen and
are reported to the error log files. The administrator can view the security logger by using the
PDT or the security log viewer. For more information, see Security and error logs on
page 259.
The following is a list of authentication failure messages that appear on the IP Deskphone
screen when a failure occurs during the operation of the IP Deskphone:
• EAP Authenticate-Fail—happens when the IP Deskphone fails to authenticate to an
authentication server; the message applies for the three EAP methods: EAP-MD5, EAPPEAP, and EAP-TLS.
• EAP Authenticate-Timeout—happens after the third time the IP Deskphone fails to
authenticate to an authentication server and the IP Deskphone is connected to an EAP
disabled port on the Layer 2 switch.
For EAP failures logged in the security log, see Diagnostic logs on page 267.
SIP Software for Avaya 1200 Series IP Deskphones-Administration
September 2013
269
Certificate-based authentication
270
SIP Software for Avaya 1200 Series IP Deskphones-Administration
Comments? [email protected]
September 2013
Chapter 25: Security
This section specifies the behavior of the following security features:
• SIP over TLS
• Connection persistence
• SRTP
• SFTP
• SSH
SIP over TLS
To avoid security problems such as message integrity attacks, SIP over TLS uses Transport
Layer Security (TLS) to provide secure communication between the IP Deskphone and the
SIP proxy.
Transport Layer Security (TLS) protects SIP signaling traffic. It sits on top of the Transmission
Control Protocol (TCP), the preferred default protocol for SIP traffic. You can use TLS with a
user name and password to provide a means of server-only authentication. IP Deskphonespecific Public Key certificates can provide even stronger mutual authentication of both the
server and the IP Deskphone.
Using SIP over TLS protects SIP messages on a hop-by-hop basis. To achieve complete endto-end security through the use of TLS, each element involved in the system must also be
capable of securing SIP traffic using TLS.
Connection persistence
Connection persistence allows the IP Deskphone to establish a connection and monitor the
connection for failure by using "keep-alive requests.
The IP Deskphone establishes connection with the proxy using the commonly accepted ports.
Periodically, based on a configured timer value, the IP Deskphone issues a request to the
server to verify that the connection with the server at the TCP level is still active. When the IP
Deskphone discovers that the keep-alive packet has not been answered, it attempts to
reestablish a connection with the proxy. If this is successful, the IP Deskphone reregisters with
the proxy (and sends a new subscription requests where appropriate). If it is not possible to
reestablish the connection, the IP Deskphone falls back into a state where connection attempts
SIP Software for Avaya 1200 Series IP Deskphones-Administration
September 2013
271
Security
are tried periodically based on random, but increasing time periods, in order to give the server
adequate time to recover.
SSH and secure file transfer
The Secure Shell Handler (SSH) is a widely-used protocol for providing secure logon access
to run commands remotely. To establish a connection, you must access the SSH-capable
client, and know the user name and password that is configured on the IP Deskphone through
the use of the provisioning system.
Secure File Transfer Protocol (SFTP) lets the administrator securely log on to the IP
Deskphone (using the common user name and password shared with SSH/PDT). After you
logon, the IP Deskphone displays a list of files on the flash file that you can transfer.
SSH and SFTP configuration parameters
The following table provides a list of SSH and SFTP configuration parameters.
Parameter
Description
Default value
Boundaries
Enable
SSH
Enables the SSH server
on the IP Deskphone for
secure shell access.
Enable
SFTP
Enables the SFTP server Not checked (off)
on the IP Deskphone for (appears dimmed until
secure FTP access. SSH SSH is enabled)
must be enabled for
SFTP to be enabled
Not checked (off)
Checked (on)
User ID
The User ID that must be None
entered when connecting
to the IP Deskphone SSH
or SFTP.
Non-null string
Maximum: 49
characters
Password
The password that must
be entered when
connecting to the IP
Deskphone through
SSH, SFTP.
Non-null string
Maximum: 49
characters
Not checked (off)
None
Not checked (off)
Checked (on)
UI Properties for Device Settings SSH and SFTP parameters are as follows:
272
SIP Software for Avaya 1200 Series IP Deskphones-Administration
Comments? [email protected]
September 2013
TCP/TLS operation overview
• The User ID field is empty and the Password field displays "****" when both SSH and
SFTP are disabled and applied.
• The user can enable SSH or SFTP.
• The user must provide a valid user ID and password when the User ID field is empty, and
an application (SSH or SFTP) is selected. If a valid user ID and valid password are not
provided, and the user presses the Apply context-sensitive soft key, one of the following
error message appears:
- Error: User ID size: 4-12 – appears if a valid user ID is not provided.
- Error: Password size: 4-12 – appears if a valid password is not provided.
- Error: User ID size: 4-12 Error: Password size: 4-12 – appear if
both a valid user ID and a valid password are not provided.
TCP/TLS operation overview
TCP is the alternative protocol the IP Deskphone uses when sending and receiving SIP
requests. Avaya recommends TCP for Avaya SIP-enabled entities.
When a server initiates a TCP or TLS connection to the IP Deskphone, the connection only
lasts as long as the server chooses to keep the connection open; a persistent connection is
not maintained by the IP Deskphone.
How the IP Deskphone uses TCP
TCP is a connection-based protocol, which means the IP Deskphone must first establish a
connection with a target. This is done using a three-way handshake. After the handshake
process is complete and a connection is made, the IP Deskphone can send data over the TCP
connection. The data, which makes up a SIP request, can now be sent and received by either
side of the communication.
How the IP Deskphone uses TLS
Transport Level Security (TLS) is a protocol for establishing a secure connection between two
end-points. After a connection is established using TCP, TLS negotiates the cryptographic
parameters used to secure the traffic that is sent over that connection. TLS, Public Key
Cryptography, and X.509 certificates provide either mutual or server authentication.
• Mutual authentication occurs when both the client and the server have public key
certificates assigned, that are used during the TLS handshake, to validate the identity of
SIP Software for Avaya 1200 Series IP Deskphones-Administration
September 2013
273
Security
both communicating parties. Both the server and the end point device certificates are
"signed" by well-known trusted certificate authorities.
• Server authentication occurs when a server has a certificate signed by a certificate
authority. The certificate is only used for the client to validate the identity of the server it
is connected to. After the TLS connection is established, the server can identify the IP
Deskphone through a user name and password.
How TLS impacts SIP
TLS impacts SIP in the following ways:
• URIs – contain transport parameters used to indicate the preferred method of contact.
For example,
Contact: Bob<sip:[email protected];transport=tls>
Important:
A transport parameter of TLS indicates that the server or client prefers TLS to be used
for communication.
SIP Software Release 3.2 and later adds transport=tls to the contact header when using
TCP or TLS.
• VIA header – contains the transport protocol used to send a request. For example, Via:
SIP4.1/TLSbob.company.com;....;alias
The IP Deskphone attempts to downgrade the allowed protocols if connection attempts
are made and fail. In order to avoid the IP Deskphone using an unsecure protocol, only
TLS is enabled.
The order of preference for protocols is always: TLS, TCP, and UDP.
You must enable the SIP TLS Listening port for incoming TLS connections to be made.
Certificate requirements
For the IP Deskphone to validate that the server certificate provided by the TLS-enabled proxy
matches the connected address, the certificate must contain the IP Addresses of the IP
Deskphone.
The server certificate has a Subject Alternative Name field, which contains the IPv4 and IPv6
IP addresses that correspond with the proxy. For example:
subjectAltName=IP:192.168.100.100subjectAltName=IP:
2001:0db8:0000:0000:0000:0000:1428:5 7ab
274
SIP Software for Avaya 1200 Series IP Deskphones-Administration
Comments? [email protected]
September 2013
TCP/TLS operation overview
Important:
The IP Deskphone must have a device certificate loaded. If the device certificate is not loaded,
the IP Deskphone fails to establish a TLS connection with the system.
IP Deskphone security configuration
The following table lists the various security parameters for the IP Deskphone.
Table 81: Provisioning parameters summary
Parameter
Purpose
Default
Allowed
Configures the TCP
TCP: 5060
and TLS ports used
TLS: 5061
when connecting to the
SIP domain.
Integer
SIP_UDP_PORT
SIP_TCP_PORT
SIP_TLS_PORT
Configures the local
UDP: 5060
SIP listening ports.
TCP: 5060
After you change the
TLS: 5061
listening ports
parameters through
the Check For
Updates functionality,
you must restart the IP
Deskphone to apply
the modified values.
Integer
CONN_KEEP_ALIVE
Configuration values
that affect connection
persistent.
Min: 15 Max: 1800
SERVER_TCP_PORT1_
1 SERVER_TCP_PORT1_2
SERVER_TCP_PORT2_1
SERVER_TCP_PORT2_2
SERVER_TCP_PORT3_1
SERVER_TCP_PORT3_2
SERVER_TCP_PORT4_1
SERVER_TCP_PORT4_2
SERVER_TCP_PORT5_1
SERVER_TCP_PORT5_2
SERVER_TLS_PORT1_1
SERVER_TLS_PORT1_2
SERVER_TLS_PORT2_1
SERVER_TLS_PORT2_2
SERVER_TLS_PORT3_1
SERVER_TLS_PORT3_2
SERVER_TLS_PORT4_1
SERVER_TLS_PORT4_2
SERVER_TLS_PORT5_1
SERVER_TLS_PORT5_2
SIP Software for Avaya 1200 Series IP Deskphones-Administration
30
September 2013
275
Security
Parameter
276
Purpose
Default
Allowed
REGISTER_RETRY_TIME
30
Min: 30 Max: 1800
REGISTER_RETRY_MAX
TIME
1800
Min: 600 Max:
1800
KEEPALIVE_RETRIES
3
Min: 0 Max: 10
See Managing
connection
persistence on
page 283.
No
BE-2MLines
BE-2MLines
BE-Cap Neg
SecureOnly
SRTP_ENABLED
SRTP_MODE
SRTP configuration
values.
SRTP_CIPHER_1
SRTP_CIPHER_2
Allows configuration of AES_CM_128
the preferred order for _HMAC_SHA
SRTP cipher offers.
1_80,
AES_CM_128
_HMAC_SHA
1_32
AES_CM_128_H
MAC_SHA1_32
AES_CM_128_H
M AC_SHA1_80
None
LOGIN_NOTIFY
Configures whether or
not the login banner
appears after a
successful logon.
Off
Off
Success
Failure
Both
LOGIN_NOTIFY_TIME
Configures whether or
not the time at which
the login success or
failure occurred
appears.
Not checked
Not checked (off)
Checked (on)
SSH
Configuration of the
SSH server on the IP
Deskphone. The
parameter must
remain consistent with
the current UNIStim
design.
NO
YES
NO
SFTP
Configuration of the
NO
SFTP server on the IP
Deskphone. The
parameter must be
added, but can remain
consistent with SSH.
YES
NO
SFTP_READ_PATTERNS
File extensions
allowed to read (get)
from the IP
Deskphone.
"," separated
values. See Note
1. After a change
is detected in this
.cfg,.dat
SIP Software for Avaya 1200 Series IP Deskphones-Administration
Comments? [email protected]
September 2013
TCP/TLS operation overview
Parameter
Purpose
Default
Allowed
parameter, the
system resets.
SFTP_WRITE_PATTERNS
File extensions
allowed to write (put)
from IP Deskphone.
.cfg,.dat
"," separated
values. See Note 1
and Note 2. After a
change is
detected in this
parameter, the
system resets.
SSHID
Configuration of the
SSH and SFTP user
ID.
None
See Note 3.
SSHPWD
Configuration of the
SSH and SFTP
password.
None
See Note 3.
HASHED_ADMIN_PASSW
ORD
Indicate whether the
Admin Password is
hashed or not.
NO
YES
NO
ENALBE_LOCAL_ADMIN_
UI
Configure the
availability of the local
administration UI on
the IP Deskphone.
YES
YES
NO
HASH_ALGORITHM
Hash algorithm.
SHA1
SHA1
MD5
ALLOW_EMERGENCY_P
RIORITY_HEADER
Indicates if a "Priority:
emergency" header
must be added to
emergency outgoing
calls or not.
NO
YES
NO
CALLINFO_IMAGE_ENAB
LE
Specify whether to
obtain image from
"Call-Info" url or not.
NO
YES
NO
MKI_ENABLE
Use Master Key
Identifier (MKI) or not.
NO
YES
NO
SECURE_UI_ENABLE
NO
Configure the
availability of other
sensitive data that you
want to hide from the
normal end user, such
as the IP address, the
MAC address on the IP
Deskphone
information screen,
and the FE IP Address
YES
NO
SIP Software for Avaya 1200 Series IP Deskphones-Administration
September 2013
277
Security
Parameter
Purpose
Default
Allowed
and Port on the audio
quality details screen.
ADMIN_PASSWORD_EXP
IRY
Empty
The date that the
configured
ADMIN_PWD is no
longer valid, and a new
password must be
downloaded from the
provisioning server.
Timestamp
Note:
The SFTP file read and write pattern entries must be strictly followed.
The following are examples of valid and invalid formats of SRTP read and write patterns.
Example of valid formats:
SFTP_READ_PATTERNS: cfg,.rel,.re2,.re3,.dat SFTP_WRITE_PATTERNS:
cfg,.txt,.wr1,.wr2
Example of an invalid format:
.cfg, .txt
For the SFTP file read and write pattern entries to be valid, there must be no space between
the extensions.
Note:
SFTP writes can only be made to the sftpWr folder. You are only allowed to write a file that is
10%, or less, of the available space on the folder. If a file size greater than 10% is written, a
write failure occurs, and the system logs the following event:
1042[Minor][TUE JAN 02 19:08:18 2007][353][i:/fw/build/../util/
sshapp/sftpS erver.c:691] - File (./sftpWr/lf.wrl) too large to
write.
Note:
If logon failures occur for SSH and SFTP applications, the system logs the following event:
1040[Minor][TUE JAN 02 20:12:14 2007][4189][i:/fw/build/../sshapp/
sshServer .c:616] - SSH Authentication Failed.
278
SIP Software for Avaya 1200 Series IP Deskphones-Administration
Comments? [email protected]
September 2013
TCP/TLS operation overview
Manually configure the IP Deskphone for UDP and TCP
After you enable the administration user interface, you can manually change network settings
on the IP Deskphone. You can manually configure the IP Deskphone through the Server
Settings menu.
Note:
To meet security requirements, the local administration user interface of the IP Deskphone
can be disabled for deployed IP Deskphones. If this is the case then you must manually
configure the parameters during initial IP Deskphone configuration or through the
provisioning server.
Note:
Disabling the local administration user interface drastically reduces the ability to view or edit
the configuration of the IP Deskphone, and almost completely removes the ability to
diagnose any communication or configuration errors in the field. However, disabling the local
administration user interface increases the security of the IP Deskphone because the user
is not able to view the configurations or make changes.
Configuring the domain protocol
1. Press the Globe key twice.
2. Using the Navigation key cluster, select Server Settings..
3. Select a domain.
4. Enter the admin password (if the UI and password are enabled).
5. Use the Navigation key cluster to scroll through the Domain List screen and select
the required configured SIP domain.
6. Press the Edit context-sensitive soft key.
Table 82: Listening port parameters
Parameter name
Description
Default value
Boundaries
SIP UDP Port
The listening port on 5060
the IP Deskphone for
incoming UDP
requests.
Min: 1024
Max: 65535
Disabled: 0 (must be
non-zero for a TLSonly option)
SIP TCP Port
The listening port on 5060
the IP Deskphone for
incoming TCP
requests.
Min: 1024
Max: 65535
Disabled: 0 (must be
non-zero for a TLSonly option)
SIP TLS Port
The listening port on 0
the IP Deskphone for
Min: 1024
Max: 65535
SIP Software for Avaya 1200 Series IP Deskphones-Administration
September 2013
279
Security
Parameter name
Description
Default value
incoming TLS
requests.
Boundaries
Disabled: 0 (must be
non-zero for a TLSonly option)
Note:
The configuration of the IP Deskphone for various protocols must be completed for outgoing
and incoming connections. For a complete TLS-only option, the outgoing server UDP and
TCP protocols must be configured as a non-zero value, and the incoming UDP and TCP
listening ports must be configured as a non-zero value.
Using the TLS to connect to the SIP proxy
The IP Deskphone can establish a connection with the proxy after the appropriate
configurations are made for the TLS. After the IP Deskphone registers with the SIP Proxy, the
user can detect if a secure connection is established by the presence of a security icon
(padlock) on the idle screen.
Figure 50: Security icon enabled
Note:
Connecting to the server requires that the IP Deskphone uses, at a minimum,
TLS_RSA_WITH_AES_128_CBC_SHA, and as an objective,
TLS_RSA_WITH_AES_256_CBC_SHA. Because this is a server-specific configuration, the
IP Deskphone must be prepared to handle both. There is no difference in screen indication,
regardless of the type of cipher used.
The following table describes the configurations that affect the presence of the security icon
on the idle screen of the IP Deskphone.
280
SIP Software for Avaya 1200 Series IP Deskphones-Administration
Comments? [email protected]
September 2013
TCP/TLS operation overview
Configuration
Result
Idle Screen Security Icon
Display
Default: UDP + TCP
SIP is unsecured.
No
UDP only
SIP is unsecured.
No
TCP only
SIP is unsecured.
No
TLS only
Connection is only
established if SIP is secure.
Yes
UDP + TLS: unsupported
Unsupported.
Unsupported
TCP + TLS
Connection is established
with either TCP or TLS.
Yes – only if TLS connection
is used
No – if fall back to TCP
occurs
UDP + TCP + TLS
Connection is established
using TCP or TLS, potentially
falling back to using only
UDP.
Yes – only if TLS connection
is established
No – if fall back to TCP or
UDP occurs
None : unsupported
Unsupported
Unsupported
Unsupported configurations cannot be saved. If the configurations are unsupported, the IP
Deskphone displays an error message.
The following is an example of an error message for unsupported
configurations:Unsupported: UDP + TLSUnsupported: No protocols enabled.
Registration behavior based on configuration settings
The following table describes the behavior of the IP Deskphone when the IP Deskphone is
configured to communicate with a server using specific protocols.
Table 83: Registration results based on configuration
Configuration
Description
IP Deskphone:
The IP Deskphone
UDP + TCP Server: allows protocols
UDP + TCP + TLS enabled for
communication with
the server.
Expected result
Possible results
The IP
Deskphone
establishes a
connection to the
server using TCP.
If the server does not
accept incoming requests
on TCP, it takes
approximately thirty
seconds for the initial
connection attempt to fail,
and then the IP
Deskphone attempts to
contact the server using
UDP. If this connection
also fails, the IP
Deskphone waits a
SIP Software for Avaya 1200 Series IP Deskphones-Administration
September 2013
281
Security
Configuration
Description
Expected result
Possible results
configured period of time
before attempting to
reconnect.
The IP Deskphone
IP Deskphone:
UDP Server: UDP + only has UDP
TCP + TLS
enabled for sending
requests to the
server.
The IP
Deskphone
registers using
UDP as the
protocol.
If the IP Deskphone is
unable to contact the
server, it waits a
configured period of time
before attempting to
reconnect.
IP Deskphone: TCP The IP Deskphone
only Server: UDP + only has TCP
TCP + TLS
enabled for sending
requests to the
server.
The IP
Deskphone
registers using
TCP as the
protocol.
If the IP Deskphone is
unable to contact the
server, it waits a
configured period of time
before attempting to
reconnect.
IP Deskphone: TLS The IP Deskphone
only Server: UDP + only has TLS
TCP + TLS
configured for
sending requests to
the server. The IP
Deskphone must
have a device
certificate installed
if the server is
configured for
mutual
authentication.
The IP
Deskphone
registers using
SIP over TLS. If a
device certificate
is provisioned,
and the server is
configured for
mutual
authentication,
then the IP
Deskphone
provides a
certificate during
the TLS
handshake.
Otherwise, serveronly
authentication is
used.
If the IP Deskphone is
unable to contact the
server, it waits a
configured period of time
before attempting to
reconnect.
UDP + TLS:
unsupported
Unsupported
Unsupported
The IP
Deskphone
registers the same
as if it was
configured for TLS
only.
If the IP Deskphone is
unable to connect to the
server using TLS, it
attempts to connect using
TCP. If attempts to
connect using TLS and
TCP fail, the IP Deskphone
waits a configured period
Unsupported
IP Deskphone: TCP The IP Deskphone
+ TLS Server: UDP attempts to contact
+ TCP + TLS
the server using
TLS first, because
TLS has higher
priority than TCP.
282
SIP Software for Avaya 1200 Series IP Deskphones-Administration
Comments? [email protected]
September 2013
TCP/TLS operation overview
Configuration
Description
Expected result
Possible results
of time before attempting
to reconnect.
IP Deskphone:
UDP + TCP + TLS
Server: UDP + TCP
+ TLS
The IP Deskphone
attempts to contact
the server using
TLS first, because
TLS has higher
priority than TCP
and UDP.
The IP
Deskphone
registers the same
as if it was
configured for TLS
only.
If the IP Deskphone is
unable to connect to the
server using TLS, it
attempts to connect using
TCP. If attempts to
connect using TLS and
TCP fail, the IP Deskphone
attempts to connect using
UDP. If attempts using
TLS, TCP, and UDP fail,
the IP Deskphone waits a
configured period of time
before attempting to
reconnect.
None: unsupported
Unsupported
Unsupported
Unsupported
Note:
The server must be configured with the appropriate protocols enabled for the success
condition to be realized. Failure results are possible if the server configuration is changed
to disallow protocols.
Managing connection persistence
The IP Deskphone attempts to establish and maintain a persistent connection with the proxy
when TCP and TLS are active protocols. After this connection is established, the IP Deskphone
sends all outgoing connections over this persistent connection.
SIP IP Deskphones and servers, which use UDP to communicate, listen for incoming
connections on known ports, and originate each request on a randomly selected UDP port.
Even if TCP is used, new requests can potentially be sent using a new source port unless the
connection between the IP Deskphone and proxy is kept active.
Connection persistence does the following:
• Keeps a connection established between a client and the outgoing proxy.
• Reuses the open connection for future incoming and outgoing requests.
SIP Software for Avaya 1200 Series IP Deskphones-Administration
September 2013
283
Security
Figure 51: Incoming/Outgoing with connection reuse
When using UDP, an IP Deskphone behind a firewall must periodically send a request to the
server to maintain an open pinhole in the firewall so that the server can contact the IP
Deskphone when sending requests.
When using TCP/TLS and connection persistence, it is not necessary to send a SIP_PING to
the server in order to keep a pinhole alive, and the keep-alive mechanism is reduced to a
method which involves significantly less overhead.
The following figure demonstrates how critical it is that the server can communicate directly
with the IP Deskphone through the use of the established TCP connection because it has no
way of getting through the firewall in order to contact port 5060 on the IP Deskphone.
Figure 52: Connection reuse and a firewall
Table 84: Connection timers definitions and allowed values
Parameter
name
OS Keepalive only
284
Description
Default
value
Boundaries
Selecting this value causes the Not checked Checked
OS TCP Keep-alive functions to
be used instead of the CRLF
ping/pong mechanism. Some
system deployments may prefer
the lighter weight TCP keepalive
SIP Software for Avaya 1200 Series IP Deskphones-Administration
Comments? [email protected]
September 2013
SRTP
Parameter
name
Description
Default
value
Boundaries
Keep-alive
30
This is a value, measured in
seconds, that the IP Deskphone
uses when a connection to the
server is established using TCP
or TLS. The IP Deskphone
periodically sends a packet to
the server, which contains a pair
of CRLF, to ensure the server is
responding.
Min: 5
Max: 1800
Register
Retry
When a connection failure
30
occurs, this value in seconds is
how long the IP Deskphone
waits before attempting to
reregister with the proxy.
Min: 30
Max: 1800
Register
Max Retry
After a failure to reconnect with 1800
the proxy, the IP Deskphone
increases the amount of time
that it waits for the next
registration retry attempt. This
value, measured in seconds, is
the maximum value that the IP
Deskphone waits in between
retry attempts
Min: 600
Max: 1800
SRTP
Secure Real-time Transport Protocol (SRTP) encrypts the Real-time Transport Protocol (RTP)
traffic between two end-points to achieve full security for the media path.
Security Descriptions for the Session Description Protocol (SDESC) (RFC4586) defines a
mechanism to transmit the necessary cryptographic parameters between two end-points.
SRTP is initiated when Secure Real-time Transport Control Protocol (SRTCP) allows both
sides of a conversation to agree on the keys you can use to encrypt or decrypt the messages
that are transmitted.
Media security — SRTP
Secure RTP (SRTP) encrypts the media path between two end-points. After both end-points
agree on the necessary parameters to encrypt and decrypt audio packets, the voice path
between them is established.
SRTP is configured on the IP Deskphone to provide multiple levels of protection.
SIP Software for Avaya 1200 Series IP Deskphones-Administration
September 2013
285
Security
The following table highlights the two cipher suites that are used and their related
parameters.
Table 85: SRTP properties
Parameter
AES_CM_128_HMA
C_SHA1_80
AES_CM_128_HMAC_SHA1_32
Master key
length
128 bits
128 bits
Master salt
length
112 bits
112 bits
SRTP lifetime
2^48 packets
2^48 packets
SRTCP lifetime
2^31 packets
2^31 packets
Cipher
AES Counter Mode
AES Counter Mode
Encryption key
128 bits
128 bits
MAC
HMAC-SHA1
HMAC-SHA1
SRTP auth. tag
80 bits
32 bits
SRTCP auth. tag 80 bits
80 bits
SRTP auth. key
len.
160 bits
160 bits
SRTCP auth. key 160 bits
len.
160 bits
Call security is identified by the presence of the security icon present during an active call, as
shown in the following example.
The presence of the security icon is the only visible indication that the media path is encrypted.
The presence of this icon depends on whether the IP Deskphone has been configured to
support SRTP or not and is visible when the IP Deskphone is not in the idle screen.
286
SIP Software for Avaya 1200 Series IP Deskphones-Administration
Comments? [email protected]
September 2013
SRTP
Available SRTP configurations are provided in the following table.
Table 86: Configuration effects on media security display
Configuration
Result
Media Security Icon
Display (during active call)
Default: UDP + TCP, no
SRTP
SIP is unsecured; media is
unsecured.
UDP + TCP. Best-Effort
SRTP
SIP is unsecured; media is
No
encrypted, but due to
transmission of crypto
parameters in clear text, the
media cannot be considered
secure.
UDP + TCP, SRTP-Only
SIP is unsecured; media is
No
encrypted, but due to
transmission of crypto
parameters in clear text, the
media cannot be considered
secure.
TLS, no SRTP
SIP is secured; media is
unencrypted.
No
TLS, Best-effort
SIP is unsecured; media is
encrypted only if both endpoints agree on use of
SRTP.
Yes/No, depending on
negotiation
TLS, SRTP Only
SIP is secured, media is
Yes
encrypted. If both end-points
do not agree on the use of
SRTP, the connection fails.
SIP Software for Avaya 1200 Series IP Deskphones-Administration
No
September 2013
287
Security
The security icon indicates the security status of a call, and is useful for best-effort
environments where there is a possibility of an unsecured call or where TLS is not used to
communicate with the proxy.
Last successful or unsuccessful logon
You can configure the IP Deskphone to provide the user with logon feedback regarding the
last successful logon or the last unsuccessful logon, and provide the local time at which logon
feedback was logged (assuming that the IP Deskphone has the correct time configured). The
time is correct when the IP Deskphone successfully retrieves the correct time during a
successful logon process, or through the use of SNTP.
The display of a logon success and failure notification is local only to the IP Deskphone being
used, and displays the last time that a user successfully logged on to the IP Deskphone or
failed to log on to the IP Deskphone.
The figures shown below provide examples of the IP Deskphone display screen based on the
configuration of the IP Deskphone and whether Login Notify is enabled or not.
The following notification appears on the display screen when the user login ID or password
is incorrect and log in fails.
Note:
The server recognizes account login failure thresholds. After a configurable number of
failures, the server temporarily disallows login attempts for an account. The IP Deskphone
does not display any indication of this lockout.
Figure 53: New login failure notification
The following notification appears on the display screen when the user successfully logs on.
288
SIP Software for Avaya 1200 Series IP Deskphones-Administration
Comments? [email protected]
September 2013
Last successful or unsuccessful logon
Figure 54: Basic login notification
The following notification appears on the display screen when the user successfully logs on
when Login Notify with Time is enabled.
Figure 55: Basic login and time notification
The following notification appears on the display screen to notify the user of the last
unsuccessful log on attempt made.
SIP Software for Avaya 1200 Series IP Deskphones-Administration
September 2013
289
Security
Figure 56: Login failure notification
The following notification appears on the display screen to notify the user of the date and time
of the last unsuccessful log on attempt made.
Figure 57: Login failure with time notification
The following notification appears on the display screen to notify the user the last successful
and unsuccessful log on attempts made.
290
SIP Software for Avaya 1200 Series IP Deskphones-Administration
Comments? [email protected]
September 2013
Enhanced administrative password security
Figure 58: Login and login failure notification
The following notification appears on the display screen to notify the user of the date and time
of the last successful and unsuccessful log on attempts made.
Figure 59: Login and login failure with time notification
Enhanced administrative password security
The provisioning server can provide additional security associated with the administrative
password. The provisioning server provides the password to the IP Deskphone in the form of
an SHA1 or MD5 hash instead of the plain text password. This removes the need to store the
password on the IP Deskphone by using the existing ADMIN_PASSWORD provisioning
parameter.
The provisioning server can also enforce a password expiry using the provisioning flag,
ADMIN_PASSWORD_EXPIRY. This flag contains a date after which the admin password
SIP Software for Avaya 1200 Series IP Deskphones-Administration
September 2013
291
Security
stored on the IP Deskphone is not accepted. After this time, the administrative password must
be changed in the administrative server. Password expiry can only be enforced if the date and
time are retrieved by the IP Deskphone through SIP, SOAP, or SNTP.
Important:
IP Deskphone licensing information is located in the Keycode Retrieval System (KRS) User
Guide. You must register for access to KRS.
292
SIP Software for Avaya 1200 Series IP Deskphones-Administration
Comments? [email protected]
September 2013
Chapter 26: Licensing
A license is a "right to use" granted by Avaya, that the customer purchases to enable the features on the
IP Deskphone. A license contains at least one entitlement and can contain more than one entitlement. A
license usually has an expiry date and is keyed for a specific license server.
An entitlement is the most basic component of a license and represents a single instance of a right to a
particular feature or capability. Entitlements are feature-related information passed to the server through
licenses. Entitlements are also known as tokens or keycodes.
On Avaya IP Deskphones, the licensing solution uses the Embedded Server Model. In this model, the
licensing server is embedded on the IP Deskphone and executes on the phone. There is a one—to—one
relationship between the license file and IP Deskphone. There are no multiple IP Deskphones per server
in the embedded server model; each IP Deskphone has its own embedded server. The IP Deskphone
does not have to connect to a remote server to obtain tokens; instead, it calls the license server locally
on the IP Deskphone. There are two modes of operation in this model.
• Node Locked Solution
• Network Locked Solution
In the Node Locked Solution within the embedded server model, the administrator obtains a license file
for each IP Deskphone, and the license file is installed onto the IP Deskphone through the provisioning
infrastructure.
For the Network Locked Solution within the embedded server model, the administrator obtains a generic
license file, and the license file is installed onto the IP Deskphones through the provisioning
infrastructure.
The Embedded Server Model does not provide the following capabilities:
• Grace period handling
• SSL communication with the IP Deskphone as the server is local to the phone
• Crediting or transfer of entitlements
• Web-based OAM interface. There is no OAM functionality to upload the license file to an IP
Deskphone.
Licensing framework supports two types of tokens.
1. Time Based Tokens — These tokens expire based on the expiry date associated with the key
code.
2. Standard tokens — The warranty date on these tokens is verified based on firmware build and
contract dates available from the IP Deskphone.
SIP Software for Avaya 1200 Series IP Deskphones-Administration
September 2013
293
Licensing
Important IP Deskphone licensing information is located in the Keycode Retrieval System (KRS) User
Guide. You must register for access to KRS.
Accessing the Keycode Retrieval System
The Keycode Retrieval System (KRS) User Guide provides important IP Deskphone licensing information.
You must register for access to KRS. The ollowing section describes how to access the KRS User
Guide.
Registering for access to KRS
1. Go to http://support.avaya.com/krs.
Users must have an Avaya Access registration profile to access the KRS application.
2. Follow the instructions on this page to obtain an Avaya Access registration profile and to
request access to KRS.
3. On the right side of the page, click KRS Site and log in when prompted.
4. Select IP CLIENTS from the list for the product whose keycodes you would like to access.
Licensing framework
The licensing framework contains the fundamental infrastructure required to deliver a tokenbased licensing model that consists of a node-locked based licensing server and a licensing
client.
The licensing framework consists of the following components:
• License Server (node-locked)—embedded in the IP Deskphone and calls the server
locally.
• License Client—resides in the IP Deskphone and makes requests to the License Server
for tokens.
• KRS integration—a key or license generator provided with the CKLT solution which is
integrated into the Keycode Retrieval System (KRS).
Characteristics of the licensing framework
The following list describes the characteristics of the licensing framework on the IP
Deskphone.
• The embedded server relies on a real time clock to calculate when a token expires
• The embedded server (node-locked) enables the license server to execute on the IP
Deskphone. The IP Deskphone obtains tokens by calling the server locally.
294
SIP Software for Avaya 1200 Series IP Deskphones-Administration
Comments? [email protected]
September 2013
License file download
• The license file is installed on the IP Deskphone through the provisioning server or TFTP
server.
• The IP Deskphone does not have an internal real-time clock. The time of day is obtained
from the Call Server that the IP Deskphone is registered to on the network.
• The license file contains only one type of token because the IP Deskphone only uses one
type at a time.
• The administrator must enter the IP Deskphone system ID directly into the Keycode
Retrieval System (KRS).
• A Node Locked license file is keyed for the IP Deskphone so that the license is only valid
on a specific IP Deskphone.
• A Network Locked license file can be installed on a limited number of IP Deskphones at
a given site.
• The system ID is the MAC of the IP Deskphone.
• When the IP Deskphone is connected to an Avaya server, the IP Deskphone gets an
additional token.
License file download
This section describes the procedure for downloading Node Locked license files and the
procedure for downloading Network Locked license files.
Node Locked license file download
Use the following procedure to download Node Locked license files keyed to each phone by
MAC address from the provisioning or TFTP server.
Downloading Node Locked license files:
1. Configure the IP Deskphone with a provisioning IP address so it can access a
provisioning server.
For more information about provisioning parameters for the IP Deskphone, see
Create the SIP provisioning file on the provisioning server on page 40.
2. The IP Deskphone config file must include a [LICENSING] section to enable the IP
Deskphone to download the licence file. Add [LICENSING] section to the IP
Deskphone .cfg file.
Examples of IP Deskphone cfg files are 1120eSIP.cfg, 1140eSIP.cfg,
1165eSIP.cfg, 1220eSIP.cfg, and 1230eSIP.cfg.
The [LICENSING] section specifies a wild card filename which uses the IP
Deskphone MAC address as the filename with the ipctoken prefix and cfg suffix.
For example:
[FW]
SIP Software for Avaya 1200 Series IP Deskphones-Administration
September 2013
295
Licensing
DOWNLOAD_MODE AUTO
VERSION 4.00.xx.yy
PROTOCOL TFTP
FILENAME SIP 1230_03.02.xx.yy.bin
...
[LICENSING]
DOWNLOAD_MODE AUTO
VERSION 000001
FILENAME ipctoken*.cfg
3. Place the IP Deskphone license file on the provisioning server.
The generated license file must be named ipctokenMAC.cfg, where MAC is the 12character MAC address of the IP Deskphone.
For example, for an IP Deskphone with MAC address “000f1fd304f8”, the license
file will be named “ ipctoken000f1fd304f8.cfg”.
4. Start the provisioning server so the IP Deskphone can retrieve the .cfg files when
the server starts.
When the new license file is downloaded to the phone from the provisioning server, it overwrites
the existing license file and reboots the phone to activate the new license.
Network Locked license file download
If a Network Locked license file is to be used, the same license file can be installed on all
phones. In this case, the wildcard “*” is not used in the FILENAME, as the filename is fixed
and does not contain the MAC address of each phone.
Use the following procedure to download a Network Locked license file from the provisioning
or TFTP server.
Downloading a Network Locked license file:
1. Configure the IP Deskphone with a provisioning IP address so it can access a
provisioning server. For more information about provisioning parameters for the IP
Deskphone, see Create the SIP provisioning file on the provisioning server on
page 40.
2. The IP Deskphone config file must include a [LICENSING] section to enable the IP
Deskphone to download the licence file. Add [LICENSING] section to the IP
Deskphone .cfg file.
Examples of IP Deskphone cfg files are 1120eSIP.cfg, 1140eSIP.cfg,
1165eSIP.cfg, 1220eSIP.cfg, and 1230eSIP.cfg.
For example:
[FW]
DOWNLOAD_MODE AUTO
VERSION 4.00.xx.yy
PROTOCOL TFTP
FILENAME SIP 1230_03.02.xx.yy.bin
...
[LICENSING]
DOWNLOAD_MODE AUTO
296
SIP Software for Avaya 1200 Series IP Deskphones-Administration
Comments? [email protected]
September 2013
[LICENSING] section
VERSION 000001
FILENAME ipctoken.cfg
3. Place the IP Deskphone license file on the provisioning server.
4. Start the provisioning server so the IP Deskphone can retrieve the .cfg files when
the server starts.
When the new license file is downloaded to the phone from the provisioning server, it overwrites
the existing license file and reboots the phone to activate the new license.
[LICENSING] section
The IP Deskphone config file must include a [LICENSING] section to enable the IP Deskphone
to download the licence file. The [LICENSING] section specifies a wild card filename which
uses the IP Deskphone MAC address as the filename with the cfg prefix and suffix.
The following format is an example of the [LICENSING] section that is added to the IP
Deskphone config file (1xxxe.cfg):
[LICENSING] VERSION version FILENAME X*.Y
The following table describes the items in the [LICENSING] section.
Table 87: Description of items in the [LICENSING] section of the config file.
Field name
Field value
Description
[LICENSING]
—
Section header for licensing
config file information.
VERSION
000001
The version of the license
file.
FILENAME
X*.Y
License filename. The IP
Deskphone looks for a file
with the IP Deskphone MAC
address included in the
filename.
The 1xxxe.cfg file can have one, or all, of the following sections:
• [FW]
• [DEVICE_CONFIG]
• [LICENSING]
Although the IP Deskphone [FW] section is not required to activate the token, the provisioning
server and the IP Deskphone provisioning server IP configuration must be configured to
retrieve, save, and process the license file.
SIP Software for Avaya 1200 Series IP Deskphones-Administration
September 2013
297
Licensing
The following is an example of an 11xxe.cfg file that contains the [FW] section and the
[LICENSING] section.
[FW]
DOWNLOAD_MODE AUTO
VERSION VERSION 4.00.xx.yy
FILENAME SIP 1140_e03.02.xx.yy.bin
PROTOCOL TFTP
SERVER_IP 47.11.183.165
...
[LICENSING]
VERSION 000001
FILENAME ipctoken*.cfg
The following is an example of an 11xxe.cfg file with the [LICENSING] section only.
[LICENSING]
VERSION 000001
FILENAME ipctoken*.cfg
License information for the IP Deskphone
The Licensing information screen provides information on Embedded Mode, status and other
licensing information.
To access the Licensing information screen, press the Globe key twice.
Select Prefs > Network > Licensing and select 1. Licensing Info. Enter the admin password
(if prompted).
298
SIP Software for Avaya 1200 Series IP Deskphones-Administration
Comments? [email protected]
September 2013
Licensable features
Figure 60: Licensing menu
Licensable features
Licensable features are divided into three groups.
1. Basic Feature Set
2. Enhanced Feature Set - 1 token required
3. Advanced Feature Set - 2 tokens required
The Basic Feature Set is always enabled on the IP Deskphone. Enabling the Enhanced
Feature Set requires an additional token. Enabling the Advanced d Feature Set requires two
tokens.
When connected to an Avaya Server, the IP Deskphone gets an additional token. This means
that the Enhanced Feature Set is available when the IP Deskphone connects to an Avaya
Server.
Access Licensed Features list
The Licensed Features screen can be accessed through the IP Deskphone by pressing the
Globe key twice and then selecting Prefs > Network > Licensing > 2. Features.
SIP Software for Avaya 1200 Series IP Deskphones-Administration
September 2013
299
Licensing
Figure 61: Licensing menu
The Licensable Features list displays.
Figure 62: 12xx Licensable Features allowed by license
300
SIP Software for Avaya 1200 Series IP Deskphones-Administration
Comments? [email protected]
September 2013
Node-locked license mode
Figure 63: 12xx Licensable Features not allowed by license
Node-locked license mode
In the node-locked license mode, the IP Deskphone uses a license file to acquire the required
tokens needed to activate the features. There are two types of tokens: time-based tokens, and
standard tokens.
Time-based token
The following figure is an example of a node-locked time-based token. In this example, the
embedded server on the IP Deskphone contains 5 tokens and the IP Deskphone is enabled
for Advanced Feature Set and connected to a non-Avaya server.
SIP Software for Avaya 1200 Series IP Deskphones-Administration
September 2013
301
Licensing
Figure 64: Node-locked license mode — License information for time-based token (connected
to non-Avaya Server)
The following figure is an example of a node-locked time-based token. In this example, the
embedded server on the IP Deskphone contains 5 tokens and the IP Deskphone is enabled
for Advanced Feature Set and connected to an Avaya server.
302
SIP Software for Avaya 1200 Series IP Deskphones-Administration
Comments? [email protected]
September 2013
Node-locked license mode
Figure 65: Node-locked license mode — License information for time-based token (connected
to Avaya Server)
Note the extra line Tokens Required: 1. This line is displayed only when the IP Deskphone
connects to an Avaya Server.
The status of the time-based token can be one of the following:
• Active
• Inactive
A time-based token can be inactive for one of the following reasons:
• Insufficient tokens
• License expired
Standard token
The following figure is an example of a node-locked Standard token. In this example, the
embedded server on the IP Deskphone contains five tokens. The IP Deskphone is enabled for
Advanced Feature Set and is connected to a non-Avaya server.
SIP Software for Avaya 1200 Series IP Deskphones-Administration
September 2013
303
Licensing
Figure 66: Node-locked license mode — license information for Standard token (connected to
non—Avaya Server)
The following figure is an example of a node-locked Standard token. In this example, the
embedded server on the IP Deskphone contains five tokens. The IP Deskphone is enabled for
Advanced Feature Set and is connected to an Avaya server.
Note the extra line Tokens Required: 1. This line is displayed only when the IP Deskphone
connects to an Avaya Server.
304
SIP Software for Avaya 1200 Series IP Deskphones-Administration
Comments? [email protected]
September 2013
Invalid or no license file
Figure 67: Node-locked license mode — license information for Standard token (connected to
Avaya Server)
The status of the standard token can be one of the following:
• Active
• Inactive
A standard token can be inactive for one of the following reasons:
• Insufficient token
• License expired
Invalid or no license file
The following figure is an example of an invalid or no license file.
SIP Software for Avaya 1200 Series IP Deskphones-Administration
September 2013
305
Licensing
Figure 68: License information — Invalid or no license file
Evaluation period
When the IP Deskphone arrives from the factory, it has a 31–day evaluation period. This period
allows users to try licensed features before they actually purchase the tokens. Any time the
user loads a valid license file and has tokens granted, the evaluation is terminated
immediately. ; Once the evaluation period expires, there is no way to reset it.
The following figure is an example of the IP Deskphone with 15 days left in the evaluation
period.
Figure 69: IP Deskphone in an evaluation period
306
SIP Software for Avaya 1200 Series IP Deskphones-Administration
Comments? [email protected]
September 2013
Alarms
Alarms
The license feature provides notifications on the IP Deskphone screen about the licensing
status. The license feature provides notification on the IP Deskphone screen if the following
conditions apply:
• No avaliable tokens
• Expired tokens
• Evaluation period has ended
A notification message is displayed in a pop-up window on top of the IP Deskphone screen.
The window can be dismissed by pressing the Stop key or by lifting the handset. After the
message is dismissed, the IP Deskphone closes the warning window. The warning window redisplays every 24 hours at 1:00 am. You can configure the time frame through the IP
Deskphone configuration system. If the licensed features are disabled, the IP Deskphone
cannot display any type of window warning.
Support warning
A Support warning is used to direct the user to contact technical support. The actual label
displayed on the screen and the contact information are specified in the device configuration
file.
License not available warning
A warning window, indicating that a license is not available, appears on the IP Deskphone
screen when the token request or refresh is rejected due to insufficient tokens available or an
invalid license file.
The following figure is an example of a warning window indicating that a license is not
available.
SIP Software for Avaya 1200 Series IP Deskphones-Administration
September 2013
307
Licensing
Figure 70: License not available warning
License expiry warning
A warning window, indicating that a license has expired, appears on the IP Deskphone screen
when a node-locked license expires.
The following figure is an example of a warning window indicating that a license is expired.
Figure 71: License expiry warning
Evaluation period expiry warning
A warning window, indicating that the evaluation period has expired, appears on the IP
Deskphone screen when the evaluation period expires and if the IP Deskphone has never had
a valid token grant.
The following figure is an example of a warning window indicating that the evaluation license
period is expired.
308
SIP Software for Avaya 1200 Series IP Deskphones-Administration
Comments? [email protected]
September 2013
Alarms
Figure 72: Evaluation period expiry warning
Evaluation threshold warning
A warning window informing you of the approaching evaluation expiration date appears on the
IP Deskphone at the following predefined times:
• 15 days before expiration date
• 7 days before expiration date
• 1 day before expiration date
The following figure is an example of the evaluation threshold warning.
Figure 73: Evaluation threshold warning
SIP Software for Avaya 1200 Series IP Deskphones-Administration
September 2013
309
Licensing
Licensing expiry threshold warning
When the expiration date of the node-locked licence approaches,, a warning window is
displayed on the IP Deskphone. The warning window indicates when the license will expire,
and notifies you at the following predefined times:
• 30 days before the license expires
• 15 days before the license expires
• 7 days before the license expires
• 1 day before the license expires
The following figure is an example of the license expiry threshold warning.
Figure 74: License expiry threshold warning
Licensed features
The following Standard features are available to all users without a token.
• SIP Core Features (RFC3261 and SIPPING 19)
• 3-way calling and conference calling
• Audio codecs - standard and wideband
• Auto Login and Auto Logout
• Background Image
• Busy Lamp Field (BLF)
• Distinctive ringing
• Downloadable ringtones
310
SIP Software for Avaya 1200 Series IP Deskphones-Administration
Comments? [email protected]
September 2013
Licensed features
• Image screensaver and lock
• Standard font languages
• Multiple calls per user
• Server failover redundancy
• Session timers
• SNTP (time server)
• Speed Dial List
• Transfer to VM softkey
• USB flash drive
• Hotline
The following extended features are available with a token or if the IP Deskphone is registered
to a recognized Avaya server (Avaya, Avaya Communication Server 1000, or IP Office) then
extended features are available without a token.
• Standard features
• Authentication security
• Call Server Service Package
• Expansion Module support
• Instant Messaging
• Media Security (SRTP)
• Multiuser login support
• NAT Traversal/STUN
• Proactive Voice Quality Management
• PC Client Control
• Signaling Security (TLS)
• USB headset support for audio
• IPv6 support
The following advanced features are available with two tokens or if the IP Deskphone is
registered to a recognized Avaya server (Avaya, Avaya CS 1000, or IP Office) then advanced
features are available with one token.
• Standard features
• Extended features
• MLPP (Federal)
• Call Origination Busy
• DoD Network
• FIPS Certified
SIP Software for Avaya 1200 Series IP Deskphones-Administration
September 2013
311
Licensing
312
SIP Software for Avaya 1200 Series IP Deskphones-Administration
Comments? [email protected]
September 2013
Chapter 27: PC Client Softphone
interworking
The interworking feature allows the user to access the functionality of the SIP IP Deskphone using a
softphone client on their PC. On an incoming call, both the IP Deskphone and the PC Client Softphone
ring. When the user answers the IP Deskphone, the softphone remains available for Instant Messages,
video and other multimedia features.
The IP Deskphone, PC Client softphone, and the Call Server are all necessary to support interworking
and the Click-to-Answer functionality.
The interworking feature enables the IP Deskphone to automatically answer an incoming call for the
purpose of Click-to-Answer. To avoid any security risk, the user must pre-grant authorization to another
user, or user groups, to allow them to make requests for the IP Deskphone to automatically answer their
calls.
By using Click-to-Answer, the user can answer a call on their PC Client Softphone, causing the server to
send an auto-answer request to the IP Deskphone. (When a user logs in, the IP Deskphone sends a
special identifier so that only that specific IP Deskphone receives the request even though the user is
logged in on multiple IP Deskphones.) The call is answered without user interaction, but the microphone
is muted to prevent the device from being used as a listening device by a malicious user. When a call is
answered, the user hears a ring-splash notification and can un-mute the microphone to allow bidirectional
media.
Pre-granting authorization for the Answer-Mode
The user must specify which users or groups of users are authorized to request auto-answer.
The user can grant authorization through the Feature Options menu if the interworking feature
is enabled in the user's IP Deskphone device configuration.
The user can enable and disable one or more of the following groups:
• Allow Public—Authorizes anyone on the internet.
• Allow Friends List—Authorizes everyone on the user's Friends List.
• Allow Directory—Authorizes everyone in the user's Personal Directory.
• Allow Addresses—Acts as a white-list of domain names and SIP addresses that have
authorized users.
SIP Software for Avaya 1200 Series IP Deskphones-Administration
September 2013
313
PC Client Softphone interworking
Answer-Mode Settings screen
The Answer-Mode Settings screen is used to pre-grant authorization to request an automatic
answer to potential callers or groups of callers.
The Answer-Mode Settings screen has the following two independent configurations:
• Allow Mode: [Current Setting]
• Allow Addresses
For the Allow Mode option, the current setting can be one of the following choices:
• Disabled
• Friends
• Directory—includes all Friends
• Public—includes all users
For the Allow Addresses option, the user can edit a listing by adding domain names or SIP
addresses up to a maximum defined in the device configuration.
To access the Answer-Mode Settings screen, from the Preference menu, choose Feature
Option and Answer-Mode Settings.
The following screen appears.
Figure 75: Answer-Mode Settings screen
The following table describes the function of the Context-sensitive soft keys for the AnswerMode Settings screen.
314
SIP Software for Avaya 1200 Series IP Deskphones-Administration
Comments? [email protected]
September 2013
Allow-Mode Settings screen
Table 88: Context-sensitive soft keys for the Answer-Mode Settings screen
Context-sensitive soft key
Action
Change
Opens the screen for the selected option:
Allow Mode, or Allow Addresses.
Back
Returns you to the Feature Options screen.
The following table describes the outside actions on content for the Answer-Mode Settings
screen.
Table 89: Outside actions on content for the Answer-Mode Settings screen
Key or action
Result
Goodbye
Idle screen.
Quit
Idle screen.
Off Hook; call keys
Clears the screen and allows you to make a
call.
Allow-Mode Settings screen
The Allow-Mode Settings screen allows you to disable the feature, and to allow automatic
requests for Friends, Directory, or Public users.
To access the Allow-Mode Settings screen, on the Preference menu, choose Feature Option,
Answer-Mode Settings, and then Allow Mode.
The following screen appears.
Figure 76: Allow-Mode Settings screen
SIP Software for Avaya 1200 Series IP Deskphones-Administration
September 2013
315
PC Client Softphone interworking
The following table describes the function of the Context-sensitive soft keys for the Allow-Mode
Settings screen.
Table 90: Context-sensitive soft keys for the Allow-Mode Settings screen
Context-sensitive soft key
Action
Select
Makes the current selection enabled. The
selected user group is authorized for
Answer-Mode.
Back
Returns you to the previous screen.
The following table describes the outside actions on content for Allow-Mode Settings screen.
Table 91: Outside action on content for the Allow-Mode Settings screen
Key or action
Result
Goodbye
Idle screen.
Quit
Idle screen.
Off Hook; call keys
Clears the screen and allows you to make a
call.
Allow Addresses screen
The Allow Addresses screen is used to pre-grant authorization to request an automatic answer
to a list of user-entered domains and SIP addresses.
If the user selects the Allow Addresses option in the Answer-Mode Settings screen, the user
is presented with an interface for entering a list of strings. For the purpose of Click-to-Answer,
only the current user is needed in the list because the requests originates from the user's PC
Client Softphone.
For the Allow Addresses option, the user can edit a list of domain names or SIP addresses.
The items in the list can be in any of the following formats:
• Single SIP user address
For example:
[email protected]
• SIP domain
For example:
sipdomain.com (all users from sipdomain.com
316
SIP Software for Avaya 1200 Series IP Deskphones-Administration
Comments? [email protected]
September 2013
Allow Addresses screen
• IPv4 address of a SIP domain
For example:
172.25.20.20
• IPv6 address of a SIP domain
For example:
2001:db8::57ab
The user can add as many entries as the device configuration allows. If the Add soft key is
disabled, then the user has reached the maximum number or entries. The user can also edit
and delete entries.
To access the Allow Addresses screen, on the Preference menu, choose Feature Options,
Answer-Mode Settings, and then Allow Addresses.
If there are no domains in the list, the following screen appears.
Figure 77: Allow Addresses screen — first entry
The following screen is an example of the Allow Address screen if one (or more) domain or
SIP address is in the system.
Figure 78: Allow Addresses screen with domains and SIP addresses
SIP Software for Avaya 1200 Series IP Deskphones-Administration
September 2013
317
PC Client Softphone interworking
The following table describes the function of the Context-sensitive soft keys for the Allow
Addresses screen with no entries listed.
Table 92: Context-sensitive soft keys for the Allow Addresses screen - with no entries
listed
Context-sensitive soft key
Action
Save
Saves the entered domain or SIP address in
a list and displays the list content.
abc
Changes from alphanumeric and numeric
entry (abc to 123).
Clear
Erases all entered characters.
Back
Returns you to the previous screen.
The following table describes the function of the Context-sensitive soft keys for the Allow
Addresses screen with a list of entries.
Table 93: Context-sensitive soft keys for the Allow Addresses screen - with entries listed
Context-sensitive soft key
Action
Add
Displays the entry content.
Edit
Selects the current entry and displays the
entry content with a populated field.
Delete
Deletes the selected domain from the list.
Back
Returns you to the Answer-Mode Settings
screen.
The following table describes the outside actions on content for the Allow Addresses
screens.
Table 94: Outside actions on content for the Allow Addresses screens
Key or action
318
Result
Goodbye
Idle screen.
Quit
Idle screen.
Off Hook; call keys
Clears the screen and allows you to make a
call.
SIP Software for Avaya 1200 Series IP Deskphones-Administration
Comments? [email protected]
September 2013
Automatically answering a call
Automatically answering a call
With the interworking feature enabled, the IP Deskphone can answer automatically, manually,
or reject an incoming auto-answer request. If the request is valid and the user is authorized to
make the request (see Pre-granting authorization for the Answer-Mode on page 313), the call
is answered automatically.
A "ring splash", or short ring tone, indicates to the user that the call was automatically
answered. The subject is "Auto-Answered", and the microphone is muted (the user can
deactivate the mute status by pressing the "mute" key on the IP Deskphone).
The following image is an example of a notification indicating an auto-answered call.
Figure 79: Example of a Notification screen indicating an Auto-Answered call
When a call is auto-answered and the handset is on the hook, the handsfree button is
activated.
If there is an active call when an auto-answer request is received, the active call is placed on
hold and the incoming call is answered.
If a user who is not pre-granted authorization requests a call to be automatically answered on
the IP Deskphone, the call is not automatically answered and is treated as a normal call; the
IP Deskphone rings and the user answers it manually.
Configuration of the PC Client Softphone
Enabling the interworking feature in the IP Deskphone device configuration file allows the user
to pre-grant authorization to other users and to configure the IP Deskphone to auto-answer.
The following table describes the configuration flags used to configure the PC Client Softphone
interworking feature for the IP Deskphone.
SIP Software for Avaya 1200 Series IP Deskphones-Administration
September 2013
319
PC Client Softphone interworking
Table 95: PC Client Softphone configuration commands
Configuration commands
ENABLE_INTERWORKING
Description
The configuration values are YES and NO.
The default value is NO.
• If configured as YES, the interworking
feature is enabled.
• If configured as NO, the interworking
feature is disabled.
If interworking is enabled, the interface for
pre-authorization is visible in the Feature
Options menu. If the feature is disabled,
requests to automatically answer a call are
handled as a normal incoming call.
interworking must be configured through
provisioning.
MAX_ALLOWEDADDRESSES
320
Limits the size of the list of user and domain
addresses stored for auto-answered
authorization. The default value is 100.
SIP Software for Avaya 1200 Series IP Deskphones-Administration
Comments? [email protected]
September 2013
Chapter 28: Maintenance
Convert SIP Software to UNIStim Software
The IP Deskphone can be ordered with UNIStim software installed or with SIP Software
installed. If you have an IP Deskphone with UNIStim software, and you convert the software
from UNIStim to SIP, the UNIStim software is overwritten. To convert an IP Deskphone from
SIP Software to UNIStim software, a software reload is required.
Reloading UNIStim software
1. Determine the appropriate UNIStim version to match the hardware release number
of your IP Deskphone.
There are different versions of UNIStim software available for download. Which
version you choose depends on the hardware release number of your particular
IP Deskphone.
If the hardware release number of your IP Deskphone is among the following
hardware release numbers, download UNIStim software version release 062AC5L
or higher (the hardware release number is the Product Engineering Code [PEC]
followed by the release number):
• NTYS05ACE6 20
• NTYS05BCE6 20
• NTYS05BCGSE6 04
If the hardware release number of your IP Deskphone is not among the previous
list, download UNIStim version release 062AC5L or higher.
2. Download the appropriate UNIStim software file to your TFTP server.
3. Create an 12xxSIP.cfg file containing the following information:
[FW]
DOWNLOAD_MODE FORCED
VERSION xxx
FILENAME yyy.bin
SIP Software for Avaya 1200 Series IP Deskphones-Administration
September 2013
321
Maintenance
where xxx is the UNIStim version number appropriate for the hardware release of
your IP Deskphone, for example, 062AC5L , and yyy.bin is the filename containing
the version number, for example, SIP12x004.01.03.00.bin.
4. Power the IP Deskphone off and on. The IP Deskphone reboots and contacts the
TFTP server upon bootup and downloads the new UNIStim software.
Reset Factory Settings support
A configured IP Deskphone can be reset to factory defaults to clear all stored information and
preference data. By activating this mode, the data stored on the IP Deskphone is erased, and
the administrator can reconfigure it for a new user.
The IP Deskphone resets data stored in the EEPROM to factory defaults and erases files in
TFFS.
There are two ways to activate Reset to Factory Settings:
1. by entering a Special Key Sequence (SKS), or
2. remotely using SSH-PDT.
After you activate Reset to Factory Settings, the action is registered in the ECR-log file.
Activating Reset to Factory Setting by SKS
1. At any point while the IP Deskphone is operating, press the Special Key Sequence
(SKS).
2. Enter the following command:
**73639<MAC>## (or **renew<MAC>##)
For example, the MAC-address, A1B2C3D4E5F6 , can be translated to
212223343536 . Therefore, the SKS would be **73639212223343536## .
After the proper sequence is entered on the IP Deskphone, the confirmation screen
appears.
3. Press the YES context-sensitive soft key to reset to factory setting.
Or
Press the NO context-sensitive soft key to close the confirmation screen and return
to regular mode.
The following table describes the function of the Context-sensitive soft keys for Reset to
Factory Setting.
322
SIP Software for Avaya 1200 Series IP Deskphones-Administration
Comments? [email protected]
September 2013
Reset Factory Settings support
Table 96: Context-sensitive soft keys for Reset to Factory Setting
Context-sensitive soft key
Action
Yes
Activates Reset to Factory Setting.
No
Rejects Reset to Factory Setting, closes the
confirmation screen, and returns to regular
mode.
Activating Reset to Factory Setting using SSH_PDT
1. Enter the PDT-command:
>reset2factory
The PDT displays the prompt:
>Reset to Default... Are you sure?
2. Enter Y to accept.
OR
Enter N to decline.
If you select Y, the PDT displays the prompt:
>Enter MAC-address:
3. Type in the IP Deskphone MAC-address.
><MAC><enter>
For example, if the IP Deskphone MAC-address is A1B2C3D4E5F6 , you enter:
>A1B2C3D4E5F6<enter>
4. Click Enter.
• If the MAC-address is correct, the IP Deskphone is reset and the remote telnet
client is restarted.
• If the MAC-address is incorrect, the IP Deskphone displays:
>Incorrect MAC-address. Action is rejected .
Return to Step 1.
SIP Software for Avaya 1200 Series IP Deskphones-Administration
September 2013
323
Maintenance
324
SIP Software for Avaya 1200 Series IP Deskphones-Administration
Comments? [email protected]
September 2013
Chapter 29: Diagnostics and
troubleshooting
This chapter contains the following topics:
• IP Deskphone diagnostics on page 325
• Local diagnostic tools on page 327
• How to access the Diagnostics menu on page 328
• IP Set and DHCP information on page 330
• Network Diagnostic Tools on page 332
• Ethernet Statistics on page 334
• IP Network Statistics on page 338
• Advanced Diag Tools on page 340
• Test key on page 342
• Logging Systems on page 344
• Problem Determination Tool (PDT) on page 345
• Diagnostic logs on page 353
IP Deskphone diagnostics
Network-related issues can be debugged using the Network Diagnostic Utility (NDU) built into
the IP Deskphone.
Another way to diagnose a problem on an IP Deskphone is to capture a message trace using
any appropriate software.
The IP Deskphone has Problem Determination Tools (PDT). These can be accessed through
a SSH session using the IP address of the IP Deskphone (you can configure the login and
password using provisioning or manually in the network configuration window of the phone).
Problem: Server unreachable after the IP Deskphone is powered up:
:
SIP Software for Avaya 1200 Series IP Deskphones-Administration
September 2013
325
Diagnostics and troubleshooting
If the display indicates that the server is unreachable and it continuously resets, some
parameters must be configured. Things to consider when setting parameters:
• Enter requested information in the menu fields by pressing the number keys on the
dialpad. Press the asterisk (*) key to enter a period (.) when entering an IP address.
• To record the entry and advance the initialization to the next parameter, press OK.
• To abandon the manual configuration process and restart the power-up, press Cancel.
• To manually enter parameters, use the BKSpace or Clear soft keys to edit the default
entry. BKSpace deletes each character as the key is pressed. Clear deletes the entire
entry.
• Each parameter must have a corresponding entry.
Problem: Software download failure:
If you are having trouble downloading software, review the following.
• Are the Server URL and Protocol parameters correct in the IP Deskphone's Device
Settings > Provisioning dialog?
• Is the IP Deskphone connecting to the TFTP server log?
Check any firewall configuration settings to allow TFTP protocol access.
• Is the syntax within the 12xxSIP.cfg correct? See Configure the provisioning server on
page 39. Supported sections describe the syntax of the configuration file.
• Does DOWNLOAD_MODE = AUTO and is VERSION less than the current running
software version? If a file does not download using the AUTO selection, it is possible the
version number is not high enough. A version number exists permanently on the
IP Deskphone until a higher version number is downloaded through the device
configuration file or you select Srvcs > System > Erase User Data on the
IP Deskphone.
• Check FILENAME. Does this exist on the TFTP server?
• Check to make sure your firewall settings allow for the provisioning protocol (TFTP, FTP,
OR HTTP) to go through.
Problem: Software conversion failures:
326
SIP Software for Avaya 1200 Series IP Deskphones-Administration
Comments? [email protected]
September 2013
Local diagnostic tools
There are four different boot loaders in the FLASH and application load. Various boot loaders
are used to recover the IP Deskphone if a failure occurs.
• If a conversion fails before anything is written to FLASH, the IP Deskphone reboots with
the previous software load.
• If the software download fails while the application is being written to FLASH, there are
two possible recovery methods:
- If an application file was not created, after power up the IP Deskphone jumps to the
BootC loader and downloads a new application load using the same mechanism as
the application.
- If the application is executed and the file created is corrupted, the IP Deskphone
crashes. In this case, force the IP Deskphone to use BootC by pressing the UP key
and “2” during power up.
Problem: Users of the IP Deskphone complain that their banner is not updated with their
custom banner:
When the banner is configured as FORCED in the device configuration file, the user's banner
is overwritten by the value in the device configuration file.
Problem: Provisioning Error is displayed on the IP Deskphone display.:
The Provisioning Error is displayed on the screen when the IP Deskphone is unable to contact
the TFTP, FTP, or HTTP server.
Local diagnostic tools
Local diagnostic tools provides information about the IP Deskphone, such as identification,
software version, settings, and a set of testing routines for checking network condition.
You can access Diagnostics tools through the Diagnostics menu.
Table 97: Diagnostics menu options on page 327, describes the Diagnostics menu options.
Table 97: Diagnostics menu options
Diagnostics option
Description
IP Deskphone and DHCP information
Provides detailed information about the
IP Deskphone and service configuration.
Network Diagnostics Tools
Provides access to the following testing
routines:
• ping
• tracert
SIP Software for Avaya 1200 Series IP Deskphones-Administration
September 2013
327
Diagnostics and troubleshooting
Diagnostics option
Description
Ethernet Statistics
Provides some Ethernet statistics for
Network Interface and PC port.
IP Network Statistics
Provides IP Network statistics.
Certificates Administration
Supports administration of available
certificates.
Advanced Diag Tools
Provides information for setting up the
following configuration parameters:
• Auto Recovery (enable/disable)
• SSH (enable/disable)
• Port Mirroring (enable/disable)
• User ID and Password for SSH
Test Key
Activates key testing mode.
How to access the Diagnostics menu
To activate the Diagnostics menu, access the Network menu by selecting one of the following
steps:
• Press the Services key twice on the IP Deskphone while the IP Deskphone is in the idle
mode.
• Press the Prefs soft key, and then select the Network item in the Preferences menu.
The following screen appears:
328
SIP Software for Avaya 1200 Series IP Deskphones-Administration
Comments? [email protected]
September 2013
How to access the Diagnostics menu
Figure 80: Network menu
After you access the Network menu, the following options are available:
• Server Settings
• Device Settings
• Diagnostics
• Licensing
• Lock
Select 3. Diagnostics, or press Back to return to the Network menu.
The following screen appears:
SIP Software for Avaya 1200 Series IP Deskphones-Administration
September 2013
329
Diagnostics and troubleshooting
Figure 81: Diagnostics menu
The following table describes the function of the Navigation keys for the Diagnostics
screen.
Table 98: Navigation
Key
Action
Up and down arrows
Use the up and down arrows to change the
selected item in the list.
Enter
Invokes the Select soft key.
Digital keys (number associated with option) Invokes an appropriate option.
*
Selects the first option Server Settings, but
does not activate it.
#
Selects the last option Lock, but does not
activate it.
IP Set and DHCP information
The IP Set and DHCP Info screen provides detailed information about the IP Deskphone, such
as configuration, software version, IP addresses, gateway, and servers.
To access the IP Set and DHCP Info screen, from the Diagnostics menu, choose 1. IP Set
and DHCP Info.
The following screen appears:
330
SIP Software for Avaya 1200 Series IP Deskphones-Administration
Comments? [email protected]
September 2013
IP Set and DHCP information
Figure 82: IP Set and DHCP Info screen
The following is an example of the information that appears:
1. Configuration
Network Data Valid: Yes
MAC Address Stored: Yes
Perform DHCP: No
Voice VLAN Enable: No
Voice VLAN Config: No
VLAN Voice VLAN Discovered: No
2. Primary Server: S1
PC Port is: ON
3. Software Version: 3.00.09.02
Hardware ID: xxxxxx
4. Set IP: xxx.xxx.xxx.xxx (could be in IPv4 or IPv6 format)
5. Sub-Mask: xxx.xxx.xxx.xxx (could be in IPv4 or IPv6 format)
6. GateWay: xxx.xxx.xxx.xxx (could be in IPv4 or IPv6 format)
7. Voice VLAN Priority: 6
8. Voice VLAN ID: 6
9. DHCP Respond String: ....
10. Servers' Information:
SIP Software for Avaya 1200 Series IP Deskphones-Administration
September 2013
331
Diagnostics and troubleshooting
S01 IP: xxx.xxx.xxx.xxx
Port: 4100 Act: 1 Retries: 5
S02 IP: xxx.xxx.xxx.xxx
Port: 4100 Act: 1 Retries: 5
S03: IP: xxx.xxx.xxx.xxx
Port: 4100 Act: 1 Retries: 5
S04 IP: xxx.xxx.xxx.xxx
Port: 4100 Act: 1 Retries: 5
11. Provisioning Server: xxx.xxx.xxx.xxx
The following table describes the function of the Navigation key for the IP Set and DHCP
Info screen.
Table 99: Navigation
Key
Action
Up and down arrows
Use the up and down arrows to scroll the
screen.
The following table describes the function of the context-sensitive soft keys for the IP Set and
DHCP Info screen.
Table 100: Context-sensitive soft key for the IP Set and DHCP information screen
Context-sensitive soft key
Return
Action
Press the Return soft key to cancel this
screen and return to the Diagnostics menu.
Network Diagnostic Tools
The Network Diagnostic Tools screen provides access to ping and tracert testing routines.
To access the Network Diagnostic Tools screen, from the Diagnostics menu, choose 2.
Network Diagnostics tools.
The following screen appears:
332
SIP Software for Avaya 1200 Series IP Deskphones-Administration
Comments? [email protected]
September 2013
Network Diagnostic Tools
Figure 83: Network Diagnostic Tools screen
There are two configurable fields:
• IP — enter an IP address.
• Hops — number of hops used as a configurable parameter for tracert routine.
The following services are available:
• activate the ping routine
• activate the tracert routine
The following table describes the function of the context-sensitive soft keys for the Network
Diagnostics tools screen.
SIP Software for Avaya 1200 Series IP Deskphones-Administration
September 2013
333
Diagnostics and troubleshooting
Table 101: Context-sensitive soft keys for the Network Diagnostic Tools screen
Context-sensitive soft key
Action
Ping
Activates the ping routine.
Tracert
Activates the tracert routine.
Cancel
Returns you to the Diagnostics menu.
The following table describes the function of the Navigation keys for the Network Diagnostic
Tools screen.
Table 102: Navigation
Key
Action
Up and down arrows
Use the up and down arrows to scroll through
a list of testing information.
Left and right arrows
Use the left and right arrows to move through
the configurable fields.
Enter
Use the Enter key to enter the editing mode
for the active configurable field.
Ethernet Statistics
The Ethernet Statistics screen displays Ethernet statistics information for Network Interface
(NI) or PC ports, such as the number of incoming and outgoing network packages and network
settings.
To access the Ethernet Statistics screen, from the Diagnostics menu, choose 3. Ethernet
Statistics.
The Ethernet Statistics for the NI Port screen appears, as shown in the following screen
examples. Use the up and down Navigation arrows to scroll through the complete list of
Ethernet statistics.
334
SIP Software for Avaya 1200 Series IP Deskphones-Administration
Comments? [email protected]
September 2013
Ethernet Statistics
SIP Software for Avaya 1200 Series IP Deskphones-Administration
September 2013
335
Diagnostics and troubleshooting
Ethernet statistics example:
The following is an example of Ethernet statistics for the IP Deskphone:
1. NI Link Status: Up
2. Duplex Mode: Full
3. Network Speed: 1000Mb
4. Auto Sense/Negotiate
Auto-Negotiate Capability: Yes
Auto-Negotiate Completed: Yes
5. Port VLAN Priority: 0
6. Port VLAN ID: 0
7. Packet Collision: 0
8. CRC Errors: 1
9. Frame Errors: 1
A. Unicast Packets Tx: 1
B. Unicast Packets Rx: 1
C. Broadcast Packets Rx: 1
D. Multicast Packets Rx: 1
=== 802.1x Status ===
EAP Status: Disabled
The following table describes the function of the context-sensitive soft keys for the Ethernet
Statistics (NI Port screen.
Table 103: Context-sensitive soft keys for the Ethernet Statistics (NI Port) screen
Context-sensitive soft key
Action
Reset
Resets statistics value.
NI Port
Switches to the PC Port Ethernet statistics.
Return
Returns you to the Diagnostics menu.
The following table describes the function of the Navigation keys for the Ethernet Statistics
(NI Port) screen.
336
SIP Software for Avaya 1200 Series IP Deskphones-Administration
Comments? [email protected]
September 2013
Ethernet Statistics (PC Port) screen
Table 104: Navigation
Key
Up and down arrows
Action
Use the up and down arrows to scroll through
the list of statistics information.
Ethernet Statistics (PC Port) screen
The Ethernet Statistics (PC Port) screen displays Ethernet statistics for the PC Port. To view
the PC Port Ethernet statistics, from the Ethernet Statistics screen, press the NI Port soft
key.
The following screen appears:
Figure 84: Ethernet Statistics (PC Port) screen
Use the up and down Navigation arrows to scroll through the list of Ethernet statistics for the
PC Port.
The following is an example of Ethernet Statistics for the PC Port:
1. PC Link Status: Up
2. Duplex Mode: Full
3. Network Speed: 10 Mb
4 Auto Sense/Negotiate
SIP Software for Avaya 1200 Series IP Deskphones-Administration
September 2013
337
Diagnostics and troubleshooting
Auto-Negotiate Capability: Yes
Auto-Negotiate Completed: Yes
5. Port VLAN Priority: 0
6. Port VLAN ID: 0
7. Packet Collision: 0
8. CRC Errors: 1
9. Frame Errors: 1
A. Unicast Packets Tx: 1
B. Unicast Packets Rx: 1
C. Broadcast Packets Rx: 1
D. Multicast Packets Rx: 1
The following table describes the function of the context-sensitive soft keys for the Ethernet
Statistics (PC Port) screen.
Table 105: Context-sensitive soft keys for the Ethernet Statistics (PC Port) screen
Context-sensitive soft key
Action
Reset
Resets statistics values.
PC Port
Switches to the NI Port Ethernet statistics.
Return
Returns you to the Diagnostics menu.
The following table describes the function of the Navigation keys for the Ethernet Statistics
(PC Port) screen.
Table 106: Navigation
Key
Action
Up and down arrows
Use the up and down arrows to scroll through
a list of statistics information.
IP Network Statistics
The IP Network Statistics screen provides information such as the number of incoming and
outgoing network packets, number of error packets, and protocols. To access the IP Network
Statistics screen, from the Diagnostics menu, choose 4. IP Network Statistics.
The following screen appears:
338
SIP Software for Avaya 1200 Series IP Deskphones-Administration
Comments? [email protected]
September 2013
IP Network Statistics
Figure 85:
Use the up and down Navigation arrows to scroll through the list of IP Network Statistics
information.
The following is an example of IP Network Statistics for the IP Deskphone:
1. Packet Sent: 0
2. Packet Received: 0
3. Incoming Packets Error: 0
4. Outgoing Packets Error: 0
5. Incoming Pkt Discarded: 0
6. Outgoing Pkt Discarded: 0
7. Unknown Protos: 0
8. Last ICMP Type/Code: 1
The following table describes the function of the context-sensitive soft keys for the IP Network
Statistics screen.
Table 107: Context-sensitive soft keys for the IP Network Statistics screen
Context-sensitive soft key
Action
Reset
Resets statistics values.
Refresh
Refreshes the IP Network statistics.
Return
Returns to the Diagnostics menu.
SIP Software for Avaya 1200 Series IP Deskphones-Administration
September 2013
339
Diagnostics and troubleshooting
The following table describes the function of the Navigation keys for the IP Network
Statistics screen.
Table 108: Navigation
Key
Action
Up and down arrows
Use the up and down arrows to scroll through
a list of statistics information.
Advanced Diag Tools
With the Advanced Diag Tools option, you can modify the following parameters:
• Auto Recovery (enable/disable)
• Port Mirroring (enable/disable)
To access the Advanced Diag Tools screen, from the Diagnostics menu, choose 5.
Advanced Diag Tools.
The following screen appears:
Figure 86: Advanced Diag Tools screen
Use the up and down Navigation arrows to scroll through the Advanced Diag parameters.
The following table describes the function of the context-sensitive soft keys for the Advanced
Diag Tools screen.
340
SIP Software for Avaya 1200 Series IP Deskphones-Administration
Comments? [email protected]
September 2013
Advanced Diag Tools
Table 109: Context-sensitive soft keys for the Advanced Diag Tools screen
Context-sensitive soft key
Action
Apply
Invokes the selected service.
Back
Dismisses the dialog box and returns you to
the Diagnostics menu.
The following table describes the function of the navigation keys for the Advanced Diag
Tools screen.
Table 110: Navigation
Key
Action
Up and down arrows
Use the up and down arrows to scroll through
a list of statistics information.
Enter
Use the Enter key to enter the editing mode
for the active configurable field or change the
value for check boxes.
Port Mirroring
The Port Mirroring field behavior depends on the device configuration flag defined by the
administrator. The following device configuration file parameter manages the PC Port Mirroring
option:
PORT_MIRROR_ENABLE [YES/NO]
The command determines whether or not the option can be managed:
• If PORT_MIRROR_ENABLE is YES, then you can activate or deactivate the option. The
Port Mirroring prompt in the Network->Diagnostics->Advanced Diag Tools menu is
enabled and can be modified.
• If PORT_MIRROR_ENABLE is NO, then you cannot manage the option. The Port
Mirroring prompt in the Advanced Diag Tools menu is disabled (dimmed); Port Mirroring
is disabled.
The default value for the PORT_MIRROR_ENABLE is NO. This means that PC Port Mirroring
is not active.
Gathering Network Traces from a phone
You can capture network traces from the PC port of the IP Deskphone.
Port Mirroring can be enabled manually or through provisioning.
Manually enabling Port Mirroring feature on the IP Deskphone:
To manually enable Port Mirroring feature on the IP Deskphone, perform this procedure:
SIP Software for Avaya 1200 Series IP Deskphones-Administration
September 2013
341
Diagnostics and troubleshooting
1. In Device Settings dialog, turn on PC Port
2. Press the following keys in order (dial the magic sequence): [mute] + [up] + [down]
+ [up] + [down] + [up] + [mute] + [7] on the IP Deskphone dial pad.
3. Connect your PC to the PC port of the IP Deskphone.
Enabling Port Mirroring on the IP Deskphone through provisioning:
To enable Port Mirroring feature on the IP Deskphone through provisioning, perform this
procedure:
1. Open the Device Settings dialog.
2. Check to see if the Enable PC Port parameter checkbox is displayed and the
checkbox is checked. If the Enable PC Port parameter checkbox is not visible, do
the following:
• Press the Auto soft key and check the 07. PC Port Enable checkbox in the
Auto Provisioning window.
• Press the Config soft key to return to the Network Settings window.
• Check the PC Port checkbox.
3. Add the following parameter to the phone device configuration file:
PORT_MIRROR_ENABLE YES
4. Press the Services soft key and select 4.Check for Update. Press the YES soft
key to update the IP Deskphone configuration.
5. Connect your PC to the PC port of the IP Deskphone.
Test key
The Test key screen lets you perform a physical key operation test. After you activate the test
mode, the "Test key: Press any key" prompt appears on the screen. The IP Deskphone goes
into the Do Not Disturb (DND) mode and cannot receive any external calls. Information about
the pressed key event (except for the Rls key) appears on the IP Deskphone screen. To access
the Test key screen, from the Diagnostics menu, choose 6. Test key.
The following screen appears:
342
SIP Software for Avaya 1200 Series IP Deskphones-Administration
Comments? [email protected]
September 2013
Test key
Figure 87: Test key screen
After you activate the test mode, the key event appears on the screen:
• Key pressing: "Test key: xx pressed"
• Key pressing: "Test key: xx pressed"
The following table describes the function of the context-sensitive soft keys for the Test key
screen.
Table 111: Context-sensitive soft keys for the Test key screen
Context-sensitive soft key
Quit
Action
Dismisses the Services menu.
The following table describes the function of the Navigation key for the Test key screen.
Table 112: Navigation
Key
Rls
Action
Closes the test mode and restarts the
IP Deskphone.
SIP Software for Avaya 1200 Series IP Deskphones-Administration
September 2013
343
Diagnostics and troubleshooting
Logging Systems
Logging Systems contains a subsystem for logging incoming and outgoing SIP packages for
the IP Deskphone to the log file in FFS. You can enable or disable the SIP logging subsystem
by selecting Yes (enable) or No (disable).
To access the Logging Systems menu, press the Services key on the IP Deskphone, and
then choose Logging Systems from the Services menu.
The following screen appears:
Figure 88: Logging Systems screen
The Logging Systems screen displays the SIP Logging subsystem. Press the Enter key in
the Navigation key cluster to switch the value of the selected sign from Yes to No, or No to
Yes. Then press the Apply soft key to apply the settings.
The following table describes the function of the context-sensitive soft keys for the Logging
Systems screen.
Table 113: Context-sensitive soft keys for the Logging Systems screen
Context-sensitive soft key
Apply
344
Action
Applies the setting and returns to the parent
screen.
SIP Software for Avaya 1200 Series IP Deskphones-Administration
Comments? [email protected]
September 2013
Problem Determination Tool (PDT)
Context-sensitive soft key
Back
Action
Dismisses the setting and returns you to the
parent screen.
The following table describes the function of the Navigation keys for the Logging Systems
screen.
Table 114: Navigation
Key
Action
Up and down arrows
Use the up and down arrows to scroll the
screen.
Right and left arrows
Navigates through the signs.
Enter
Switches the value of the selected sign from
ON to OFF, and OFF to ON.
You can enable or disable SIP-logging using the following command in the Device
configuration file:
LOGSIP_ENABLE Yes/[No]
If the parameter is Yes, the SIP-logging Manager is active and starts logging SIP incoming and
outgoing packages into the log file in FFS. If the parameter is No, the SIP-logging Manager is
not active and there is no logging of incoming and outgoing packages into the log file in FFS.
The default parameter is No.
Problem Determination Tool (PDT)
The IP Deskphone with SIP Software contains special services that monitor the performance
and various other states of the IP Deskphone. These services also automatically collect
problem data, and provide symptom analysis support for the various categories of problems
encountered by the software. All significant events are registered in special log files.
Error Logging framework
The Error logging framework saves error-related information in the ECR Log file and is the
base object used by all the other monitoring services listed as follows:
• ECR Watchdog
• Task Monitor
• CPU Load Monitor
SIP Software for Avaya 1200 Series IP Deskphones-Administration
September 2013
345
Diagnostics and troubleshooting
• Stack Overflow Monitor
• Traffic Monitor
ECR Watchdog
The ECR Watchdog tracks the IP Deskphone to ensure the IP Deskphone survives transitions
(for example: soft reset). If the watchdog is active and has not detected activity in a certain
period of time, the watchdog logs the appropriate error and recovers the IP Deskphone.
Task Monitor
The Task Monitor performs the following functions:
• Tracks the switch of any task to the suspended state. If the task gets to the suspended
state, the Task Monitor logs the error-related information (including the suspended task
information and summary information about all running tasks), and then initiates recovery
of the IP Deskphone.
• Monitors important tasks. The Task Monitor scans these tasks, and if any task is lost
without a reason, the Task Monitor logs the error and recovers the IP Deskphone.
CPU Load Monitor
The CPU Load Monitor tracks the CPU usage. If the CPU load reaches 100 percent and stays
at that level for more than 1 minute, the CPU Load Monitor logs the appropriate error (including
the list of most suspect tasks that could occupy the CPU), and recovers the IP Deskphone.
Stack Overflow Monitor
The Stack Overflow Monitor tracks the stack of all tasks in the real-time mode, detects the
stack overflow or corruption, and logs the task trace.
Traffic Monitor
The Traffic Monitor monitors incoming and outgoing IP and SIP traffic and registers events in
the ECR-log file when the traffic exceeds predefined thresholds. The Traffic Monitor also
registers the content of the incoming and outgoing SIP packages.
346
SIP Software for Avaya 1200 Series IP Deskphones-Administration
Comments? [email protected]
September 2013
PDT commands
PDT commands
The Problem Determination Tool (PDT) is a troubleshooting tool for the IP Deskphone. The
PDT has powerful functions which allow you to perform special testing actions, and can display
the content of any log files. The PDT helps to identify the origin of the problem under
investigation, reduces the amount of time it takes to reproduce a problem with the proper RAS
tracing levels set (trace levels are set automatically by the tool), and reduces the effort required
to send the appropriate log information to technical support.
The PDT provides remote access to the IP Deskphone with the problem, using SSH session.
Access is restricted by admin ID and password.
SSH can be enabled manually or through provisioning.
Enabling SSH manually:
Steps to enable SSH on an IP Deskphone manually:
1. Open the Device Settings dialog.
2. Check to see if theEnable SSH parameter checkbox is displayed and the checkbox
is checked. If theEnable SSH parameter checkbox is not displayed, do the
following:
• Press the Auto soft key and uncheck the 18. SSH Enable checkbox in the
Auto Provisioning window.
• Press Config soft key to return to the Network Settings window.
• Check the Enable SSH checkbox.
3. Enter the UserID and Password.
4. Press the Apply soft key.
5. Connect to the IP Deskphone by using any SSH client program.
Enabling SSH through provisioning:
To enable SSH on an IP Deskphone through provisioning, perform this procedure:
1. Open the Device Settings dialog.
2. Check to see if the Enable SSH parameter checkbox is displayed and the checkbox
is checked. If the Enable SSH parameter checkbox is not displayed, do the
following:
• Press the Auto soft key and check the 18. SSH Enable checkbox in the Auto
Provisioning window.
• Press the Config soft key to return to the Network Settings window.
• Check the Enable SSH checkbox.
3. Add the following parameters to the IP Deskphone device configuration file:
• SSH YES
SIP Software for Avaya 1200 Series IP Deskphones-Administration
September 2013
347
Diagnostics and troubleshooting
• SSHID <user name>
• SSHPWD <user password>
.
4. Press the Services soft key and select 4.Check for Update. Press the YES soft
key to update the IP Deskphone configuration.
5. Connect to the IP Deskphone by using any SSH client program.
The PDT supports the following set of commands:
Table 115: List of PDT commands
#
1
Command
prtlog >prtlog<mngr_dest>
Description
• Prints the content of the ECR-log file.
• Outputs content of the specified log file to
stdout (the screen, a stream, stdout, or a
string). The input parameter specifies a type
of logging manager:
- 0 (default) — ECR-log file
- 1 — SIP-log file
If the input parameter is incorrect, the
following notification appears:
>prtlog: incorrect type of manager <x>
2
clearLogFile
Clears the content of the ECR-log file
3
setLogLevel <loglevel>
Configures log level, where the loglevel is in the
range 0...3:
• If loglevel = 0 — logging is disabled
• If loglevel = 1 — logging only Critical errors
• If loglevel = 2 — logging Critical and Major
errors
• If loglevel >=3 — logging any type of errors
4
printLogLevel
Prints log level
5
setRecoveryLevel <reclevel>
Sets up recovery level, where the reclevel is in
the range 0...3. If the Auto Recovery option is
ON, the IP Deskphone behaves as follows:
• If reclevel = 0 — recovering is disabled
• If reclevel = 1 — recovering on only Critical
errors
• If reclevel = 2 — recovering on Critical and
Major errors
• If reclevel >= 3 — recovering on any errors
348
SIP Software for Avaya 1200 Series IP Deskphones-Administration
Comments? [email protected]
September 2013
PDT commands
#
Command
Description
6
printRecoveryLevel
Prints recovery level
7
taskMonShow
Prints a list of monitored tasks
8
"i"
Prints all task information
9
ti <taskName | task id>
Prints task information
10
memshow [level]
Shows memory information
11
checkStack <taskName | task Checks stack of some task
id>
12
tt <taskName | task id>
Prints Task Trace
13
info
Prints HardwareID, SoftwareID, MAC and BT
address
14
prtcfg
Prints content of the IP Deskphone
configuration file, SystemConfig.dat in FFS.
The file contains IP Deskphone-specific
configuration. The content of this file is formed
from the content of several downloadable
configuration files:
• Device Configuration file
• Tones file
• Language file
15
lsr
Lists directory contents (similar to unix Is) and
the contents of a directory and any of its
subdirectories
16
ping <host ip> [# of pings]
Pings any host (ping)
17
tracert <host ip> [max hops]
Traceroute to any host (tracert)
18
netinfo
Prints common network information
19
routeshow
Displays host and network routing tables and
stats
20
arp
Displays entries in the system ARP table
21
listcerts
Lists all trusted certificates
22
printcert <index>
Displays certificate details
23
sipapp <start | stop>
Starts or stops the SIP application
24
sendunistim <xx xx....>
Sends UNIStim message
25
rxunistim <on | off
Displays UNIStim messages from the Core
26
txunistim <on | off
Displays UNIStim messages to the Core from
the SIP application
SIP Software for Avaya 1200 Series IP Deskphones-Administration
September 2013
349
Diagnostics and troubleshooting
#
Command
Description
27
sendevent <0xmmm <0xnnn> Simulates an UNIStim event.
28
lcdparam
Sets up LCD parameters for the IP Deskphone
29
audio <hs | hd | hf | off>
Loopbacks audio to handset/headset/
Handsfree
30
display <on | off>
Turns all LCD and LED on or off
31
keypress <on | off>
Turns all key presses on or off
32
clearlog
>clearlog<mngr_dest>
Clears content of the specified log file. The input
parameter specifies the type of logging
manager:
• 0 (default) — ECT-log file
• 1 — SIP-log file
If the input parameter is incorrect, the following
notification appears:
>clearlog: incorrect type of manager <x>
33
removelog
>removelog<mngr_dest>
Removes the specified log file.
The input parameter specifies the type of
logging manager:
• 0 (default) — ECR-log file
• 1 — SIP-log file
If the input parameter is incorrect, the following
notification appears:
>removelog: incorrect type of manager <x>
34
reset2factory >reset2factory
Resets the IP Deskphone to the default setting.
See Activating Reset to Factory Setting using
SSH_PDT on page 323.
You can request the following commands to the support team if you have any issues:
• printSetInfo
• prtcfg
• prtlog 0
• prtlog 1
• netinfo
• arpShow
• memShow
• routeshow
•i
350
SIP Software for Avaya 1200 Series IP Deskphones-Administration
Comments? [email protected]
September 2013
Device configuration file
The command ( i ) displays the list of tasks with TID and STATUS fields. For every task that
has a SUSPEND status in the list, enter the following commands:
ti 0x. <TID>
tt 0x <TID>
checkStack 0x <TID>
To print out a list of all supported commands and a short description of each, enter the "?"
command when the PDT prompt is displayed, as shown in this example:
PDT> ?.
Device configuration file
The following table describes the configuration commands in the device configuration file for
alarms, logs and diagnostics.
Table 116: Alarms, logs and diagnostics configuration commands
Component
Flag
Description
PC Port Mirroring parameter PORT_MIRROR_ENAB Determines whether the option
which can be modified in the LE
can be managed or not.
Advanced Diag Tools
• If PORT_MIRROR_ENABLE is
dialog.
configured as YES, The Port
Mirroring prompt in the
Advanced Diag Tools dialog is
enabled, and you can activate
or deactivate the option.
• If PORT_MIRROR_ENABLE is
configured as NO, the Port
Mirroring prompt in the
Advanced Diag Tools dialog is
disabled (dimmed); the option
is deactivated by force and you
cannot manage the option.
• The values are YES and NO.
The default value is NO
(disabled).
Memory Monitor.
MEMCHECK_PERIOD
SIP Software for Avaya 1200 Series IP Deskphones-Administration
Determines the time period in
seconds when the Memory
Monitor wakes up (after start-up
September 2013
351
Diagnostics and troubleshooting
Component
Flag
Description
or the last memory check
attempt).
• The values are 1800 (0.5 hrs) to
86400 (24 hrs). The default
value is 86400 (24 hrs).
SIP-traffic monitor
DOS_PACKET_RATE
Determines the maximum
number of packets per second
that is allowed.
SIP_traffic monitor
DOS_MAX_LIMIT
Specifies how many packets past
DOS_PACKET_RATE the IP
Deskphone can receive before
packets are dropped.
• If packets are received at a rate
of DOS_PACKET_RATE +1,
then packets start getting
dropped after the time specified
in DOS_MAX_LIMIT (in
seconds).
SIP-traffic monitor
DOS_LOCK_TIME
Specifies the amount of time (in
seconds) the IP Deskphone stops
processing packets after
DOS_MAX_LIMIT is reached.
• If DOS_PACKET_RATE is < 1,
other values are ignored and
packets are not dropped.
Logging System
LOGSIP_ENABLE
Allows the administrator to
enable or disable SIP-logging.
• If the parameter is YES, the
SIP-logging Manager is active
and starts logging SIP incoming
and outgoing packets into the
log files in FFS.
• The values are YES and NO.
The default value is NO (the
manager is not active and the
IP Deskphone does not log in
SIP incoming and outgoing
packets.
352
SIP Software for Avaya 1200 Series IP Deskphones-Administration
Comments? [email protected]
September 2013
Diagnostic logs
Diagnostic logs
The IP Deskphone supports two types of log files:
• ECR-log
• SIP-log
ECR-log file
The ECR-log file registers and provides detailed information on the errors or bugs that occur
during the operation of the IP Deskphone. The ECR-log also contains records indicating some
events, such as restart.
Each error is logged as a record. The format of the record is the same regardless of the monitor
that generates it or the level of severity of the error. There are three sections to the record.
The first section provides mandatory information for each record including:
• severity level
• severity flag
• time stamp
• software version
• source file information
• error number
• brief description
The following is an example of the information logged in the first section:
=== Record #001 === MAJOR SET Logged 01/07/2002 00:34:35
Firmware: 06A5C1Hd10 Description: Task Monitor: the Transport
task is suspended
The second section is optional. If the task is registered in the list of stack overflow events, the
following type of information may be displayed, as shown in the following example
ERROR*ecrStackShow: :StackOverflow: PDT tpStackBase =
0x8194ffa0, pStackLimit=0x8194bfa0, pStackEnd= 0x8194bfa0
tstack: base 0x8194ffa0 end 0x8194bfa0 size 16368 high 1492
margin 14874
SIP Software for Avaya 1200 Series IP Deskphones-Administration
September 2013
353
Diagnostics and troubleshooting
The third section includes the supplementary information. The content depends on the flag in
the calling function. The flag can be as follows:
• ECR_LOG_NO_EXTRA_INFO
— no supplementary information
• ECR_LOG_TASK_INFO:
— log task information (ti, tt, the stack information from SP-96 to SP+96)
• ECR_LOG_SUM_TASK_INFO:
— log summary of each task TCB (i)
• ECR_LOG_MEM_INFO:
— log memory usage information (memShow)
The following is an example of the supplementary information in the ECR-log file:
354
SIP Software for Avaya 1200 Series IP Deskphones-Administration
Comments? [email protected]
September 2013
Diagnostic logs
Figure 89: Example of the supplementary information in the ECR-log file
SIP Software for Avaya 1200 Series IP Deskphones-Administration
September 2013
355
Diagnostics and troubleshooting
Figure 90: Example of the supplementary information in the ECR-log file (continued)
Figure 91: Example of the ECR-log file on page 357 is an example of the ECR-log file output
when the following PDT command is entered:
PDT>prtlog 0
356
SIP Software for Avaya 1200 Series IP Deskphones-Administration
Comments? [email protected]
September 2013
Diagnostic logs
Figure 91: Example of the ECR-log file
SIP Software for Avaya 1200 Series IP Deskphones-Administration
September 2013
357
Diagnostics and troubleshooting
Figure 92: Example of the ECR-log file (continued)
358
SIP Software for Avaya 1200 Series IP Deskphones-Administration
Comments? [email protected]
September 2013
Diagnostic logs
SIP-log file
The SIP-log file registers incoming and outgoing SIP-packages, and each package is logged
as a record. There are two sections:
• The first section requires mandatory information for each record including:
- type of the package (incoming or outgoing)
- time stamp
- software version
• The second section contains the content of the package in text format.
Figure 93: Example of the SIP-log file on page 360 is an example of the SIP-log file that is
output when the following PDT command is entered:
PDT>prtlog 1
SIP Software for Avaya 1200 Series IP Deskphones-Administration
September 2013
359
Diagnostics and troubleshooting
Figure 93: Example of the SIP-log file
360
SIP Software for Avaya 1200 Series IP Deskphones-Administration
Comments? [email protected]
September 2013
Diagnostic logs
Figure 94: Example of the SIP-log file (continued)
There are three ways to get SIP-logs from the IP Deskphone:
1. Connect to the phone through SSH
• Online — connect to the phone through SSH and enter the PDT command
dbgshell. The log messages are printed out during a call to the SSH
console.
• Offline— connect to the phone through SSH and enter the PDT command
prtlog 1. The active SIP-log file is printed out to the SSH console.
2. Log files are stored on the IP Deskphone flash device. You can access these
files using the File Manager of the IP Deskphone and copy the files to an external
flash drive.
Perform this procedure to copy SIP-log files using the File Manager of the IP
Deskphone:
a. Connect a USB flash drive to the USB port of the IP Deskphone.
b. Navigate to File Manager->Phone->Logs.
c. Select one of *.log file.
d. Press the Send soft key.
3. You can obtain the log files through an SFTP connection to the IP
Deskphone.
Perform this procedure to enable SFTP on an IP Deskphone:
Note:
Changing the SFTP_READ_PATTERNS causes the IP Deskphone reboot.
a. Open the Device Settings dialog.
b. Check to see if the Enable SFTP parameter checkbox is displayed and
if the checkbox is checked. If the Enable SFTP parameter checkbox is
not displayed, do the following:
SIP Software for Avaya 1200 Series IP Deskphones-Administration
September 2013
361
Diagnostics and troubleshooting
• Press the Auto soft key and check the SFTP Enable checkbox in
the Auto Provisioning window.
• Press the Config soft key to return to the Network Settings window
• Check the Enable SSH checkbox.
c. Add the following parameters to the device configuration file of the phone
SSH YES SSHID
SSH YES
SSHID <user name>
SSHPWD <user password>
SFTP YES
SFTP_READ_PATTERNS .txt,.zip,.log
SFTP_WRITE_PATTERNS .txt,.zip,.log
You can then connect through SFTP and obtain the most recent/logs/
SIPLogFile.log and the archive:/logs/SIPLogFile.log.zip files.
HTTP server logs
To view all logs related to the http server, go to:
/usr/local/sipx/var/log/sipxbx/httpd_access_log /usr/local/
sipx/var/log/sipxbx/httpd_error_log /usr/local/sipx/var/log/sipxbx/
httpd_rewrite_log
Installation logs
To view the log of all the installed packages, go to:
/root/install.log
To view all system messages during startup, go to:
/var/log/messages
362
SIP Software for Avaya 1200 Series IP Deskphones-Administration
Comments? [email protected]
September 2013
Configuration server logs
Configuration server logs
To view all logs related to the configuration server, go to:
/usr/local/sipx/var/log/sipxbx/sipxconfig.log /usr/local/
sipx/var/log/sipxbx/sipxconfig.logins.log
PC Client Softphone interworking with the IP Deskphone
If the user does not have access to the pre-authorization configurations in the Feature Options
menu, the feature is not enabled. You must verify the device configurations and enable the
interworking feature so that the user can access the pre-grant authorization configuration and
the IP Deskphone can auto-answer calls from authorized users or user groups. For more
information, see Configuration of the PC Client Softphone on page 319.
If the call is being received, but is not being automatically answered in a Click-to-Answer
scenario, the user must verify that the user making the request is an authorized user. For more
information, see Pre-granting authorization for the Answer-Mode on page 313.
SIP Software for Avaya 1200 Series IP Deskphones-Administration
September 2013
363
Diagnostics and troubleshooting
364
SIP Software for Avaya 1200 Series IP Deskphones-Administration
Comments? [email protected]
September 2013
Index
Numerics
1230 IP Deskphone with SIP Software illustration ..... 29
12xxBoot.cfg download ............................................ 100
12xxBoot.cfg file download, manual ......................... 101
12xxBoot.cfg file, downloading the ........................... 100
802.1ab Link Layer Discovery Protocol (LLDP) ........ 122
802.1x (EAP) authorization .......................................121
802.1x (EAP) device ID ............................................ 121
802.1x (EAP) password ............................................ 122
A
Answer-after ............................................................... 17
Automatic provisioning at a preconfigured time ......... 39
Automatic provisioning at power-up ........................... 39
Automatic TFTP/FTP/HTTP 12xxBoot.cfg download on
Bootup using DHCP .................................... 100
Avaya 1200 Series IP Deskphones Getting Started
Card ............................................................... 31
Avaya 1200 Series IP Deskphones parts list ............. 35
B
Boot loader software .................................................. 99
C
Cached IP configuration ........................................... 134
Certificate Admin option in the user interface ........... 263
certificate requirements ............................................ 274
Change the default language of an IP Deskphone
already configured as English ....................... 65
Check-synch enhancement ........................................ 16
Checking the UNIStim software version on an IP
Deskphone in use ........................................ 107
Checking the UNIStim version on a new IP Deskphone
...................................................................... 107
Communication Server 2000 and Communication Server
2100 ............................................................. 147
Configuration file ........................................................ 40
Configure the device settings ................................... 134
Configuring the provisioning server ............................ 39
Configuring the TFTP server .................................... 108
connection persistence ............................................. 271
Connection persistence ............................................ 271
Connections on the IP Deskphone ............................. 97
Convert SIP software to UNIStim software ............... 321
Converting UNIStim software to SIP Software ......... 111
Converting UNIStim software to SIP software using
TFTP ............................................................ 111
Create the device configuration file on the provisioning
server ............................................................ 47
Create the IP Deskphone configuration file on the
provisioning server ........................................ 85
Creating the SIP provisioning file on the provisioning
server ............................................................ 40
Ctrl Priority bits configuration .................................... 134
Custom banner problem ........................................... 325
D
Data 802.1Q configuration ........................................134
Data Priority bits configuration ..................................134
Data VLAN ................................................................130
Data VLAN configuration .......................................... 134
Default error handling ............................................... 217
Device configuration commands, details .................... 51
Device configuration commands, list .......................... 47
Device configuration file example ...............................47
Device ID .................................................................. 133
Device ID configuration ............................................ 134
Device Settings .........................................................119
Device Settings menu parameters ........................... 119
Device settings on the IP Deskphone with SIP Software
...................................................................... 119
DHCP ....................................................................... 126
DHCP configuration .................................................. 134
DHCP enhancements .................................................15
Dialing function description ........................................ 88
Dialing plan .................................................................88
Dialing plan declarations section sample ................... 88
Dialing plan digit map section sample ........................ 88
Dialing plan file on the provisioning server ................. 87
Dialing plan sample .................................................... 87
dialing plan variable definitions sample ...................... 88
Disable PC Port ........................................................ 130
Disable PC Port configuration .................................. 134
Distinctive ringing feature ......................................... 203
DNS configuration .................................................... 134
DNS IP ......................................................................128
DNS lookup .............................................................. 184
Downloadable WAV files ............................................ 92
SIP Software for Avaya 1200 Series IP Deskphones-Administration
September 2013
365
Downloading SIP Software from the Avaya Web site 111
Downloading the 12xxBoot.cfg file ........................... 100
Downloading the SIP software to the provisioning
server ............................................................ 40
Downloading UNIStim software through TFTP on
bootup .......................................................... 108
DRegex ...................................................................... 90
DRegex rules ..............................................................90
Duplex ...................................................................... 132
M
MADN keys, display ................................................... 18
Maintenance and troubleshooting ............................ 321
Mandatory keywords in the provisioning file ............... 40
Manual 12xxBoot.cfg file download .......................... 101
Manual TFTP/FTP/HTTP 12xxBoot.cfg file download 101
Media Priority bits configuration ............................... 134
Multiple Appearance Directory Number .................... 145
E
EAP configuration ..................................................... 134
Emergency call location information ......................... 198
Emergency calls only, hide banner ............................ 17
Emergency calls overview ........................................ 197
Emergency service dialing plan configuration .......... 198
Emergency Services .................................................197
Ethernet port mode configuration ............................. 134
F
Failover support in centralized deployment ................ 14
Feature configuration commands ............................... 55
Feature dependencies and restrictions .................... 148
G
Gateway ................................................................... 128
N
NAT configuration commands .................................... 81
NAT firewall traversal ............................................... 205
NAT Media ................................................................133
NAT media configuration .......................................... 134
NAT Signal ............................................................... 133
NAT Signal configuration .......................................... 134
NAT Traversal .......................................................... 133
NAT TTL ................................................................... 133
NAT TTL configuration ............................................. 134
Net Mask .................................................................. 127
Net Mask and Gateway configuration .......................134
Network requirements ................................................ 35
No DHCP mode ........................................................ 127
Ntwk Port Duplex configuration ................................ 134
Ntwk Port Speed configuration ................................. 134
O
H
Optional keywords in the provisioning file .................. 40
Hotline option configuration ........................................ 17
HTTP 503 response enhancement ............................ 19
P
I
Identify the current version of UNIStim Software ...... 107
Ignore GARP ............................................................ 132
Install the SIP software ...............................................99
Installation overview ................................................... 31
Installing the IP IP Deskphone ................................... 97
IP Deskphone diagnostics ........................................ 325
IP Deskphone restrictions .........................................203
L
Licensable features .................................................. 299
LLDP configuration ................................................... 134
Local Diagnostic Tools ............................................. 327
366
Password .................................................................. 133
Password configuration ............................................ 134
PC Port Duplex configuration ................................... 134
PC Port Speed configuration .................................... 134
PC-Port Untag all ......................................................131
PC-Port Untag-All configuration ............................... 134
Port functions on the three-port switch when VLAN is
enabled ........................................................ 207
Preinstallation checklist .............................................. 35
Proactive Voice Quality Monitoring (PVQMon or
VQMon) ....................................................... 115
Protocol .................................................................... 133
Protocol configuration ............................................... 134
Provisioning .............................................................. 133
Provisioning DHCP ................................................... 126
Provisioning error displayed ..................................... 325
SIP Software for Avaya 1200 Series IP Deskphones-Administration
September 2013
Provisioning file example ............................................40
Provisioning file supported sections ........................... 40
Provisioning server ..................................................... 39
Provisioning the Device Settings parameters ........... 134
Provisioning updates .................................................. 39
PVQMon IP ...............................................................133
PVQMon IP configuration ......................................... 134
PVQMon or VQMon Server set-up ........................... 116
Remote control hold ................................................... 17
Remote control talk .................................................... 17
SIP responses - 3xx Response ................................ 213
SIP responses - 4xx Response ................................ 214
SIP responses - 5xx Response ................................ 216
SIP responses - 6xx Response ................................ 217
SIP security authentication ....................................... 221
SIP software, install the .............................................. 99
Software conversion failure ...................................... 325
Software download failure ........................................ 325
SP2 .............................................................................18
SRTP ........................................................................ 271
SSH ................................................................... 271, 272
STUN S1 IP .............................................................. 133
STUN S1 IP configuration ........................................ 134
STUN S2 IP .............................................................. 133
STUN S2 IP configuration ........................................ 134
Support instant messaging ....................................... 222
Supported subscriptions ........................................... 221
System commands ..................................................... 84
S
T
SDP and Call Hold ....................................................220
Secure file transfer ................................................... 272
Secure Real-time Transfer Protocol ......................... 285
Server and network configuration commands ............ 51
Server profiles ............................................................ 16
Server unreachable after power up .......................... 325
Server URL ............................................................... 133
Server URL configuration ......................................... 134
Service Pack 2 ........................................................... 18
Service package restrictions .....................................203
Session description protocol usage .......................... 220
SET IP ...................................................................... 127
SET IP configuration .................................................134
SFTP ........................................................................ 271
SIP Domain DNS Lookup ......................................... 184
SIP DTMF Digit transport ......................................... 221
SIP header fields ...................................................... 218
SIP messages supported ......................................... 211
SIP methods ............................................................. 211
SIP over TLS ............................................................ 271
SIP overview .............................................................. 29
SIP responses .......................................................... 212
SIP responses - 1xx Response ................................ 212
SIP responses - 2xx Response ................................ 213
TCP .......................................................................... 271
TCP operation overview ........................................... 273
Three-port switch and VLAN functionality ................ 207
TLS ........................................................................... 271
TLS operation overview ............................................ 273
Tone configuration commands ................................... 79
Transport layer protocols .......................................... 220
Q
QoS and ToS commands ........................................... 78
R
U
Upgrade and convert the IP Deskphone software .... 105
Upgrade the SIP Software ........................................ 105
Upgrade the UNIStim software version .................... 108
Upgrade to the minimum UNIStim Software ............. 106
User preferences, Hotline option configuration .......... 17
V
Vertical services (MADN) ......................................... 147
Viewing the Certificate Admin option in the user
interface ....................................................... 263
VLAN Filter ............................................................... 129
VLAN Filter configuration ..........................................134
Voice 802.1Q configuration ...................................... 134
Voice VLAN .............................................................. 129
Voice-VLAN and Data VLAN .................................... 207
volume adjustment for second call beep .................... 18
VQMon - how it works .............................................. 116
VQMon configuration commands ............................... 82
VQMon set-up .......................................................... 115
SIP Software for Avaya 1200 Series IP Deskphones-Administration
September 2013
367