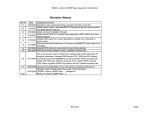
1
Business Communications Manager
MSC FRU replacement process
Media Services Card replacement
P0607273 03
The procedures in this document replace the procedures in your Business Communications
Manager (BCM) installation and maintenance guide to remove, replace, and configure the
media services card (MSC) field replaceable unit (FRU). These procedures help you correctly
set up the system to receive a new MSC and to download the correct operating files from the
system hard disk.
The procedures to prepare the system for maintenance, and to remove and replace the base
function tray, are the same procedures as found in your installation and maintenance guide.
Warning: Only qualified personnel must perform these procedures. Failure to
follow these steps in sequence to replace an MSC results in an inoperable system.
Ensure that all procedures performed on the hardware occur in a static safe
environment.
Equipment note: BCM200/BCM400
Most internal diagrams in this document show the BCM200 hardware configuration. The
BCM400 base function tray is the same. One exception is that the BCM400 MSC has space for
four processor expansion cards (PECs), whereas the BCM200 supports a maximum of two.
The procedure to remove and replace the tray and the MSC is the same for both models. Any
differences are noted where appropriate,
Addendum contents
This addendum contains the following sections. Ensure that you follow each section in
sequence.
•
•
•
•
•
•
•
•
•
•
•
•
Process Map: Installing a new media services card for BCM 3.x on page 2
Process Map: Installing a new media services card for BCM 4.0 on page 3
Before you start on page 4
A. Preparing the system for maintenance on page 5
B. Removing the base function tray on page 5
C. Removing the MSC on page 8
D. Performing service configuration commands on page 9
E. Installing the new MSC on page 10
F. Replacing the base function tray on page 11
G. Uploading the MSC software for BCM 3.x on page 13
H. Loading the MSC software for BCM 4.0 on page 16
I. Restoring the system to operation on page 17
2 MSC FRU replacement process
Process Map: Installing a new media services card for BCM 3.x
Warning: Protect the hardware components against damage from electrostatic
discharge. Always wear a ground wrist strap while you handle components.
Always place the components in static-safe containers. Ensure that you follow all
electrical safety procedures when you perform this operation. The BCM must
have all power removed before you attempt to access the MSC.
Before you start on page 4.
A. Preparing the system
for maintenance
D. Performing service
configuration commands
F. Replacing the
base function tray
I. Restoring the
system to operation
B. Removing the base
function tray
G. Uploading the
MSC software for
BCM 3.x
C. Removing the MSC
NN40010-315
E. Installing the
new MSC
Media Services Card replacement
MSC FRU replacement process 3
Process Map: Installing a new media services card for BCM 4.0
Warning: Protect the hardware components against damage from electrostatic
discharge. Always wear a ground wrist strap while you handle components.
Always place the components in static-safe containers. Ensure that you follow all
electrical safety procedures you perform this operation. The BCM must have all
power removed before you attempt to access the MSC.
Before you start on page 4.
A. Preparing the system
for maintenance
E. Installing the
new MSC
H. Loading the
MSC software for
BCM 4.0
F. Replacing the
base function tray
B. Removing the base
function tray
I. Restoring the
system to
operation
C. Removing the MSC
Media Services Card replacement
NN40010-315
4 MSC FRU replacement process
Before you start
The following list contains items you need to know or tasks you need to perform before and after the MSC
replacement procedure to ensure the integrity of your system.
Before you start the procedure
•
•
Ensure you have access to, or perform a backup to create, the most recent backup of your system data. Store
the backup off the system hard disk and the computer that you use to configure the MSC. For more information
about the Backup and Restore Utility (BRU) procedures, see section “I. Restoring the system to operation” on
page 17.
Set up a computer to access the text-based menus on the BCM. For information to create these connections, see
your BCM installation guide.
The computer either
•
•
•
•
•
•
runs VT100 emulation, if you plan to connect to the BCM serial port; or
runs Telnet or a Secure Shell (SSH) tool such as PUTTY, if you plan to connect to the BCM through a
LAN connection. You need the BCM IP address to make a LAN connection.
Know the administrator user name and password.
Note the system ID of the installed MSC that you require when you regenerate keycodes at the end of the
procedures.
• In Unified Manager, the system ID is under System > Licensing.
• In Element Manager, the system ID is under Configuration > System > Keycodes.
Have a current list of keycodes active on your system.
Note the MSC version for the system. The version is an internal code. If you do not know which profile the
system runs, you can call technical help and ask to which profile the code belongs.
• In Unified Manager, the code is under Diagnostics > MSC.
• In Element Manager, the code is under Configuration > System > Identification.
Each region setting requires a specific core software to perform correctly. Use BCM monitor to display the MSC
core version and Region.
BCM 4.0 users can select their region using the Cold Reset Telephony Services button in Element Manager under
Administration > Utilities > Reset.
The following table shows the core software available for BCM 3.x and BCM 4.0. BCM 4.0 also supports Brazil
and Poland.
Core Software
(Carrier software ID)
Region
T1 CT2 Plus
T1 Etiquette
E1 Euro E1
E1 Global
E1 CALA
Caribbean
Hong Kong
North American
Taiwan
Caribbean
Hong Kong
North American
Taiwan
Denmark
France
Germany
Holland
Italy
Norway
Spain
Sweden
Switzerland
United Kingdom
Australia
Brazil (BCM 4.0)
CALA
Global
Poland (BCM 4.0)
PRC
Australia
Brazil (BCM 4.0)
CALA
Global
PRC
South American and Central American countries are assigned to regions in the following way:
Caribbean includes Antigua, Bahamas, Barbados, Bermuda, Cayman Islands, Dominican Republic, Jamaica, USVI, Puerto Rico, and
Trinidad
CALA refer to all other Caribbean and Latin American countries with European-based standards.
NN40010-315
Media Services Card replacement
MSC FRU replacement process 5
After you finish the procedure
•
•
Use BRU to restore the system telephony data.
Discover the new MSC system ID, and generate the keycodes for the optional applications installed on your
system. For information about how to generate keycodes, go to Nortel Keycodes Retrieval system (KRS)
http://www.nortel.com/servsup/krs.
A. Preparing the system for maintenance
1
If you continue to have access to the telephony data, then use BRU to create a current system backup.
OR
Ensure you have access to the most recent telephony data backup.
2
If you operate a BCM 3.x system and continue to have access to Unified Manager, then shut down the system
using the Shutdown command, and go to step 3.
OR
If you operate a BCM 4.0 system and continue to have access to Element Manager, then shut down the system
using the Shutdown System button provided under Administration > Utilities > Reset, and go to step 3.
3
Disconnect the AC connection to the BCM hardware from the AC power outlet.
4
Disconnect any cables from the front of the base function tray.
Next Step: You are ready to remove the base function tray so you can access the MSC.
B. Removing the base function tray
1
Attach one end of the grounding strap to your wrist and the other end to a grounded metal surface.
2
Remove the base function tray latch screws and place in a safe location (Figure 1, #1)
3
Move the base function tray latches to the unlocked position. (Figure 1, #2)
Media Services Card replacement
NN40010-315
6 MSC FRU replacement process
4
Grasp the base function tray latches and partially remove the base function tray from the platform base chassis.
(Figure 1, #3)
Warning: Do not exert force on the DS30 cables or connectors.
Figure 1 Remove the base function tray
Figure 2 shows the position of the base function tray in a BCM400. Remove the tray in the same manner for both
hardware platforms.
Figure 2 BCM400 platform base function tray location
5
Disconnect DS30 cable connectors from the MSC.
If you have a Wide Area Network (WAN) card installed in the base function tray, then follow the procedure in
“Base function tray with WAN card installed” on page 7.
OR
Continue with step 6.
NN40010-315
Media Services Card replacement
MSC FRU replacement process 7
6
Carefully remove the base function tray from the platform base chassis to prevent damage to the cables and
connectors.
7
Place the base function tray on a flat, clean, and static-safe surface.
8
Remove the base function tray bezel:
9
a
Unfasten the bezel screws from the base function tray face. Place the screws in a safe location.
b
Pull and tip the bezel away from the base function tray until the bezel clips are clear of the base function
tray chassis. Move the bezel in a downward direction between the base function tray latches. Place the
bezel in a safe location.
At the front of the base function tray, loosen and remove the Peripheral Component Interconnect (PCI) cover
plate screw (use a #2 Phillips screwdriver). Place the screw in a safe location. (Figure 3)
10 Remove the PCI cover plate from the base function tray chassis.
Next Step: You are ready to remove the MSC; see “C. Removing the MSC” on page 8.
Base function tray with WAN card installed
Perform the following procedure if your BCM has a WAN card installed in the base function tray (Figure 3).
1
With the base function tray partially removed from the platform base chassis, perform step 8, step 9, and step
10 in the preceding procedure.
2
Remove the WAN card.
3
Disconnect the DS30 cable connectors from the MSC.
4
Completely remove the base function tray from the platform chassis.
5
Place the base function tray on a flat, clean, and static-safe surface.
Next Step: You are ready to remove the MSC.
Figure 3 Remove the PCI cover plate and WAN card before you remove DS30 cables
Media Services Card replacement
NN40010-315
8 MSC FRU replacement process
C. Removing the MSC
This procedure describes how to safely remove the existing MSC from the base function tray.
Warning: Always wear a grounded wrist strap while you handle components.
Always place the components in static-free containers.
1
Remove the two chassis mounting screws that secure the MSC to the chassis extension of the base function
tray at the rear of the MSC (Figure 4).
2
Place the screws in a safe location.
Figure 4 MSC chassis mounting screws
3
Hold the card along the side edges.
4
Push the card away from the PCI riser card connector to disconnect the MSC.
5
Remove the MSC from the base function tray.
6
Place the MSC on a flat, clean, and static-free surface.
7
Remove all PECs from the MSC, and place them in static-safe containers.
Note: If you replace a BCM400 with fewer than four PECs, note from
which slots you removed the cards, and ensure that you replace them into
the corresponding slots on the new boards.
8
Place the MSC in a static-safe container so you can return it to service center.
Next Step: You are ready to prepare the system for the new MSC.
NN40010-315
Media Services Card replacement
MSC FRU replacement process 9
D. Performing service configuration commands
Warning: Do not perform this procedure with the MSC installed.
Note: This procedure does not apply to BCM 4.0 systems.
1
Replace the base function tray into the BCM housing, ensuring that the DS30 MSC cables are not caught
behind the tray.
2
Lock the unit in place.
3
Restore AC power to the main unit only.
4
Connect the computer you are to use to access the system to the serial port on the BCM.
OR
Connect to the BCM through a LAN connection. Then enter the VT100 emulation program (serial port) or
Telnet or SSH (LAN connection):
a
After you connect, press <Enter>
b
When you are prompted for a User ID, enter the administrator user name, and then press <Enter>.
c
When you are prompted for a Domain, enter a domain name if your system uses one, and then press
<Enter>. If your system does not use domains, then only press <Enter>.
d
When you are prompted for a Password, enter the administrator password, and then press <Enter>.
The Main Menu appears
5
Type 7 (Command line), and press <Enter>.
6
After the [<systemname>]C:\TEMP> prompt, type the following, the press <Enter>:
f:
a
After the f: prompt, type the following, and then press <Enter>:
cd f:\program files\nortel networks\voice platform
b
Type the following, and then press <Enter>:
mscoff.bat
A number of ChangeServiceConfig actions occur.
c
When the Voice Platform prompt reappears, type the following, and then press <Enter>:
sc config voicemscservice start= auto
The system indicates that the ChangeServiceConfig succeeded and returns to the Voice Platform prompt.
d
Type Exit, and then press <Enter>.
Your system returns to the Main Menu.
Media Services Card replacement
NN40010-315
10 MSC FRU replacement process
7
Type 8 (Restart the system), and then press <Enter>.
8
At the restart [A, R] prompt, type R, and then press <Enter>.
The system indicates that it is shutting down.
9
After the system shuts down (about 30 seconds), remove the BCM AC power connector from the AC outlet.
10 Remove the base function tray, as described in “B. Removing the base function tray” on page 5, and place the
tray on static-safe surface.
Next Step: You are ready to install the new MSC.
E. Installing the new MSC
Warning: Always wear a grounded wrist strap while you handle components.
1
Attach one end of the grounding strap to your wrist and the other end to a grounded metal surface.
2
Remove the MSC from the container and the static-safe bag.
3
Put the new MSC on a static-free surface.
4
Install the PECs onto the new MSC (Figure 5).
Note: BCM200 MSCs support one or two PEC IIIs. BCM400 MSCs
supports two or four PEC IIIs or four PEC Is. Ensure that you replace
them into the same slots from which you remove them.
a
Line up the card between the rails of the slot. Ensure the card label is faces up.
b
Carefully slide the PEC into the slot until it is firmly seated.
c
Repeat steps a and b for each PEC.
Figure 5 Insert the processor expansion card
5
Carefully hold the MSC by the edges, and position the MSC in the correct PCI riser card connector (lowest
connector, closest to the main system board) on the inside of the basic function tray.
6
Push the card firmly and fully into the PCI riser card connector.
NN40010-315
Media Services Card replacement
MSC FRU replacement process 11
7
Ensure the lancet tab on the MSC PCI bracket aligns correctly with the lancet slot on the base function tray
chassis.
8
Install the two chassis mounting screws at the rear of the MSC. See Figure 6.
Figure 6 MSC chassis mounting screws
Next Step: You are ready to restore the base function tray to the platform base chassis and restore power to the
system.
F. Replacing the base function tray
1
Partially install the base function tray in the platform base chassis.
2
Connect the DS30 connectors to the MSC.
3
Reinstall the WAN card if your system has one. (Figure 7).
If your system does not have a WAN card, skip to step 4.
Media Services Card replacement
NN40010-315
12 MSC FRU replacement process
Figure 7 Install the WAN card
4
Position the PCI cover plate on the front of the base function tray so that the base function tray and cover plate
screw holes align. (Figure 7).
5
Position the locking screw in the PCI cover plate. Tighten the locking screw until the plate is firmly in place.
6
Replace the base function tray bezel and reinstall the two screws that hold it in place.
Warning: Avoid crimping the DS30 cables when you install the base function
tray.
7
Move the base function tray latches to the locked position. (Figure 8)
Figure 8 Install the base function tray
NN40010-315
Media Services Card replacement
MSC FRU replacement process 13
8
Install the base function tray latch screws. (Figure 9)
Figure 9 Install the base function tray screws
9
Insert all connectors in the correct locations on the front of the base function tray.
10 Connect the AC cord from the BCM hardware to the AC power outlet.
The LEDs on the front of the base unit flash upon startup.
Next Step: You are ready to download the software to the MSC. If you operate a BCM 3.x system, go to
G. Uploading the MSC software for BCM 3.x on page 13. If you operate a BCM 4.0 system, go to H. Loading the
MSC software for BCM 4.0 on page 16.
G. Uploading the MSC software for BCM 3.x
1
If you disconnected your computer, reconnect it to the serial port on the BCM or reconnect it to the BCM
through the LAN connection. Then enter the VT100 emulation program (serial port) or Telnet or SSH (LAN
connection).
2
After you connect, press <Enter>.
3
When you are prompted for a User ID, enter the administrator user name, and then press <Enter>.
4
When you are prompted for a Domain, enter a domain name if your system uses one, and then press <Enter>.
If your system does not use domains, only then press <Enter>.
5
When you are prompted for a Password, enter the administrator password, and then press <Enter>.
The Main Menu appears.
Go to step 7.
If you replace the MSC on a BCM 3.5 or later system, type 1, and press <Enter>.
Media Services Card replacement
NN40010-315
14 MSC FRU replacement process
The Platform Initialization Menu appears.
6
Type 2 (MSC Upload Menu), and press <Enter>.
The MSC Installation Menu appears.
Go to step 8.
7
Type 1, and press <Enter>.
Figure 10 BCM 3.0 Main Menu
Figure 11 BCM 3.5 to BCM 3.7 Main Menu
The Platform Initialization Menu displays the list of core software options in the Platform initialization menu.
Warning: If you are unsure of which core load to install, do not proceed. See
“Before you start” on page 4 or contact technical assistance.
NN40010-315
Media Services Card replacement
MSC FRU replacement process 15
8
Enter the number for the core software option appropriate to your region, and then press <Enter>.
Figure 12 BCM 3.0
Figure 13 BCM 3.5
Figure 14 BCM 3.7
The upload takes approximately 5 minutes.
9
When you are prompted, press a key on your keyboard.
You return to the Platform Initialization Menu.
10 Type 1, and press <Enter> to select the Initialization Menu.
The Initialize Menu appears.
Media Services Card replacement
NN40010-315
16 MSC FRU replacement process
11 Type 2, and press <Enter> to select Set service startup to Auto.
12 After you finish the change, type M, and then press <Enter>.
You return to the Main Menu.
13 Type 8 (Restart System), and then press <Enter>.
14 At the restart [A, R] prompt, type R, and then press <Enter>.
The system indicates that it is shutting down.
Next Step: You are ready to restore the system to operation.
H. Loading the MSC software for BCM 4.0
The autoCoreUpload application detects the core software version on the MSC and automatically uploads the core
software. The upload takes approximately 16 minutes and occurs before all services start.
If the autoCoreUpload application cannot detect the core software, you need to perform a cold reset of your
BCM 4.0 system using Element Manager; see Performing a cold reset.
Performing a cold reset
Caution: A cold reset of telephony services erases all telephony programming,
as well as all Voice Message mailboxes and messages. Telephony services restart
with all telephony programming at default values for the specified region,
template, and start DN, for the current software release.
Use Element Manager to perform a cold reset of your BCM 4.0 system.
1
Start Element Manager.
2
Connect to your BCM 4.0 system.
3
Click the Administration tab.
4
Open the Utilities folder, and then click Reset.
The Reset panel appears.
5
Click Cold Reset Telephony Services.
The Cold Reset Telephony Services dialog box appears.
NN40010-315
Media Services Card replacement
MSC FRU replacement process 17
6
Configure the Cold Reset Telephony attributes and check the Force MSC download box.
7
Click OK.
Next Step: You are ready to restore the system to operation.
I. Restoring the system to operation
When the system restarts, the power and system LEDs on the front of the BCM are solid green,
1
Use BRU to perform a telephony data restore to the BCM system from the latest system backup files. Restore
only the telephony data from the backup.
If you operate a BCM 3.x system, see “Restoring BCM settings for BCM 3.x” on page 19. If you operate a
BCM 4.0 system, see “Restoring BCM settings for BCM 4.0” on page 25.
2
After the telephony data restore succeeds, test the telephony services by making an internal and external call
and verify DNS are correct.
3
After you configure your system so that it functions correctly, you can enter the keycodes for the optional
applications:
a
Ensure you have the System ID of the previous MSC, which you recorded when you performed the Before
you start tasks, and the system ID of the new MSC, which is found in Unified Manager under System >
Licensing or in Element Manager under Configuration > System > Keycodes.
b
Go to the Nortel Keycode Retrieval System (KRS) Web site (http://www.nortel.com/servsup/krs) and
follow the instructions to regenerate keycodes.
c
Enter the regenerated keycodes into your system in Unified Manager under System > Licensing or in
Element Manager under Configuration > System > Keycodes.
Note: Some keycodes require you to reboot the system.
If you use Unified Manager, select System > Logoff > Reboot.
If you use Element Manager, select Administration > Utilities > Reset.
d
Test the client application functionality.
Your system is now operating normally.
Appendix
Backup and Restore Utility
This chapter describes how to use the Backup and Restore Utility (BRU). If you operate a BCM 3.x system, go to
page 18. If you operate a BCM 4.0 system, go to page 20.
•
•
•
Starting BRU for BCM 3.x on page 18
Backing up BCM settings for BCM 3.x on page 18
Restoring BCM settings for BCM 3.x on page 19
Media Services Card replacement
NN40010-315
18 MSC FRU replacement process
•
•
Backing up BCM settings for BCM 4.0 on page 20
Restoring BCM settings for BCM 4.0 on page 25
Starting BRU for BCM 3.x
1
To start the BRU, launch your Web browser.
Note: You must use Microsoft Internet Explorer 5.01 or later to use the
Backup and Restore Utility.
2
Access the main Web page of the BCM.
3
Click BRU.
4
In the User Name box, type the administrator user name.
5
In the Password box, type the administrator password.
6
Click OK.
The BRU dialog appears.
Backing up BCM settings for BCM 3.x
Caution: A backup can interrupt services that run on the BCM. A warning
appears whenever the backup causes a service interruption. If you want to perform
a backup that does not affect the system, you can exclude services that can be
affected. Alternatively, you can include these services and perform a backup at a
time when the system is typically not in use.
A backup saves your BCM settings to a volume on the BCM or another computer on the network.
1
Start BRU.
The BRU dialog appears with the BACKUP operation selected.
2
Click Volume.
The Volume Administration dialog appears.
3
Under Backup Location, if you need to change the location to store the backup, click VOLUME, and select the
correct location.
4
Click Select to return to the BRU main page.
5
From the Select BCM Components list, select Telephony.
6
Click Start Backup.
The User name and Password dialog appears.
Note: If you back up the file to a Local volume, the User Name and
Password dialog does not appear. Go to step 10.
7
In the Username box, type the user name required to access the remote volume.
Use a domain name qualifier if you are require to.
8
In the Password box, type the password required to access the remote volume.
9
Click Submit.
The Report File Name dialog.
NN40010-315
Media Services Card replacement
MSC FRU replacement process 19
10 In the Report File Name box, type a report name for this backup.
This report contains the results of the backup and is stored in the same folder as the backup.
11 Click Next.
12 When the backup finishes, a dialog box appears.
If the dialog box confirms that the backup succeeded, click OK.
If the dialog box indicates an error, click OK, and check the log file for errors. Correct the cause of the errors
and try the backup again.
Restoring BCM settings for BCM 3.x
A restore copies the BCM settings from a backup volume to the BCM system.
1
Start BRU.
The BRU dialog appears.
2
Click the Restore tab.
The BRU dialog displays the restore options.
3
Click Volume.
The Volume Administration dialog appears.
4
Select the volume where you stored the backup, and then click Select to return to the BRU main page.
5
From the Select BCM Components list box, select telephony.
6
Click Start Restore.
The User name and password dialog appears.
Note: If you backed up the file to a Local volume, the User Name and
Password dialog does not appear. Go to step 10.
7
In the Username box, type the user name required to access the remove volume.
Use a domain name qualifier, if necessary.
8
In the Password box, type the password to access the remote volume.
9
Click Submit.
10 When the restore finishes, a dialog box appears.
If the dialog box confirms that the restore succeeded, click OK.
If the dialog box indicates an error, click OK, and check the log file for errors. Correct the cause of the errors
and try the restore again.
A dialog box appears indicating that you need to reboot the system,
11 Click OK.
Media Services Card replacement
NN40010-315
20 MSC FRU replacement process
Backing up BCM settings for BCM 4.0
Caution: A backup can interrupt services that run on the BCM. A warning
appears whenever the backup causes a service interruption. If you want to perform
a backup that does not affect the system, you can exclude services that can be
affected. Alternatively, you can include these services and perform a backup at a
time when the system is typically not in use.
Performing an immediate backup
You can perform immediate backups to the following storage locations:
•
•
•
•
•
•
BCM
My Computer
network folder
USB storage device
FTP server
SFTP sever
To perform an immediate backup to the BCM
Warning: Nortel recommends that you do not back up to the BCM
when you perform maintenance on the BCM.
1
In the task panel, click the Administration tab.
2
Open the Backup and Restore folder, and then click Backup.
The Backup panel appears and displays the Immediate Backup tab.
3
In the Backup To selection field, choose BCM.
NN40010-315
Media Services Card replacement
MSC FRU replacement process 21
4
Click Backup.
The Backup window appears.
5
In the Optional Components table, select or clear the check box for each component to include or exclude
from the backup.
6
Click OK.
A warning window appears.
7
Click Yes to proceed.
A progress window appears. When the backup is complete, the Backup Complete message appears.
8
Click OK.
To perform an immediate backup to my computer
1
In the task panel, click the Administration tab.
2
Open the Backup and Restore folder, and then click Backup.
The Backup panel appears and displays the Immediate Backup tab.
3
In the Backup To selection field, select My Computer.
4
Click Backup.
The Backup window appears.
Media Services Card replacement
NN40010-315
22 MSC FRU replacement process
5
In the Optional Components table, select or clear the check box for each component to include or exclude
from the backup.
6
Click OK,
A warning message appears.
7
Click Yes to proceed.
A progress window appears. When the backup preparation is complete, the Save window appears.
8
Specify the directory and enter a file name with a .tar extension (for example, backup2.tar) in the File Name
field so that you can open the file with a utility such as WinZip. If you do not select the folder backup, the new
backup file is stored in the root of this folder.
9
Click Save.
When the backup is complete, the Backup Complete message appears.
10 Click OK.
To perform an immediate backup to a network folder
1
In the task panel, click the Administration tab.
2
Open the Backup and Restore folder, and then click Backup.
The Backup panel appears and displays the Immediate Backup tab.
3
In the Backup To selection field, select Network Folder.
4
Configure the Network Folder attributes.
Table 1 Configure Network Folder attributes
Attribute
Action
Network Folder
Enter the host name or IP address of the network folder and the resource
name. For example, enter \\<server>\<resource>.
User Name
Enter the user name associated with the network folder.
Password
Enter the password associated with the network folder.
Directory
Enter the path to the subdirectory (optional).
NN40010-315
Media Services Card replacement
MSC FRU replacement process 23
Note: When you backup to a network folder hosted in a computer that runs
Windows 98 SE, you cannot specify an IP address in the folder name. You must
specify the computer name in the network folder name. For example, enter
\\<computer>\<resource>.
Note: If the BCM and the network folder are on different networks, configure the
BCM to use a DNS server. The Windows 98 SE computer name must be identical
to the DNS host name entry for that computer.
Note: If the BCM does not have the same domain name as the Windows 98 SE
computer, the fully qualified domain name must be specified in the folder name.
For example, specify \\computer.company.com\resource.
5
Click Backup.
The Backup window appears.
6
In the Optional Components table, select or clear the check box for each component to include or exclude
from the backup.
7
Click OK.
A warning window appears.
8
Click Yes to proceed.
A progress window appears. When the backup preparation is complete, the Backup Complete message
appears.
9
Click OK.
To perform an immediate backup to a USB storage device
1
In the task panel, click the Administration tab.
2
Open the Backup and Restore folder, and then click Backup.
The Backup panel appears and displays the Immediate Backup tab.
3
In the Backup To selection field, select USB Storage Device.
4
Click Backup.
The Backup window appears.
5
In the Optional Components table, select or clear the check box for each component to include or exclude
from the backup.
6
Click OK.
A warning window appears.
7
Click Yes to proceed.
A progress window appears. When the backup is complete, the Backup Complete message appears.
8
Click OK.
To perform an immediate backup to an FTP server
1
In the task panel, click the Administration tab.
2
Open the Backup and Restore folder, and then click Backup.
The Backup panel opens and displays the Immediate Backup tab.
3
In the Backup To selection field, select FTP Server.
Media Services Card replacement
NN40010-315
24 MSC FRU replacement process
4
Configure the FTP Server attributes.
Table 2 Configure FTP Server attributes
Attribute
Action
FTP Server
Enter the host name or IP address of the FTP server.
User Name
Enter the user name associated with the FTP server.
Password
Enter the password associated with the FTP server.
Directory
Enter the path to the subdirectory (optional).
5
Click Backup.
The Backup window appears.
6
In the Optional Components table, select or clear the check box for each component to include or exclude
from the backup.
7
Click OK.
A warning window appears.
8
Click Yes to proceed.
A progress window appears. When the backup preparation is complete, the Backup Complete message
appears.
9
Click OK.
To perform an immediate backup to an SFTP server
1
In the task panel, click the Administration tab.
2
Open the Backup and Restore folder, and then click Backup.
The Backup panel appears and displays the Immediate Backup tab.
3
In the Backup To selection field, select SFTP Server.
4
Configure the SFTP Server attributes.
Table 3 Configure SFTP Server attributes
Attribute
Action
SFTP Server
Enter the host name or IP address of the SFTP server.
User Name
Enter the user name associated with the SFTP server.
Directory
Enter the path to the subdirectory, as applicable.
5
Click Backup.
The Backup window appears.
6
In the Optional Components table, select or clear the check box to include or exclude from the backup.
7
Click OK.
A warning window appears.
8
Click Yes to proceed.
A progress window appears. When the backup preparation is complete, the Backup Complete message
appears.
9
Click OK.
NN40010-315
Media Services Card replacement
MSC FRU replacement process 25
Restoring BCM settings for BCM 4.0
Restoring data
You can restore data from the following storage locations:
•
•
•
•
•
•
BCM
My computer
network folder
USB storage device
FTP server
SFTP sever
To restore data from the BCM
1
In the task panel, click the Administration tab.
2
Open the Backup and Restore folder, and then click Restore.
The Restore panel appears. The Restore From selection field has BCM as a default value.
3
Click Restore.
The Restore From BCM window appears.
4
Click OK.
The Select Components to Restore window appears.
5
Select the optional components to include from the backup file.
6
Click OK.
A warning window appears and displays information about components affected by the restore.
7
Click Yes to proceed.
A progress window appears. When the operation is complete, the Restore Complete window appears.
Media Services Card replacement
NN40010-315
26 MSC FRU replacement process
8
Click OK.
To restore data from your personal computer
1
In the task panel, click the Administration tab.
2
Open the Backup and Restore folder, and then click Restore.
The Restore panel appears.
3
In the Restore From selection field, select My Computer.
4
Click Restore.
The Open window appears.
5
Select the backup file to restore.
A message appears and displays information about the backup file, including a warning that the selected
backup file will replace the backup file currently stored on the BCM.
Caution: When you proceed to the next step, the selected file overwrites the
backup file that is stored on the BCM. Ensure that you select the correct backup
file before you proceed.
6
Click Open.
The Select Components to Restore window appears.
7
Select the optional components to include in the backup file.
8
Click OK.
A warning message appears and displays information about components affected by the restore.
9
Click Yes to proceed.
A progress window appears. When the operation is complete, the Restore Complete window appears.
10 Click OK.
To restore data from a network folder
1
In the task panel, click the Administration tab.
2
Open the Backup and Restore folder, and then click Restore.
The Restore panel appears.
3
In the Restore From selection field, select Network Folder.
NN40010-315
Media Services Card replacement
MSC FRU replacement process 27
4
Configure the Restore from Network Folder attributes.
Table 4 Configure Restore from Network Folder attributes
Attribute
Action
Network Folder
Enter the host name or IP address of the network folder and resource
name. For example, \\<server>\<resource>.
User Name
Enter the user name associated with the network folder.
Password
Enter the password associated with the network folder.
Directory
Enter the path to the subdirectory, as applicable (optional).
File
Enter the name of the backup file.
A window appears and displays information about the backup file, including a warning that the selected
backup file replaces the backup file currently stored on the BCM.
Caution: When you proceed to the next step, the selected file overwrites the
backup file that is stored on the BCM. Ensure that the correct backup file is
selected before you proceed.
5
Click Open.
The Select Components to Restore window appears.
6
Select the optional components to include in the backup file.
7
Click OK.
A warning window appears and displays information about components affected by the restore.
8
Click Yes to proceed.
A progress window appears. When the operation is complete, the Restore Complete window appears.
9
Click OK.
To restore data from a USB storage device
1
In the task panel, click the Administration tab.
2
Open the Backup and Restore folder, and then click Restore.
The Restore panel appears.
3
In the Restore From selection field, select USB Storage Device.
4
Select the backup file to restore.
A window appears and displays information about the backup file, including a warning that the selected
backup file replaces the backup file currently stored on the BCM.
Caution: When you proceed to the next step, the selected file overwrites the
backup file that is stored on the BCM. Ensure that you select the correct backup
file before you proceed.
5
Click Open.
The Select Components to Restore window appears.
6
Select the optional components to include in the backup file.
7
Click OK.
A warning window appears and displays information about components affected by the restore.
Media Services Card replacement
NN40010-315
28 MSC FRU replacement process
8
Click Yes to proceed.
A progress window appears. When the operation is complete, the Restore Complete window appears.
9
Click OK.
To restore data from an FTP server
1
In the task panel, click the Administration tab.
2
Open the Backup and Restore folder, and then click Restore.
The Restore panel appears.
3
In the Restore From selection field, select FTP Server.
4
Configure the Restore from FTP Server attributes.
Table 5 Configure Restore from FTP Server attributes
Attribute
Action
FTP server
Enter the host name or IP address of the FTP server.
User Name
Enter the user name associated with the FTP server.
Password
Enter the password associated with the FTP server.
Directory
Enter the path to the subdirectory, as applicable (optional).
File
Enter the name of the backup file.
A window appears and displays information about the backup file, including a warning that the selected
backup file replaces the backup file currently stored on the BCM.
Caution: When you proceed to the next step, the selected file overwrites the
backup file that is stored on the BCM. Ensure that you select the correct backup
file before you proceed.
5
Click Open.
The Select Components to Restore window appears.
6
Select the optional components to include in the backup file.
7
Click OK.
A warning window appears and displays information about components affected by the restore.
8
Click Yes to proceed.
A progress window appears. When the operation is complete, the Restore Complete window appears.
9
Click OK.
To restore data from an SFTP server
1
In the task panel, click the Administration tab.
2
Open the Backup and Restore folder, and then click Restore.
The Restore panel appears.
3
In the Restore From selection field, select SFTP Server.
NN40010-315
Media Services Card replacement
MSC FRU replacement process 29
4
Configure the Restore from SFTP Server attributes.
Table 6 Configure Restore from SFTP Server attributes
Attribute
Action
SFTP server
Enter the host name or IP address of the SFTP server.
User Name
Enter the user name associated with the SFTP server.
Password
Enter the password associated with the SFTP server.
Directory
Enter the path to the subdirectory, as applicable.
File
Enter the name of the backup file.
A window appears and displays information about the backup file, including a warning that the selected
backup file replaces the backup file currently stored on the BCM.
Caution: When you proceed to the next step, the selected file overwrites the
backup file that is stored on the BCM. Ensure that you select the correct backup
file before you proceed.
5
Click Open.
The Select Components to Restore window appears.
6
Select the optional components to include in the backup file.
7
Click OK.
A warning window appears and displays information about components affected by the restore.
8
Click Yes to proceed.
A progress window appears. When the operation is complete, the Restore Complete window appears.
9
Click OK.
1-800-4 NORTEL
www.nortel.com
January 2007
Document Number: NN40010-315 01.01
CPC: P0607273 03
Printed in Canada
Media Services Card replacement
NN40010-315
30 MSC FRU replacement process
NN40010-315
Media Services Card replacement