1
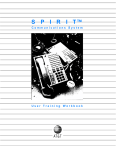
AT&T
SPIRIT
®
Communications System
User Manual
Table of Contents
How to Use this Manual
2
Key to Symbols
4
Ringing Patterns
5
Groups (2448 System)
5
Indicator Light Patterns
5
Parts of the Telephones
6
Line, Auto-Dial, and Programmable Buttons (308/616 System)
8
Line and Multi-Purpose Buttons (2448 System)
10
Answer Calls
12
Place Calls (308/616 System)
14
Place Calls (2448 System)
16
Conference
18
Hold
20
Transfer
21
Message
22
Change to Touch Tone
23
Do Not Disturb
24
Line Reserve
24
Privacy Release and Bridging
25
Switchhook Flash
25
Night Service
26
Auto Callback (2448 System)
26
Intercom Call Forward (2448 System)
27
Mute
27
Paging (308/616 System)
28
Programmable Buttons (308/616 System)
28
Paging (2448 System)
30
Programming Multi-Purpose Buttons (2448 System)
30
Personal SpeedCall (308/616 System)
32
Personal SpeedCall (2448 System)
34
Customized Features
36
Volume Control
37
Using with a PBX/Centrex System
38
Caring for Your Telephone
38
Dial Codes
39
Index (308/616 System)
40
Index (2448 System)
41
NOTICE: While reasonable efforts were made to ensure that the information
in this document was complete and accurate at the time of printing, AT&T
assumes no responsibility for any errors. Changes or corrections to the
information contained in this document may be incorporated into future
re-issues.
SPIRIT is a registered trademark of AT&T
1
2
How to Use this Manual
Your telephone is part of an easy-to-use communications system that combines built-in features with
features that may be customized to better meet the needs of your company. This manual will explain
how to use all of the features. “
Which System Does Your Company Have?
®
There are two SPIRIT Communications Systems –Models 308/616 and 2448. Sometimes the
systems work differently, so you need to find out which system your company has.
To determine which system your company has,
● Press INTERCOM. ● Lift receiver. ● Dial 8.
If your system is a 308/616 you will hear a siren-like tone of alternating pitches.
If your system is a 2448 you will hear an intercom dial tone.
Examples of Color-Coded Instructions
■ Instructions
● Lift
for Both Systems
receiver (or press SPEAKER).
■ Instructions
● Press
for 308/616 System Only
INTERCOM.
● Lift
receiver (or press SPEAKER)
● Dial
61. Make announcement.
■ Instructions
● Press
for 2448 System Only
INTERCOM.
● Lift
receiver (or press SPEAKER). ● Dial ✱ 7.
Parts of the Telephone
Drawings of the telephones with the parts labeled and explained appear on pages 6 and 7.
Two different telephones may be used with SPIRIT Communications Systems. Both telephones have
a dial, feature buttons, a speakerphone, and either 6 or 24 additional buttons that have different uses,
depending on the system you have.
Patterns
Descriptions of the ringing patterns and indicator light patterns are on page 5. These patterns are
easy to learn, but you may want to refer to the descriptions while you are getting used to your
telephone.
System and Personal SpeedCAll Numbers
Two kinds of memories are available for your use, System and Personal SpeedCall. Up to 70 telephone
numbers can be stored in the System SpeedCall memory, which is available to all the people using
the system. The person in your company who maintains your system can give you a directory of the
System SpeedCall numbers. You may also store Personal SpeedCall numbers in the memory for your
telephone. Instructions are on pages 32-35.
3
4
Key to Symbols
Lift receiver (or press SPEAKER)
Don’t lift receiver (and do not press SPEAKER)
Press line button
Press auto-dial or programmable button
(308/616 system)
Dial outside or intercom extension number/code
Dial feature dial code
Press multi-purpose button (2448 system)
(type of multi-purpose button displayed on
the symbol)
Press feature button
Hang up receiver (or press SPEAKER if using
speakerphone)
Use one or another procedure, depending on
the kind of telephone or type of call.
Ringing Patterns
Groups (2448 System)
Two short rings—call from outside system
Telephones in 2448 systems are assigned to
groups according to their intercom extension
numbers.
One long ring—call from another intercom extension
One short, one long ring—transferred call
Three short rings—transfer return or line reserve callback
(or auto callback on a 2448 system)
One low-volume ring pattern—call when your telephone
is busy (or calls are forwarded on a 2448 system)
Intercom Extension Numbers
Group Number
10-17
18-25
26-33
34-41
42-49
50-57
61
62
63
64
65
66
Indicator Light Patterns
5
I USE (The telephone line you are
currently using)
Very Long On, Short Off, repeat
THEY USE (The telephone line
someone else IS currently using)
Steady On
RINGING (A telephone line that is
ringing normally)
Long On, Long Off, repeat
CALLBACK SIGNAL (The system is
calling you for a line reserve callback
or transfer return)
Short On, Short Off, repeat
I HOLD (A telephone line that you
have placed on HOLD)
One Short Flash, Very Long Off, repeat
THEY HOLD (A telephone line that
someone else has placed on HOLD)
Two Short Flashes, Very Long Off, repeat
Start
1 Second
6
Parts of the Telephones
24-Button Telephone
Labeling Buttons
To remove old labels:
● Insert end of paper clip
into notch of clear cover
● Slide cover sideways
● Lift cover and label
To add new labels:
●
●
Fill out label
Replace label and cover
(rough side up)
Labeling Intercom Extension
Number:
● Locate plastic hook under
receiver
● Push down on hook and
slide up
● Lift off clear plastic window
● Locate ICM label
● Write intercom extension
number on label
● Place label and plastic
window on hook
● Slide hook back into
telephone
LINE. AUTO-DIAL. PROGRAMMABLE
BUTTONS and INDICATOR LIGHTS
(308/616 System)
Buttons 1-6 are line buttons for incoming
telephone lines. 24-button sets have 16
auto-dial buttons for making outside and
intercom calls and two buttons that may be
programmed at the telephones for manual
signaling or paging. See page 8.
BUTTONS 1-6
LINE AND MULTI-PURPOSE BUTTONS
and INDICATOR LIGHTS (2448 System)
Line buttons, for incoming telephone lines.
are assigned by the person who customizes your system and will be labeled as
incoming Iines. Multi-purpose buttons may
be programmed by you to be Personal
SpeedCall buttons, intercom extension
buttons, or special use buttons for paging,
manual signaling or entering account
codes. See page 10.
6-Button Telephone
MESSAGE WAITING INDICATOR
Shows that you have a message waiting.
See page 22.
HANDS-FREE ANSWER INDICATOR
LIGHT
Shows whether the Hands-Free Answer
on Intercom feature is on or off. Turned.
on and off using the MUTE/HFAl button.
See page 12.
VOLUME CONTROL
Adjusts the volume of the ringer. speaker.
and receiver. See page 37.
MUTE/HFAl BUTTON and
INDICATOR LIGHT
Used to turn off the sound to the other
person. Also used to turn on and off the
Hands-Free Answer on Intercom feature.
See pages 12 and 27.
SPEAKER BUTTON and
INDICATOR LIGHT
Used to turn the speakerphone on and off.
MEMORY BUTTON
Used to store and dial SpeedCall
numbers. See pages 32-35.
7
INTERCOM BUTTONS and INDICATOR
LIGHTS
Used for placing and receiving intercom
calls. Also used for personal programming, feature codes. and accessing lines
without buttons, depending on the system.
RECALL/DROP BUTTON
Used to disconnect intercom calls without
hanging up or used for switchhook flash.
Also used to drop a party from a
conference. See pages 25 and 19.
HOLD/PAUSE BUTTON
Used with the HOLD feature. See page 20.
Also used to insert a pause into a number
stored in memory See pages 33 and 35.
TRANSFER BUTTON
Used to transfer a call to another
intercom extension See page 21.
CONFERENCE BUTTON
Used to add lines of intercom extensions
to a call. See page 18.
DIAL
Used to dial outside calls, intercom calls.
and feature dial codes.
Line/Auto-Dial /Programmable Buttons
8
Line, Auto-Dial, and Programmable Buttons (308/616 System)
A 6-button telephone in a 308/616 system has six line buttons. If your system has fewer than six
incoming lines, some of the buttons will not be used. A 24-button telephone has six line buttons,
16 auto-dial buttons, and two programmable buttons.
25: auto-dial
26: programmable
27: programmable
22: auto-dial
23: auto-dial
24: auto-dial
19: auto-dial
20: auto-dial
21: auto-dial
16: auto-dial
17: auto-dial
18: auto-dial
13: auto-dial
14: auto-dial
15: auto-dial
10: auto-dial
11: auto-dial
12: auto-dial
4: line 04
5: line 05
6: line 06
4: line 04
5: line 05
6: line 06
1: line 01
2: line 02
3: line 03
1: line 01
2: line 02
3: line 03
6-button telephone (308/616 system)
24-button telephone (308/616 system)
Line Button Used for placing and receiving outside calls. Incoming lines are the lines coming into your
system from outside, either local telephone company lines or lines from a PBX system.
Lines are numbered according to how they are connected to the system. All the lines in the 308/616
system appear in sequence on line buttons on all telephones in the system, from the bottom left.
Auto-Dial Button These buttons are pre-set to call the intercom extension numbers shown on the
buttons in the diagram on page 8. The lights next to these buttons also provide information about
telephone activity. The numbers are also pre-printed on the labels provided for those buttons.
Auto-dial buttons may also be programmed by you for one-touch dialing of a Personal SpeedCall
number. Buttons numbered 10 to 25 on a 24-button telephone in a 308/616 system are auto-dial
buttons and correspond to the Personal SpeedCall numbers 10-25. See page 32.
Programmable Button Buttons numbered 26 and 27 on a 24-button telephone may be programmed
to manually signal, page all intercom extensions, or page through a loudspeaker. See page 28.
9
Line/Auto-Dial /Programmable Buttons
Line/ Multi-Purpose Buttons
10
Line and Multi-Purpose Buttons (2448 System)
Line buttons are assigned to your telephone by the person in your company who maintains your
system. Buttons that are not line buttons are multi-purpose buttons that you may program to use
in other convenient ways.
button 22
button 23
button 24
button 19
button 20
button 21
button 16
button 17
button 18
button 13
button 14
button 15
button 10
button 11
button 12
button 7
button 8
button 9
button 4
button 5
button 6
button 4
button 5
button 6
button 1
button 2
button 3
button 1
button 2
button 3
6-button telephone (2448 system)
24-button telephone (2448 system)
Line Button Used for placing and receiving outside calls. The person who
maintains your system assigns lines to your telephone.
Incoming lines are the lines coming into your system from outside, either local telephone company
lines or lines from a PBX system. The lines are numbered according to how they are connected
to the system. The person who maintains your system should have labeled the line buttons on your
telephone. Different SPIRIT telephones in your system may have different lines represented by
line buttons. Be careful to check the line labels carefully when using other SPIRIT telephones in
your system.
Multi-Purpose Buttons
Buttons that are not line buttons may be used as multi-purpose buttons.
Each multi-purpose button may be programmed as ONE of the following:
Intercom Extension Button This allows one-touch dialing to another SPIRIT
telephone. See page 31.
Group Page Button This allows one-touch paging to one of the groups of telephones
in the system. The lights next to these buttons also provide information about
telephone activity. See page 31.
Account Code Entry Button This allows you to enter an account code into the call
records. See page 31.
Manual Signal Button This allows tone signaling to another SPIRIT telephone
when used with an INTERCOM EXTENSION BUTTON. See page 31.
Personal SpeedCall Button This allows one-touch dialing of a Personal SpeedCall
number. See page 34.
A multi-purpose button that is not programmed will not do anything. The
programming of these buttons is flexible and may be changed by giving the button
a new use. If you have difficulty programming a button, ask the person who
maintains your system to check the customization of your telephone.
11
Line/Multi-Purpose Buttons
Answer Calls
12
Answer Calls
■
Answer an Outside Call, an Intercom Call, or a Page to Intercom Extensions
● Lift
receiver (or press SPEAKER).
■ Answer
●
a Specific Line
Press line button. ● Lift receiver (or press SPEAKER).
■ Answer
an Intercom Call When HFAI (Hands-Free Answer on Intercom) Light is On
Call will be answered automatically via the speakerphone. You will hear a brief warning tone to
indicate that you are being called and that a two-way intercom connection has been made. The
speakerphone will be turned off automatically when the caller hangs up or you may press SPEAKER
to end the call.
If you lift the receiver during the call, place the call on hold, or set up a conference call, the intercom
call will then be like a normally placed intercom call and your telephone will not be turned off
automatically when the caller hangs up.
Turn the HFAI feature ON and OFF by pressing the MUTE/HFAI button when the phone is not in use.
■ Answer
a Call When Your Telephone is Busy
● Press
HOLD/PAUSE. ● Press flashing line or INTERCOM button.
■ Pickup
a Call Ringing on Another Telephone (308/616 System)
● Press INTERCOM. ● Lift receiver (or press SPEAKER). ● Dial ✱ 8. ● Dial intercom extension
number or press auto-dial button. (If your telephone is customized so that it cannot answer calls
on that line, you will hear a busy signal.)
■ Pickup
a Call Ringing on Another Telephone (2448 System)
● Press
INTERCOM. ● Lift receiver (or press SPEAKER). ● Dial ✱ 8. ● Dial intercom extension
number or press intercom extension button. (If your telephone is customized so that it cannot answer
calls on that line, you will hear a busy signal).
■ Pickup
a Call Ringing in Your Group (2448 System)
● Press
13
INTERCOM.
● Lift
receiver (or press SPEAKER). ● Dial ✱ 7.
Answer Calls
Place Calls
14
Place Calls (308/616 System)
■ Using
the Dial
receiver (or press SPEAKER). ● Dial number (If you must dial an extra digit in order to make
an outside call, dial that digit first. See page 38.)
● Lift
■ Using
a Specific Line
● Press
■ Using
line button. ● Lift receiver (or press SPEAKER).
● Dial
number.
Personal SpeedCall (See page 32 for instructions for storing Personal SpeedCall numbers)
24-button telephone: ● Press auto-dial button for stored Personal SpeedCall number.
6-button telephone: ● Press MEMORY. (Speakerphone turns on. If you want to use the receiver,
lift before pressing MEMORY). ● Dial two-digit code (10-25).
■
Using System SpeedCall
MEMORY. (Speakerphone turns on. If you want to use the receiver, lift before pressing
MEMORY). ● Dial two-digit code (30-99).
● Press
■
Last Number Redial (manually dialed digits only)
● Press MEMORY. (Speakerphone turns on. If you want to use the receiver, lift before pressing
MEMORY). ● Dial 0 (zero).
■
Intercom Call
INTERCOM. 24-button telephone: ● Press auto-dial button. (Speakerphone turns on.
If you want to use the receiver, lift before pressing auto-dial button.)
6-button telephone: ● Lift receiver (or press SPEAKER). ● Dial intercom extension number.
Intercom extension 10 may be reached by dialing 0 (zero).
● Press
15
Place Calls
Place Calls
16
Place Calls (2448 System)
■ Using
the Dial
reciever (or press SPEAKER). ● Dial number. (If you must dial an extra digit in order to make
an outside call, dial that digit first. See page 38.)
● Lift
■ Using
a Specific Line Assigned to a Line Button
● Press
■
line button. ● Lift receiver (or press SPEAKER).
● Dial
number.
Using a Specific Line not Assigned to a Line Button
INTERCOM. ● Lift receiver (or press SPEAKER). ● Dial 8. ● Dial line number (01 to 24)
Dial number. Some lines may be customized as not accessible from your telephone.
■ Press
■
■ Using
SpeedCall (See page 34 for instructions for storing Personal SpeedCall numbers)
If the number is programmed on a Personal SpeedCall button, ● Press SpeedCall button.
If the SpeedCall number is not programmed on a Personal SpeedCall button, ● Press MEMORY.
(Speakerphone turns on. If you want to use the receiver, lift before pressing MEMORY).
● Dial two-digit code (Personal 10 to 21; System 30 to 99).
■ Last
Number Redial (manually dialed digits only)
MEMORY. (Speakerphone turns on. If you want to use the receiver, lift before pressing
MEMORY). ● Dial 0 (zero).
● Press
■ Intercom
Call
If the intercom extension number is programmed on a button, ● Press intercom extension button.
(Speaker will turn on. If you want to use the receiver, press INTERCOM and lift the receiver
before pressing the intercom extension button.)
If the number is not programmed on a button, ● Press INTERCOM. ● Lift receiver (or press
SPEAKER). ● Dial intercom extension number. Intercom extension 10 may also be reached by dialing
0 (zero).
17
Place Calls
Conference
18
Conference
A total of four parties may be in the conference. For more details about special conferencing
situations, see the person in your company who maintains your system.
■
Add Another intercom Extension to a Call (308/616 System)
● Press
HOLD/PAUSE. ● Press INTERCOM. ● Dial intercom extension number or press auto-dial
button. ● Press CONFERENCE. ● Press button of call on hold.
■ Add
Another Intercom Extension to a Call (2448 System)
● Press
HOLD/PAUSE. ● Press INTERCOM. ● Dial intercom extension number or press intercom
extension button. ● Press CONFERENCE. ● Press button of call on hold.
■ Add
Another Line to a Call
● Press
HOLD/PAUSE.
● Press CONFERENCE.
● Press
line button. ● Dial number of person to be added to the call.
● Press button of call on hold.
■ Add
a Held Call to a Conference
● Press
■ Place
CONFERENCE. ● Press button of call on hold.
a Conference on Hold
● Press
HOLD/PAUSE. To go back to the conference call, press any line or INTERCOM button
involved in the conference.
■ Drop
a Line or Telephone from a Conference (Originator Only)
RECALL/DROP. ● Press line or INTERCOM button to be dropped. (Or, the person can
hang up, leaving the other callers on the conference.)
● Press
■ End
a Conference CaII
Originator of conference call hangs up. (The originator is the person who added the third person
to the call.)
19
Conference
Hold
20
Hold
(so the call can be retrieved from any telephone in the system)
● Press HOLD/PAUSE.
■ Hold
(so the call can be retrieved at your telephone ONLY— may be used for outside lines that are
not part of a conference)
● Press HOLD/PAUSE twice.
■ Hold
■ Retrieve
● Press
■ Retrieve
● Press
Call on Hold
line or INTERCOM button of call on hold. ● Lift receiver (or press SPEAKER).
a Held Line not Programmed on a Button (Pickup by Line-2448 System)
INTERCOM.
(01 through 24).
● Lift
receiver (or press SPEAKER). ● Dial ✱ 5. ● Dial two-digit line number
■ Held
Call Reminder
If you place a call on hold and hangup without retrieving the call, your telephone can remind
you with a periodic short ring. The interval between these rings is a customized feature.
Transfer
■ Transfer
● Press
■ Transfer
an Outside Call tO Another lntercom Extension (308/616 System)
TRANSFER. ● Dial intercom extension number or press auto-dial button. ● Hang up.
an Outside Call to Another lntercom Extension (2448 System)
● Press
TRANSFER.
● Hang up.
■ Returned
● Dial
intercom extension number or press intercom extension button.
Transferred Call
If the transferred call is not answered, it will return to your telephone. ● Lift receiver (or press
SPEAKER). The call will continue to ring at both telephones until it is answered.
21
Transfer
Message
22
Message
To use MESSAGE, you and another person need to have agreed to take messages for each other. If
you have a message for the other person, turn on the Message Indicator for that person's telephone.
If your Message Indicator is on, check with that person for your message. This feature is typically
used by the system attendant.
■ Turn
on the Message Indicator at Another Telephone (308/616 System)
● Press
INTERCOM. ● Lift receiver (or press SPEAKER). ● Dial ✱ 6. ● Dial intercom extension
number or press auto-dial button.
■ Turn
on the Message Indicator at Another Telephone (2448 System)
● Press
INTERCOM. ● Lift receiver (or press SPEAKER).
number or press intercom extension button.
● Dial
✱ 6.
● Dial
intercom extension
If you make a call to an extension with a prearranged agreement, and the extension is busy or there
is no answer, ● Dial ✱ 6. ● Hang up. The message indicator at that extension will turn ON.
Remember, the other person must be someone with whom you have a message agreement.
■
Turn off the Message Indicator at Another Telephone (308/616 System)
● Press
INTERCOM. ● Lift receiver (or press SPEAKER).
number or press auto-dial button.
■ Turn
● Dial
# 6. ● Dial intercom extension
off the Message Indicator at Another Telephone (2448 System)
● Press
INTERCOM. ● Lift receiver (or press SPEAKER). ● Dial # 6. ● Dial intercom extension
number or press intercom extension button.
■ Turn
off Your Own Message Indicator
● Press
INTERCOM.
● Lift
receiver (or press SPEAKER). ● Dial # 6. ● Hang up.
Change to Touch Tone
■ Change
to Touch Tone
If your local telephone service is pulse (rotary) dial, and you want to change to touch tone, ● Press ✱ .
The change to touch tone will be cancelled when you hang up.
23
Message/Touch Tone
Do Not Disturb/Line Reserve
24
Do Not Disturb
■ Turn
on Do Not Disturb
● Press
INTERCOM. ● Lift receiver (or press SPEAKER). ● Dial ✱ 2. Your phone will not ring
for incoming calls, transferred calls, or manual signaling. The MUTE light will blink as a reminder
that you have turned on the DO NOT DISTURB feature.
■ Turn
off Do Not Disturb
● Press
INTERCOM.
● Lift
receiver (or press SPEAKER).
● Dial
# 2.
Line Reserve
If you want to reserve a line that is busy, ● Press line button without lifting the receiver. When the line
is free you will hear three short rings every four seconds for twelve seconds.
2448 System: If the line is not assigned to a button on your telephone, ● Press INTERCOM.
receiver (or press SPEAKER). ● Dial 8 ● Dial two-digit line number (01 through 24).
When the line is free you will hear three short rings every four seconds for twelve seconds.
● Lift
Privacy Release and Bridging
■ Privacy
Release
If your company is using the privacy feature, others cannot join your call without your permission.
If you want someone else to join your call, hold down the line button of your call while the person
joining the call presses the line button for that call on his/her telephone.
2448 System: If the call is on a line that is not on a line button on your telephone, hold down the
INTERCOM button on which you have accessed that line.
■ Bridging
(Joining a Call in Progress)
Press the line button of the call you want to join. If your company is using the privacy feature, the
person already on the call must press the button for that line while you press that line button on your
telephone.
2448 System: If the call is on a line that is not on a line button on your phone, ● Press INTERCOM.
● Lift receiver (or press SPEAKER). ● Dial ✱ 5. ● Dial two-digit line number (01 through 24).
Switchhook Flash
■ Switchhook
Flash
Sometimes a feature provided by your local telephone company (or your PBX system) will require
a "switchhook flash." An example of such a feature is "call waiting." To send a switchhook flash,
● Press RECALL/DROP.
25
Privacy Release /Bridging /Switchhook Flash
Night Service/Auto Callback
26
Night Service
■
Turn on Night Service
● Press
■
INTERCOM.
● Lift
receiver (or press SPEAKER). ● Dial ✱ 4.
● Lift
receiver (or press SPEAKER). ● Dial # 4.
Turn off Night Service
● Press
INTERCOM.
Auto Callback (2448 System)
■ Auto
Callback (Intercom only)
If the intercom extension you called is busy or does not answer, ● Dial ✱ 1. ● Hang up. Your
telephone will ring with three short rings when the intercom extension you called is next hung up.
After you answer your telephone, the system will ring the other person. If you make a second auto
callback request, the first request will be canceled.
To cancel the auto-callback request, ● Press INTERCOM. ● Lift receiver (or press SPEAKER). ● Dial # 1.
Intercom Call Forward (Follow Me-2448 System)
For more information about lntercom Call Forward, see the person in your company who maintains your system.
■ Intercom
Call Forward-follow Me
To forward incoming intercom calls to another telephone, ● Press INTERCOM at any telephone.
● Lift receiver (or press SPEAKER). ● Dial ✱ 3. ● Dial intercom extension number or press intercom
extension button of telephone from which you want calls forwarded.
● Dial intercom extension number or press intercom extension button of telephone to which you want
calls forwarded.
To turn off Intercom Call Forward, ● Press INTERCOM at telephone from which calls should no
longer be forwarded. ● Lift receiver (or press SPEAKER). ● Dial # 3.
Mute
Press MUTE during a call to turn on this feature. When the MUTE indicator light is on, the person at
the other end cannot hear you or the sound around you. The feature will mute either the receiver
or the speakerphone. Turn off by pressing the MUTE button again. The feature will automatically turn
off when you hang up, or when you change from speaker to receiver, or receiver to speaker.
27
Intercom Call Forward/Mute
Paging/Programmable Buttons
28
Paging (308/616 System) Both paging features may be programmed on buttons numbered
26 and 27 on 24-button telephones.
■ Page
to All Intercom Extensions
● Press
INTERCOM. ● Lift receiver (or press SPEAKER).
● Dial
61. Make announcement.
NOTE: Only one person may answer a page to all intercom extensions. All other extensions
are disconnected from the page when someone answers.
■ Loudspeaker
● Press
Paging (For systems with optional public address system)
INTERCOM. ● Lift receiver (or press SPEAKER) ● Dial 60. Make announcement.
Programmable Buttons (308/616 System, 24-button telephones only)
Buttons labeled 26 and 27 can be programmed by you (1) to manually signal another intercom
extension, or (2) for one of the paging features described above.
NOTE: To program buttons on telephone 10, the controller administration switch must be OFF.
■ Programming
Button for Manual Signal
INTERCOM. ● Lift receiver (or press SPEAKER). ● Dial ✱ 0 (zero). ● Dial intercom
extension number of telephone you want to signal. ● Press button you want to program (button
26 or 27).
● Press
■ Programming
Button for Paging
● Press
INTERCOM. ● Lift receiver (or press SPEAKER). ● Dial ✱ 0 (zero). ● Dial 60 to
program button for paging through optional loudspeaker or dial 61 to program button for paging
to all intercom extensions. ● Press button you want to program (button 26 or 27).
■
Erase Programming
● Press
INTERCOM. ● Lift receiver (or press SPEAKER). ● Dial ✱ 0 (zero). ● Press MEMORY.
● Press button with feature you want to erase.
■ Using
Programmable Buttons
● Press programmed button. If it is programmed for manual signaling, a tone will sound at the
desired intercom extension and at your telephone as long as you hold the button down. If it is
programmed for one of the paging features, make your announcement, then hang up.
29
Programmable Buttons
Paging/ Programming Multi-Purpose Buttons
30
Paging (2448 System)
■
Group Page
You can page all the telephones in one group. See page 5 for a list of groups.
● Press INTERCOM. ● Lift receiver (or press SPEAKER). ● Dial two-digit group number (61-66).
Make announcement.
If you have programmed a button for group paging, press that button (see below).
NOTE: Only one person may answer a group page. All other extensions are disconnected from the
page when someone answers.
■ Loudspeaker
Paging (For systems with optional public address system)
If there is a line button on your phone for the public address system, ● Press line button.
● Lift receiver (or press SPEAKER). Follow the instructions provided with the public address system.
If the line is not on a button on your phone, ● Press INTERCOM. ● Lift receiver (or press
SPEAKER). ● Dial 8. ● Dial two-digit line number (01-24) of the loudspeaker. Follow the
instructions provided with the public address system. Make announcement.
Programming Multi-Purpose Buttons (2448 System)
To program a button for SpeedCall, see page 34.
To program a button for any other purpose, continue to the next page for instructions.
■ Programming
Multi-Purpose Buttons
● Press
INTERCOM. ● Lift receiver (or press SPEAKER). ● Dial * 0 (zero).
Intercom Extension Button. ● Dial intercom extension number. ● Press button you want to program.
Group Page Button. ● Dial two-digit group number of group you want to page (61-66).
● Press button you want to program.
Account Code Entry Button. ● Dial 70. ● Press button you want to program.
Manual Signal Button. ● Dial 71. ● Press button you want to program.
To erase a button, ● Press button you want to erase.
■ Using
Programmed Multi-Purpose Buttons
Intercom Extension Button. You may use a intercom extension button to place a call (see page 17) or
whenever you would dial an intercom extension number.
Group Page Button. ● Press group page button. (Speaker will turn on. If you want to use the
receiver, press INTERCOM and lift the receiver before pressing the group page button.)
Account Code Entry Button. An account code may be entered at any time during a call.
● Press account code entry button. ● Dial account code. ● Press account code entry button. The
indicator light by the button will be turned on by the first press and remain on until the second press.
Manual Signal Button. ● Press manual signal button. ● Press intercom extension button. As long
as the intercom extension button is held down, a tone will sound at your telephone and at the
telephone you have signaled.
■ Changing
Programming
You may change the use of a button by programming the button for another purpose. If you program a
SpeedCall button for some other use, the SpeedCall number will remain in the SpeedCall memory
and can be used by pressing MEMORY and dialing the two-digit code for that number.
31
Programming Multi-Purpose Buttons
SpeedCall
32
Personal SpeedCall (308/616 System)
■ Storing
Numbers
Plan the numbers you want to store in your Personal SpeedCall memory. These numbers are
available only at your telephone. You may store up to 16 numbers in your Personal SpeedCall
memory. A directory is provided on the Reference Card so that you may list the stored numbers.
Label the auto-dial buttons on 24-button telephones.
6-Button Telephone: ● Press INTERCOM. ● Lift receiver (or press SPEAKER). ● Dial ✱ 0 (zero).
● Dial
number. ● Press MEMORY.
● Dial
To store another number, ● Dial number.
two-digit code (10 through 25).
● Press
MEMORY. ● Dial two-digit code. When you are
finished storing numbers, ● Hang up receiver (or press SPEAKER).
24-Button Telephone: ● Press INTERCOM. ● Lift receiver (or press SPEAKER).
number. ● Press auto-dial button where you want to store number.
● Dial
✱ 0 (zero).
● Dial
To store another number, ● Dial number.
● Press auto-dial button. When you are finished storing
numbers, ● Hang up receiver (or press SPEAKER).
If you make an error when entering a number, press the INTERCOM button with the indicator light
ON and enter the number again. To store Personal SpeedCall at telephone 10, the
administration switch on the controller must be in the OFF position. If you hear three short
beeps after you dial ✱ 0 (zero), the administration switch is ON and should be turned OFF.
NOTE: Press HOLD/PAUSE to enter a 1½ second pause in a number if, for instance, you want the
system to wait for a dial tone or access tone before continuing dialing. If the line you are using
is customized as a PBX/Centrex line and the code has been customized into the system, the system
will put the pause in for you. Consult the person in your company who maintains your system.
A "switchhook flash," sometimes used for local dialing services or PBX/Centrex codes, may be
entered as the first button press in a number by pressing RECALL/DROP. A total of 16 digits,
pauses, and the one flash may be stored as one number.
■ Erasing
Numbers
6-Button Telephone: ● Press INTERCOM. ● Lift receiver (or press SPEAKER). ● Dial ✱ 0 (zero).
MEMORY. ● Dial two-digit code for number you want to erase.
● Press
24-Button Telephone: ● Press INTERCOM. ● Lift receiver (or press SPEAKER).
● Press MEMORY. ● Press auto-dial button of number you want to erase.
■ Changing
● Dial
✱ 0 (zero).
Numbers
Follow the instructions for storing numbers. Be sure you change your Reference Card directory
and the auto-dial labels on 24-button telephones.
■ Using
SpeedCall
Instructions for using SpeedCall are on pages 14 and 15.
33
SpeedCall
SpeedCall
34
Personal SpeedCall (2448 System)
■ Storing
Numbers
Plan the numbers you want to store in your Personal SpeedCall memory. These numbers are available
only at your telephone. A directory is provided on the Reference Card so that you may list the stored
numbers. You may store up to 12 numbers in memory. EACH OF THE 12 NUMBERS MUST BE
GIVEN AN INDIVIDUAL TWO-DIGIT CODE, USING NUMBERS 10 through 21. You may choose
to program some or all of your Personal SpeedCall numbers on multi-purpose buttons. See page 11
for other uses of multi-purpose buttons. Be sure you label SpeedCall buttons with the name AND
THE TWO-DIGIT CODE FOR THAT NUMBER.
To store a number in your Personal SpeedCall memory, ● Press INTERCOM. ● Lift receiver (or press
SPEAKER). ● Dial ✱ 0 (zero). ● Dial number you want to store. ● Press MEMORY.
[Optional: ● Press a multi-purpose button if you want to program number on a SpeedCall button.]
● Dial the individual two-digit code (10 through 21). (Every SpeedCall number must have a
different two-digit code.)
To store another number, ● Dial number. ● Press MEMORY. [Optional: ● Press a multi-purpose
button if you want to program number on a SpeedCall button.] ● Dial individual two-digit code.
If you make an error when entering a telephone number, press the INTERCOM button with indicator
light ON and enter number again. When you are finished storing numbers, ● Hang up receiver (or press)
SPEAKER).
NOTE: Press HOLD/PAUSE to enter a 1½ second pause in a number if, for instance, you want the
system to wait for a dial tone or access tone before continuing dialing. If the line you are using is
customized as a PBX/Centrex line and the code has been customized into the system, the system will
put the pause in for you. Consult the person in your company who maintains your system.
A "switchhook flash," sometimes used for local dialing services or PBX/Centrex codes, may be
entered as the first button press in a number by pressing RECALL/DROP. A total of 16 digits,
pauses, and the one flash may be stored as one number.
■
Erasing Numbers
To erase a number from memory, ● Press INTERCOM. ● Lift receiver (or press SPEAKER).
● Dial ✱ 0 (zero). ● Press MEMORY. ● Dial two-digit code.
■ Changing
Numbers or Programming
Follow instructions for storing numbers. Be sure you change your Reference Card directory and
the labels on SpeedCall buttons.
If you program a SpeedCall button for another feature (see page 31), the number remains in your
Personal SpeedCall memory and can be dialed by pressing MEMORY and dialing the two-digit code.
■ Using
SpeedCall
Instructions for using SpeedCall are on page 17.
NOTE: Your Personal SpeedCall numbers do not have to be for outside calls. You can store dial
codes, access numbers, and account code numbers instead of telephone numbers. If you have stored a
SPIRIT feature dial code (see page 39) as a Personal SpeedCall number, you must press INTERCOM
before using the SpeedCall number.
35
SpeedCall
36
Customized Features
The person responsible for maintaining your system may have customized some of the features so that
the system better meets the needs of your company. Because of this customization, your telephone
may not work exactly like another telephone in the same system. Following is a list and brief description
of some of the ways your telephone may be customized. See the person who maintains your
system if you have questions.
AUTOMATIC LINE SELECTION. When you pick up your receiver, or press SPEAKER, you may
not hear a dial tone. Some systems will be customized so that you must press a line button that is not
in use before making an outside call. If you are using a 2448 system, you may have to enter a dial
code to select a line.
LINE USE PERMISSION. Some lines may be customized so that they cannot be used by your telephone.
Some may be customized so that you can answer them, but not dial out on them.
LINE RINGING OPTIONS. The ringing options may be customized. The lines on your telephone
may be set to ring normally, ring for 12 seconds and then stop, or not ring for the first 12 seconds
and then start ringing. They may also be customized to not ring at all for incoming calls. These
options may not be in effect when Night Service is on.
NIGHT RINGING. When Night Service is on, your telephone may ring as it usually does or
it may be set to ignore the customized ringing options.
OUTSIDE SERVICE. Your telephone may be customized so that you can place any outside calls,
any calls but toll calls, or no outside calls at all.
PRIVACY RELEASE. The system may be customized so that privacy release is not required for
another person to join a call.
HELD CALL REMINDER. The intervals between reminders that you have a call on hold are
customized. The interval may also be customized so that you are not reminded of a call on hold.
LINE BUTTON ASSIGNMENTS (2448 System). The lines assigned to line buttons on your telephone
may not be the same lines assigned to buttons on another telephone in the system. Sometimes
the same line will appear in a different position on different telephones.
Volume Control
The volume control adjusts the volume of the ringer, speaker, and receiver. The adjustment of the
volume of one does not affect the volume of the others.
Press the "UP" arrow to raise the volume level.
Press the "DOWN" arrow to lower the volume level.
37
●
If the telephone is not being used or is ringing, the volume
control will affect the loudness of the ring ONLY. When you
are adjusting the loudness of the ring, the telephone will
"ring" briefly at the new volume.
●
If the speakerphone is ON, the volume control will affect the
volume of the speakerphone ONLY.
●
If the receiver is lifted, the volume control will affect the
volume of the sound from the receiver ONLY.
38
Using with a PBX/Centrex System
The term "intercom extension" is used in several places in the manual to refer to another telephone
in the system. The two-digit intercom extension is the SPIRIT system number determined by the
telephone wiring connection at the controller. If you must dial an access digit in order to make
outside calls, then you have PBX or Centrex lines. If you have such lines, then each telephone
that is part of the PBX system or Centrex service may have a PBX or Centrex "extension" number.
Do not use that extension number for SPIRIT system features. If you do not know a SPIRIT
intercom extension number, ask the person in your office who maintains your system for the number.
The RECALL/DROP button can be used to access the PBX/Centrex features on some systems.
Caring for Your Telephone
Do not place your SPIRIT Communications System telephone near a radiator or other heat source.
Your telephone is an electronic device and should not be exposed to water or any other liquid. Unplug
the telephone from the telephone jack if the telephone cord is damaged, if liquid has been spilled
into the speaker slots, or if the telephone is dropped.
The outside housing may be wiped clean with a soft cloth that has been dampened with water and
a mild detergent. Do not use solvents, spray liquids, or abrasive cleaners.
Dial Codes
Dial Codes (308/616 System)
Dial Codes (2448 System)
Intercom Extensions and Codes
0
Telephone 10
10-25
Telephones 10-25
Loudspeaker Paging
60
Page to All Intercom Extensions
61
Intercom Extensions and Codes
0
Telephone 10
10-57
Telephone 10-57
61-66
Group Page
70
Account Code Button Programming
71
Manual Signal Button Programming
801-824
Outside Line Access (Via Intercom)
Feature Dial Codes
Do Not Disturb on
✱2
#2
Do Not Disturb off
✱4
Night Service on
#4
Night Service off
✱4
Send Message
#6
Cancel Message
✱8
Pickup by Intercom Extension
✱0
Program
SpeedCall Codes
0
Last number manually dialed
Personal SpeedCall
10-25
30-79
System SpeedCall unrestricted
80-99
System SpeedCall restricted
Feature Dial Codes
✱1
Automatic Callback
Automatic Callback cancel
#1
✱2
Do Not Disturb on
Do Not Disturb off
#2
✱3
Call Forward
#3
Call Forward cancel
Night Service on
✱4
#4
Night Service off
Pickup by Line
✱5
✱6
Send Message
#6
Cancel Message
✱7
Pickup by Group
✱8
Pickup by Intercom Extension
✱0
Program
SpeedCall Codes
0
Last number manually dialed
Personal SpeedCall numbers
10-21
System SpeedCall unrestricted
30-79
System SpeedCall restricted
80-99
39
m
40
Index (308/616 System)
A
Answer, 12; intercom, 12; specific line, 12
Auto-dial button, 9
Automatic line selection, 36
H
Held call reminder, 21, 37
HFAI 12; turning on, 12
Hold, 20; pick up, 20; retrieve, 20;
B
Bridging, 25
I
Indicator light patterns, 5
Intercom call, 12, 15
C
Call pickup, 13
Caring for your telephone, 38
Centrex system, 38; using access code 14;
dialing pause for, 33
Conference, 18; add call, 18; add extension,
18; add line, 18; drop, 19; end, 19;
hold, 19
Customized features 36
D
Dial codes, 39
Do not disturb, 24
E
Erase programmable button, 29;
SpeedCall, 3 3
J
Joining a call, 25
L
Last number redial, 15
Light patterns, 5
Line button, 9
Line reserve, 24
Line use permission, 36
M
Manual signal, program button for, 28
Message, 22; turn off, 23; turn on, 22
Mute, 27; flashing light (see Do Not
Disturb), 24
N
Night service, 26
Night ringing, 36
P
Paging, 28; all extensions. 28;
loudspeaker, 28; program button for, 29:
using programmable button, 29
Parts of telephone, 6, 7
PBX system, 38; using access code, 14;
dialing pause for, 33
Pick up, call on another telephone, 13
Place calls, 14, 15; specific line, 14
Privacy release, 25
Programmable button, 9; programming,
28, 29; using, 29
R
Recall (switchhook flash), 25
Reserve line, 24
Ringing patterns, 5
S
SpeedCall, 32; change, 33; erase, 33;
Personal, 3, 32; place calls, 14, 15;
program button for, 32; store 32;
System, 3, 15
Switchhook flash, 25
Symbols, key to, 4
T
Touch Tone, 23
Transfer, 21
V
Volume control, 37
Index (2448 System)
A
Account code entry, 31; button, 11;
program button for, 31
Answer, 12; intercom, 12; specific line, 12
Auto callback, 26
Automatic line selection, 36
B
Bridging, 25
C
Call forward (follow me), 27
Call pickup, 13
Caring for your telephone, 38
Centrex system, 38; using access code, 16;
dialing pause for, 35
Conference, 18; add call, 18; add extension,
18; add line, 18; drop, 19; end, 19;
hold, 19
Customized features, 36
D
Dial codes, 39
Do not disturb, 24
E
Erase, multi-purpose button, 31;
SpeedCall, 3 5
G
Group page, 30; button, 11; program
button for, 31
H
Held call reminder, 21, 37
HFAI, 12; turning on, 12
Hold, 20; pick up, 20; retrieve, 20; retrieve
when not programmed on a line button, 20
I
Indicator light patterns, 5
Intercom call, 12, 17
Intercom call forward, 27
Intercom extension button, 11, 31;
program button for, 31
J
Joining a call, 25
L
Last number redial, 17
Light patterns, 5
Line button, 10
Line reserve, 24
Line use permission, 36
M
Manual signal; program button for, 31
Message, 22; turn off, 23; turn on, 22
Multi-purpose buttons, 11; programming,
30, 31
Mute, 27; flashing light (see Do Not
Disturb), 24
N
Night service, 26
Night ringing, 36
P
Paging, 30; group, 30; loudspeaker, 30;
program button for, 31; using
programmed button, 30, 31
Parts of telephone, 6, 7
PBX system, 38; using access code, 16;
dialing pause for, 35
Pick up, call by line, 20; call on another
telephone, 13; in your group, 13
Place calls, 16, 17; specific line, 16
Privacy release, 25
R
Recall (switchhook flash), 25
Reserve line, 24
Ringing patterns, 5
S
SpeedCall, 34; button, 11; change, 35;
erase, 35; Personal, 3; place calls, 17;
program button for, 34; store 34;
System, 3
Switchhook flash, 25
Symbols, key to, 4
T
Touch Tone, 23
Transfer, 21
V
Volume control, 37
999-500-237