1
®
USB-N13
ASUS 802.11n Network Adapter
(For 802.11b/g/n Networks)
User Manual
Copyright Information
E5125
Revised Edition
October 2009
Copyright © 2009 ASUSTeK COMPUTER INC. All Rights Reserved.
No part of this manual, including the products and software described in it, may
be reproduced, transmitted, transcribed, stored in a retrieval system, or translated
into any language in any form or by any means, except documentation kept by the
purchaser for backup purposes, without the express written permission of ASUSTeK
COMPUTER INC. (“ASUS”).
ASUS PROVIDES THIS MANUAL “AS IS” WITHOUT WARRANTY OF ANY KIND,
EITHER EXPRESS OR IMPLIED, INCLUDING BUT NOT LIMITED TO THE
IMPLIED WARRANTIES OR CONDITIONS OF MERCHANTABILITY OR FITNESS
FOR A PARTICULAR PURPOSE. IN NO EVENT SHALL ASUS, ITS DIRECTORS,
OFFICERS, EMPLOYEES OR AGENTS BE LIABLE FOR ANY INDIRECT,
SPECIAL, INCIDENTAL, OR CONSEQUENTIAL DAMAGES (INCLUDING
DAMAGES FOR LOSS OF PROFITS, LOSS OF BUSINESS, LOSS OF USE OR
DATA, INTERRUPTION OF BUSINESS AND THE LIKE), EVEN IF ASUS HAS
BEEN ADVISED OF THE POSSIBILITY OF SUCH DAMAGES ARISING FROM
ANY DEFECT OR ERROR IN THIS MANUAL OR PRODUCT.
Product warranty or service will not be extended if: (1) the product is repaired,
modified or altered, unless such repair, modification of alteration is authorized in
writing by ASUS; or (2) the serial number of the product is defaced or missing.
Products and corporate names appearing in this manual may or may not be
registered trademarks or copyrights of their respective companies, and are used
only for identification or explanation and to the owners’ benefit, without intent to
infringe.
SPECIFICATIONS AND INFORMATION CONTAINED IN THIS MANUAL ARE
FURNISHED FOR INFORMATIONAL USE ONLY, AND ARE SUBJECT TO
CHANGE AT ANY TIME WITHOUT NOTICE, AND SHOULD NOT BE CONSTRUED
AS A COMMITMENT BY ASUS. ASUS ASSUMES NO RESPONSIBILITY OR
LIABILITY FOR ANY ERRORS OR INACCURACIES THAT MAY APPEAR IN THIS
MANUAL, INCLUDING THE PRODUCTS AND SOFTWARE DESCRIBED IN IT.
ASUS Network adapter
Contact Information
ASUSTeK COMPUTER INC. (Asia Pacific)
Address
15 Li-Te Road, Peitou, Taipei, Taiwan 11259
Website
www.asus.com
Technical Support
Telephone
+886228943447
Support Fax
+886228907698
Software download
support.asus.com*
ASUS COMPUTER INTERNATIONAL (America)
Address
800 Corporate Way, Fremont, CA 94539, USA
Telephone
+15029550883
Fax
+15029338713
Website
usa.asus.com
Software download
support.asus.com*
ASUS COMPUTER GmbH (Germany and Austria)
Address
Harkort Str. 25, D40880 Ratingen, Germany
Fax
+492102959911
Online contact
www.asus.com.de/sales
Technical Support
Component Telephone
+49-1805-010923
System/Notebook
/Eee/LCD Telephone
+49-1805-010920
Support Fax
+492102959911
Online support
www.asus.com.de/support
Website
www.asus.com.de/news
* Available on this site is an online Technical Inquiry Form that you can fill out to contact
technical support.
ASUS Network adapter
Manufacturer:
ASUSTeK Computer Inc.
Tel:
+886-2-2894-3447
Address:
No. 15, LI-DE RD., PEITOU, TAIPEI 112,
TAIWAN
Authorised
representative
in Europe:
ASUS Computer GmbH
Authorised distributors
in Turkey:
BOGAZICI BIL GISAYAR SAN. VE TIC. A.S.
Address:
HARKORT STR. 21-23, 40880
RATINGEN, GERMANY
Tel:
+90 212 3311000
Address:
AYAZAGA MAH. KEMERBURGAZ CAD.
NO.10 AYAZAGA/ISTANBUL
INDEX BILGISAYAR SISTEMLERI MUHENDISLIK
SAN. VE TIC. A.S.
Tel:
+90 212 3312121
Address:
AYAZAGA MAH: CENDERE YOLU NO:9
AYAZAGA/ISTANBUL
EEE Yönetmeliğine Uygundur
ASUS Network adapter
Table of Contents
Chapter 1: Introduction.................................................................... 7
Package contents................................................................................... 7
Features................................................................................................... 7
Chapter 2: Installation...................................................................... 8
System Requirements............................................................................ 8
Installation Procedures.......................................................................... 8
The status indicators........................................................................ 13
Using the WPS Wizard..................................................................... 14
Configuring with the WLAN utility (Infrastructure)............................ 23
Configuring with the WLAN utility (Ad Hoc)...................................... 24
Chapter 3: Software Reference...................................................... 27
ASUS WLAN Control Center................................................................ 27
ASUS Wireless Settings Utility............................................................ 29
Status - Status.................................................................................. 29
Status - Connection.......................................................................... 31
Status - IP Config............................................................................. 32
Status - Ping..................................................................................... 32
Config - Basic................................................................................... 33
Config - Encryption........................................................................... 34
Config - Authentication..................................................................... 37
Config - Advanced............................................................................ 38
Soft AP (Windows XP/Vista)............................................................ 39
Soft AP (Windows XP/Vista) Cont.................................................... 40
Soft AP (Windows XP/Vista) Cont.................................................... 41
Survey - Site Survey........................................................................ 41
About - Version Info.......................................................................... 42
Link State......................................................................................... 43
Save Configuration........................................................................... 43
Exit Wireless Settings...................................................................... 44
ASUS Mobile Manager..................................................................... 44
ASUS Network adapter
Creating a new configuration........................................................... 46
Editing a configuration...................................................................... 48
Site Monitor...................................................................................... 52
Site Monitor main window................................................................ 53
Monitoring a connection................................................................... 54
A-S (AP mode <--> Station mode)................................................... 55
Windows® XP wireless options......................................................... 56
Windows® Vista wireless options..................................................... 58
Windows® 7 wireless options........................................................... 60
Chapter 4: Application.................................................................... 61
Setting up the XLink Mode under Windows® XP.............................. 61
Setting up the XLink Mode under MAC OS...................................... 64
Chapter 5: Troubleshooting........................................................... 65
Chapter 6: Appendix....................................................................... 67
ASUS Network adapter
Chapter 1 - Introduction
Chapter 1
Introduction
Introduction
Package contents
Check the following items in your ASUS Wireless LAN Adapter package.
•
•
•
•
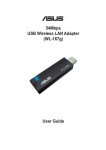
1 x ASUS Wireless LAN Adapter (USB-N13)
1 x Support CD
1 x Quick Start Guide
1 x Warranty card
Note: Contact your retailer if any of the items is damaged or missing.
Features
• High speed networking for fast download, file transfer, and media streaming
• EZ WPS setup: Press the WPS button on the network adapter and the router to
enable the WPS function.
• Multiple OS support: Windows, Linux, and MAC.
ASUS Network adapter
Chapter 2 - Installation
Installation
System Requirements
Before using your network adapter, your system must meet the following minimum
requirements:
Chapter 2
Installation
• Windows 2000/XP (x86/x64)/Vista (x86/x64)/7 (x86/x64)/Mac 10.3/10.4/10.5/
Linux 2.6
• USB 2.0 for personal computer or notebook computer
• 128MB system memory or larger
• 750MHz processor or higher
IMPORTANT!
• The ASUS wireless utility cannot run on Windows 7 and Linux.
• Install the utilities and driver from the support CD before using your
network adapter.
Installation Procedures
Installing the utilities and driver in Windows® XP/Vista OS
Follow these instructions to install the network adapter utilities and driver. Insert the
support CD into your optical drive. If autorun is enabled in your computer, the CD
automatically displays the utility menu. Click Install ASUS WLAN Card Utilities/
Driver. If autorun is disabled, double-click SETUP.EXE in the root directory of the
CD.
1. Select your language and click
Install ASUS WLAN Card Utilities/
Driver.
2. Click Next on the Welcome screen.
ASUS Network adapter
3. Click Next to use the default destination
folder or click Browse to select another
folder.
4. Click Next.
5. The installation process takes
several seconds.
6. When Setup is completed, click
Finish to exit the installation wizard
and restart the computer.
7. Carefully insert the network adapter
into your computer ’s USB slot.
Windows will automatically detect
and configure the network adapter
using the utilities and drivers
installed in the previous steps.
8. Click OK to disable Windows Zero
Configuration and allow ASUS
WLAN utilities to manage your
wireless network.
ASUS Network adapter
Chapter 2
Installation
Chapter 2 - Installation
Chapter 2 - Installation
Installing the driver in Windows® 7 OS
To install the driver in Windows® 7 OS:
1. Insert the network adapter into your computer's USB port.
2. Place the Support CD into your computer's optical drive.
3. From the Windows® Start menu, right-click Computer then select Properties.
Chapter 2
Installation
4. Click Device Manager at the left side of the screen.
5. The Device Manager window appears. From the Other devices category, rightclick 802.11 n WLAN then select Update Driver Software.
6. Select Browse my computer for driver software.
10
ASUS Network adapter
Chapter 2 - Installation
Chapter 2
Installation
7. Click Browse to locate the Support CD folder, then click Next to start the driver
installation.
You may also click Let me pick from a list of device drivers on my
computer, then select ASUS 802.11 n Network Adapter and click Next to
start the driver installation.
8. Windows has successfully updated your driver software. Click Close and
restart your computer to activate the new settings.
ASUS Network adapter
11
Chapter 2 - Installation
Installing the utilities and driver in MAC OS
To install the utilities and driver in MAC OS:
1. Double click the installation Icon and
then click Continue.
Chapter 2
Installation
2. Select a destination volume to
install the USB Wireless Utility.
When done, click Continue.
3. Click Install to perform a basic
installation of this software package
on the volume.
4. Click Restart to finish installating
the software.
12
ASUS Network adapter
Chapter 2 - Installation
Installing the driver in Linux OS
To install the driver in Linux OS:
• Refer to the README text file in the Linux zipped file included in the support
CD.
Chapter 2
Installation
Note: Obtain the Linux source code from the support CD and build the
driver for the Linux OS that you are using.
The status indicators
The device comes with one LED to indicate the status of the Network adapter, and
one button for WiFi Protected Setup (WPS).
LED
ON: Connected to wireless device.
Blinking:Transmitting data. The blinking speed
indicates the link speed.
OFF: Adapter is disabled.
WPS
button LED
Button
WPS Push Button: Enable WPS mode.
ASUS Network adapter
13
Chapter 2 - Installation
Using the WPS Wizard
WPS Wizard is a utility that allows you to easily set up your wireless network using
any of the following:
•WPS button on both the 802.11n network adapter and the router (or Access
Point) that you want to connect to.
• PIN code of the WPS router or AP that you want to connect to.
Chapter 2
Installation
Launching the WPS Wizard
To launch the WPS Wizard:
1. Do any of the following to launch
the WPS Wizard:
•From the Windows ® taskbar,
right-click the WLAN icon
,
then select WPS Wizard.
•Click Start > ASUS Utility >
WLAN Card > WPS Wizard to
launch the WPS Wizard.
•Press the WPS button on your
network adapter.
2. The WPS Wizard appears. Select
the method that you want to use to
connect to the network.
14
ASUS Network adapter
WPS
button
Chapter 2 - Installation
Connecting via the WPS button
1. Press the WPS button on your network adapter to launch the WPS Wizard.
Chapter 2
Installation
WPS
button
2. From the WPS Wizard, select Use the WPS button. Click Next.
3. Press the WPS button on the 802.11n network router.
ASUS Network adapter
15
Chapter 2 - Installation
3. The 802.11n network adapter searches for the wireless router. When done,
click Next and follow the succeeding onscreen instructions.
Chapter 2
Installation
Note: If WPS configuration failed, move your computer closer to the
router then try again.
Connecting via the PIN code
1. From the WPS Wizard, select Use the PIN code. Click Next.
2. Select the router that you want to connect to. The router's status is displayed
as either Configured (with security settings) or Unconfigured (without security
settings).
16
ASUS Network adapter
Chapter 2 - Installation
Chapter 2
Installation
3. Click Next. The router's PIN code is displayed.
4. If your selected router’s status is Configured, key in the PIN code in the
router's web user interface.
Note: If your selected router's status is Unconfigured, proceed to the
section Using the PIN code on an unconfigured router.
5. Wait until the WPS Wizard finishes applying the wireless settings.
ASUS Network adapter
17
Chapter 2 - Installation
6. WPS Wizard is completed. Click Save or print settings for future reference or
Save settings to a USB flash drive to add other devices to the network. Click
Finish to close the WPS Wizard.
Chapter 2
Installation
Note: For more details on adding devices to the network using a USB
flash drive, refer to the section Adding network devices using a USB
flash drive.
Using the PIN code on an unconfigured router
To use the PIN code on an unconfigured router:
1. Follow steps 1-3 in Connecting via the PIN code.
2. If your selected router's status is Unconfigured, the WPS Wizard screen below
appears. Key in the PIN code in this screen. Click Next.
18
ASUS Network adapter
Chapter 2 - Installation
Chapter 2
Installation
3. Wait until the WPS Wizard finishes applying the wireless settings.
4. Assign a name to your network. When done, click Next.
If the router is used for the first time, the WPS Wizard assigns the SSID
(network name) automatically.
ASUS Network adapter
19
Chapter 2 - Installation
5. Use the auto-generated passphrase as your network’s security key or manually
assign a passphrase containing between 8 and 63 characters. When done,
click Next.
Chapter 2
Installation
20
To configure the advanced security settings, click Show advanced network
security options. Select the Security Method and manually key in your
Security key or passphrase.
ASUS Network adapter
Chapter 2 - Installation
Chapter 2
Installation
6. WPS Wizard is completed. Click Save or print settings for future reference or
Save settings to a USB flash drive to add other devices to the network. Click
Finish to close the WPS Wizard.
Note: For more details on adding devices to the network using a USB
flash drive, refer to the section Adding network devices using a USB
flash drive.
Adding network devices using a USB flash drive
With the WPS Wizard utility, you can add devices to your network using a USB
flash drive.
To add network devices using a USB flash drive:
1. In the WPS Wizard, click Save settings to a USB flash drive.
ASUS Network adapter
21
Chapter 2 - Installation
2. Plug a USB flash drive into your computer's USB port, and then select the drive
from the dropdown list. Click Next to continue.
Chapter 2
Installation
3. Remove the USB flash drive from this computer, and then plug to the computer
that you want to add to the wireless network.
4. Locate the SetupWireless.exe from the USB drive, and double-click to run it.
Click Yes to add the computer to the wireless network.
22
ASUS Network adapter
Chapter 2 - Installation
Chapter 2
Installation
5. Click OK to exit the Wireless Network Setup Wizard.
Configuring with the WLAN utility (Infrastructure)
Use the ASUS WLAN utility to get connected with an existing wireless network.
1. Right-click the wireless connection
icon and select Wireless Settings.
2. Click Config to set the SSID
(network name) to that of your
wireless AP.
3. Use Survey if you do not know the
SSID of your access point.
4. Encryption settings must match
those at the access point. Ask your
network administrator about the
settings if necessary. Click Apply to
activate the settings.
ASUS Network adapter
23
Chapter 2 - Installation
Chapter 2
Installation
5. Click Status to view the association
state. If connection is established,
the box shows “Connected - xx:
xx:xx:xx:xx:xx”.
6. Click the Connection tab to view
the signal strength. Click OK to exit
the utility.
Configuring with the WLAN utility (Ad Hoc)
The network adapter supports Ad Hoc mode that allows communication between
wireless stations without an AP.
1. Right-click the wireless connection
icon and select Wireless Settings.
24
2. Click Config and set the network
adapter to Ad Hoc connection mode.
ASUS Network adapter
3. Click Survey to scan for Ad Hoc
nodes. Select the node you want to
communicate with and click Connect.
4. If the encryption settings of your
network adapter are different from
those of the other Ad Hoc nodes, you
are prompted to make the encryption
of the two nodes identical. Click Apply
to activate the settings.
5. Click Status to view the association
state. If connection is established, the
box shows “Connected - xx:xx:xx:xx:
xx:xx”.
6. Click the Connection tab to view the
signal strength. Click OK to exit the
utility.
ASUS Network adapter
Chapter 2
Installation
Chapter 2 - Installation
25
Chapter 2 - Installation
Note: You cannot configure Infrastructure or Ad-Hoc settings using
the WLAN utility in Windows® Vista OS. Refer to the section Windows
Vista wireless options for details.
Chapter 2
Installation
26
ASUS Network adapter
Chapter 3 - Software Reference
Software Reference
ASUS WLAN Control Center
ASUS WLAN Control Center is an application which makes it easier to launch
WLAN applications and activate network location settings. The WLAN Control
Center starts automatically when the system boots up. When WLAN Control Center
is running, you can see a Control Center icon on the Windows taskbar.
Launching the ASUS WLAN Control Center
To launch the ASUS WLAN Control center, do any of the
following:
Chapter 3
Software Reference
• Select ASUS WLAN Control Center from Windows Start menu.
• Double-click the ASUS WLAN Control Center icon on the Windows desktop.
Using the Control Center
The Control Center taskbar icon displays the following information:
•�����������������������������������������������������������������������������
Link quality of the Network adapter (Excellent, Good, Fair, Poor, Not Linked)
•�����������������
Whether the Network adapter is connected to a network (Blue: Connected,
Gray: Not Connected)
Taskbar Icon and Status
Wireless Status Icons (on the taskbar)
Excellent link quality and connected to Internet (Infrastructure)
Good link quality and connected to Internet (Infrastructure)
Fair link quality and connected to Internet (Infrastructure)
Poor link quality and connected to Internet (Infrastructure)
Not linked but connected to Internet (Infrastructure)
Excellent link quality but not connected to Internet (Infrastructure)
Good link quality but not connected to Internet (Infrastructure)
Fair link quality but not connected to Internet (Infrastructure)
Poor link quality but not connected to Internet (Infrastructure)
Not linked and not connected to Internet (Infrastructure)
ASUS Network adapter
27
Chapter 3 - Software Reference
Taskbar icon - Right-click menu
Right-click the taskbar icon to show the following menu items:
• Wireless Settings: Click to launch Wireless
Settings application.
• Activate Configuration: Click to choose a
preset profile.
• Mobile Manager: Click to launch Mobile
Manager application.
Chapter 3
Software Reference
• WPS Wizard: Click to launch Wireless
Protected Setup Wizard.
• Site Monitor: Click to launch Site Monitor
application.
• Preferences: Click to customize the Control
Center program. You can create a Control
Center shortcut on the desktop and decide
whether to start Control Center when the system boots up.
• About Control Center: Shows the version of Control Center.
• Help: Click to launch the help file.
• Exit Control Center: Click to close the Control Center program.
Taskbar icon - Left-click menu
Left-click the taskbar icon to show the following
menu items:
• Wireless Radio On: Click to turn the wireless
radio ON.
• Wireless Radio Off: Click to turn the wireless
radio OFF.
Taskbar Left-Click Menu
• Search & Connect: Click to view the
properties of available access points.
•� Wireless Option (Windows® XP only): Click to choose Windows® Wireless Zero
Configuration (WZC) service or ASUS utilities to configure your Network adapter.
Taskbar Icon - Launch Wireless Settings
Double-click the taskbar icon�����������������������������������������
to launch the Wireless Settings utility.
28
ASUS Network adapter
Chapter 3 - Software Reference
ASUS Wireless Settings Utility
Wireless Settings is an application for managing the network adapter. Use Wireless
Settings to view or modify the configuration settings, or to monitor the operational
status of your network adapter. When Wireless Settings is launched, you can see the
tabbed property sheets which categorize the configuration options into groups.
Launching Wireless Settings
To launch Wireless Settings, do any of the following:
• Click Start > All Programs > ASUS Utility > WLAN card > Wireless Settings.
• From the Windows taskbar, right-click the Control Center icon and select
Wireless Settings.
Chapter 3
Software Reference
NOTE: If you have more than one ASUS WLAN device installed on your
computer, you may see a device selection window when you launch the
“Wireless Settings” utility. Select the device you want when such
situation occurs.
Status - Status
You can view the information about the Network adapter from the Status menu.
The status fields are blank if the network adapter is not installed. Click Disable
Radio to turn off the network adapter.
Association State: Displays the connection status as follows:
Connected: The adapter is now associated with one wireless LAN device.
When operating in Infrastructure mode, this field shows the MAC address of the
access point that the network adapter is communicating with. When operating
in Ad Hoc mode, this field shows the virtual MAC address used by computers
participating in the Ad Hoc network.
Scanning... : The station is trying to authenticate and associate with an access
point or Ad Hoc node.
Disconnected: The Network adapter is installed to the system, but not yet
connected to a wireless device.
SSID: Displays the Service Set Identifier (SSID) of the device that the adapter is
either associated or intending to join.
MAC address: Shows the hardware address of the Network adapter. MAC address
is a unique identifier for networking devices (typically written as twelve hexadecimal
digits from 0 through 9 and A through F separated by colons, i.e. 00:E0:18:F0:05:
C0).
ASUS Network adapter
29
Chapter 3 - Software Reference
Current Channel: Displays the radio channel to which the adapter is currently
tuned. This number changes as the radio scans the available channels.
Current Data Rate: Displays the current data rate in megabits per second (Mbps).
NOTE: For 802.11n performance, select 40MHz bandwidth in wireless
router. Channel option depends on the bandwidth that you select.
Chapter 3
Software Reference
Radio State: Shows the wireless radio status: ON or OFF.
Radio On: When the wireless radio is turned ON, the icon on the right
appears in the upper left of the Status page.
Radio Off: When the wireless radio is turned OFF, the icon on the right
appears in the upper left of the Status page.
Disable Radio: Click this to disable the wireless
function.
Buttons
Rescan: Make the network adapter rescan all available devices. If the current
link quality or signal strength is poor, rescanning can be used to push the radio off
a weak access point and search for a better link with another access point. This
function usually takes several seconds.
Change SSID: Click this button to set the SSID to that of the AP you want to
connect to.
Search & Connect: Click this button to connect to an available wireless AP.
Activate Configuration
Auto roaming is enabled by default and makes the
adapter automatically switch to APs with better
signal. You can uncheck it if you want to connect
to a specified AP using a particular profile.
30
ASUS Network adapter
Chapter 3 - Software Reference
Status - Connection
You can view the current link statistics about the network
adapter. These statistics are updated once per second
and are valid if the Network adapter is correctly installed.
Throughput
Transmitted: The number of frames that are
transmitted.
Received: The number of frames that are received.
Frame Error
Chapter 3
Software Reference
Transmitted: The number of frames that are not successfully transmitted.
Received: The number of frames that are not successfully received.
Connection Quality
Signal Strength/Link Quality: Shows the signal strength/link quality of the access
point or Ad Hoc node the Network adapter is currently connected to. Ratings are:
Excellent, Good, Fair, and Poor.
Overall Connection Quality
The overall connection quality is derived from the current signal strength. A graphic
chart uses percentage to show signal quality.
ASUS Network adapter
31
Chapter 3 - Software Reference
Status - IP Config
IP Config tab shows all the current host and
Network adapter information including host name,
DNS servers, IP address, Subnet Mask and
Default Gateway.
Button
IP Release: If you want to remove the current
IP address, click this button to release the IP
address from DHCP server.
IP Renew: If you want to obtain a new IP address from DHCP server, click this
button to renew the IP address.
Ping: Click this button to open “Ping” tab which is used to ping the devices in your
network.
Chapter 3
Software Reference
NOTE: The IP Release and IP Renew buttons can only be used on the
network adapter that gets its IP address from the DHCP server.
Status - Ping
Click the "Ping" button in Status-IP Config tab to
open this page. The Ping tab allows you to verify
the accessibility of other computers or network
devices.
To ping a connection:
1. Key in the IP address of the device you want
to verify in the IP Address field.
2. Configure the ping session by assigning
the ping packet size and number of packet to send, and the timeout value (in
milliseconds).
3. Click the “Ping” button.
During the ping session, the Ping button Changes into a Stop button. To cancel the
ping session, click the “Stop” button.
The session field displays information on the verified connection including the
roundtrip time (minimum, maximum, and average) and packets sent, received, and
lost after a ping session.
Click the “Clear” button to clear the session field.
32
ASUS Network adapter
Chapter 3 - Software Reference
Config - Basic
This page enables you to change the Network
adapter configurations.
Network Type
Infrastructure – Infrastructure means to establish
a connection with an access point. Once
connected, the access point allows you to access
wireless LAN and wired LAN (Ethernet). The
Channel field turns to Auto if the connection is
based on Infrastructure.
Ad Hoc – Ad Hoc means to communicate directly with other wireless clients without
using an access point. An “Ad Hoc” network can be setup quickly and easily without preplanning, for example, sharing meeting notes between attendants in a meeting room.
Chapter 3
Software Reference
Network Name (SSID)
SSID stands for “Service Set Identifier”, which is a string used to identify a wireless
LAN. Use the SSID to connect with a known access point. You can enter a new SSID or
select one from the drop-down list box. If you get connected by designating the SSID,
you are only to connect the AP with the SSID you assigned. If the AP is removed
from the network, your Network adapter does not roam automatically to other APs.
SSIDs must all be printable characters and having a maximum of 32 case sensitive
characters, such as “ Wireless”.
Clear history of SSID settings
Channel
The Channel field is for setting radio channel. Your Network adapter can automatically
select the correct channel to communicate with a wireless device, and the parameter is
fixed to "Auto" in both Infrastructure and Ad Hoc mode.
The available radio channels depend on the regulations in your country. For the United
States (FCC) and Canada (IC), channel 1 to 11 are supported. For Europe (ETSI),
channel 1 to 13 are supported. For Japan (MKK), channel 1 to 14 are supported.
NOTE: Click Apply to save and activate the new configurations.
ASUS Network adapter
33
Chapter 3 - Software Reference
PS Mode
Constantly Awake Mode (CAM), also known as Disable Power Saving Mode, is a
full powered state that yields the best performance. We recommend this mode for
devices running on AC power.
Max PSP (Maximum power-saving mode), which is also known as Enable Power
Saving mode, periodically wakes up the system to check if there is any data being
sent. We recommend this mode for devices running on battery power.
Others
Encryption: Click this link to show the "Encryption" tab.
Advanced: Click this link to show the "Advanced" tab. In most cases, the default
values do not have to be changed.
Chapter 3
Software Reference
Config - Encryption
This page enables you to configure the Wireless LAN Adapter encryption settings.
For data confidentiality in a wireless environment, IEEE 802.11 specifies a Wired
Equivalent Privacy (WEP) algorithm to offer transmission privacy. The WEP uses
keys to encrypt and decrypt data packets. The encryption process can scramble
frame bits to avoid disclosure to others. The WPA-Personal/WPA2-Personal
is improved security system for 802.11 which are developed to overcome the
weakness of the WEP protocol.
Network Authentication
Since there is no precise bound in wireless LANs, the
WLAN users need to implement certain mechanism to
provide security solution. The Authentication policies
in this tab provide protection of different levels such as
Open, Shared, WPA-Personal, WPA2-Personal, WPAEnterprise, and WPA2-Enterprise.
Open - Select this option to make the network operate
on Open System mode, which use no authentication
algorithm. Open stations and APs can authenticate
with each other without checking any WEP Key, even
if there is.
Shared - Select this option to make the network operate on Shared key mode. In
a Share Key Authentication system, four-step exchange of frames is required to
validate that the station is using the same WEP Key as the access point.
34
ASUS Network adapter
Chapter 3 - Software Reference
WPA-Personal/ WPA2-Personal - Select this option to enable WPA Pre-Shared
Key under Infrastructure mode. It enables communication between your client and
APs using WPA-Personal/WPA2-Personal encryption mode.
WPA-Enterprise/ WPA2-Enterprise - The network is operating in IEEE 802.1x
authentication mode. This mode is for environments with RADIUS (Remote Access
Dial-in User Service). In a RADIUS environment, three Extensible Authentication
Protocol (EAP) are supported, including PEAP, EPA/TLS, and LEAP.
Data encryption
For Open and Shared authentication mode, the configuration options of
encryption type are Disabled and WEP. For WPA-Personal and WPA-2 Personal
authentication modes, Temporal Key Integrity Protocol (TKIP) encryption and
Advanced Encryption Standard (AES) encryption are supported.
Chapter 3
Software Reference
Disabled - Disable the encryption function.
WEP - WEP Key is used to encrypt your data before it is transmitted over air. You
can only connect and communicate with wireless devices that use the same WEP
keys.
TKIP - TKIP uses an encryption algorithm method that is more stringent than
the WEP algorithm. It also uses existing WLAN calculation facilities to perform
encryption. TKIP verifies the security configuration after the encryption keys are
determined.
AES: AES is a symmetric 128-bit block encryption technique that works simultaneously on
multiple network layers.
Wireless network key
This option is enabled only if you select �������������������������������
WPA-Personal or WPA2-Personal �
authentication mode. Select “TKIP” or “AES” in the encryption filed as encryption
mode to begin the encryption proceed. Note: 8 to 64 characters are required in this
field.
Wireless Network Key (WEP)
This option is configurable only if you enable WEP in Network Authentication field.
The WEP Key is a 64 bits (5 byte) or 128 bits (13 byte) Hexadecimal digits which is
used to encrypt and decrypt data packets.
Key Format
You can select to enter Hexadecimal digits (0~9, a~f, and A~F) or ASCII characters
to setup keys by defining the Key Format.
ASUS Network adapter
35
Chapter 3 - Software Reference
Key Length
For 64 bits encryption, each key contains 10 hex digits or 5 ASCII characters. For
128 bits encryption, each key contains 26 hex digits or 13 ASCII characters.
Manual assign WEP keys - When you select this option, the cursor appears
in the field for Key 1. For 64-bit encryption, you are required to enter four WEP
Keys. Each Key contains exactly 10 hex digits (0~9, a~f, and A~F). For 128-bit
encryption, you are required to enter four WEP Keys. Each Key contains exactly 26
hex digits (0~9, a~f, and A~F).
Select one as your Default Key
Chapter 3
Software Reference
The Default Key field allows you specify which of the four encryption keys is to
use for transmitting data over wireless LAN. You can change the default key by
clicking on the downward arrow, selecting the number of the key you want to use,
and clicking the “Apply” button. If the access point or station with which you are
communicating uses the identical key by the same sequence, you can use any of
the keys as the default on your Network adapter.
Click the “Apply” button after you have created the encryption keys, the Wireless
Settings Utility uses asterisks to mask your keys.
64/128bits versus 40/104bits
There are two levels of WEP Encryption: 64 bits and 128 bits.
Firstly, 64 bit WEP and 40 bit WEP are the same encryption method and can
interoperate in the wireless network. This lower level of WEP encryption uses a 40
bit (10 Hex character) as a “secret key” (set by user), and a 24 bit
“Initialization Vector” (not under user control). This together makes 64 bits (40 +
24). Some vendors refer to this level of WEP as 40 bits and others refer to this
as 64 bits. Our Wireless LAN products use the term 64 bits when referring to this
lower level of encryption.
Secondly, 104 bit WEP and 128 bit WEP are the same encryption method and can
interoperate in the wireless network. This higher level of WEP encryption uses a
104 bit (26 Hex character) as a “secret key” (set by user), and a 24 bit
“Initialization Vector” (not under user control). This together makes 128 bits (104 +
24). Some vendors refer to this level of WEP as 104 bits and others refer to this as
128 bits. Our Wireless LAN products use the term 128 bits when referring to this
higher level of encryption.
36
ASUS Network adapter
Chapter 3 - Software Reference
Config - Authentication
This tab allows you to set the security settings to match those of your AP. It is
configurable only if you have set Network Authentication to WPA or WPA2 in
Config-Encryption tab.
Authentication Type
ASUS Network adapter
Chapter 3
Software Reference
The authentication type methods include:
PEAP: PEAP (Protected Extensible Authentication
Protocol) authentication is a version of Extensible
Authentication Protocol (EAP). EAP ensures
mutual authentication between a wireless
client and a server that resides at the network
operations center.
TLS/Smart Card: TLS (Transport Layer Security)
authentication is used to create an encrypted
tunnel and achieve server-side authentication in a manner similar to Web server
authentication using Secure Sockets Layer (SSL) protocol. This method uses
digital certificates to verify the identity of a client and server.
TTLS: TTLS authentication uses certificates to authenticate the server, while
maintaining similar security properties to TLS such as mutual authentication and a
shared confidentiality for session WEP key.
LEAP: LEAP (Light Extensible Authentication Protocol) authentication is a version
of Extensible Authentication Protocol (EAP). EAP ensures mutual authentication
between a wireless client and a server that resides at the network operations
center.
Md5-challenge: Md5-challenge is a one-way encryption algorithm that uses
usernames and passwords. This method does not support key management, but
require a preset key.
37
Chapter 3 - Software Reference
Config - Advanced
Click Advanced link on Config-Basic page to
show this tab. This tab allows you to set up
additional parameters for the wireless Adapter.
We recommend using the default values for all
items in this window.
RTS Threshold (0-2347)
The RTS/CTS (Request to Send/Clear to Send)
function is used to minimize collisions among wireless stations. When RTS/CTS
is enabled, the router refrains from sending a data frame until another RTS/CTS
handshake is completed. Enable RTS/CTS by setting a specific packet size
threshold. The default value (2347) is recommended.
Chapter 3
Software Reference
Fragmentation Threshold (256-2346)
Fragmentation is used to divide 802.11 frames into smaller pieces (fragments) that
are sent separately to the destination. Enable fragmentation by setting a specific
packet size threshold. If there is an excessive number of collisions on the WLAN,
experiment with different fragmentation values to increase the reliability of frame
transmissions. The default value (2346) is recommended for normal use.
Multimedia / Gaming Environment
Multimedia / Gaming Environment can ignore the scanning command coming
from Windows every 60 seconds. Enable this setting, the scanning command
will not disturb the normal operation of packets transferring for better game play
performance.
Frame Bursting
Frame Bursting technology improves wireless network efficiency and boosts
throughput.
PSP Xlink Mode
Disable or enable an infrastructure tunneling program which allows you to play adhoc PSP multiplayer games on the Internet (like virtual infrastructure mode).
38
ASUS Network adapter
Chapter 3 - Software Reference
Soft AP (Windows XP/Vista)
1. Select Soft AP Mode.
Chapter 3
Software Reference
Soft AP mode allows the Wireless LAN card to act as a virtual access point. The
computer needs to be connected to a wired network using an Ethernet connection
in order to provide network access to Wireless LAN clients.
2. Drag and drop a wired network
connection next to the globe icon.
3. Right-click the taskbar icon and
select A-S Change Mode to easily
switch between Soft AP and Station
modes.
ASUS Network adapter
39
Chapter 3 - Software Reference
Soft AP (Windows XP/Vista) Cont.
Soft AP mode allows you to configure Access Control settings.
Access Control
The AP provides facilities to limit the wireless clients that associate with it and the
data packets that can forward through it. Filters provide network security or improve
performance by eliminating broadcast/multicast packets from the radio network.
The Access Control List (ACL) contains MAC addresses for wireless clients allowed
to associate with the AP. This provides security by preventing unauthorized access.
The AP also uses a disallowed address list of destinations. This feature prevents
the AP from communicating with specified destinations. This can include network
devices that do not require communication with the AP or its wireless clients.
Chapter 3
Software Reference
40
Status Page
Encryption Page
Clicking Apply after configuring Soft
AP will show the “Access Control” tab.
Enter a MAC Address on the Access
Control page and select “Accept” or
“Reject” or “Disable” from the pull-down
menu.
ASUS Network adapter
Chapter 3 - Software Reference
Soft AP (Windows XP/Vista) Cont.
The Event Log tracks messages
associated with the Soft AP.
Chapter 3
Software Reference
Soft AP Mode will also provide two extra
tabs on the Status pages - Association
Table and Event Log. The Association
Table shows clients that are currently
connected to the Soft AP.
IMPORTANT: If the end points of a chain are connected to each other
a loop is created. Normally it is advised to avoid loops involving bridges
as it can lead to performance breakdowns, and broadcast and multicast
storms.
Survey - Site Survey
Use the Site Survey tab to view statistics
on the wireless networks available to the
Network adapter and their parameters.
• SSID: The SSID of the available
networks.
• Channel: The channel used by each
network.
ASUS Network adapter
41
Chapter 3 - Software Reference
• RSSI: The Received Signal Strength Indication (RSSI) transmitted by each network.
This information is helpful in determining which network to connect to. The value is
then normalized to a dBm value.
• Security: Wireless network encryption information. All devices in the network should
use the same encryption method to ensure the communication.
• BSSID: The media access control (MAC) address of the access point or the Basic
Service Set ID of the Ad Hoc node.
NOTE: Some access points may disable SSID broadcast and hide
themselves from “Site Survey” or “Site Monitor”, however, you can
connect such AP if you know their SSID.
Chapter 3
Software Reference
Buttons
Search – To scan all available wireless networks and show the scan result in the
“Available Network” list.
C o n n e c t – To associate with a network, select the network from the
“Available Network” list and click this button.
About - Version Info
Use the Version Info tab to view program and Network adapter version information.
The program version information field includes the Copyright and utility version.
The version information includes the NDIS version, driver name, driver version and
hardware version.
NOTE: The screen shown above is for reference only.
42
ASUS Network adapter
Chapter 3 - Software Reference
Link State
Network adapter “Link State” icon appears on the left side of the
Network adapter Settings. Use the icon to view the current signal
status.
Excellent link quality (Infrastructure)
Good link quality (Infrastructure)
Fair link quality (Infrastructure)
Poor link quality (Infrastructure)
Not linked (Infrastructure)
Chapter 3
Software Reference
Linked (Ad-Hoc)
Not linked (Ad-Hoc)
Scanning
Save Configuration
Click Save Configuration to save the changes you made to your wireless settings.
You may choose to save the changes in the wireless settings to the current profile
or to a new profile.
IMPORTANT!
Click Apply to apply the new
settings, then click Save
Configuration to save the
new settings to the current
profile or to a new profile.
Apply - Click to apply the changes made on the Wireless Settings utility.
OK - Click to close the Wireless Setting utility window.
Cancel - Click to cancel any changes made on the Wireless Settings utility. Click
to close the Wireless Settings utility window.
Help - Click to display the help menu.
ASUS Network adapter
43
Chapter 3 - Software Reference
Exit Wireless Settings
To exit Wireless Settings, you can click OK or Cancel.
ASUS Mobile Manager
Chapter 3
Software Reference
The Mobile Manager is a convenient tool to set up and manage network location
settings. In different places, you have to reconfigure settings for conforming to the
connectivity needs of the place.
Mobile Manager lets users configure multiple alternative configurations for different
locations. You just need to set once, and then easily activate a configuration with
a push of a button when you change location. Mobile Manager would determine
whether or not the new settings would require rebooting Windows for the changes
to take effect.
To launch the Mobile Manager utility:
1. Click Start > All Programs > ASUS Utility > WLAN Card > Mobile Manager,
or right-click the Control Center icon on the Windows® taskbar, then select
Mobile Manager.
2. The Mobile Manager main window appears.
File menu
: Select this option to launch the New Configuration
New Configuration
Wizard. See the next section for details.
: Select this option to load a configuration from an INI
Import Configuration
File.
: Save the selected configuration (containing Wireless
Export Configuration
Settings, TCP/IP Settings, Network Settings, etc.) to an INI file. The INI file may be
saved on a floppy disk, and may be imported by other computers with the Mobile
Manager utility. You may also use this file as backup.
: Select to close the Mobile Manager utility.
Exit
44
ASUS Network adapter
Chapter 3 - Software Reference
Activate menu
: Activating this option allows the ASUS network adapter to
Auto Roaming
switch to another association you have specified when changes to an existing
association occurred. If no associations are made, Auto Roaming automatically
connects to a wireless network based on your specified configurations.
: Applies the configuration you selected from the list.
Activate Configuration
Follow the screens instructions to activate a configuration.
NOTE: You need to restart the system to activate the configuration
settings under Windows® 98/ME operating system. You do not need to
restart the system to activate the configuration settings in Windows®
2000/XP operating system.
Chapter 3
Software Reference
Edit menu
Edit Configuration
: The Edit Configuration option allows you to edit selected
configuration items. See the “Editing a Configuration” section on page 3-19 for
details.
Rename
: Changes the name of the selected configuration.
Duplicate
: Duplicates the selected configuration.
Delete
: Discards the selected configuration.
Up : Raises the position of a selected wireless network configuration in the
preferred network list.
Down
: Lowers the position of the selected wireless network configuration in
the preferred network list.
Note: Edit menu commands appear when you right-click a
configuration in the Mobile Manager window.
View menu
Large Icons
: Displays large icons for each configuration.
Small Icons
: Displays small icons for each configuration.
List
: Shows a list of available configurations.
Details
: Displays the name, type, and description of a selected configuration.
Help menu
Help contents
: Displays the Mobile Manager help window.
About Mobile Manager
: Displays the Mobile Manager version number and
copyright information. Click the ASUS logo to launch the ASUS website.
ASUS Network adapter
45
Chapter 3 - Software Reference
Creating a new configuration
To create a new configuration:
Chapter 3
Software Reference
1. To launch the New Configuration Wizard, click File > New Configuration or
double‑click the New Configuration
icon on the Mobile Manager toolbar.
The New Configuration Wizard dialog box appears.
2. Select any of the configuration types below. Click Next when done.
• ASUS Wireless Local Area Network Configuration. Select this option if you
have an installed ASUS USB Wireless LAN Adapter in your computer.
• W i r e d L o c a l A r e a N e t w o r k
Configuration. Select this if your
computer has an installed network
interface card other than ASUS USB
Wireless LAN Adapter.
• Dialup Networking Configuration.
Select this option if your computer
has an installed modem.
3. Key in the name and description
of the configuration you wish to
create, then click Next.
46
ASUS Network adapter
Chapter 3 - Software Reference
4. Configure the wireless settings
including the network type, SSID,
channel and WEP encryption. Click
Next when done.
Chapter 3
Software Reference
5. S e t t h e I P a d d r e s s o f t h e
configuration type. Specify the
IP address using the DHCP
server (automatic) or assign it
manually. The wizard auto-detects
and displays the current system
settings. Click Next when done.
6. Key in the computer name, then
click Next.
ASUS Network adapter
47
Chapter 3 - Software Reference
7. Set up the proxy server and printer
sharing settings.
Click Advanced to display the
proxy server and printer sharing
options.
Click Next when finished.
Chapter 3
Software Reference
8. Tick the Activate Configuration
Now option to activate the new
configuration settings. The Mobile
Manager window displays the
created configuration when it is not
activated. Click Finish to close the
wizard.
Editing a configuration
To edit a configuration:
1. Select a configuration from the
Mobile Manager window.
2. Click Edit from the menu bar, then
select Edit Configuration. The
Edit Configuration dialog box
appears. Click the buttons on the
left to navigate the window.
48
ASUS Network adapter
Chapter 3 - Software Reference
General settings
Name: The configuration name indicates the location from where you are dialing
or connecting to a network. For example, name your configuration “Work-Meeting
Room” if you are using this connection at your workplace meeting room.
Description: Key in additional details of the configuration in this field. This field is
optional.
Network settings -Wireless tab
Priority of Preferred Network: This field allows you to select the priority of the
preferred network.
Network Type
Chapter 3
Software Reference
Infrastructure: Select the Infrastructure
mode to establish connection to an
access point.
Ad-hoc: Select the Ad-hoc mode
to communicate directly with other
Wireless LAN devices without using an
access point.
SSID: SSID stands for Service Set
Identifier, a string used to identify a
wireless LAN. You can only connect
with an Access Point that has the same
SSID. Use different SSIDs to segment the wireless LAN and add security.
Channel: The Channel field allows you to select the radio channel for the network
adapter. In an Infrastructure network, your network adapter automatically selects
the correct frequency channel required to communicate with an Access Point.
WEP: This option allows you to disable or enable (64-bit or 128-bit) WEP
encryption. The WEP Key is a 64-bit (5 byte) or 128-bit (13 byte) hexadecimal digit
use to encrypt transmitted data packets and decrypt received data packets.
Network settings -Identification tab
Computer name: Assign a unique name of up to 15 characters for your computer.
The computer name allows other users in a network to recognize your computer.
The computer name is generally the same with the DNS hostname.
NOTE: Avoid using spaces or symbols in your computer name.
ASUS Network adapter
49
Chapter 3 - Software Reference
TCP/IP settings-Device tab
Select the network adapter you want to use for this configuration.
NOTE: This item appears
only when you are editing a
wired LAN configuration.
Chapter 3
Software Reference
TCP/IP settings-IP Address tab
Obtain an IP address from a DHCP server: The Dynamic Host Configuration
Protocol (DHCP) server assigns IP addresses automatically within a specified
range of devices.
Specify an IP address: Ask your network administrator for the IP address and
subnet mask you should use. Key in the IP Address and Subnet Mask manually.
TCP/IP settings-Gateway tab
Specify the gateways. You may specify more than one gateway. Set up the primary
gateway first.
Add: Click this button to add a new TCP/IP gateway address. The added gateway
appears in the Default gateways list. Repeat the process to add another gateway.
The value in each gateway field must be between 0 and 255. You can have up to
eight IP addresses for gateways.
Edit: Click this button to edit a selected gateway address.
Remove: Click this button to delete a selected gateway address.
TCP/IP settings-DNS tab
The DNS tab allows you to configure the DNS settings of the selected
configuration. This tab also allows you to add a DNS server and arrange them in
order of their use. You may also assign a DNS suffix for a specified DNS server.
50
ASUS Network adapter
Chapter 3 - Software Reference
TCP/IP settings-WINS tab
The WINS tab allows you to configure the WINS settings of the selected
configuration. This tab allows you to add WINS addresses and arrange them in
order of their use. This tab also allows you to enable or import LMHOST lookup
and adjust the NetBIOS settings.
Internet settings
Chapter 3
Software Reference
A proxy server acts as a security barrier
between your internal network (Intranet)
and the Internet. A proxy server
restricts other people on the Internet
from gaining access to confidential
information on your internal network or
your computer.
Disable Proxy Server: Allows you to
disable the proxy server.
Enable Proxy Server: Use the Proxy
server to access the Internet.
Use the same proxy server for all
protocols: Specifies whether you want
to use the same proxy server to gain access to the Internet using all protocols.
Servers field: Provides fields for you to type the address and port number of the
proxy server you want to use to gain access to the Internet over HTTP, Secure,
FTP, Gopher, and Socks protocol.
Exceptions field
Do not use proxy server for address beginning with: Key in the Web addresses
that do not need to be accessed through the proxy server. If you want to connect
to a computer on your Intranet, make sure you type its address in this box. You
may use wild cards to match domain and host names or addresses, for example,
“*.company.com”, “192.72.111.*”.
Bypass proxy server for local addresses: This option allows you to use the
proxy server for all local (Intranet) addresses.
NOTE: You may gain access to local addresses easier and faster if you
do not use the proxy server.
ASUS Network adapter
51
Chapter 3 - Software Reference
Sharing settings
I want to set the default printer:
Allows you to select the default printer
for printer sharing.
Default printer: Allows you to select
the default printer from a list of installed
printers.
Click New to add a new printer using
the Windows® Add Printer Wizard.
Click Properties to display the
properties of a selected printer.
Command buttons
Chapter 3
Software Reference
Use these buttons to activate, save, or cancel changes made in the configuration.
Click Close to close the Edit Configuration window. Click Help to view the help
files.
Site Monitor
The Site Monitor utility measures the signal-to-noise (SNR) values of all available
wireless networks. Use this utility to determine the best placement of access points
in a wireless network.
Launching Site Monitor
To launch the Site Monitor:
• Click the Windows ® Start button,
then select Programs > ASUS
Utility > WLAN Card > Site
Monitor.
• Right-click the Control Center icon
on the Windows taskbar, then select
Site Monitor.
The Site Monitor survey message
appears. Click OK.
52
ASUS Network adapter
Chapter 3 - Software Reference
Site Monitor main window
Chapter 3
Software Reference
The Site Monitor main window displays the available wireless connections and the
signal-to-noise (SNR) value of a selected connection.
NOTE: Some Access Points disable their SSID broadcasting to hide
themselves from “Site Survey” or “Site Monitor”. You may join these APs
if you know their SSID.
ASUS Network adapter
53
Chapter 3 - Software Reference
Monitoring a connection
To monitor a connection:
1. Select the connection from the list.
2. Click Command from the menu bar, then select monitor. You may also press
<Ctrl> + <M> in your keyboard. The Monitor window appears.
Chapter 3
Software Reference
The following connection parameters are displayed in graphical representation.
SNR. This indicates the quality of communications within the current network. The
communication quality is based on signal level and noise level measurements. The
higher the SNR, the better the connection quality.
Communication Quality. This indicates the communication quality of the Basic
Service Set that the station is connected to.
Signal Level. This line specifies the average signal level of the Basic Service Set
that the station is connected to.
Noise Level. Specifies the average noise level of the Frequency Channel currently
used for connection.
Throughput. The Throughput graph sends a specified number of data packets to
the remote host and calculates the average transmission rate in megabytes per
second.
During the test, you can toggle between the Start and Stop buttons. Click Start to
begin the link test. Click Stop at any time to stop the test.
54
ASUS Network adapter
Chapter 3 - Software Reference
A-S (AP mode <--> Station mode)
Select the mode you want to use. When done, click
OK.
Chapter 3
Software Reference
If you change to a different mode, the current connection status will be
lost.
ASUS Network adapter
55
Chapter 3 - Software Reference
Windows® XP wireless options
The wireless options window shown below is only available for Windows® XP. It
appears when you run the Control Center utility for the first time. Select the utility
you want to use for configuring your Network adapter.
Only use Windows wireless function – Only
use Windows® XP Wireless Zero Configuration
service to configure the Network adapter.
Only use our WLAN utilities and disable
Windows wireless function
– Only use ASUS WLAN utilities to configure the
Network adapter.
Chapter 3
Software Reference
Configuring with Windows ® Wireless Zero Configuration
service
If you want to configure your Network adapter via Windows® Wireless Zero
Configuration (WZC) service, follow the instruction below to make the settings.
1. Double-click the wireless network
icon on the Windows taskbar to
view available networks.Select the
AP and click Connect.
56
2. If you have set up encryption on
your wireless router, key in the
encryption keys and click Connect.
The connection is complete.
ASUS Network adapter
Chapter 3 - Software Reference
1. The General page shows status,
duration, speed, and signal strength.
The green bars represent signal
strength, with five bars indicating
excellent signal and one bar
indicating poor signal.
Chapter 3
Software Reference
To set up the wireless connection properties, right-click the wireless icon on the
taskbar and select Open Network Connection. Then right-click the network
connection icon and select Property to open the Wireless Network Connection
Status page.
2. Select “Wireless Networks” tab to
show Preferred networks. Use
the Add button to add the “SSID”
of available networks and set the
connection preference order with
the Move up and Move down
buttons. The radio tower with a
signal icon identifies the currently
connected access point. Click
Properties to set the authentication
of the wireless connection.
ASUS Network adapter
57
Chapter 3 - Software Reference
Windows® Vista wireless options
If you want to configure your Network adapter via Windows® Wireless Client
service, follow the instruction below to make the settings.
Chapter 3
Software Reference
1. Right-click the network icon on the
Windows taskbar. Select Connect
to a network to view the available
networks. Select the AP and click
Connect.
2. If you have set up encryption on
your wireless router, key in the
encryption keys and click Connect.
The connection is complete.
To set up the wireless connection properties:
1. Right-click the network icon on the Windows taskbar and select Network and
sharing Center.
2. Select Manage network connections.
3. Double-click the wireless network connection icon to open the Wireless
Network Connection Status page.
4. Click Properties to open the Property page from the Wireless Network
Connection Status page.
�����������������������
The General page shows
status,SSID, duration, speed, and
signal strength. The green bars
represent signal strength, with five
bars indicating excellent signal and
one bar indicating poor signal.
58
ASUS Network adapter
Chapter 3 - Software Reference
Click Properties from the Property
page to set the authentication of the
wireless connection.
Chapter 3
Software Reference
ASUS Network adapter
59
Chapter 3 - Software Reference
Windows® 7 wireless options
Windows® 7 allows you to connect to a wireless network using the WPS function.
1. Right-click the network icon in the
notification area, then select Open
Network and Sharing Center.
Click Connect to a network, select
the AP and click Connect.
2. Key in the security key, then click
OK. You may also press the WPS
button on the access point and the
network adapter to establish the
WiFi connection.
Chapter 3
Software Reference
60
The picture below indicates that you
have successfully connected to the
wireless network.
ASUS Network adapter
Chapter 4 - Application
Application
Setting up the XLink Mode under Windows® XP
To set up the XLink Mode under Windows® XP:
1. Click ASUS WLAN Control Center > Config > Advanced to enable the PSP
Xlink Mode.
Chapter 4
Application
2. Turn on your PSP to set up the configuration.
3. Select Network Settings.
ASUS Network adapter
61
Chapter 4 - Application
4. Select AD Hoc Mode.
5. Select the PSP channel that you want to connect to.
6. When done, select O to save the settings.
Chapter 4
Application
62
ASUS Network adapter
Chapter 4 - Application
7. Select the game you want to play that is available for system-link then start
the game connection. The PSP can provide you the SSID named PSP_**** to
connect.
Click ASUS WLAN Control Center > Survey to search the available
connection.
Select PSP_**** to connect.
Chapter 4
Application
8. When done, click Connect.
ASUS Network adapter
63
Chapter 4 - Application
Setting up the XLink Mode under MAC OS
To set up the XLink Mode under MAC OS:
1. Select USB Wireless Utility > Advanced to enable PSP Xlink.
2. Click USB Wireless Utility > Site Survey to search the available connection.
3. Select PSP_**** to connect.
4. When done, click CONNECT.
Chapter 4
Application
64
ASUS Network adapter
Chapter 5 - Troubleshooting
Troubleshooting
The following troubleshooting guides provide answers to some of the more
common problems, which you may encounter while installing or using Network
adapter products. If you encounter difficulties that are not mentioned in this section,
please contact the Wireless LAN Technical Support.
Verify if the Network adapter is installed correctly.
When the Network adapter setup is complete, you can verify if the driver has been
setup properly. Right click My Computer, select Properties, and click the Device
Manager tab. Then double-click the Network adapters icon; you should see
“802.11g Network Adapter” with an icon of an expansion adapter. There should
not be a “!” or “?” (problem) or “x” (disabled) symbol over this icon.
There is a yellow exclamation mark or a yellow question mark in
Device Manager in front of my Network adapter.
To resolve the problem, you should update/reinstall the Network adapter driver. In
“Device Manager”, right click 802.11g Network Adapter, select Properties, and
select Driver tab. Click on Update Driver button, then follow the “Update Device
Driver Wizard” to complete the driver installation.
Chapter 5
Troubleshooting
Cannot connect to any access points
Follow the procedure below to configure your Network adapter.
a. Verify that the “Network Type” is in “Infrastructure” mode.
b. Verify that the “SSID” of your Network adapter is set to the same “SSID” of an
access point.
c. Verify that the “Encryption” type is the same as that of an access point. If you
enabled “WEP” encryption, you must also set the same WEP Keys on both
sides.
ASUS Network adapter
65
Chapter 5 - Troubleshooting
Cannot connect to a Station (Network adapter)
Follow the procedure below to configure your Network adapter.
a. Verify that the “Network Type” is in “Ad Hoc” mode.
b. Verify that the “SSID” of your Network adapter is set to the same “SSID” of the other
station (or another Network adapter).
c. Verify that the “channel” of the Network adapter is “Auto” or set to the same
“channel” of the other station (or another Network adapter).
d. Verify that the “Encryption” type is the same as the other station (or another
Network adapter). If “WEP” encryption is enabled, you must set the same
“WEP” Keys on both stations.
Bad link quality or bad signal strength
There are two possible reasons. First is radio interference, keep the environment
around the Network adapter away from microwave ovens and large metal objects.
Then try to reorient the Network adapter antenna. Second is the distance, decrease
the distance between your Network adapter and the access point or station (or
another Network adapter).
The TCP/IP protocol did not bind to the WLAN PC Adapter.
Chapter 5
Troubleshooting
This will occur when the computer already has six TCP/IP bindings in Windows
98 or ten bindings in Windows Me. These limits are imposed by the Microsoft
operating system.
Solution: If your computer already has the maximum number of TCP/IP bindings,
remove one of the network adapters from the Network configuration before
installing the Network adapter driver.
66
ASUS Network adapter
Chapter 6 - Appendix
Appendix
FCC Warning Statement
This device complies with Part 15 of the FCC Rules. Operation is subject to the
following two conditions:
1. This device may not cause harmful interference.
2. This device must accept any interference received, including interference that
may cause undesired operation.
This equipment has been tested and found to comply with the limits for a class
B digital device, pursuant to part 15 of the FCC Rules. These limits are designed
to provide reasonable protection against harmful interference in a residential
installation.
This equipment generates, uses and can radiate radio frequency energy and, if
not installed and used in accordance with the instructions, may cause harmful
interference to radio communications. However, there is no guarantee that
interference will not occur in a particular installation. If this equipment does cause
harmful interference to radio or television reception, which can be determined
by turning the equipment off and on, the user is encouraged to try to correct the
interference by one or more of the following measures:
• Reorient or relocate the receiving antenna.
• Increase the separation between the equipment and receiver.
• Connect the equipment into an outlet on a circuit different from that to which
the receiver is connected.
• Consult the dealer or an experienced radio/TV technician for help.
CAUTION: Any changes or modifications not expressly approved by
the party responsible for compliance could void the user’s authority to
operate the equipment.
Prohibition of Co-location
This device and its antenna(s) must not be co-located or operating in conjunction
with any other antenna or transmitter
ASUS Network adapter
Chapter 6
Appendix
Important:
Radiation Exposure Statement
This equipment complies with FCC radiation exposure limits set forth
for an uncontrolled environment.End users must follow the specific
operating instructions for satisfying RF exposure compliance. To
maintain compliance with FCC RF exposure compliance requirements,
please follow operation instruction as documented in this manual.
67
Chapter 6 - Appendix
Declaration of Conformity for R&TTE directive
1999/5/EC
Essential requirements – Article 3
Protection requirements for health and safety – Article 3.1a
Testing for electric safety according to EN 60950-1 has been conducted. These are
considered relevant and sufficient.
Protection requirements for electromagnetic compatibility – Article 3.1b
Testing for electromagnetic compatibility according to EN 301 489-1 and EN 301
489-17 has been conducted. These are considered relevant and sufficient.
Effective use of the radio spectrum – Article 3.2
Testing for radio test suites according to EN 300 328- 2 has been conducted.
These are considered relevant and sufficient.
CE Mark Warning
This is a Class B product, in a domestic environment, this product may cause radio
interference, in which case the user may be required to take adequate measures.
IC Warning
The Class B digital apparatus meets all requirements of the Canadian InterferenceCausing Equipment Regulation.
Cet appareil numerique de la class B erspecte toutes les exigences du Reglement
sur le materiel brouilleur du Canada.
REACH
Complying with the REACH (Registration, Evaluation, Authorisation, and Restriction
of Chemicals) regulatory framework, we published the chemical substances in our
products at ASUS REACH website at http://green.asus.com/english/REACH.htm.
Chapter 6
Appendix
68
ASUS Network adapter
Chapter 6 - Appendix
Industry Canada statement
This device complies with RSS-210 of the Industry Canada Rules. Operation is
subject to the following two conditions: (1) This device may not cause harmful
interference, and (2) this device must accept any interference received, including
interference that may cause undesired operation.
Chapter 6
Appendix
IMPORTANT
Radiation Exposure Statement:
This equipment complies with IC radiation exposure limits set forth
for an uncontrolled environment. End users must follow the specific
operating instructions for satisfying RF exposure compliance. To
maintain compliance with IC RF exposure compliance requirements,
please follow operation instruction as documented in this manual.
ASUS Network adapter
69