1
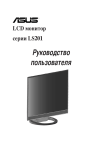
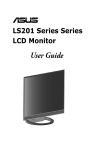
LS201 Series
LCD Monitor
Quick Start Guide
English
Safety information
•
English
•
•
•
•
•
Before setting up the monitor, carefully read all the documentation that came
with the package. To prevent fire or shock hazard, never expose the monitor to rain or moisture. The monitor should be operated only from the type of power source indicated
on the label. If you are not sure of the type of power supplied to your home,
consult your dealer or local power company.
Use the appropriate power plug which complies with your local power standard.
To ensure satisfactory operation, use the monitor only with UL listed computers
which have appropriate configured receptacles marked between 100-240V AC. If you encounter technical problems with the monitor, contact a qualified service
technician or your retailer. Monitor introduction
Front view
Rear view
Light In Motion
Stand
6
1
1
2
3
44
544
1. SPLENDID™ mode hotkey
2. Decrease button
3. MENU button
4. Increase button/Brightness hotkey
5. Power button
6. VGA port
7. DVI port
8. DC-IN port
Quick Start Guide
7
8
Unfolding the monitor
The monitor is folded in the package. To unfold the monitor, hold the back cover
and press the Button with one hand, and carefully tilt the monitor forward with the
other hand until the Button rebounds with a click.
-5º~20º
English
2.1
Button
2.2
1.
•
•
Connecting the cables
Connect the cables as the following instructions:
To connect the power adapter: first, connect the adapter cord securely to the
monitor’s DC-in port. Then, connect the power plug to the adapter port with the
other end to a power outlet.
To connect the VGA/DVI cable:
a.
b.
c.
2.3
Plug the VGA/DVI connector to the LCD monitor’s VGA/DVI port. Connect the other end of the VGA/ DVI cable to your computer’s VGA/
DVI port.
Tighten the two screws to secure the VGA/DVI connector.
Turning the monitor on
Gently press the power button . See page 1-2 for the location of the power
buton. The power indicator lights up in blue to show that the monitor is ON.
Quick Start Guide
2.3
•
English
•
•
Adjusting the monitor
For optimal viewing, we recommend that you look at the full face of the
monitor, then adjust the monitor to the angle that is most comfortable for you.
Hold the stand to prevent the monitor from falling when you change its angle.
You can adjust the monitor’s angle from -5º to 20º.
-5º~20º
It is normal that the monitor slightly shakes while you adjust the the viewing
angle.
2.4
Installing the monitor to a VESA wall
mount
The foldable stand of the LS201 LCD monitor is specially designed for a VESA wall
mount.
To install the monitor to a VESA wall mount:
1.
Have the front of the monitor face down on a table.
3.
Fix the monitor on the VESA wall mount using a screw driver to fasten four
screws into the four screw holes on the monitor stand.
2.
Press down the button on the arm and fold the stand toward the back of the
monitor until the button rebounds with a click.
VESA wall mount
Button
Screw holes
We recommend that you cover the table surface with soft cloth to prevent
damage to the monitor.
Quick Start Guide