1
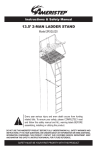
RAPTOR
TRIPOD
Instruction and Safety Manual
ith
luded w
c
in
D
V
D
truction
take
p”™ Ins
U
d
n
et up /
u
s
o
r
n
o
G
n
e
th
enu.
structio
! “From
Main M
r ther in
u
e
f
h
t
d
NEW
e
n
e
o
r
you n
Chapte
duct. If
ctional
u
r
t
s
this pro
In
fer to
lease re
down, p
Model #7700
T h a n k Y o u ! for purchasing Ameristep®
Non-Typical RAPTOR TRIPOD
!
C A U T I O N : Maximum Tested Weight Capacity Limit for this Product is: 300 POUNDS
(Including Accessories, Gear and Attire)
!
D O N O T Exceed tested weight limit capacity.
This product is designed for only ONE PERSON.
! W A R N I N G : Every year serious injury and even death occurs from hunting related falls. To ensure your safety, please COMPLETELY read
and follow this safety manual and ALL warning labels BEFORE assembling, installing, or utilizing this product.
DO NOT USE THIS AMERISTEP® PRODUCT BEFORE FULLY UNDERSTANDING ALL SAFETY WARNINGS AND INSTRUCTIONS. IF YOU HAVE
QUESTIONS, ARE UNSURE ABOUT ANY INFORMATION, or NEED ADDITIONAL INFORMATION CONCERNING THIS PRODUCT, CONTACT OUR
CUSTOMER SERVICE DEPARTMENT. KEEP AND MAINTAIN THIS SAFETY & INSTRUCTION MANUAL FOR FUTURE REFERENCE.
©2008 (rev 6/08)
SAFETY MUST BE YOUR FIRST PRIORITY WITH THIS PRODUCT
TREE/LADDER STAND SAFETY INSTRUCTIONS/WARNINGS
Please read the following instruction manual and warning labels completely before utilizing this product. Failure to understand and execute these
instructions and warnings may result in serious injury or death. KEEP THIS INSTRUCTION MANUAL IN A SAFE PLACE AND REVIEW ANNUALLY.
• ALWAYS read and understand these WARNINGS & INSTRUCTIONS before using this product each season. Practice at ground level prior to using at elevated
positions. Maintain the WARNINGS & INSTRUCTIONS for later review as needed, for instructions on usage to anyone borrowing your stand. Use all safety devices
provided with this product. Never exceed weight limit specified by Manufacturer. If you have any questions after reviewing the WARNINGS & INSTRUCTIONS,
please contact Ameristep®. DO NOT lend this product to anyone unless they have read this manual and fully understand the Instructions and warnings provided.
• ALWAYS inspect for any damaged or missing pieces after removing all contents from box and cardboard from products. If you think parts are missing or
damaged, contact Ameristep’s Customer Service Department. Do Not begin to assemble if any parts are missing or damaged.
• DO NOT modify or alter your Tree/Ladder Stand. Improper installation or adjustment may cause serious injury or death. You must only use
Ameristep® certified replacement parts. Using any other replacement parts will void product warranty. DO NOT use homemade or permanently
elevated stands or make modifications to a purchased TREE/LADDER STAND.
• DO NOT use this product under the influence of alcohol, medication (prescription or non-prescription), or any illegal substance. Using this product while
under influence of any of these substances may result in serious injury or death.
• DO NOT use this product if you have a history of heart problems, back problems, high blood pressure, impaired vision, equilibrium impairments, dizzy,
if you are not physically fit, or ill in any way; If have been advised by a doctor or other healthcare provider not to climb, or have any condition that
would impair your ability to use climber. Physical ailments can reduce your ability to safely install, utilize, and remove your product. Please consult a
physician prior to use. Be sure you are well rested and alert and NEVER fall asleep in your stand as you may fall out resulting in serious injury or death.
• NEVER ttransport any equipment with yourself while ascending or descending the tripod. Use a haul line (such as our Hoist Rope) to transport
your weapons and equipment into or out of the tripod. Guns should be unloaded, chamber opened, safety lock engaged and muzzle pointed
toward the ground. Only begin raising or lowering weapons and equipment while you are safely seated atop tripod with both hands free.
• ALWAYS know your physical limitations. Falls can occur anytime after leaving the ground. Don’t take chances. If you start thinking about how
high you are, don’t go any higher. Instead, choose a minimum height that will allow for safe, effective, and comfortable hunting.
• ALWAYS have a minimum of three people present when installing or removing this product AND hunt with a plan and a buddy. Before you leave home, let
others know your exact hunting location, when you plan to return & who is with you.
• ALWAYS have a communication device on your person and easily accessible. Immediate access to another person may save your life. In the event of an accident,
a rescue plan must be in place and able to be incorporated immediately. ALWAYS carry emergency signal devices such as a cell phone, walkie-talkie, whistle,
signal flare, PLD (personal locator device) and flashlight on your person at all times and within reach. In the event of an accident, remain calm and seek help
immediately. DON’T PANIC !
• NEVER adjust your stand while in use. Always ensure that you and your ladder stand are safely secured to a healthy tree. A checklist for selecting a safe tree is
also included in the instructions. Your TREE/LADDER STAND must be attached tightly to the tree and secured in place. ALL contact points must be in contact with
tree BEFORE you step onto your TREE/LADDER STAND. If the stand is not secure, it may shift while in use, and may result in serious injury.
•
•
•
•
NEVER
NEVER
NEVER
NEVER
jump on the platform OR stand on the seat OR lean out from the ladder stand for any reason.
use this product for trimming trees OR as a house-hold ladder.
leave stand unattended. Always fully inspect this product before each use. DO NOT use if any bolts or nuts are loose, bent or crooked.
let children play or use this product without adult supervision. This product is not a toy.
• NEVER use during inclement weather. DO NOT use during thunderstorms or any other weather conditions that include (but not limited to) lightning, high wind,
freezing rain. Your product must always be free from moisture, mud, frost, snow, ice or any other slippery surface that may compromise your safety and could
potentially create dangerous conditions. ALWAYS watch for changing weather conditions.
©2008 (rev 6/08)
Ameristep® Inc.
Page 2
901 Tacoma Ct. • P.O. Box 189 • Clio, MI 48420
(810) 686-4035
www.ameristep.com
TREE/LADDER STAND SAFETY INSTRUCTIONS/WARNINGS
Ameristep® Tree/Ladder Stands are designed with your safety being our primary concern. We have invested time to properly design, engineer,
manufacture, and test this product’s safety. This Tree/Ladder Stand will continuously be safe with appropriate equipment, usage and
maintenance followed carefully in this safety and instruction booklet. Ameristep® and Ameristep® Retailers will not be responsible for any
misuse of this product.
• ALWAYS inspect tripod before each use and do not store outdoors when not in use.
• ALWAYS check legs and ladder section connections every time you use tripod.
• ALWAYS check ground under tripod to ensure it is firm and level.
• ALWAYS maintain three points of contact when climbing ladder and ALWAYS lean forward as you climb.
PROPER CARE AND MAINTENANCE:
• ALWAYS inspect for defects from damage, rot, corrosion, cracks caused from freezing or excessive heat.
• DO NOT use is damage is detected or suspected.
• ALWAYS insure the appropriate maintenance such as retightening, or replacement of parts, preserving or refinishing wood, touch-up
painting and lubrication is recommended.
• DO NOT leave your Tree/Ladder Stand outside OR in a tree for more than two weeks at a time. Store inside when not in use.
!
C A U T I O N : Maximum Tested Weight Capacity Limit for this Product is: 300 POUNDS
(Including Accessories, Gear and Attire)
D O N O T Exceed tested weight limit capacity.
This product is designed for only ONE PERSON.
Never remove any safety warning stickers from this product.
Safety must be your first priority during the use of this product.
©2008 (rev 6/08)
Ameristep® Inc.
S
E
L
P
AM
901 Tacoma Ct. • P.O. Box 189 • Clio, MI 48420
xxxx
Page 3
(810) 686-4035
www.ameristep.com
HARDWARE AND PARTS
THE
RAPTOR TRIPOD
Model #7700
( 1 ) Shooting Rail
Connection
( 1 ) Top Ladder Section
( 1 ) Left Platform
( 1 ) Right Platform
( 1 ) Shooting Rail
( 1 ) Middle Ladder Section
( 1 ) Footrest
( 1 ) Bottom Ladder Section
( 1 ) Seat Frame
( 2 ) Bottom Leg
( 2 ) Middle Leg
( 1 ) Back Rest
( 1 ) M8 x 30mm HEX BOLT
(2 Washers, 1 Lock-Nut)
( 2 ) Top Leg
( 1 ) Stabilizer Bar
( 1 ) Seat Frame Base
( 2 ) M8 x 40mm HEX BOLT
(3 Washers, 1 Lock-Nut)
( 1 ) 5½” Swivel Washer
( 3 P a r t s ) BackPack Straps
( 1 ) Shooting Rest Pad
( 1 ) Sling
( 2 ) M8 x 45mm HEX BOLT
( 2 ) Buckle Loop
(3 Washers, 1 Lock-Nut)
( 2 ) Buckle Strap
( 2 ) S-Hook Brace Strap
( 2 ) M8 x 70mm HEX BOLT
(2 Washers, 1 Lock-Nut)
( 1 ) Seat Back Cushion
( 1 ) Seat Cushion
( 1 ) Cable
( 4 ) M8 x 70mm HEX BOLT
(3 Washers, 1 Lock-Nut)
(1) Shooting Rail Cover
( 4 ) Ground Stakes
( 2 ) M8 x 75mm HEX BOLT
(3 Washers, 1 Lock-Nut)
WRENCH ( 2 )
( 2 ) D-Clips
©2008 (rev 6/08)
Ameristep® Inc.
901 Tacoma Ct. • P.O. Box 189 • Clio, MI 48420
(810) 686-4035
Page 4
www.ameristep.com
PLATFORM ASSEMBLY
!
THE
RAPTOR TRIPOD
Model #7700
N O T E : You will need:
( 1 ) Seat Frame Base
( 1 ) Seat Frame
( 1 ) 5½” Swivel Washer
( 1 ) M8 x 30mm HEX BOLT
(2 Washers, 1 Lock-Nut)
( 1 ) Seat Back Cushion
( 1 ) Seat Cushion
(1) Shooting Rail Cover
( 1 ) Shooting Rail
( 1 ) Shooting Rest Pad
Connection
( 1 ) Back Rest
( 1 ) Shooting Rail
Step 1: Seat Frame to Connection Base with 5.5”
Washer in between them using (1) M8 x 30 mm bolt.
1
3
2
Step 2: Mount B A C K R E S T to S E A T F R A M E using (2) M8 x 70 mm
bolts. Assemble S H O O T I N G R E S T by inserting S H O O T I N G R E S T into
S H O O T I N G R E S T C O N N E C T I O N ; then inserting assembled S H O O T I N G
R E S T S Y S T E M into S E A T F R A M E . Sliding each part of S H O O T I N G
R E S T S Y S T E M requires depressing spring-loaded buttons which are
also used to adjust S H O O T I N G R E S T to desired position.
Step 3: Slide on SEAT CUSHION, SEAT BACK
CUSHION, and SHOOTING REST PADS.
Page 5
©2008 (rev 6/08)
Ameristep® Inc.
901 Tacoma Ct. • P.O. Box 189 • Clio, MI 48420
(810) 686-4035
www.ameristep.com
PLATFORM • FOOTREST • SEAT ASSEMBLY
!
THE
RAPTOR TRIPOD
Model #7700
N O T E : You will need:
( 2 ) Top Leg
( 2 ) D-Clips
( 1 ) Top Ladder Section
( 1 ) Left Platform
( 1 ) Footrest
( 1 ) Right Platform
( 2 ) M8 x 75mm HEX BOLT
(3 Washers, 1 Lock-Nut)
( 2 ) M8 x 70mm HEX BOLT
(2 Washers, 1 Lock-Nut)
( 2 ) M8 x 70mm HEX BOLT
(3 Washers, 1 Lock-Nut)
4
5
Step 4: Assemble PLATFORM by putting RIGHT and LEFT PLATFORM
SECTIONS sections together and bolting them with (2) M8 x 70 mm bolts.
Mount FOOTREST to front of PLATFORM using (2) M8 x 70 mm bolts with
welded stoppers underneath PLATFORM.
Step 5: Mount (2) TOP LEGS and TOP LADDER SECTION to CONNECTION BASE
by passing TOP LEGS through PLATFORM; sliding them into CONNECTION BASE.
Depress spring-loaded button on each TOP LEG until button snaps into hole in
CONNECTION BASE port. Line up holes in each Top Leg with corresponding hole
in PLATFORM and lock Legs to PLATFORM using D-CLIPS (one for each leg).
5a
5b
Step 5a: Bolt TOP LADDER SECTION to CONNECTION BASE
using (2) M8 x 45 mm bolts ( f i g 5 a ) .
Then, bolt TOP LADDER SECTION to PLATFORM
using (2) M8 x 75 mm bolts ( f i g 5 b ) .
Page 6
©2008 (rev 6/08)
Ameristep® Inc.
901 Tacoma Ct. • P.O. Box 189 • Clio, MI 48420
(810) 686-4035
www.ameristep.com
TRIPOD LEGS
!
THE
RAPTOR TRIPOD
Model #7700
N O T E : You will need:
( 2 ) Middle Leg
( 1 ) Middle Ladder Section
( 2 ) Bottom Leg
6
Step 6: Slide each of (2) MIDDLE LEGS into bottom of TOP LEGS by depressing
spring-loaded button until each leg section snaps into corresponding hole in TOP LEG
as shown. Slide MIDDLE LADDER SECTION into bottom of TOP LADDER SECTION.
Make sure brackets at bottom of MIDDLE LADDER SECTION face inward.
Make sure as each ladder section is slid together, each ladder
section has slid fully into its corresponding ladder section.
5th Hole
7
Step 7: Slide each of (2) BOTTOM LEGS into bottom of MIDDLE LEGS by depressing spring-loaded
button until each leg section snaps into corresponding FIFTH HOLE from bottom of MIDDLE LEGS.
Make sure button is in fifth hole in bottom section initially as this will make platform level on level
ground. Once tripod is set up, use multiple adjustment holes to level tripod if ground is uneven.
Page 7
©2008 (rev 6/08)
Ameristep® Inc.
901 Tacoma Ct. • P.O. Box 189 • Clio, MI 48420
(810) 686-4035
www.ameristep.com
STABILIZER BAR • TRUSS SYSTEM
!
THE
RAPTOR TRIPOD
Model #7700
N O T E : You will need:
( 2 ) S-Hook Brace Strap
( 2 ) Buckle Loop
( 1 ) Cable
( 2 ) Buckle Strap
( 1 ) Stabilizer Bar
( 2 ) M8 x 40mm HEX BOLT
(3 Washers, 1 Lock-Nut)
Step 8: Mount STABILIZER BAR to brackets
using (2) M8 x 40 mm bolts.
8
9a
9
Step 9: TRUSS SYSTEM; Attach BUCKLE STRAPS to PLATFORM (fig 9)
and Bottom of BOTTOM LADDER SECTION (fig 9a).
BUCKLE STRAP on One Side and
BUCKLE LOOP on other side.
Strap at Bottom
Ladder Section
Strap at Platform
Assemble BUCKLE STRAPS together as shown above.
Page 8
©2008 (rev 6/08)
Ameristep® Inc.
901 Tacoma Ct. • P.O. Box 189 • Clio, MI 48420
(810) 686-4035
www.ameristep.com
ASSEMBLY TRUSS SYSTEM CONTINUED
THE
RAPTOR TRIPOD
Model #7700
10a
Step 10: Place HOOK END of CABLE to each BUCKLE STRAP
(at PLATFORM and BOTTOM LADDER SECTION) looping CABLE
over STABILIZER BAR.
Make sure CABLE PLASTIC SLIDE makes contact with STABILIZER BAR
BEFORE raising Stabilizer up so it is horizontal to ground. ALSO make
sure there is ample tension in CABLE by tightening truss straps.
Be sure truss system is tight (shown below).
Cable
Plastic Slide
10b
10
11a
Step 11: Attach S-HOOK BRACE STRAPS, (1) to each Leg. There is a sticker
marking placement for each S-HOOK BRACE STRAP on each Leg.
If sticker is not present, make sure straps are on a level, horizontal plane with
STABILIZER BAR.
11
Once BUCKLE STRAPS are wrapped around each leg and positioned properly,
attach hooks on ends of each S-HOOK BRACE STRAP to holes on STABILIZER
BAR (fig 11a). Make sure legs are pushed out so as to create tension on straps.
Page 9
©2008 (rev 6/08)
Ameristep® Inc.
901 Tacoma Ct. • P.O. Box 189 • Clio, MI 48420
(810) 686-4035
www.ameristep.com
GROUND STAKES • DISMANTLE TRIPOD
THE
RAPTOR TRIPOD
Model #7700
!
C A U T I O N : Make sure tripod legs are on level ground at all times.
Do not use in hazardous weather conditions such as lightning,
high winds, and freezing rain.
Step 12: Once tripod has been set up at desired hunting location, use (4)
GROUND STAKES to hold tripod in place. Each leg has a foot with one hole
for each Ground Stake to be driven through. The feet on Bottom Ladder
Section one hole on each foot for remaining two stakes to be driven through.
12
DISMANTLING TRIPOD
Step 1: Dismantle TRUSS SYSTEM by unhooking S-HOOK BRACE STRAPS
from STABILIZER BAR, loosen TRUSS STRAPS and remove CABLE.
Step 2: Gently tip tripod over on its side.
3a
Step 3: Depress spring-loaded buttons on each leg where
MIDDLE LEGS meet UPPER LEGS. Separate MIDDLE and LOWER LEG
SECTIONS from UPPER LEGS (fig 3).
Depress spring-loaded buttons that adjust leg height between
MIDDLE and LOWER LEGS and slide leg sections together and lock
them at shortest length (fig 3a).
3
Step 4: Remove LOWER and MIDDLE LEG SECTIONS.
5
©2008 (rev 6/08)
6
Step 5: Remove D-CLIPS holding UPPER LEGS to PLATFORM and
push button to release UPPER LEGS from CONNECTION BASE.
Ameristep® Inc.
901 Tacoma Ct. • P.O. Box 189 • Clio, MI 48420
Step 6: Remove Shooting Rail by
depressing button and sliding Rail out.
(810) 686-4035
www.ameristep.com
Page 10
FOLDING TRIPOD FOR TRANSPORT AND STORAGE
!
THE
RAPTOR TRIPOD
Model #7700
N O T E : You will need:
( 1 ) Sling Strap
( 3 P a r t s ) BackPack Straps
fig 2
Step 8: Place CABLE in seat cushion pocket for transport.
Install BackPack Straps as shown above.
Step 7: Fold up remaining assembled portion.
Step 9: Stack Leg and Ladder sections as shown and strap
together with SLING STRAP and place GROUND STAKES in
pocket on SLING STRAP.
Raptor Tripod - Shown Packed
BUCKLE STRAP INSTRUCTION
TAG END
1. Thread tag end of STRAP up
through hole in underside of BUCKLE.
2. Push "PRESS" button to allow
tag end of STRAP to be fed through
opening under PRESS BUTTON out
through front.
©2008 (rev 6/08)
Ameristep® Inc.
901 Tacoma Ct. • P.O. Box 189 • Clio, MI 48420
3. Pull tag end to adjust strap length.
STRAP will only loosen when "Press"
button is pushed again.
(810) 686-4035
Page 11
www.ameristep.com
LIMITED WARRANTY
READ THIS AGREEMENT
This Ameristep® product has a limited warranty. No other warranties, whether expressed or implied,including warranties of
merchantability and fitness for a particular purpose, apply to the product.
I. GENERAL PROVISIONS OF LIMITED WARRANTY
A. The original purchaser of this Ameristep® product is warranted against defects in material and workmanship for one year
following the date of its retail purchase.
B. The exclusive remedy for defects in material and workmanship under the warranty is replacement/ replacement parts.
C. Ameristep® will, at its option, replace products not conforming to this limited warranty. This is the sole and exclusive
remedy available under legal theory for this Ameristep® product.
II. NO OTHER WARRANTIES
NO OTHER WARRANTIES OR REPRESENTATIONS, WHETHER EXPRESSED OR IMPLIED, INCLUDING
WARRANTIES OF MERCHANTABILITY AND FITNESS FOR A PARTICULAR PURPOSE, SHALL APPLY TO THE PRODUCT.
III. EXCLUSIONS, LIMITATIONS, AND CONDITIONS OF LIMITED WARRANTY
A. This warranty cannot be assigned or transferred.
B. This warranty only applies if the Ameristep® product is used in accordance with Ameristep's written instructions.
C. Ameristep® products are intended only for use in hunting. Ameristep® products are not intended or authorized for
use in any situations that may create health or injury risks.
D. This warranty is void if the product is damaged through abuse, accident, improper use, negligence or normal wear & tear.
E. This warranty is void if the product is a l te r e d , changed, or modified in any manner.
F. This warranty is void if any attempt is made to repair the product without written authorization from Ameristep®.
G. Except as provided in this limited warranty, all Ameristep® products are provided "as is." All other warranties and
representations, oral or written, express or implied,including but not limited to any implied warranties of merchantability
or fitness for a particular purpose, are excluded and do not apply.
IV. PROCEDURES IN EVENT OF DEFECT
A. If you find a product to be defective, contact Ameristep at 1-810-686-4035.
B. When you receive authorization from Ameristep®, return the product as directed by Ameristep®.
V. LIMITATION OF DAMAGES
A. Ameristep shall not, under any circumstances or legal theory, be liable or responsible for direct, indirect, special,
incidental, or consequential damages.
B. Ameristep shall not, under any circumstances or legal theory, be liable or responsible for any amount in excess of the
product purchase price.
C. Ameristep shall not, under any circumstances or legal theory, be liable or responsible for damage to items or equipment
used with the Ameristep product.
D. Ameristep shall not, under any circumstances or legal theory, be liable for personal injury, personal loss, lost profits, lost
wages, goodwill, downtime, economic loss in excess of the product purchase price, or any non-economic damages.
VI. ADDITIONAL PROVISIONS
A. This agreement is the entire agreement between you and Ameristep®. This agreement supercedes any prior or different
agreements, representations, or proposals, whether written or oral.
B. No representative, agent, or employee, of Ameristep® is authorized to make warranties, representations, or obligations,
other than those set fo r t h in this l i m i t e d warranty.
C. This agreement may only be changed through an express written agreement with Ameristep®.
D. Waiver by any party of any default or breach of this agreement will not constitute a waiver of any subsequent default or
breach of the same or different kind.
E. If any action or provision of this agreement is fo u n d to be invalid, such invalidity does not affect or extend to other
sections or provisions in the agreement.
F. This warranty gives you the specific legal rights. You may also have other rights that vary from state to state. This
agreement shall be g o ve r n e d by the laws of the State of Michigan, United States of America.
©2008 (rev 6/08)
See our Ful l Line of Products, Accessories and Replacement Parts at:
Ameristep® Inc.
901 Tacoma Ct. • P.O. Box 189 • Clio, MI 48420
www.ameristep.com
(810) 686-4035
www.ameristep.com