1
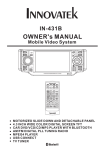
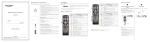
SD MPEG-4 TERRESTRIAL RECEIVER
2501
USER MANUAL
-1-
CONTENTS
Important Safety Instructions---------------------------------------------------------------------------Precautions-------------------------------------------------------------Layout of Your Set Top Box---------------------------------------------------------------------Remote Control
Connecting Your Set Top Box
Main Menu
1. Installation
1.1. Basic Settings
1.2. Auto/Manual Scan
2. Channel Manager
3. Timer Manager
3.1. Program Timer
3.2. Sleep Timer
3.3. Auto Scan Timer
4. Multimedia
5. Settings
5.1. Language Preference
5.2. Display Preference
5.3. Recording Settings
5.4. Parental Control
6. Tools
6.1. Storage Manager
6.2. Software Upgrade
6.3. Factory Reset
Convenient Functions
1. Ways of selecting program
2. QUICK SELECT
3. EPG
4. SUBTITLE
5. TTX
6. AUDIO
7. Program information
8. FAV
9. TV/RADIO program switch
10. PROG
11. RECORD
12.PLAY/PAUSE
13. RECALL
14. STOP
Troubleshootting
-2-
IMPORTAT SAFETY ISTRUCTIOS
WARNING
TO PREVENT FIRE OR SHOCK HAZARD, DO NOT USE WITH AN EXTENSION CORD,
RECEPTACLE OR OTHER OUTLET UNLESS THE BLADES CAN BE FULLY INSERTED TO
PRESENT BLADE EXPOSURE.
● TO PREVENT FIRE OR SHOCK HAZARD. DO NOT EXPOSE THIS APPLIANCE TO RAIN
OR MOISTURE.
● TO PREVENT ELECTRICAL SHOCK, MATCH WIDE BLADE PLUG TO WIDE SLOT FULLY
INSERTED.
●
This
appliance
shall not be exposed to dripping or splashing water and that no object filled with liquids such as
vases shall be placed on apparatus.
1. Read Instructions-All the safety and operating instructions should be read before the appliance
is operated.
2. Retain Instructions-The safety and operating instructions should be retained for future
-3-
reference.
3. Heed Warnings-All warnings on the appliance and in the operating instructions should be
adhered to.
4. Follow Instructions-All operating and use instructions should be followed.
5. Water and Moisture-The appliance should not be used near water.
6. Ventilation-The appliance should be well situated that its location or position does not interfere
with its proper ventilation.
7. Heat-The appliance should be situated away from heat sources such as radiators, heat
registers, stoves that produce heat.
8. Power Sources-The appliance should be connected to a power supply only of the type
described in the operating instructions or as marked on the appliance.
9. Grounding or Polarization-Precautions should be taken.
10. Power -Cord Protection -Power supply cord should be routed so they are not likely to be
walked on or pinched by item placed upon or against them, pay plugs ,and the point where they
exit from the appliance.
11. Cleaning -The appliance should be cleaned only by ways recommended by the manufacturer.
12. Power Plug-Where the MAINS plug or an appliance coupler is used ad the disconnect device,
the disconnect device shall remain readily operable.
13. Power Lines -An outdoor antenna should be located away from power lines.
14. Outdoor Antenna Grounding-If an outside is connected to the receiver is sure the antenna
system is grounded so as to provide protection against voltage surges and to build up static
charges.
15. Non-use Periods -The power cord of the appliance should be unplugged from the outlet when
left unused for a long period of time.
16. Object and Liquid Entry -Care should be taken so that objects do not fall and liquids are not
spilled, into the enclosure through openings. The apparatus shall not be exposing to dripping or
splashing and that no objects filled with liquids, such as vases, shall be placed on the apparatus.
17. Conditions Requiring Service -The Appliance should be serviced by qualified service
personnel when:
● The power-supply cord or the plug has been into the appliance.
● Objects have fallen or liquid has been spilled into the appliance.
● The appliance has been expose rain.
● The appliance does not appear to operate normally or exhibit a marked change in performance.
-4-
Precautions
Please read these precautions before operating this unit.
1. Power cord protection
To avoid any malfunctions of the unit, and to protect against electric shock, fire or personal injury, please observe
the following.
•
Hold the plug firmly when connecting or disconnecting the AC power cord.
•
Keep the AC power cord away from heating appliances.
•
Never put any heavy object on the AC power cord.
•
Do not attempt to repair the AC power cord in any way.
•
Never make or change connections with the power switched on.
2. Placement
Avoid placing the unit in areas of:
•
Direct sunlight or heating radiators
•
High temperature (over 35℃) or high humidity (over 90%)
•
Dust as the internal parts may be seriously damaged.
3. Non-use periods
When the unit is not being used, turn it off. When left unused for a long period of time, the unit should be
unplugged from the power source.
4. No fingers or other objects inside
•
Touching internal parts of this unit is dangerous, and may cause serious damage to the unit. Do not attempt
to disassemble the unit.
•
Do not put any foreign object in this unit.
5. Keep away from water
•
Keep the unit away from flower vases, tubs, sinks, etc. If liquids are spilled into the unit, serious damage
could occur.
-5-
IDENTIFY YOUR SET TOP BOX
1. ANT IN
2. LOOP OUT
3. IR
4. USB
5. DC 5V
-6-
Remote control :
1.Mute: Turn off / on voice.
2.Number Key: <0-9>
3. Menu: Enter main menu
4. VOL -/+ : Volume adjustment
5. EPG: Electronic Program Guide
6. AUDIO: Audio mode operation
7. Info: Display program information in full-screen playing
Or show operation guide in current menu
8. RECALL: Change back to previous channel
9. RECORD: TV Program recording
10. MEDIA: Play media
11.STOP: Stop program playing
12. PLAY/PAUSE: Pause/Play program playing or movie playing
13. POWER: Turn on / off, Standby
14. EXIT: Cancel current operation and return to previous menu
15. OK: Confirm selection on operateing menu
16. CH+/-: Channel up/down
17. TTX : DVB teletext
18. SUBTITLE: Subtitle
19. FAV: Display favourite programs
20. TV/RADIO: Switch between TV and Radio mode
21.PROG: Recorder/wake up timer editing
22.PAGE UP: To the prvious page
23. PAGE DOWN: To the next page
24. PREV: Play previous USB media
25.NEXT: Play next USB media
26.FF and FR: Screen image zoom in / out when in zoom mode
Speed up / Slow down when USB media playing
-7-
Connecting Your Set Top Box
a)
Antenna to set top box connection
Connect the aerial to the unit through ANT IN jack.
b)
Set Top Box to TV Connection
Connect the unit to TV with scart cable through scart socket.
c)
Turn on your TV and the unit, then select AV IN.
Main Menu
1. Installation
When user connects Set Top Box (STB) for the first time, no channels are stored in the unit, User should search
channels first as below:
1.1. Press <OK> to enter Installation page, then press <CH+>/<CH-> to select the item you want to set up,
<V->/<V+>and <OK> to select OSD language, Country, Time Zone where user locates in. Also turn on/off
Summer Time, LCN (Logic channel number list an exclusive number for every channel in ON mode), ANT
Power(Supply power for antenna connected). Press <OK> to save the settings. See figure 1
Figure 1
1.2. Press red button <EPG> to confirm the setting, system will start to search channels automatically. Green
button <AUDIO> for search channels when user know the frequency point. See figure 2 & 3:
-8-
Figure 2
Figure 3
<NOTE> Before searching, Make sure the antenna is connected to the STB.
Once the channel scan is finished and all the channels are stored into the database, you can start to watch the
digital TV channels, some typical operations are given in this chapter. Following is Main Menu for operating
functions.
1.Press <MENU> to enter Main Menu.
2.Press <LEFT>/<RIGHT > to select item you want to operate.
-9-
2. Channel Manager
2.1 Press <OK> to enter “Channel Manager” page through “ Main Menu - Channel Manager– OK”.
2.2. Press <CH+>/<CH-> to select a TV channel, press <EPG><AUDIO><SUBTITLE> <TTX> to edit the
channel, Four functions are available for editing channels, Skip / Delete/Fav/ Lock. See figure 4:
Figure 4
Skip: Press red button <EPG> to skip selected channel.
Delete: Press green button <AUDIO> to delete selected channel.
Fav: Press yellow button <SUBTITLE> to edit a selected channel as a favorite channel, (Note: After setting
favorite channels & exit “Channel Manager” page, user may press hot key “FAV” on remote control to find them
directly.)
Lock: Press blue button <TTX> to lock a selected channel, see figure 3.If you want to remove the lock function,
pls re-press the blue button <TTX>.
NOTE: Press < TV/RADIO> button to operate same for radio channel edit.
After you have finished press, exit the “Channel Manager” page, System will automatically save changes.
3. Timer Manager
Press <OK> to enter “Timer Manager” page through “ Main Menu - Timer Manager– OK”, then see Figure 5:
- 10 -
Figure 5
3.1 Program Timer
Press <OK> to enter Program Timer page, then press green button <AUDIO> to set the TV/Radio channel, Date,
Start Time, Duration, Mode, Function which you’d like to record. Press <OK> to confirm the setting. See Figure 6:
Figure 6
3.2 Sleep Timer
Press <OK> to enter Sleep Timer page. Press <CH+>/<CH-> to select the item you wish to set, and press
<V+>/<V-> to set the time for sleeping. While on mode for “Auto Power Down”, it means the unit enter standby
mode after 3H automatically(default set is ON for this function, please press red button <POWER> to restart
playing). See Figure 7:
- 11 -
Figure 7
3.3 Auto Scan Timer
Press <OK> to enter Auto Scan Timer page, Press <CH+>/<CH-> to select the item you wish to set, and press
<V+>/<V-> to set ON/OFF mode for Standby & Operate Mode. When both are in on mode, press number buttons
to set the time for auto scan. Still press <V+>/<V-> to choose daily or weekly scan. See Figure 8:
See Figure 8
4. Multimedia
Insert USB device into USB slot, then press <OK> to enter “Multimedia” page through “ Main Menu – Multimedia
– OK”, then see Figure 9:
- 12 -
Figure 9
4.1 Multimedia supported files are illustrated below. NTFS, FAT32 and FAT16 file system can be supported at the
moment.
1) Video size: up to SD (standard definition)
2) Photo size: up to 256M pixels (16376*16376)
3) Audio channels: 2 channels
Video Decoder
Audio Decoder
MPEG-1
MPEG-2
MPEG4 SP
MPEG4 ASP
H.263
H.264
MP3
AMR
−WMA
−AAC-LC
−AAC+
e-AAC+
Image Decoder
Formats
Extension
MPEG1
dat, avi
MPEG2
mpg, vob, ts, tp, trp, avi
MPEG4 SP
3gp, mp4, mov
MPEG4 ASP
divx, xvid, mp4, mov, avi
H.263
3gp, mov
H.264
mkv, mp4, mov, ts, avi
JPEG
BMP
- 13 -
Memory Size
NOR
8M
DDR1
4MB
bitx16
4.2 Press <CH+>/<CH-> to select the item(Music, Photo, Movie, PVR) you wish to play, <OK> to enter playing
mode.
NOTE: In PVR mode, if there isn’t any recorded files on USB drive, you can record live program first as per below
steps:
(a) Insert USB drive into USB socket, after seeing a hint message on the screen “Insert USB device”, select a
channel you want to record, then press <REC> on remote control. See figure 10:
Figure 10
(c) To stop recording, press <STOP> button, a dialogue “Do you want to stop record now?” display, select ”OK”
to stop recording and select “Exit” to continue. A icon always display on left-up side of the screen during
recording. See Figure 11:
Figure 11
- 14 -
Note: When USB drive is full, system will display a message ”Disk Full Error, LeavingR”
5. Settings
press <OK> to enter “Settings” page through “ Main Menu – Settings – OK”, <CH+>/<CH-> to select the items
you wish to adjust. See Figure 12:
Figure 12
5.1 Press <OK> to enter Language Preference page after you choose this item, using <CH+>/<CH-> &
<V+>/<V-> to select language for Program Guide, Audio, Subtitle. See Figure 13:
Figure 13
5.2 Press <OK> to enter Display Preference page after you choose this item, using <CH+>/<CH-> & <V+>/<V->
- 15 -
to select the modes (for Display Mode, Aspect Ratio, Video Output) which are suitable for user’s TV. See Figure
14:
Figure 14
5.3 Press <OK> to enter Recording Settings page after you choose this item, using <CH+>/<CH-> & <V+>/<V->
to set the detailed data(for Timeshift Function, Timeshift Storage, Recording Duration, Recording Target). See
Figure 15:
Figure 15
5.4 Press <OK> to enter Parental Control page after you choose this item, you can change the password as per
your needs according to below steps.
(1) Input old password (default password is “0000”) to enter Parental Control page. See Figure16:
- 16 -
Figure16
(2) using <CH+>/<CH-> & <V+>/<V-> to turn on/off Menu Lock, Channel Lock, Maturity Lock. See Figure 17:
Figure 17
(3) For PIN Code changing, press <V+>, then input old password, display shows “Please enter the new PIN
code”. Input the new password, then “Confirm the new PIN code”. Until display shows “The PIN code is
changed!!”, which means the password set success.
6. Tools
press <OK> to enter “Tools” page through “ Main Menu – Tools – OK”, <CH+>/<CH-> to select the items you
- 17 -
wish to adjust. See Figure 18:
Figure 18
6.1 Insert USB, then press <OK> to enter Storage Manager page after you choose this item. The display will
show the volume information of the USB. See Figure 19:
Figure 19
6.2 Press <OK> to enter Software Upgrade page after you choose this item, then use <CH+>/<CH-> to choose
USB / SD card as upgrading tools. See Figure 20:
- 18 -
Figure 20
6.3 Press <OK> to enter Factory Reset page after you choose this item, then input your old password (default
password is “0000”) the unit will ask “The operation will load default setting. Are you Sure?” Choose No/Yes as
you wish. See Figure 21 & 22:
Figure 21
- 19 -
Figure 22
6.4 Press <OK> to enter Software Information page after you choose this item, then display will show your
present system version No..
Convenient Functions
1 Ways of selecting program
STB provides four ways to select program.
(1) Press <Up/Down> button to next or previous program.
(2) Press <OK> to select program in program list.
(3) Press <0~9> to switch program.
If the input program number doesn’t exist, STB will ignore the input.
2 QUICK SELECT
(1) Press <OK> to display channel list.
(2) Press <Up/Down > to select channel, <OK>to confirm and switch to corresponding channel.
3. EPG
Press <EPG> to enter “Program Guide” page in playing mode.
(1).Press <EPG> red button on remote control to enter Daily Mode.
(2).Select a channel by pressing <CH+>/<CH-> to preview day’s information. Press yellow button <SUBTITLE>
or blue button <TTX> to view former & next day’s information.
(3).Press <OK> button to show program description.
4. SUBTITLE
- 20 -
Display subtitle on screen, the style of subtitle may be different by content provider.
(1) Press <SUBTITLE> yellow button to enter subtitle page.
(2) press <V-/V+> and <OK> to turn on/off subtitle.
5. TTX
(1) Press <TTX> to enter Teletext page.
(2) Press <Up/Down> to go to previous or next page.
(3) Press <EXIT> to exit from teletext page.
6. AUDIO
Audio language selection. See figure 56
(1) Press <AUDIO> to enter Multiaudio page.
(2) Press <Left>/<Right> to switch among stereo, left, right, press <UP>/<DOWN> to select the language of
sound.
(3) Press <OK>/<EXIT> to confirm the selection and return to full-screen play mode.
7. Program information
To view the information of current program, press <i> on remote control to open it when it is in full screen display,
press again or <EXIT> to exit.
8. FAV
You can select favourite channel easily here after setting favourite channels.
(1) Press <FAV> to enter favourite list.
(2) Press < Up/ Down> to select channel.
(3) Press <EXIT> to exit.
9. TV/RADIO program switch
Press “TV/RADIO” to switch between TV program and Radio program when it is in full screen display.
NOTE: If no radio channels, system would display a hint message “No Radio Program”.
10. PROG
Press <Prog> to enter program list.
11. RECORD
A hot-key to record live TV program. Detail information please refer to last section “record set”
12. PLAY/PAUSE
- 21 -
This button is used to play or pause the current live program or recorded program playing
13. RECALL
A hot-key to recall recorded program watched.
14. STOP
Stop to play current live program.
Troubleshooting
There may be various reasons for the abnormal operation of the receiver.
Check the receiver according to the procedures shown below. If the receiver does
not work properly after checking it ,please contact the dealer. Don't open the
receiver cover .It may cause a dangerous situation .
The display on front panel does not light up
●
Check that the power cord is plugged into the wall outlet .
●
Check whether Power Switch is on .
No picture
●
Make sure that the product is in Operation Mode.
●
Make sure that the AV Cable is correctly connected to the TV AV Channel
●
Make sure the TV is in AV mode ,for this Set Top Box uses AV output .
●
Make sure that antenna cable is correctly connected to the DVB Product.
●
Check the brightness level of TV.
●
Check the channel that is on air .
No or bad signal message appears
●
Check other device connected between antenna and the receiver ,or
adjust the antenna position
Poor Picture & sound quality
●
Install antenna where there is not obstacle ahead .
● Make sure to avoid putting mobile phone or microwave oven around the DVB Product.
●
Use 75Ω coaxial cable to connecting TV and antenna.
● The DVB is a Standard Definition Receiver ,so when viewing High Definition
channels on it may
cause poor image and sou
No or poor sound
●
Check the volume level of the TV .
●
Check the Mute status of the TV and product .
● Press the Audio button to change the Sound Track type .
Remote control does operate
●
To manipulate the equipment with the remote control ,the control's emitting part should
be directly pointing towards the receiving part (IR Sensor) of receiver.
●
Check the battery of Remote control
- 22 -
23