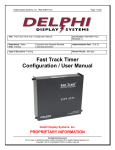
1
Fast Track 2+2/386®
2000 Series
Drive-Thru Timer System
User Guide
R 02/02
PHASE RESEARCH
3500 W. Moore Avenue, Suite M
Santa Ana, CA 92704
(714) 850-1320 or Fax: (714) 850-1502
www.phaseresearch.com
email - [email protected]
PHASE RESEARCH
USER GUIDE
SET PARAMETERS WORKSHEETS
SET PARAMETERS WORK SHEET SAMPLE
Sheet 1
Store Header
FAST BURGER
Store:
Number:
1234
Manager:
JONES
Phone:
(123) 456-7889
Modem:
(123) 456-7890
City:
ANY TOWN
STORE HOURS
1st day of week:
OPEN
6:00AM
6:00AM
6:00AM
6:00AM
6:00AM
6:00AM
6:00AM
SUN
MON
TUE
WED
THU
FRI
SAT
1
2
3
4
5
6
7
8
DAYPARTS
START
6:00AM
10:30AM
1:00PM
5:00PM
8:00PM
MON
-
CLOSE
1:00AM
1:00AM
1:00AM
1:00AM
1:00AM
1:00AM
1:00AM
- STOP
- 10:30AM
1:00PM
5:00PM
8:00PM
1:00AM
-
PRINTER OPTIONS
RT
Hour
X
Daypart
X
Shift
X
Daily
1
2
3
4
- STOP
- 4:00PM
- 1:00AM
-
SET PARAMETERS WORKSHEETS
WK
MO
X
X
X
X
X
Report @
CLOSE + 00:15
time=
Header
Targets
ON
ON
PEC
AUTO
or
OFF
ON
Remote Display
Remote #1
Remote #2
Remote #3
Remote #4
Remote #5
Remote 80%
Flash avg
SHIFTS
START
6:00AM
4:00PM
DA
A
A
DAILY
WINDOW
TOTAL
PHASE RESEARCH
USER GUIDE
SET PARAMETERS WORK SHEET SAMPLE
Sheet 2
A MENU
Target=
BEEP ON ARRIVAL=
A <=
B <=
C <=
D <=
F >
F Repeat
Time
:30
:45
1:00
1:30
1:30
@
B
P
1
2
3
4
2
N
N
N
N
N
30 SEC
A GREET
Target=
BEEP ON ARRIVAL=
Time
:04
:07
:10
:10
:10
A <=
B <=
C <=
D <=
F >
F Repeat @
Target=
BEEP ON ARRIVAL=
NO
B
P
0
0
0
0
0
N
N
N
N
N
OFF SEC
Time
:30
:45
1:00
1:30
1:30
@
A <=
B <=
C <=
D <=
F >
F Repeat
Time
1:30
1:45
2:00
2:30
2:30
@
B
P
1
2
3
4
2
N
N
N
N
N
B
P
1
2
3
4
2
N
N
N
N
Y
SET PARAMETERS WORKSHEETS
SEC
Time
A <=
B <=
C <=
D <=
F >
F Repeat @
B
P
SEC
Time
A <=
B <=
C <=
D <=
F >
F Repeat @
B
P
SEC
Target=
BEEP ON ARRIVAL=
NO
30 SEC
P
Target=
BEEP ON ARRIVAL=
30 SEC
A TOTAL
Target=
BEEP ON ARRIVAL=
B
Target=
BEEP ON ARRIVAL=
NO
A WINDOW
Target=
NO
BEEP ON ARRIVAL=
A <=
B <=
C <=
D <=
F >
F Repeat
Time
A <=
B <=
C <=
D <=
F >
F Repeat @
Time
A <=
B <=
C <=
D <=
F >
F Repeat @
B
SEC
P
PHASE RESEARCH
USER GUIDE
SET PARAMETERS WORKSHEET
Store Header
Store:
Number:
Manager:
Phone:
Modem:
City:
STORE HOURS
1st day of week:
OPEN
SUN
MON
TUE
WED
THU
FRI
SAT
1
2
3
4
5
6
7
8
- CLOSE
-
DAYPARTS
START
- STOP
-
PRINTER OPTIONS
RT
Hour
Daypart
Shift
Daily
Report @
PEC
AUTO
Remote Display
#1
#2
#3
#4
#5
%
Flash avg
SHIFTS
START
1
2
3
4
- STOP
-
SET PARAMETERS WORKSHEETS
CLOSE +
time=
Header
Targets
Remote
Remote
Remote
Remote
Remote
Remote
DA
WK
MO
or
PHASE RESEARCH
USER GUIDE
Target=
BEEP ON ARRIVAL=
Time
A <=
B <=
C <=
D <=
F >
F Repeat @
Target=
BEEP ON ARRIVAL=
B
P
SEC
Target=
BEEP ON ARRIVAL=
Time
A <=
B <=
C <=
D <=
F >
F Repeat @
Time
B
P
Time
Time
A <=
B <=
C <=
D <=
F >
F Repeat @
SEC
P
SEC
B
P
SEC
Target=
BEEP ON ARRIVAL=
B
P
Time
A <=
B <=
C <=
D <=
F >
F Repeat @
SEC
Target=
BEEP ON ARRIVAL=
A <=
B <=
C <=
D <=
F >
F Repeat @
B
Target=
BEEP ON ARRIVAL=
Target=
BEEP ON ARRIVAL=
A <=
B <=
C <=
D <=
F >
F Repeat @
Time
A <=
B <=
C <=
D <=
F >
F Repeat @
B
P
SEC
Target=
BEEP ON ARRIVAL=
B
SEC
SET PARAMETERS WORKSHEETS
P
Time
A <=
B <=
C <=
D <=
F >
F Repeat @
B
SEC
P
PHASE RESEARCH
USER GUIDE
DAYPARTS AND SHIFTS RECORD
DATE:
________________________
Dayparts
Sun
start
1
stop
Store
opening time
Mon
start
stop
Store
opening time
Tue
start
stop
Store
opening time
Wed
start
stop
Store
opening time
Thur
start
stop
Store
opening time
Fri
start
stop
Store
opening time
Sat
start
stop
Store
opening time
2
3
4
5
6
7
Store
closing time
8
Store
closing time
Store
closing time
Store
closing time
Store
closing time
Store
closing time
Store
closing time
Shifts
Sun
start
stop
Mon
start
stop
Tue
start
1
2
3
4
NOTES:
SET PARAMETERS WORKSHEETS
stop
Wed
start
stop
Thur
start
stop
Fri
start
stop
Sat
start
stop
PHASE RESEARCH
USER GUIDE
TABLE OF CONTENTS
1
INTRODUCTION ............................................................................................................... 1-1
1-1
1-2
1-3
1-4
1-5
2
3
OPERATION ....................................................................................................................... 2-1
2-1
2-2
General ...................................................................................................................... 2-1
Principles of Operation ....................................................................................... 2-1
2-3
2-4
2-5
2-6
2-7
2-2.1 Multiple Vehicles.............................................................................................. 2-4
Electrical Power ..................................................................................................... 2-4
Remote Displays.................................................................................................... 2-5
LED Status Lights ................................................................................................. 2-6
Keypad ....................................................................................................................... 2-7
Thermal Printer ...................................................................................................... 2-9
SCREENS .......................................................................................................................... 3-1
3-1
4
View Target Times ................................................................................................ 7-1
MENU SCREEN ................................................................................................................ 8-1
8-1
9
View Periods............................................................................................................ 6-1
VIEW TARGET TIMES SCREEN .............................................................................. 7-1
7-1
8
View Configuration Screens ............................................................................. 5-1
VIEW PERIODS SCREEN............................................................................................ 6-1
6-1
7
Activity ....................................................................................................................... 4-1
VIEW CONFIGURATION SCREEN ......................................................................... 5-1
5-1
6
General ...................................................................................................................... 3-1
ACTIVITY SCREEN ........................................................................................................ 4-1
4-1
5
General ...................................................................................................................... 1-1
Elements of a Fast Track 2+2/386 2000 Series Timer ............................ 1-1
Features .................................................................................................................... 1-3
Using The Fast Track 2+2/386 2000 Series Timer .................................... 1-4
Using this Manual ................................................................................................. 1-5
Menu .......................................................................................................................... 8-1
REMOVE CAR ................................................................................................................... 9-1
9-1
Remove Car ............................................................................................................. 9-1
TABLE OF CONTENTS
1
Fast Track 2+2 and Fast Track 2+2/386
are trademarks of Phase Research
© 1999 Phase Research
PHASE RESEARCH
USER GUIDE
10 RESET LOOP .................................................................................................................. 10-1
10-1 Reset Loop ............................................................................................................. 10-1
11 PRINT HEADER SCREEN ......................................................................................... 11-1
11-1 Print Store Header .............................................................................................. 11-1
12 MANUAL REPORTS .................................................................................................... 12-1
12-1 Manual Reports .................................................................................................... 12-1
12-1.1 Daily, Weekly, and Monthly Reports ............................................................. 12-2
12-1.1.1 Daily Reports ................................................................................ 12-3
12-1.1.2 Weekly Reports............................................................................. 12-6
12-1.1.3 Monthly Reports ........................................................................... 12-9
12-1.2 Hourly and Custom Reports ......................................................................... 12-12
12-1.3 Daypart and Shift Reports............................................................................. 12-14
12-1.3.1 Daypart Reports .......................................................................... 12-14
12-1.3.2 Shift Reports ............................................................................... 12-17
12-1.4 Year to Date Reports..................................................................................... 12-20
12-1.5 Car by Car Reports ....................................................................................... 12-22
12-1.5.1 Car by Car Reports by Station .................................................... 12-22
12-1.5.2 Car by Car Reports by Time and Date........................................ 12-24
13 PARAMETERS PROGRAMMING .......................................................................... 13-1
13-1 Parameters Programming................................................................................ 13-1
13-1.1 Assign Access Codes ...................................................................................... 13-3
13-1.2 Time/Store Hours............................................................................................ 13-6
13-1.3 Store Heading ................................................................................................. 13-8
13-1.4 Set Dayparts .................................................................................................. 13-10
13-1.5 Set Shifts ....................................................................................................... 13-12
13-1.6 Set Targets .................................................................................................... 13-14
13-1.7 Set Printer Options........................................................................................ 13-17
13-1.8 Set Remote Display Options......................................................................... 13-20
13-1.9 Set Remote Addressing................................................................................. 13-23
13-1.10Night Manager.............................................................................................. 13-24
13-1.10.1 Show Event Detail ...................................................................... 13-26
13-1.10.2 Show Event Counts..................................................................... 13-28
14 DIAGNOSTICS SCREENS ........................................................................................ 14-1
14-1 Diagnostics ............................................................................................................ 14-1
15 RESET MEMORY ........................................................................................................... 15-1
15-1 Reset Memory ....................................................................................................... 15-1
PRINTER REPORT TAPES .............................................................................................. A1-1
DEFINITIONS OF TERMS.................................................................................................. A2-1
TABLE OF CONTENTS
2
PHASE RESEARCH
USER GUIDE
TROUBLESHOOTING ......................................................................................................... A3-1
SET PARAMETERS WORKSHEETS ........................................................................... A4-1
INDEX .......................................................................................................................................... A5-1
TABLE OF CONTENTS
3
PHASE RESEARCH
USER GUIDE
SECTION 1 - INTRODUCTION
1-1
General
The Fast Track 2+2/386 2000 Series Timer (herein also referred to as the Timer) helps you
operate a drive-thru store more efficiently and profitably by tracking the progress of customer
vehicles through the ordering and delivery process. Management and staff can use this
information in crucial ways:
1-2
#
To analyze service time
#
To improve productivity
#
To set performance goals and incentives
#
To measure performance
#
To predict staffing requirements based on past experience
#
To compare shifts, seasons, and stores
Elements of a Fast Track 2+2/386 2000 Series Timer
A Timer consists of the following elements:
#
A Main Console with:
H a Liquid Crystal Display (LCD)
H Status Lights for monitoring eight stations
H a Thermal Printer
H a Keypad for controlling system operation
#
Up to five large, LED Remote Displays that show time and give performance information
by flashing average times during non-active timing. These Displays use a series of audio
beeps to indicate satisfaction of performance goals. A sixth LED Two-Color Remote
Display is used as a Special Percentage Remote. It displays the percentage of cars that
satisfies the A-grade target time on any selected event.
#
Sensor data channels that detect vehicles in the drive-thru lanes. (Loops embedded in the
drive-thru pavement are a typical kind of vehicle sensor.)
#
Communication sensor data channels that detect conversation between employees and
customers.
SECTION 1 - INTRODUCTION
1-1
PHASE RESEARCH
USER GUIDE
A fully functional system requires a customer-furnished Intercom, Menu Board Loop with
Vehicle Detector and the Fast Track 2+2/386 2000 Series Timer. At a minimum, the Timer
contains a Main Console and a Remote Display. The Main Console interfaces with the
customer-furnished Intercom and Vehicle Detector, Window Loops, and from one to six Remote
Displays.
The Timer can work with a single or double lane drive-thru restaurant. A typical fast food restaurant with two drive-thru lanes is pictured below: Side A is the primary drive-thru lane, with
the driver seated closest to the cashier (WIN1) and service windows (WIN2). Side B is the secondary drive-thru lane, with the car passenger closest to the cashier and service windows. Each
lane has a communications system (Intercom) and three Loops to detect cars. One Loop is
located at the Menu Board, another at WIN1, and a third at WIN2 on both Side A and Side B.
The Loops allow the Timer to detect when cars arrive and leave the Loop locations.
T
EN
RA
B SIDE MENU
BOARD
AND GREET
NC
WIN1
WINDOW
LOOP
WIN2
WINDOW
LOOP
E
EXIT
MENU
BOARD
LOOP
EN
TR
AN
B SIDE
WIN1
B SIDE
WIN2
A SIDE
WIN1
A SIDE
WIN2
A SIDE MENU
BOARD
AND GREET
CE
EXIT
MENU
BOARD
LOOP
SECTION 1 - INTRODUCTION
WIN1
WINDOW
LOOP
WIN2
WINDOW
LOOP
1-2
PHASE RESEARCH
USER GUIDE
1-3
Features
The Fast Track 2+2/386 2000 Series Timer helps you improve and maintain efficiency and profitability with the following features:
#
Automatic operation that handles most of your routine requirements (For the most part,
your job is to replace printer paper and let the Timer do its job!)
#
Indicator lights that let you see at a glance exactly where the cars are in your drive-thru
lanes
#
Automatic operation that helps identify drive-thru problems and then lets you manually
correct them
#
Data displays and printed reports that give you both summary and real-time information,
so you and your staff have instant performance feedback
#
Automatic printing at scheduled intervals
#
Flexible reporting that allows you to analyze both current and historical drive-thru data,
so that you can compare past and present performance as well as the effects of product,
staff, and policy changes
#
Comprehensive reporting to help you determine how efficiently your staff serves your
customers, the percentage of vehicles meeting your performance goals and standards,
and the performance of different shifts in relation to one another, as well as help you to
predict staffing needs.
#
Optional Settings allow custom setup (Contact Dealer).
H Time display can be set to seconds only or minutes and seconds (default setting).
H Time display can be set for 12-hour AM and PM (default setting), or 24-hour Military
time.
H Daylight Savings Time can be set ON (default setting) or OFF.
H Reporting period can be set for Monthly Reports (12 reports per year - default setting)
or 4-Week Reports (13 reports per year).
SECTION 1 - INTRODUCTION
1-3
PHASE RESEARCH
USER GUIDE
1-4
Using The Fast Track 2+2/386 2000 Series Timer
You can select, group, and analyze any of the data the Timer collects, with the Timer providing
both detail and summary reports showing how vehicles move through your drive-thru. Reports
print automatically on a regular schedule.
When the Timer is installed, it is programmed to automatically display data and produce reports
based on your store’s requirements. You view its various types of data on many different display
screens, and the system allows you to modify its functions to fit your requirements.
As cars arrive and depart from your drive-thru stations, the Timer adds database event records
that include date and time of day information for reporting and comparison. These include:
#
Event records when your communications system is used to greet cars
#
Status records for events like application of power or entry of a security password
#
Exception records for unusual conditions
NOTE: The Timer’s memory management should meet your needs. When its memory is full,
it deletes the oldest data as required to free space and then continues recording new
data. If you have a legitimate reason for discarding all your historical data, select
[RESET MEMORY] to display the Clear Memory screen.
You will use only a few of the Timer’s many features on a daily basis. A numeric password or
Access Code – to protect your configuration from accidental changes – is required to use some
of these features.
This manual will show you how to use these powerful tools.
SECTION 1 - INTRODUCTION
1-4
PHASE RESEARCH
USER GUIDE
1-5
Using this Manual
This manual will familiarize you with all of the Timer’s functions and instruct you how to customize its behavior to meet your special or changing requirements. Simply look in the Table of
Contents or Index for the section describing the feature. The manual also gives you step-by-step
instructions on how to perform routine operations such as loading paper in the printer, resetting
sensors, producing reports on demand, customizing automatic operation, and adjusting to
changes in requirements.
You will find the following symbols and characters used throughout this manual:
ARROWS – Press the Up, Down, Left, and Right arrow keys appropriately, usually to
move the cursor (a blinking underline character,) to a position on the screen. The position
you have moved to is indicated by the cursor.
SQUARE BRACKETS AROUND TEXT (example: [MANUAL REPORTS]) – Use
ARROW KEYS to move to the menu option line specified in the brackets.
<ENTER SELECT> – Angle brackets around a key means to press that key to select the
option. This notation is used throughout this manual to indicate the actions you should
take to get the results you want.
SECTION 1 - INTRODUCTION
1-5
PHASE RESEARCH
USER GUIDE
SECTION 2 - OPERATION
2-1
General
The Fast Track 2+2/386 2000 Series Timer operates automatically with a minimum of operator
attention, updating the data on its Activity screen and Remote Displays, and printing regularly
scheduled automatic reports.
2-2
Principles of Operation
A fully functional timer requires a customer furnished Intercom, Menu Board Loop with a
Vehicle Detector, and the Timer. As a minimum, the Timer must include a Main Console and a
Remote Display. The Main Console interfaces with the customer furnished Intercom and
Vehicle Detector, Cashier Loop and Pick-Up Loop (Window Loops), a Remote Display, and a
power source. Up to six Remote Displays may be connected to the Main Console.
A simple Fast Track 2+2/386 2000 Series Timer (for a single lane drive-thru) is pictured
below:
NOTE: Though this example depicts a “typical,” simple system, the Fast Track 2+2/386 can
be configured for virtually any other drive-thru restaurant setup.
INTERCOM
SYSTEM
GREET
CANCEL
SIGNAL
MAIN
CONSOLE
VEHICLE
PRESENCE
TR
REMOTE
DISPLAY
AN
CE
VEHICLE PRESENCE
WIN1
WIN2
VEHICLE PRESENCE
EN
SPEAKER
VEHICLE PRESENCE
VEHICLE
DETECTOR
EXIT
KEY
Customer-furnished Menu Board
& Intercom Equipment
Fast Track 2+2/386 Timer Equipment
Flow Line
SECTION 2 - OPERATION
MENU
BOARD
LOOP
WIN1
WINDOW
LOOP
WIN2
WINDOW
LOOP
2-1
PHASE RESEARCH
USER GUIDE
The Main Console’s interface with the customer-furnished Intercom and Vehicle Detector
allows the Timer to detect a vehicle that has been greeted via Intercom upon arrival at the Menu
Board. Window Loops allow the Timer to detect the car’s arrival at and departure from the cashier and service window and/or other detection points. For simplicity, the following sequence of
events assumes that there are Loops at the Cashier Window and Pick-Up Window:
1.
A vehicle arrives at the Menu Board where the Loop detects its presence. A VEHICLE
PRESENCE SIGNAL is sent by the Vehicle Detector to the Main Console which starts the timing
sequence.
2.
An employee keys the Intercom microphone to greet the customer. The employee’s voice
generates a GREET CANCEL signal that is sent to the Main Console which records the 1-2 time
as the GREET time.
3.
When the vehicle departs from the Menu Board deactivating the Menu Board Loop, the
VEHICLE PRESENCE SIGNAL discontinues. The Main Console interprets the 1-3 time as the
MENU time.
4.
When the vehicle arrives at the Cashier Loop, a VEHICLE PRESENCE SIGNAL is sent to the
Main Console. The Main Console interprets the 3-4 time as WAIT time.
5.
When the vehicle departs from the cashier's window deactivating the Cashier Loop the VEHICLE
PRESENCE SIGNAL discontinues. The Main Console interprets the 4-5 time as the Cashier time.
6.
When the vehicle arrives at the Pick-Up Loop, a VEHICLE PRESENCE SIGNAL is sent to the
Main Console. The Main Console interprets the 5-6 time as WAIT time.
7.
When the vehicle departs from the pick-up window, deactivating the Pick-Up Loop, the
VEHICLE PRESENCE SIGNAL discontinues. The Main Console interprets the 6-7 time as PickUp time. Additionally the Main Console interprets the 1-7 time as this customer's total Line Time.
SECTION 2 - OPERATION
2-2
PHASE RESEARCH
USER GUIDE
EVENT 1
EVENT 2
Arrival of vehicle at
Menu Board
Loop
Generates VEHICLE
PRESENCE signal
Generates GREET
CANCEL signal
Employee keys microphone
to greet customer
EVENT 3
Vehicle departs from
Menu Board Loop
EVENT 4
Discontinues VEHICLE
PRESENCE signal
Vehicle arrives at
Cashier Loop
EVENT 5
Generates VEHICLE
PRESENCE signal
Vehicle departs from
Cashier Loop
EVENT 6
Discontinues VEHICLE
PRESENCE signal
Vehicle arrives
at Pick-Up Loop
EVENT 7
Generates VEHICLE
PRESENCE signal
Vehicle departs from
Pick-Up Loop
Discontinues VEHICLE
PRESENCE signal
Elapsed Time
1
1
GREET
2
MENU
1
3
3
4
WAIT*
CASHIER
WINDOW
4
5
5
6
WAIT*
LINE TIME
6
PICK-UP
WINDOW
7
7
*NOTE: Full Line Time includes the wait time between 3 - 4 and 5 - 6
SECTION 2 - OPERATION
2-3
PHASE RESEARCH
USER GUIDE
2-2.1
Multiple Vehicles
The Timer is capable of keeping track of up to 16 vehicles moving simultaneously through
each drive-thru lane. The Timer can track the progress of each vehicle independently, accurately noting when each car moves onto or off a vehicle detection zone.
2-3
Electrical Power
The Timer’s electrical power, supplied by an external transformer, is always left on. The transformer is connected by a power cord to a 110 VAC power outlet.
WHEN POWER RETURNS AFTER ANY INTERRUPTION,
THE FAST TRACK 2+2/386 2000 SERIES TIMER TESTS ITSELF, ITS THERMAL PRINTER,
AND ANY ATTACHED REMOTE DISPLAYS.
When power is applied, the Remote Display(s) powers on and shows its numerical address. The
Remote Display(s) then shows digits counting down from 9 to 0 and beeps during the process,
allowing you to verify that the Display(s) is working properly. Each Remote Display then
resumes displaying the elapsed times and average times for its assigned event.
The printer prints reports for the power reset and is then available again for reporting. The
Timer next displays the Activity screen and begins acquiring data, producing scheduled reports
automatically at the appointed times.
SECTION 2 - OPERATION
2-4
PHASE RESEARCH
USER GUIDE
2-4
Remote Displays
SECTION 2 - OPERATION
The Remote Displays are 5-by-9 inch modules with three illuminated digits visible on both
sides. The Displays show minutes and seconds to document the time each car spends during key
steps in the ordering and sales process. (When no cars are in the drive-thru, the Displays show
the average vehicle times during the shift or other appropriate time period.)
SIGNAL
INPUT/OUTPUT
CONNECTORS
BEEP VOLUME
One to Five Remote Displays May be Programmed to:
#
Show the elapsed time for a selected event in progress. See “Set Remote Display Options”
on page 13-20.
#
Show the average event time for a selected time period (indicated by flashing mode). See
“Set Remote Display Options” on page 13-20.
#
Show the same information on more than one Display (example: one Remote for your
cashier and customers, and another for your cooks). See “Set Remote Display Options” on
page 13-20.
#
Communicate information through audible beeps (example: a car arrives at a station). The
beep volume can be adjusted up or down as desired. See “Set Targets” on page 13-14.
The Sixth Remote Display is a Two-Color Special Percentage Remote that may be Programmed
to:
#
Show the percentage of cars that satisfy the A-grade target time on any selected event. See
“Set Remote Display Options” on page 13-20.
SECTION 2 - OPERATION
2-5
PHASE RESEARCH
USER GUIDE
2-5
LED Status Lights
SECTION 2 - OPERATION
The eight LED Status Lights on the Main Console show how customers are moving through
your drive-thru system. Labeled L1 through L8, these lights are activated when their corresponding stations are active or occupied.
The pattern of the L1...L8 indicator lights on the Console lets you see at a glance where the cars
are in your drive-thru lanes. They also help you make sure that the Timer and its sensors are
working together properly.
Below is an example of what the LED Status Lights might indicate in a store with two drivethru lanes (“A” and “B”) and four monitored stations in each lane.
MAIN
MENU
ENTER
SELECT
PRINT
DISPLAY
DISPLAY
MODE
VIEW
PERIODS
VIEW
TARGET
TIMES
KEYBOARD
MODE
A/B/
A+B
CLEAR
L1 TO L8 layout.wmf
Customer
being Greeted at
A side
Menu Board
Vehicle
Present at A
Side MENU
Board
CE
AN
TR
EN
L5
B SIDE MENU BOARD
Vehicle
Present at A
Side Win1 (Cashier)
Vehicle
Present at A
Side Win2
(Service)
Note: L5 - L8 indicate presence/greeting for B side lane of a
dual lane Drive-Thru (e.g. L8 indicates a vehicle present at B
side Win2)
L6
B SIDE GREET
EXIT
AN
TR
EN
L1
A SIDE
MENU BOARD
L2
A SIDE GREET
CE
L7
B SIDE
CASHIER
WINDOW
L8
B SIDE
PICK-UP
WINDOW
L3
A SIDE
CASHIER
WINDOW
L4
A SIDE
PICK-UP
WINDOW
EXIT
SECTION 2 - OPERATION
2-6
PHASE RESEARCH
USER GUIDE
2-6
Keypad
SECTION 2 - OPERATION
The Keypad is your entry to the Timer’s many features and options, allowing you to access the
Timer’s numerous screens and customize its reports and features.
The keys and their basic functions are described below:
Returns to the previous screen. Repeatedly pressing this key
returns to the Activity screen.
Selects a menu option. Also used to move to the next screen
in a sequence and for confirming selections.
Prints a copy of the display screen.
Clears settings during programming. Also used to stop printing process, as well as advancing the printer tape by one line.
Move the cursor. The cursor is a blinking underline option for
data entry fields.
Used for changing settings on the Timer’s screens.
Displays the dayparts and shifts settings.
Displays one event showing the percentage of service times
meeting performance goals.
Toggles displays to show data from different drive-thru lanes.
Used for screens requiring alphanumeric data entry. Moves
cursor in <Keyboard Mode>.
Returns keyboard to standard behavior.
EACH KEY PERFORMS SPECIAL FUNCTIONS DEPENDING ON THE SCREEN DISPLAYED.
NOT ALL KEYS ARE ACTIVE WITH ALL SCREENS.
SECTION 2 - OPERATION
2-7
PHASE RESEARCH
USER GUIDE
Pressing <KEYBOARD MODE> makes the keys with pink triangles act as a telephone-style
Keypad, allowing you to enter characters and digits. Press the appropriate key from 0 through 9
one or more times to select the character you want to enter. Repeatedly pressing the keys cycles
through four alphanumeric characters, including the number in the pink triangle. For example,
the “2” key can be used to cycle through the characters “ABC2” (see below). After cycling to
the desired character, press <KEYBOARD MODE> to move to the next typing position to the
right. If you need to move left, up, or down on the screen, use the arrow keys after pressing
<DISPLAY MODE>.
ENTER
SELECT
ABC
DEF
DISPLAY
MODE
GHI
JKL
MNO
KEYBOARD
MODE
PRS
TUV
MAIN
MENU
CLEAR
QZ
A/B/
A+B
NOTE: LETTER DESIGNATIONS ARE FOR REFERENCE ONLY.
LETTERS DO NOT APPEAR ON KEYS.
SECTION 2 - OPERATION
2-8
PHASE RESEARCH
USER GUIDE
2-7
Thermal Printer
SECTION 2 - OPERATION
The Thermal Printer prints reports and logs significant events that occur during the Timer’s
operation, both automatically as scheduled and manually as desired.
The printer uses special thermal paper tape, designed to print only on the side facing out on the
roll. The serrated edge of the paper exit slot helps you to neatly tear off reports.
When the paper tape’s edges begin to turn pink, it is time to load a new roll. To do so:
IMPORTANT: OPERATOR-CAUSED DAMAGE TO THE PRINTER OR MISUSE WILL VOID THE WARRANTY. TAKE CARE WHEN
REMOVING PAPER JAMS, LOADING PAPER, ETC., TO FOLLOW ALL DIRECTIONS (BELOW) TO AVOID MISUSE
OR OTHERWISE HARM THE PRINTER.
PAPER ROLL
HOLDER
POINT
LOADING PROCEDURE:
1 Open printer door.
2 Place roll in holder so that printed instructions
face you upside down.
3 Cut paper so that it comes to a point as shown.
CUT PAPER - DO NOT FOLD
4 Insert point of paper into top of printer until
point comes through front.
5 Carefully pull point of paper directly toward top
of unit until about 6 inches is fed through.
6 Feed paper completely through printer door
and close and secure door.
IF PAPER JAMS:
1 Carefully cut paper where it enters printer.
2 Taking care not to put stress on printer parts,
pull remaining paper from front of printer. Pull
Toward top of unit.
DO NOT USE ANY DEVICE (SCISSORS,
SCREWDRIVER, POINTED OBJECT) TO
REMOVE PAPER.
PRINTER
RESET
BUTTON
3 Reset printer by pressing the PRINTER
RESET BUTTON. Printhead will cycle
back and forth.
4 Repeat the loading procedure.
TO RESET PRINTER:
1 The printer has a safety shutoff feature to
protect the printer from heat damage.
Reset printer by pressing the PRINTER
RESET BUTTON. Printhead will cycle
back and forth.
SECTION 2 - OPERATION
2-9
PHASE RESEARCH
USER GUIDE
THIS PAGE IS INTENTIONALLY LEFT BLANK
SECTION 2 - OPERATION
2-10
PHASE RESEARCH
USER GUIDE
SECTION 3 - SCREENS
3-1
General
This section describes the Fast Track 2+2/386 2000 Series Timer’s screens: how you can display them and use the Keypad to customize the Timer, as well as analyze the data it collects and
stores. Once you learn how to use a few of the screens, it will be easy for you to use all the
others.
THE MENU SCREEN – YOUR GATEWAY TO THE FAST TRACK 2+2/386 2000 SERIES
TIMER’S POWERFUL CUSTOMIZATION AND REPORTING FEATURES
When the Timer was installed, it was configured to display the Activity screen and operate automatically, producing the displays and automatic reports that your installer programmed. But you
can also use the Keypad to access the Menu screen and many other screens from the Activity
screen.
Each Fast Track 2+2/386 2000 Series Timer screen is briefly summarized below:
ACTIVITY SCREEN “Home Base” for the Timer’s operation
VIEW PERIODS Shows current daypart and shift settings
VIEW TARGET TIMES Use to view goals and employee performance
MENU “Gateway” to the Timer’s powerful features
REMOVE CAR
Use to manually clear event timers for a car that has left
drive-thru
RESET LOOP Use to manually reset Loops
PRINT HEADER Prints headings or titles on printer reports
MANUAL REPORTS Entry to the manual or customized reporting system
SET PARAMETERS Use to customize the Timer to adapt to changing needs
DIAGNOSTICS Use to view the number of events and Pullouts
RESET MEMORY Erases all historical event data
SECTION 3 - SCREENS
3-1
PHASE RESEARCH
USER GUIDE
Each screen is described in much greater detail in the following sections, with step-by-step
instructions on how to access and use each screen.
As you follow the instructions to display these screens, keep in mind that:
H The starting point is the Activity screen (See “Activity” on page 4-1).
H Some screens and actions require a password.
H Some screens are accessed from menu screens, from which you select an option that
takes you to another screen.
NOTE: In addition, the screens on the following pages are based on a standard default. Your
screens may vary somewhat depending on your particular configuration.
SECTION 3 - SCREENS
3-2
PHASE RESEARCH
USER GUIDE
SECTION 4 - ACTIVITY SCREEN
4-1
Activity
The Activity screen is your “Home Base” for system operation.
1
D
S
A
M
G
W
W
L
1 : 0 0 A M
M O N F E B
Y P T 1 0 : 3 0 A M - 2 : 0 0
H F T
6 : 0 0 A M - 4 : 0 0
S I D E
N O W
A V
E N U
: 0 4
:
R E E T
: 0 4
:
I N 1
: 1 5
:
I N 2
: 2 8
:
I N E
1 : 3 3
1 :
D A I L Y
C A R S
I N
L A N E
T O T A L
C A R S
P U L L
O U T S
IMPORTANT:
1.
=
=
=
2
P
P
G
3
0
2
3
4
3
M
M
3
5
2
9
5
4
1 5 0
1
YOUR SCREENS MAY VARY SOMEWHAT DEPENDING ON YOUR
PARTICULAR CONFIGURATION.
Press
one or more times to open Activity screen, OR Activity screen is
automatically displayed after a period of keyboard inactivity.
(You may have passed through more than one screen to reach a particular Fast Track
2+2/386 2000 Series Timer screen. Each time you press <MAIN MENU>, the Timer moves one
step back in this screen sequence, finally arriving at the Activity screen.)
The Activity screen contains the following summary of your drive-thru operation. It is updated
in real time as cars move through your facility:
#
Time, day, and date
#
The current daypart (DYPT)
#
The current shift (SHFT)
#
The drive-thru lane being viewed (A SIDE or B SIDE)
SECTION 4 - ACTIVITY SCREEN
4-1
PHASE RESEARCH
USER GUIDE
#
An event list with current car times and average car times
#
The time period for averages and totals
#
Number of cars now in the selected drive-thru lane (CARS IN LANE)
#
Total number of cars passing through the selected lane during the time period
#
Total number of Pullouts from the selected lane during the time period
Use the Keypad to access other data screens and the Menu. The function of the individual keys
depends on the particular screen displayed and the configuration options selected at the time:
Press
to access the Menu screen (from here you can toggle between the
Menu screen and the Activity screen). Also, use the Menu screen to return to the
screen displayed immediately before the current screen.
Press
to switch the screen view between “A SIDE” and “B SIDE” data.
Press
to view the daypart settings and shift settings.
Press
goals.
to view target settings and compare actual performance to target
Press
to print the current screen display. This is applicable to all screens.
After using the Keypad to access the Timer’s many other features and options, you can return to
the Activity screen and resume automatic operation.
SECTION 4 - ACTIVITY SCREEN
4-2
PHASE RESEARCH
USER GUIDE
SECTION 5 - VIEW CONFIGURATION SCREEN
5-1
View Configuration Screens
From ACTIVITY Screen (see “ACTIVITY SCREEN” on page 4-1):
1.
Press
to open Menu screen.
2.
Press
to move cursor to [DRIVE-THRU CONFIG].
3.
Press
to view the Main and Alternate Configurations.
1 1 : 0 0
A M
M O N
F E B
2 3
* M A I N * * C O N F I G * * M A I N *
D
D
D
*
R
R
S
M
I
I
P
O
V
V
P
R
E
E
R
E
O F F
O F F
D
*
m a x
m i n
=
=
4 0
=
1 5
D A I L Y
* * A L T * * C O N F I G * * A L T * *
D
D
D
*
R
R
S
M
I
I
P
O
V
V
P
R
E
E
R
E
O F F
O F F
D
*
m a x
m i n
=
A L T / E N A B L E
=
4 0
=
1 5
D A I L Y
=
O F F
NOTE: Not all Timers use the Alternate Configuration feature. By default, Alternate
Configuration is not configured for use. You will be able to view the Alternate
Configuration, but you must contact a technician or Phase Research
customer service specialist to use it.
4.
Press
to scroll through the Configuration screens.
SECTION 5 - VIEW CONFIGURATION SCREEN
5-1
PHASE RESEARCH
USER GUIDE
NOTE: The Alternate Configuration feature is used only when your drive-thru
operation changes during the day. For example, if your store includes two
windows, one of which is used only when busy, there is no reason to time that
window when it is not in use. Therefore, Alt Config allows you to disable the
unused window. This helps to keep information consistent with your changing
drive-thru operation. This feature can also be used in other scenarios. To use
Alt Config, contact your local technician or call Phase Research customer
service.
SECTION 5 - VIEW CONFIGURATION SCREEN
5-2
PHASE RESEARCH
USER GUIDE
SECTION 6 - VIEW PERIODS SCREEN
6-1
View Periods
This is a view-only screen that shows the current daypart and shift settings. The actual programming is set on another screen (see “PARAMETERS PROGRAMMING” on page 13-1).
From ACTIVITY Screen (see “ACTIVITY SCREEN” on page 4-1):
1.
Press
.
1 1 : 0 0
D
1 =
6 :
2 = 1 0 :
3 =
1 :
4 =
4 :
5 =
8 :
6
7
8
S
1 =
6 :
2 =
4 :
3
4
Reminder: Press
A
0
3
0
3
0
A
Y
0
0
0
0
0
M
P
A
A
P
P
P
A
M
M
M
M
M
M O N
F E
R T S
- 1 0 : 3 0 A
1 : 0 0 P
4 : 3 0 P
8 : 0 0 P
- 1 2 : 0 0 A
B
2 3
M
M
M
M
M
H I F T S
0 0 A M 4 : 0 0 P M
0 0 P M - 1 2 : 0 0 A M
to return to the Activity screen.
SECTION 6 - VIEW PERIODS SCREEN
6-1
PHASE RESEARCH
USER GUIDE
SECTION 7 - VIEW TARGET TIMES SCREEN
7-1
View Target Times
This screen shows the grading criteria and grades achieved for different target events.
From ACTIVITY Screen (see “ACTIVITY SCREEN” on page 4-1):
1.
Press
. You are now in the View Target Times screen.
1 1 : 0 0
A M
V I E W
M O N
=
D A I L Y
T A R G E T =
T O T A L
A
B
C
D
F
=
=
=
=
=
T I
:
1 :
1 :
2 :
> D
M
3
0
3
0
E
0
0
0
0
# C A R
7
1
3
1
1
< + O R - > S C R O L L S
< M A I N M E N U > T O
2.
F E B
S
5
5
0
5
5
5
1
2
1
1
2 3
0
0
0
0
0
%
%
%
%
%
E V E N T
E X I T
Press
or
to scroll through the available target events (as displayed on
the field beginning, TARGET=) to see how your drive-thru lanes and their stations are
performing.
Reminder: Press
to return to the Activity screen.
This is a view-only display, showing data recorded only up to the time the screen was entered.
The actual criteria used to grade the target events are set on another screen. (See Section 13-1.6
on page 13-14.)
SECTION 7 - VIEW TARGET TIMES SCREEN
7-1
PHASE RESEARCH
USER GUIDE
SECTION 8 - MENU SCREEN
8-1
Menu
The Menu screen displays information about your Fast Track 2+2/386 system, including menu
options and instructions for accessing features.
TIMER SERIES
NUMBER
1 1 : 0 0
A M
M O N F E B 2 3
F T 2 + 2 / 3 8 6 V E R 2 2 0
F T 1 0 0 3
S N # 1 2 3 4 5 6
M E N U
R E M O V E C A R F R O M L A N E
R E S E T L O O P
P R I N T H E A D E R
M A N U A L R E P O R T S
S E T P A R A M E T E R S
D R I V E - T H R U C O N F I G
D I A G N O S T I C S
R E S E T
M E M O R Y
MODEL
CONFIGURATION
< A R R O W S > T O
< E N T E R >
T O
< M A I N M E N U >
IMPORTANT:
IMAGE
VERSION
SERIAL
NUMBER
M O V E
S E L E C T
T O E X I T
YOUR SCREENS MAY VARY SOMEWHAT DEPENDING ON YOUR
PARTICULAR CONFIGURATION.
From ACTIVITY Screen (see “ACTIVITY SCREEN” on page 4-1):
1.
Press
.
A blinking underline (cursor) shows the currently selected menu line.
SECTION 8 - MENU SCREEN
8-1
PHASE RESEARCH
USER GUIDE
The available menu option lines as listed below are described in more detail in the sections
noted:
#
[REMOVE CAR FROM LANE] Section 9
#
[RESET LOOP]
Section 10
#
[PRINT HEADER]
Section 11
#
[MANUAL REPORTS]
Section 12
#
[SET PARAMETERS]
Section 13
#
[DIAGNOSTICS]
Section 14
#
[RESET MEMORY]
Section 15
SECTION 8 - MENU SCREEN
8-2
PHASE RESEARCH
USER GUIDE
SECTION 9 - REMOVE CAR
9-1
Remove Car
THIS FEATURE REQUIRES AN ACCESS CODE FOR ENTRY
The Remove Car screen lets you manually synchronize the Fast Track 2+2/386 2000 Series
Timer. You will rarely need this option, however, as the Timer normally synchronizes itself.
From MENU Screen (see “MENU SCREEN” on page 8-1). The cursor is on [Remove Car
From Lane] :
1.
Press
. You are prompted to enter an Access Code.
2.
Enter your six-digit Access Code. You are now in the Remove Car screen.
1 1 : 0 0
R E M O V E
L I N E
A M
M O N
C A R
F R O M
A
< A R R O W S >
T O
< E N T E R >
T O
< M A I N M E N U >
3.
Press
4.
Press
F E B
2 3
L A N E
C A R S
=
0
M O V E
S E L E C T
T O
E X I T
to move to the station you want to adjust.
. The car count is now decreased by one (to the right of the = sign).
SECTION 9 - REMOVE CAR
9-1
PHASE RESEARCH
USER GUIDE
THIS PAGE IS INTENTIONALLY LEFT BLANK
SECTION 9 - REMOVE CAR
9-2
PHASE RESEARCH
USER GUIDE
SECTION 10 - RESET LOOP
10-1 Reset Loop
THIS FEATURE REQUIRES AN ACCESS CODE FOR ENTRY
This screen lets you manually reset an internal Fast Track 2+2/386 2000 Series Timer Loop
Detector that failed to reset when the last car left. This action should rarely be required.
NOTE: Reset Loop feature should only be used when an L light is on and there is no car on a
particular detection point. Example: L4 is on, the Timer is running, but no cars are in
the drive-thru lane(s). Generally, L1 and L2 – when used for Menu and Greet – cannot
be reset from the Fast Track Timer.
From MENU Screen (see “MENU SCREEN” on page 8-1):
1.
Press
to move cursor to [RESET LOOP].
2.
Press
. You are prompted to enter an Access Code.
3.
Enter your six-digit Access Code. You are now in the Reset Loop screen.
1 1 : 0 0
R E S E T
L
L
L
L
1
2
3
4
/
/
/
/
A
A
A
A
/
/
/
/
A M
M O N
L O O P
M
G
W
W
E
R
I
I
N
E
N
N
2 3
F O R :
U
E T
1
2
< A R R O W S > T O
< E N T E R >
T O
< M A I N M E N U >
SECTION 10 - RESET LOOP
F E B
/
/
/
/
M O V E
S E L E C T
T O E X I T
10-1
PHASE RESEARCH
USER GUIDE
4.
Press
to move to the station you want to adjust.
5.
Press
to reset the selected loop and turn off its loop light on the Main Console.
(Only Loop Detectors internal to the Timer can be reset.)
SECTION 10 - RESET LOOP
10-2
PHASE RESEARCH
USER GUIDE
SECTION 11 - PRINT HEADER SCREEN
11-1 Print Store Header
The [PRINT HEADER] function enables your Fast Track 2+2/386 2000 Series Timer to print
the Store Header information. (The Menu will remain displayed during printing.)
From MENU Screen (see “MENU SCREEN” on page 8-1):
1.
Press
to move cursor down to [PRINT HEADER].
2.
Press
. The printer now generates a Store Header (see example following).
Customize the Print Header format above with your particular store’s Header information using
the [MAIN MENU][SET PARAMETERS][HEADING] screen (see “Store Heading” on
page 13-8). The Print Header report is useful for labeling a report tape in a multiple store operation, distinguishing it from reports produced at other stores.
SECTION 11 - PRINT HEADER SCREEN
11-1
PHASE RESEARCH
USER GUIDE
SECTION 12 - MANUAL REPORTS
12-1 Manual Reports
The Manual Reports screen is your entry to the manual reporting system. It allows you to
request a report based on a selected portion of the historical data gathered by the Fast Track
2+2/386 2000 Series Timer.
From MENU Screen:
1.
Press
to move cursor to [MANUAL REPORTS].
2.
Press
. You are now in the Manual Reports screen.
1 1 : 0 0
H
D
S
D
W
M
Y
C
C
O
A
H
A
E
O
T
U
A
U
Y
I
I
E
N
D
S
R
R
P
F
L
K
T
L
A
T
Y
L
H
A M
M O N F E B
R E P O R T S
2 3
Y
R T S
S
Y
L Y
( Y E A R - T O - D A T E )
T O M
B Y C A R
< A R R O W S >
T O M O V E
< E N T E R >
T O S E L E C T
< M A I N M E N U > T O
E X I T
3.
Press
to move to the desired report type.
4.
Press
to view the desired report. The following pages of this section provide
instructions to set up, view and/or print the various individual Manual Reports listed
on the main screen above.
SECTION 12 - MANUAL REPORTS
12-1
PHASE RESEARCH
USER GUIDE
NOTE: A Manual Report can provide the answer to almost any kind of question you might
ask about your data. Use a Manual Report to see how your store is meeting
performance standards, to compare shifts or time periods, and for many other useful
purposes. Defining and producing a Manual Report is easy and becomes very natural
with some practice. The information the Timer needs to produce reports is entered
using a short sequence of one, two, or three screens.
Produce Manual Reports on your Main Console display screen or on the Thermal
Printer. You can also generate a screen report and then use the <PRINT DISPLAY>
key to print a copy of the screen. (If you should need to stop printing of a report or
series of reports, press the <CLEAR> key.)
The various types of report screens that you can select follow:
12-1.1 Daily, Weekly, and Monthly Reports
These screens let you set reporting for one or more daily, weekly, or monthly time periods.
The Daily, Weekly, and Monthly screens are very similar except for the time period differences. You can select the current period and/or one or more of the seven most recent periods.
Alternatively, you can select every period within a range of dates that you specify. This lets
you access all of the historical data stored in the Timer. In either case, individual reports will
be produced for each specified period. If your report includes multiple time periods, one
report will be produced for each period. The screen rows correspond to time periods for which
data will be reported. You select reporting for one of these periods by using <ARROWS> to
move to the corresponding row and then using the <+> or <-> key to toggle reporting for the
period on or off.
SECTION 12 - MANUAL REPORTS
12-2
PHASE RESEARCH
USER GUIDE
12-1.1.1
Daily Reports
From MANUAL REPORTS Screen (see “MANUAL REPORTS” on page 12-1):
1.
Press
to move cursor to [DAILY].
2.
Press
. You are now in the Daily Reports screen.
3.
Press
to move cursor to the desired day(s).
4.
Press
to select or
to deselect a specific day (you may select one or more
days). An X appears to the right of each row selected for reporting.
1 1 : 0 0
<
<
<
<
F
F
F
F
F
F
F
F
D
E
E
E
E
E
E
E
E
A
B
B
B
B
B
B
B
B
I L
A
+
E
M
R
O
N
A
R
R
T
I
A M
2
2
2
2
1
1
1
1
Y
3
2
1
0
9
8
7
6
M O N
D A I L Y
F E B
2 3
X
X
O W S > T O M O V E
- >
T O S E L E C T
E R >
T O C O N T I N U E
N
M E N U >
T O E X I T
NOTE: If you select [DAILY] instead of a specific day (or days), any individual days
you may have also selected will be deselected automatically.
5.
Press
screen.
when selection is complete. You are now in the Report Format selection
SECTION 12 - MANUAL REPORTS
12-3
PHASE RESEARCH
USER GUIDE
The Report Format Selection screen lets you pick the starting and ending dates of a time range
for which Daily Reports will be produced.
1 1 : 0 0
A M
D A I L Y
M O N
F E B
R E P O R T S
2 3
F R O M
D A T E
- T O
F E B / 2 1 / 0 1 < > F E B / 2 3 / 0 1
R E P O
V
R E P O
V
R
I
R
I
T
B Y
A V
E W < > P R I
T
B Y
P E
E W < > P R I
E
N
R
N
R A G E
T
I O D
T
< A R R O W S >
T O
M O V E
< E N T E R >
T O
C O N T I N U E
< M A I N M E N U >
T O
E X I T
NOTE: If you have selected individual periods, the FROM and TO dates are fixed based on
the earliest and latest periods you chose.
6.
Press
to move the cursor to the FROM or TO fields, to the
month, date and/or year field(s) requiring adjustment.
7.
Press
to adjust the month, date and/or year. The Timer knows the date
range associated with your data and protects you from requesting reports outside this
range.
8.
Press
to move the cursor to [VIEW] or [PRINT] in order to send the
report to either the display or the printer. Selecting the [VIEW] or [PRINT] option
below the REPORT BY AVERAGE field will produce a single report that averages all
the selected data. (For example, selecting REPORT BY AVERAGE for a Daily Report
for which you have selected three particular days will produce a single report
combining and averaging the data for the three daily time periods.) The REPORT BY
PERIOD [VIEW] or [PRINT] selection will produce individual report sections for
each period. The Header for each report section indicates which dates are included in
the section.
SECTION 12 - MANUAL REPORTS
12-4
PHASE RESEARCH
USER GUIDE
9.
Press
to produce the selected screen or printer report. The Timer will display
SEARCHING and/or PROCESSING for up to several seconds before the report is
displayed or printed.
10. Press
when viewing a screen report to display the corresponding grading
report. This screen shows counts and percentages of cars that meet the criteria for each
letter grade.
(If you then need a printed copy of the grading report, press
11.
Press
.)
to scroll through reports that have too many lines to fit on the screen.
12. Press
to cycle through individual period reports when viewing reports
for more than one period.
SECTION 12 - MANUAL REPORTS
12-5
PHASE RESEARCH
USER GUIDE
12-1.1.2
Weekly Reports
From MANUAL REPORTS Screen (see “MANUAL REPORTS” on page 12-1):
1.
Press
to move cursor to [WEEKLY].
2.
Press
. You are now in the Weekly Reports screen.
3.
Press
to move cursor to the desired week(s).
4.
Press
to select or
to deselect a specific week (you may select one or
more weeks). An X appears to the right of each row selected for reporting.
NOTE: If you select [WEEKLY] instead of a specific week (or weeks), any individual
weeks you may have also selected will be deselected automatically.
1 1 : 0 0
<
<
<
<
F
F
F
J
J
J
J
J
W
E
E
E
A
A
A
A
A
E
B
B
B
N
N
N
N
N
E K
A
+
E
M
R
O
N
A
R
R
T
I
2
1
3
2
1
1
L
A M
M O N
W E E K L Y
1
4
7
1
4
7
0
3
Y
O W S >
T O
- >
T O
E R >
T O C
N M E N U >
M
S
O
T
F E B
2 3
X
X
O V E
E L E C T
N T I N U E
O
E X I T
NOTE: The days shown on the screen are the first days of the most current seven
business weeks as programmed in Set Parameters for a specific Timer.
5.
Press
screen.
when selection is complete. You are now in the Report Format selection
SECTION 12 - MANUAL REPORTS
12-6
PHASE RESEARCH
USER GUIDE
The Report Format Selection screen lets you pick the starting and ending dates of a time range
for which Weekly Reports will be produced.
1 1 : 0 0
A M
W E E K L Y
M O N
F E B
R E P O R T S
2 3
F R O M
D A T E
- T O
F E B / 2 1 / 0 1 < > F E B / 2 3 / 0 1
R E P O
V
R E P O
V
R
I
R
I
T
B Y
A V
E W < > P R I
T
B Y
P E
E W < > P R I
E
N
R
N
R A G E
T
I O D
T
< A R R O W S >
T O
M O V E
< E N T E R >
T O
C O N T I N U E
< M A I N M E N U >
T O
E X I T
NOTE: If you have selected individual periods, the FROM and TO dates are fixed based on
the earliest and latest periods you chose.
6.
Press
to move the cursor to the FROM or TO fields, to the
month, date and/or year field(s) requiring adjustment.
7.
Press
to adjust the month, date and/or year. The Timer knows the date
range associated with your data and protects you from requesting reports outside this
range.
8.
Press
to move the cursor to [VIEW] or [PRINT] in order to send the
report to either the display or the printer. Selecting the [VIEW] or [PRINT] option
below the REPORT BY AVERAGE field will produce a single report that averages all
the selected data. (For example, selecting REPORT BY AVERAGE for a Weekly
Report for which you have selected three particular weeks will produce a single report
combining and averaging the data for the three weekly time periods.) The REPORT
BY PERIOD [VIEW] or [PRINT] selection will produce individual report sections for
each period. The Header for each report section indicates which dates are included in
the section.
SECTION 12 - MANUAL REPORTS
12-7
PHASE RESEARCH
USER GUIDE
9.
Press
to produce the selected screen or printer report. The Timer will display
SEARCHING and/or PROCESSING for up to several seconds before the report is
displayed or printed.
10. Press
when viewing a screen report to display the corresponding grading
report. This screen shows counts and percentages of cars that meet the criteria for each
letter grade.
(If you then need a printed copy of the grading report, press
11.
Press
.)
to scroll through reports that have too many lines to fit on the screen.
12. Press
to cycle through individual period reports when viewing reports
for more than one period.
SECTION 12 - MANUAL REPORTS
12-8
PHASE RESEARCH
USER GUIDE
12-1.1.3
Monthly Reports
From MANUAL REPORTS Screen (see “MANUAL REPORTS” on page 12-1):
1.
Press
to move cursor to [MONTHLY].
2.
Press
. You are now in the Monthly Reports screen.
3.
Press
to move cursor to the desired month(s).
4.
Press
to select or
to deselect a specific month (you may select one or
more months). An X appears to the right of each row selected for reporting.
NOTE: If you select [MONTHLY] instead of a specific month (or months), any
individual months you may have also selected will be deselected
automatically.
1 1 : 0 0
<
<
<
<
5.
Press
screen.
F
J
D
N
O
S
A
J
M
E
A
E
O
C
E
U
U
O
B
N
C
V
T
P
G
L
N T
A
+
E
M
R
O
N
A
R
R
T
I
2
2
2
2
2
2
2
2
H
A
M
0
0
0
0
0
0
0
0
L
M
O
0
0
0
0
0
0
0
0
Y
M O N F E B
N T H L Y
1
1
0
0
0
0
0
0
2 3
X
X
O W S >
T O M O V E
- >
T O S E L E C T
E R >
T O C O N T I N U E
N M E N U >
T O E X I T
when selection is complete. You are now in the Report Format selection
SECTION 12 - MANUAL REPORTS
12-9
PHASE RESEARCH
USER GUIDE
The Report Format Selection screen lets you pick the starting and ending dates of a time range
for which Monthly Reports will be produced.
1 1 : 0 0
A M
M O N T H L Y
M O N
F E B 2 3
R E P O R T S
F R O M
D A T E
- T O
F E B / 2 1 / 0 1 < > F E B / 2 3 / 0 1
R E P O
V
R E P O
V
R
I
R
I
T
B Y
A V
E W < > P R I
T
B Y
P E
E W < > P R I
E
N
R
N
R A G E
T
I O D
T
< A R R O W S >
T O
M O V E
< E N T E R >
T O
C O N T I N U E
< M A I N M E N U >
T O
E X I T
NOTE: If you have selected individual periods, the FROM and TO dates are fixed based on
the earliest and latest periods you chose.
6.
Press
to move the cursor to the FROM or TO fields, to the
month, date and/or year field(s) requiring adjustment.
7.
Press
to adjust the month, date and/or year. The Timer knows the date
range associated with your data and protects you from requesting reports outside this
range.
8.
Press
to move the cursor to [VIEW] or [PRINT] in order to send the
report to either the display or the printer. Selecting the [VIEW] or [PRINT] option
below the REPORT BY AVERAGE field will produce a single report that averages all
the selected data. (For example, selecting REPORT BY AVERAGE for a Monthly
Report for which you have selected three particular months will produce a single
report combining and averaging the data for the three monthly time periods.)The
REPORT BY PERIOD [VIEW] or [PRINT] selection will produce individual report
sections for each period. The Header for each report section indicates which dates are
included in the section.
SECTION 12 - MANUAL REPORTS
12-10
PHASE RESEARCH
USER GUIDE
9.
Press
to produce the selected screen or printer report. The Timer will display
SEARCHING and/or PROCESSING for up to several seconds before the report is
displayed or printed.
10. Press
when viewing a screen report to display the corresponding grading
report. This screen shows counts and percentages of cars that meet the criteria for each
letter grade.
(If you then need a printed copy of the grading report, press
11.
Press
.)
to scroll through reports that have too many lines to fit on the screen.
12. Press
to cycle through individual period reports when viewing reports
for more than one period.
SECTION 12 - MANUAL REPORTS
12-11
PHASE RESEARCH
USER GUIDE
12-1.2 Hourly and Custom Reports
SECTION 12 - MANUAL REPORT
From MANUAL REPORTS Screen (see “MANUAL REPORTS” on page 12-1):
1. Press
to move cursor to [CUSTOM] or leave cursor on [HOURLY].
2. Press
. You are now in either the Custom (displayed below) or Hourly
Reports screen. (The Hourly Reports screen is identical except for the heading
that reads, “HOURLY REPORTS” rather than “CUSTOM REPORTS.”)
1 1 : 0 0
A M
C U S T O M
S T
6
F R O M
F E B /
R E
A R T
: 0 0
2 1 /
P O R
V I
R E P O R
V I
<
<
<
<
A
+
E
M
R
O
N
A
R
R
T
I
A M
D
0 1
T
E W
T
E W
M O N
F E B
R E P O R T S
S T O P
1 2 : 3 0
A T E
- T
< > F E B / 2 3
B Y
A V E R A
< > P R I N T
B Y
P E R I O
< > P R I N T
O W S >
T O
M
- >
T O
S
E R >
T O
C O
N M E N U >
T
2 3
P M
O
/ 0 1
G E
D
O V E
E T
T & D
N T I N U E
O
E X I T
3. Press
to move the cursor to the START and STOP
fields, to the time(s) requiring adjustment. The Timer knows the time range
associated with your data and protects you from requesting reports outside this
range.
4. Press
to set the time. The time moves in one-hour increments
for Hourly Reports and 15-minute increments for Custom Reports.
5. Press
fields.
to move the cursor to the dates on the FROM and TO
SECTION 12 - MANUAL REPORT SCREENS
12-12
PHASE RESEARCH
USER GUIDE
6. Press
to set the dates.
7. Press
to move the cursor to [VIEW] or [PRINT] in order to send
the report to either the display or the printer. Selecting the [VIEW] or [PRINT]
option below the REPORT BY AVERAGE field will produce a single report
that averages all the selected data. The REPORT BY PERIOD [VIEW] or
[PRINT] selection will produce individual report sections for each period. The
Header for each report section indicates which dates are included in the section.
8. Press
to produce the selected screen or printer report. The Timer will
display SEARCHING and/or PROCESSING for up to several seconds
before the report is displayed or printed.
9. Press
when viewing a screen report to display the corresponding grading report. This screen shows counts and percentages of cars that meet the criteria for each letter grade.
(If you then need a printed copy of the grading report, press
10. Press
screen.
.)
to scroll through reports that have too many lines to fit on the
11. Press
to cycle through individual period reports when viewing
reports for more than one period.
SECTION 12 - MANUAL REPORT SCREENS
12-13
PHASE RESEARCH
USER GUIDE
SECTION 12 - MANUAL REPORT
12-1.3 Daypart and Shift Reports
The Daypart and Shift Report screens let you set reporting for one or more dayparts or shifts.
12-1.3.1
Daypart Reports
From MANUAL REPORTS Screen (see “MANUAL REPORTS” on page 12-1):
1. Press
to move cursor to [DAYPARTS].
2. Press
. You are now in the Dayparts screen.
1 1 : 0 0
3. Press
1
2
3
4
5
6
7
8
=
6 : 0
= 1 0 : 3
=
1 : 0
=
4 : 3
=
8 : 0
<
<
<
<
A
+
E
M
R
O
N
A
R
R
T
I
A M
M O N F E B
D A Y P A R T S
0
0
0
0
0
A
A
P
P
P
M
M
M
M
M
- 1 0 : 3 0
1 : 0 0
4 : 3 0
8 : 0 0
- 1 2 : 0 0
O W S >
T O M
- >
T O S
E R >
T O C O
N
M E N U > T
A
P
P
P
A
2 3
M
M
M
M
M
O V E
E L E C T
N T I N U E
O
E X I T
to move cursor to the desired daypart row(s).
4. Press
to select or
to deselect a specific daypart (you may select
one or more dayparts). An X appears to the right of each row selected for
reporting.
5. Press
when selection is complete. You are now in the Report Format
selection screen.
SECTION 12 - MANUAL REPORT SCREENS
12-14
PHASE RESEARCH
USER GUIDE
The Report Format Selection screen lets you pick the starting and ending dates of a time range
for which Daypart Reports will be produced.
1 1 : 0 0
A M
M O N
F E B 2 3
D A Y P A R T S
R E P O R T S
S E L E C T E D : 1 2 3 4 5 6 7
F R O M
D A T E
- T O
F E B / 2 1 / 0 1 < > F E B / 2 3 / 0 1
R E P O
V
R E P O
V
<
<
<
<
A
+
E
M
R
O
N
A
R
R
T
I
R
I
R
I
T
B Y
A V
E W < > P R I
T
B Y
P E
E W < > P R I
O W S >
T O
- >
T O
E R >
T O C
N M E N U >
M
S
O
T
E
N
R
N
R A G E
T
I O D
T
O V E
E T
D A T E
N T I N U E
O
E X I T
6. Press
to move the cursor to the FROM or TO
fields, to the month, date and/or year field(s) requiring adjustment.
7. Press
to adjust the month, date and/or year. The Timer knows
the date range associated with your data and protects you from requesting
reports outside this range.
8. Press
to move the cursor to [VIEW] or [PRINT] in order to send
the report to either the display or the printer. Selecting the [VIEW] or [PRINT]
option below the REPORT BY AVERAGE field will produce a single report
that averages all the selected data. (For example, selecting REPORT BY
AVERAGE for a Daypart Report for which you have selected three particular
dayparts will produce a single report combining and averaging the data for the
three daypart time periods.) The REPORT BY PERIOD [VIEW] or [PRINT]
selection will produce individual report sections for each period. The Header
for each report section indicates which dates are included in the section.
SECTION 12 - MANUAL REPORT SCREENS
12-15
PHASE RESEARCH
USER GUIDE
9. Press
to produce the selected screen or printer report. The Timer will
display SEARCHING and/or PROCESSING for up to several seconds
before the report is displayed or printed.
10. Press
when viewing a screen report to display the corresponding grading report. This screen shows counts and percentages of cars that meet the criteria for each letter grade.
(If you then need a printed copy of the grading report, press
11. Press
screen.
.)
to scroll through reports that have too many lines to fit on the
12. Press
to cycle through individual period reports when viewing
reports for more than one period.
SECTION 12 - MANUAL REPORT SCREENS
12-16
PHASE RESEARCH
USER GUIDE
12-1.3.2
Shift Reports
From MANUAL REPORTS Screen (see “MANUAL REPORTS” on page 12-1):
1. Press
to move cursor to [SHIFTS].
2. Press
. You are now in the Shifts screen.
1 1 : 0 0
1 =
2 =
3
4
<
<
<
<
3. Press
A
+
E
M
A M
M O N
S H I F T S
F E B
2 3
6 : 0 0 A M 4 : 0 0 P M
4 : 0 0 P M - 1 2 : 0 0 A M
R
O
N
A
R
R
T
I
O W S > T O M O V E
- >
T O S E L E C T
E R > T O C O N T I N U E
N
M E N U > T O E X I T
to move cursor to the desired shift row(s).
4. Press
to select or
to deselect a specific shift (you may select one
or more shifts). An X appears to the right of each row selected for reporting.
5. Press
when selection is complete. You are now in the Report Format
selection screen.
SECTION 12 - MANUAL REPORT SCREENS
12-17
PHASE RESEARCH
USER GUIDE
The Report Format Selection screen lets you pick the starting and ending dates of a time range
for which Shift Reports will be produced.
1 1 : 0 0
A M
S H I F T
S E L E C T E D :
M O N
F E B
R E P O R T S
1 2 3
2 3
F R O M
D A T E
- T O
F E B / 2 1 / 0 1 < > F E B / 2 3 / 0 1
R E P O
V
R E P O
V
<
<
<
<
A
+
E
M
R
O
N
A
R
R
T
I
R
I
R
I
T
B Y
A V
E W < > P R I
T
B Y
P E
E W < > P R I
O W S >
T O
- >
T O
E R >
T O C
N M E N U >
M
S
O
T
E
N
R
N
R A G E
T
I O D
T
O V E
E T
D A T E
N T I N U E
O
E X I T
6. Press
to move the cursor to the FROM or TO
fields, to the month, date and/or year field(s) requiring adjustment.
7. Press
to adjust the month, date and/or year. The Timer knows
the date range associated with your data and protects you from requesting
reports outside this range.
8. Press
to move the cursor to [VIEW] or [PRINT] in order to send
the report to either the display or the printer. Selecting the [VIEW] or [PRINT]
option below the REPORT BY AVERAGE field will produce a single report
that averages all the selected data. (For example, selecting REPORT BY
AVERAGE for a Shift Report for which you have selected three particular
shifts will produce a single report combining and averaging the data for the
three shift time periods.) The REPORT BY PERIOD [VIEW] or [PRINT]
selection will produce individual report sections for each period. The Header
for each report section indicates which dates are included in the section.
SECTION 12 - MANUAL REPORT SCREENS
12-18
PHASE RESEARCH
USER GUIDE
9. Press
to produce the selected screen or printer report. The Timer will
display SEARCHING and/or PROCESSING for up to several seconds
before the report is displayed or printed.
10. Press
when viewing a screen report to display the corresponding grading report. This screen shows counts and percentages of cars that meet the criteria for each letter grade.
(If you then need a printed copy of the grading report, press
11. Press
screen.
.)
to scroll through reports that have too many lines to fit on the
12. Press
to cycle through individual period reports when viewing
reports for more than one period.
SECTION 12 - MANUAL REPORT SCREENS
12-19
PHASE RESEARCH
USER GUIDE
SECTION 12 - MANUAL REPORT
12-1.4 Year to Date Reports
The Year to Date Reports screen shows the number of cars that pass through your drive-thru
lanes and stations and the average time at each, since January 1 of the current year.
From MANUAL REPORTS Screen (see “MANUAL REPORTS” on page 12-1):
1. Press
to move cursor to [YTD].
2. Press
. You are now in the Year to Date screen.
1 1 : 0 0
A M
M O N
Y E A R
F
F
M
A
N
E
E
A
U
O
B
B
Y
G
V
T
T
T
T
T
H
H
H
H
H
R
R
R
R
R
T O
U
U
U
U
U
J
A
J
O
J
A
P
U
C
A
F E B
D A T E
0 0
N
R
L
T
N
2 3
0 1
R E P O R T
V I E W < > P R I N T
< A R R O W S >
T O
< E N T E R >
T O
< M A I N
M E N U >
3. Press
M O V E
C O N T I N U E
T O
E X I T
to move cursor to the desired time period.
4. Press
to select or
to deselect a specific time period (you may
select one or more periods). An X appears to the right of each row selected for
reporting. The Timer knows the date range associated with your data and protects you from requesting reports outside this range.
SECTION 12 - MANUAL REPORT SCREENS
12-20
PHASE RESEARCH
USER GUIDE
5. Press
to move the cursor to [VIEW] or [PRINT] in order to send
the report to either the display or the printer. Selecting the [VIEW] option will
produce a single report that averages all the selected data. Selecting the
[PRINT] selection will produce the same single report, as well as individual
grading reports for each event. The Header for each report section indicates
which time periods are included in the section.
6. Press
to produce the selected screen or printer report. The Timer will
display SEARCHING and/or PROCESSING for up to several seconds
before the report is displayed or printed.
7. Press
when viewing a screen report to display the corresponding grading report. This screen shows counts and percentages of cars that meet criteria
for each letter grade.
(If you then need a printed copy of the grading report, press
8. Press
screen.
.)
to scroll through reports that have too many lines to fit on the
9. Press
to view grading reports for more than one event by
cycling through individual grading reports.
SECTION 12 - MANUAL REPORT SCREENS
12-21
PHASE RESEARCH
USER GUIDE
12-1.5 Car by Car Reports
SECTION 12 - MANUAL REPORT
The Car by Car Reports allow you to define reports that provide information about each car
passing through your drive-thru.
12-1.5.1
Car by Car Reports by Station
From MANUAL REPORTS Screen (see “MANUAL REPORTS” on page 12-1):
1. Press
to move cursor to [CAR BY CAR].
2. Press
. You are now in the Car by Car screen.
1 1 : 0 0
A M
M O N F E B 2 3
C A R
C A R
b y
A
M E N U
A L L
A B C D F
A
G R E E T
A L L
A B C D F
A
W I N 1
A L L
A B C D F
A
W I N 2
A L L
A B C D F
A
L I N E
A L L
A B C D F
P U L L O U T S
O F F
F T
E V E N T S
O F F
< A R R O W S > T O M O V E
< + O R - >
T O S E L E C T
< E N T E R > T O C O N T I N U E
3. Press
to move cursor to the desired event and grade row.
4. Press
to move cursor to [ALL] to select all grades, or press
one or more times to move cursor to select individual letter grades. If you do
not select any grades on an event line, the report will not include that event.
SECTION 12 - MANUAL REPORT SCREENS
12-22
PHASE RESEARCH
USER GUIDE
5. Press
or
now highlighted.
to toggle selection ON or OFF. Your selections are
NOTE: Pullouts and other (FT) events will not be reported unless you change the
settings from OFF (default setting) to ON.
SECTION 12 - MANUAL REPORT SCREENS
12-23
PHASE RESEARCH
USER GUIDE
12-1.5.2
Car by Car Reports by Time and Date
From MANUAL REPORTS Screen (see “MANUAL REPORTS” on page 12-1):
1. Press
to move cursor to [CAR BY CAR].
2. Press
. You are now in the Car by Car screen.
1 1 : 0 0
A
A
A
A
A
P U
F T
M
G
W
W
L
L
E
R
I
I
I
L
E
A M
M O N F E B 2 3
C A R
C A R
b y
N U
A L L
A B C D F
E E T
A L L
A B C D F
N 1
A L L
A B C D F
N 2
A L L
A B C D F
N E
A L L
A B C D F
O U T S
O F F
V E N T S
O F F
< A R R O W S > T O M O V E
< + O R - >
T O S E L E C T
< E N T E R > T O C O N T I N U E
3. Press
to move cursor to the desired event and grade row.
4. Press
to move cursor to [ALL] to select all grades, or continue to press
to move cursor to select individual letter grades.
5. Press
highlighted.
to toggle selection ON or OFF. Your selections are now
SECTION 12 - MANUAL REPORT SCREENS
12-24
PHASE RESEARCH
USER GUIDE
6. Press
to view the screen below, on which you can define the time
period and date range for your Car by Car report. The events and grades you
previously selected are displayed below the current time/date and type of
report (CAR by CAR).
1 1 : 0 0
A
A
A
7. Press
A M
C A R
M E N U
G R E E T
W I N 2
S T A
6
F R O
F E B /
P R
R
:
M
2
I
<
<
<
<
O W S >
T O M
T O S
- >
E R >
T O C O
N
M E N U > T
A
+
E
M
R
o
N
A
R
r
T
I
T
0 0 A M
M O N
F
C A R
b y
D
B C D
A B C D
1 / 0 1
N T
E B
2 3
F
F
F
S T O P
1 : 0 0 P M
T O
F E B / 2 3 / 0 1
O V E
E T
T & D
N T I N U E
O
E X I T
to move cursor to time and date fields you want to change.
8. Press
to change the times and/or dates. One report is produced
for each date you select.
9. Press
to move cursor to [PRINT].
10. Press
to print the report. The Timer will display SEARCHING and/or
PROCESSING for up to several seconds before the report is displayed or
printed.
SECTION 12 - MANUAL REPORT SCREENS
12-25
PHASE RESEARCH
USER GUIDE
The following is a sample Car by Car Report with rows for each event, using the actual
event names in your configuration. Each row shows time of day, station name, letter grade,
and actual time duration of event.
SAT SEP 23, 2000
SUN SEP 24, 2000
MON SEP
1:23PM
1:32PM
1:34PM
1:45PM
1:46PM
1:46PM
1:46PM
1:46PM
1:48PM
1:48PM
1:48PM
1:49PM
1:49PM
1:49PM
1:49PM
1:50PM
1:54PM
1:54PM
25, 2000
POWER OFF
ACCESS A
ACCESS T
GREET
B
GREET
B
ACCESS T
CASHIER D
GREET
B
WINDOW
F
TOTAL
F
CASHIER F
WINDOW
F
TOTAL
F
CASHIER F
TOTAL
C
WINDOW
D
CASHIER F
TOTAL
F
SECTION 12 - MANUAL REPORT SCREENS
0:04
O:04
0:36
0:04
1:19
2:04
1:17
1:04
2:18
0:47
1:40
0:38
2:37
4:25
12-26
PHASE RESEARCH
USER GUIDE
SECTION 13 - PARAMETERS PROGRAMMING
13-1 Parameters Programming
THIS FEATURE REQUIRES AN ACCESS CODE FOR ENTRY.
The Set Parameters screen lets you customize your Timer to match changing store requirements
(operating hours, shift times, or automatic reporting requirements). See “SET PARAMETERS
WORKSHEETS” (Appendix 2).
1
D
S
A
M
G
W
W
L
1 : 0 0 A M
M O N F E B
Y P T 1 0 : 3 0 A M - 2 : 0 0
H F T
6 : 0 0 A M - 4 : 0 0
S I D E
N O W
A V
E N U
: 0 4
:
R E E T
: 0 4
:
I N 1
: 1 5
:
: 2 8
:
I N 2
I N E
1 : 3 3
1 :
D A I L Y
C A R S
I N
L A N E
T O T A L
C A R S
P U L L
O U T S
=
=
=
2
P
P
G
3
0
2
3
4
3
M
M
3
5
2
9
5
4
1 5 0
1
From ACTIVITY Screen:
1.
Press
. You are now in the Menu screen.
SECTION 13 - PARAMETERS PROGRAMMING
13-1
PHASE RESEARCH
USER GUIDE
TIMER SERIES
NUMBER
MODEL
CONFIGURATION
1 1 : 0 0
A M
M O N F E B 2 3
F T 2 + 2 / 3 8 6 V E R 2 2 0
F T 1 0 0 3
S N # 1 2 3 4 5 6
M E N U
R E M O V E C A R F R O M L A N E
R E S E T L O O P
P R I N T H E A D E R
M A N U A L R E P O R T S
S E T P A R A M E T E R S
D R I V E - T H R U C O N F I G
D I A G N O S T I C S
R E S E T
M E M O R Y
< A R R O W S > T O
< E N T E R >
T O
< M A I N M E N U >
IMAGE
VERSION
SERIAL
NUMBER
M O V E
S E L E C T
T O E X I T
2.
Press
to move cursor to [SET PARAMETERS].
3.
Press
. You are now prompted to enter your Access Code.
4.
Press the numbered pink keys (0 - 9) to enter your six-digit Access Code. See “Assign
Access Codes” on page 13-3. You are now in the Store Parameters screen, and the
cursor is immediately to the left of ACCESS CODES.
SECTION 13 - PARAMETERS PROGRAMMING
13-2
PHASE RESEARCH
USER GUIDE
13-1.1 Assign Access Codes
The Access Codes screen lets you secure your system from unauthorized use.
1 1 : 0 0
A
T
H
D
S
T
P
R
N
S
C
I
E
A
H
A
R
E
I
T
C
M
A
Y
I
R
I
M
G
O
E
E
D
P
F
G
N
O
H
A M
R
S
/
I
A
T
E
T
T
T
E
S
S
N
R
S
T
E
E
M O N
F E B
2 3
P A R A M E T E R S
C O D E S
T O R E
H O U R S
G
T S
S
R
O P T I O N S
D I S P
O P T I O N S
M A N A G E R
< A R R O W S >
T O
< E N T E R >
T O
< M A I N M E N U >
M O V E
S E L E C T
T O
E X I T
From STORE PARAMETERS Screen (see “PARAMETERS PROGRAMMING” on
page 13-1):
1.
Press
. You are now in the Set Access Codes screen.
1 1 : 0 0
A M
S E T
C
C
C
C
O
O
O
O
D
D
D
D
E
E
E
E
A
B
C
D
M O N
F E B
2 3
A C C E S S
C O D E S
:
:
:
:
S
U N U S
U N U S
U N U S
G L O B A L :
< A R R O W S > T O
< E N T E R >
T O
< M A I N M E N U >
SECTION 13 - PARAMETERS PROGRAMMING
E
E
E
E
T
D
D
D
U N U S E D
M O V E
S E L E C T
T O
E X I T
13-3
PHASE RESEARCH
USER GUIDE
NOTE: You may assign up to four Access Codes, identified as A, B, C, and D on the
Set Access Codes screen. An unused Access Code is displayed as
“UNUSED.” A used Access Code is displayed as “SET.” (When no access
code has been set, the default access code is 000000. Once any of the access
codes has been set, however, the default access code (000000) no longer
allows access.)
You may also program a global password to allow full access, but care must
be taken before this is done.
2.
Press
to select the unused Access Code you wish to set.
3.
Press
. You are now in the Password Entry screen.
1 1 : 0 0
A M
M O N
F E B
2 3
E N T E R
6 - D I G I T
C O D E
C
T H I S
O P
A N
A
T O
B
A
T
C
E
U
I
C
T
O
E
M
I
N
S
O
- O N
R E Q U I R E S
S
C O D E
D I F I E D
4.
Press the numbered pink keys (0 - 9) to enter the new six-digit Access Code. You are
now returned to the previous screen (SET ACCESS CODES).
5.
Press
.
SECTION 13 - PARAMETERS PROGRAMMING
13-4
PHASE RESEARCH
USER GUIDE
IMPORTANT:
IF THE SELECTED ACCESS CODE IS UNUSED, THE PASSWORD
ENTRY SCREEN (SEE PREVIOUS PAGE) WILL APPEAR. IF THE
ACCESS CODE HAS ALREADY BEEN SET, THE FOLLOWING TECH
CODES SCREEN WILL APPEAR.
1 1 : 0 0
A M
M O N
T E C H
T H I S
A
T O
F E B
2 3
C O D E S
O P T I O N
R E Q U I R E S
T E C H
C O D E
B E
M O D I F I E D
E N T E R
T E C H
C O D E
- - - - - F O R H E L P C A L L :
P H A S E
R E S E A R C H
A T : ( 7 1 4 ) 8 5 0 - 1 3 2 0
< M A I N
M E N U >
T O
E X I T
NOTE: You must call Phase Research to obtain a “TECH CODE” in order to change the
Access Code.
SECTION 13 - PARAMETERS PROGRAMMING
13-5
PHASE RESEARCH
USER GUIDE
SECTION 13 - PARAMETERS
13-1.2 Time/Store Hours
The Time/Store Hours screen lets you set the current date and time and the day considered to
be the first day of the week for your store. It also lets you set the daily store opening and closing times for each day of the week.
From STORE PARAMETERS Screen (see “PARAMETERS PROGRAMMING” on
page 13-1):
1. Press
to select [TIME/STORE HOURS].
2. Press
. You are now in the Time/Store Hours screen.
1 1 : 0 0
1 S T
1 S T
S
M
T
W
T
F
S
U
O
U
E
H
R
A
N
N
E
D
U
I
T
A M
D A Y
M O .
O P
C L
6 :
6 :
6 :
6 :
6 :
6 :
E
O
0
0
0
0
0
0
M O
Y
O F
W
O F
Y
N
S E D 0 A M 0 A M 0 A M 0 A M 0 A M 0 A M -
< A R R O W S >
T O
< + O R - >
T O
< M A I N
M E N U >
3. Press
N
F E B
2 3
E A R : 2 0 0 1
E E K :
W E D
E A R :
F E B
C L O S E
2
1
1
1
1
1
4
2
2
2
2
2
:
:
:
:
:
H
0
0
0
0
0
O
0
0
0
0
0
U
A
A
A
A
A
R
M
M
M
M
M
M O V E
S E T
T & D
T O
E X I T
to move to the desired field.
4. Press
to change the times, days, and dates. The OPEN and
CLOSE times move in 15-minute increments, and AM and PM change automatically as you scroll through the hours.
SECTION 13 - PARAMETERS PROGRAMMING
13-6
PHASE RESEARCH
USER GUIDE
NOTE: To set up a store for a 24-hour day, set the OPEN and CLOSE times the
same. When CLOSE time is set to the same time as OPEN time, CLOSE
time field will display 24 HOUR.
NOTE: You may set a particular day as CLOSED by pressing
on the day’s
OPEN time until it reads, “CLOSED”. (Closed will be between 11:45
p.m. and 12:00 a.m.)
SECTION 13 - PARAMETERS PROGRAMMING
13-7
PHASE RESEARCH
USER GUIDE
13-1.3 Store Heading
SECTION 13 - PARAMETERS
The Store Heading screen lets you enter text for the Header, which you can print using the
[PRINT HEADER] function on the Menu screen. (The Header can be automatically printed
with some reports to identify them by their store.) The Header information is also displayed
on the Header of reports generated by the Fast Track personal computer software suite, if
being used.
From STORE PARAMETERS Screen (see “PARAMETERS PROGRAMMING” on
page 13-1):
1. Press
to select [HEADING].
2. Press
. You are now in the Heading screen.
1 1 : 0 0
A M
M O N
F E B
2 3
S T O R E : - - - - - - - - - - - - N U M B E R : - - - - - - - - - - - M A N A G E R : - - - - - - - - - - P H O N E : ( - - - ) - - - - - - - M O D E M : ( - - - ) - - - - - - - C I T Y :
- - - - - - - - - - - - - -
D I S P L A Y
3. Press
M O D E
to move to the desired typing position.
4. Press
to change the screen from DISPLAY MODE to KEYBOARD
MODE (see bottom row of screen). The Keypad then functions like a telephone keypad with letters or characters associated with keys (see diagram on
following page).
NOTE: If the Keypad is already in KEYBOARD MODE, pressing [KEYBOARD
MODE] advances the cursor one space to the right.
SECTION 13 - PARAMETERS PROGRAMMING
13-8
PHASE RESEARCH
USER GUIDE
5. Press the number key(s) repeatedly until the desired character is displayed. For
example, pressing the number “2” key (PRINT DISPLAY):
One time will display an “A”
Two times will display a “B”
Three times will display a “C”
Four times will display a “2”
Five times will display an “a”
Six times will display a “b”
Seven times will display a “c”
(All number keys will display letters and numbers in this fashion.)
Press
while in KEYBOARD MODE to cycle through various
punctuation marks and symbols.
6. Press
to enable you to move the cursor as needed to continue modifying the Header.
7. Press
to store the modified Header and return to the previous screen.
ENTER
SELECT
ABC
DEF
DISPLAY
MODE
GHI
JKL
MNO
KEYBOARD
MODE
PRS
TUV
MAIN
MENU
CLEAR
QZ
A/B/
A+B
NOTE: LETTER DESIGNATIONS ARE FOR REFERENCE ONLY.
LETTERS DO NOT APPEAR ON KEYS.
SECTION 13 - PARAMETERS PROGRAMMING
13-9
PHASE RESEARCH
USER GUIDE
SECTION 13 - PARAMETERS
13-1.4 Set Dayparts
The Set Dayparts screen lets you break each day into a number of smaller units called dayparts, which are used to group data for viewing and reporting.
From STORE PARAMETERS Screen (see “PARAMETERS PROGRAMMING” on
page 13-1):
1. Press
to select [DAYPARTS].
2. Press
. You are now in the Set Dayparts screen.
1 1 : 0 0
A M
M O N
F E B
S E T
D A Y P A R T S
D A Y :
1
2
3
4
5
6
7
8
S U N
S T A
=
6 : 0
= 1 0 : 3
=
1 : 0
=
4 : 3
=
8 : 0
C O P Y
2 3
R
0
0
0
0
0
T O
T
A
A
P
P
P
M
M
M
M
M
S T O P
- 1 0 : 3 0
1 : 0 0
4 : 3 0
8 : 0 0
- 1 2 : 0 0
A L L
A
P
P
P
A
M
M
M
M
M
< E N T E R >
NOTE: The cursor is now on DAY. To change the day of the week, complete the
following two steps.
3. Press
to move the cursor immediately to the right of DAY:.
4. Press
or
5. Press
to move to the desired daypart.
6. Press
times.
to move to the [=] or [-] fields to change the START or STOP
to change the day.
SECTION 13 - PARAMETERS PROGRAMMING
13-10
PHASE RESEARCH
USER GUIDE
7. Press
to change the time in 15-minute increments. The Timer
adjusts automatically to prevent time gaps or overlaps.
NOTE: The ending time of each daypart coincides with the starting time of the next
daypart for the same day, though you may use different dayparts for each day
of the week. Daypart 1 always starts at the opening time for the day, and the
last programmed daypart always ends at the closing time for the day.
8. Press
to add a new daypart by moving the cursor immediately to
the right of the first unused daypart number (for which START and STOP
times have not yet been entered).
9. Press
or
now entered.
to add the daypart. The START and STOP times are
10. Press
to delete dayparts by moving the cursor to
the [=] field of the first daypart (moving from top to bottom, or 1 to 8) you
want to remove.
11. Press
to delete the daypart. Any dayparts that follow will automatically
be removed as well. And the store’s closing time will automatically be entered
in place of the STOP time for the last remaining daypart.
NOTE: If all days use the same dayparts, you can set the dayparts for only one day
and then use the COPY TO feature to copy the same settings to all other days,
as explained in the following steps.
12. Press
to move the cursor immediately to the right of DAY:.
13. Press
or
to select the desired day from which to copy.
14. Press
to move cursor to COPY.
15. Press
to move the cursor to <ENTER>.
16. Press
to copy the displayed daypart settings to all other days, replacing
any individual dayparts previously set for these days.
SECTION 13 - PARAMETERS PROGRAMMING
13-11
PHASE RESEARCH
USER GUIDE
SECTION 13 - PARAMETERS
13-1.5 Set Shifts
The Set Shifts screen lets you divide each day into smaller units called shifts, which are used
to group data for viewing and reporting.
From STORE PARAMETERS Screen (see “PARAMETERS PROGRAMMING” on
page 13-1):
1. Press
to select [SHIFTS].
2. Press
. You are now in the Set Shifts screen, and the cursor is on DAY.
1 1 : 0 0
A M
M O N
S E T
D A Y :
1 =
2 =
3
4
F E B
2 3
S H I F T S
S U N
S T A R T
S T O P
6 : 0 0 A M 4 : 0 0 P M
4 : 0 0 P M - 1 2 : 0 0 A M
C O P Y
T O
A L L
< E N T E R >
3. Press
to move cursor immediately to the right of DAY: if you want to
change the day.
4. Press
to move the day forward or backward.
5. Press
to move to an existing shift you would like to modify. (You may
use up to four shifts per day.)
6. Press
to move cursor to the [=] or [-] fields to
change the START or STOP times.
SECTION 13 - PARAMETERS PROGRAMMING
13-12
PHASE RESEARCH
USER GUIDE
7. Press
to change the time in 15-minute increments. The Timer
adjusts automatically to prevent time gaps or overlaps.
NOTE: The ending time of each shift coincides with the starting time of the next shift
for the same day, though you may use different shifts for each day of the week.
Shift 1 always starts at the opening time for the day, and the last programmed
shift always ends at the closing time for the day.
8. Press
to add a new shift by moving the cursor immediately to
the right of the first unused shift number (for which START and STOP times
have not yet been entered).
9. Press
entered.
or
to add the shift. The START and STOP times are now
10. Press
to delete shifts by moving the cursor to the
[=] field of the first shift – in order from top (1) to bottom (4) – you wish to
remove.
11. Press
to delete the shift. Any shifts that follow will automatically be
removed as well. And the store’s closing time will automatically be entered in
place of the STOP time for the last remaining shift.
NOTE: If all days use the same shifts, you can set the shifts for only one day and then
use the COPY TO feature to copy the same settings to all other days, as
explained in the following steps.
12. Press
to move the cursor immediately to the right of DAY:.
13. Press
or
to select the desired day from which to copy.
14. Press
to move cursor to COPY.
15. Press
to move the cursor to <ENTER>.
16. Press
to copy the displayed shift settings to all other days, replacing
any individual shifts previously set for these days.
SECTION 13 - PARAMETERS PROGRAMMING
13-13
PHASE RESEARCH
USER GUIDE
SECTION 13 - PARAMETERS
13-1.6 Set Targets
The Set Targets screen lets you create a system of target times, audible indicators (beeps), and
letter grades for any or all programmed event(s).
From STORE PARAMETERS Screen (see “PARAMETERS PROGRAMMING” on
page 13-1):
1. Press
to select [TARGETS].
2. Press
. You are now in the Set Targets screen.
1
T
D
B
1
A
A
E
:
R
Y
E
A
B
C
D
F
F
C
<
<
<
<
>
=
=
=
=
O
D
D
< A
< +
3. Press
R
P
A
A
R
O
0 0
A
G E T =
: S U N
P
O N
T I
:
1 :
1 :
2 :
2 :
E P E A
Y
T A
Y
Y P A R
R O W S
R - >
M
M
M
D A
A R R
E
0
0
0
0
0
@
O
G E T
: A
S : A
T O
T O
A
M
3
0
3
0
0
T
R
T
>
O
E
Y
I
N
F E B
N U
P A R T : 1
V A L = N O
B
1
2
3
4
2
F F
S E
S
T O :
S M T W T F
1 2 3 4 5 6
M O V E
S E T
2 3
P
N
N
N
N
N
C
S
7 8
to move cursor to the [=] field.
4. Press
or
to select the desired vehicle detection point (MENU,
GREET, WIN 1, WIN 2, LINE).
5. Press
to move the cursor to DAY.
6. Press
to move the cursor to [:] immediately to the right of DAY.
7. Press
or
8. Press
to move the cursor to [:] immediately to the right of DAYPART.
to select the desired day.
SECTION 13 - PARAMETERS PROGRAMMING
13-14
PHASE RESEARCH
USER GUIDE
9. Press
or
to select the desired daypart.
10. Press
to move the cursor to BEEP.
11. Press
to move the cursor to [=] immediately to the right of BEEP ON
ARRIVAL.
12. Press
NO.
or
to toggle the BEEP ON ARRIVAL option to YES or
13. Press
to select the grade (A, B, C, etc.) for which you wish to set or
change the target time. (If you do not want targeting for a particular grade, set
the grade’s target time to 0.)
NOTE: The target time for B must be equal to or greater than that for A; the target
time for C must be equal to or greater than that for B, and the same applies
through the entire sequence of letter grades. The Timer adjusts automatically
to ensure this.
Pass/Fail grading may be used rather than letter grading: Set all letter grades
except F to the same time – the maximum time allotted to the event (MENU,
GREET, etc.) to achieve a passing grade. For example, if you want to make
10 seconds the (Pass) time, set A, B, C, and D to a time of 10 (the selected
event must occur within this amount of time in order to “pass.”).
14. Press
field.
to move the cursor immediately to the left of the B (beep) column
15. Press
or
to set the beep count for the grade you have chosen
(0 - 9 beeps may be chosen). The Remote will beep (the number of times specified) when the selected event exceeds the target time you have selected.
16. Press
field.
to move the cursor immediately to the left of the P (print) column
17. Press
or
to toggle the printing option for the grade to Y (yes) or
N (no). If you select Y (yes), the Timer will print every car that falls within the
particular grade’s target time.
SECTION 13 - PARAMETERS PROGRAMMING
13-15
PHASE RESEARCH
USER GUIDE
18. Press
to move the cursor to the field that begins F REPEAT.
19. Press
to move the cursor to the field just to the right of @.
20. Press
or
to set the number of times you want the beep to repeat.
The Remote Display will sound two successive short beeps at intervals of 2, 5,
10, 15, or 30 seconds depending on your choice. (Select OFF to disable the
repeat beep.)
21. Press
to move the cursor immediately to the left of DAYS.
22. Press
to move the cursor to [A] (A means “All”), or to any of the days
to the right.
23. Press
or
to select the days to which you wish to copy the targets
you have set. Your selections are now highlighted.
24. Press
to move the cursor to the DAYPARTS field.
25. Press
to move the cursor to [A] (A means “All”), or to any of the dayparts to the right.
26. Press
or
to select the dayparts to which you wish to copy the
targets you have set. Your selections are now highlighted.
27. Press
to perform the specified copy operation. Repeat this procedure as
needed for different targeted events.
28. Press
to move the cursor to the top of the screen to the
[TARGET], [DAY] and [DAYPART] fields.
29. Press
or
to scroll through the TARGET, DAY, and DAYPART
values to confirm your settings.
SECTION 13 - PARAMETERS PROGRAMMING
13-16
PHASE RESEARCH
USER GUIDE
SECTION 13 - PARAMETERS
13-1.7 Set Printer Options
The Set Printer Options screen lets you select automatic report printing that matches your
requirements, providing 16 different report settings to give you a great deal of flexibility.
From STORE PARAMETERS Screen (see “PARAMETERS PROGRAMMING” on
page 13-1):
1. Press
to select [PRINTER OPTIONS].
2. Press
. You are now in the Set Printer Options screen.
DAILY WEEKLY
MONTHLY
3. Press
Option fields.
to move the cursor to any of the 16 Report
NOTE: You can decide which reports to print and when. (However, Real Time (RT)
reports only print at the end of their time period.)
SECTION 13 - PARAMETERS PROGRAMMING
13-17
PHASE RESEARCH
USER GUIDE
4. Press
or
each selection.
to select the report option. The Timer displays an X for
5. Press
to move the cursor to REPORT.
6. Press
to move the cursor to [@] immediately to the right of REPORT.
7. Press
or
to select one of two options: a specified time (time=)
or a specified time increment after store closing (close+).
8. Press
to move the cursor to either [=] or [+] depending on your choice
in the previous step.
9. Press
or
to set the time for printing the automatic reports.
NOTE: You can turn the following features – HEADER, TARGET, PEC, AUTO – ON
or OFF.
10. Press
to move cursor immediately to the right of PULLOUT.
11. Press
or
12. Press
to move cursor to the right of FTe (Fulltime Event).
13. Press
or
14. Press
to select ON or OFF.
to select ON (to print any events in the Timer) or OFF.
to move cursor to the right of HEADER.
15. Press
or OFF.
or
to select ON (to print a Report Header on each report)
16. Press
to move cursor to the right of PEC (Print Each Car).
SECTION 13 - PARAMETERS PROGRAMMING
13-18
PHASE RESEARCH
USER GUIDE
17. Press
or
to select ON (to print the PEC report as cars move
through the drive-thru) or OFF.
18. Press
to move cursor immediately to the right of TARGETS.
19. Press
OFF.
or
to select ON (to print the Targets on the reports) or
20. Press
to move cursor immediately to the right of AUTO.
21. Press
or
to select ON or OFF (to disable automatic reporting).
NOTE: Events that will be printed on the automatic reports must be defined by
corresponding drive-thru configurations or target settings.
IMPORTANT: Samples of the Printer report tapes generated by the automatic reporting
feature of the Timer are shown in “PRINTER REPORT TAPES” (Appendix 1).
SECTION 13 - PARAMETERS PROGRAMMING
13-19
PHASE RESEARCH
USER GUIDE
SECTION 13 - PARAMETERS
13-1.8 Set Remote Display Options
THIS FEATURE REQUIRES AN ACCESS CODE FOR ENTRY
The Set Remote Display Options screen lets you select the information that appears on the
Remote Displays.
From STORE PARAMETERS Screen (see “PARAMETERS PROGRAMMING” on
page 13-1):
1. Press
to select [REMOTE DISP OPTIONS].
2. Press
. You are now in the Set Remote Display Options screen.
NOTE: A Timer may have up to six Remote Displays (one standard plus up to five
optional). The first five show two types of data: 1) the elapsed time for the
event assigned to the Display, continuously updated during the event; and,
2) the average time for the event computed over the daypart, shift, day, week,
month, or year to date (as selected by the user), after the car leaves the station.
The average time is re-computed after each car leaves the event assigned to
the Display, and is shown by flashing numerals once the event station is no
longer occupied.
1 1 : 0 0
A M
R E M O T E
M O N
F E B
D I S P L A Y
R
R
R
R
R
R
A
A
A
A
L
W
W
W
A
W I N 1
E
E
E
E
E
E
M
M
M
M
M
M
O
O
O
O
O
O
T
T
T
T
T
T
F L A S H
E
E
E
E
E
E
#
#
#
#
#
8
1
2
3
4
5
3 %
A V G
< A R R O W S >
T O
< + O R - >
T O
< M A I N
M E N U >
3. Press
I
I
I
I
N
N
N
N
2 3
E
1
2
1
D A Y P A R T
M O V E
S E L E C T
T O
E X I T
to move the cursor to the desired Remote(s).
SECTION 13 - PARAMETERS PROGRAMMING
13-20
PHASE RESEARCH
USER GUIDE
NOTE: If you do not know the number associated with a particular Remote Display,
remove and reconnect the five-pin connector atop the Display. Do not remove
the connector by pulling on the gray cable; remove it only by pulling on
its black base. The unit then goes through a power-up sequence and displays
the address of the Remote.
IMPORTANT! While Remote Displays that show the time of the same
event can have either the same or different addresses, if you want two or
more Remote Displays to show the time of different events, each display
must be set to a different address. The address of the Remote is the third
digit only of the first number that comes up after you power on the Remotes,
e.g., for example, the address for 275 would be 5; the address for 005 would
also be 5. (If the Display’s address is 001, it will show the time that Remote
#1 is programmed to show as indicated on the Remote Display screen. If a
Remote’s address is 002, it will show the time that Remote #2 is programmed
to show, etc.)
4. Press
to move the cursor immediately to the right of the individual
Remote address number(s) (i.e., #1).
5. Press
or
to select the event that the Remote(s) will be monitoring. Adjust all other Remotes as needed.
NOTE: The optional sixth Remote Display setting serves as a special Percentage
Remote which can be used to monitor speed of service, as well as to provide
performance incentive for crew members. The Percentage Remote shows, in
either red or green numerals, the percentage of cars that satisfy a particular
grade’s target time. If the percentage of cars satisfying the particular grade’s
target time is below a percentage selected by the user, the Display numerals
will be red. If the percentage is equal to or higher than the selected percentage,
the numerals will be green. Only the Percentage Remote and two-color
Remote – not the standard one-color Remote Display – have this capability.
Percentage Remotes will display the A target only, while the two-color
Remotes will allow you to specify any target grade you wish. To set your twocolor Remote to show percentage, please refer to the Phase Research
Installation Guide.
NOTE: Steps 5.a. to 5.e. explain how to set up a percentage Remote or a two-color
Remote that is set to show percentage. If you do not want your system set to
include such percentage remote capabilities, proceed to Step 6.
5.a. Press
to move cursor to the sixth (last) Remote position.
SECTION 13 - PARAMETERS PROGRAMMING
13-21
PHASE RESEARCH
USER GUIDE
5.b. Press
to move cursor to the right of the percentage.
5.c. Press
or
will change color.
5.d. Press
5.e. Press
6. Press
to select the desired percentage at which the Display
to move the cursor to [%].
or
to select the event to be monitored.
to move the cursor to [FLASH AVG].
7. Press
or
to select the averaging period (HOURLY; DAYPRTS;
SHIFTS; DAILY; WEEKLY; MONTHLY; ALT). The averaging period applies
to all Remote Displays. If you select a blank value, no averages will be flashed
between events.
NOTE: Depending on the model of the Remote (one-color, two-color, or percentage),
the data will be shown either in minutes:seconds, seconds only, or percentage.
Time data will be displayed only during the hours the store is open. When
closed, only a colon (two vertical dots, i.e., :) is shown on a minutes:seconds
Display; a seconds and percentage Display is blank.
SECTION 13 - PARAMETERS PROGRAMMING
13-22
PHASE RESEARCH
USER GUIDE
SECTION 13 - PARAMETERS
13-1.9 Set Remote Addressing
IF IT IS NECESSARY TO CHANGE A REMOTE DISPLAY’S ADDRESS,
USE THE FOLLOWING STEPS:
1. Unplug the five-pin connector from the top of the Remote Display and remove
the display from its mounting. Remove the two (2) smaller Phillips head
screws from the top of the Display first, and then remove the two (2) Phillips
head screws from the bottom of the Display. The two (2) covers of the Display
should now separate.
2. After separating the two covers, locate the eight (8) position dip-switch block
located on the upper right-hand side of the circuit board. Adjust the switches
according to the addresses you want.
Remote Display Address Dip-Switch Settings
OFF
8
7
6
Address 001:
Address 002:
Address 003:
Address 004:
Address 005:
Address 006:
5
4
3
2
1
ON
Switch 1 ON, 2 OFF, 3 OFF
Switch 2 ON, 1 OFF, 3 OFF
Switches 1 & 2 ON, 3 OFF
Switch 3 ON, 1 OFF, 2 OFF
Switches 1 & 3 ON, 2 OFF
Switches 2 & 3 ON, 1 OFF
3. Plug the connector back into the Remote Display and verify that it has the correct address before reassembling.
4. Once the Remote Display is addressed correctly, reassemble and remount it.
SECTION 13 - PARAMETERS PROGRAMMING
13-23
PHASE RESEARCH
USER GUIDE
SECTION 13 - PARAMETERS
13-1.10 Night Manager
THIS FEATURE REQUIRES AN ACCESS CODE FOR ENTRY
The Night Manager screen allows you to view and print particular events over a specified time
period to track such events, as well as identify problems and their causes (which is particularly
useful for absentee management).
.
From STORE PARAMETERS Screen (see “PARAMETERS PROGRAMMING” on
page 13-1):
1. Press
to select [NIGHT MANAGER].
2. Press
. You are now in the Night Manager screen.
1 1 : 0
N
6 :
D A T E
0
A M
M O N
F E B
2 3
I G H T
M A N A G E R
0 0 P M
1 2 : 0 0 A M
: F E B / 2 3 / 0 1
V I E W < > P R I N T
F T
E V E N T S
P U L L
P
<
<
<
<
E
A
+
E
M
C
R
O
N
A
:
R
R
T
I
O U T S
O F F
O W S >
T O
M
- >
T O
S
E R >
T O
C O
N
M E N U >
T
=
=
O V E
E T
T & D
N T I N U E
O
E X I T
NIGHT MANAGER PROVIDES A SET OF SCREENS TO DISPLAY
OPERATING EXCEPTIONS – FT (FAST TRACK) EVENTS AND PULLOUTS –
THAT OCCUR IN YOUR DRIVE-THRU OPERATION.
3. Press
to move the cursor to the time and/or date field(s)
to set the time period for Night Manager displays.
SECTION 13 - PARAMETERS PROGRAMMING
13-24
PHASE RESEARCH
USER GUIDE
4. Press
to move the cursor to [VIEW] or [PRINT] in order to send
the report to either the display or the printer.
NOTE: Selecting VIEW allows you to “drill down” through two more screens of
greater detail (one for FT EVENTS and one for PULL OUTS). Selecting
PRINT will cause all three Night Manager screens (the first Night Manager
screen, FT EVENTS screen, and PULLOUTS screen) to print.
5. Press
to produce the selected screen or printer report. The total number
of FT EVENTS and PULLOUTS appears on the display.
NOTE: Night Manager also includes a PEC (Print Each Car) feature that applies to
the selected time period.
6. Press
to move the cursor immediately to the right of PEC:
7. Press
or
to toggle PEC ON or OFF.
SECTION 13 - PARAMETERS PROGRAMMING
13-25
PHASE RESEARCH
USER GUIDE
13-1.10.1 Show Event Detail
The Show Event Detail screen displays more detail for the event (FT EVENTS) selected on
the first Night Manager screen.
1. From STORE PARAMETERS Screen (see “PARAMETERS PROGRAMMING” on page 13-1):
2. Press
to select [NIGHT MANAGER].
3. Press
. You are now in the Night Manager screen.
1 1 : 0
N
6
D A T E
P
P
A
A
M
A
R
O
O
C
C
A
L
E
W
W
C
C
I
T
S
0
A M
M O N
F E B
2 3
I G H T
M A N A G E R
: 0 0 P M
1 2 : 0 0 A M
: F E B / 2 3 / 0 1
F
R
R
S S
S S
C
C O
E T
E
E
E
E
N
< M A I N
T
E
O N
O F F
D E
G R
O N F
N F I
M E M
V E N T S
N
A
I
G
O
I E D
N T E D
G
R Y
M E N U >
T O
=
=
=
=
=
=
=
0
4
9
9
1 4
1
0
E X I T
4. Press
to move the cursor to the time and/or date field(s)
to set the time period for Night Manager displays.
5. Press
to move the cursor to [VIEW] or [PRINT] in order to send
the report to either the display or the printer.
6. Press
to produce the selected screen or printer report. The total number
of FT EVENTS and PULLOUTS appears on the display.
SECTION 13 - PARAMETERS PROGRAMMING
13-26
PHASE RESEARCH
USER GUIDE
7. Press
to move the cursor to [FT EVENTS].
8. Press
to “drill down” to view a more detailed screen for FT EVENTS.
The display shows the conditions that contributed to the FT Events count.
SECTION 13 - PARAMETERS PROGRAMMING
13-27
PHASE RESEARCH
USER GUIDE
13-1.10.2 Show Event Counts
The Show Event Counts screen displays more detail for the event (PULLOUTS) selected on
the previous screen.
1. From STORE PARAMETERS Screen (see “PARAMETERS PROGRAMMING” on page 13-1):
2. Press
to select [NIGHT MANAGER].
3. Press
. You are now in the NIGHT MANAGER screen.
1 1 : 0
N
6
D A T E
E
R
R
M
D
V
E
E
A
R
E
M
S
X
I
0
A M
M O N
F E B
2 3
I G H T
M A N A G E R
: 0 0 P M
1 2 : 0 0 A M
: F E B / 2 3 / 0 1
P
N T
:
O V E
E T
L
C A R
V E
O
< M A I N
U
0
C
O
S
F
L L O U T S
0
=
A R
=
O P
=
=
F
=
M E N U >
T O
0
0
0
0
0
E X I T
4. Press
to move the cursor to the time and/or date field(s)
to set the time period for Night Manager displays.
5. Press
to move the cursor to [VIEW] or [PRINT] in order to send
the report to either the display or the printer.
6. Press
to produce the selected screen or printer report. The total number
of FT EVENTS and PULLOUTS appears on the display.
SECTION 13 - PARAMETERS PROGRAMMING
13-28
PHASE RESEARCH
USER GUIDE
7. Press
to move the cursor to [PULL OUTS].
8. Press
to “drill down” to view a more detailed screen for PULLOUTS.
The display shows the conditions that contributed to the Pullouts count.
SECTION 13 - PARAMETERS PROGRAMMING
13-29
PHASE RESEARCH
USER GUIDE
SECTION 14 - DIAGNOSTICS SCREENS
14-1 Diagnostics
THIS FEATURE REQUIRES AN ACCESS CODE FOR ENTRY
The Diagnostic screen is a monitoring feature that lets you view the number of operating exceptions – FT (Fast Track) Events and Pullouts – for a particular day of operation.
From MENU Screen (see “Menu” on page 8-1):
1.
Press
to move cursor to [DIAGNOSTICS].
2.
Press
. You are now prompted to enter your Access Code.
3.
Press the numbered pink keys (0 - 9) to enter your six-digit Access Code. You are now
in the Diagnostic screen, and the cursor is on the month in the date field.
1 1 : 0 0
A M
M O N
F E B
D I A G N O S T I C
2 3
D A T E : F E B / 2 3 / 0 1
V I E W < > P R I N T
F T
E V E N T S
P U L L
<
<
<
<
A
+
E
M
R
o
N
A
R
r
T
I
O U T S
O W S >
T O
M
- >
T O
S
E R >
T O
C O
N
M E N U >
T
=
=
O V E
E T
D A T E
N T I N U E
O
E X I T
4.
Press
to select the desired date.
5.
Press
to move cursor to [VIEW] or [PRINT].
SECTION 14 - DIAGNOSTICS SCREENS
14-1
PHASE RESEARCH
USER GUIDE
NOTE: Selecting either [VIEW] or [PRINT] will allow you to view three Diagnostic
screens (all showing details about the FT EVENTS and PULLOUTS, as
shown on screens below):
Choosing [PRINT] will produce these three Diagnostic screens
on a single report tape.
Selecting [VIEW] will allow you to view the same three Diagnostic
tools on the display screen by using the following steps:
6.
Press
after selecting [VIEW]. The number of FT EVENTS and PULLOUTS
for the date selected will appear on the main Diagnostic screen. (If you have selected
[PRINT], the three Diagnostic screens will be printed as described above.) If you have
selected [VIEW], proceed to step 7.
7.
Press
8.
Press
to display another Diagnostic screen with more details about either
selection, FT EVENTS or PULLOUTS.
to move cursor to FT EVENTS or PULLOUTS.
NOTE: If you wish to view the other operating exception (FT EVENTS or
PULLOUTS), return to the main Diagnostic screen and repeat
steps 7 and 8.
If you wish to view information for other days, return to the main
Diagnostic screen to select the desired date.
1 1 : 0 0
A M
M O N
F E B
D I A G N O S T I C
2 3
O
O
C
C
A
L
E
W
W
C
C
I
T
S
F
R
R
S S
S S
C
C O
E T
E
E
E
E
N
< M A I N
T
E
O N
O F F
D E
G R
O N F
N F I
M E M
V E N T S
N
A
I
G
O
I E D
N T E D
G
R Y
M E N U >
T O
A M
M O N
F E B
D I A G N O S T I C
2 3
D A T E : F E B / 2 3 / 0 1
D A T E : F E B / 2 3 / 0 1
P
P
A
A
M
A
R
1 1 : 0 0
=
=
=
=
=
=
=
3 1
3 1
9
2 6 7
5
5
1
E X I T
SECTION 14 - DIAGNOSTICS SCREENS
E
R
R
M
D
V
E
E
A
R
E
M
S
X
I
P
N T
:
O V E
E T
L
C A R
V E
O
< M A I N
U
0
C
O
S
F
L L O U T S
0
=
A R
=
O P
=
=
F
=
M E N U >
T O
3
2
1
1
4
E X I T
14-2
PHASE RESEARCH
USER GUIDE
SECTION 15 - RESET MEMORY
15-1 Reset Memory
THIS FEATURE REQUIRES A TECH CODE FOR ENTRY
The Reset Memory screen allows you to erase all historical event data in the memory.
CAUTION: THIS SCREEN WARNS THAT IF YOU PRESS THE
KEY, YOU
WILL ERASE ALL HISTORICAL EVENT DATA PERMANENTLY.
1 1 : 0 0
A M
M O N F E B 2 3
F T 2 + 2 / 3 8 6 V E R 2 2 0
F T 1 0 0 3
S N # 1 2 3 4 5 6
M E N U
R E M O V E C A R F R O M L A N E
R E S E T L O O P
P R I N T H E A D E R
M A N U A L R E P O R T S
S E T P A R A M E T E R S
D R I V E - T H R U C O N F I G
D I A G N O S T I C S
R E S E T
M E M O R Y
< A R R O W S > T O
< E N T E R >
T O
< M A I N M E N U >
M O V E
S E L E C T
T O E X I T
From MENU Screen:
1.
Press
to move cursor to [RESET MEMORY].
2.
Press
. You are now prompted to enter your Tech Code. (This code must be
obtained from Phase Research.)
SECTION 15 - RESET MEMORY
15-1
PHASE RESEARCH
USER GUIDE
3.
Press the numbered pink keys (0 - 9) to enter your six-digit Tech Code. You are now in
the Reset Memory screen.
1 1 : 0 0
A M
M O N
F E B
2 3
C A U T I O N
T H I S
W I L L
C A U S E
A L L
C A R
C O U N T S ,
T O T A L S
T O
B E
L O S T
F O R E V E R
T O
C O N T I N U E
P R E S S
< C L E A R >
< M A I N
4.
M E N U >
T O
E X I T
Press
. This will erase your Timer’s memory permanently, and you will not be
able to retrieve any historical event data.
NOTE: The Fast Track 2+2/386 memory is capable of storing up to 131,000 events. Once
its data exceeds that amount, the Timer will begin writing over the oldest data.
If your Timer monitors five stations (Menu, Greet, Win1, Win2, and Line), it will
create five events for each vehicle that passes through the drive-thru. So, to calculate the number of events stored in memory each day, simply multiply the number
of events by the average number of cars recorded on a daily basis. For example,
based on the five-station configuration above:
5 events x 400 cars per day = 2,000 events per day
131,000 events ÷ 2000 events per day = approx. 65 days worth of memory.
SECTION 15 - RESET MEMORY
15-2
PHASE RESEARCH
USER GUIDE
PRINTER REPORT TAPES
The sample Printer report tape below details the meaning of each entry on a report
generated by the automatic reporting feature of the Timer. The following four pages feature Printer tape examples of the 16 different reporting options:
Time and Date of
Report Creation
Report Beginning Date
Drive-Thru Lane
Detection Points
Total Pullouts
Targeted Event
Target Grades
****DAILY DAYPART******
1:30
AM MON FEB 23 1999
Printer Options Vector Header
Type of Report
FROM
DAYPARTX
TO
FEB/ 23/ 99<>FEB/ 23/ 99
A SIDE
MENU
GREET
PICK UP
TOTAL
#CARS
241
240
240
240
PULLOUTS
AVG
:52
:04
1:19
2:48
=
1
EVENT:
TARGET
A
B
C
D
F
MENU
#CARS
143
22
49
15
11
%
59
9
20
6
4
EVENT:
TARGET
A
F
GREET
#CARS
224
16
%
93
7
EVENT:
TARGET
A
B
C
D
F
PICK UP
#CARS
171
28
13
19
11
%
71
12
5
8
4
EVENT:
TARGET
A
B
C
D
F
TOTAL
#CARS
124
52
48
15
1
%
52
22
20
6
0
Report Ending Date
1
Detection Points Average Time
Detection Point Total Cars
Total Cars at Each Grade
****END OF REPORT*********
Percentage of Total Cars at
Each Grade
Report Footer
NOTE: The Printer Options feature contains an option to turn targets on (as in example
above) or off. If the targets are turned off, all information below the entry
“PULLOUTS” will not appear on the report.
PRINTER REPORT TAPES
A
P
P
E
N
D
I
X
A1-1
PHASE RESEARCH
USER GUIDE
A
P
P
E
N
D
I
X
1
HOURLY REPORTS
4:00 PM
START3:00 PM
A SIDE
MENU
GREET
PICK UP
TOTAL
MON FEB 23 1999
<>
-STOP
4:00 PM
#CARS
19
19
19
19
PULLOUTS
AVG
:58
:04
1:11
2:40
=
1
EVENT:
TARGET
A
B
C
D
F
MENU
#CARS
7
4
4
2
2
%
35
23
20
12
10
EVENT:
TARGET
A
F
GREET
#CARS
18
1
%
95
5
EVENT:
TARGET
A
B
C
D
F
PICK UP
#CARS
9
5
2
2
1
%
50
25
10
10
5
EVENT:
TARGET
A
B
C
D
F
TOTAL
#CARS
5
6
4
3
1
%
30
34
19
15
5
****END OF REPORT*********
This report is a
REAL-TIME (RT)
report. Notice that
the time and date of
the report are the
same as the end of
the reporting period.
This report has no
VECTOR HEADER.
**** DAILY HOURLY ********
1:30 AM MON FEB 23 1999
START3:00PM
<>
FROMHOURLY
FEB/ 23/99<>FEB/
A SIDE
MENU
GREET
PICK UP
TOTAL
-STOP
4:00PM
-TO
23/99
#CARS
19
19
19
19
PULLOUTS
AVG
:58
:04
1:11
2:40
=
This report is a
WEEKLY HOURLY
report, as indicated by
the VECTOR HEADER.
This report will combine
the like hours from each
day in the week, create a
single report for each
hour, and then generate
them on the first day of
the succeeding week at
the time specified in the
REPORT @ feature.
1
EVENT:
TARGET
A
B
C
D
F
MENU
#CARS
7
4
4
2
2
EVENT:
TARGET
A
F
GREET
#CARS
18
1
%
95
5
EVENT:
TARGET
A
B
C
D
F
PICK UP
#CARS
9
5
2
2
1
%
50
25
10
10
5
EVENT:
TARGET
A
B
C
D
F
TOTAL
#CARS
5
6
4
3
1
%
30
34
19
15
5
%
35
23
20
12
10
**** WEEKLY HOURLY *******
1:30 AM MON FEB 23 1999
START-STOP
3:00PM
<>
4:00PM
FROMHOURLY
-TO
FEB/ 17/99<>FEB/ 23/99
A SIDE
MENU
GREET
PICK UP
TOTAL
#CARS
133
133
133
133
PULLOUTS
****END OF REPORT*********
This report is a
DAILY HOURLY
report, as indicated by
the VECTOR
HEADER. This report
will be just like the RT
report, except that it is
generated at the time
specified in the
REPORT @ feature.
AVG
:47
:04
1:26
3:01
=
3
EVENT:
TARGET
A
B
C
D
F
MENU
#CARS
50
29
25
20
9
%
37
22
19
15
7
EVENT:
TARGET
A
F
GREET
#CARS
126
7
%
95
5
EVENT:
TARGET
A
B
C
D
F
PICK UP
#CARS
58
32
17
21
4
%
44
24
13
16
3
EVENT:
TARGET
A
B
C
D
F
TOTAL
#CARS
49
37
26
16
5
%
36
28
20
12
4
****END OF REPORT*********
This report is a
MONTHLY HOURLY
report, as indicated by the
VECTOR HEADER.
This report will combine
the like hours from each
day in the month, create a
single report for each
hour and then generate
them on the first day of
the succeeding month at
the time specified in the
REPORT @ feature.
**** MONTHLY HOURLY ******
1:30 AM MON MAR 1 1999
START3:00PM
<>
FROMHOURLY
FEB/ 01/99<>FEB/
A SIDE
MENU
GREET
PICK UP
TOTAL
-STOP
4:00PM
-TO
28/99
#CARS
532
532
532
532
PULLOUTS
AVG
:42
:03
1:02
2:53
=
3
EVENT:
TARGET
A
B
C
D
F
MENU
#CARS
202
117
96
64
53
%
38
22
18
12
10
EVENT:
TARGET
A
F
GREET
#CARS
505
27
%
95
5
EVENT:
TARGET
A
B
C
D
F
PICK UP
#CARS
250
160
58
48
16
%
47
30
11
9
3
EVENT:
TARGET
A
B
C
D
F
TOTAL
#CARS
186
160
96
53
37
%
35
30
18
10
7
****END OF REPORT*********
PRINTER REPORT TAPES
A1-2
PHASE RESEARCH
USER GUIDE
A
P
P
E
N
D
I
X
DAYPART REPORTS
1:30 AM
MON FEB 23 1999
START- DAYPARTX -STOP
11:00 AM
<>
1:30 PM
A SIDE
MENU
GREET
PICK UP
TOTAL
#CARS
122
122
122
122
PULLOUTS
AVG
:52
:04
1:19
2:48
=
EVENT:
TARGET
A
B
C
D
F
MENU
#CARS
42
35
24
13
7
EVENT:
TARGET
A
F
GREET
#CARS
111
11
EVENT:
TARGET
A
B
C
D
F
PICK UP
#CARS
56
32
13
12
9
EVENT:
TARGET
A
B
C
D
F
TOTAL
#CARS
66
16
22
13
5
1
%
35
28
20
11
6
%
91
9
%
46
26
11
10
7
%
54
13
18
11
4
****END OF REPORT*********
This report is a
REAL-TIME (RT)
report. Notice that
the time and date of
the report are the
same as the end of
the reporting period.
This report has no
VECTOR HEADER.
**** DAILY DAYPART *******
1:30 AM MON FEB 23 1999
FROM- DAYPARTX -TO
FEB/ 23/99<>FEB/ 23/99
A SIDE
MENU
GREET
PICK UP
TOTAL
#CARS
122
122
122
122
PULLOUTS
AVG
:52
:04
1:19
2:48
=
1
EVENT:
TARGET
A
B
C
D
F
MENU
#CARS
42
35
24
13
7
%
35
28
20
11
6
EVENT:
TARGET
A
F
GREET
#CARS
111
11
%
91
9
EVENT:
TARGET
A
B
C
D
F
PICK UP
#CARS
56
32
13
12
9
%
46
26
11
10
7
EVENT:
TARGET
A
B
C
D
F
TOTAL
#CARS
66
16
22
13
5
%
54
13
18
11
4
This report is a
WEEKLY DAYPART
report, as indicated by
the VECTOR HEADER.
This report will combine
the like dayparts from
each day in the week,
create a single report for
each daypart, and then
generate them on the
first day of the
succeeding week at the
time specified in the
REPORT @ feature.
**** WEEKLY DAYPART ******
1:30 AM MON FEB 23 1999
1
FROM- DAYPARTX -TO
FEB/ 17/99<>FEB/ 23/99
A SIDE
MENU
GREET
PICK UP
TOTAL
#CARS
813
813
813
813
PULLOUTS
AVG
:47
:04
1:26
3:01
=
2
EVENT:
TARGET
A
B
C
D
F
MENU
#CARS
317
211
170
81
32
EVENT:
TARGET
A
F
GREET
#CARS
756
57
%
93
7
EVENT:
TARGET
A
B
C
D
F
PICK UP
#CARS
414
203
73
65
57
%
51
25
9
8
7
EVENT:
TARGET
A
B
C
D
F
TOTAL
#CARS
406
147
114
89
57
%
50
18
14
11
7
%
39
26
21
10
4
****END OF REPORT*********
This report is a
DAILY DAYPART
report, as indicated by
the VECTOR
HEADER. This report
will be just like the RT
report, except that it is
generated at the time
specified in the
REPORT @ feature.
This report is a
MONTHLY DAYPART
report, as indicated by the
VECTOR HEADER.
This report will combine
the like dayparts from
each day in the month,
create a single report for
each daypart and then
generate them on the first
day of the succeeding
month at the time
specified in the REPORT
@ feature.
****END OF REPORT*********
**** MONTHLY DAYPART *****
1:30 AM MON MAR 1 1999
FROM- DAYPARTX -TO
FEB/ 01/99<>FEB/ 28/99
A SIDE
MENU
GREET
PICK UP
TOTAL
#CARS
3455
3455
3455
3455
PULLOUTS
AVG
:42
:03
1:02
2:53
=
5
EVENT:
TARGET
A
B
C
D
F
MENU
#CARS
1417
760
622
345
311
%
41
22
18
10
9
EVENT:
TARGET
A
F
GREET
#CARS
3282
173
%
95
5
EVENT:
TARGET
A
B
C
D
F
PICK UP
#CARS
1693
760
410
419
173
%
49
22
12
12
5
EVENT:
TARGET
A
B
C
D
F
TOTAL
#CARS
1728
628
619
310
170
%
50
18
18
9
5
****END OF REPORT*********
PRINTER REPORT TAPES
A1-3
PHASE RESEARCH
USER GUIDE
A
P
P
E
N
D
I
X
1
SHIFT REPORTS
4:00 PM
MON FEB 23 1999
START10:00AM
<>
A SIDE
MENU
GREET
PICK UP
TOTAL
#CARS
198
198
198
198
PULLOUTS
-STOP
4:00PM
AVG
:58
:04
1:11
2:40
=
1
EVENT:
TARGET
A
B
C
D
F
MENU
#CARS
77
44
40
22
15
EVENT:
TARGET
A
F
GREET
#CARS
180
18
%
91
9
EVENT:
TARGET
A
B
C
D
F
PICK UP
#CARS
83
44
38
19
14
%
42
22
19
10
7
EVENT:
TARGET
A
B
C
D
F
TOTAL
#CARS
95
38
32
19
14
%
39
22
20
11
8
%
48
19
16
10
7
****END OF REPORT*********
This report is a
REAL-TIME (RT)
report. Notice that
the time and date of
the report are the
same as the end of
the reporting period.
This report has no
VECTOR HEADER.
**** DAILY SHIFT ********
1:30 AM MON FEB 23 1999
FROMSHIFTX
-TO
FEB/ 23/99<>FEB/ 23/99
A SIDE
MENU
GREET
PICK UP
TOTAL
#CARS
198
198
198
198
PULLOUTS
AVG
:58
:04
1:11
2:40
=
1
EVENT:
TARGET
A
B
C
D
F
MENU
#CARS
77
44
40
22
15
EVENT:
TARGET
A
F
GREET
#CARS
180
18
%
91
9
EVENT:
TARGET
A
B
C
D
F
PICK UP
#CARS
83
44
38
19
14
%
42
22
19
10
7
EVENT:
TARGET
A
B
C
D
F
TOTAL
#CARS
95
38
32
19
14
%
48
19
16
10
7
%
39
22
20
11
8
This report is a
WEEKLY SHIFT
report, as indicated by
the VECTOR HEADER.
This report will combine
the like shifts from each
day in the week, create a
single report for each
shift, and then generate
them on the first day of
the succeeding week at
the time specified in the
REPORT @ feature.
**** WEEKLY SHIFT *******
1:30 AM MON FEB 23 1999
FROMSHIFTX
-TO
FEB/ 17/99<>FEB/ 23/99
A SIDE
MENU
GREET
PICK UP
TOTAL
#CARS
1352
1352
1352
1352
PULLOUTS
****END OF REPORT*********
This report is a
DAILY SHIFT report,
as indicated by the
VECTOR HEADER.
This report will be just
like the RT report,
except that it is
generated at the time
specified in the
REPORT @ feature.
AVG
:47
:04
1:26
3:01
=
6
EVENT:
TARGET
A
B
C
D
F
MENU
#CARS
568
284
257
162
81
%
42
21
19
12
6
EVENT:
TARGET
A
F
GREET
#CARS
1257
95
%
93
7
EVENT:
TARGET
A
B
C
D
F
PICK UP
#CARS
649
257
165
160
121
%
48
19
12
12
9
EVENT:
TARGET
A
B
C
D
F
TOTAL
#CARS
622
311
230
148
41
%
46
23
17
11
3
****END OF REPORT*********
This report is a
MONTHLY SHIFT
report, as indicated by the
VECTOR HEADER.
This report will combine
the like shifts from each
day in the month, create a
single report for each
shift and then generate
them on the first day of
the succeeding month at
the time specified in the
REPORT @ feature.
**** MONTHLY SHIFT *******
1:30 AM MON MAR 1 1999
FROMSHIFTX
-TO
FEB/ 01/99<>FEB/ 28/99
A SIDE
MENU
GREET
PICK UP
TOTAL
#CARS
5561
5561
5561
5561
PULLOUTS
AVG
:42
:03
1:02
2:53
=
15
EVENT:
TARGET
A
B
C
D
F
MENU
#CARS
2502
1168
1001
612
278
%
45
21
18
11
5
EVENT:
TARGET
A
F
GREET
#CARS
5227
334
%
94
6
EVENT:
TARGET
A
B
C
D
F
PICK UP
#CARS
2447
1001
834
667
612
%
44
18
15
12
11
EVENT:
TARGET
A
B
C
D
F
TOTAL
#CARS
2502
1168
773
781
334
%
45
21
14
14
6
****END OF REPORT*********
PRINTER REPORT TAPES
A1-4
PHASE RESEARCH
USER GUIDE
A
P
P
E
N
D
I
X
DAILY REPORTS
12:00 AM
MON
START6:00 AM
DAILY
<>
A SIDE
MENU
GREET
PICK UP
TOTAL
FEB 23 1999
-STOP
12:00 AM
#CARS
241
240
240
240
PULLOUTS
AVG
:52
:04
1:19
2:48
=
1
EVENT:
TARGET
A
B
C
D
F
MENU
#CARS
143
22
49
15
11
EVENT:
TARGET
A
F
GREET
#CARS
224
16
EVENT:
TARGET
A
B
C
D
F
PICK UP
#CARS
171
28
13
19
11
%
71
12
5
8
4
EVENT:
TARGET
A
B
C
D
F
TOTAL
#CARS
124
52
48
15
1
%
52
22
20
6
0
%
59
9
20
6
4
%
93
7
****END OF REPORT*********
This report is a
REAL-TIME (RT)
report. Notice that
the time and date of
the report are the
same as the end of
the reporting period.
This report has no
VECTOR HEADER.
**** DAILY DAILY ********
1:30 AM MON FEB 23 1999
FROMDAILY
-TO
FEB/ 23/99<>FEB/ 23/99
A SIDE
MENU
GREET
PICK UP
TOTAL
#CARS
241
240
240
240
PULLOUTS
AVG
:52
:04
1:19
2:48
=
EVENT:
TARGET
A
B
C
D
F
MENU
#CARS
143
22
49
15
11
EVENT:
TARGET
A
F
GREET
#CARS
224
16
EVENT:
TARGET
A
B
C
D
F
PICK UP
#CARS
170
27
13
19
11
EVENT:
TARGET
A
B
C
D
F
TOTAL
#CARS
124
52
48
15
2
1
%
59
9
20
6
4
%
93
7
This report is a
WEEKLY DAILY
report, as indicated by
the VECTOR HEADER.
This report will take all
the days in the week,
create a single report,
and then generate it on
the first day of the
succeeding week at the
time specified in the
REPORT @ feature.
**** WEEKLY DAILY ********
1:30 AM MON FEB 23 1999
FROMWEEKLY
-TO
FEB/ 17/99<>FEB/ 23/99
A SIDE
MENU
GREET
PICK UP
TOTAL
#CARS
1687
1687
1685
1685
PULLOUTS
%
71
12
5
8
4
%
52
22
20
6
0
****END OF REPORT*********
This report is a
DAILY DAILY report,
as indicated by the
VECTOR HEADER.
This report will be just
like the RT report,
except that it is
generated at the time
specified in the
REPORT @ feature.
AVG
:47
:04
1:26
3:01
=
2
EVENT:
TARGET
A
B
C
D
F
MENU
#CARS
742
388
320
202
35
EVENT:
TARGET
A
F
GREET
#CARS
1586
101
%
94
6
EVENT:
TARGET
A
B
C
D
F
PICK UP
#CARS
1129
152
151
169
84
%
67
9
9
10
5
EVENT:
TARGET
A
B
C
D
F
TOTAL
#CARS
909
337
319
115
5
%
54
20
19
7
0
%
44
23
19
12
2
****END OF REPORT*********
This report is a
MONTHLY DAILY
report, as indicated by the
VECTOR HEADER.
This report will take all
the days in the month,
create a single report, and
then generate it on the
first day of the
succeeding month at the
time specified in the
REPORT @ feature.
1
**** MONTHLY DAILY *******
1:30 AM MON MAR 01 1999
FROMMONTHLY -TO
FEB/ 01/99<>FEB/ 28/99
A SIDE
MENU
GREET
PICK UP
TOTAL
#CARS
6948
6948
6944
6944
PULLOUTS
AVG
:42
:03
1:02
2:53
=
9
EVENT:
TARGET
A
B
C
D
F
MENU
#CARS
3405
1251
1459
625
208
%
49
18
21
9
3
EVENT:
TARGET
A
F
GREET
#CARS
6531
417
%
94
6
EVENT:
TARGET
A
B
C
D
F
PICK UP
#CARS
4583
694
763
760
144
%
66
10
11
11
2
EVENT:
TARGET
A
B
C
D
F
TOTAL
#CARS
3458
1309
1329
830
18
%
50
19
19
12
0
****END OF REPORT*********
PRINTER REPORT TAPES
A1-5
PHASE RESEARCH
USER GUIDE
DEFINITIONS OF TERMS
DRIVE-THRU TIMER-A computer technology management tool to measure and monitor drive-thru speed of
service in a fast food restaurant
EVENT- Occurrences in the drive-thru and/or the Timer itself
THE FOLLOWING ARE EXAMPLES OF EVENTS:
ACCESS CODE-User can program four individual Access Codes (A,B,C,D) to establish restricted entry to
Timer features
ALT CONFIG OFF-The time at which Alt Config toggles OFF and the original main drive-thru configuration
is restored
ALT CONFIG ON-The time at which Alt Config toggles ON
ALT DRIVE-THRU CONFIG-Allows user to toggle detection points ON and OFF within the drive-thru config feature by pressing the <DISPLAY MODE> and <MAIN MENU> keys within the same second of each
other (not simultaneously)
CARS IN LANE-The number of cars that have arrived at the first active detection point, but not yet left the
last detection point
DAYPARTS-Up to eight time periods (1-8) can be entered into the system to break the day into segments.
Each daypart automatically ends at the beginning of the following daypart. Some periods usually represented
as dayparts are breakfast, mid-morning, lunch, mid-afternoon, dinner, evening, and late-night hours.
DRIVEOFF-The Timer’s automatic subtraction of a car that has taken more than the allotted time to reach the
next detection point
DRIVE-THRU CONFIG-System settings specific to drive-thru architecture
CAUTION:
DO NOT USE THE DRIVE-THRU CONFIG. FEATURE WITHOUT FIRST
CONTACTING PHASE RESEARCH CUSTOMER SERVICE OR YOUR
LOCAL DEALER
EVENT: 00-A counter that keeps track of cars that accumulate no elapsed time (Example: A car triggers an
event programmed to delay, but then exits the event before the delay has been completed)
FT (FAST TRACK) EVENTS- Occurrences in the Timer
GLOBAL CODE-Programmable Tech Code that allows full access to the Timer
DEFINITIONS OF TERMS
A2-1
A
P
P
E
N
D
I
X
2
PHASE RESEARCH
USER GUIDE
A
P
P
E
N
D
I
X
2
GREET TIME-The time taken to respond to a car that has arrived at the Menu Board/order point
MAX CARS-The Timer’s automatic subtraction of a car when the actual number of cars exceeds the number
that has been programmed (using the drive-thru configuration feature)
MULTI-STATION EVENT-An event that starts and stops an event timer from two or more detection points;
there may be up to four such events
PERIOD-A user defined block of time used with the Manual Reporting feature.
POWER OFF-The time at which the unit loses power
POWER ON-The time at which the unit regains power
PULLOUTS-The operator’s manual subtraction of a car that has taken more than the allotted time to reach the
next detection point.
REMOVE CAR-A manual method by which cars are subtracted from the drive-thru
RESET LOOP-The resetting of a Loop and/or Loop Detector due to the false detection of a car (phantom car)
RESET MEMORY-Removes all events stored in memory
CAUTION:
DO NOT USE THE RESET MEMORY FEATURE WITHOUT FIRST
CONTACTING PHASE RESEARCH CUSTOMER SERVICE OR YOUR
LOCAL DEALER
SET PARAMETERS-User defined settings specific to each store
SHIFTS- Up to four (4) time periods can be entered into the system to break the day into segments. Each shift
automatically ends at the beginning of the following shift.
SINGLE-STATION EVENT-An event that starts and stops an event timer from a single detection point; there
may be up to eight such events
TARGET TIMES-Associated with dayparts, these are used to categorize service times on a grading scale and
can be set for any event in the system
TECH CODE-Allows full access to the Timer; used to protect features such as RESET MEMORY and
DRIVE-THRU CONFIG.
4W PERIOD-A block of time of 4 consecutive weeks on which reports are based in lieu of monthly reporting.
DEFINITIONS OF TERMS
A2-2
PHASE RESEARCH
USER GUIDE
TROUBLESHOOTING
TROUBLE
PRINTER
REMOTE
PROBABLE CAUSE
Paper jam.
SOLUTION
Remove jammed paper and
reload printer. Reset
printer.
Printer locks up.
Paper jam.
Remove jammed paper,
reload paper, and reset
printer.
Paper advances but does
not print.
Incorrect paper type.
Use specified paper.
Paper in backwards.
Reload paper correctly.
Prints too light.
Possible printer issue.
Contact dealer or factory.
Prints only half of
characters.
Possible printer issue.
Contact dealer or factory.
Does not supply all reports.
Printer options set
incorrectly.
Set printer options.
Beeps continuously.
Beeper options setting calls
for beeps to continue.
Check target options and
reset if necessary.
Remote needs to be reset.
Unplug cable from top of
Remote and then plug back
in. Wait for Remote to stop
counting down and press
Main Menu twice.
Possible detection issue.
Contact dealer or factory.
TROUBLESHOOTING
A3-1
A
P
P
E
N
D
I
X
3
PHASE RESEARCH
USER GUIDE
A
P
P
E
N
D
I
X
TROUBLE
REMOTE
Displays colon (:) only.
3
Blank display.
TROUBLESHOOTING
PROBABLE CAUSE
SOLUTION
Brown-out or power surge.
Unplug cable from top of
Remote and then plug back
in. Wait for Remote to stop
counting down and press
Main Menu twice.
Remote needs to be reset.
Unplug cable from top of
Remote and then plug back
in. Wait for Remote to stop
counting down and press
Main Menu twice.
Store hours set incorrectly.
Reset store hours or time
and date.
A particular timed event is
inactive, e.g., Remote is set
to display a window that is
closed.
Reset Remote Display
options.
Remote not connected to
Timer.
Reset cable. Wait for
Remote to stop counting
down and hit Main Menu
twice.
Brown-out or power surge.
Press Main Menu twice.
Remote needs to be reset.
Unplug cable from top of
Remote and then plug back
in. Wait for Remote to stop
counting down and press
Main Menu twice.
Store hours set incorrectly.
Reset store hours or time
and date.
A3-2
PHASE RESEARCH
USER GUIDE
TROUBLE
MAIN
CONSOLE
Timer inaccurately shows
store as closed.
PROBABLE CAUSE
Store hours set incorrectly.
SOLUTION
Reset store hours.
Timer continues timing
Slowpoke.
though no cars are in drivePossible detection issue.
thru.
Timer fixes itself.
Contact dealer or factory.
Timer does not have power.
Power cord unplugged.
Plug in power cord.
Circuit breaker in building
is tripped (off).
Reset circuit breaker.
3
Power to building is off.
Blown fuse.
Replace fuse
(5mm x 20mm, 5 amp,
fast blowing).
Timer screen is blank.
Power turned off.
Resume power.
Keyboard does not
respond.
Possible power surge.
Contact dealer or factory.
An L light is locked on.
Possible detection issue.
Contact dealer or factory.
Headset not working.
Intercom not functioning.
Check your intercom
manual and/or contact
intercom dealer or factory.
TROUBLESHOOTING
A
P
P
E
N
D
I
X
A3-3
PHASE RESEARCH
USER GUIDE
SET PARAMETERS WORKSHEETS
A
P
P
E
N
D
I
X
SET PARAMETERS WORK SHEET SAMPLE
Sheet 1
Store Header
FAST BURGER
Store:
Number:
1234
Manager:
JONES
Phone:
(123) 456-7889
Modem:
(123) 456-7890
City:
ANY TOWN
STORE HOURS
1st day of week:
OPEN
6:00AM
6:00AM
6:00AM
6:00AM
6:00AM
6:00AM
6:00AM
SUN
MON
TUE
WED
THU
FRI
SAT
1
2
3
4
5
6
7
8
DAYPARTS
START
6:00AM
10:30AM
1:00PM
5:00PM
8:00PM
MON
-
CLOSE
1:00AM
1:00AM
1:00AM
1:00AM
1:00AM
1:00AM
1:00AM
- STOP
- 10:30AM
1:00PM
5:00PM
8:00PM
1:00AM
-
PRINTER OPTIONS
RT
Hour
X
Daypart
X
Shift
X
Daily
1
2
3
4
WK
MO
X
X
X
X
X
Report @
CLOSE + 00:15
time=
Header
Targets
ON
ON
PEC
AUTO
or
OFF
ON
Remote Display
Remote #1
Remote #2
Remote #3
Remote #4
Remote #5
Remote 80%
Flash avg
SHIFTS
START
6:00AM
4:00PM
DA
4
A
A
WINDOW
TOTAL
DAILY
- STOP
- 4:00PM
- 1:00AM
-
SET PARAMETERS WORKSHEETS
A4-1
PHASE RESEARCH
USER GUIDE
A
P
P
E
N
D
I
X
4
SET PARAMETERS WORK SHEET SAMPLE
Sheet 2
A MENU
Target=
BEEP ON ARRIVAL=
A <=
B <=
C <=
D <=
F >
F Repeat
Time
:30
:45
1:00
1:30
1:30
@
B
P
1
2
3
4
2
N
N
N
N
N
30 SEC
A GREET
Target=
BEEP ON ARRIVAL=
Time
:04
:07
:10
:10
:10
A <=
B <=
C <=
D <=
F >
F Repeat @
Target=
BEEP ON ARRIVAL=
NO
B
P
0
0
0
0
0
N
N
N
N
N
OFF SEC
Time
:30
:45
1:00
1:30
1:30
@
A <=
B <=
C <=
D <=
F >
F Repeat
Time
1:30
1:45
2:00
2:30
2:30
@
B
P
1
2
3
4
2
N
N
N
N
N
B
P
1
2
3
4
2
N
N
N
N
Y
SET PARAMETERS WORKSHEETS
SEC
Time
A <=
B <=
C <=
D <=
F >
F Repeat @
B
P
SEC
Time
A <=
B <=
C <=
D <=
F >
F Repeat @
B
P
SEC
Target=
BEEP ON ARRIVAL=
NO
30 SEC
P
Target=
BEEP ON ARRIVAL=
30 SEC
A TOTAL
Target=
BEEP ON ARRIVAL=
B
Target=
BEEP ON ARRIVAL=
NO
A WINDOW
Target=
NO
BEEP ON ARRIVAL=
A <=
B <=
C <=
D <=
F >
F Repeat
Time
A <=
B <=
C <=
D <=
F >
F Repeat @
Time
A <=
B <=
C <=
D <=
F >
F Repeat @
B
P
SEC
A4-2
PHASE RESEARCH
USER GUIDE
A
P
P
E
N
D
I
X
SET PARAMETERS WORKSHEET
Store Header
Store:
Number:
Manager:
Phone:
Modem:
City:
STORE HOURS
1st day of week:
OPEN
SUN
MON
TUE
WED
THU
FRI
SAT
1
2
3
4
5
6
7
8
- CLOSE
-
DAYPARTS
START
- STOP
-
PRINTER OPTIONS
RT
Hour
Daypart
Shift
Daily
Report @
DA
CLOSE +
time=
Header
Targets
WK
4
MO
or
PEC
AUTO
Remote Display
Remote
Remote
Remote
Remote
Remote
Remote
#1
#2
#3
#4
#5
%
Flash avg
SHIFTS
START
1
2
3
4
- STOP
-
SET PARAMETERS WORKSHEETS
A4-3
PHASE RESEARCH
USER GUIDE
A
P
P
E
N
D
I
X
4
Target=
BEEP ON ARRIVAL=
Time
A <=
B <=
C <=
D <=
F >
F Repeat @
Target=
BEEP ON ARRIVAL=
B
P
SEC
Target=
BEEP ON ARRIVAL=
Time
A <=
B <=
C <=
D <=
F >
F Repeat @
Time
B
P
Time
Time
A <=
B <=
C <=
D <=
F >
F Repeat @
SEC
P
SEC
B
P
SEC
Target=
BEEP ON ARRIVAL=
B
P
Time
A <=
B <=
C <=
D <=
F >
F Repeat @
SEC
Target=
BEEP ON ARRIVAL=
A <=
B <=
C <=
D <=
F >
F Repeat @
B
Target=
BEEP ON ARRIVAL=
Target=
BEEP ON ARRIVAL=
A <=
B <=
C <=
D <=
F >
F Repeat @
Time
A <=
B <=
C <=
D <=
F >
F Repeat @
B
P
SEC
Target=
BEEP ON ARRIVAL=
B
SEC
SET PARAMETERS WORKSHEETS
P
Time
A <=
B <=
C <=
D <=
F >
F Repeat @
B
P
SEC
A4-4
PHASE RESEARCH
USER GUIDE
DAYPARTS AND SHIFTS RECORD
DATE:
________________________
Dayparts
Sun
start
1
stop
Store
opening time
Mon
start
stop
Store
opening time
Tue
start
stop
Store
opening time
Wed
start
stop
Store
opening time
Thur
start
stop
Store
opening time
Fri
start
stop
Store
opening time
Sat
start
stop
Store
opening time
2
3
A
P
P
E
N
D
I
X
4
4
5
6
7
Store
closing time
8
Store
closing time
Store
closing time
Store
closing time
Store
closing time
Store
closing time
Store
closing time
Shifts
Sun
start
stop
Mon
start
stop
Tue
start
stop
Wed
start
stop
Thur
start
stop
Fri
start
stop
Sat
start
1
2
3
4
NOTES:
SET PARAMETERS WORKSHEETS
A4-5
stop
PHASE RESEARCH
USER GUIDE
INDEX
SYMBOLS
+/- Keys
Description of .......................................................................................................................... 2-7
A
A/B/A+B Key
Description of .......................................................................................................................... 2-7
Access Codes Screens
Assign Access Codes See Assign Access Codes Screen
Set Access Codes See Set Access Codes Screen
Activity Screen
Brief Description of ................................................................................................................. 3-1
Illustration ................................................................................................................................ 4-1
Alternate Configuration ........................................................................................................... 5-1
Arrow Keys
Description of .......................................................................................................................... 2-7
Assign Access Codes Screen
Illustration .............................................................................................................................. 13-3
Automatic Printing
How to set options for .......................................................................................................... 13-17
C
Car by Car Reports by Station Screen
Illustration ............................................................................................................................ 12-22
Car by Car Reports by Time and Date Screen
Illustration ............................................................................................................................ 12-24
Car by Car Reports Screens
Car by Car Reports by Station See Car by Car Reports by Station Screen
Car by Car Reports by Time and Date See Car by Car Reports by Time and Date Screen
Cashier Window ................................................................................................................. 1-2, 2-2
Change Current Date/Time .................................................................................................. 13-6
INDEX
A5-1
A
P
P
E
N
D
I
X
5
PHASE RESEARCH
USER GUIDE
A
P
P
E
N
D
I
X
5
Change Header Settings ......................................................................................................... 13-8
Change Store Hours ................................................................................................................ 13-6
Clear Key
Description of .......................................................................................................................... 2-7
Current Daypart and Shift Settings, Viewing ..................................................................... 6-1
Customization
Changing Store Requirements ............................................................................................... 13-1
Custom Reports .................................................................................................................... 12-12
D
Daily Reports Screen
Illustration .............................................................................................................................. 12-3
Daily, Weekly, and Monthly Reports .................................................................................. 12-2
Daily Reports See Daily Reports Screen
Monthly Reports See Monthly Reports Screen
Report Format Selection See Report Format Selection Screen (Daily, Weekly, and Monthly Reports)
Weekly Reports See Weekly Reports Screen
Daypart or Shift Reports
Daypart Reports See Daypart Reports Screen
Report Format Selection See Report Format Selection Screen (Daypart or Shift Reports)
Shift Reports See Shift Reports Screen
Daypart Reports Screen
How to Break Into Smaller Units and/or Shifts ................................................................... 13-10
Illustration ............................................................................................................................ 12-14
Dayparts
Definition .............................................................................................................................. A2-1
Dayparts and Shifts Record
See Worksheets
Definitions of Terms .............................................................................................................. A2-1
Diagnostics Screens
Brief Description of ................................................................................................................. 3-1
Illustration .............................................................................................................................. 14-1
Display Mode Key
Description of .......................................................................................................................... 2-7
Drive-Thru Operation
Summary .................................................................................................................................. 2-1
INDEX
A5-2
PHASE RESEARCH
USER GUIDE
E
Electrical Power Outage .......................................................................................................... 2-4
Enter Select Key
Description of .......................................................................................................................... 2-7
Event 00 .................................................................................................................................... A2-2
Events
See FT Events
F
Fast Track Timer
Elements Of ............................................................................................................................. 1-1
Features .................................................................................................................................... 1-3
General Use .............................................................................................................................. 1-4
Illustration ................................................................................................................................ 1-2
Introduction To ........................................................................................................................ 1-1
Version ..................................................................................................................................... 8-1
FT Events ........................................................................................ 13-24, 13-26, 14-1, 14-2, A2-1
Event 00 ................................................................................................................................ A2-2
Remove Car .......................................................................................................................... A2-2
FT Events Screen
Illustration .............................................................................................................................. 14-2
G
Grades, Viewing ......................................................................................................................... 7-1
Grading Criteria, Viewing ....................................................................................................... 7-1
H
Header, Changing Settings .................................................................................................... 13-8
Heading Screen
Illustration .............................................................................................................................. 13-8
Hourly and Custom Reports Screen
Illustration ............................................................................................................................ 12-12
INDEX
A5-3
A
P
P
E
N
D
I
X
5
PHASE RESEARCH
USER GUIDE
A
P
P
E
N
D
I
X
5
I
Intercom ............................................................................................................................... 1-2, 2-1
K
Keyboard Mode Key
Description of .......................................................................................................................... 2-7
Keypad
Description of .......................................................................................................................... 2-7
Illustration (Keys) .................................................................................................................... 2-7
Keys
Basic Functions ........................................................................................................................ 2-7
Illustration ................................................................................................................................ 2-7
L
LED Status Lights
Example of ............................................................................................................................... 2-6
Purpose of ................................................................................................................................ 2-6
Loop
Manually Resetting Internal Loop Detector .......................................................................... 10-1
Loop Detector Failed to Reset
How to Manually Reset ......................................................................................................... 10-1
M
Main Console ................................................................................................................1-1–1-2, 2-1
Manual Operation ....................................................................................... 9-1, 10-1, 12-1–12-26
Manual Reports
Car by Car ............................................................................................................................ 12-22
Daily ....................................................................................................................................... 12-3
Dayparts ............................................................................................................................... 12-14
Hourly, Custom .................................................................................................................... 12-12
Monthly .................................................................................................................................. 12-9
Shifts .................................................................................................................................... 12-17
Weekly ................................................................................................................................... 12-6
YTD (Year to Date) ............................................................................................................. 12-20
INDEX
A5-4
PHASE RESEARCH
USER GUIDE
Manual Reports Screen
Brief Description of ................................................................................................................. 3-1
Illustration .............................................................................................................................. 12-1
Manually Reset a Loop Detector .......................................................................................... 10-1
Manually Synchronize Fast Track ........................................................................................ 9-1
Memory ............................................................................................................................... 1-4, 15-1
Menu
Key, Description of .................................................................................................................. 2-7
Screen, Brief Description of .................................................................................................... 3-1
Screen, Function ...................................................................................................................... 8-1
Screen, Illustration ................................................................................................................... 8-1
Screen, Keystroke Actions Available ...................................................................................... 8-1
Menu Board ................................................................................................................................ 2-1
Monthly Reports Screen
Illustration .............................................................................................................................. 12-9
Multi-Station Events
Using Night Manager to Monitor ........................................................................................ 13-24
N
Night Manager Screen
Illustration ............................................................................................................................ 13-24
Show Event Counts See Show Event Counts Screen
Show Event Detail See Show Event Counts Detail
P
Parameters Programming
Brief Description of ................................................................................................................. 3-1
Illustration .............................................................................................................................. 13-1
INDEX
A5-5
A
P
P
E
N
D
I
X
5
PHASE RESEARCH
USER GUIDE
A
P
P
E
N
D
I
X
5
Parameters See Parameters Programming
Access Codes See Set Access Codes Screen
Dayparts See Set Dayparts Screen
Heading See Heading Screen
Night Manager See Night Manager Screen
Printer Options See Set Printer Options Screen
Remote Display Options See Set Remote Display Options Screen
Shifts See Set Shifts Screen
Targets See Set Targets Screen
Time/Store Hours See Time/Store Hours Screen
Pick-Up Window ................................................................................................................. 1-2, 2-2
Print Display Key
Description of .......................................................................................................................... 2-7
Print Header Screen
Brief Desciption of ................................................................................................................... 3-1
Customizing Text in the Header to be Printed ....................................................................... 13-8
Illustration .............................................................................................................................. 11-1
Printer Report Tapes ............................................................................................................. A1-1
Printer See Thermal Printer
Pull Outs ...............................................................................................................13-28, 14-2, A2-2
Pullouts Screen
Illustration .............................................................................................................................. 14-2
R
Remote Displays
Beep Function ............................................................................................ 2-4–2-5, 13-14–13-16
Description of .......................................................................................................................... 2-5
How to Select Information on ................................................................................... 13-20, 13-23
Illustration ................................................................................................................................ 2-5
Percentage Remotes ............................................................................................................. 13-21
Set Addressing ..................................................................................................................... 13-23
Two-Color Remote Display .............................................................................................. 1-1, 2-5
Remove Car
Definition .............................................................................................................................. A2-2
How to Manually Synchronize Fast Track .............................................................................. 9-1
Remove Car Screen
Brief Description of ................................................................................................................. 3-1
How to Manually Synchronize Fast Track .............................................................................. 9-1
Illustration ................................................................................................................................ 9-1
INDEX
A5-6
PHASE RESEARCH
USER GUIDE
Report Format Selection Screen (Daily, Weekly, and Monthly Reports)
Illustration ..........................................................................................................12-4, 12-7, 12-10
Report Format Selection Screen (Daypart or Shift Reports)
Illustration ............................................................................................................................ 12-15
Reports
Car by Car ............................................................................................................................ 12-22
Daily ....................................................................................................................................... 12-3
Dayparts ............................................................................................................................... 12-14
Hourly, Custom .................................................................................................................... 12-12
Monthly .................................................................................................................................. 12-9
Shifts .................................................................................................................................... 12-17
Weekly ................................................................................................................................... 12-6
YTD (Year to Date) ............................................................................................................. 12-20
Reset Loop Screen
Brief Description of ................................................................................................................. 3-1
Illustration .............................................................................................................................. 10-1
Reset Memory Screen
Brief Description of ................................................................................................................. 3-1
Illustration .............................................................................................................................. 15-1
Resetting a Loop Detector ..................................................................................................... 10-1
S
Screens
List and Brief Description of all Screens ................................................................................. 3-1
Sectionalizing the Day (Setting Dayparts) ....................................................................... 13-10
Set Access Codes Screen
Illustration .............................................................................................................................. 13-3
Set Dayparts Screen
Illustration ............................................................................................................................ 13-10
Set Parameters Worksheets
See Worksheets
Set Printer Options Screen
Illustration ............................................................................................................................ 13-17
Set Remote Display Options Screen
Illustration ................................................................................................................. 13-20, 13-23
Selecting the Information that Appears on the Remote Displays ............................. 13-20, 13-23
Set Shifts Screen
Illustration ............................................................................................................................ 13-12
INDEX
A5-7
A
P
P
E
N
D
I
X
5
PHASE RESEARCH
USER GUIDE
A
P
P
E
N
D
I
X
5
Set Targets Screen
Illustration ............................................................................................................................ 13-14
Set Text to Appear in Header ............................................................................................... 13-8
Setting Sections of the Day (Dayparts) and/or Shifts .................................................... 13-10
Setting Targets for Grading ................................................................................................ 13-14
Shift Reports Screen
Illustration ............................................................................................................................ 12-17
Show Event Counts Screen
Illustration ............................................................................................................................ 13-28
Show Event Detail Screen
Illustration ............................................................................................................................ 13-26
Special Percentage Remote .............................................................................................. 1-1, 2-5
Symbols
Explanation of Symbols Used in this Manual ......................................................................... 1-5
Synchronize Fast Track ........................................................................................................... 9-1
T
Targets See Set Targets Screen
Tech Codes Screen
Illustration .............................................................................................................................. 13-5
Thermal Paper Tape
Installing and Replacing .......................................................................................................... 2-9
Thermal Printer
Changing Paper ........................................................................................................................ 2-9
Function ................................................................................................................................... 2-9
Resetting .................................................................................................................................. 2-9
Stop Printing ............................................................................................................................ 2-7
Time/Store Hours Screen
Function ................................................................................................................................. 13-7
Illustration .............................................................................................................................. 13-6
Settings for a 24-hour store .................................................................................................... 13-6
Troubleshooting ...................................................................................................................... A3-1
Two-Color Remote Display .............................................................................................. 1-1, 2-5
INDEX
A5-8
PHASE RESEARCH
USER GUIDE
V
Vehicle Detector .................................................................................................................. 1-2, 2-1
Vehicle Presence Signal ............................................................................................................ 2-2
View Configuration Screen ..................................................................................................... 5-1
Illustration ................................................................................................................................ 5-1
View Current Daypart and Shift Settings ............................................................................ 6-1
View Current Time ................................................................................................................. 13-6
View Grading Criteria and Grades Acheived ..................................................................... 7-1
View Periods
Key, Description of .................................................................................................................. 2-7
Screen, Brief Description of .................................................................................................... 3-1
Screen, Illustration ................................................................................................................... 6-1
View Target Times
How to Customize ................................................................................................................... 7-1
Key, Description of .................................................................................................................. 2-7
Screen, Brief Description of .................................................................................................... 3-1
Screen, Illustration ................................................................................................................... 7-1
Viewing Grading Criteria and Grades Acheived ..................................................................... 7-1
Viewing Store Hours ............................................................................................................... 13-6
W
Weekly Reports Screen
Illustration .............................................................................................................................. 12-6
Worksheets
Dayparts And Shifts Record ................................................................................................. A4-5
Set Parameters Worksheets Blank Sheet 1 ........................................................................... A4-3
Set Parameters Worksheets Blank Sheet 2 ........................................................................... A4-4
Set Parameters Worksheets Sample Sheet 1 ......................................................................... A4-1
Set Parameters Worksheets Sample Sheet 2 ......................................................................... A4-2
Y
Year to Date Reports Screen
Illustration ............................................................................................................................ 12-20
YTD (Year to Date) Reports
INDEX
See Year to Date Reports Screen
A5-9
A
P
P
E
N
D
I
X
5
PHASE RESEARCH
3500 W. Moore Avenue, Suite M
Santa Ana, CA 92704
(714) 850-1320 or Fax: (714) 850-1502
www.phaseresearch.com
email - [email protected]