1
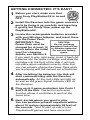
GETTING CONNECTED: IT’S EASY!
1
Before you start, make sure that
your Sony PlayStation®2 is turned
OFF!
2
Install the Receiver into the game console’s
ports by lining it up carefully and inserting
it gently, but firmly. Now, power up the
PlayStation®2.
3
Locate the rechargeable batteries provided
with your Wireless Adapter, and insert them
into the Power Pack.
IMPORTANT: The
CAUTION:
Do not recharge
Power Pack must be
standard
Carbon Zinc
charged for at least 12
or Alkaline batteries!
hours before the initial Do not mix battery
use! For charging
types.
details, see Section 2.
If you want to play right away, insert 4 fresh AA
batteries into the spare cartridge, and slide the
cartridge into the front of the Hub. It will lock
into place when installed correctly. Note that
you can actually charge the Power Pack while
you’re playing with the second set of batteries.
4
After installing the batteries, the Hub will
start communicating with the Receiver
automatically. All the Hub LEDs will light up,
as well as the green Signal Indicator LED on
the Receiver.
5
Plug up to 2 game controllers into Ports 1
and 2 of the Hub. The built-in auto-scan
function allows 2 controllers to work at the
same time.
6
Next, decide where you want to play.
You can position yourself anywhere within
about 10 metres (approximately 30 feet) of
the console. Time to start up one of your
PlayStation® games and have some fun!