1
Self-Clean Oven
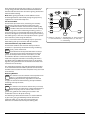
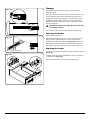
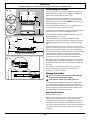
Fig. 5.6
WARNING!
Remove all cookware, shelves, and the shelf
supports from the oven before using the self-clean
function. If the shelves and supports are left in the
oven they will discolour and become rough.
nn
ArtNo.272-0007
FF - MF oven Prof+ pyroOUS
Self clean setting
WARNING!
nn
Using the self-cleaning function results in higher
temperatures than those for normal cooking. Under
such conditions the surfaces may get hotter than
usual so children should be kept away.
WARNING!
nn
Remove the divider before using the self-clean
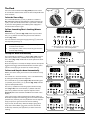
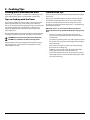
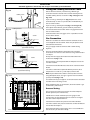
Fig. 5.7
function. See page 8, ‘Removing the Divider’.
DO NOT clean the door gasket: the door gasket is
nn
essential for a good seal. Care should be taken not to
ArtNo.302-0013 6BC Self clean 1
rub, damage or move the gasket.
DO NOT use oven cleaners: no commercial oven
nn
cleaner or oven liner protective coating of any kind
should be used in or around any part of the oven.
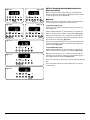
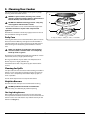
Fig. 5.8
Clean only parts listed in this User Guide.
nn
DO NOT use the oven light while in self-cleaning
nn
mode.
ArtNo.302-0014 6BC Self clean 2
Before Using the Self-clean Function
Pre-clean any areas that are not reached by the self-clean
cycle, such as the outer edges of the oven door. Wipe up any
excess fat or liquids.
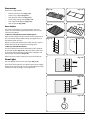
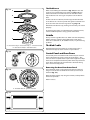
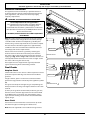
Fig. 5.9
Before operating the self-clean cycle, use hot water and
detergent or a paste of water and baking soda to remove any
difficult spots. Rinse off all residue with vinegar water. This
will prevent this soil from being baked on by the high heat of
the self-cleaning cycle.
ArtNo.272-0008
FF - MF oven Prof+ pyroOUS
Self clean light on
Self-clean Operation
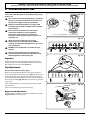
Set the oven function control to self-clean (Fig. 5.6). The
timer display will now show a ‘P ’ (Fig. 5.7).
Press the [D] button once (Fig. 5.8) to set the default
cleaning time (3 hours). To adjust the cleaning cycle duration,
hold down the [D] button and press either the [–] or [+]
buttons and set the time as required; see Table 5.1.
Note that the maximum time for the self-cleaning operation
is 4 hours.
The cooling fan will switch to high speed and as soon as a
certain temperature is reached the oven door will lock as
indicated by the illuminated interlock neon (Fig. 5.9).
Hours
Soiling
2 hours
Normal clean
3 hours
Heavy soiling
4 hours
Very heavy soiling
Table 5.1
Note: Because of the high temperatures generated during
the self-cleaning, the door will remain locked for some
time after the cleaning cycle has finished. When the oven
temperature has fallen sufficiently the interlock neon will go
out and the door will unlock.
WARNING! The oven will still be hot!
nn
17