1
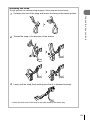
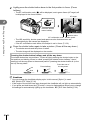
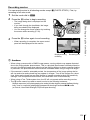
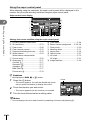
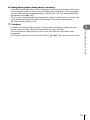
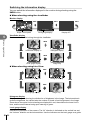
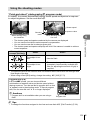
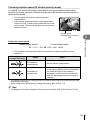
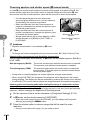
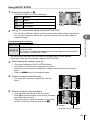
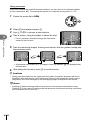
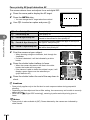
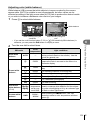
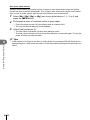
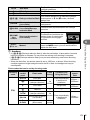
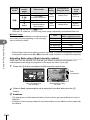
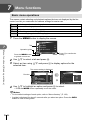
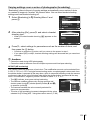
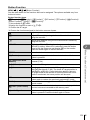
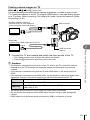
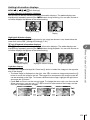
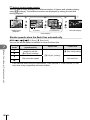
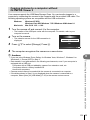
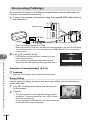
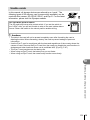
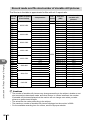
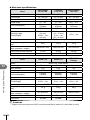
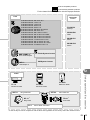
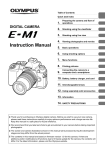
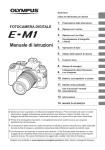
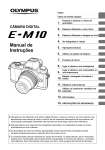
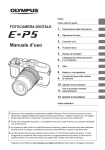
3 Adjust the settings for each group in the super control panel. Group • Select the flash control mode and adjust the flash intensity separately for each group. For MANUAL, select the flash intensity. Adjust settings for the camera flash unit. Flash intensity value Normal flash/Super FP flash • Switch between normal flash and Super FP flash. A Mode TTL M Off TTL P +5.0 1/8 – +3.0 Ch Communication light level • Set the communication light level to [HI], [MID], or [LO]. LO 1 250 F5.6 38 Channel • Set the communication channel to the same channel used on the flash. Flash control Flash intensity mode 4 Press the flash switch to pop up the internal flash. • After confirming that the built-in and remote flash units have charged, take a test shot. Wireless flash control range Position the wireless flash units with their remote sensors facing the camera. The following illustration shows the approximate ranges at which the flash units can be positioned. The actual control range varies with local conditions. 30° 60° 30° 7m 50° 100° 50° 5m # Cautions 12 Using separately sold accessories 126 EN • We recommend using a single group of up to three remote flash units. • Remote flash units cannot be used for second curtain slow synchronization or anti-shock exposures longer than 4 seconds. • If the subject is too close to the camera, the control flashes emitted by the camera flash may affect exposure (this effect can be reduced by reducing the output of the camera flash by, for example, using a diffuser). • The upper limit of flash synchronization timing is 1/160 sec. when using the flash in RC mode.