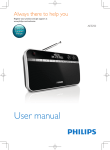
Download Philips Portable Radio DA1200
Transcript
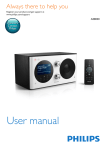
Register your product and get support at User manual DA1200 Contents 1 Important Safety 5 5 2 Your DAB+ digital radio Introduction What’s in the box Overview 8 8 8 9 3 Get started Connect power Turn on Adjust volume Connect the earphones 11 11 13 14 14 4 Listen to DAB radio Switch to DAB mode Store DAB radio stations automatically Store DAB radio stations manually Select a preset DAB radio station Display DAB information Use DAB menu 15 15 15 16 17 17 18 5 Listen to FM radio Switch to FM mode Tune to a radio station manually Tune to a radio station automatically Store FM radio stations Select a preset FM radio station 20 20 20 20 20 21 Display RDS information Use FM menu 22 22 6 Synchronize the clock 24 7 Upgrade the software Register your product Check the current software version Perform the upgrade 25 25 26 26 8 Product information Tuner (FM/DAB) General information RDS program types 27 27 28 28 9 Troubleshooting 30 10 Notice Compliance Care of the environment Copyright 31 31 31 33 11 About DAB 34 1 Important Safety Never lubricate any part of this unit Never place this unit on other electrical equipment. or heat. manufacturer. ! " #$ is required when the digital radio has been damaged in any way, such as power-supply cord or plug is damaged, liquid has been spilled or objects have fallen into the digital radio, the digital radio has been exposed to rain or moisture, does not operate normally, or has been dropped. The unit shall not be exposed to dripping or splashing. Do not place any sources of danger on the unit (e.g. liquid %&# Where the mains plug or an appliance coupler is used as the disconnect device, the disconnect device shall remain readily operable. Hearing safety Listen at a moderate volume. Using headphones at a high volume can impair your hearing. This product can produce sounds in decibel ranges that may cause hearing loss for a normal person, even for exposure less than a minute. The higher decibel ranges are offered for those that may have already experienced some hearing loss. Sound can be deceiving. Over time your hearing ‘comfort level’ adapts to higher volumes of sound. So after prolonged listening, what sounds ‘normal’ can actually be loud and harmful to your hearing. To guard against this, set your volume to a safe level before your hearing adapts and leave it there. To establish a safe volume level: Set your volume control at a low setting. Slowly increase the sound until you can hear it comfortably and clearly, without distortion. Listen for reasonable periods of time: Prolonged exposure to sound, even at normally ‘safe’ levels, can also cause hearing loss. Be sure to use your equipment reasonably and take appropriate breaks. Be sure to observe the following guidelines when using your headphones. Listen at reasonable volumes for reasonable periods of time. Be careful not to adjust the volume as your hearing adapts. Do not turn up the volume so high that you can’t hear what’s around you. You should use caution or temporarily discontinue use in potentially hazardous situations. Do not use headphones while operating a motorized vehicle, cycling, skateboarding, #'!* areas. Note The type plate is located on the back of the product. 2 Your DAB+ digital radio Congratulations on your purchase, and welcome to Philips! To !! : !! product at www.philips.com/welcome. Introduction With this digital radio, you can listen to FM radio (RDS radio included), and DAB radio (DAB+ radio included). What’s in the box Check and identify the contents of your package: Digital radio AC power adaptor USB cable Earphones User manual Overview a i b c h d g e f a Earphones socket. b Display panel Display current information. c INFO Display DAB/RDS information d / Connect to the AC power adaptor through a USB cable for power and battery charge. Connect to PC for software upgrade. e MENU Access DAB/FM menu. f / Adjust volume. / Select a menu item. Press repeatedly to tune to a radio station at a !"# Press and hold to activate the automatic tuning to a radio station with strong signals. OK = # Press to activate the automatic tuning to the next radio station with strong signals. g DAB/FM Switch the source between FM radio and DAB radio. h PRESET Press to access the list of stored radio stations. Press and hold to access the menu for storing a radio station. i Power switch Turn on or off the digital radio. 3 Get started Always follow the instructions in this chapter in sequence. If you contact Philips, you will be asked for the model number and serial number of this product. The model number and serial number are on the back of the product. Write the numbers here: Model No. ________________ Serial No. _________________ Connect power Caution Risk of product damage! Make sure that the power supply voltage matches with the voltage printed on the back of the product. Risk of electric shock! When you unplug the AC power adaptor, always pull the plug from the socket. Never pull the USB cable. Before connecting the AC power adaptor, make sure that you have completed all other connections. When you unplug the USB cable from the digital radio or ! ># The battery contains chemical substances, so it should be disposed of properly. This digital radio can be powered by AC mains or build-in battery. 1 2 Uncover the / socket on the left of the unit. Connect the USB cable to the / socket, and the AC power adaptor. 3 Connect the AC power adaptor to the power supply. » The digital radio begins to charge. Note To use the build-in battery as power supply, make sure that >!#?! ! > charge your digital radio. Turn on Slide the power switch to ON. » [Welcome to Digital Radio] (welcome to use this digital radio) is displayed. » The digital radio switches to the last selected source. To turn it off, slide the power switch to OFF. Adjust volume Press / repeatedly. : Increase the volume. : Decrease the volume. Connect the earphones Before tuning to a radio station, connect the supplied earphones to the socket on the top of the product. For optimal reception, fully extend the cable of your earphones and adjust the position of your digital radio. Note To avoid interference, position your digital radio as far as possible from TV, VCR, or any other radiation source. 4 Listen to DAB radio Switch to DAB mode Press DAB/FM repeatedly until [DAB Mode] (DAB mode) is displayed. Store DAB radio stations automatically @ > HJK ! or no DAB station is stored, the digital radio automatically stores DAB radio stations. 1 Press DAB/FM repeatedly to switch to DAB mode. » The scan starts. A progress bar on the bottom: indicates the progress of the search. A number on the middle right: indicates the total number of stations that has been stored. 2 The scan is complete. » ?! automatically. » If no DAB station is stored, [No DAB Station] (no DAB station) is displayed. Re-scan DAB radio stations To keep the list of DAB stations up-to-date, perform full scan regularly. 1 2 3 Press MENU to access the DAB menu. Press / displayed. repeatedly until [Full scan] (full scan) is Press OK # » The scan goes on until all available DAB radio stations are # Store DAB radio stations manually Note You can store up to 10 DAB radio stations. 1 2 Tune to a DAB radio station. 3 Press Press and hold PRESET until [Preset Store] (store as a preset station) is displayed. / repeatedly to select a sequence number. 4 5 Press OK # Repeat steps 1 to 4 to store more DAB stations. Note To overwrite a preset station, store another station with its sequence number. Select a preset DAB radio station 1 Press PRESET. » [Preset Recall] (recall the list of preset stations) is displayed. 2 Press / station. 3 Press OK # repeatedly to select a preset DAB radio Note If no button is pressed within 15 seconds when you scroll through the preset station list, the radio tunes to last selected station. Display DAB information 1 Tune to a DAB radio station. 2 Press INFO repeatedly to scroll through the following information (if available): Dynamic Label Segment (DLS) Signal strength Program Type (PTY) Ensemble name Channel and frequency Signal error rate Bit rate and audio status Time Use DAB menu 1 Press MENU to access the DAB menu. » 2 3 4 [Station list] (station list) is displayed. Press / repeatedly to select a menu item. Press OK # Repeat steps 2 and 3 if sub-options are available. [Station list] (station list): display the list of all stored DAB radio stations. [Full scan] (full scan): scan all available DAB radio stations. [Manual tune]Q&X channel/frequency manually and add it to the station list. [DRC] (DRC): Dynamic range compression adds or removes a degree of compensation for the differences in the dynamic range between radio stations. [DRC high] (DRC high): set DRC in high level. [DRC low] (DRC low): set DRC in low level. [DRC off] (DRC off ): turn off DRC. Note H= > > ! station. [Station order] (station order): select an ordering pattern for the list of stored stations. [Alphanumeric] (alphanumeric): list stations in alphanumeric order. [Ensemble] (ensemble): list groups of stations that are broadcast together on the same ensemble. [System] (system): adjust system settings. [Backlight] (backlight): select [On] to keep the backlight on, or select a duration for the backlight. [Language] (language): select a language for displayed menus. [Factory Reset] (factory reset): reset all settings to factory default. [Software Upgrade] (software upgrade): upgrade the software when available. [SW version] (software version): display the version information of current software. Note Before you perform the software upgrade, make sure that the latest software is available on your PC and the digital radio is correctly connected to your PC through the USB cable. If no button is pressed within 15 seconds, the product exits the menu. 5 Listen to FM radio Switch to FM mode Press DAB/FM repeatedly until [FM Mode] (FM mode) is displayed. Tune to a radio station manually Press / repeatedly until the target frequency is displayed. Tune to a radio station automatically Press OK, or press and hold » / for more than two seconds. [Scanning] (scanning) is displayed until a station with strong signals is detected and broadcast. Store FM radio stations Note You can store up to 10 FM radio stations. 1 2 Tune to an FM radio station. Press and hold PRESET until [Preset Store] (store as a preset station) is displayed. 3 4 5 Press / repeatedly to select a sequence number. Press OK # » The frequency of the preset radio station is displayed behind the sequence number. Repeat steps 1-4 to store more FM stations. Tip To overwrite a preset station, store another station with its sequence number. Select a preset FM radio station 1 2 3 Press PRESET. » [Preset Recall] (recall the list of preset stations) is displayed. Press / repeatedly to select a preset FM radio station. Press OK # Note If no button is pressed within 15 seconds when you scroll through the preset station list, the radio tunes to the last selected station. Display RDS information Radio Data System (RDS) is a service that allows FM stations to transmit additional information. When you tune to an FM radio station that transmits RDS signals, the station name is displayed. 1 2 Tune to an RDS station. Press INFO repeatedly to scroll through the following information (if available): Radio text Program type such as [NEWS] (news), [SPORT] (sport), [POP M] (pop music)... Station name Mono/stereo Use FM menu 1 2 3 4 Press MENU to access the menu. » [Scan setting] (scan settings) is displayed. Press / repeatedly to select a menu item. Press OK # Repeat steps 2 and 3 if sub-options are available. [Scan setting] (scan setting) [All stations] (all stations): scan all FM radio stations. [Strong stations only] (strong stations only): scan stations with strong signals only. [Audio setting] (audio setting) [Stereo allowed] (stereo allowed): select stereo broadcast. [Forced mono] (forced mono): select mono broadcast. [System] (system) [Backlight] (backlight): select [On] to keep the backlight on, or select a duration for the backlight. [Language] (language): select a language for displayed menus. [Factory Reset] (factory reset): reset all settings to factory default. [Software Upgrade] (software upgrade): upgrade the software when available. [SW version] (software version): display the version information of current software. Note Before you perform the software upgrade, make sure that the latest software is available on your PC and the digital radio is correctly connected to your PC through the USB cable. If no button is pressed within 15 seconds, the product exits the menu. 6 Synchronize the clock The digital radio can automatically synchronize its clock with a DAB or RDS radio station that transmits time signals. Note The time accuracy depends on the DAB or RDS radio station. 7 Upgrade the software Note Before you perform the upgrade, make sure that the latest software is available on your PC and the digital radio is correctly connected to your PC through the USB cable. Power supply must not be interrupted during the upgrade. ?!! !! then redo the upgrade. Register your product 1 2 Go to www.philips.com/welcome. Click the link of “Register my product“ (the exact wording of this link name may vary in different languages). 3 Log in with your account on the prompt Web page. If you have no account for Club Philips, create one @# 4 5 Search your product with “DA1200/12“ as the keywords. 6 Fill in necessary information about this product to complete the registration. Click the link of search result to access the Web page for registering your product. » With the registration, you can get information about software update and product support at this Web page or via your mailbox that is registered as the account for Club Philips. Check the current software version Follow the steps to check the version of current software on your product. 1 2 3 4 Press DAB/FM to switch to radio mode. Press MENU to access the menu. Press OK. / to select [System] (system), and then press Press / to select [SW version] (software version), and then press OK. » The version of current software scrolls on the display panel Perform the upgrade 1 2 Go to www.philips.com/welcome. Log in with your account for Club Philips. » Support information about your registered product is displayed. 3 Click the link of “Firmware Upgrade Readme File“ (the exact wording of this link name may vary in different languages). 4 Read and understand the instructions on software upgrade. 5 Follow the instructions to download the upgrade packet and complete the upgrade. 8 Product information Note Product information is subject to change without prior notice. Tuner (FM/DAB) Tuning range FM: 87.5 - 108 MHz DAB: 174.928 - 239.200 MHz (Band III) Tuning grid (FM) 50 kHz Sensitivity - Mono, 26 dB S/N ratio - Stereo, 46 dB S/N ratio < 22 dBu < 45 dBu Search selectivity -All stations -Strong station 30 dBf 35 dBf Total harmonic distortion < 2% Signal-to-noise ratio > 55 dB General information AC power adaptor - Brand name - Model - Input - Output PHILIPS S005SV0500050 100-240 V~; 50/60 Hz; 150 mA 0.5 A 5V Operation power consumption 2.5 W Headphone output power 3 mW x 2 (16 Ohm) Dimensions (H x W x D) 172 x 92 x 72 mm Net weight 0.067 kg RDS program types NO TYPE No RDS programme type NEWS News services AFFAIRS Politics and current affairs INFO Special information programs SPORT Sports EDUCATE Education and advanced training DRAMA Radio plays and literature CULTURE Culture, religion and society SCIENCE Science VARIED Entertainment programs POP M Pop music ROCK M Rock music MOR M Light music LIGHT M Light classical music CLASSICS Classical music OTHER M Special music programs WEATHER Weather FINANCE Finance CHILDREN Children’s programs SOCIAL Social Affairs RELIGION Religion PHONE IN Phone In TRAVEL Travel LEISURE Leisure JAZZ Jazz Music COUNTRY Country Music NATION M National Music OLDIES Oldies Music FOLK M Folk Music DOCUMENT Documentary TES Alarm Test ALARM Alarm 9 Troubleshooting Warning Never remove the casing of this product. To keep the warranty valid, never try to repair the product yourself. If you encounter problems when using this product, check the following points before requesting service. If the problem remains unsolved, go to the Philips Web page (www.philips.com/ support). When you contact Philips, make sure that the product is nearby and the model number and serial number are available. No power When you use the build-in battery as power supply, make >!# When you use AC power adaptor as power supply, make sure that the USB cable is properly connected to both the digital radio and the power adaptor, and there is power at the AC outlet. No sound Fully insert your earphones. Adjust the volume. No response from the unit Make sure that the power is available. Turn off the product, and then turn it on again. Poor radio reception Due to the interference from other electrics or building obstacles, the signals become weak. Move to a place free of interference. Make sure that the earphone cable is fully extended. 10 Notice J expressly approved by Philips Consumer Lifestyle may void the user’s authority to operate the equipment. Compliance This product complies with the radio interference requirements of the European Community. Care of the environment Your product is designed and manufactured with high quality materials and components, which can be recycled and reused. When this crossed-out wheeled bin symbol is attached to a product it means that the product is covered by the European Directive 2002/96/EC. Please inform yourself about the local separate collection system for electrical and electronic products. Please act according to your local rules and do not dispose of your old products with your normal household waste. Correct disposal of your old product helps to prevent potential negative consequences for the environment and human health. Your product contains batteries covered by the European Directive 2006/66/EC, which cannot be disposed with normal household waste. Please inform yourself about the local rules on separate collection of batteries because correct disposal helps to prevent negative consequences for the environmental and human health. Always bring your product to a professional to remove the built-in battery. Environmental information All unnecessary packaging has been omitted. We have tried to make the packaging easy to separate into three materials: cardboard (box), polystyrene foam (buffer) and polyethylene (bags, protective foam sheet.) Your system consists of materials which can be recycled and reused if disassembled by a specialized company. Please observe the local regulations regarding the disposal of packaging materials, exhausted batteries and old equipment. Copyright 2012 © Koninklijke Philips Electronics N.V. $ % > #} are the property of Koninklijke Philips Electronics N.V or their respective owners. Philips reserves the right to change products at any time without being obliged to adjust earlier supplies accordingly. 11 About DAB What is Digital Audio Broadcasting (DAB)? DAB digital radio is a new way of broadcasting radio via a network of terrestrial transmitters. It provides listeners with more choice and information delivered in crystal clear, cracklefree sound quality. – The technology allows the receiver to lock on to the strongest # – With DAB digital stations there are no frequencies to remember, and sets are tuned by station name, so there is no returning on the move. What is DAB+? DAB+ is based on the original DAB standard but uses a more ! #@HJK:J ?? (better known as MP2), DAB+ uses HE-AAC v2 (better known as MP4 or AAC+). This allows equivalent or better subjective audio quality to be broadcast at lower bit rates. The increased ! !!! Q !& Q > station) and consumers (a wider choice of stations). DAB+ is designed to provide the same functionality as the original DAB radio services including services following (e.g. to the same service on another DAB ensemble or its FM &! :JHQ## dynamic labels such as title artist information or news headlines; complementary graphics and images etc.) What is a multiplex? Digital radio operation is made up of a single block of frequencies called a multiplex. Each multiplex works within a frequency spectrum, such as Band III for DAB broadcasts. DAB BROADCASTERS AND DLS Each DAB broadcaster (or multiplex operator) also provides text and audio data services. Some programs are supported by Dynamic Label Segments (DLS). This is data which you can read as scrolling text on your DAB radio display. Some stations transmit the latest news, travel, and weather, what’s on now and next, website addresses and phone numbers. Tip For more information about digital radio coverage and services, go to www.drdb.org. © 2012 Koninklijke Philips Electronics N.V. All rights reserved. DA1200_12_CCR_V1.0


