1
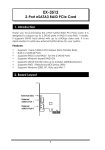
EX-3595
2-Port eSATA3 (6Gb/s) Express Card/34mm
1. Introduction
Thank you for purchasing this eSATA3 Express Card. It is designed to
support two SATA, SATA2 and SATA3 devices with eSATA connectors
(SATA, SATA2 and SATA3 is a new trend to improve the performance
and reliability from Parallel ATA) to the notebook computers with an
34mm or 54mm ExpressCard Slot. With its built-in intelligent Serial ATA3
controller chip, this Express Card increases the system throughput with
the SATA/SATA2/SATA3 devices that transfer data at a maximum burst
rate of 1.5Gb/s, 3Gb/s and 6Gb/s.
Features:
Provides 2 eSATA3 Connectors (up to 2 drives)
Supports SATA2 Port Multipliers for More Drive Expansion
Supports Hot-Plug and Hot-Swap Features
Supports Hard Drives over 137GB Capacity
Driver supports Major OS available in the Market
2. Layout
Port#1 Activity LED
ExpressCard
Connector
ExpressCard
Port#0 Activity LED
eSATA3 Connectors:
Port#1
Port#0
1
eSATA3 Express Card /34mm
3. Installing the Express Card
This Express Card can be hot-plugged to your notebook PC due to
the specifications of ExpressCard. It supports the following operating
systems:
Windows XP
Windows 2000
Vista
Windows 7
Please follow the following steps to install your Express card:
1.
Use static electricity discharge precautions.
Remove possible static discharge potential from any objects that
the Express Card may come in contact with before installation.
This can be accomplished by touching a bare metal chassis rail
after you have turned off the power.
2.
Locate an unused ExpressCard slot, insert Express Card into
Notebook PC (please note the direction of the Express Card
should match the direction of the ExpressCard slot)
3.
The “Add New Hardware Wizard” in the Operating Systems will
be invoked, insert the Driver CD, browse to the correct location
and then Windows will guide you to complete the whole driver
installations.
2
eSATA3 Express Card /34mm
4.
Installing eSATA cables
There are two eSATA3 connectors which are double-decked on
this Express card. The lower one is port #0 and the upper one is
port #1. To connect the eSATA devices, use an eSATA-to-eSATA
cable (since the cable does NOT support bus power, the eSATA
device has to be self-powered). Since it is a point-to-point
connection, no termination problem has to be cared about.
4. Driver Installation
To install the device drivers, insert the supplied driver CD (folders as
the following picture).
Please follow the following steps:
1.
Run the driver installer (drvSetup.exe)
\SATA3\88SE9128\Drivers to install the drivers
2.
Reboot the system to let the drivers take effect.
3
in
the
folder
eSATA3 Express Card /34mm
5. Safe-Removing the Express Card
Windows 2000/XP/Vista/Win7:
If you insert the Express Card, you will get a “green arrow” icon at the
bottom of the screen, after clicked this icon, you will be allowed to
safe-remove the Express Card afterward:
Click this icon before removing the Express Card
4