1
EX
EX--11099
English
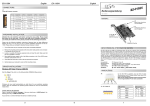
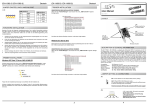
JUMPER SETTING & CONNECTORS:
EX
EX--11099
English
DRIVER INSTALLATION:
Windows XP/ Vista/ 7/ Server 2008 R2:
J1-J2:
USB 3.0 Pin‘s
Pin
Signal
5
SSTX+
6
SSTX-
7
GND
8
SSRX+
9
SSRX-
USB 2.0 Pin‘s
Pin
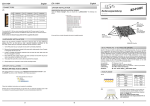
Start the „Setup“ File which is in the „NEC“ folder:
Bedienungsanleitung
Vers. 1.0 / 23.01.12
Signal
1
VCC
2
DATA-
3
DATA+
4
GND
AUFBAU:
Windows will now install automatically you right driver for your particular operating
system. After the installation the operating system detects the card and automatically
installs them.
HARDWARE INSTALLATION:
Attention! Do not install the card before running the setup utility. Please install
the drivers for the card first. If not the card might not be installed correctly!!! If
you already do install the drivers please proceed with the following Instructions.
If you are ready with the jumper settings for the EX-11099, please proceed with the
following installation instructions. Because there are large differences between PC’s, we
can give you only a general installation guide for the EX-11099. Please refer your computer’s reference manual whenever in doubt.
J3: 20-pin Header Anschluss für USB 3.0 Port 1, 2
CHECK INSTALLED DRIVER:
Open as sample the >Device manager< . Now you should see at „USB Devices“ the
following new entry's: <USB 3.0 Root Hub>.
JP4: USB Bus Power Eingangs Buchse
If you see this or a similar information the device is installed correctly.
Muss an das Netzteil vom Rechner angeschlossen werden um 900mA Strom am
USB 3.0 Stecker zu haben
1. Turn off the power to your computer and any other connected peripherals.
2. Remove the mounting screws located at the rear and/or sides panels of your Computer and gently slide the cover off.
BESCHREIBUNG & TECHNISCHE DATEN:
3. Install now the external power supply to the card like shown at JP4 above.
Vielen Dank das Sie sich für die EX-11099 entschieden haben. Die USB 3.0 PCI-Express Karte
stellt zwei Super-Speed USB 3.0 Ports in eine 3.5“ Schacht (Fronteinbau) zur Verfügung. Sie ist
entwickelt worden um zwei weitere USB 1.1, 2.0 oder 3.0 Endgeräte an Ihre Workstation,
Desktop oder Server anzuschließen. Sie unterstützt USB 1.1 Low-Speed (1.5Mbps), Full-Speed
(12Mpbs), USB 2.0 High-Speed (480Mbps) und USB 3.0 Super-Speed (5Gbps). Sie ist die
perfekte Technologie für externe Speicher Gehäuse, digitale Kameras, Webcam, Scanner und
mehr. Zur Unterstützung des Stromes 900mA an den externen USB 3.0 Ports, benötigt man
den Stromanschluss vom PC-Netzteil. Es ist nicht möglich die I/O Adressen und Interrupts
manuell einzustellen, da die Einstellungen der Karte vom System (BIOS) und beim installieren
des Betriebssystems automatisch vorgenommen werden.
4. Locate an available PCI-Express expansion slot and remove its covers from the rear
panel of your computer.
5. Align the EX-11099 with the expansion slot, and then gently but firmly, insert the card.
Make sure the card is seated and oriented correctly.
6. Then connect the card with a screw to the rear panel of the computer.
7. Install the 3.5-inch-bay cable adapter and connect its cable to J3 connector.
8. Gently replace your computer’s cover and the mounting screws.
Merkmale:
• Kompatible mit PCI Express Gen2 Specifikation
• Unterstützt zwei USB3.0 Host Ports über den internen 20-pin Header Anschluss
• Kompatibel mit USB3.0 and Intel xHCI Specifikations
• Unterstützt Low-Speed (1.5Mbps)/ Full-Speed (12Mbps)/ High-Speed (480Mbps)/ SuperSpeed (5Gbps)
• Unterstützt Control/Bulk/Interrupt/Isochronous Transfer
• Unterstützt 900mA USB Bus Power für jeden Ausgang
• Unterstützt Windows XP, Vista, Windows 7 und mehr
J3
JP4
J1
J2
Kompatibilität:
Betriebssysteme:
Anschlüsse:
Lieferumfang:
PCI Express x1 bis x16
Windows XP/ Vista/ 7/ Server 2008 R2
2x A-Buchse extern, 1x 20 Pin Stecker, 1x 4 pin Molex
EX-11099, Treiber CD, Anleitung
Zertifikate:
CE / FCC / RoHS / WEEE
DE97424562 / WHQL
JUMPER EINSTELLUNG & ANSCHLÜSSE:
JP4:
Bitte auf die richtige Polarität achten! Achtung! Stecker nie bei eingeschaltetem PC ein oder ausstecken!
1 +12V 2 GND
5
6
3 GND
4 +5V
1
EX
EX--11099
Deutsch
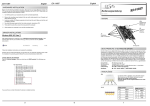
JUMPER EINSTELLUNG & ANSCHLÜSSE:
EX
EX--11099
Deutsch
TREIBER INSTALLATION:
Windows XP/ Vista/ 7/ Server 2008 R2:
J1-J2:
USB 3.0 Pin‘s
Pin
Signal
5
SSTX+
6
SSTX-
7
GND
8
SSRX+
9
SSRX-
USB 2.0 Pin‘s
Pin
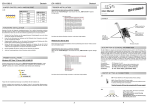
Starten Sie jetzt das „Setup“ File die im Ordner „NEC“ liegt (Siehe Abbildung):
Signal
1
VCC
2
DATA-
3
DATA+
4
GND
User Manual
Vers. 1.0 / 23.01.12
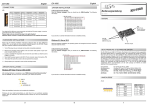
LAYOUT:
Windows installiert jetzt automatisch den richtigen Treiber für das jeweilige Betriebssystem. Nach der Installation der Treiber erkennt das Betriebssystem automatisch die Karte
und installiert diese.
HARDWARE INSTALLATION:
J3: 20-pin Header Connector for USB 3.0 Port 1, 2
Achtung! Installieren Sie die Karte auf keinen Fall bevor Sie das Setup ausgeführt
haben. Bitte installieren Sie zuerst die Treiber, wie unter Treiber Installation beschrieben. Sollten Sie dies bereits getan haben fahren sie bitte wie folgt fort:
ÜBERPRÜFEN DES INSTALLIERTEN TREIBER:
Öffnen Sie z.B. den >Geräte-Manager<. Jetzt müssten Sie unter „USB Geräte“ folgende Einträge sehen: <USB Hub 3.0>.
JP4: USB Bus Power Input Connector
Beachten Sie bitte die folgenden Installationshinweise. Da es große Unterschiede
zwischen PC‘s gibt, können wir Ihnen nur eine generelle Anleitung zum Einbau der EX11099 geben. Bei Unklarheiten halten Sie sich bitte an die Bedienungsanleitung Ihres
Computersystems.
Sind diese oder ähnliche Einträge vorhanden, ist die Karte richtig installiert.
Should be connected to Power Supply to
function properly
1.
Schalten Sie Ihren Rechner und alle angeschlossenen Peripheriegeräte aus und
ziehen Sie bei allen Geräten den Netzstecker.
2.
Lösen Sie die Schrauben des Gehäuses auf der Rückseite Ihres Computers und
entfernen Sie vorsichtig das Gehäuse.
3.
Stecken Sie nun die externe Stromversorgung in den 4 Pin Molex Stecker (JP4)
ein.
4.
Suchen Sie jetzt einen freien PCI-Express Steckplatz und stecken Sie die EX11099 vorsichtig in den ausgewählten PCI-Express Steckplatz ein. Beachten Sie,
das die EX-11099 korrekt eingesteckt wird und das kein Kurzschluss entsteht.
5.
Danach befestigen Sie die EX-11099 mit einer Schraube am Gehäuse.
6.
Schließen Sie jetzt das Kabel des 3.5“ Fronteinbau HUB‘s an den Stecker J3 an.
7.
Jetzt das Computergehäuse mit den Schrauben wieder schließen.
DESCRIPTION & TECNICAL INFORMATION:
Thank you for purchasing the EX-11099. The USB 3.0 PCI-Express card offer you two SuperSpeed USB 3.0 ports in a 3.5-inch Front-Bay. The EX-11099 it’s design for connect two more
USB 1.1, 2.0 or 3.0 peripheral device to your Workstation, Desktop or Server. He support USB
1.1 Low-Speed (1.5Mbps), Full-Speed (12Mpbs), USB 2.0 High-Speed (480Mbps) and USB 3.0
Super-Speed (5Gbps). It is an ideal technology for external storage devices, digital cameras,
webcams, scanners and much more. For support power 900mA to the external USB 3.0 ports,
need the additional power from the PC power supply. It is not possible to change the address or
IRQ settings manually, they will be obtained automatically by the system (BIOS) and operating
system.
Features:
• Fully PCI Express Gen2 Specification Compliant
• Supports 2 USB3.0 Host Ports over the Internal 20-pin Header Connector
• Fully Compliant with USB3.0 and Intel xHCI Specifications
• Supports Low-Speed (1.5Mbps)/ Full-Speed (12Mbps)/ High-Speed (480Mbps)/ SuperSpeed (5Gbps)
• Supports Control/Bulk/Interrupt/Isochronous Transfer
• Supports 900mA USB Bus Power for Each Port
• Supports Windows XP, Vista, Windows 7 and more
J3
JP4
J1
Compatibility:
Operating system:
Connectors:
Extent of delivery:
PCI Express x1 till x16
Windows XP/ Vista/ 7/ Server 2008 R2
2x external USB A-Port, 1x 20 Pin Connector, 1x 4 pin Molex
EX-11099, Driver CD, Manual
Certificates:
CE / FCC / RoHS / WEEE
DE97424562 / WHQL
J2
JUMPER SETTING & CONNECTORS:
JP4:
Please make sure you connect the plug in the right direction. Never connect or release the plug while the PC
power is on!
1 +12V
2
3
2 GND
3 GND
4 +5V
4