1
Operation
A. Starting status (power switch on mode):
P01 640x480 @60
H/V
MENU
”, ”
P01 FLAT
▲ ▼
Note: Pattern Index option will blink
Key: “▲”: Increasing
“▼”: Decreasing
“: Enter
“
P02 Blinking setup guide
Start setting: Key Î “MENU” Switch
b. After pressing ”MENU” optionÎ
P01 640x480 @60
Tim Ptn Sync Hky
Set: Setting black and white blinking frequency
(frames/number)
▼
WHT:001
▲
BLK:001
▲▼
▼
▲
Note: The chosen option will blink
BLK: Black, WHT: White
Key: “▲”: Increasing
“▼”: Decreasing
“ ”, ” ”: Choosing BLK or WHT
“
“: Enter
3> Sync: (Sync selector)
Sync:
INFO
MODE
INFO: Currently output timing information
1> Tim: (Timing selector)
640x480 @60
▲▼
Info:
Ver
Hor
▼
Ver: Vertical frequency option
Note: The chosen option will blink
Key: “▲”: Increasing
“▼”: Decreasing
-3-
Hor Frequency:
▲ ▼ 37.879KHz
Key: “▲”, “▼”: Choosing last or next item
MODE: Output synchronization selector (H/V or SOG)
Sync_MODE:
H/V
SOG
P02 Blinking
▲ ▼ set
1. After pressing power On/Off key for 2~3 seconds, it
will sound a long ”beep”.
2. Only valid for the corresponding key found below the
LCD. After confirming the press, it will sound a short
confirm “beep.
3. Factory preset starting value: P01 640x480 @60
P01 Î Pattern 01
640x480 Î Resolution 640X480
@60 Î Refresh rate 60Hz
B. Operation Guide:
a.
P01 640x480 @60
TTL MENU
▲
”: Choosing Resolution or Refresh
rate
“
“: Enter
2> Ptn: (Pattern selector)
“
▼
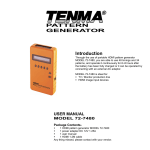
1. Insert the external AC adaptor into AC outlet, connect
the power cord to VPG-V for charging.
2. Switch off the monitor.
3. Connect the HD-15 extension cord between the VPG-V
and monitor.
4. Switch on the power of the monitor.
5. Press the VPG-V power key for more than 3 seconds to
switch on/off the VPG-V.
▲
Installation
Vertical Freq:
▲▼
60.317Hz
Hor: Horizontal frequency option
-4-
Note: The chosen option will blink
After choosing, press ”RETURN” key to return to upper
level. The lower corner of LCD will display ”H/V” or “SOG”
text
Example:
P01 640x480 @60
SOG MENU
4> Hky: (Hot key selector)
O O O X O
R G B Rev Out
O: Enable X: Disable
R: Red component output
G: Green component output
B: Blue component output
Rev: Pattern reverse
Out: Video Output On/Off
Note:
1. After purchasing and before using the VPG-V first time,
please charge it continuously for more than 16 hours.
2. If there is no image while using the VPG-V, please
ensure the following matters:
a. If it is unable to switch onÆthere is a possibility of
dead battery or inferior battery. Please connect it
with the transformer.
b. If it is able to switch on but there is no imageÆ
z Lower the resolution or change the resolution
and vertical frequency.
z Please ensure the compatibility of Sync MODE:
H/V or SOG of the monitor.
3. We suggest you to charge the battery when the battery
power indicator has become low.
4. The VPG-V will save the last setting automatically.
-5-