1
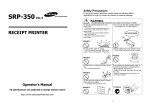
SRP - 770
Thermal Label Printer
Operator’s Manual
JE68-00131B
http://www.samsungminiprinters.com
1
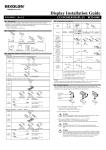
Safety Precautions
In using the present appliance, please keep the following safety
regulations in order to prevent any hazard or material damage.
WARNING
WARNING
Violating following instructions can cause serious injury or death.
Do not plug several products in one
multi-outlet.
You must use only the supplied adapter.
It is dangerous to use other adapters.
This can provoke over-heating and a fire.
If the plug is wet or dirty, dry or wipe it
before usage.
If the plug does not fit perfectly with the
outlet, do not plug in.
Be sure to use only standardized
multi-outlets.
ONLY SUPPLIED ADAPTER
PROHIBITE
Keep the plastic bag out of children’s reach.
Do not pull the cable to unplug.
If not, a child may put the bag on his head.
This can damage the cable, which is the
origin of a fire or a breakdown of the printer.
PROHIBITE
Violating following instructions can cause slight wound or damage the appliance.
Keep the desiccant out of children’s
reach.
Install the printer on the stable surface.
If the printer falls down, it can be broken
and you can hurt yourself.
If not, they may eat it.
PROHIBITE
PROHIBITE
PRINTER
Use only approved accessories and do
not try to disassemble, repair or remodel
it for yourself.
Do not use the printer when it is out of
order. This can cause a fire or an
electrocution.
Call your dealer when you need these
services.
Switch off and unplug the printer before
calling your dealer.
DISASSEMBLING
PROHIBITED
TO UNPLUG
PROHIBITE
Do not plug in or unplug with your hands
wet.
If you observe a strange smoke, odor or
noise from the printer, unplug it before
taking following measures.
You can be electrocuted.
Switch off the printer and unplug the set from
the mains.
After the disappearance of the smoke, call
your dealer to repair it.
PROHIBITE
PRINER
PRINTER
DEALER
Do not let water or other foreign objects
in the printer.
If this happened, switch off and unplug the
printer before calling your dealer.
Do not bend the cable by force or leave it
under any heavy object.
A damaged cable can cause a fire.
TO UNPLUG
PROHIBITE
2
PRINTER
PROHIBITE
PRINTER
3
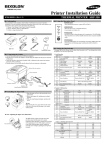
1. Unpacking
2. Samsung Label Printer
Your printer box should include these items. If any items are damaged or missing,
please contact your dealer for assistance.
Status Indicator
Feed Button
Cover Peel-off
Power Switch
Cover Open/Close
Printer Head
Paper Holder
Printer (SRP-770)
Operator’s Manual
Paper Guide
Paper(gap) Sensor
Paper Adjuster
Peel-off Sensor
Label (Paper)
Power Cord
Power Supply
Power Connector
Dip Switch
Interface Connectors
(RS-232C, IEEE1284, USB)
4
5
3. Connecting the Power Supply
4. Connecting the Interface Cable
CAUTIONS:
When connecting or disconnecting the power supply from the printer, make sure that
the power supply is not plugged into an electrical outlet. And the power supply’s
rated voltage and your outlet’s voltage do not match, contact your dealer for
assistance. Then do not plug in the power cord. Otherwise, you may damage the
power supply or the printer.
1. Make sure that the printer’s power switch is turned off, and the power supply’s
power cord is unplugged from the electrical outlet.
2. Check the label on the power supply to make sure that the voltage required by the
power supply matches that of your electrical outlet.
3. Plug in the power supply’s cable as shown below. Notice that the flat side of the
plug faces down.
Universal Serial Bus
(USB)
Parallel Interface
* Note
Defaultly, you can use Serial and Parallel Interface.
If you want to use USB Interface, please turn on the Dip
6
7
Serial Interface
RS-232 default
setting is 19200 baud,
no parity, 8 data bits
and 1 stop bit
S/W2-4
5. Installing or Replacing the Paper Roll
6. Setting The Dip Switches
6-1. Setting the Dip Switches
① Open Cover
② Open Guides
The Dip Switches are located on the bottom of the printer. The Dip Switches are used to
set the Printer to perform various functions. Follow these steps when changing Dip
Switches setting :
1. Turn the printer power switch off.
2. Remove the screw on the bottom of the printer and open the bracket.
3. Flip the Dip Switches using tweezers or another narrow-ended tool. Switches are
off when up and on when down in the Figure below.
4. The new setting takes effect when you turn on the printer.
③ Install Roll
Note : Always change Dip Switch settings only when the printer is turned off.
6-2. Functions of Dip Switches
④ Close Guides to the Width of the paper
⑤ Close Cover
6-2-1. Dip S/W 1
NO Functions
1,2
Speed
Selection
3,4
Density
Selection
5,6,
7
8
8
Developer
Mode
Position
Selection
6-2-2. Dip S/W 2
Details
2
Off
Off
On
On
4
Off
Off
On
On
1
Off
On
Off
On
3
Off
On
Off
On
No
Speed
2.5 ips
3.0 ips
4.0 ips
5.0 ips
Density
0(Low)
7
13
20(High)
1,2
3
4
5~8
Default --- off
Off
On
Move to Cutting Position
Move to top of next page
9
Functions
Baud
Rate
Flow
Control
Interface
Selection
Developer
Mode
Details
2
Off
Off
On
On
1
Off
On
Off
On
Off
On
Off
On
Baud Rate
9,600 bps
19,200 bps
57,600 bps
115,200 bps
Xon/Xoff
RTS/CTS
Serial & Parallel
Serial & USB
Default --- off
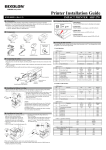
7. The Self Test
8. The Peel-off
(and Autosense Gapsensor Adjustment)
The self-test checks whether the printer has any problems. And perform this procedure
when loading a new roll.(You cannot perform this procedure if using the printer’s label
peel-off option) If the printer does not function properly, contact your dealer. The self-test
checks the following;
1.
Make sure that paper roll has been installed properly.
2.
Turn on the power while holding(2sec) down the FEED button. The self-test begins.
3.
Printers can Peel-off a single label.
You must remove the label before the printer prints the next label.
① Open the peel-off cover and turn on peeler switch.
The self-test prints the current printer status, which provides the control ROM version
and the DIP switch setting.
䧎 Cleaning Head
Paper dust on the heating elements may lower the printer quality. In this case, clean the
print head as follows :
② Remove the one a paper and
insert the paper through slot.
③ Adjust the paper guides and close the cover.
Cautions 1. Turn Off the printer power before cleaning.
2. Note that the thermal head becomes very hot during normal operation,
creating the danger of burn injury. Be sure to wait for about 10 minutes
after turning printer power off before beginning the cleaning.
1. Open the printer cover.
2. Clean the thermal element (the area which is marked a thin black line) of the
thermal head with a cotton swab moistened with a alcohol solvent (ethanol,
methanol, or IPA).
3. After confirming that the alcohol solvent has been dried up completely,
close the cover-open.
Note
remove
1. Never touch the thermal element with your hand,
then the thermal element can be damaged.
2. Don’t scratch the printer head.
10
11
9. Using Fan Fold Paper
【 Specification 】
Insert paper through both the rear slot and guides.
Adjust holders and guides to the width of the paper.
Open the Dust Cover
and Insert paper
Dust Cover
Adjust holders papers and paper Fixed
Printing method
Thermal line printing
Dot density
203 dpi (8 dot/mm)
Printing width
25.4 ~ 101.6 mm
Paper width
38.1 ~ 104 mm
Printing speed
127 mm/sec
Receive Buffer Size
4K Byte
※ Note : Printing speed may be slower, depending on the data transmission speed
and the combination of control commands.
Input voltage
100~240V AC
Supply voltage
Frequency
50/60 Hz
Output voltage
DC 24V
5 ~ 45 ℃ (Operating)
Temperature
-25 ~ 70 ℃ (Storage)
Environmental
30 ~ 80 % RH (Operating)
conditions
Humidity
10 ~ 90 % RH (Storage)
; Except for paper
10,000,000 lines
LIFE
Mechanism Head
5×10⁷ pulse (50km)
MCBF
Mechanism
20,000,000 lines
Adjust Guides
Paper Fixed
12
13