1
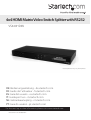
4x4 HDMI Matrix Video Switch Splitter with RS232
VS440HDMI
*actual product may vary from photos
DE: Bedienungsanleitung - de.startech.com
FR: Guide de l'utilisateur - fr.startech.com
ES: Guía del usuario - es.startech.com
IT: Guida per l'uso - it.startech.com
NL: Gebruiksaanwijzing - nl.startech.com
PT: Guia do usuário - pt.startech.com
For the most up-to-date information, please visit: www.startech.com
Manual Revision: 02/06/2012
FCC Compliance Statement
This equipment has been tested and found to comply with the limits for a Class B digital
device, pursuant to part 15 of the FCC Rules. These limits are designed to provide reasonable
protection against harmful interference in a residential installation. This equipment generates,
uses and can radiate radio frequency energy and, if not installed and used in accordance with
the instructions, may cause harmful interference to radio communications. However, there
is no guarantee that interference will not occur in a particular installation. If this equipment
does cause harmful interference to radio or television reception, which can be determined by
turning the equipment off and on, the user is encouraged to try to correct the interference by
one or more of the following measures:
• Reorient or relocate the receiving antenna.
• Increase the separation between the equipment and receiver.
• Connect the equipment into an outlet on a circuit different from that to which the receiver
is connected.
• Consult the dealer or an experienced radio/TV technician for help.
Use of Trademarks, Registered Trademarks, and other Protected Names and Symbols
This manual may make reference to trademarks, registered trademarks, and other
protected names and/or symbols of third-party companies not related in any way to
StarTech.com. Where they occur these references are for illustrative purposes only and do not
represent an endorsement of a product or service by StarTech.com, or an endorsement of the
product(s) to which this manual applies by the third-party company in question. Regardless
of any direct acknowledgement elsewhere in the body of this document, StarTech.com hereby
acknowledges that all trademarks, registered trademarks, service marks, and other protected
names and/or symbols contained in this manual and related documents are the property of
their respective holders.
Instruction Manual
Table of Contents
Introduction.............................................................................................1
Packaging Contents.................................................................................................................................. 1
System Requirements............................................................................................................................... 1
Front View..................................................................................................................................................... 2
Rear View....................................................................................................................................................... 2
Installation...............................................................................................3
Hardware Installation............................................................................................................................... 3
Software Installation................................................................................................................................. 3
How to Use...............................................................................................4
Front Panel.................................................................................................................................................... 4
Software........................................................................................................................................................ 5
Troubleshooting......................................................................................7
Specifications...........................................................................................8
Technical Support...................................................................................9
Warranty Information.............................................................................9
Instruction Manual
i
Introduction
The VS440HDMI 4x4 HDMI Matrix Video Switch Splitter with Audio and RS232 allows
you to share up to four distinct HDMI or DVI inputs (Using HDMI to DVI adapters - not
included) with audio between four independent displays or projectors.
Providing convenient front panel push-button and RS-232 PC control using the
included software, this Matrix switch allows each input and the corresponding audio to
be switched individually, meaning that different sources can be shown on each output
display or a single source can be output to several, offering maximum flexibility.
This flexible device features a front panel LCD for easy status monitoring, plus an
included remote control and IR extender module for simple control from a distance.
Designed to provide maximum control while saving space, the VS440HDMI can be
used as a standalone solution or rack-mounted using the included ear-mounts.
Backed by a StarTech.com 1 year warranty and free lifetime technical support.
Packaging Contents
• 1 x VS440HDMI video switch
• 1 x IR Extender Module
• 1 x Remote Control
• 2 x Rack Mounting Brackets
• 1 x DB9 RS232 cable
• 1 x Universal Power Adapter
• 1 x Software Installation CD
• 1 x Instruction Manual
System Requirements
• HDMI enabled video source device(s) (i.e. computer, game console, PVR/DVR, etc)
• HDMI enabled display device(s) (i.e. monitor, projector, HDTV, etc)
• Available AC power outlet
• Software: Microsoft® Windows® 2000/XP/Vista/7 (32/64-bit), 32MB RAM,
10MB storage space, CD-ROM drive, RS232 serial port
Instruction Manual
1
Front View
Rear View
Instruction Manual
2
Installation
Hardware Installation
1. Make sure that all devices are powered off before beginning installation.
2. Connect the HDMI display device(s) to the HDMI Output connectors on the rear of
the matrix switch.
3. Connect the HDMI video source device(s) to the HDMI Input connectors on the rear
of the matrix switch.
4. OPTIONAL: If planning to use RS232 control for the matrix switch, connect a DB9
RS232 cable from the rear of the matrix switch, to the RS232 port on the host
computer system.
5. OPTIONAL: If using the IR Extender module, connect it into the rear of the matrix switch.
6. Connect the power adapter to the matrix switch, followed by powering on the
display devices, then the HDMI source devices.
7. The LCD screen on the front of the matrix switch should activate and display the
current status and Input-to-Output display relationships. The top row of the LCD
lists each output port, while the bottom row indicates which input port is being
displayed on it, with “0” representing no input selected (no video).
Software Installation
1. Insert the software installation CD into the computer’s CD/DVD drive.
2. On the CD, in the “AVM” folder, double click the AV Matrix file to start the installation.
3. Proceed through the installation prompts.
4. Once installation is complete, close the installation wizard. The software should
now be ready for use.
Instruction Manual
3
How to Use
Front Panel
OUT 1~4: Selects the numbered Output Port to be configured. An output must be
selected before selecting an input.
IN 1~4: Selects the numbered Input Port to map to an Output Port. Should only be
used after an Output Port has been selected first, otherwise an error message will be
generated on the LCD status display.
ALL: Selects all of the Output ports at once. Used to configure all output ports
simultaneously with the same setting.
STO: Stores/saves the current Input/Output display relationships to internal memory.
EDID: Switches between “FIX” and “TV1” modes. FIX uses an internal EDID profile that
supports up to 1080p and sends it to each input device. TV1, uses the EDID from the
display connected to Output port 1 and sends it to each input device. Useful if the
connected display devices have different capabilities than the built in EDID that you
wish to use (i.e. different display resolutions).
OFF: Turns off the selected Output port. No video will be sent to the selected display(s).
RCL: Recalls/loads the stored display relationships from the “STO” button.
Instruction Manual
4
Software
Once the software is installed and the matrix switch is properly connected to the host
computer, launch the AV Matrix software to bring up the main control panel.
The panel on the left side will list all compatible matrix switches that are connected to
the host computer system. The name/model, number of ports will also be listed.
The center panel displays a grid showing the current Input-to-Output relationships for
the selected matrix switch. The numbered ports for Input and Output are listed along
the X and Y axis of the grid, with the currently set relationships highlighted.
The panel on the right side displays the stored display relationship profiles for the
selected matrix switch. Up to 4 different custom profiles can be saved for each matrix
switch from the software (front panel controls can only store 1).
The buttons along the bottom of the software window serve various functions:
Select/Deselect all output: Selects or deselects all 4 of the “Output” ports on the
matrix switch.
Disconnect all: Disables video output to all displays.
Scan: Refreshes the software window with any changes that may have been made
through directly using the front panel controls on the matrix switch while the software
is running.
Instruction Manual
5
Options: Used to configure the serial port on the computer, if necessary.
Selecting Video Output
Mapping the “Output” ports to an “Input” port can be accomplished through one of
two methods
Method 1:
1. Ensure the “Video” checkbox is checked in the bottom right corner of the center panel.
2. Click on the appropriate location on the grid to map the numbered “Output” port to
a numbered “Input” port.
Method 2:
1. Ensure the “Video” checkbox is checked in the bottom right corner of the center panel.
2. Click on the numbered “Output” port button(s) along the side of the grid.
3. Click on the numbered “Input” port button along the bottom of the grid that you
want the previously selected outputs to use.
4. Press the “Deselect all output” button in the bottom left corner of the window.
NOTE: If the I/O port relationships are changed from the front panel controls directly,
the software will need to be refreshed using the “Scan” button.
Disconnect/Disable Video Output
To stop video from being sent to one or more of the Output ports:
1.Press the numbered button for the Output port(s) from the side of the grid.
2.Press the “Disconnect” button in the bottom right corner of the grid.
3.Press the “Deselect all output” button in the bottom left corner of the software window.
Saving/Loading Stored Profiles
The matrix switching software can store up to 4 different display relationship profiles.
To save the current configuration, select the desired profile number from the drop
down list and press the “Save” button. To load the currently selected profile, click the
“Load” button.
Instruction Manual
6
Troubleshooting
If switching input/output with the front panel keys are not responsive.
• Press and hold the key for 2 seconds, then release, instead of just a quick press.
Loss of video output or color, or the unit becomes unusually hot.
• If the signal voltage difference between the video source device(s) and the matrix
switch is too large, hot plugging could easily cause damage to the IC chips. Please
turn off power to the system before plugging or unplugging.
The LCD displays normally and the communication port has a return code but no
image is being output.
• The output/input cable connectors are loose. Simply reconnect the cables.
• The connection cable short-circuited. Simply replace the cable.
• The connection cable is broken. Simply replace the cable.
The front panel keys and communication ports are not responsive.
• Check that the equipment input power is properly connected and the computer
communication ports are working.
• Disconnect all cables and power and let sit for several minutes before attempting to
use again.
• Otherwise, contact technical support for further assistance.
Instruction Manual
7
Specifications
Video Signal
High Speed HDMI (HDMI 1.3)
Number of Inputs
4
Number of Outputs
4
4 x HDMI type A female (input)
4 x HDMI type A female (output)
External Connectors
1 x DB9 female
1 x IR Extender connector
1 x DC Power
LEDs
N/A
Maximum Video Resolution
1080p / 1920x1200
Maximum Cable Length
10m / 32.8ft
Audio Support
Yes
EDID Support
Yes
Rack Mountable
Yes
Power Adapter
12VDC, 1500mA, center positive
Enclosure Material
Metal
Operating Temperature
0°C ~ 70°C (32°F ~ 158°F)
Storage Temperature
-20°C ~ 85°C (-4°F ~ 185°F)
Humidity
0% ~ 95% RH
Dimensions
440.0mm x 185.0mm x 42.0mm
Weight
2350g
Compatible Operating Systems
(Software)
Instruction Manual
Windows 2000/XP/Vista/7 (32/64-bit)
8
Technical Support
StarTech.com’s lifetime technical support is an integral part of our commitment to
provide industry-leading solutions. If you ever need help with your product, visit
www.startech.com/support and access our comprehensive selection of online tools,
documentation, and downloads.
For the latest drivers/software, please visit www.startech.com/downloads
Warranty Information
This product is backed by a two year warranty.
In addition, StarTech.com warrants its products against defects in materials
and workmanship for the periods noted, following the initial date of purchase.
During this period, the products may be returned for repair, or replacement with
equivalent products at our discretion. The warranty covers parts and labor costs only.
StarTech.com does not warrant its products from defects or damages arising from
misuse, abuse, alteration, or normal wear and tear.
Limitation of Liability
In no event shall the liability of StarTech.com Ltd. and StarTech.com USA LLP (or their
officers, directors, employees or agents) for any damages (whether direct or indirect,
special, punitive, incidental, consequential, or otherwise), loss of profits, loss of business,
or any pecuniary loss, arising out of or related to the use of the product exceed the
actual price paid for the product. Some states do not allow the exclusion or limitation
of incidental or consequential damages. If such laws apply, the limitations or exclusions
contained in this statement may not apply to you.
Instruction Manual
9
Hard-to-find made easy. At StarTech.com, that isn’t a slogan. It’s a promise.
StarTech.com is your one-stop source for every connectivity part you need. From
the latest technology to legacy products — and all the parts that bridge the old and
new — we can help you find the parts that connect your solutions.
We make it easy to locate the parts, and we quickly deliver them wherever they need
to go. Just talk to one of our tech advisors or visit our website. You’ll be connected to
the products you need in no time.
Visit www.startech.com for complete information on all StarTech.com products and
to access exclusive resources and time-saving tools.
StarTech.com is an ISO 9001 Registered manufacturer of connectivity and technology
parts. StarTech.com was founded in 1985 and has operations in the United States,
Canada, the United Kingdom and Taiwan servicing a worldwide market.