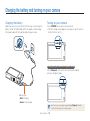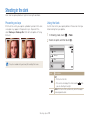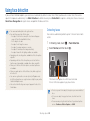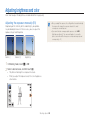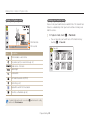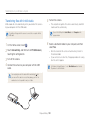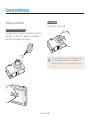
1
This user manual includes detailed usage instructions for your camera. Please read this manual thoroughly. Ä Click a topic Basic troubleshooting Quick reference User Manual SH100 Contents Basic functions Extended functions Shooting options Playback/Editing Wireless network Settings Appendixes Index Health and safety information Always comply with the following precautions and usage tips to avoid dangerous situations and ensure peak performance of your camera. Keep your camera away from small children and pets. Keep your camera and all accessories out of the reach of small children and animals. Small parts may cause choking or serious injury if swallowed. Moving parts and accessories may present physical dangers as well. Warning—situations that could cause injury to yourself or others Do not disassemble or attempt to repair your camera. This may result in electric shock or damage to the camera. Do not use your camera near flammable or explosive gases and liquids. This may cause a fire or explosion. Do not expose the camera to direct sunlight or high temperatures for an extended period of time. Prolonged exposure to sunlight or extreme temperatures can cause permanent damage to your camera’s internal components. Do not insert flammable materials into the camera or store these materials near the camera. This may cause a fire or electric shock. Avoid covering the camera or charger with blankets or clothes. The camera may overheat, which may distort the camera or cause a fire. Do not handle your camera with wet hands. This may result in electric shock. If liquid or foreign objects enter your camera, immediately disconnect all power sources, such as the battery or charger, and then contact a Samsung service center. Prevent damage to subjects’ eyesight. Do not use the flash in close proximity (closer than 1 m/3 ft) to people or animals. If you use the flash too close to your subject’s eyes, this can cause temporary or permanent eyesight damage. 1 Health and safety information Comply with any regulations that restrict the use of a camera in a certain area. • Avoid interference with other electronic devices. • Turn off the camera when in an aircraft. Your camera can cause interference with aircraft equipment. Follow all airline regulations and turn off your camera when directed by airline personnel. • Turn off the camera near medical equipment. Your camera can interfere with medical equipment in hospitals or health care facilities. Follow all regulations, posted warnings, and directions from medical personnel. Caution—situations that could cause damage to your camera or other equipment Remove the batteries from your camera when storing it for an extended period of time. Installed batteries may leak or corrode over time and cause serious damage to your camera. Use only authentic, manufacturer-recommended, Lithium-ion replacement batteries. Do not damage or heat the battery. Inauthentic, damaged, or heated batteries may cause a fire or personal injury. Avoid interference with pacemakers. Maintain a minimum of 15 cm (6 inches) between this camera and all pacemakers to avoid potential interference, as recommended by the manufacturer and the independent research group, Wireless Technology Research. If you have any reason to suspect that your camera is interfering with a pacemaker or other medical device, turn off the camera immediately and contact the manufacturer of the pacemaker or medical device for guidance. Use only Samsung-approved batteries, chargers, cables and accessories. • Using unauthorized batteries, chargers, cables or accessories can cause batteries to explode, damage your camera, or cause injury. • Samsung is not responsible for damages or injuries caused by unauthorized batteries, chargers, cables or accessories. 2 Health and safety information Use the battery only for its intended purpose. Misusing the battery may cause a fire or electric shock. Do not force the camera’s parts or apply pressure to the camera. This may cause your camera to malfunction. Do not touch the flash while it fires. The flash is very hot when fired and may burn your skin. When you use AC charger, turn off the camera before you disconnect the power to the AC charger. Failing to do so may result in fire or electric shock. Exercise caution when you connect cables or adapters and install batteries and memory cards. If you force the connectors, improperly connect cables, or improperly install batteries and memory cards, you can damage ports, connectors, and accessories. Disconnect the charger from the wall socket when not in use. Failing to do so may result in fire or electric shock. Keep cards with magnetic strips away from the camera case. Information stored on the card may be damaged or erased. Do not use a damaged power supply cord, plug, or loose outlet when you charge batteries. These may cause a fire or electric shock. Never use a damaged charger, battery, or memory card. This may result in electric shock or camera malfunction or cause a fire. Do not allow the AC charger to come in contact with the +/terminals on the battery. This may cause a fire or electric shock. 3 Health and safety information Check that the camera is operating properly before use. The manufacturer takes no responsibility for any loss of files or damage that may result from camera malfunction or improper use. Data transference and your responsibilities • Data transferred via WLAN could be leaked, so avoid transferring sensitive data in public areas or on open networks. • The camera manufacturer is not liable for any data transfers that infringe on copyrights, trademarks, intellectual property laws, or public decency ordnances. You must plug the end of the USB cable with the indicator light (S) into your camera. If the cable is reversed, it may damage your files. The manufacturer is not responsible for any loss of data. Avoid interference with other electronic devices. Your camera emits radio frequency (RF) signals that may interfere with unshielded or improperly shielded electronic equipment, such as pacemakers, hearing aids, medical devices, and other electronic devices in homes or vehicles. Consult the manufacturers of your electronic devices to solve any interference problems you experience. To prevent unwanted interference, use only Samsung-approved devices or accessories. Use your camera in the normal position. Avoid contact with your camera’s internal antenna. 4 Outline of the User Manual Basic functions Copyright information • Microsoft Windows and the Windows logo are registered trademarks of the Microsoft Corporation. • Mac is a registered trademark of the Apple Corporation. • microSD™, microSDHC™ are registered trademarks of the SD Association. • Wi-Fi®, the Wi-Fi CERTIFIED logo, and the Wi-Fi logo are registered trademarks of the Wi-Fi Alliance. • Trademarks and trade names used in this manual are the property of their respective owners. 14 Learn about your camera’s layout, icons, and basic functions for shooting. Extended functions 35 Learn how to capture a photo, record a video, and voice memo by selecting a mode. Shooting options 52 Learn how to set the options in Shooting mode. Playback/Editing 80 Learn how to play back photos, videos, or voice memos and edit photos or videos. Also, learn how to connect your camera to your computer, photo printer, or TV. • Camera specifications or contents of this manual may be changed without prior notice due to upgrade of camera functions. • We recommend using your camera within the country where you purchase it. • You are not allowed to reuse or distribute any part of this manual without prior permission. • For Open Source License information, refer to the ‘OpenSourceInfo.pdf’ in the provided CD-ROM. Wireless network 107 Learn to connect to wireless local area networks (WLANs) and use functions. Settings 127 Refer to options to configure your camera’s settings. Appendixes Get information about error messages, specifications, and maintenance. 5 133 Icons used in this manual Icon Function Additional information Safety warnings and precautions [ ] Camera buttons. For example, [Shutter] represents the shutter button. ( ) Page number of related information The order of options or menus you must select to perform a step; for example: Touch m Photo Size (represents Touch m, and then touch Photo Size). * Annotation Abbreviations used in this manual Abbreviation Definition ACB Auto Contrast Balance AEB Auto Exposure Bracket AF Auto Focus AP Access Point DIS Digital Image Stabilization DPOF Digital Print Order Format EV Exposure Value ISO International Organization for Standardization WB White Balance 6 Expressions used in this manual Pressing the shutter • Half-press [Shutter]: press the shutter halfway down • Press [Shutter]: press the shutter all the way down Half-press [Shutter] Exposure (Brightness) The amount of light that enters your camera determines the exposure. You can alter the exposure with shutter speed, aperture value, and ISO sensitivity. By altering the exposure, your photos will be darker or lighter. Normal exposure Press [Shutter] Subject, background, and composition • Subject: the main object in a scene, such as a person, animal, or still life • Background: the objects around the subject • Composition: the combination of a subject and background Background Composition Subject 7 Overexposure (too bright) Basic troubleshooting Learn to solve common problems by setting shooting options. The subject’s eyes appear red. • Set the flash option to Photos have dust spots. • Turn off the flash or avoid capturing photos in a dusty place. Red eye is caused by the eyes reflecting light from the camera flash. Red-eye or Red-eye Fix. (p. 57) • If the photo has already been captured, select Red-eye Fix in the edit menu. (p. 97) If dust particles are present in the air, you may capture them in photos when you use the flash. • Set ISO sensitivity options. (p. 59) Photos are blurred. Blurring can occur if you capturing photos in low light conditions or hold the camera incorrectly. Use the DIS function or half-press [Shutter] to ensure the subject is focused. (p. 33) Photos are blurred when shooting at night. As the camera tries to let in more light, the shutter speed slows. This can make it difficult to hold the camera steady long enough to take a clear picture and may result in camera shake. • Select Night Shot mode. (p. 39) • Turn on the flash. (p. 57) • Set ISO sensitivity options. (p. 59) • Use a tripod to prevent your camera from shaking. Subjects come out too dark because of backlighting. When the light source is behind the subject or when there is a high contrast between the light and dark areas, the subject may appear too dark. • Avoid shooting toward the sun. • Select Backlight in Scene mode. (p. 38) • Set the flash option to Fill in. (p. 57) • Adjust the exposure. (p. 68) • Set the Auto Contrast Balance (ACB) option. (p. 69) • Set the metering option to Spot if a bright subject is in the center of the frame. (p. 69) 8 Quick reference Capturing photos of people • Beauty Shot mode f 39 • Red-eye/Red-eye Fix (to prevent or correct red-eye) f 57 • Face Detection f 63 Capturing photos of text, insects, or flowers • Scene mode > Text f 38 • Close Up mode f 38 • Macro f 60 Applying effects to photos • • • • Capturing photos at night or in the dark Scene mode > Sunset, Dawn f 38 Night Shot mode f 39 Flash options f 57 ISO sensitivity (to adjust the sensitivity to light) f 59 Capturing action photos • Continuous, Motion Capture f 72 Adjusting the exposure (brightness) • ISO sensitivity (to adjust the sensitivity to light) f 59 • EV (to adjust exposure) f 68 • ACB (to compensate for subjects against bright backgrounds) f 69 • Metering f 69 • AEB (to take 3 photos of the same scene with different exposures) f 72 • • • • • • Object Highlight mode f 44 Magic Frame shot mode f 45 Photo Filter mode f 45 Vignetting mode f 48 Smart Filter effects f 73 Image Adjust (to adjust Saturation, Sharpness, or Contrast) f 76 Applying effects to videos • Movie Filter mode f 47 • Vignetting mode f 48 • Palette Effect mode f 49 Reducing camera shake • Digital Image Stabilization (DIS) f 32 9 • Viewing files by category in Smart album f 84 • Viewing files in 3D view f 85 • Viewing files as thumbnails f 86 • Deleting files on the memory card f 87 • Viewing files as a slide show f 89 • Viewing files on a TV f 98 • Connecting your camera to a computer f 99 • Sending photos via email f 111 • Using photo or video sharing websites f 115 • Adjusting sound and volume f 129 • Adjusting the brightness of the display f 130 • Changing the display language f 131 • Setting the date and time f 131 • Before contacting a service center f 143 Contents Basic functions ................................................................. 14 Extended functions .......................................................... 35 Unpacking ................................................................... Camera layout ............................................................. Inserting the battery and memory card ....................... Charging the battery and turning on your camera ...... Charging the battery ................................................... Turning on your camera .............................................. Performing the initial setup ......................................... Learning icons ............................................................. Using the touch screen ............................................... Setting the touch screen and sound ........................... Setting the display type for the touch screen ................. Setting the sound ....................................................... Using the Home screen ............................................... Accessing the Home screen ....................................... Icons on the Home screen .......................................... Rearranging icons ...................................................... Capturing photos ......................................................... Zooming .................................................................... Reducing camera shake (DIS) ..................................... Tips for getting a clearer photo ................................... Using shooting modes ................................................ Using the Smart Auto mode ........................................ Using the Simple Shot mode ....................................... Using the Scene mode ............................................... Using the Close Up mode ........................................... Using the Night Shot mode ......................................... Using the Beauty Shot mode ....................................... Using the Program mode ............................................ Using the Movie mode ................................................ Using the Smart movie mode ...................................... Using effect modes ..................................................... Using the Object Highlight mode ................................. Using the Magic Frame Shot mode .............................. Using the Photo Filter mode ........................................ Using the Movie Filter mode ........................................ Using the Vignetting mode .......................................... Using the Palette Effect mode ..................................... Recording voice memos ............................................. Recording a voice memo ............................................ Adding a voice memo to a photo ................................. 15 16 18 19 19 19 20 22 23 25 25 25 26 26 26 28 29 30 32 33 10 36 36 37 38 38 39 39 40 41 42 44 44 45 45 47 48 49 50 50 51 Contents Adjusting brightness and color ................................... Adjusting the exposure manually (EV) ........................... Compensating for backlighting (ACB) ........................... Changing the metering option ...................................... Selecting a light source (White balance) ........................ Using burst modes ...................................................... Applying effects/Adjusting images .............................. Applying Smart Filter effects ........................................ Adjusting your photos ................................................. Reducing the zoom sound .......................................... Available shooting options by shooting mode ............ Shooting options .............................................................. 52 Selecting a resolution and quality ............................... Selecting a resolution .................................................. Selecting image quality ............................................... Using the timer ............................................................ Shooting in the dark .................................................... Preventing red-eye ..................................................... Using the flash ........................................................... Adjusting the ISO sensitivity ......................................... Changing the camera’s focus ..................................... Using macro .............................................................. Using Smart Touch focus ............................................ Using one touch shooting ........................................... Adjusting the focus area .............................................. Using face detection ................................................... Detecting faces .......................................................... Capturing a self portrait shot ........................................ Capturing a smile shot ................................................ Detecting eye blinking ................................................. Using Smart Face Recognition .................................... Registering faces as your favorites (My Star) ................. 53 53 54 56 57 57 57 59 60 60 61 62 62 63 63 64 64 65 65 66 11 68 68 69 69 70 72 73 73 76 77 78 Contents Playback/Editing............................................................... 80 Wireless network ............................................................ 107 Viewing photos or videos in Playback mode .............. 81 Starting Playback mode .............................................. 81 Viewing photos .......................................................... 88 Playing a video ........................................................... 90 Playing a voice memo ................................................. 92 Editing a photo ............................................................ 93 Resizing photos ......................................................... 93 Rotating a photo ......................................................... 94 Using Smart Crop ...................................................... 94 Applying Smart Filter effects ........................................ 95 Adjusting your photos ................................................. 95 Creating a print order (DPOF) ....................................... 97 Viewing files on a TV ................................................... 98 Transferring files to your Windows computer ............. 99 Transferring files with Intelli-studio ............................... 100 Transferring files by connecting the camera as a removable disk ......................................................... 102 Disconnecting the camera (for Windows XP) ............... 103 Transferring files to your Mac computer ................... 104 Printing photos with a PictBridge photo printer ....... 105 Connecting to a WLAN and configuring network settings ...................................................................... Connecting to a WLAN ............................................. Setting network options ............................................ Manually setting the IP address ................................. Network connection tips ........................................... Sending photos via email .......................................... Changing email settings ............................................ Sending photos via email .......................................... Entering text ............................................................. Using photo or video sharing websites .................... Accessing a website ................................................ Uploading photos or videos ....................................... Using a smart phone as a remote shutter release .... 12 108 108 109 109 110 111 111 113 114 115 115 115 116 Contents Viewing photos or videos on AllShare devices ......... Viewing photos or videos on a TV screen ................... Viewing photos or videos on another device (renderer) ................................................................. Sending or receiving photos or videos with another camera ....................................................................... Sending photos or videos to another camera .............. Receiving photos or videos from another camera ........ Using Auto Backup to send photos or videos .......... Installing the program for Auto Backup on your PC ...... Sending photos or videos to a PC ............................. Sending photos or videos to a Blu-ray disc Player ....... About the Wakeup on LAN(WOL) feature ................. 118 118 Settings ........................................................................... 127 Settings menu ........................................................... Accessing the settings menu .................................... Sound ..................................................................... Display .................................................................... Connectivity ............................................................. General ................................................................... 120 121 121 121 123 123 123 124 125 128 128 129 129 130 131 Appendixes ..................................................................... 133 Error messages ......................................................... Camera maintenance ................................................ Cleaning your camera ............................................... Using or storing the camera ...................................... About memory cards ................................................ About the battery ...................................................... Before contacting a service center ........................... Camera specifications ............................................... Glossary ..................................................................... FCC notice ................................................................. Declaration sentence in official languages ............... Index .......................................................................... 13 134 135 135 136 137 139 143 146 150 155 158 160 Basic functions Learn about your camera’s layout, icons, and basic functions for shooting. Unpacking ………………………………… 15 Using the Home screen …………………… 26 Camera layout ……………………………… 16 Accessing the Home screen ……………… 26 Icons on the Home screen ……………… 26 Rearranging icons ………………………… 28 Inserting the battery and memory card … 18 Charging the battery and turning on your camera ……………………………………… 19 Charging the battery ……………………… 19 Turning on your camera ………………… 19 Performing the initial setup ……………… 20 Learning icons ……………………………… 22 Using the touch screen …………………… 23 Setting the touch screen and sound …… 25 Setting the display type for the touch screen …………………………………… 25 Setting the sound ………………………… 25 Capturing photos ………………………… 29 Zooming ………………………………… 30 Reducing camera shake (DIS) …………… 32 Tips for getting a clearer photo …………… 33 Unpacking The following items are included in your product box. Optional accessories Camera Rechargeable battery Touch pen AC adapter/USB cable Camera case A/V cable Battery charger Memory card/Memory card adapter Strap User Manual CD-ROM The illustrations may differ slightly from the items shipped with your product. Quick Start Manual Basic functions 15 Camera layout Before you start, familiarize yourself with your camera’s parts and their functions. Zoom button • In Shooting mode: Zoom in or out • In Playback mode: Zoom in on part of a photo or view files as thumbnails Shutter button Speaker Flash AF-assist light/Timer lamp Internal antenna* * Avoid contact with the internal antenna while using the wireless network. Lens Tripod mount USB and A/V port Accepts USB cable and A/V cable Battery chamber cover Insert a memory card and battery Basic functions 16 Camera layout POWER button Playback button Microphone Attaching the strap x Touch screen Home button Basic functions 17 y Status lamp • Blinking: When the camera is saving a photo or video, being read by a computer or printer, or out of focus, connecting to a WLAN, or sending a photo • Steady: When the camera is connecting to a computer or in focus Inserting the battery and memory card Learn how to insert the battery and an optional memory card into the camera. Removing the battery and memory card Push the card gently until it disengages from the camera, and then pull it out of the slot. Memory card Insert a memory card with the gold-colored contacts facing up. Battery lock Memory card Insert the battery with the Samsung logo facing down. Slide the lock up to release the battery. Rechargeable battery You can use the internal memory for temporary storage if a memory card is not inserted. Rechargeable battery Basic functions 18 Charging the battery and turning on your camera Charging the battery Turning on your camera Before you use the camera for the first time, you must charge the battery. Attach the USB cable to the AC adapter, and then plug the end of cable with the indicator light into your camera. Press [POWER] to turn your camera on or off. • The initial setup screen appears when you turn on the camera for the first time. (p. 20) Turning on your camera in Playback mode Press [Playback]. The camera turns on and immediately accesses Playback mode. Indicator light • Red: Charging • Green: Fully charged If you turn on your camera by pressing and holding [Playback] for about 5 seconds, the camera does not emit any sounds. Basic functions 19 Performing the initial setup When the initial setup screen appears, follow the steps below to configure the camera’s basic settings. 1 Touch Language. 4 Touch Home, and then touch z or x to select a time zone. • When you travel to another country, touch Visit, and then select a new time zone. Time Zone 2 Select a language, and then touch o. London, Lisbon 5 6 3 Touch o to save. Touch Date/Time Set. Touch Time Zone. Basic functions 20 Performing the initial setup 7 Touch the up or down arrows to set the date. Date/Time Set Year Month 10 11 Touch Touch Calibration. Touch the target on the screen with your touch pen. Day Touch Calibration 8 Touch , and then set the time. Touch directly in the center of the target for optimal performance. Date/Time Set Hr Min 12 • To set daylight-saving time, touch 9 Touch o to save settings. . Touch o to save. Basic functions 21 Learning icons The icons the camera displays on the screen change according to the mode you select or the options you set. Icon Description Memory card inserted • Voice memo 2 3 1 Option icons (touch) Icon m • : Fully charged : Partially charged : Empty (Recharge) Photo resolution Video resolution Auto focus frame Metering Camera shake Digital Image Stabilization (DIS) Zoom ratio Flash option • Timer Zoom indicator Description Description Aperture value Shutter speed 1 Icon Current time Auto focus option Photo resolution when Intelli zoom is on Timer option Grid lines Exposure value adjusted ISO sensitivity White balance Burst type Flash Shooting options 3 Status icons Intelli zoom is off Icon Description Smart filter 2 Status icons Available number of photos Image adjust Icon Description Available recording time Face detection Shooting mode Memory card not inserted (Internal memory) Auto focus Display type Current date Basic functions 22 Using the touch screen Learn how to use the touch screen. Use the supplied touch pen to touch or drag on the screen. Do not use sharp objects, such as pens or pencils, to touch the screen. You can damage the screen. Touching Flicking Touch an icon to select a menu or option. Smart Auto Program Smart movie Web Email Auto Backup Album Settings Gently flick the touch pen across the screen. Dragging Touch and hold a part of the screen, and then drag the touch pen. White Balance Auto WB Daylight Cloudy Basic functions 23 Using the touch screen Selecting an option • The touch screen may not recognize your inputs if you touch multiple • Drag the option list up or down until you find the desired option. items at the same time. Touch the option, and then touch o. • The touch screen may not recognize your inputs if you touch the White Balance • When you touch or drag the screen, discolorations may occur. screen with your finger. This is not a malfunction, but a characteristic of the touch screen. Touch or drag lightly to minimize the effect. • The touch screen may not work properly if you use the camera in extremely humid environments. • The touch screen may not work properly if you apply screen protection film or other accessories to the screen. • Depending on the viewing angle, the screen may appear dim. Adjust the brightness or viewing angle to improve the resolution. Auto WB Daylight Cloudy • If an option has a setting button, touch the button to turn it on or off. Drive Smart Filter Image Adjust DIS Basic functions 24 Setting the touch screen and sound Learn how to change the screen display type and the sound settings. Setting the display type for the touch screen Setting the sound You can select from three screen display types. Each displays differently. Set your camera to emit or not to emit a sound when you perform functions. 1 In Shooting mode, touch . 2 Select an option, and then touch o. 1 On the Home screen, touch . 2 Touch Sound. 3 Touch the setting button next to Beep Sound to Display Set turn the beep on or off. Full Hide Guide Line Icon Description Full: Icons are always displayed. Hide: Icons are hidden if you perform no operation for 5 seconds (touch the screen to display the icons again). Guide Line: Grid lines are displayed. The grid lines are helpful for getting the photo aligned with a surface, such as the horizon or the edges of buildings. Basic functions 25 Using the Home screen You can select a shooting mode or access the settings menu by touching the icons on the Home screen. Accessing the Home screen Icons on the Home screen In Shooting or Playback mode, press [HOME]. Press [HOME] again to return to the previous mode. Icon Description Smart Auto: Capture a photo by letting the camera select a scene mode automatically. (p. 36) Program: Capture a photo by manually setting options. (p. 40) Smart movie: Record a video by letting the camera select a scene mode automatically. (p. 42) Web: Access a web site to upload photos and videos stored on the camera. (p. 115) Email: Send photos stored on the camera as email attachments. (p. 111) Smart Auto Program Smart movie Web Email Auto Backup Album Settings Auto Backup: Send new photos and videos to a PC or Blu-ray disc player wirelessly. (p. 123) 1 Album: View files by category in Smart album. (p. 84) Settings: Adjust settings to match your preferences. (p. 128) 2 Description Remote Viewfinder: Use a mobile phone as a remote shutter release via an ad-hoc wireless network. (p. 116) 1 Touch an icon to access a mode or function. • Scroll to another page by dragging or flicking the touch pen on the screen. Camera to Camera : Connect your camera to another camera via a wireless network to share photos and videos. (p. 121) 2 The number of the current page. ( No. ) Basic functions 26 Using the Home screen Icon Icon Description AllShare: Connect your camera to an AllShare-enabled device via a wireless network and view your files on the connected device. (p. 118) Movie: Record a video. (p. 41) Scene: Capture a photo with options that are preset for a specific scene. (p. 38) Vignetting: Capture a photo or record a video with a vignetting effect. (p. 48) Beauty Shot: Capture a portrait with options to hide facial imperfections. (p. 39) Photo Editor: Edit photos with various effects. (p. 95) Magic Frame shot: Capture a photo with various frame effects. (p. 45) Photo Filter: Capture a photo with various filter effects. (p. 45) Movie Filter: Record a video with various filter effects. (p. 47) Night Shot: Capture a night scene by adjusting shutter speed and aperture value. (p. 39) Palette Effect: Record a video with palette effects. (p. 49) Close Up: Capture close-up photos of subjects. (p. 38) Basic functions 27 Description Simple Shot: Capture a photo with simple adjustments to brightness and color. (p. 37) Object Highlight: Capture a photo with the subject's background blurred. (p. 44) 3D Album: View files with 3D effects. (p. 85) Slide Show: View photos as a slide show with effects and music. (p. 89) Voice Recorder: Record and save a voice memo. (p. 50) Magazine: View files with page flip effect. (p.85) Using the Home screen 2 Rearranging icons You can rearrange the icons on the Home screen in any order. 1 Drag it to a new location. • To move an icon to another page, drag it to the left or right Touch and hold an icon. edge of the screen. When you drop the icon to a new location, the other icons will neatly slide out of the way. Smart Auto Program Smart movie Web Smart Auto Email Auto Backup Album Settings Email Basic functions 28 Program Smart movie Album Web Settings Capturing photos Learn how to capture photos easily and quickly in Smart Auto mode. 1 2 On the Home screen, touch . 3 Half-press [Shutter] to focus. • A green frame means the subject is in focus. • A red frame means the subject is out of focus. Smart Auto Program Smart movie Web Email Auto Backup Album Settings Align your subject in the frame. 4 Press [Shutter] to capture a photo. See page 33 for tips to get clearer photos. Basic functions 29 Capturing photos Digital zoom Zooming You can capture close-up photos by adjusting the zoom. Your camera has a 5X Optical zoom, 2X Intelli zoom, and 5X Digital zoom. The Intelli zoom and Digital zoom cannot be used at the same time. If the zoom indicator is in the digital range, your camera is using the Digital zoom. By using both the Optical zoom and Digital zoom, you can zoom in up to 25 times. Digital range Zoom indicator Optical range • The Digital zoom is available only in Program and Scene (except Text) Zoom ratio Zoom out modes. • The Digital zoom is not available with a Smart Filter effect or Smart Zoom in Touch AF option. • If you capture a photo with the Digital zoom, the photo quality may deteriorate. The available zoom ratio for videos differs from photo zoom ratio. Basic functions 30 Capturing photos Intelli zoom Setting Intelli zoom If the zoom indicator is in the Intelli range, your camera is using the Intelli zoom. Photo resolution varies according to the zoom rate if you use the Intelli zoom. By using both the Optical zoom and Intelli zoom, you can zoom in up to 10 times. 1 2 In Shooting mode, touch m. Touch the setting button next to Intelli Zoom. Intelli range Zoom indicator Optical range Photo resolution when the Intelli zoom is on • The Intelli zoom is available only in Smart Auto, Program, and Scene (except Text) modes. • The Intelli zoom is available only when you set a 4:3 resolution ratio. If you set another resolution ratio with Intelli zoom on, the Intelli zoom will be turned off automatically. • The Intelli zoom is not available with the Smart Filter effect, or Smart Touch AF option. • The Intelli zoom helps you capture a photo with less quality deterioration than the Digital zoom. However, the photo quality may be lower than when you use the Optical zoom. Basic functions 31 Capturing photos Reducing camera shake (DIS) • DIS may not function properly when: Reduce camera shake digitally in Shooting mode. Before correction 1 2 - you move your camera to follow a moving subject you use the Digital zoom there is too much camera shake the shutter speed is slow (for example, when you capture night scenes) - the battery is low - you capture a close-up shot • If the camera is hit or dropped, the display will be blurry. If this occurs, turn off the camera, and then turn it on again. After correction In Shooting mode, touch m. Touch the setting button next to DIS. Drive Smart Filter Image Adjust DIS Basic functions 32 Tips for getting a clearer photo Holding your camera correctly Reducing camera shake Ensure nothing is blocking the lens. Set the Digital Image Stabilization option to reduce camera shake. (p. 32) When h is displayed Half-pressing the shutter button Half-press [Shutter] to adjust the focus. The camera adjusts the focus and exposure automatically. Camera shake The camera sets the aperture value and shutter speed automatically. Focus frame • Press [Shutter] to capture the photo if the focus frame appears in green. • Change the composition and half-press [Shutter] again if the focus frame appears in red. When you shoot in the dark, avoid setting the flash option to Slow Sync or Off. The aperture remains open longer and it may be harder to hold the camera steady long enough to take a clear picture. • Use a tripod or set the flash option to Fill in. (p. 57) • Set ISO sensitivity options. (p. 59) Basic functions 33 Preventing your subject from being out of focus It may be difficult to get your subject in focus when: - there is little contrast between the subject and background (for example, when your subject is wearing clothing that is similar in color to the background) - the light source behind the subject is too bright - the subject is shiny or reflective - the subject includes horizontal patterns, such as blinds - the subject is not positioned in the center of the frame • When you capture photos in low light Turn on the flash. (p. 57) • When subjects are moving rapidly Use the Continuous or Motion Capture function. (p. 72) Use the focus lock Half-press [Shutter] to focus. When the subject is in focus, you can reposition the frame to change the composition. When you are ready, press [Shutter] to capture your photo. Basic functions 34 Extended functions Learn how to capture a photo, record a video, and record a voice memo by selecting a mode. Using shooting modes …………………… 36 Using effect modes ………………………… 44 Using the Smart Auto mode ……………… Using the Simple Shot mode …………… Using the Scene mode …………………… Using the Close Up mode ………………… Using the Night Shot mode ……………… Using the Beauty Shot mode …………… Using the Program mode ………………… Using the Movie mode …………………… Using the Smart movie mode …………… Using the Object Highlight mode ………… Using the Magic Frame Shot mode ……… Using the Photo Filter mode ……………… Using the Movie Filter mode ……………… Using the Vignetting mode ……………… Using the Palette Effect mode …………… 36 37 38 38 39 39 40 41 42 Recording voice memos 44 45 45 47 48 49 ………………… 50 Recording a voice memo ………………… 50 Adding a voice memo to a photo ………… 51 Using shooting modes Capture photos or record videos by selecting the best shooting mode for the conditions. Using the Smart Auto mode Icon Description In Smart Auto mode, your camera automatically chooses the appropriate camera settings based on the type of scene it detects. The Smart Auto mode is helpful if you are not familiar with the camera settings for various scenes. Portraits at night 1 2 Portraits On the Home screen, touch . Landscapes with backlighting Portraits with backlighting Close-up photos of objects Align your subject in the frame. • The camera automatically selects a scene and adjusts its settings. An appropriate scene icon appears at the top left of the screen. The icons are listed below. Close-up photos of text Sunsets Clear skies Forested areas Close-up photos of colorful subjects Camera is stabilized or on a tripod (when shooting in the dark) Fireworks (when using a tripod) Actively moving subjects Icon Description Landscapes Scenes with bright white backgrounds Landscapes at night (when the flash is off) Extended functions 36 Using shooting modes 3 Half-press [Shutter] to focus. Using the Simple Shot mode • In several scenes, the camera automatically captures a photo In Simple Shot mode, you can capture photos with simple adjustments to brightness and color. when you half-press [Shutter]. 4 Press [Shutter] to capture the photo. • If the camera does not recognize an appropriate scene mode, it uses • • • • the default settings for the Smart Auto mode. Even if it detects a face, the camera may not select a portrait mode depending on the subject's position or lighting. The camera may not select the correct scene depending on the shooting conditions, such as camera shake, lighting, or distance to the subject. Even if you use a tripod, the camera may not detect the mode if the subject is moving. In Smart Auto mode, the camera consumes more battery power, because it changes settings often to select appropriate scenes. 1 2 On the Home screen, touch . Drag the sliders to adjust Brightness and Color. Brightness Color 3 Align your subject in the frame, and then half-press [Shutter] to focus. 4 Press [Shutter] to capture the photo. Extended functions 37 Using shooting modes Using the Scene mode Using the Close Up mode In Scene mode, you can capture a photo with options that are preset for a specific scene. In Close Up mode, you can capture close-up photos of subjects, such as flowers or insects. 1 2 1 2 On the Home screen, touch 3 Press [Shutter] to capture the photo. On the Home screen, touch . Touch a scene. Option Description . Align your subject in the frame, and then half-press [Shutter] to focus. Landscape: Capture still-life scenes and landscapes. Sunset: Capture scenes at sunset, with natural-looking reds and yellows. Dawn: Capture scenes at sunrise. Backlight: Capture backlit subjects. Beach & Snow: Reduce underexposure of subjects caused by sunlight reflected from sand or snow. Text: Clearly capture text from printed or electronic documents. 3 Align your subject in the frame, and then half-press [Shutter] to focus. 4 Press [Shutter] to capture the photo. Extended functions 38 Using shooting modes Using the Night Shot mode Using the Beauty Shot mode In Night Shot mode, you can use a slow shutter speed to extend the time the shutter stays open. Increase the aperture value to prevent overexposure. In Beauty Shot mode, you can capture a portrait with options to hide facial imperfections. 1 2 On the Home screen, touch . Drag the dials on the screen to the arrow directions below to adjust shutter speed and aperture value. 1 2 On the Home screen, touch . Drag the sliders to adjust Face Tone and Face Retouch. • For example, increase the Face Tone setting to make skin appear lighter. Shutter speed Face Tone Face Retouch Aperture value 3 Align your subject in the frame, and then half-press [Shutter] to focus. 4 Press [Shutter] to capture the photo. 3 Align your subject in the frame, and then half-press [Shutter] to focus. 4 Press [Shutter] to capture the photo. Use a tripod to prevent blurry photos. When using the Beauty Shot mode, the focus distance will be set to Auto Macro. Extended functions 39 Using shooting modes Setting the user buttons Using the Program mode In Program mode, you can set most options, except the shutter speed and aperture value, which the camera sets automatically. In Program mode, you can add shortcuts for your favorite options to the left side of the screen. 1 2 1 2 On the Home screen, touch . Touch m, and then set desired options. (For a list of options, refer to page 52.) In Shooting mode, touch m My screen o. Touch and hold any icon, except one of the icons in the column on the far left. EV OK 3 Align your subject in the frame, and then half-press [Shutter] to focus. 4 Press [Shutter] to capture the photo. Extended functions 40 My screen Cancel Reset Using shooting modes 3 Drag the icon into a desired box on the left. Using the Movie mode • To remove shortcuts, drag an icon to the right. In Movie mode, you can record high-definition videos of up to 20 minutes in length. The camera saves recorded videos as MP4 (H.264) files. EV My screen • H.264 (MPEG-4 part10/AVC) is a high-compression video format OK 4 Cancel established by the international standard organizations ISO-IEC and ITU-T. • Some memory cards may not support high definition recording. In this case, set a lower resolution. • Memory cards with slow writing speeds will not support highresolution videos and high-speed videos. To record high-resolution or high-speed videos, use memory cards with faster writing speeds. Reset Touch o to save. 1 2 3 4 On the Home screen, touch . Touch m, and then set desired options. (For a list of options, refer to page 52.) Press [Shutter] or touch to start recording. Press [Shutter] again or touch You can create up to 3 shortcuts. Extended functions 41 to stop recording. Using shooting modes Pause recording Using the Smart movie mode The camera allows you to temporarily pause a video while recording. With this function, you can record separate scenes as a single video. In Smart movie mode, your camera automatically chooses the appropriate camera settings based on the scene it has detected. 1 2 On the Home screen, touch . Align your subject in the frame. • The camera automatically selects a scene and adjusts its settings. An appropriate scene icon will appear at the top left of the screen. The icons are listed below. • Touch • Touch to pause while recording. to resume. Icon Description Landscapes Sunsets Clear skies Forested areas Extended functions 42 Using shooting modes 3 4 Press [Shutter] or touch to start recording. Press [Shutter] again or touch to stop recording. • If the camera does not recognize an appropriate scene mode, it uses the default settings for the Smart movie mode. • The camera may not select the correct scene depending on the shooting conditions, such as camera shake, lighting, and distance to the subject. • Smart filter effects are not available in Smart Movie mode. Extended functions 43 Using effect modes Capture photos or record videos with various effects. 4 Using the Object Highlight mode 1 2 Half-press [Shutter] to focus. • When the camera can apply the Object Highlight effect, The Object Highlight mode makes the subject more discernible by adjusting the depth of field. will appear. • When the camera cannot apply the Object Highlight effect, On the Home screen, touch . will appear. If this occurs, adjust the distance from the camera to the subject. Position the camera according to the optimum distance displayed on the screen. 5 Press [Shutter] to capture the photo. • The optimum distance will vary, based on the zoom ratio you use. 3 • Available resolutions in Object Highlight mode are and . • If the shooting distance is not within the optimum range, you can capture a photo but the Object Highlight effect will not be applied. Drag the sliders to adjust Blur and Tone. • The Object Highlight effect cannot be used in dark places. • The Object Highlight effect cannot be used with the Optical zoom at 3X or higher. • Digital zoom is not available in Object Highlight mode. • Use a tripod to prevent camera shake as the camera captures 2 consecutive photos to apply the effect. Blur • The subject and the background should have a significant contrast in color. Tone • Subjects should be positioned far away from the background for the greatest effect. Extended functions 44 Using effect modes Using the Magic Frame Shot mode Using the Photo Filter mode In Magic Frame Shot mode, you can apply various frame effects to your photos. The shape and the feel of the photos will change according to the frame you select. In Photo Filter mode, you can apply various filter effects to your photos. 1 2 On the Home screen, touch . Select a desired frame. 3 Align your subject in the frame, and then half-press [Shutter] to focus. 4 Press [Shutter] to capture the photo. In Magic Frame shot mode, the resolution is automatically set to . Miniature Vignetting Fish-eye Sketch 1 2 On the Home screen, touch . Touch a desired filter. • To view the original photo, touch Before. • To view the photo with the filter effect, touch After. Extended functions 45 Using effect modes Before Option Description Defog Make image clearer. Classic Apply a black and white effect. Retro Apply a sepia tone effect. Negative Apply a negative film effect. After Option Description Miniature Apply a tilt-shift effect to make the subject appear in miniature. Vignetting Apply the retro-looking colors, high contrast, and strong vignette effect of Lomo cameras. Soft-Focus Hide facial imperfections or apply dreamy effects. Old Film 1 Apply vintage film effect 1. Old Film 2 Apply vintage film effect 2. Half Tone Dot Apply a halftone effect. Sketch Apply a pen sketch effect. Fish-eye Blacken the edges of the frame and distort objects to imitate the visual effect of a fisheye lens. 3 Align your subject in the frame, and then half-press [Shutter] to focus. 4 Press [Shutter] to capture the photo. • To apply filter effects to saved photos, touch . • When you select Sketch, the resolution will change to and below. • When you select Fish-eye, the resolution will change to and below. Extended functions 46 Using effect modes Using the Movie Filter mode Option Description In Movie Filter mode, you can record videos with various filter effects. Classic Apply a black and white effect. Retro Apply a sepia tone effect. 1 2 Negative Apply a negative film effect. On the Home screen, touch . 3 4 Touch a desired filter. Press [Shutter] or touch to start recording. Press [Shutter] again or touch to stop recording. • If you select Miniature, the speed of the video will increase. • If you select Miniature, the camera will not record sound. • If you select Miniature, Vignetting, Half Tone Dot, Sketch, Fish-eye, or Defog, the recording speed will be set to recording resolution will be set to less than . Option Description Miniature Apply a tilt-shift effect to make the subject appear in miniature. Vignetting Apply the retro-looking colors, high contrast, and strong vignette effect of Lomo cameras. Half Tone Dot Apply a halftone effect. Sketch Apply a pen sketch effect. Fish-eye Distort close objects to imitate the visual effect of a fisheye lens. Defog Make the image clearer. Extended functions 47 and the Using effect modes Using the Vignetting mode In Vignetting mode, you can capture a photo or record a video with a vignetting effect. 1 2 3 On the Home screen, touch Select (photo) or 4 Align your subject in the frame, and then half-press [Shutter] to focus. 5 Press [Shutter] to capture the photo. . To apply the Vignetting effect to saved photos in Shooting mode, touch (movie). Drag the sliders to adjust Level, Brightness, and Contrast. • To view the original photo, touch Before. • To view the photo with the Vignetting effect, touch After. Level Brightness Contrast Before After Extended functions 48 . Using effect modes Using the Palette Effect mode Option Description In Palette Effect mode, you can record a video with effects to make specific colors stand out. Palette Effect 1 Create a vivid look with sharp contrast and a red color. Palette Effect 2 Make scenes clean and clear by applying a soft blue tone. Palette Effect 3 Apply a soft brown tone. Palette Effect 4 Create a cold and monotone effect. 1 2 On the Home screen, touch . Touch a desired palette. 3 4 Press [Shutter] or touch to start recording. Press [Shutter] again or touch Extended functions 49 to stop recording. Recording voice memos Learn how to record a voice memo that you can play back later. You can also add a voice memo to a photo to remind you of shooting conditions. You will get the best sound quality when you speak 16 in (40 cm) away from the camera. 3 Recording a voice memo 1 2 On the Home screen, touch Press [Shutter] or touch Press [Shutter] again or touch . To view the list of saved voice memos, touch to start recording. • Touch to pause or touch to resume. • Each memo can be up to 10 hours long if memory is available. Extended functions 50 to stop recording. . Recording voice memos 4 Adding a voice memo to a photo In Program mode, you can add a voice memo to a captured photo. 1 2 3 On the Home screen, touch Record a short voice memo (10 seconds maximum). • Press [Shutter] to stop recording a voice memo before the . 10 seconds are up. You cannot add voice memos to photos in the burst mode. Touch m, and then touch the setting button next to Memo. Align your subject in the frame, and then capture a photo. • The camera begins to record a voice memo right after you capture the photo. Extended functions 51 Shooting options Learn how to set the options in Shooting mode. Selecting a resolution …………………… 53 Selecting image quality …………………… 54 Using Smart Face Recognition …………… 65 Registering faces as your favorites (My Star) ………………………………… 66 Using the timer ……………………………… 56 Adjusting brightness and color …………… 68 Shooting in the dark ……………………… 57 Adjusting the exposure manually (EV) …… Compensating for backlighting (ACB) …… Changing the metering option …………… Selecting a light source (White balance) … Selecting a resolution and quality ………… 53 Preventing red-eye ……………………… 57 Using the flash …………………………… 57 Adjusting the ISO sensitivity ……………… 59 68 69 69 70 Changing the camera’s focus …………… 60 Using burst modes ………………………… 72 Using macro ……………………………… Using Smart Touch focus ………………… Using one touch shooting ………………… Adjusting the focus area ………………… 60 61 62 62 Applying effects/Adjusting images ……… 73 Using face detection ……………………… 63 Available shooting options by shooting mode ………………………………………… 78 Detecting faces …………………………… Capturing a self portrait shot ……………… Capturing a smile shot …………………… Detecting eye blinking …………………… 63 64 64 65 Applying Smart Filter effects ……………… 73 Adjusting your photos …………………… 76 Reducing the zoom sound ………………… 77 Selecting a resolution and quality Learn how to change the image resolution and quality settings. Selecting a resolution Icon As you increase the resolution, your photo or video will include more pixels, so it can be printed on larger paper or displayed on a larger screen. When you use a high resolution, the file size will also increase. Setting a photo resolution 1 2 Description 4320 X 3240: Print on A1 paper. 4320 X 2880: Print on A1 paper in wide ratio (3:2). 4320 X 2432: Print on A2 paper in panorama ratio(16:9) or play back on an HDTV. 3648 X 2736: Print on A2 paper. In Shooting mode, touch m Photo Size. 2592 X 1944: Print on A4 paper. Select an option, and then touch o. 1984 X 1488: Print on A5 paper. 1920 X 1080: Print on A5 paper in panorama ratio (16:9) or play back on an HDTV. Photo Size 4320 X 2880 1024 X 768: Attach to an email. 4320 X 2432 3648 X 2736 Shooting options 53 Selecting a resolution and quality Setting a video resolution 1 2 Selecting image quality Set the photo and video quality settings. Higher image quality settings will result in larger file sizes. In Shooting mode, touch m Movie Size. Select an option, and then touch o. Setting the photo quality The camera compresses and saves the photos you capture in the JPEG format. Movie Size 1280 X 720 HQ 1 2 1280 X 720 640 X 480 In Shooting mode, touch m Quality. Select an option, and then touch o. Quality Super Fine Icon Description Fine 1280 X 720 HQ: Play back high-quality files on an HDTV. Normal 1280 X 720: Play back on an HDTV. 640 X 480: Play back on an analog TV. 320 X 240: Post on a web page. For Sharing: Post on a website using the wireless network (30 seconds maximum). Icon Description Super Fine: Capture photos in super high quality. Fine: Capture photos in high quality. Normal: Capture photos in normal quality. Shooting options 54 Selecting a resolution and quality Setting the video quality The camera compresses and saves the videos you record in the MP4 (H.264) format. 1 2 In Shooting mode, touch m Frame Rate. Select an option, and then touch o. • As the frame rate increases, action appears more natural, but the file size also increases. Frame Rate 30 FPS 15 FPS Icon Description 30 FPS: Record 30 frames per second. 15 FPS: Record 15 frames per second. Shooting options 55 Using the timer Learn how to set the timer to delay shooting. 1 2 3 In Shooting mode, touch m Timer. Press [Shutter] to start the timer. • The AF-assist light/timer lamp blinks. The camera will Select an option, and then touch o. automatically capture a photo at the specified time. • Press [Shutter] to cancel the timer. • Depending on the Face Detection option you have selected, the timer Timer 10 Sec function or some of its options may not be available. • Self timer options are not available if you set Burst options. 2 Sec Double Icon Description Off: The timer is not active. 10 Sec: Capture a photo after a 10-second delay. 2 Sec: Capture a photo after a 2-second delay. Double: Capture one photo after a 10-second delay and another photo after a 2-second delay. Available options may differ depending on the shooting mode. Shooting options 56 Shooting in the dark Learn how to capture photos at night or in low light conditions. Preventing red-eye Using the flash If the flash fires when you capture a photo of a person in the dark, a red glow may appear in the person’s eyes. To prevent this, select Red-eye or Red-eye Fix. Refer to flash options in “Using the flash.” Use the flash when you capture photos in the dark or when you need more light on your photos. 1 2 In Shooting mode, touch m Flash. Select an option, and then touch o. Flash Auto Red-eye Fill in This option is available in Program, Beauty Shot and Night Shot modes. Icon Description Off: • The flash will not fire. • The camera will display the shake warning when you are shooting in low light. Auto: The flash will fire automatically when the subject or background is dark. Shooting options 57 Shooting in the dark Icon Description • Flash options are not available if you set burst options or select Red-eye: • The flash will fire twice when the subject or background is dark to reduce the red-eye effect. • There is an interval between the 2 bursts of the flash. Do not move until the flash fires a second time. Fill in: • The flash always fires. • The camera automatically adjusts the flash's intensity. Slow Sync: • The flash fires and the shutter stays open longer. • This option is recommended when you want to capture ambient light to reveal more details in the background. • Use a tripod to prevent your photos from blurring. • The camera will display the shake warning when you are shooting in low light. Red-eye Fix: • The flash fires twice when the subject or background is dark, and the camera corrects red-eyes through its advanced software analysis. • There is an interval between the 2 bursts of the flash. Do not move until the flash fires a second time. Available options may differ depending on the shooting mode. Shooting options 58 Self-Portrait or Blink Detection. • Make sure that your subjects are within the recommended distance from the flash. (p. 146) • If light from the flash is reflected or there is a substantial amount of dust in the air, tiny spots may appear in your photo. Shooting in the dark Adjusting the ISO sensitivity The ISO sensitivity is the measure of a film’s sensitivity to light as defined by the International Organization for Standardization (ISO). The higher the ISO sensitivity you select, the more sensitive to light your camera becomes. With a higher ISO sensitivity, you can get a better photo without using the flash. 1 2 In Shooting mode, touch m ISO. Select an option, and then touch o. • Select Auto to have the camera select an appropriate ISO sensitivity based on the brightness of the subject and lighting. ISO ISO 80 ISO 100 ISO 200 Higher ISO sensitivities may result in more image noise. Shooting options 59 Changing the camera’s focus Learn how to adjust the camera’s focus to suit the subject and the shooting conditions. Using macro Use macro to capture close-up photos of subjects, such as flowers or insects. 1 2 In Shooting mode, touch m Focus. Select Macro, and then touch o. Focus Normal (AF) Macro Icon Description Normal (AF): Focus on a subject farther than 32 in (80 cm). Macro: Manually focus on a subject that is 2-32 in (5-80 cm) from the camera. 39-59 in (100-150 cm) when you use the zoom. • Try to hold the camera firmly to prevent blurry photos. • Turn off the flash if the distance to the subject is less than 16 in (40 cm). Shooting options 60 Changing the camera’s focus Using Smart Touch focus • If you do not touch any area on the screen, the focus frame will appear Smart Touch AF allows you to track and auto focus on your subject, even when you are moving. • Tracking a subject may fail when: 1 2 3 in the center of the screen. In Shooting mode, touch m Focus Area. Select Smart Touch AF, and then touch o. Touch the subject you want to track in the touch area. • • • • • The white frame means that your camera is tracking the subject. • The green frame means that your subject is in focus when you half-press [Shutter]. Shooting options 61 - the subject is too small - the subject moves excessively - the subject is backlit or you are shooting in a dark place - colors or patterns on the subject and the background are the same - the camera shakes excessively When tracking a subject fails, the focus frame will appear as a white single-line frame ( ). If the camera fails to track the subject, you must reselect the subject to track. If the camera fails to focus, the focus frame will change to a red singleline frame ( ). If you use this function, you cannot set self timer options, Face Detection options, and Smart Filter options. Changing the camera’s focus Using one touch shooting Adjusting the focus area You can focus on a subject and capture a photo with the touch of your finger. You can get clearer photos by selecting an appropriate focus area according to your subject’s location in the scene. 1 2 3 1 2 In Shooting mode, touch m Focus Area. Select One Touch Shooting, and then touch o. In Shooting mode, touch m Focus Area. Select an option, and then touch o. Touch a subject to capture the photo. Focus Area Multi AF One Touch Shooting Smart Touch AF Icon If you use this function, you cannot set Self Timer options, burst options, and Smart Filter effects. Description Center AF: Focus on the center of the frame (suitable when subjects are located at or near the center). Multi AF: Focus on one or more of 9 possible areas. One Touch Shooting: Focus on the subject by touching the image on the screen. Touch and hold the subject to capture the photo. (p. 62) Smart Touch AF: Focus on and track the subject that you touch on the screen. (p. 61) Shooting options 62 Using face detection If you use Face Detection options, your camera can automatically detect a human face. When you focus on a human face, the camera adjusts the exposure automatically. Use Blink Detection to detect closed eyes or Smile Shot to capture a smiling face. You can also use Smart Face Recognition to register faces and prioritize the focus on them. Detecting faces • The camera automatically tracks the registered face. • Face detection may not be effective when: • • • • • • - the subject is far from the camera (The focus frame will appear orange for Smile Shot and Blink Detection.) - it is too bright or too dark - the subject is not facing the camera - the subject is wearing sunglasses or a mask - the subject’s facial expression changes drastically - the subject is backlit or the lighting conditions are unstable Depending on the shooting options, available Face Detection options may differ. Depending on the Face Detection options you selected, the timer function may not be available or available timer options may differ. When you set the Face Detection options, some burst options are not available. When you capture photos of detected faces, they will be registered in the face list. You can view registered faces in order of priority in Playback mode. (p. 84) Even though faces are registered successfully, they may not be classified in Playback mode. A face detected in Shooting mode may not appear in the face list or Smart Album. Your camera automatically detects up to 10 human faces in one scene. 1 2 In Shooting mode, touch m Face Detection. Select Normal, and then touch o. The nearest face appears in a white focus frame and the rest of the faces appear in gray focus frames. • The closer you are to the subjects, the quicker your camera will detect faces. • To focus on a subject in a gray focus frame, touch the face in the frame. • The camera may not register detected faces if you set burst options such as Continuous, Motion Capture, and AEB. Shooting options 63 Using face detection Capturing a self portrait shot Capturing a smile shot Take photos of yourself. The focus distance will be set to closeup and your camera will emit a beep. The camera automatically releases the shutter when it detects a smiling face. 1 2 3 1 2 3 In Shooting mode, touch m Face Detection. Select Self-Portrait, and then touch o. When you hear a quick beep, press [Shutter]. In Shooting mode, touch m Face Detection. Select Smile Shot, and then touch o. Compose your shot. • The camera automatically releases the shutter when it detects a smiling face. When faces are located in the center, the camera beeps rapidly. When your subject smiles broadly, your camera can detect the smile more easily. If you turn Volume off in the sound settings, the camera will not emit a beep. (p. 129) Shooting options 64 Using face detection Detecting eye blinking Using Smart Face Recognition If your camera detects closed eyes, it will automatically capture 2 photos in succession. The camera automatically registers faces that you frequently photograph. The Smart Face Recognition feature will automatically prioritize the focus on those faces and on favorite faces. The Smart Face Recognition feature is available only when you use a memory card. 1 2 In Shooting mode, touch m Face Detection. Select Blink Detection, and then touch o. 1 2 In Shooting mode, touch m Face Detection. Select Smart Face Recognition, and then touch o. • Hold your camera still while “Capturing” is displayed on the screen. • If blink detection fails, the “Picture taken with eyes closed.” message appears. Capture another photo. The nearest face appears in a white focus frame and the rest of the faces appear in gray focus frames. • : Faces that you have registered as favorites. (To register faces as favorites, refer to page 66.) • : Faces that the camera automatically registers. Shooting options 65 Using face detection • The camera may recognize and register faces incorrectly depending Registering faces as your favorites (My Star) on lighting conditions, drastic changes in the subject's pose or face, and whether or not the subject is wearing glasses. • The camera can automatically register up to 14 faces. If the camera recognizes a new face when 14 faces have already been registered, it will replace the lowest priority face with the new one. • The camera can detect up to 5 favorite faces in one scene. You can register your favorite faces to prioritize the focus and exposure on those faces. This feature is available only when you use a memory card. 1 2 3 In Shooting mode, touch m Smart FR Edit. Select My Star, and then touch o. Align your subject’s face with the oval guideline, and then press [Shutter] to register the face. • If the subject’s face is not aligned with the oval guideline, the white frame will not appear. • Capture 5 photos of the subject’s face: one each from the front, left, right, above, and below. • Capture photos of one person at a time when registering faces. Shooting options 66 Using face detection 4 Touch when the face list appears. • Your favorite faces are indicated with a on the face list. • You can register up to 6 favorite faces. • The flash will not fire when you register a favorite face. • If you register the same face twice, you can delete one of the faces in the face list. Viewing your favorite faces 1 2 In Shooting mode, touch m Smart FR Edit. Select Face List, and then touch o. • To change the ranking of your favorite faces, touch • To delete a favorite face, touch . . (p. 83) Shooting options 67 Adjusting brightness and color Learn how to adjust the brightness and color for better image quality. Adjusting the exposure manually (EV) • Once you adjust the exposure, the setting will be stored automatically. Depending on the intensity of the ambient light, your photos may be too bright or dark. In these cases, you can adjust the exposure to get a better photo. You may need to change the exposure value later to avoid overexposure or underexposure. • If you cannot decide on an appropriate exposure, select AEB (Auto Exposure Bracket). The camera will capture 3 consecutive photos, each with a different exposure: normal, underexposed, and overexposed. (p. 72) Darker (-) 1 2 Neutral (0) Brighter (+) In Shooting mode, touch m EV. Select a desired value, and then touch o. • The photo will be brighter as exposure increases. • When you adjust the exposure value, the icon will appear as shown below. Shooting options 68 Adjusting brightness and color Compensating for backlighting (ACB) • The ACB feature is always on in Smart Auto, Scene (Beach & Snow) modes. When the light source is behind your subject or there is high contrast between your subject and the background, your subject is likely to appear dark in the photo. In this case, set the Auto Contrast Balance (ACB) option. • The ACB feature is not available when you set Continuous, Motion Capture, or AEB options. Changing the metering option The metering mode refers to the way in which a camera measures the quantity of light. The brightness and lighting of your photos will vary depending on the metering mode you select. Without ACB 1 2 With ACB In Shooting mode, touch m. 1 2 In Shooting mode, touch m Metering. Select an option, and then touch o. Touch the setting button next to ACB. Metering Multi Smart FR Edit Spot Photo Size Center-weighted Quality ACB Shooting options 69 Adjusting brightness and color Icon Description Selecting a light source (White balance) Multi: • Your camera divides the frame into several areas, and then measures the light intensity of each area. • Suitable for general photos. The color of your photo depends on the type and quality of the light source. If you want the color of your photo to be realistic, select a white balance setting that is appropriate for the lighting conditions, such as Auto WB, Daylight, Cloudy, or Tungsten. Spot: • Your camera measures only the light intensity of the very center of the frame. • If a subject is not in the center of the frame, your photo may be improperly exposed. • Suitable for a subject with backlighting. Center-weighted: • Your camera averages the meter reading of the entire frame with emphasis placed on the center. • Suitable for photos with subjects in the center of the frame. Auto WB Daylight Cloudy Tungsten Shooting options 70 Adjusting brightness and color 1 2 In Shooting mode, touch m White Balance. Defining your own white balance You can customize the White Balance by capturing a photo of a white surface, such as a piece of paper, under the lighting conditions in which you intend to capture a photo. The White Balance feature will help your camera reproduce the colors that are in the scene accurately in your photo. Select an option, and then touch o. White Balance Daylight 1 2 3 Cloudy Fluorescent_H Icon In Shooting mode, touch m White Balance. Select Custom Set, and then touch o. Aim the lens at a piece of white paper, and then press [Shutter]. Description Auto WB: Automatically set the White Balance based on the lighting conditions. Daylight: For outdoor photos on a sunny day. Cloudy: For outdoor photos on a cloudy day or in shadows. Fluorescent_H: For shooting under a daylight fluorescent or 3-way fluorescent light. Fluorescent_L: For shooting under white fluorescent light. Tungsten: For shooting indoor photos under incandescent bulbs or halogen lamps. Custom Set: Use White Balance settings that you defined. Shooting options 71 Using burst modes It can be difficult to capture photos of fast-moving subjects or capture natural facial expressions and gestures of your subjects in photos. In these cases, select one of the burst modes to rapidly capture multiple photos. Icon Description Single: Capture a single photo. Continuous: • While you are pressing [Shutter], the camera continuously captures photos. • The maximum number of photos depends on the capacity of your memory card. 1 2 In Shooting mode, touch m Drive. Motion Capture: While you are pressing [Shutter], the camera captures VGA photos (6 photos per second; maximum of 30 photos). Select an option, and then touch o. AEB: • Capture 3 consecutive photos, each with a different exposure: normal, underexposed, and overexposed. • Use a tripod to prevent blurry photos. Drive Continuous Motion Capture AEB • You can use the flash, timer, ACB, and Smart Filter only when you select Single. • When you select Motion Capture, your camera will set the resolution to VGA and set the ISO sensitivity to Auto. • Depending on the Face Detection option you selected, some burst options may not be available. Shooting options 72 Applying effects/Adjusting images Available filters in Program mode Applying Smart Filter effects Apply various filter effects to your photos and videos to create unique images. Icon Description Normal: No effect Miniature: Apply a tilt-shift effect to make the subject appear in miniature. Vignetting: Apply the retro-looking colors, high contrast, and strong vignette effect of Lomo cameras. Miniature Soft-Focus: Hide facial imperfections or apply dreamy effects. Vignetting Old Film 1: Apply vintage film effect 1. Old Film 2: Apply vintage film effect 2. Half Tone Dot: Apply a halftone effect. Sketch: Apply a pen sketch effect. Fish-eye 1 2 Fish-eye: Blacken the edges of the frame and distort objects to imitate the visual effect of a fisheye lens. Sketch Defog: Make a photo clearer. In Shooting mode, touch m Smart Filter. Classic: Apply a black and white effect. Select a filter, and then touch o. Shooting options 73 Applying effects/Adjusting images Icon Description Icon Description Miniature: Apply a tilt-shift effect to make the subject appear in miniature. Retro: Apply a sepia tone effect. Negative: Apply a negative film effect. Vignetting: Apply the retro-looking colors, high contrast, and strong vignette effect of Lomo cameras. Custom RGB: Customize a color value. Half Tone Dot: Apply a halftone effect. • When you select Sketch, the resolution will change to and below. • When you select Fish-eye, the resolution will change to and Sketch: Apply a pen sketch effect. Fish-eye: Distort close objects to imitate the visual effect of a fisheye lens. below. Defog: Make image clearer. Available filters in Movie mode Icon Classic: Apply a black and white effect. Description Retro: Apply a sepia tone effect. Normal: No effect Negative: Apply a negative film effect. Palette Effect 1: Create a vivid look with sharp contrast and red color. Palette Effect 2: Make scenes clean and clear by applying a soft blue tone. Palette Effect 3: Apply a soft brown tone. Palette Effect 4: Create a cold and monotone effect. Shooting options 74 Custom RGB: Customize a color value. Applying effects/Adjusting images Defining your own RGB tone 1 2 3 • If you select Miniature when you are recording a video, the speed of the video will increase. In Shooting mode, touch m Smart Filter. • If you select Miniature when you are recording a video, the camera Select Custom RGB, and then touch o. • If you select Miniature, Vignetting, Half Tone Dot, Sketch, Fish- will not record sound. eye, or Defog while recording a video, the recording speed will be set and the recording resolution will be set to less than . to • If you set Smart Filter effects, you cannot use the Face Recognition, options, ACB, burst options, Image Adjustment options, Intelli zoom, or Smart Touch AF. Drag up or down to adjust the values of each color. • The higher the value, the brighter the photo. • The lower the value, the darker the photo. Custom RGB 4 Touch o to save your changes. Shooting options 75 Applying effects/Adjusting images Adjusting your photos Adjust the sharpness, saturation, or contrast of your photos. 1 2 3 Touch o to save your changes. Sharpness In Shooting mode, touch m Image Adjust. Drag up or down to adjust each value. • • • : Sharpness : Contrast : Saturation - Soften the edges on your photos (suitable for editing the photos on your computer). + Sharpen the edges to improve the clarity of your photos. This may also increase the noise on your photos. Contrast Image Adjust Description Description - Decrease the color and brightness. + Increase the color and brightness. Saturation Description - Decrease the saturation. + Increase the saturation. • Select 0 if you do not want to apply any effects (suitable for printing). • If you set adjustment functions, you cannot use Smart Filter options. Shooting options 76 Reducing the zoom sound When you use the zoom while recording videos, the camera can record the sound of the zoom in the videos. Use the Sound Alive function to reduce the zoom noise. 1 2 In Shooting mode, touch m Voice. Select an option, and then touch o. Voice Sound Alive On Sound Alive Off Mute Icon Description Sound Alive On: Turn on the Sound Alive function. Sound Alive Off: Turn off the Sound Alive function. Mute: Do not record sounds. • Do not block the microphone when you use the Sound Alive function. • Recordings made with Sound Alive may differ from actual sounds. Shooting options 77 Available shooting options by shooting mode For details about shooting options, refer to "Shooting options". Smart Auto Simple Shot Scene Close Up Night Shot Beauty Shot Program Movie Resolution O O O O O O O O Quality - O O O O O O O Timer U O O O O O O U Flash U U U - U U O - - - - - - - O - U U U U - U O O - - - - - - O - U - U - - U O - - - - - - - O O ISO sensitivity Macro Focus area Face detection EV U - U - - - O - Metering - - - - - - O O White balance - - - - - - O O Drive - - - - - - O - Smart filter - - - - - - U U Image adjust - - - - - - O - Sound Alive - - - - - - - O Digital zoom - - U - - - O - Intelli zoom U - U - - - U - DIS O O O O O O O - Voice memo - - - - - - O - ACB O All options are available. U In these modes, some options are limited or a certain option is set by default. Shooting options 78 Available shooting options by shooting mode Smart movie Object Highlight Magic Frame shot Photo Filter Movie Filter Vignetting (photo) Vignetting (movie) Resolution O U - O O O O O Quality O O O O - O O O Timer U O O O U O U U Flash - U O U - U - - ISO sensitivity - - - - - - - - Palette Effect U - - - U - U U Focus Area - - - - - - - - Face detection - - - - - - - - EV - - - - - - - - ACB - - - - - - - - Metering - - - - - - - - White balance - - - - - - - - Drive - - - - - - - - Smart filter - - - U U - - U Image adjust - - - - - - - - Sound Alive O - - - O - O O Digital zoom - - - - - - - - Intelli zoom - - - - - - - - DIS - - - - - - - - Voice memo - - - - - - - - Macro O All options are available. U In these modes, some options are limited or a certain option is set by default. Shooting options 79 Playback/Editing Learn how to play back photos, videos, or voice memos and edit photos or videos. Also, learn how to connect your camera to your computer, photo printer, or TV. Viewing photos or videos in Playback mode …………………………… 81 Starting Playback mode ………………… Viewing photos …………………………… Playing a video …………………………… Playing a voice memo …………………… 81 88 90 92 Editing a photo ……………………………… 93 Resizing photos …………………………… Rotating a photo ………………………… Using Smart Crop ………………………… Applying Smart Filter effects ……………… Adjusting your photos …………………… Creating a print order (DPOF) …………… 93 94 94 95 95 97 Viewing files on a TV ……………………… 98 Transferring files to your Windows computer …………………………………… 99 Transferring files with Intelli-studio ……… 100 Transferring files by connecting the camera as a removable disk …………… 102 Disconnecting the camera (for Windows XP) ……………………… 103 Transferring files to your Mac computer ………………………………… 104 Printing photos with a PictBridge photo printer …………………………………… 105 Viewing photos or videos in Playback mode Learn how to play back photos, videos, or voice memos and how to manage files. 2 Starting Playback mode Drag the image left or right to move to another file. View photos or play videos and voice memos stored in your camera. 1 Press [Playback]. • To skip files quickly, tilt the camera to the direction you want to flip files. (p. 82) • You can also touch and hold the left end or right end of the screen to skip files quickly. • The most recent file will be displayed. • If the camera is off, it will turn on and display the most recent • You can also drag the slider left or right to move to the file. • To view files by category, touch on the Home screen. (p. 84) • To send an email, touch m Share Email. To upload the file to the web sites, touch m Share an web site. Playback/Editing 81 previous or next file. Viewing photos or videos in Playback mode • If you want to view files stored in the internal memory, remove your memory card. • The camera will not properly play back files of unsupported sizes or files that were captured with other cameras. • Motion recognition may not work well if you hold the camera with the screen parallel to the ground. Viewing files with motion recognition You can view files by tilting the camera in Playback mode. • When you rotate the camera 90° or 180° while you view a photo, the camera will automatically change the orientation of the displayed photo. (p.132) • To deactivate motion recognition, touch m, and then touch the setting button next to Gesture View. Playback/Editing 82 Viewing photos or videos in Playback mode Display in Playback mode Ranking your favorite faces You can rank your favorite faces or delete them. The favorite face feature is available only when you have inserted a memory card into the camera. 1 In Playback mode, touch m Face List. • You can also rank your favorite faces in Thumbnail view by touching m Face List. File Information File Location Face List Icon Description Photo includes a voice memo Play videos (p. 90) or voice memos (p. 92) Folder name – File name Video length Protected file Print order has been set (DPOF) Delete files (p. 87) Upload the current file to Facebook View files as thumbnails (p. 86) To display file information on the screen, touch m, and then touch the setting button next to File Information. Playback/Editing 83 Viewing photos or videos in Playback mode 2 To change the rank of a face, touch drag the face to a new location. Yes, and then 1 2 Edit Ranking 3 Viewing files in Smart album as thumbnails View files by category, such as date, face, or file type. On the Home screen, touch Touch . a category option. Touch o to save your changes. • To delete a face from the list, touch , touch a face, and then touch o. Icon Touch to view only your favorite face in the face list. Description View all files. View files by the date they were saved. View files by recognized faces and favorite faces. View files by the file type. • It may take some time for the camera to open Smart album, change the category, or reorganize files. • If you delete a category, all files in the category will be deleted. Playback/Editing 84 Viewing photos or videos in Playback mode Viewing files in 3D view 1 2 On the Home screen, touch Viewing files with the page flip effect . Drag images left or right to move to the previous or next file. • Flick screen left or right to move files switch quickly. The faster you flick the screen, the more files you will scroll through at a time. You can flip through files by dragging or flicking the touch pen across the screen. You can also apply a page flip effect to a slide show. 1 2 3 On the Home screen, touch . Touch a theme. Drag images left or right to move to the previous or next file. • You cannot play movies or voice memos in 3D view. • The 3D feature is not available while the camera is connected to a TV. Playback/Editing 85 Viewing photos or videos in Playback mode Icon Description Play a slide show. • Touch the screen to pause the slide show and adjust the volume or mute the sound. • Touch to stop the slide show. Touch a file to display it in full screen view. Return to the theme selection screen. You can view only photos when you use the page flip effect. Icon Description Delete files Select files to upload to Facebook Viewing files as thumbnails Photo includes a voice memo Scan thumbnails of files. Video file In Playback mode, rotate [Zoom] to the left to view thumbnails (9 at a time). Rotate [Zoom] to the left once or twice more to display more thumbnails (16 or 36 at a time). Rotate [Zoom] to the right to return to the previous view. Playback/Editing 86 Voice memo file Drag the screen up or down to move to the previous or next page of thumbnails. Viewing photos or videos in Playback mode Deleting files Protecting files Protect your files to prevent accidental deletion. Select files to delete in Playback mode. 1 In Playback mode, locate the file you want to protect, and then touch m. Deleting a single file You can select one file, and then delete it. 2 Touch the setting button next to Protect. 1 In Playback mode, locate the file you want to delete, and then touch . 2 When the pop-up message appears, touch Yes. Delete Start Slide Show You can also delete a file by touching m Delete Delete o. Protect Resize Deleting multiple files You can select multiple files, and then delete them at once. You cannot delete or rotate a protected file. 1 2 3 In Thumbnail view, touch . Select the files you want to delete, and then touch When the pop-up message appears, touch Yes. Playback/Editing 87 . Viewing photos or videos in Playback mode Deleting all files You can select all files, and then delete them at once. 1 Viewing photos Enlarge part of a photo or view photos as a slide show. In Playback mode, touch m Delete. • You can also delete files in Thumbnail view by touching m Enlarging a photo Delete. 2 3 In Playback mode, rotate [Zoom] to the right to enlarge a portion of the photo. Rotate [Zoom] to the left to zoom out. Select All, and then touch o. When the pop-up message appears, touch Yes. Copying files to a memory card Drag the screen to see another part of the photo. Copy files from the internal memory to a memory card. 1 In Playback mode, touch m. • You can also copy files to a memory card in Thumbnail view or in Smart Albumby touching m Copy to Card. 2 3 Touch Copy to Card. When the pop-up message appears, touch Yes. Playback/Editing 88 Viewing photos or videos in Playback mode Icon Playing a slide show Description Apply effects and audio to a slide show of your photos. The slide show function does not work for videos or voice memos. Delete the file. Crop the photo (the camera will save it as a new file). Return to the original view. Zoom ratio (The maximum zoom ratio differs depending on the photo resolution.) 1 2 On the Home screen, touch Touch , and then select individual photos that you want to include in the slide show. • • • • When you view photos that were captured by another camera, the zoom ratio may differ. 3 4 . Touch to select all. Touch to cancel your selection. You cannot select video files. You can select up to 2,000 files. Touch o. Touch m, and then set a slide show effect. All Play Playback/Editing 89 Viewing photos or videos in Playback mode * Default Icon Description Playing a video Play Mode: Set whether or not to repeat the slide show. (One Play*, Repeat) In Playback mode, you can view a video, and then capture or trim parts of the playing video. You can save the captured or trimmed segments as new files. Interval: • Set the interval between photos. (1 sec*, 3 sec, 5 sec, 10 sec) • You must set the Effect option to interval. 1 2 to set the In Playback mode, locate a video, and then touch View the video. Music: Set background audio. (Off*, Mist, Drops, Muse, Trip, Fall) Effect: • Set a scene change effect between photos. (Off*, Calm, Shine, Relax, Lively, Sweet) • Select to cancel effects. • When you use the Effect option, the interval between photos will be set to 1 second. 5 Touch Icon Description Scan backward. to start the slide show. / • Touch the screen to pause the slide show. • Touch to adjust the volume or mute the sound. • Touch to stop the slide show. Pause or resume playback. Scan forward. Adjust the volume or mute the sound. Return to Playback mode. Playback/Editing 90 . Viewing photos or videos in Playback mode Trimming a video 1 While viewing a video, touch want the trimming to begin. 2 3 Touch Touch end. Capturing an image from video at the point where you . at the point where you want the trimming to 1 While viewing a video, touch want to capture an image. 2 3 Touch handles that appear on the progress bar. Touch . When the pop-up message appears, touch Yes. • You can also adjust the scene to be cropped by dragging the 4 5 at the point where you • The file resolution of the captured image will be the same as the original video. • The captured image is saved as a new file. . When the pop-up message appears, touch Yes. • The original video should be at least 10 seconds long. • The camera will save the edited video as a new file. Playback/Editing 91 Viewing photos or videos in Playback mode Playing voice memos that are attached to photos Playing a voice memo Listening to a voice memo 1 In Playback mode, locate a voice memo file, and then touch . 2 Listen to the voice memo. 1 In Playback mode, locate a photo that includes a voice memo, and then touch . 2 Listen to a voice memo. Icon / Icon / Description Pause or resume playback. Description Adjust the volume or mute the sound. Scan backward. Return to Playback mode. Pause or resume playback. Scan forward. Adjust the volume or mute the sound. Return to Playback mode. Playback/Editing 92 Editing a photo Learn how to edit photos. • The camera will save edited photos as new files. • When you edit photos, the camera will automatically convert them to a lower resolution. Photos that you rotate or resize manually are not automatically converted to a lower resolution. 3 Resizing photos Touch o to save. Change the size of a photo and save it as a new file. You can also select a photo to be displayed when the camera turns on. 1 2 In Playback mode, locate a photo, and then touch m. Touch Resize, and then select a size option. • Select Start Image to save the photo as a start image. (p. 129) Resize 2688 X 1512 1920 X 1080 Start Image Playback/Editing 93 Available resize options differ depending on the original size of the photo. Editing a photo Rotating a photo 1 2 Using Smart Crop In Playback mode, locate a photo, and then touch m. Touch Rotate, and then select a rotate option. Rotate Rotate Use Smart Crop to select objects in a photo and save the cropped area as a new file. 1 2 3 In Playback mode, locate a photo, and then touch m. Touch Smart Crop. Touch 4 points on the screen to select an area. • You can re-select the area by dragging the 4 points. Right 90˚ Left 90˚ 3 Touch o to save. The camera will overwrite the original file. 4 Touch o to save. • The cropped photo is saved as a new file. The size of the new file may be smaller than the original. Playback/Editing 94 Editing a photo Applying Smart Filter effects Adjusting your photos Apply special effects to your photos. Learn how to adjust the brightness, contrast, or saturation or how to correct the red-eye effect. If the center of a photo is dark, you can adjust it to be brighter. The camera will save an edited photo as a new file, but may convert it to a lower resolution. 1 On the Home screen, touch . • The most recent file will be displayed. 2 3 4 Touch a photo. • You can adjust brightness, contrast, and saturation and apply Smart Filter effects at the same time. Touch m Smart Filter. • You cannot apply the ACB, Face Retouch, and Red-eye Fix effects at the same time. Select a filter. • To see available filter options, refer to page 73. • To view the original photo, touch Before. • To view the photo with the filter effect, touch After. Adjusting brightness, contrast, or saturation 1 On the Home screen, touch . • The most recent file will be displayed. 2 3 Touch Icon Before a photo. Touch m an adjusting option. After Description Brightness Contrast 5 Touch s to save your changes. Saturation Playback/Editing 95 Editing a photo 4 Drag the slider left or right to adjust the option. • To view the original photo, touch Before. • To view the adjusted photo, touch After. 5 Touch s to save your changes. Adjusting dark subjects (ACB) 1 On the Home screen, touch . Retouching faces 1 Touch 2 3 4 • To view the original photo, touch Before. • To view the adjusted photo, touch After. 4 Touch a photo. Touch m Face Retouch. Drag the slider to the left (darker) or right (lighter) to adjust the skin tone. • As the slider moves to the right, the skin tone becomes brighter. • To view the original photo, touch Before. • To view the adjusted photo, touch After. a photo. Touch m ACB. . • The most recent file will be displayed. • The most recent file will be displayed. 2 3 On the Home screen, touch 5 Touch s to save your changes. Touch s to save your changes. Playback/Editing 96 Editing a photo 3 Removing red-eye 1 On the Home screen, touch . Touch / to select the number of copies, and then touch o. • The most recent file will be displayed. 2 3 Touch a photo. Touch m Red-eye Fix. • To view the original photo, touch Before. • To view the adjusted photo, touch After. 4 Touch s to save your changes. • You can take the memory card to a print shop that supports DPOF Creating a print order (DPOF) Select photos to print and save print options in the Digital Print Order Format (DPOF). This information is saved in the MISC folder on your memory card for convenient printing on DPOFcompatible printers. 1 2 In Playback mode, locate a photo, and then touch m. Touch DPOF. Playback/Editing 97 (Digital Print Order Format) or you can print photos directly through a DPOF-compatible printer at home. • Photos with dimensions that are wider than the paper may be cut off on the left and right edges. Ensure that your photo dimensions are compatible with the paper you select. • You cannot set DPOF options for photos stored in the internal memory. Viewing files on a TV Play back photos or videos by connecting your camera to a TV with the A/V cable. 7 1 2 3 On the Home screen, touch 4 5 Turn off your camera and TV. • Depending on the TV model, you may see some digital noise or part Connect your camera to your TV with the A/V cable. • Images may not be centered on the TV screen depending on your . Turn on your camera. • The camera automatically enters into Playback mode when Touch Connectivity Video Out. you connect it to a TV. 8 Select the appropriate video signal output for your country or region. (p. 130) Playback the photos or videos using the touch screen on your camera. of an image may not appear. TV settings. Audio 6 Video Turn on your TV, and then select a video output mode with the TV remote control. Playback/Editing 98 Transferring files to your Windows computer Transfer files to your Windows computer, edit them with Intelli-studio, and upload them to the web. Requirements • The requirements are recommendations only. Intelli-studio may not Item Requirements CPU Intel Pentium 4, 3.2 GHz or higher/AMD Athlon™ FX 2.6 GHz or higher RAM Minimum 512 MB RAM (1 GB or more recommended) OS Windows XP SP2, Windows Vista, or Windows 7 (32-bit editions) work properly even when the computer meets the requirements, depending on the condition of your computer. • If your computer does not meet the requirements, videos may not play correctly or it may take longer to edit videos. • Install DirectX 9.0c or above before you use the program. • Your computer must be running Windows XP, Windows Vista or Windows 7 for you to connect the camera as a removable disk. (See p. 102 and p. 104.) Hard disk capacity 250 MB or more (1 GB and above recommended) • CD-ROM drive • 1024 X 768 pixels, 16-bit color display compatible Others monitor (1280 X 1024 pixels, 32-bit color display recommended) • USB 2.0 port • nVIDIA Geforce 7600GT or higher/ATI X1600 series or higher • Microsoft DirectX 9.0c or higher * The programs may not work properly on 64-bit editions of Windows XP, Windows Vista, and Windows 7. Playback/Editing 99 The manufacturer is not responsible for any damage that results from using an unqualified computer such as a computer you assembled yourself. Transferring files to your Windows computer 5 Transferring files with Intelli-studio Turn on the camera. • The computer recognizes the camera automatically and Intelli- Intelli-studio will start automatically when you connect the camera to your computer with the USB cable. studio launches automatically. If you set the USB option to Select Mode, select Computer in the pop-up window. The battery will charge while the camera is connected to a computer with the USB cable. 1 2 3 4 On the Home screen, touch 6 . Touch Connectivity, and then turn on PC Software by touching the setting button. Select a destination folder on your computer, and then select Yes. • New files stored on the camera will automatically transfer to the selected folder. • If your camera has no new files, the pop-up window for saving Turn off the camera. new files will not appear. Connect the camera to your computer with the USB cable. You must plug the end of the cable with the indicator light (S) into your camera. If the cable is reversed, it may damage your files. The manufacturer is not responsible for any loss of data. Playback/Editing 100 For Windows Vista and Windows 7, select Run iStudio.exe from the Auto Play window to start Intelli-studio. Transferring files to your Windows computer Using Intelli-studio Intelli-studio is a built-in program that allows you to play back and edit files. For details, select Help Help from the program toolbar. • To enjoy more features, such as creating slide shows with templates, install the full version of Intelli-studio by selecting Web Support Update Intelli-studio • • • • Start Update from the program toolbar. You can update the firmware of your camera by selecting Web Support Upgrade firmware for the connected device from the program toolbar. If you install Intelli-studio on your computer, the program will launch more quickly. To install the program, select Tool Install Intelli-studio on PC. You cannot edit files directly on the camera. Transfer files to a folder on your computer before editing. Intelli-studio supports the following formats: - Videos: MP4 (Video: H.264, Audio: AAC), WMV (WMV 7/8/9), AVI (MJPEG) - Photos: JPG, GIF, BMP, PNG, TIFF 1 2 3 4 5 % $ 6 # 8 7 9 @ 0 ! Playback/Editing 101 Transferring files to your Windows computer 1 Open menus. Transferring files by connecting the camera as a removable disk 2 Display files in the selected folder. Connect the camera to your computer as a removable disk. 3 Switch to the Photo edit mode. 4 Switch to the Video edit mode. On the Home screen, touch 5 Switch to the Sharing mode. (to send files by email or upload files to websites, such as Flickr or YouTube) 1 2 6 Enlarge or reduce the thumbnails in the list. 7 Select a file type. Turn off the camera. 8 View files in the selected folder on your computer. 3 4 9 Show or hide files on the connected camera. 0 View files in the selected folder on the camera. ! View files as thumbnails or on a map. @ Browse folders stored on the camera. # Browse folders stored on your computer. $ Move to the previous or next folder. % Print files, view files on a map, store files in My Folder, or register faces. No. Description . Touch Connectivity, and then turn off PC Software by touching the setting button. Connect the camera to your computer with the USB cable. You must plug the end of the cable with the indicator light (S) into your camera. If the cable is reversed, it may damage your files. The manufacturer is not responsible for any loss of data. Playback/Editing 102 Transferring files to your Windows computer 5 Turn on the camera. Disconnecting the camera (for Windows XP) • The computer recognizes the camera automatically. With Windows Vista and Windows 7, the methods for disconnecting the camera are similar. If you set the USB option to Select Mode, select Computer in the pop-up window. 6 On your computer, select My Computer Removable Disk DCIM 100PHOTO. 7 Drag or save files to your computer. 1 If the status lamp on your camera is blinking, wait until it stops. 2 Click on the tool bar at the bottom right of your computer screen. 3 4 5 Click the pop-up message. Click the message box indicating safely removed. Remove the USB cable. The camera may not disconnect safely while Intelli-studio is running. End the program before disconnecting the camera. Playback/Editing 103 Transferring files to your Mac computer When you connect the camera to a Macintosh computer, the computer will automatically recognize the device. You can transfer files directly from the camera to the computer without installing any programs. Mac OS 10.4 or later is supported. 1 Connect your camera to a Macintosh computer with the USB cable. 2 Turn on the camera. • The computer recognizes the camera automatically and displays a removable disk icon. You must plug the end of the cable with the indicator light (S) into your camera. If the cable is reversed, it may damage your files. The manufacturer is not responsible for any loss of data. If you set the USB option to Select Mode, select Computer in the pop-up window. 3 4 Double-click the removable disk icon. Drag or save files to your computer. Playback/Editing 104 Printing photos with a PictBridge photo printer Print photos with a PictBridge-compatible printer by connecting your camera directly to the printer. 1 2 3 On the Home screen, touch 7 . • Touch Touch Connectivity USB Printer. to print all photos. If the camera is off, press [POWER] or [Playback] to turn it on. When the pop-up window appears, touch Yes to begin printing. • To cancel printing, touch Cancel on the pop-up window. • The printer recognizes the camera automatically. 5 6 to print. Turn on the printer, and then connect your camera to the printer with the USB cable. 8 4 Touch Select a file to print. Touch / to select the number of copies. • To set printer options, touch m. (p. 106) Playback/Editing 105 Printing photos with a PictBridge photo printer Configuring print settings Touch m to configure print settings. Size Layout Type Quality Icon Description Size: Set the print size. Layout: Set the number of photos to be printed on a single sheet of paper. Type: Set the type of paper. Quality: Set the print quality. Date: Set to print the date. File Name: Set to print the file name. Reset: Reset settings to their default values. Some options may not be supported by some printers. Playback/Editing 106 Wireless network Learn to connect to wireless local area networks (WLANs) and use functions. Connecting to a WLAN and configuring network settings ………………………… 108 Connecting to a WLAN ………………… Setting network options ……………… Manually setting the IP address ……… Network connection tips ……………… 108 109 109 110 Sending photos via email ……………… 111 Changing email settings ……………… 111 Sending photos via email ……………… 113 Entering text …………………………… 114 Using photo or video sharing websites 115 Accessing a website …………………… 115 Uploading photos or videos …………… 115 Using a smart phone as a remote shutter release …………………………………… 116 Viewing photos or videos on AllShare devices …………………………………… 118 Viewing photos or videos on a TV screen 118 Viewing photos or videos on another device (renderer) ……………………… 120 Sending or receiving photos or videos with another camera ………………………… 121 Sending photos or videos to another camera ………………………………… 121 Receiving photos or videos from another camera ………………………………… 121 Using Auto Backup to send photos or videos …………………………………… 123 Installing the program for Auto Backup on your PC …………………………… 123 Sending photos or videos to a PC …… 123 Sending photos or videos to a Blu-ray disc Player ……………………………… 124 About the Wakeup on LAN (WOL) feature 125 Connecting to a WLAN and configuring network settings Learn to connect via an access point (AP) when you are in a range of a WLAN. You can also configure network settings. Connecting to a WLAN 1 On the Home screen, touch 2 Touch . Icon , or Ad hoc AP . Secured AP Boingo hotspot • The camera automatically searches for available AP devices. WPS AP 3 Touch an AP. Signal strength AP setting options AP Setting Connecting WPS AP Samsung 1 Refreshing connectable APs Samsung 2 Samsung 3 Samsung 4 Samsung 5 Description • When you select a secured AP, a pop-up window appears. Input the required passwords to connect to the WLAN (for information about entering text, refer to page 114). • When you select an unsecured AP, the camera will connect to the WLAN. • If you select a WPS profile supported AP, touch WPS PIN, and then enter a PIN on the AP device. You can also connect to a WPS profile supported AP by touching WPS PBC on the camera, and then pressing WPS button on the AP device. Wireless network 108 Connecting to a WLAN and configuring network settings Setting network options 1 2 On the Home screen, touch Touch Manually setting the IP address , or 1 2 . . • The camera automatically searches for available AP devices. 3 4 5 Touch next to an AP. Touch each option and enter the required information. Option Description Authentication Select a network authentication type. Data Encryption Select an encryption type. Network Key Enter the network key. IP Setting Set the IP address manually. On the Home screen, touch Touch , or . . • The camera automatically searches for available AP devices. 3 4 5 When you are finished, touch o. 6 Touch next to an AP to change settings. Touch IP Setting Manual. Touch each option and enter the required information. Option Description IP Enter the static IP address. Subnet Mask Enter the subnet mask. Gateway Enter the gateway. DNS Server Enter the DNS address. Touch o to save your changes. Wireless network 109 Connecting to a WLAN and configuring network settings • You can use only free WLANs with your camera. If you use free Network connection tips • The quality of the network connection will be determined by • • • • • • • • • • the AP. The further the distance between your camera and the AP, the longer it will take to connect to the network. If a nearby device is using the same radio frequency signal as your camera, it may interrupt your connection. If your AP name is not in English, the camera may not be able to locate the device or the name may appear incorrectly. For network settings or a password, contact your network administrator or network service provider. If a WLAN requires authentication from the service provider, you may not be able to connect to it. To connect the WLAN, contact your network service provider. Depending on the encryption type, the number of digits in the password may differ. A WLAN connection may not be possible in all surroundings. The camera may display a WLAN-enabled printer may be shown on the AP lists. However, you cannot connect to the network via a printer. You cannot connect your camera to a network and a TV simultaneously. Also, you cannot view photos or videos on a TV while connected to a network. Connecting to a network may incur additional charges. Costs will vary based on the conditions of your contract. • • • • • • • WLANs that require a user agreement and additional information when you connect to a web browser, some features may be limited when connecting to websites or sending email. Available network connections may differ by country. The WLAN feature of your camera must comply with radio transmission laws in your region. To ensure compliance, use the WLAN feature only in the country where you purchased the camera. For network profiles and a password, contact your network administrator or network service provider. The process for adjusting network settings may differ, depending on network conditions. Do not access a network that you are not authorized to use. Before you connect to a network, ensure your battery is fully charged. When a DHCP server is not available you must make an autoip. txt file and copy it to the inserted memory card to connect to the network using Auto IP. Wireless network 110 Sending photos via email You can change settings in the email menu, and send photos stored on the camera via email. Changing email settings 4 In the email menu, you can change settings for storing your information or saving email addresses. You can also set or change the email password. See p. 114 for information about entering text. Touch the Email box, input your email address, and then touch o. 5 Touch o to save your changes. • To delete your information, touch . Storing your information Saving email addresses 1 2 3 On the Home screen, touch . Touch m User Setting. Touch the Name box, input your name, and then touch o. 1 2 3 On the Home screen, touch Touch m Email Address. Touch Touch Email Touch to open the email address. Email Address Book User Setting Name . Wireless network 111 Sending photos via email 4 5 Touch the Name box, input a name, and then touch o. 6 Touch o to save the new email address. Touch the Email box, input an email address, and then touch o. • Touch • Touch to add an address. to delete the address from the list. Setting an email password 1 2 3 4 5 6 On the Home screen, touch . Changing the email password 1 2 3 4 5 6 On the Home screen, touch . Touch m Change Password. Enter your current 4-digit password. Enter a new 4-digit password. Enter the new password again. When the pop-up appears, touch Confirm. If you do not want to use a password to access email options, touch the setting button next to Setting Password to deactivate it. Touch m, and then touch the setting button next to Setting Password. When the pop-up appears, touch Confirm. Enter a 4-digits password. Enter the password again. When the pop-up appears, touch Confirm. Wireless network 112 Sending photos via email 4 5 Sending photos via email You can send photos stored on the camera via email. See p. 114 for information about entering text. 1 2 On the Home screen, touch • You can select up to 20 photos. The total size must be 10 MB or less. Touch the Sender box, input your email address, and then touch o. 6 Touch the Receiver box, input an email address, and then touch o. Sender/Receiver Touch Receiver [email protected] Touch the Text box, input your comments, and then touch o. • For information about entering text, refer to page 114. 7 automatically. (p. 111) Sender Select photos to send, and then touch o. . • If you have previously saved your information, it will be inserted 3 Touch o. Touch Upload to connect to the network and send the photos. • The camera will automatically attempt to connect to a WLAN via the most recently connected AP device and send the photo. • If the camera has not previously been connected to a WLAN, it will search for available AP devices. (p. 108) Touch • Touch to use an address from your address book. (p. 111) • Touch the Touch box to add additional recipients. You can input up to 10 recipients. to delete an address from the list. • Touch Wireless network 113 Sending photos via email • You may not be able to send an email if no network connection is • • • • available or if your email account settings are incorrect. The camera will display the Transfer completed. message, even when the photos cannot be sent or will be recognized as spam due to an error with the recipient’s email account. The maximum photo resolution you can send is . If you select a photo with resolution that is higher than , it will be automatically resized. If you cannot send an email because of firewall or user authentication settings, contact your network administrator or network service provider. When there are no photos in the camera memory, you cannot use this feature. Entering text Learn how to enter text. The icons in the table below let you move the cursor, change the case, etc. Text Input Icon Description Move the cursor. In ABC mode, change the case. In 123 mode, view more symbols. Switch to ABC mode. Enter a space. Delete the last letter. Switch to 123 mode. o Save the displayed text. You can enter only English alphabets, regardless of the display language. Wireless network 114 Using photo or video sharing websites Upload your photos or videos to file sharing websites. Available websites will be displayed on your camera. Accessing a website 1 2 On the Home screen, touch Uploading photos or videos . Access the website with your camera, and then touch Upload. 2 Select files to upload from the list, and then touch o. Select a website. • The camera will automatically attempt to connect to a WLAN via the most recently connected AP device. • If the camera has not previously been connected to a WLAN, it will search for available AP devices. (p. 108) 3 1 Input your ID and password, and then touch Login. • You may be logged in automatically, if you have previously logged in to the website. • You can select up to 20 photos and the total size must be 10 MB or less. 3 Touch the Comment box, input your comments, and then touch o. 4 Touch Upload. You must have an existing account on the file sharing website to use this feature. • The maximum photo resolution you can upload is • • • • • Wireless network 115 , and the longest video you can upload is 30 seconds at 320 resolution or a video recorded using . If the selected photo resolution is higher than , it will be automatically resized to a lower resolution. The method of uploading photos or videos may differ depending on the selected website. If you cannot access a website because of firewall or user authentication settings, contact your network administrator or network service provider. If you are unable to upload photos or videos due to server errors, touch Retry. Uploaded photos or videos may be automatically titled with the date they were captured. The speed of your internet connection may affect how quickly photos upload or web pages open. Using a smart phone as a remote shutter release The camera connects to a smart phone via a WLAN. Use the smart phone as a remote shutter release with the Remote Viewfinder feature. The captured photo will display on the smart phone. • This feature is supported only by Galaxy S phones with the Android 2.2 OS. If your smart phone uses the Android 2.1 OS, upgrade your smart phone to Android 2.2. • You can download the application from Samsung Apps or Android market. 1 On your smart phone, turn on the Remote Viewfinder application. 2 3 On the Home screen of the camera, touch 4 Icon Description Flash option . Timer option Select your smart phone from the list of available devices found by the camera. Photo size • If the smart phone connected to the camera recently, it will • While using this feature, only the touch screen and [POWER] reconnect to the camera automatically. • You can choose only one camera at a time. • The zoom button and the shutter button on your smart phone On the smart phone, set the following shooting options. • Remote Viewfinder mode supports the are available on your camera. will not function when using this feature. and photo sizes only. 5 On the smart phone, touch and hold to focus. • The focus is automatically set to multi-AF. 6 Release to capture the photo. • The photo will be saved in your camera. • Touch the photo in the bottom right corner of the screen to save it to the smart phone. The photo will be resized to VGA (640x480) size. Wireless network 116 Using a smart phone as a remote shutter release • When you use this feature, the ideal distance between the camera and the smart phone may vary, depending on your surroundings. • The smart phone must be within 30 ft/10 m of the camera to use this feature. • It will take some time to capture the photo after you release on the smart phone. • The Remote Viewfinder function will deactivate when: - there is an incoming call on the smart phone - either of the camera or the smart phone turn off - memory is full - either device loses connection to the WLAN - the Wi-Fi connection is poor or unstable • To rotate the scene by rotating the smart phone, turn on the rotation feature on your smart phone. • When you take a self image shot, the display will show a reflected image, just like a mirror. Wireless network 117 Viewing photos or videos on AllShare devices AllShare is an international technology standard for sharing media files between networked devices in your home. With this technology, you can view your photos or videos on a widescreen TV or another device. You cannot send or receive voice memos. 4 Viewing photos or videos on a TV screen View your photos or videos on a TV that supports the AllShare function. 1 2 On the TV, search for the camera and browse the shared photos or videos. • For information about searching for the camera and browsing the photos or videos on the TV, refer to the TV user manual. On the Home screen, touch . • Videos may not play smoothly depending on the type of TV Touch Broadcast files. • The camera will automatically attempt to connect to a WLAN via the most recently connected AP device. or network condition. (p. 55) If this happens, re-record the video in 640 or 320 quality and play it again. If videos do not play smoothly on your TV over the wireless connection, try connecting the camera to the TV with an A/V cable. • If the camera has not previously been connected to a WLAN, it wil search for available AP devices. (p. 108) • To store your camera's name, in AllShare mode, touch m Device Name, and then input a name by touching the Device Name box. 3 Connect your TV to a wireless network via an AP device. • Refer to your TV’s user manual for more information. AP Wireless network 118 Viewing photos or videos on AllShare devices • You can share up to 1,000 photos. • On a TV screen, you can view only photos or videos captured with your camera. • The range of the wireless connection between your camera and a TV • • • • • • • • • • • • may vary depending on the specifications of the AP. If the camera is connected to 2 TVs, playback may be slower. Photos will be shared according to the size you set. Videos will be shared in their original sizes. You can use this feature only with a AllShare-enabled Digital Media Players (DMPs). Shared photos or videos will not be stored on the TV, but they can be stored according to the TV specifications. Transferring photos or videos to the TV may take some time depending on the network connection, the number of files to be shared, or sizes of the files. If you power off the camera abnormally while viewing photos or videos on a TV (for example, by removing the battery), the TV considers the camera to still be connected. The order of photos or videos on the camera may be different than on the TV. Depending on the number of photos or videos you want to share, it may take some time to load your photos or videos and complete the initial set-up process. While viewing photos or videos on the TV, continuously using the TV remote or performing additional operations on the TV may prevent this feature from working properly. If you reorder or sort files on the camera while viewing them on a TV, you must repeat the initial set-up process to update the list of files on the TV. When there are no photos or videos in the camera memory, you cannot use this feature. Wireless network 119 Viewing photos or videos on AllShare devices Viewing photos or videos on another device (renderer) You can view your photos and videos via AllShare on any renderer-enabled digital media player. 1 2 On the Home screen, touch • When searching for AllShare-enabled devices in the area, the camera may not list all available devices. • If you power off the device abnormally while viewing photos or videos • • • • . Touch Send files. • The camera will automatically attempt to connect to a WLAN • via the most recently connected AP device. • If the camera has not previously been connected to a WLAN, it will search for available AP devices. (p. 108) • When the camera connects to the WLAN, it automatically searches for and displays available AllShare-enabled devices in order of their signal strength. However, searching for all available devices may take some time. 3 On the device that you will use to display files, activate AllShare. 4 From the list on your camera, select the device that you will display files. 5 Select photos or videos that you will share. • The camera will share the files. Touch Cancel to stop sharing. Wireless network 120 • • • • on a device, the camera considers the device to still be connected. Photos will be shared according to the size you set. Videos will be shared in their original sizes. You can use this feature only with an AllShare-enabled renderer. The shared photos or videos will not be stored on the device, but some TVs may store photos or videos, depending on its memory capabilities and settings. Transferring photos or videos to the device may take some time depending on the network connection and the file size. You can transfer files one by one. When there are no photos or videos in the camera memory, you cannot use this feature. On the player (renderer), you can view only photos or videos captured with your camera. Network conditions will affect how long the camera searches for devices. If the search takes an unusually long time, try reconnecting the camera to the network. Sending or receiving photos or videos with another camera Learn to send or receive photos or videos to or from cameras that support network connections. You cannot send or receive voice memos. Sending photos or videos to another camera 1 2 On the Home screen, touch . Touch Send. • The camera generates a password and displays it on the screen while waiting to make a connection with the receiving camera. • To store your camera's name, in Camera to Camera mode, touch m Device Name, and then input a name by touching the Device Name box. 3 On the receiving camera, activate the camera to camera function, and then select Receive. 4 On the receiving camera, select your camera from the list of available devices. 5 On the receiving camera, enter the 4-digit password displayed on your camera in step 2. Receiving photos or videos from another camera 1 2 On the Home screen, touch 3 On the sending camera, select Send, and then on your camera, touch Receive. 4 Select the sending camera from the list of available devices. 5 Enter the 4-digit password displayed on the sending camera. 6 On the sending camera, send photos or videos. • Your camera will receive the files from the sending camera. • When the connection is made, the selection area automatically appears on the sending camera. 6 Select photos or videos to send, and then touch . On the sending camera, activate the camera to camera function. . • The camera will send the files. Wireless network 121 Sending or receiving photos or videos with another camera • This feature uses an ad hoc wireless network. • If you most recently used your camera to receive files, you must end the connection and reassign your camera as the sender to send files. • The range of the wireless connection between two cameras may vary, depending on the conditions of the wireless ad hoc network. • If you power off the camera abnormally while sending or receiving • • • • • • • photos or videos, the other camera considers the camera to still be connected. Cameras will be disconnected after some time. Transferring photos or videos to the device may take some time depending on the network connection and the file size. If you fail to receive or send a photo or video, it will not be saved on the receiving camera. If no photos have been stored on the camera, you cannot use this feature. You can send and receive photos or videos taken with your camera. Photos larger than will automatically be resized. The maximum video file size you can send or receive is 35 MB. Wireless network 122 Using Auto Backup to send photos or videos You can send photos or videos that you captured with the camera to a PC or Blu-ray disc player wirelessly. Before sending files to your PC, connect the camera to the PC with the USB cable, so that the camera can store information about the PC. The Auto Backup feature works only with the Windows OS. Installing the program for Auto Backup on your PC 3 1 2 4 Connect the camera to the PC with the USB cable. • The camera will prepare to connect to the network and send files. The camera will send files. • You cannot select individual files to send. This function is Turn on the camera. available only for newly stored files on the camera. • The computer recognizes the camera and Intelli-studio • The progress will be shown on the PC monitor. launches automatically. 3 Select options, and then touch Confirm. • If the PC supports the Wake on LAN(WOL) feature, you can turn When the pop-up appears, click o. • The program will be installed automatically. • Before install program, ensure that the PC is connected to a network. If no internet connection is available, you must install the program from the provided CD. • This program is for backing up files to the PC. You do not need a program to send files to the Blu-ray disc player. • • • • • • • Sending photos or videos to a PC 1 2 On the Home screen of your camera, touch . Touch Confirm. Wireless network 123 on the PC automatically by searching for the PC from your camera. (p.125) When you connect the camera to the WLAN, select the AP that is connected to the PC. The camera will search for available access points even if you are connecting to the same access point again. If you turn off the camera or remove the battery while sending files, the file transfer will be interrupted. While you are using this feature, the buttons on the camera will be disabled. You can connect only one camera to the PC at a time for sending files. The backup may be canceled due to network conditions. Photos or videos can be sent to a PC or Blu-ray player one time only. Files cannot be sent again even if you reconnect your camera. Using Auto Backup to send photos or videos Sending photos or videos to a Blu-ray disc Player 1 2 On the Home screen, touch Touch . to connect to the AP. • Select the AP that is connected to the Blu-ray player. 3 Search for available devices, and then select your Bluray player. 4 When the camera is connected to the Blu-ray player and a pop-up appears on the player's display, select Allow. 5 On the Blu-ray player, select Menu Settings Network AllShare Server Management Device Access Control your camera. Then, set the Blu-ray player to be accessible by other devices. • The Blu-ray player will remember the most recent access settings. If the connection conditions are the same as the last connection, the camera will automatically access the Blu-ray player. 6 Touch Confirm to send files. • Transferred files will be stored on the hard disk of the Blu-ray player. Wireless network 124 • Before you backup the files, connect the Blu-ray disc player to a wired AP. Select Menu Settings Network Network Setting to view the player’s IP allocation. • Even when you have set the Blu-ray player to be accessed by other devices, you may be prompted to change the access setting again. To set the access setting, refer to steps 4 – 5. • This feature works with Samsung Blu-ray players that support Auto Backup. • The Auto Backup function cannot be used when the Blu-ray player is: - playing back files or access to browser, in My Contents or My Device menu - upgrading the software - recording files or time-shifting files (reservation recordings will function normally during automatic backups.) - formatting the player's hard disk or when you are testing the device or its capabilities About the Wakeup on LAN (WOL) feature With the WOL feature, you can automatically turn on or wake up a PC with your camera. Setting the PC to turn on Setting the PC to wake up from sleep mode 1 2 1 Click Start, and then open the Control Panel. • The BIOS setting menu will appear. Configure the network connection. 2 3 4 5 6 • Windows 7: Click Network and Internet Network and Sharing Center Change adapter settings. • Windows Vista: Click Network and Internet Network and Sharing Center Manage network connections. • Windows XP: Click Network and Internet Connection Network Connection. 3 4 Right click Local Area, and then click Properties. 5 6 Click o. Turn on the PC and press F2 while the PC is booting. Select Advanced tab Power management Setup. Select Resume on PME Enabled. Press F10 to save your changes and continue booting. Click Start, and then open the Control Panel. Configure the network connection. • Windows 7: Click Network and Internet Network and Sharing Center Change adapter settings. • Windows Vista: Click Network and Internet Network and Sharing Center Manage network connections. • Windows XP: Click Network and Internet Connection Network Connection. Click Configure the Power manage tab Allow this device to wake the computer. Restart the PC. 7 8 Select drivers related to network adapter. Click Advanced tab and then set WOL menus. Wireless network 125 About the Wakeup on LAN (WOL) feature • You cannot use this feature across a firewall or if a security program has been installed. • This feature has been available for Samsung desktop PCs for the last 5 years(not available for all-in-one PCs). • To turn on the PC with the WOL feature, the PC must have an active connection to the LAN. Ensure that the indicator light on the PC’s LAN port is on, which shows that the LAN connection is active. • Depending on your PC model, the camera may only be able to wake the PC. • Depending on your PC’s OS or drivers, the names of the WOL setting menu may vary. - examples of setting menu names : Enable PME, Wake on LAN etc. - examples of setting menu values : Enable, Magic packet etc. Any changes to your PC’s BIOS settings other than the ones described below may damage your PC. The manufacturer is not responsible for damage caused by your changing your PC’s BIOS settings. Wireless network 126 Settings Refer to options to configure your camera’s settings. Settings menu ………………………………………… 128 Accessing the settings menu ……………………… 128 Sound ……………………………………………… 129 Display ……………………………………………… 129 Connectivity ………………………………………… 130 General ……………………………………………… 131 Settings menu Learn to configure your camera's settings. Accessing the settings menu 1 2 On the Home screen, touch 3 Touch an item. General . Device Information Touch a menu. Settings Sound Language English Time Zone Home Date/Time Set Display Connectivity General 4 Select an option, and then touch o. Date Type Icon Description YYYY/MM/DD Sound: Set various camera sounds and the volume. (p. 129) MM/DD/YYYY DD/MM/YYYY Display: Customize the display settings. (p. 129) Off Connectivity: Set the connection options. (p. 130) General: Change the settings for the camera system such as memory format and default file name. (p. 131) 5 Settings 128 Touch to return to the previous screen. Settings menu Sound Display * Default Item Description Volume Set the volume of any sound. (Off, Low, Medium*, High) Beep Sound Set to emit sounds when you touch the screen or switch modes. (Off, On*) Shutter Sound Set the sound the camera emits when you press the shutter button. (Off, 1*, 2, 3) Start Sound Set the sound the camera emits when you turn on your camera. (Off*, 1, 2, 3) AF Sound Set to emit a sound when you half-press the shutter button. (Off, On*) * Default Item Description Start Image Set a start image to display when the camera turns on. • Off*: Display no start image. • Logo: Display a default image stored in the internal memory. • User Image: Display a custom image. (p. 93) • The camera will save only one User Image in the internal memory at a time. • If you select a new photo as a User Image or reset your camera, the camera will delete the current image. Grid Line Settings 129 Set a grid to help you compose a scene. (2 X 2*, 3 X 3, X, +) Settings menu Connectivity * Default * Default Item Display Brightness Quick View Description Item Description Video Out Set the video signal output for your region. • NTSC*: USA, Canada, Japan, Korea, Mexico, Taiwan • PAL (supports only BDGHI): Australia, Austria, Belgium, China, Denmark, England, Finland, Germany, Italy, Kuwait, Malaysia, Netherlands, New Zealand, Norway, Singapore, Spain, Sweden, Switzerland, Thailand USB Select the mode to use when you connect the camera to a computer or printer with a USB cable. • Computer*: Connect your camera to a computer for transferring files. • Printer: Connect your camera to a printer for printing files. • Select Mode: Manually select the USB mode when you connect your camera to a device. PC Software Set Intelli-studio to launch automatically when you connect your camera to your computer. (Off, On*) Adjust the brightness of the screen. (Auto*, Dark, Normal, Bright) Normal is fixed in Playback mode even if you have selected Auto. Set the duration for reviewing a captured image before returning to the Shooting mode. (Off, 0.5 sec*, 1 sec, 3 sec) If you perform no operations for 30 seconds, the camera automatically switches to Power save mode. (Off*, On) Power Save • In Power save mode, press any button other than [POWER] to resume using the camera. • Even if you do not set the Power save mode, the screen will dim in 30 seconds after the last operation to save power. Settings 130 Settings menu General * Default Item Description Device Information See the Mac address and serial number of your camera. Language Set a language for the display text. Time Zone Set the time zone for your location. When you travel to another country, touch Visit, and then touch the appropriate time zone. Date/Time Set Set the date and time. Date Type Set a date format. (YYYY/MM/DD, MM/DD/YYYY, DD/MM/YYYY, Off*) * Default Item Description Specify how to name files. • Reset: Set the file number to start from 0001 when you insert a new memory card, format a memory card, or delete all files. • Series*: Set the file number to resume from the previous file number when you insert a new memory card, format a memory card, or delete all files. • The default name of the first folder is 100PHOTO File No. and the default name of the first file is SAM_0001. • The file number increases one at a time from SAM_0001 to SAM_9999. • The folder number increases one at a time from 100PHOTO to 999PHOTO. • The maximum number of files that can be stored in one folder is 9,999. • The camera defines file names according to the Design rule for Camera File system (DCF) standard. If you intentionally change file names, the camera may not play back the files. Settings 131 Settings menu * Default * Default Item Description Item Description Auto Rotate Set to automatically rotate photos as you rotate the camera. (Off, On*) AF Lamp Set a light to automatically turn on in dark places to help the camera focus. (Off, On*) Set to display the date and time on captured photos. (Off*, Date, Date & Time) Format the internal memory and the memory card (formatting will delete all files, including protected files). (Yes, No) • The date and time will be displayed on the Imprint Format bottom right corner of the photo. • Some printer models may not print the date and time properly. • If you select Text in Scene mode, the camera will not display the date and time. Set the camera to automatically turn off when you perform no operations for a specified period. (Off, 1 min, 3 min*, 5 min, 10 min) • Your settings will not change when you replace Auto Power Off Errors can occur if you use a memory card formatted by another brand of camera, a memory card reader, or a computer. Please format memory cards in the camera before using them to capture photos. Reset Reset menus and shooting options (date and time, language, and video output settings will not be reset). (Yes, No) Touch Calibration Calibrate the touch screen so that your camera will properly recognize your inputs. the battery. • The camera will not automatically turn off when the camera is connected to a computer or printer, when you are playing a slide show or videos, and when you are recording a voice memo. Settings 132 Appendixes Get information about error messages, specifications, and maintenance. Error messages ……………………………………… 134 Camera maintenance ………………………………… 135 Cleaning your camera ……………………………… 135 Using or storing the camera ………………………… 136 About memory cards ……………………………… 137 About the battery …………………………………… 139 Before contacting a service center ………………… 143 Camera specifications ……………………………… 146 Glossary ……………………………………………… 150 FCC notice …………………………………………… 155 Declaration sentence in official languages ………… 158 Index …………………………………………………… 160 Error messages When the following error messages appear, try these remedies. Error message Suggested remedies Error message • Turn off your camera, and then turn it on Card Error Suggested remedies • Turn on AllShare enabled devices on the again. • Remove your memory card, and then insert it again. • Format your memory card. Initialization failed. network. • The camera has failed to locate an AllShare- enabled device. Invalid password. The password for transferring files to another camera is wrong. Enter the correct password again. Low Battery Insert a charged battery or recharge the battery. using the selected access point. Select another and try again. • The camera fails to connect to the other camera. Try connecting again. Memory Full Delete unnecessary files or insert a new memory card. No Image File Capture photos or insert a memory card that contains some photos. DCF Full Error File names do not match the DCF standard. Transfer the files on the memory card to your computer, and then format the card. Photo transfer failed. The camera has failed to receive a photo from the sending camera. Ask the other person to send the file again. File Error Delete the damaged file or contact a service center. Photo reception failed. File system not supported. Your camera does not support the FAT file structure of the inserted memory card. Format the memory card on the camera. Network connection disconnected while transferring photos. Try turning on the AllShare feature again. Card not supported. The inserted memory card is not supported by your camera. Insert a microSD or microSDHC memory card. • The camera cannot connect to the network Connection failed. Appendixes 134 Camera maintenance Camera body Cleaning your camera Wipe gently with a soft, dry cloth. Camera lens and touch screen Use a blower brush to remove dust and wipe the lens gently with a soft cloth. If any dust remains, apply lens cleaning liquid to a piece of lens cleaning paper and wipe gently. • Never use benzene, thinners, or alcohol to clean the camera. These solutions can damage the camera or cause it to malfunction. • Do not press on the lens cover or use a blower brush on the lens cover. Appendixes 135 Camera maintenance Using on beaches or shores Using or storing the camera • Protect your camera from sand and dirt when you use it on beaches or in other similar areas. Inappropriate places to use or store the camera • Your camera is not waterproof. Do not handle the battery, • Avoid exposing the camera to very cold or very hot temperatures. • Avoid using your camera in areas with extremely high humidity, adapter, or memory card with wet hands. Operating the camera with wet hands may cause damage to your camera. or where the humidity changes drastically. • Avoid exposing the camera to direct sunlight and storing it in hot, poorly-ventilated areas, such as in a car during summertime. Storing for extended period of time • When you store the camera for an extended period, place it in a • Protect your camera and the display from impact, rough handling, and excessive vibration to avoid serious damage. • Avoid using or storing your camera in dusty, dirty, humid, or poorly-ventilated areas to prevent damage to moving parts and internal components. • Do not use your camera near fuels, combustibles, or flammable chemicals. Do not store or carry flammable liquids, gases, or explosive materials in the same compartment as the camera or its accessories. • Do not store the camera where there are mothballs. sealed container with an absorbent material, such as silica gel. • Remove the batteries from your camera when storing it for an extended period. Installed batteries may leak or corrode over time and cause serious damage to your camera. • Over time, unused batteries will discharge and must be recharged before use. Use the camera with caution in humid environments When you transfer the camera from a cold environment to a warm one, condensation can form on the lens or internal components of the camera. In this situation, turn off the camera and wait for at least 1 hour. If condensation forms on the memory card, remove the memory card from the camera and wait until all moisture has evaporated before reinserting it. Appendixes 136 Camera maintenance • Paint or metal on the outside of the camera may cause Other cautions • Do not swing your camera by the strap. This may cause injury • • • • • • • • • to yourself or others or damage to your camera. Do not paint your camera, as paint can clog moving parts and prevent proper operation. Turn off the camera while not in use. Your camera consists of delicate parts. Avoid impacts to the camera. Protect the display from external force by keeping it in the case when not in use. Protect the camera from scratches by keeping it away from sand, sharp implements, or loose change. Do not expose the lens to direct sunlight, as this may discolor the image sensor or cause it to malfunction. Protect your lens from fingerprints and scratches. Clean your lens with a soft, clean, debris-free lens cloth. The camera may turn off if subjected to a sudden impact. This is to protect the memory card. Turn on the camera to use it again. While you use the camera, it may heat up. This is normal and should not affect your camera’s lifespan or performance. When you use the camera in low temperatures, it may take some time to turn on, the screen color may be changed temporarily, or after-images may appear. These conditions are not malfunctions and they will correct themselves when the camera is returned to normal temperatures. allergies, itchy skin, eczema, or swelling for people with sensitive skin. If you experience any of these symptoms, stop using the camera immediately and consult a doctor. • Do not insert foreign objects into any of your camera’s compartments, slots, or access points. Damage due to improper use may not be covered by your warranty. • Do not allow unqualified personnel to service the camera or attempt to service the camera yourself. Any damage that results from unqualified service is not covered by your warranty. About memory cards Supported memory cards Your camera supports microSD (Secure Digital) or microSDHC (Secure Digital High) memory cards. Appendixes 137 To read data with a PC or memory card reader, insert the memory card into a memory card adapter. Camera maintenance Memory card capacity Cautions when using memory cards The memory capacity may differ from the the capacities listed below depending on the scenes you shoot or the shooting conditions. These capacities are based on a 1 GB microSD card: Size P h o t o s * V i d e o s Super Fine Fine Normal 30 FPS 15 FPS 119 233 343 - - 133 260 380 - - 159 311 458 - - 166 323 469 - - 319 607 858 - - 522 954 1,336 - - • Insert a memory card in the correct direction. Inserting a • • • • • 742 1,336 1,878 - - 1,582 2,505 3,006 - - - - - - - - - - - - Approx. 13' 08" Approx. 14' 55" Approx. 34' 55" Approx. 134' 34" Approx. 22' 57" Approx. 28' 54" Approx. 65' 40" Approx. 231' 14" - - - Approx. 134' 34" - • • • • memory card in the wrong direction may damage your camera and memory card. Do not use memory cards that have been formatted by other cameras or by a computer. Reformat the memory card with your camera. Turn off the camera when you insert or remove the memory card. Do not remove the memory card or turn off your camera while the lamp is blinking, as this may damage your data. When the lifespan of a memory card has expired, you cannot store any more photos on the card. Use a new memory card. Do not bend, drop, or subject memory cards with heavy impact or pressure. Avoid using or storing memory cards near strong magnetic fields. Avoid using or keeping memory cards in areas with high temperature, high humidity, or corrosive substances. Prevent memory cards from making contact with liquids, dirt, or foreign substances. If dirty, wipe the memory card clean with a soft cloth before you insert the memory card in your camera. Do not allow liquids, dirt, or foreign substances to come in contact with memory cards or the memory card slot. Doing so may cause memory cards or the camera to malfunction. * Available recording time may vary if you use the zoom. Several videos were recorded in succession to determine the total recording time. Appendixes 138 Camera maintenance • When you carry a memory card, use a case to protect the card from electrostatic discharges. • Transfer important data to other media, such as a hard disk, CD, or DVD. • When you use the camera for an extended period, the memory card may become warm. This is normal and does not indicate a malfunction. The manufacturer is not responsible for any loss of data. Battery life Average shooting time / Number of photos Test conditions (when the battery is fully charged) This is measured under the following conditions: in Program mode, at resolution, with DIS off, on Fine quality. Approximately 110 min/ Photos Approximately 220 photos 1. Set the flash option to Fill in, take a single shot, and zoom in or out. 2. Set the flash option to Off, take a single shot, and zoom in or out. 3. Perform steps 1 and 2 for 30 seconds and repeat for 5 minutes. Then turn off the camera for 1 minute. About the battery Use only Samsung-approved batteries. Battery specifications 4. Repeat steps 1 to 3. Videos Specification Description Model BP85A Type Lithium-ion battery Cell capacity 850 mAh Voltage 3.7 V Charging time* (when the camera is switched off) Approximately 180 min Approximately 90 min Record videos at 1280 X 720 HQ resolution and 30 FPS. • The figures above are measured using Samsung’s standards. Your reslults may differ, depending on your actual usage. • Several videos were recorded in succession to determine the total recording time. • When using network functions, the battery will be depleted more quickly. * Charging the battery by connecting it to a computer may take longer. Appendixes 139 Camera maintenance Cautions about using the battery Low battery message When the battery has fully discharged, the battery icon will turn red and the "Low Battery" message will appear. Notes about using the battery • Avoid exposing batteries or memory cards to very cold or very • • • • hot temperatures (below 0 ºC/32 ºF or above 40 ºC/104 ºF). Extreme temperatures can reduce the charging capacity of your batteries and can cause memory cards to malfunction. When you use the camera for an extended period, the area around the battery chamber may become warm. This does not affect the normal use of the camera. Do not pull the power supply cord to disconnect the plug from the power outlet, as this may cause a fire or electric shock. In temperatures below 0 ºC/32 ºF, battery capacity and battery life may decrease. Battery capacity may decrease in low temperatures but will return to normal in milder temperatures. Protect batteries, chargers, and memory cards from damage Prevent batteries from making contact with metal objects, as this can create a connection between the + and – terminals of your battery and lead to temporary or permanent battery damage and may cause a fire or electric shock. Notes about charging the battery • If the indicator light is off, make sure that the battery is inserted correctly. • If the camera is on while battery is charging, the battery may not fully charge. Turn off the camera before charging the battery. • Do not use your camera when you charge the battery. This may cause a fire or electric shock. • Do not pull the power supply cord to disconnect the plug from the power outlet, as this may cause a fire or electric shock. • Let the battery charge for at least 10 minutes before turning on the camera. • If you connect the camera to an external power source while the battery is depleted, using some high energy-consuming functions will cause the camera to turn off. To use the camera normally, recharge the battery. Appendixes 140 Camera maintenance • Using the flash or recording videos depletes the battery quickly. • • • • Charge the battery until the indicator light turns green. If the indicator light blinks in orange or does not illuminate, reconnect the cable, or remove the battery and insert it again. If you charge the battery when the cable is overheated or the temperature is too high, the indicator light may turn orange. Charging will start when the battery cools down. Overcharging batteries may shorten battery life. After charging is finished, disconnect the cable from your camera. Do not bend or place heavy objects on the AC cable. Doing so may damage the cable. Handle and dispose of batteries and chargers with care • Never dispose of batteries in a fire. Follow all local regulations when you dispose of used batteries. • Never place batteries or cameras on or in heating devices, such as microwave ovens, stoves, or radiators. Batteries may explode when they are overheated. Notes about charging with a computer connected • Use only the provided USB cable. • The battery may not charge when: - you use a USB hub - other USB devices are connected to your computer - you connect the cable to the port on the front side of your computer - the USB port of your computer does not support the power output standard (5 V, 500 mA) Appendixes 141 Camera maintenance Personal injury or death can occur if the battery is handled carelessly or improperly. For your safety, follow these instructions for proper battery handling: • The battery can ignite or explode if not handled properly. If you notice any deformities, cracks, or other abnormalities in the battery, immediately discontinue use of the battery and contact a service center. • Use only authentic, manufacturer-recommend battery chargers and adapters and charge the battery only by the methods described in this user manual. • Do not place the battery near heating devices or expose it to excessively warm environments, such as the inside of an enclosed car in the summertime. • Do not place the battery in a microwave oven. • Avoid storing or using the battery in hot, humid places, such as spas or shower enclosures. • Do not rest the device on flammable surfaces, such as bedding, carpets, or electric blankets for a prolonged period. • When the device is switched on, do not leave it in any confined space for a prolonged period. • Do not allow battery terminals to come in contact with metallic objects, such as necklaces, coins, keys, or watches. • Use only authentic, manufacturer-recommended, Lithiumion replacement batteries. Appendixes 142 • Do not disassemble the battery or puncture the it with any sharp object. • Avoid exposing the battery to high pressure or crushing forces. • Avoid exposing the battery to major impacts, such as dropping it from high places. • Do not expose the battery to temperatures of 60 °C (140 °F) or above. • Do not allow the battery to come in contact with moisture or liquids. • Do not expose the battery to sources of excessive heat such as direct sunshine, fire or the like. Disposal guidelines • Dispose of the battery with care. • Do not dispose of the battery in a fire. • Disposal regulations may differ by country or region. Dispose of the battery in accordance with all local and federal regulations. Guidelines for charging the battery Charge the battery only by the method described in this user manual. The battery can ignite or explode if not charged properly. Before contacting a service center If you are having trouble with your camera, try these troubleshooting procedures before you contact a service center. If you have attempted the suggested remedy and are still having problems with your device, contact your local dealer or service center. When you leave your camera at a service center, be sure to also leave the other components that may have contributed to the malfunction, such as the memory card and battery. Situation Suggested remedies Situation • Ensure that the battery is inserted. Cannot turn on the camera • Ensure that the battery is inserted correctly. (p. 18) • Charge the battery. • • • Charge the battery. Cannot capture photos • Your camera may be in Power save The power turns off suddenly • mode. (p. 132) • The camera may turn off to prevent the • memory card from being damaged due to an impact. Turn on your camera again. • • The battery may lose power more quickly The camera is losing battery power quickly Suggested remedies • There is no space on the memory card. in low temperatures (below 0 °C). Keep the battery warm by putting it into your pocket. • Using the flash or recording videos depletes the battery quickly. Recharge if needed. • Batteries are consumable parts that must be replaced over time. Get a new battery if the battery life is diminishing quickly. Delete unnecessary files or insert a new card. Format the memory card. The memory card is defective. Get a new memory card. Make sure that the camera is switched on. Charge the battery. Make sure that the battery is inserted correctly. The camera freezes Remove the battery and insert it again. The camera heats up While you use the camera, it may heat up. This is normal and should not affect your camera’s lifespan or performance. The flash does not work Appendixes 143 • The flash option may be set to off. (p. 57) • You cannot use the flash in some modes. Before contacting a service center Situation Suggested remedies The flash fires unexpectedly The flash may fire due to static electricity. The camera is not malfunctioning. Situation The date and time are incorrect Set the date and time in the display settings. (p. 131) is suitable for close-up shots. (p. 60) Remove the battery and insert it again. The camera screen responds poorly If you use your camera at very low temperatures, it may cause the camera screen to malfunction or discolor. For better performance of your camera screen, use your camera in moderate temperatures. • Make sure that the lens is clean. If not, clean the lens. (p. 135) of the flash. (p. 146) • Turn off your camera and then turn it on again. An incorrect white balance can create The colors in the photo unrealistic color. Select the proper white do not match the actual balance option to suit the light source. scene (p. 70) The photo is too bright Your photo is overexposed. • Turn off the flash. (p. 57) • Adjust the ISO sensitivity. (p. 59) • Adjust the exposure value. (p. 68) The photo is too dark Your photo is underexposed. • Turn on the flash. (p. 57) • Adjust the ISO sensitivity. (p. 59) • Adjust the exposure value. (p. 68) • Remove your memory card and insert it again. • Format your memory card. See “Cautions when using memory cards” for more detail. (p. 138) Cannot play back files The photo is blurry • Make sure that the subject is within range The touch screen or buttons do not work The memory card has an error Suggested remedies • Make sure that the focus option you set If you change the name of a file, your camera may not play the file (the name of the file should meet the DCF standard). If you encounter this situation, play back the files on your computer. Appendixes 144 Before contacting a service center Situation Suggested remedies Situation • Make sure that the camera is correctly The TV does not display your photos connected to the TV with the A/V cable. • You cannot use Intelli-studio on • Make sure that your memory card Macintosh computers. contains photos. • Make sure that PC Software is turned • Make sure that the USB cable is Your computer does not recognize your camera Suggested remedies • End Intelli-studio and restart the program. connected correctly. • Make sure that your camera is switched on. • Make sure that you are using a supported operating system. Your computer disconnects the camera while transferring files The file transmission may be interrupted by static electricity. Disconnect the USB cable and connect it again. Your computer cannot play videos Videos may not play on some video player programs. To play video files captured with your camera, install and use the Intelli-studio program on your computer. (p. 100) Intelli-studio is not functioning properly Appendixes 145 on in the settings menu. (p. 130) • Depending on your computer's specifications and environment, the program may not launch automatically. In this case, click Start My Computer Intelli-studio iStudio.exe on your computer. Camera specifications Image sensor Type 1/2.3" (Approximately 7.76 mm) CCD Effective pixels Approximately 14.2 mega-pixels Total pixels Range Wide (W) Tele (T) Normal (AF) 80 cm-infinity 150 cm-infinity Macro 5 cm-80 cm 100 cm-150 cm Auto Macro 5 cm-infinity 100 cm-infinity Approximately 14.48 mega-pixels Shutter speed Lens Focal length Samsung Lens f = 4.7 mm-23.5 mm (35 mm film equivalent: 26 mm-130 mm) F-stop range F3.3 (W)-F5.9 (T) Digital zoom • Still image mode: 1.0X-5.0X (Optical Zoom x Digital Zoom: 25.0X) • Playback mode: 1.0X-14.4X • Smart Auto: 1/8-1/2,000 sec. • Program: 1-1/2,000 sec. • Night Shot: 8-1/2,000 sec. Exposure Display Type TFT LCD Feature 3.0" (7.6 cm) WQVGA, 230K Program AE Metering Multi, Spot, Center-weighted, Face Detection Compensation ±2EV (1/3 EV Step) ISO equivalent Auto, ISO 80, ISO 100, ISO 200, ISO 400, ISO 800, ISO 1600, ISO 3200 Flash Focusing Type Control TTL auto focus (Multi AF, Center AF, Smart Face Recognition AF, Face Detection AF, Smart Touch AF, One Touch Shooting AF) Mode Auto, Red-eye, Fill in, Slow Sync, Off, Red-eye Fix Range • Wide: 0.2 m-3.2 m (ISO Auto) • Tele: 0.5 m-1.8 m (ISO Auto) Recharging time Approximately 4 sec. Appendixes 146 Camera specifications Digital Image Stabilization (DIS) Shooting Digital Image Stabilization (DIS) Effect Photo Shooting mode Video Shooting mode • Photo Filter (Smart Filter): Normal, Miniature, Vignetting, Soft-Focus, Old Film 1, Old Film 2, Half Tone Dot, Sketch, Fish-eye, Defog, Classic, Retro, Negative, (Custom RGB) • Image Adjust: Sharpness, Contrast, Saturation Photos • Palette Effect: Palette Effect 1, Palette Effect 2, Palette Effect 3, Palette Effect 4 • Movie Filter (Smart Filter): Normal, Miniature, Vignetting, Half Tone Dot, Sketch, Fish-eye, Defog, Classic, Retro, Negative, (Custom RGB) White Balance Auto WB, Daylight, Cloudy, Fluorescent_H, Fluorescent_L, Tungsten, Custom Set Date Imprinting Date & Time, Date, Off Appendixes 147 • Modes: Smart Auto*, Program, Scene*, Simple Shot, Magic Frame shot, Beauty Shot, Object Highlight, Night Shot, Close Up, Vignetting, Photo Filter * Smart Auto: Macro, Macro text, Portrait, White, Landscape, Action, Tripod, Night, Night Portrait, Backlight, Backlight Portrait, Blue Sky, Sunset, Macro Color, Natural Green, Fireworks * Scene: Landscape, Text, Sunset, Dawn, Backlight, Beach & Snow • Drive: Single, Continuous, Motion Capture, AEB • Timer: 2 Sec, 10 Sec, Double (2 sec., 10 sec.) Camera specifications Videos • Modes: Movie, Smart movie*, Vignetting, Movie Filter, Palette Effect * Smart movie: Landscape, Blue Sky, Natural Green, Sunset • Format: MP4 (H.264)(Maximum recording time: 20 min) • Size: 1280 X 720 HQ (30 FPS, 15 FPS), 1280 X 720 (30 FPS, 15 FPS), 640 X 480 (30 FPS, 15 FPS), 320 X 240 (30 FPS, 15 FPS), 320 X 240 WEB (30 FPS) • Frame rate: 30 FPS, 15 FPS • Voice: Mute, Sound Alive On, Sound Alive Off • Video editing (embedded): Pause during recording, Still image capture, Time trimming Playback Type Edit Effect Voice recording • Voice Recording (Maximum 10 hours) • Voice Memo in a photo (Maximum 10 sec.) Storage Media • Internal memory: Approximately 6.9 MB • External memory (Optional): microSD card (up to 2 GB guaranteed), microSDHC card (up to 8 GB guaranteed) Internal memory capacity may not match these specifications. File format • DCF, EXIF 2.21, DPOF 1.1, PictBridge 1.0 • Still Image: JPEG (DCF) • Movie Clip: MP4 (Video: MPEG-4.AVC/H.264, Audio: AAC) • Audio file: WAV Single image, Thumbnails, Multi-slide show with music and effect, Movie clip, Smart Album*, 3D Album, Magazine * Smart Album category: Type, Date, Face Resize, Rotate, Image Adjust, Smart Filter, Trim, Smart Crop • Image Adjust: Face Retouch, Brightness, Saturation, Contrast, Red-eye Fix, ACB • Smart Filter: Normal, Miniature, Vignetting, Soft-Focus, Old Film 1, Old Film 2, Half Tone Dot, Sketch, Fish-eye, Defog, Classic, Retro, Negative, Custom RGB Appendixes 148 Camera specifications Video output A/V: NTSC, PAL (selectable) 20 pin, 4.2 V 343 DC power input connector 260 380 Power source 311 458 Rechargeable battery 166 323 469 2592 X 1944 319 607 858 1984 X 1488 522 954 1,336 1920 X 1080 742 1,336 1,878 1024 X 768 1,582 2,505 3,006 For 1 GB microSD: Number of photos Super Fine Fine Normal 4320 X 3240 119 233 4320 X 2880 133 4320 X 2432 159 3648 X 2736 Lithium-ion battery (BP85A, 850 mAh) The power source may differ depending on your region. Image size These figures are measured under Samsung’s standard conditions. Your results may vary depending on the shooting conditions and camera settings. Dimensions (W x H x D) 93 X 53.9 X 18.9 mm (without protrusions) Weight 110.2 g (without battery and memory card) Operating Temperature 0-40 °C Wireless network Operating Humidity Wi-Fi (IEEE 802.11 b/g/n), AllShare, Web Upload, Emailing, Camera to Camera, AP Connection, Auto Backup, Remote Viewfinder 5-85 % Interface Software Digital output connector Intelli-studio, PC Auto Backup USB 2.0 Specifications may change without notice to improve performance. Audio input/output Internal speaker (Mono), Microphone (Mono) Appendixes 149 Glossary ACB (Auto Contrast Balance) This feature automatically improves the contrast of your images when the subject is backlit or when there is a high contrast between your subject and the background. Composition Composition in photography means arranging objects in a photo. Usually, abiding by the rule of thirds leads to a good composition. DCF (Design rule for Camera File system) A specification to define a file format and file system for digital cameras created by the Japan Electronics and Information Technology Industries Association (JEITA). AEB (Auto Exposure Bracket) This feature automatically captures several images at different exposures to help you capture a properly exposed image. AF (Auto Focus) A system that automatically focuses the camera lens on the subject. Your camera uses the contrast to focus automatically. Aperture The aperture controls the amount of light that reaches the camera’s sensor. Camera shake (Blur) If the camera is moved while the shutter is open, the entire image may appear blurred. This occurs more often when the shutter speed is slow. Prevent camera shake by raising the sensitivity, using the flash, or using a faster shutter speed. Alternately, use a tripod, the DIS or OIS function to stabilize the camera. Depth of field The distance between the nearest and farthest points that can be acceptably focused in a photograph. Depth of field varies with lens aperture, focal length, and distance from the camera to the subject. Selecting a smaller aperture, for example, will increase the depth of field and blur the background of a composition. Digital zoom A feature that artificially increases the amount of zoom available with a zoom lens (Optical zoom). When using the Digital zoom, the image quality will deteriorate as the magnification increases. DPOF (Digital Print Order Format) A format for writing printing information, such as selected images and number of prints, on a memory card. DPOF-compatible printers, sometimes available at photo shops, can read the information from the card for convenient printing. Appendixes 150 Glossary EV (Exposure Value) All the combinations of the camera’s shutter speed and lens aperture that result in the same exposure. EV Compensation This feature allows you to quickly adjust the exposure value measured by the camera, in limited increments, to improve the exposure of your photos. Set the EV compensation to -1.0 EV to adjust the value one step darker and 1.0 EV to one step brighter. Exif (Exchangeable Image File Format) A specification to define an image file format for digital cameras created by the Japan Electronic Industries Development Association (JEIDA). Exposure The amount of light allowed to reach the camera’s sensor. Exposure is controlled by a combination of the shutter speed, the aperture value, and ISO sensitivity. Flash A speed light that helps to create adequate exposure in low-light conditions. Focal length The distance from the middle of the lens to its focal point (in millimeters). Longer focal lengths result in narrower angles of view and the subject is magnified. Shorter focal lengths result in wider angles of view. Histogram A graphical representation of the brightness of an image. The horizontal axis represents the brightness and the vertical axis represents the number of pixels. High points at the left (too dark) and right (too bright) on the histogram indicate a photo that is improperly exposed. H.264/MPEG-4 A high-compression video format established by international standard organizations ISO-IEC and ITU-T. This codec is capable of providing good video quality at low bit rates developed by the Joint Video Team (JVT). Image sensor The physical part of a digital camera that contains a photosite for each pixel in the image. Each photosite records the brightness of the light that strikes it during an exposure. Common sensor types are CCD (Charge-coupled Device) and CMOS (Complementary Metal Oxide Semiconductor). Appendixes 151 Glossary ISO sensitivity The sensitivity of the camera to light, based on the equivalent film speed used in a film camera. At higher ISO sensitivity settings, the camera uses a higher shutter speed, which can reduce blur caused by camera shake and low light. However, images with high sensitivity are more susceptible to noise. JPEG (Joint Photographic Experts Group) A lossy method of compression for digital images. JPEG images are compressed to reduce their overall file size with minimal deterioration of the image resolution. LCD (Liquid Crystal Display) A visual display commonly used in consumer electronics. This display needs a separate backlight, such as CCFL or LED, to reproduce colors. MJPEG (Motion JPEG) A video format which is compressed as a JPEG image. Noise Misinterpreted pixels in a digital image that may appear as misplaced or random, bright pixels. Noise usually occurs when photos are shot with a high sensitivity or when a sensitivity is automatically set in a dark place. Optical zoom This is a general zoom which can enlarge images with a lens and does not degrade image quality. Quality An expression of the rate of compression used in a digital image. Higher quality images have a lower rate of compression, which usually results in a larger file size. Macro This feature allows you to capture close-up photos of very small objects. When using the macro feature, the camera can maintain a sharp focus on small objects at a near life-size ratio (1:1). Resolution The number of pixels present in a digital image. High resolution images contain more pixels and typically show more detail than low resolution images. Metering The metering refers to the way in which the camera measures the quantity of light to set the exposure. Appendixes 152 Glossary Shutter speed Shutter speed refers to the amount of time it takes to open and close the shutter, and it is an important factor in the brightness of a photo, as it controls the amount of light which passes through the aperture before it reaches the image sensor. A fast shutter speed allows less time to let light in and the photo becomes darker and more easily freezes subjects in motion. Vignetting A reduction of an image’s brightness or saturation at the periphery (outer edges) compared to the center of the image. Vignetting can draw interest to subjects positioned in the center of an image. White balance (color balance) An adjustment of the intensities of colors (typically the primary colors red, green, and blue), in an image. The goal of adjusting the white balance, or color balance, is to correctly render the colors in an image. Appendixes 153 Correct Disposal of This Product (Waste Electrical & Electronic Equipment) (Applicable in the European Union and other European countries with separate collection systems) Correct disposal of batteries in this product (Applicable in the European Union and other European countries with separate battery return systems) This marking on the product, accessories or literature indicates that the product and its electronic accessories (e.g. charger, headset, USB cable) should not be disposed of with other household waste at the end of their working life. To prevent possible harm to the environment or human health from uncontrolled waste disposal, please separate these items from other types of waste and recycle them responsibly to promote the sustainable reuse of material resources. Household users should contact either the retailer where they purchased this product, or their local government office, for details of where and how they can take these items for environmentally safe recycling. Business users should contact their supplier and check the terms and conditions of the purchase contract. This product and its electronic accessories should not be mixed with other commercial wastes for disposal. This marking on the battery, manual or packaging indicates that the batteries in this product should not be disposed of with other household waste at the end of their working life. Where marked, the chemical symbols Hg, Cd or Pb indicate that the battery contains mercury, cadmium or lead above the reference levels in EC Directive 2006/66. If batteries are not properly disposed of, these substances can cause harm to human health or the environment. To protect natural resources and to promote material reuse, please separate batteries from other types of waste and recycle them through your local, free battery return system. This Class [B] digital apparatus complies with Canadian ICES-003. PlanetFirst represents Samsung Electronics' commitment to the sustainable development and social responsibility through eco-driven business and management activities. Appendixes 154 FCC notice • Declaration of Conformity FCC ID:A3LSH100 This device complies with part 15 of the FCC Rules. Operation is subject to the following two conditions: (1) This device may not cause harmful interference, and (2) this device must accept any interference received, including interference that may cause undesired operation. Caution: Any changes or modifications in construction of this device which are not expressly approved by the party responsible for compliance could void the user's authority to operate the equipment. NOTE: This equipment has been tested and found to comply with the limits for a Class B digital device, pursuant to part 15 of the FCC Rules. These limits are designed to provide reasonable protection against harmful interference in a residential installation. This equipment generates, uses and can radiate radio frequency energy and, if not installed and used in accordance with the instructions, may cause harmful interference to radio communications. However, there is no guarantee that interference will not occur in a particular installation. If this equipment does cause harmful interference to radio or television reception, which can be determined by turning the equipment off and on, the user is encouraged to try to correct the interference by one or more of the following measures: - Reorientate, or relocate, the receiving antenna. - Increase the distance between the equipment and receiver. - Connect the equipment into an outlet on a circuit different from that to which the receiver is connected. - Consult the dealer or an experienced radio / TV technician for help. Trade Name : Samsung Electronics America, Inc. Model No. : Samsung SH100 Responsible Party : Samsung Electronics America, Inc. Address : 85 Challenger Road, Ridgefield Park, NJ 07660 Telephone No. : 1-800-SAMSUNG (726-7864) This device complies with Part 15 of the FCC Rules. Operation is subject to the following two conditions: (1) This device may not cause harmful interference, and (2) this device must accept any interference received, including interference that may cause undesired operation. RF exposure statements: This device is for handheld operation only. The antenna(s) used for this transmitter must be installed to provide a separation distance of at least 20 cm from all persons and must not be co-located or operating in conjunction with any other antenna or transmitter. Appendixes 155 Complies with IDA Standards DA100790 RISK OF EXPLOSION IF BATTERY IS REPLACED BY AN INCORRECT TYPE. DISPOSE OF USED BATTERIES ACCORDING TO THE INSTRUCTIONS. Numéro d’agrément: MR 5905 ANRT 2010 Date d’agrément: 17/12/2010 No.: ESD-1004942C Operation is subject to the following two conditions: (1) This device may not cause harmful interference, and (2) This device must accept any interference received, including interference that may cause undesired operation. Caution: Any changes or modifications to the equipment not expressly approved by the party responsible for compliance could void user’s authority to operate the equipment. IC: 649E-SH100 This equipment may be operated in all EU countries. In France, this equipment may only be used indoors. Appendixes 156 Approved by PTA, year 2010 TA-2010/1576 APPROVED 938 CAUTION Declaration of Conformity Product details EN 55022:2006+A1 :2007 EN 301 489-1 v1.8.1:2008 EN 300 328-1 v1.7.1 EN 301 489-17 v2.1.1:2009 For the following and the Eco-Design Directive (2009/125/EC) implemented by Regulations (EC) No 1275/2008 for standby and off mode electric power consumption and (EC) No 278/2009 for external power supplies. Product : DIGITAL CAMERA Model(s) : SAMSUNG SH100 Manufactured at: Manufacturer: SAMSUNG ELECTRONICS CO., LTD. 416, Maetan-3dong, Yeongtong-gu, Suwon-City, Gyeonggi-do, 443-742, Korea Representative in the EU Factory: TianJin Samsung Opto-Electronics Co., Ltd. No.9 ZhangHeng Street, Micro-Electronic Industrial Park, JinGang Road, Tianjin, China. 300385 Samsung Electronics Euro QA Lab. Blackbushe Business Park Saxony Way, Yateley, Hampshire GU46 6GG, UK (Factories name and address) Declaration & Applicable standards We hereby declare, that the product above is in compliance with the essential requirements of the R&TTE Directive (1999/5/ EC), the EMC Directive (2004/108/EC) and the LVD Directive (2006/95/EC) by application of: EN 60950-1:2006+A11:2009 EN 55024:1998+A1:2001+A2:2003 Appendixes 157 17 October, 2010 Joong-Hoon Choi / Lab. Manager (Place and date of issue) (Name and signature of authorized person) Declaration sentence in official languages Nation Declaration Cesky Samsung Electronics tímto prohlašuje, že tento digitální fotoaparát je ve shodě se základními požadavky a dalšími příslušnými ustanoveními směrnice 1999/5/ES. Dansk Samsung Electronics erklærer herved, at digitale kameraer overholder de væsentlige krav og øvrige relevante krav i direktiv 1999/5/ EF. Deutsch Hiermit erklärt Samsung Electronic, dass sich die Digitalkamera in Übereinstimmung mit den grundlegenden Anforderungen und den übrigen einschlägigen Bestimmungen der Richtlinie 1999/5/EG befindet. Eesti Käesolevaga kinnitab Samsung Electronics digitaalkaamera vastavust direktiivi 1999/5/EÜ põhinõuetele ja nimetatud direktiivist tulenevatele teistele asjakohastele sätetele. English Hereby, Samsung Electronics declares that this digital camera is in compliance with the essential requirements and other relevant provisions of Directive 1999/5/EC. Español Por medio de la presente Samsung Electronics declara que la cámara digital cumple con los requisitos esenciales y cualesquiera otras disposiciones aplicables o exigibles de la Directiva 1999/5/CE. Ελληνική ΜΕ ΤΗΝ ΠΑΡΟΥΣΑ η Samsung Electronics ΔΗΛΩΝΕΙ ΟΤΙ η ψηφιακή φωτογραφική μηχανή ΣΥΜΜΟΡΦΩΝΕΤΑΙ ΠΡΟΣ ΤΙΣ ΟΥΣΙΩΔΕΙΣ ΑΠΑΙΤΗΣΕΙΣ ΚΑΙ ΤΙΣ ΛΟΙΠΕΣ ΣΧΕΤΙΚΕΣ ΔΙΑΤΑΞΕΙΣ ΤΗΣ ΟΔΗΓΙΑΣ 1999/5/ΕΚ. Français Par la présente Samsung Electronic déclare que l'appareil photo numérique est conforme aux exigences essentielles et aux autres dispositions pertinentes de la directive 1999/5/CE. Italiano Con la presente Samsung Electronicsdichiara che questa fotocamera digitale è conforme ai requisiti essenziali e alle altre disposizioni stabilite dalla Direttiva 1999/5/CE. Latviski Ar šo Samsung Electronics deklarē, ka digitālā kamera atbilst Direktīvas 1999/5/EK būtiskajām prasībām un citiem ar to saistītajiem noteikumiem. Lietuvių Šiuo Samsung Electronics deklaruoja, kad šis skaitmeninis fotoaparatas, atitinka esminius reikalavimus ir kitas 1999/5/EB Direktyvos nuostatas. Nederlands Hierbij verklaart Samsung Electronics dat de digitale camera in overeenstemming is met de essentiële eisen en de andere relevante bepalingen van richtlijn 1999/5/EG. Appendixes 158 Declaration sentence in official languages Nation Declaration Malti Hawnhekk, Samsung Electronics, tiddikjara li din il-kamera diġitali hi konformi mar-rekwiżiti essenzjali u ma' dispożizzjonijiet rilevanti oħrajn ta' Direttiva 1999/5/KE. Magyar A Samsung Electronics kijelenti, hogy ez a digitális fényképezőgép megfelel az 1999/5/EK irányelv alapvetõ követelményeinek és egyéb vonatkozó elõírásainak. Polski Niniejszym firma Samsung Electronics oświadcza, że ten aparat cyfrowy jest zgodny z zasadniczymi wymogami oraz pozostałymi stosownymi postanowieniami Dyrektywy 1999/5/WE. Português Samsung Electronics declara que esta câmera digital está conforme os requisitos essenciais e outras disposições da Directiva 1999/5/CE. Slovensko Samsung Electronics izjavlja, da je ta digitalni fotoaparat v skladu z bistvenimi zahtevami in ostalimi relevantnimi določili direktive 1999/5/ES. Slovensky Samsung Electronics týmto vyhlasuje, že tento digitálny fotoaparát spĺňa základné požiadavky a všetky príslušné ustanovenia Smernice 1999/5/ES. Suomi Samsung Electronics vakuuttaa täten että tämä digitaalikamera on direktiivin 1999/5/EY oleellisten vaatimusten ja sitä koskevien direktiivin muiden ehtojen mukainen. Svenska Härmed intygar Samsung Electronicsatt dessa digitalkameror står i överensstämmelse med de väsentliga egenskapskrav och övriga relevanta bestämmelser som framgår av direktiv 1999/5/EG. Български С настоящото Samsung Electronics декларира, че този цифров фотоапарат е в съответствие със съществените изисквания и другите приложими разпоредби на Директива 1999/5/ЕК. Română Prin prezenta, Samsung Electronics, declară că această cameră foto digitală este în conformitate cu cerinţele esenţiale şi alte prevederi relevante ale Directivei 1999/5/CE. Norsk Samsung Electronicserklærer herved at dette digitalkameraet er i samsvar med de grunnleggende krav og øvrige relevante krav i direktiv 1999/5/EF. Türkiye Bu belge ile, Samsung Electronics bu dijital kameranın 1999/5/EC Yönetmeliginin temel gerekliliklerine ve ilgili hükümlerine uygun olduğunu beyan eder. Íslenska Hér með lýsir Samsung Electronics því yfir að þessi stafræna myndavél sé í samræmi við grunnkröfur og önnur ákvæði tilskipunar 1999/5/EB. Appendixes 159 Index A AF-assist light location 16 settings 132 AF Sound 129 AllShare 118 Aperture value 39 Auto Backup 123 Beauty Shot mode 39 Close up shot Close up mode 38 macro 60 Blink detection 65 Brightness Connecting to a computer Playback mode 95 Shooting mode 68 Mac 104 Windows 99 Burst modes auto exposure bracket 72 continuous 72 motion capture 72 C Camera maintenance 135 Camera specifications 146 A/V port 16 Battery caution 140 charging 19 inserting 18 E Editing photos 93 Editing videos Playback mode 95 Shooting mode 76 D Auto Exposure Bracket (AEB) 72 B Display set 25 capturing 91 trimming 91 Enlarging 88 Auto contrast balance (ACB) Playback mode 96 Shooting mode 68 Contrast Display brightness 130 Error messages 134 Date/Time set 131 Deleting files 87 F Charging 19 Digital Image Stabilization (DIS) 32 Face detection 63 Cleaning DIgital Print Order Format 97 camera body 135 lens 135 touch screen 135 Flash Digital zoom 31 Disconnecting the camera 103 Appendixes 160 auto 57 fill in 58 off 57 red-eye 58 red-eye fix 58 slow sync 58 Index Focus area center AF 62 multi AF 62 one touch shooting 62 smart touch AF 62 Focus sound 129 Formatting 132 I Icons Home screen 26 Playback mode 83 Shooting mode 22 Image adjustment brightness Intelli zoom 31 Motion recognition 82 ISO sensitivity 59 Movie Filter mode 47 My star L Language settings 131 Learning icons 22 Playback mode 95 Shooting mode 68 G Guide lines 129 H Half-press shutter 33 Home button 17 Home screen 26 contrast M ranking 83 registering 66 N Night Shot mode 39 Shooting mode 76 red-eye 97 saturation Playback mode 95 Shooting mode 76 sharpness 76 Image quality 54 Imprint 132 Intelli-studio 101 Macro 60 Magic Frame shot mode 45 Memory card caution 138 Insert 18 O Object Highlight mode 44 One touch shooting 62 Optional accessories 15 Metering center-weighted 70 multi 70 spot 70 P Palette effect mode 49 Photo Filter mode 45 Appendixes 161 Index PictBridge 105 Playback button 17 Playback mode 81 Power button 17 Power save mode 130 Printing photos 105 Program mode 40 Protecting files 87 Q Quick view 130 Reset 132 Resolution Playback mode 93 Shooting mode 53 Retouching faces Playback mode 96 Shooting mode 39 Rotating 94 Red-eye Playback mode 97 Shooting mode 57 Remote Viewfinder 116 Beauty Shot mode 39 blink detection 65 face detection 63 red-eye 58 red-eye fix 58 self portrait 64 Smart Face Recognition 65 smile shot 64 Shutter button 16 S Simple Shot mode 37 Saturation Slide show 89 Playback mode 95 Shooting mode 76 Scene mode 38 R Shooting portraits Self portrait shot 64 Service center 143 Settings 128 Sharpness 76 Smart Movie mode 42 Smile shot 64 Sound settings 25 Start image 93, 129 Status lamp 17 T Thumbnails 84 Timer timer lamp 16 Smart album 84 Time settings 20, 131 Smart Auto mode 36 Time zone settings 20, 131 Smart Crop 94 Touch calibration 21, 132 smart face recognition 65 Touch screen 17 Smart Filter Playback mode 95 Shooting mode 73 Appendixes 162 Index Transferring files Auto Backup 123 Camera to Camera 121 Email 111 Mac 104 Windows 99 Tripod mount 16 U Unpacking 15 USB port 16 User buttons 40 Using the touch screen V W Video playing 90 shooting 41 Viewing files page flip effect 85 slide show 89 smart album 84 thumbnails 86 TV 98 Vignetting mode 48 Voice memo playing 92 recording 50 Website Accessing 115 Uploading photos or videos 115 White balance 70 Wireless network 108 Z Zoom using the zoom 30 zoom button 16 zoom sound settings 77 flicking 23 scrolling 23 touching 23 Appendixes 163 Please refer to the warranty that came with your product or visit our website www.samsung.com/ for after-sales service or inquiries.