Download Zoom 9005 ZDTV Wireless Keyboard
Transcript
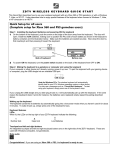
ZDTV WIRELESS KEYBOARD
QUICK START
This Quick Start describes how to use your wireless keyboard with any Windows 7, Vista, or XP computer. It also describes
how to enjoy special features of the keyboard when you use an HDMI cable to connect a Windows 7 or Vista computer’s HDMI
port to an HDTV.
Step 1: Installing the keyboard batteries
For Windows 7, Vista, and XP
Warning: Improper installation of the batteries may cause the keyboard to overheat.
You will need four AAA batteries. (These do not come with the keyboard.) On the bottom of the keyboard, find the little door
marked OPEN. Put your finger into the semi-circle near the edge of the door, and then push the center area on the edge of the
door toward the arrow and pull up. The door will open. Install four AAA batteries, making sure to properly orient the Plus side of
each battery as shown in the keyboard’s battery container and the illustration below. Make sure the batteries are seated
securely. Now close the door by first inserting its two feet and then pressing down on the edge near the semi-circle.
Push then lift
Step 2: Mating the keyboard to a computer
For Windows 7, Vista, and XP
If your computer isn’t already running, power it up now.
To pair the keyboard with your computer, first find the button on the USB dongle and the Reset button on the bottom of the
keyboard.
USB RESET
KEYBOARD RESET
Plug the USB dongle into a computer’s USB port. The wireless keyboard will automatically identify itself to your computer’s
Windows operating system. This will take about half a minute, during which you may see a message such as, “Installing
device driver software. Click here for status.” When the software is installed, you will get a message such as, “Your device
is ready to use. Device driver software installed successfully.” After that, press the button on the USB dongle briefly, and
within 10 seconds press the keyboard’s Reset button for at least 2 seconds. This will pair the computer with your keyboard. To
start using your keyboard, simply press one of the keyboard’s keys.
After you’ve done this once, your computer will always recognize your keyboard. If you unplug the USB dongle and you later
plug it back in, it will automatically pair up with the keyboard. Twenty-five or more seconds after you plug in the USB dongle,
you can press any key on the keyboard to re-activate it. If for some reason the keyboard doesn’t work (for instance the batteries
were replaced) simply repeat the pairing described above.
Waking up the keyboard
The keyboard conserves its batteries by automatically going into a low-power mode when you haven’t used it for about 5
minutes. To wake it back up, simply press one of the keyboard’s keys.
Special Touchpad features:
Goal
Move cursor
Left click
Middle click
Right click
Double left click
Drag
Vertical scroll
Action
Slide your finger
Tap one finger on the touchpad or use the left-click button
Tap two fingers on the touchpad
Tap 3 fingers on the touchpad or use the right-click button
Double tap one finger on the touchpad
Double tap the touchpad and then slide your finger
Slide 2 fingers vertically
Step 3: Connecting an HDTV to your computer
For Windows 7
If you have a Windows 7 computer with an HDMI port, we highly recommend that you try using the computer with an HDTV and
the wireless keyboard. This is particularly convenient with a notebook or small desktop computer. We want you to be able to
enjoy all your computer has to offer, including the Internet and Windows Media Center, from your favorite chair. Special
functions on the keyboard, including Magnify features, work with our software to make using it with an HDTV easy and fun.
1 Most HDTV sets have an HDMI port. If your HDTV does have an HDMI port, plug an HDMI cable into a free HDMI port on
the HDTV.
2 Plug the other end of the cable into an HDMI port on your computer. If all your HDTV’s HDMI ports are used, ZDTV may
have to share an HDMI input with a DVD player or other device. (If your Windows 7 computer does not have an HDMI port,
you can try connecting to an HDTV using a VGA or DVI video connection. You may get acceptable performance, depending
on the capabilities of your computer and HDTV, but some ZDTV features may not work correctly.)
3 Your HDTV remote or a button on your HDTV lets you select the TV’s normal input, your computer, or some other input as
the current input for your HDTV screen. Selecting your computer for the screen input is similar to selecting a DVD player.
Now press Source, Input, or a similarly-named button on your remote or HDTV to select your computer as the HDTV input.
Check to make sure that you see your computer’s Windows desktop on your HDTV.
4 You will see the message New Display Detected. Select Show my desktop on the external display only. Select Apply
and then select OK.
For Windows Vista:
Note: Windows Vista users with Desktop PCs should connect only the HDTV; no other monitor or display should be
connected at the same time.
1 Your PC may offer a DVI connector. If it does, use a DVI to HDMI cable to connect your PC to your HDTV. Otherwise, in
most cases, your PC will have a VGA port. Connect this port to a VGA input port on your HDTV.
When using an HDMI to HDMI cable, you will see the message New Display Detected. Select Show my desktop on the
external display only. Select Apply and then select OK.
2
3
Note: You will separately need to make an audio connection.
From your TV’s menu system, select the video input that you just connected to. If you have connected via VGA, often this
will be labeled “PC.”
Power up your computer if it isn’t already on. If you can’t see a display on your HDTV, or the picture doesn’t look ideal, go
to Step 5: Optimizing Screen Settings when you connect your PC to your HDTV. Then come back to Step 4:
Installing the ZDTV software. Otherwise, continue with Step 4: Installing the ZDTV software.
For Windows XP:
Note: Windows XP users with Desktop PCs should connect only the HDTV; no other monitor or display should be connected
at the same time.
1 In the vast majority of cases, your PC will have a VGA port. Connect this port to a VGA input port on your HDTV.
Note: You will separately need to make an audio connection.
2 From your TV’s menu system, select the video input that you just connected to. If you have connected via VGA, often this
will be labeled “PC.”
3 Power up your computer if it isn’t already on. If you can’t see a display on your HDTV, or the picture doesn’t look ideal, go to
Step 5: Optimizing Screen Settings when you connect your PC to your HDTV. Then come back to Step 4: Installing
the ZDTV software. Otherwise, continue with Step 4: Installing the ZDTV software.
Step 4: Installing the ZDTV software if you have a CD ROM drive in your computer
For Windows 7, Vista, and XP
Make sure your computer is on and connected to the Internet, and that you are logged on to an account with administrative
privileges. The CD that came with your keyboard should run automatically when inserted into your computer’s CD/DVD ROM
drive. If it does not, go to the Start menuÆ All ProgramsÆ AccessoriesÆ Run and type E:Setup.exe where E: is the letter
of your CD-ROM drive.
Follow the on-screen instructions to complete the software installation.
If the keyboard times out during any phase of the installation process, press the Fn key to re-activate the keyboard.
Note: If you get a message stating “This program might not have installed correctly" you should click on “This program installed
correctly”.
If you are prompted to enter a 4-character Activation Code during software installation, please enter the appropriate code for
your country/region from the table below. If a dialog box appears to upgrade ZDTV, select Upgrade Now and click
Continue.
Activation Codes
Country / Region
Code to enter
US
UK
Spain
Latin America
ZDTV
72UK
ZDSP
ZDLN
Installing ZDTV software if you don't have a CD ROM drive in your computer
You will need to download the ZDTV software from the Zoom website. Make sure your computer is connected to the Internet.
Open a browser and type http://zdtv.zoomtel.com/download in your browser's address bar.
Follow the on-screen instructions to download and install the software on your computer.
If the keyboard times out during any phase of the installation process, press the Fn key to re-activate the keyboard.
Step 5: Optimizing Screen Settings when you connect your PC to your HDTV
For Windows 7
Double-click the ZDTV icon on your Windows desktop to launch the ZDTV software that was installed. The first time you do
this, the Screen Setup Wizard that was installed on your desktop when you ran the ZDTV CD will run. Answer the Wizard’s
simple questions to set up your computer for your HDTV. If you are using a notebook, keep the lid open while you do this. The
ZDTV wizard will turn off your notebook’s screen and adjust video settings for the best possible picture on your HDTV.
You may be asked to change your HDTV’s video setting for the HDTV input that connects to your computer. Depending on the
model of your TV, you may find HDTV screen adjustment settings under one of these video menu titles: Aspect, Format,
Picture Format, Screen, Picture Size, Size, Viewing Modes, View Mode. If you select one of the above, you will see another
list of menu options which will typically include one or more of the following 1:1, 16/9, Aspect, Dot-by-Dot, Full Pixel, Just
Scan, Native, Pixel-by-Pixel, and Screen Fit. Try any of these options that you see on your TV’s menu until you find the
optimal setting.
If you still have problems with the display - for example, only part of the items located at the edge of the screen are visible, such
as the Start button in Windows (or the circles in squares in the test screen) - try turning off an "overscan" setting. This may be
called overscan, cropping, or something similar. An overscan or cropping setting is likely to appear in a menu close to the
one that controls the screen settings we described above.
If you are using a notebook and you disconnect the HDMI cable from your HDTV, your notebook’s screen will turn on whenever
the notebook is On. Whenever you reconnect your HDTV to your notebook, your notebook will automatically adjust its video
display to turn off the local display and generate the optimal display for your HDTV. You should not have to run the ZDTV
Wizard again unless you use a different HDTV.
If you connect a notebook to your HDTV, ZDTV software ensures that the notebook will not go to standby or shut down
automatically even if the notebook’s cover is closed. This makes it easy to tuck the notebook into a convenient place. If you use
a desktop computer, ZDTV will leave alone any power mode settings you may have set.
If you connect your notebook to a different HDTV, the Screen Setup Wizard may run again. If you need to adjust the screen,
click Help. Go to Adjust Screen from the ZDTV menu.
Please continue with Step 7: Using your notebook computer with an HDTV.
For Windows Vista users with Notebook or Desktop PCs
This process may require you to make adjustments to the display settings on your PC and to the Screen or Picture settings on
your HDTV. When you are done you should have the highest resolution picture possible and it should fit neatly within your
display.
Note: Windows Vista users with Desktop PCs should connect only the HDTV; no other monitor or display should be connected
at the same time.
Click Start Æ (Settings) Æ Control Panel Æ Appearance and Personalization Æ Personalization Æ Display Settings. (in
Category View)
FOR DESKTOPS ONLY: Continue with Step 6: Adjusting Your Screen Settings.
FOR NOTEBOOKS ONLY: From Display Settings select your HDTV from the drop-down menu. Select the checkbox “This is
my main monitor”. Then select the notebook screen from the drop-down menu. Un-check the box “Extend the desktop
onto this monitor”.
Alternatively, depending on your notebook, you can press the Fn key and F2 or F4 or whichever key has an icon of a screen or
the words CRT/LCD on it to make the HDTV the main display.
Continue with Step 6: Adjusting Your Screen Settings.
For Windows XP users with Notebook or Desktop PCs
This process may require you to make adjustments to the display settings on your PC and to the Screen or Picture settings on
your HDTV. When you are done you should have the highest resolution picture possible and it should fit neatly within your
display.
Note: Windows XP users with Desktop PCs should connect only the HDTV; no other monitor or display should be connected at
the same time.
FOR DESKTOPS ONLY: Click Start Æ (Settings) Æ Control Panel Æ Appearance and Themes Æ Display Æ Settings. (in
Category View)
FOR NOTEBOOKS ONLY: On your notebook’s keyboard, press the Fn key and F2 or F4 or whichever key has an icon of a
screen or the words CRT/LCD on it to make the HDTV the main display. If you press the same set of keys a second time, both
monitors will function. If you press the same set of keys a third time, only the notebook monitor will have a display.
Continue with Step 6: Adjusting Your Screen Settings.
Step 6: Adjusting Your Screen Settings
For Windows Vista and XP
Check your TV’s documentation to find its resolution. This will be either 720p or 1080i or 1080p.
If your TV is a 720p device, set your PC’s screen resolution to one of the following
widescreen resolutions: 1280x720, 1280x768, or 1360x768. If you don’t see one of these resolutions, your PC’s graphics card
may not support widescreen resolutions. You can set the resolution to a standard 4:3 resolution, leaving black columns to either
side of the display. The preferred resolution in this case is: 1024x768.
If your TV is a 1080i or 1080p device, set your PC’s screen resolution to one of the following widescreen resolutions:
1920x1080, 1600x900, 1440x810, 1360x768, or 1280x720. If you don’t see one of these resolutions, your PC’s graphics card
may not support widescreen resolutions. You can set the resolution to a standard 4:3 resolution, leaving black columns to either
side of the display. Preferred resolutions in this case are: 1400x1050 or 1280x1024.
1 From the Display Settings (for Windows Vista users) or Settings (for Windows XP users) dialog, adjust the screen
resolution slider to match your HDTV’s resolution.
2
3
4
Look at the display on your HDTV. There are two kinds of problems that you may notice. The first is that the image may not
fit well on the display. The second is that shapes and text may be stretched in one direction or another. If you notice one of
these issues, follow these instructions to make adjustments: Depending on the model of your TV, you may find HDTV
screen adjustment settings under one of these video menu titles: Aspect, Format, Picture Format, Screen, Picture
Size, Size, Viewing Modes, View Mode. If you select one of the above, you will see another list of menu options which will
typically include one or more of the following 1:1, 16/9, Aspect, Dot-by-Dot, Full Pixel, Just Scan, Native, Pixel-by-Pixel,
and Screen Fit. Try any of these options that you see on your TV’s menu until you find the optimal setting.
If you still have problems with the display - for example, only part of the items located at the edge of the screen are visible,
such as the Start button in Windows (or the circles in squares in the test screen) - try turning off an "overscan" setting. This
may be called overscan, cropping, or something similar. An overscan or cropping setting is likely to appear in a menu
close to the one that controls the screen settings we described above.
If it is impossible to rectify the image, try using a smaller resolution on the PC, and if necessary come back to the TV screen
adjustments.
Step 7: Using your notebook computer with an HDTV
For Windows 7, Vista, and XP
Here we assume:
•
You have already plugged an HDMI cable into your HDTV, so that one end is connected. The other end is open and
waiting for your notebook to be plugged in.
•
Your notebook has ZDTV software installed and properly set for your HDTV.
When you want to use ZDTV, plug the wireless keyboard’s USB dongle into an available USB port on your computer. (If
possible, keep the dongle as far away from other wireless devices as possible.) Then plug the loose end of the HDMI cable into
your computer. If your computer is a notebook and you close it now, ZDTV software knows not to shut down your notebook’s
operation. Put the computer in a good place, where it won’t fall or overheat.
Step 8: Using the keyboard with an HDTV
For Windows 7, Vista, and XP
ZDTV provides browser software that is designed to help you find and enjoy streaming media and other Internet sites for viewing
on your HDTV. However, you do not need to use ZDTV browser software to enjoy the Internet or any of the features of your PC
on your HDTV. You can still use the magnify features on Windows 7 and Vista by pushing the magnify buttons on the keyboard.
To launch the ZDTV browser (anytime after the one-time setup is completed), you can double-click the ZDTV icon on your
Windows desktop. You can also launch the ZDTV browser by pressing these 2 buttons at the same time when the magnify
function is off:
.
To exit ZDTV browser software (anytime after the one-time setup is completed), you have 3 options. You can,
1. move your mouse over Help on the left side of the screen and click on Exit ZDTV, or
2. move your mouse to the extreme right edge of the screen below the ZDTV logo and let it hover for several seconds (or press
F2) and move your mouse over Now Playing. Then click on Exit ZDTV, or
3. press F10 to exit.
Now pick up the wireless keyboard, hit a key to make sure that it’s awake, sit in your favorite chair, and enjoy!
You can use your wireless keyboard like any Windows keyboard. However, note the special buttons below on your wireless
keyboard for making the Internet, Windows Media Center, and Windows Media Player more enjoyable.
Windows Media Center
Play / Pause for Media Center/Player
Windows Media Player
Stop for Media Center / Player
Open Home Page
Mute – any audio
Magnify On/Off
Volume increase – any audio
Magnification Level/Box size
Volume decrease – any audio
ZDTV Magnify
For Windows 7 and Vista
The ZDTV wireless keyboard has special Magnify features so you can even see fine print from your favorite chair. The buttons
for controlling these features are shown below. They are the two buttons to the lower left of the touchpad and also the keyboard
buttons that are outlined with a box (Fn, the four arrow keys, and End).
Magnify Button summary
Magnify On/Off:
Magnification
Level / Box size:
Turn Magnify function ON or OFF.
When Magnify is switched on, initially the Fn key
controls the magnification level inside the Magnify
Box as described below.
When the Magnification Level / Magnification Box
button is pressed once, the Fn key now controls
the size of the Magnify Box as described below.
Each button press toggles between controlling
Magnification Level and controlling the Magnify
Box size.
When Magnify is ON, you hold down the Fn key and press an arrow to either control the magnification level inside the
Magnify Box or to change the Magnify Box size, as follows:
Magnification Level
Magnify Box size
Coarse Increase
Grow Vertically
Coarse Decrease
Shrink Vertically
Fine Increase
Grow Horizontally
Fine Decrease
Shrink Horizontally
Magnify Box Fullscreen
or not Fullscreen
(toggles)
Magnify Box Fullscreen
or not Fullscreen (toggles)
Note: For best magnification results, you must run Aero Themes under Windows 7.
When Magnify is OFF, you can hold down the Fn key and End to launch the ZDTV browser, as follows:
.
These buttons are easy to use. Please try them now.
For Windows XP
The ZDTV wireless keyboard has special Magnify features so you can even see fine print from your favorite chair. The buttons
for controlling these features are shown below. They are the two buttons to the lower left of the touchpad.
Note: To use the Magnify features in Windows XP, you must use the ZDTV browser software.
Magnify Button summary
Magnify On/Off:
Press this button multiple times to zoom in /
increase magnification.
Magnification Level /
Box size:
Press this button to restore the default
magnification.
For Windows 7, Vista, and XP
To uninstall ZDTV software
In the unlikely event that you need to uninstall ZDTV software, go to the Start menu and select All Programs and then Zoom.
Click on ZDTV Uninstall and follow the on-screen instructions. Otherwise, go to the Start menu and select Control Panel.
Under Add or Remove Programs, click on Uninstall A Program and follow the on-screen instructions.
To reinstall ZDTV
To reinstall ZDTV software, follow the instructions above to uninstall the current version and then go to Step 4: Installing the
ZDTV software.
Getting Help
If your keyboard isn’t responding, try pressing a key. If that doesn’t work, take out the batteries and then put them back, and
then try the keyboard again.
Help is available through the Help listing in the ZDTV browser software, or at http://zdtv.zoomtel.com/help
This Quick Start and other important documentation are available on your CD in the Documentation and Support folders.
We can support you best if you register your product at www.zoomtel.com/register
We have many ways to assist you, and you can see them at www.zoomtel.com/techsupport
FCC Compliance Statement
This device complies with Part 15 of the FCC Rules. Operation is subject to the following two conditions: (1) This device may not cause harmful interference, and (2) This
device must accept any interference received, including interference that may cause undesired operation.
FCC WARNING
This equipment has been tested and found to comply with the limits for a Class B digital device, pursuant to part 15 of the FCC Rules. These limits are designed to provide
reasonable protection against harmful interference in a residential installation. This equipment generates, uses, and can radiate radio frequency energy and, if not installed
and used in accordance with the instructions, may cause harmful interference to radio communications. However, there is no guarantee that interference will not occur in a
particular installation. If this equipment does cause harmful interference to radio or television reception, which can be determined by turning the equipment off and on, the
user is encouraged to try to correct the interference by one or more of the following measures:
- Reorient or relocate the receiving antenna.
- Increase the separation between the equipment and receiver.
- Connect the equipment into an outlet different from that to which the receiver is connected.
- Consult the dealer or an experienced radio/TV technician for help.
CE Declaration of Conformity
This equipment is intended to be used in all Europe and EFTA countries. Hereby Zoom Telephonics declares that this product is in conformity with European R&TTE
Directive (1999/5/EC).
Declaration of Conformity
Declaration of Conformity
Declaração de Conformidade
Manufacturer/Fabricant/Fabricante/
Brand/Marque/Marca
Déclaration de conformité
Declaración de conformidad
Zoom Telephonics, Inc.
207 South Street
Boston, MA 02111 USA / 617-423-1072
www.zoomtel.com
Zoom Wireless Keyboard
Model 9005
Type/Tipo
The manufacturer declares under sole responsibility that this equipment is compliant to Directive 1999/5/EC (R&TTE) via the following. This product is CE marked.
Le constructeur déclare sous son entière responsabilité que ce matériel est conforme à la Directive 1999/5/EC (R&TTE) via les documents ci-dessous. Ce produit a reçu le
marquage CE.
O fabricante declara sob sua exclusiva responsabilidade que este equipamento está em conformidade com a Directiva 1999/5/EC (R&TTE) através do seguinte. Este
produto possui Marcação CE.
El fabricante declara bajo su exclusiva responsabilidad que este equipo satisface la Directiva 1999/5/EC (R&TTE) por medio de lo siguiente. Este producto tiene marca CE.
EN 60950-1:2006; EN50371:2002
EN 301 489-1 V 1.8.1 (2008-04)
EN 301 289-3-V 1.4.1 (2002-08)
EN 300 440-1 V1.3.1 (2001-09)
EN 300 440-2 V1.1.2 (2004-07)
Director, /Directeur, /Director, /Director
Paul Prohodski
31 August, 2010
1078/TF, Boston, MA, USA
2430-A
27650
©2010


