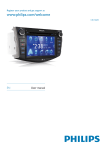
Download Philips Car infotainment system CID3693
Transcript
Register your product and get support at www.philips.com/welcome EN User manual ZH-HK Ԛ͂ʹ˫ ZH-CN Ⴌ߀൱Ҭ CID3693 ႹႹݡ༂ᇍࠋჱෑ Hazardous/toxic Substance Ҋࡵӯ Name of the Parts ( ܌Hg, Mercury) ᬄ (Cd, cadmium) ࡒ۴ أᜌ৷Ъ أᜌفЪ (Pb, Lead) (Chromium 6+) (PBB) (PBDE) O O O O O O DVD/CD loader DVD/CD ܿދ X O O O O O LCD Panel X X O O O O X O O O O O X O O O O O X O O O O O Housing ధ ທक़ ၅ࣚ૯ϴ PWBs ϴቊࡵ Accessories (Remote control & cables) ࡵڼIJီ३చĶ ჻ཐĶ৹ࢨཐij Batteries in Remote Control (ZnC) ီ३చԁ ¾ńњ൙ۂႹႹݡ༂ᇍᄡۂҊࡵෲႹबᇍҏਜᇓ֩ݧबᄡSJ/T11363 - 2006 їም݃֩ཏဵၟ༳ O: Indicates that this toxic or hazardous substance contained in all of the homogeneous materials for this part is below the limit requirement in SJ/T11363 ķ 2006. ńњ൙ۂႹႹݡ༂ᇍᇄഖᄡۂҊࡵ֩ଚ၆बᇍҏਜᇓ֩ݧӕԟSJ/T11363 ķ 2006 їም݃֩ཏဵ X: Indicates that this toxic or hazardous substance contained in at least one of the homogeneous materials used for this part is above the limit requirement in SJ/T11363 - 2006. ߐАൔႬཏ Environmental Protection Use Period This logo refers to the period ( 10 years ) ሴྔ༓ӅᇓݧႹ֩ႹႹݡ༂ᇍࠋჱෑᄡᆢӌൔႬ֩์ࡵ༳҆ߺكഷທྈࠋёĶሴྔ༓ӅႬ߀ൔ Ⴌۂሴྔ༓Ӆ҆ߺࣦߐؗᄳӲᇛಝࠋؗఇಪപґӅᄳӲᇛ ෩֩ݡཏ This logo refers to the period ( 10 years ) during which the toxic or hazardous substances or elements contained in electronic information products will not leak or mutate so that the use of these [substances or elements] will not result in any severe environmental pollution, any bodily injury or damage to any assets. 1 Important Safety Notice 4 4 4 Pair the Bluetooth-enabled devices Make a call Answer call Listen to music from Bluetooth device Adjust Bluetooth settings 8 Adjust sound 2 Your in-car entertainment system Introduction What’s in the box Overview of the main unit 3 Get started Install the car audio Turn on Adjust screen Set date and time 4 Use map Upgrade the map 5 Listen to radio Tune to a radio station Store radio stations in memory Tune to a preset station 6 Play Load discs Connect USB device Insert USB or SD/MMC card Play/Pause Skip/search Search within a title/folder Repeat Repeat a section Random play Select audio language Select audio mode Select subtitle language Rotate pictures Zoom Select slide show duration 6 6 6 7 9 9 12 12 12 14 14 15 15 15 15 16 16 16 16 17 17 17 18 18 18 19 19 19 19 19 19 20 20 20 21 21 21 22 22 22 22 23 Adjust volume Mute Adjust fader/balance Set Dynamic Bass Boost (DBB) 9 Adjust settings 23 23 23 24 25 25 26 26 Display system setup menu Adjust general settings Adjust video settings Adjust Bluetooth settings Adjust language settings Adjust volume settings Adjust DVD rating 10 Air conditioning 27 27 27 Turn on automatic climate control Adjust climate control settings 11 CD compartment controls 28 12 Others Listen to other devices Reset Remove the unit Replace fuse 28 28 28 29 30 13 Product information 30 14 Troubleshooting 32 32 About Bluetooth device 15 Glossary 34 EN 3 English 7 Play with Bluetooth device Contents 1 Important • Do not place any sources of danger on the apparatus (e.g. liquid filled objects, lighted candles). Safety • • • • • • • • • • • • • • • 4 Read and understand all instructions before you use the apparatus. If damage is caused by failure to follow instructions, the warranty does not apply. Use of controls or adjustments or performance of procedures other than herein may result in hazardous radiation exposure or other unsafe operation. This unit is designed for negative ground (earth) 12 V DC operation only. To reduce the risk of traffic accident, do no watch video during driving. To ensure safe driving, adjust the volume to a safe and comfortable level. Improper fuses can cause damage or fire. When you need to change the fuse, consult a professional. Use only the supplied mounting hardware for a safe and secure installation. To avoid short circuit, do not expose the apparatus, remote control or remote control batteries to rain or water. Never insert objects into the ventilation slots or other openings on the apparatus. Never place any objects other than discs into the disc tray/slot. Visible and invisible laser radiation when open. Avoid exposure to beam. Risk of damage to the screen! Never touch, push, rub or strike the screen with any object. Never use solvents such as benzene, thinner, cleaners available commercially, or anti-static sprays intended for discs. Clean the apparatus with soft, damp cloth. Never use substances such as alcohol, chemicals or household cleaners on the apparatus. The apparatus shall not be exposed to dripping or splashing. EN Notice Any changes or modifications made to this device that are not expressly approved by Philips Consumer Lifestyle may void the user’s authority to operate the equipment. Environmental information All unnecessary packaging has been omitted. We have tried to make the packaging easy to separate into three materials: cardboard (box), polystyrene foam (buffer) and polyethylene (bags, protective foam sheet.) Your system consists of materials which can be recycled and reused if disassembled by a specialized company. Please observe the local regulations regarding the disposal of packaging materials, exhausted batteries and old equipment. Recycling Your product is designed and manufactured with high quality materials and components, which can be recycled and reused. When you see the crossed-out wheel bin symbol attached to a product, it means the product is covered by the European Directive 2002/96/EC: Never dispose of your product with other household waste. Please inform yourself about the local rules on the separate collection of electrical and electronic products. The correct disposal of your old product helps prevent This product complies with the radio interference requirements of the European Community. The making of unauthorized copies of copy-protected material, including computer programs, files, broadcasts and sound recordings, may be an infringement of copyrights and constitute a criminal offence. This equipment should not be used for such purposes. Manufactured under license from Dolby Laboratories. “Dolby” and the double-D symbol are trademarks of Dolby Laboratories. Other trademarks and trade names are those of their respective owners. This apparatus includes this label: 2010 © Koninklijke Philips Electronics N.V. All rights reserved. Specifications are subject to change without notice. Trademarks are the property of Koninklijke Philips Electronics N.V. or their respective owners. Philips reserves the right to change products at any time without being obliged to adjust earlier supplies accordingly. “DivX, DivX” Certified, and associated logos are trademarks of DivX, Inc. and are used under license. Offical DivX® Certified product. Plays all versions of DivX® video (including DivX® 6) with standard playback of DivX® media files. The Bluetooth® word mark and logos are registered trademarks owned by Bluetooth SIG, Inc. and any use of such marks by Philips is under license. EN 5 English potentially negative consequences on the environment and human health. Your product contains batteries covered by the European Directive 2006/66/EC, which cannot be disposed of with normal household waste. Please inform yourself about the local rules on separate collection of batteries. The correct disposal of batteries helps prevent potentially negative consequences on the environment and human health. 2 Your in-car entertainment system Congratulations on your purchase, and welcome to Philips! To fully benefit from the support that Philips offers, register your product at www.philips.com/welcome. What’s in the box Check and identify the contents of your package: a b c d e f g h Introduction With the car entertainment system, you can: • quickly find routine through the navigation system • enjoy audio/video/JPEG pictures from • DVD, VCD or CD • USB devices • SD/SDHC/MMC cards • External devices • listen to FM or AM (MW) radio • play audio from Bluetooth-enabled devices • make/answer phone calls with Bluetoothenabled devices i a Main unit b Power cable c AV OUT cable d MZ-TFT/Video out 2 cable e AV IN cable f GPS antenna g Cleaning cloth h Printing materials (include User manual, Quick start guide, Installation guide) i QC card / Guarantee card 6 EN English Overview of the main unit q p a o b n c m d e f l k j i h g a TUNE/ SELECT • Skip to the previous/next title, chapter, or track. • Confirm an entry or selection. • Start, pause or resume play. d AV IN/MAP • Open the cover and connect or remove the AV IN device. • Open the cover and insert or remove the GPS map card. b e Disc slot • c Eject a disc. / • f • TEMP Adjust the temperature. Open the cover and insert or remove the USB storage device/ SDHC card. EN 7 g CLIMATE • Access the air conditioning interface. h • Select in-car air recycling system/air refreshing system. • Turn on the rear window defroster. • Turn on the windscreen defroster. i j k AUTO • Turn on the automatic climate control mode. l • Turn off the air conditioner. m DISP/ / • Adjust screen brightness. • Turn on/off the screen display. n NAVI • Enter the GPS navigation system or exit. o MENU • Return to the home menu. p • • • /MUTE/VOL Turn the unit on or off. Mute or unmute audio. Adjust volume. q • 8 EN Built-in microphone for phone calls. Caution • Use of controls or adjustments or performance of procedures other than herein may result in hazardous radiation exposure or other unsafe operation. Always follow the instructions in this chapter in sequence. Notes on speaker connection • Never connect speaker wires to the metal body or chassis of the car. • Never connect speaker wires with stripes to one another. Connect wires Caution • Ensure that all loose leads are insulated with electrical tape. 1 Install the car audio Check the car’s wirings carefully, then connect them to the unit. These instructions are for a typical installation. However, if your car has different requirements, make the corresponding adjustment. If you have any questions regarding installation kits, consult your Philips car audio dealer. Caution • This unit is designed for negative ground (earth) 12 V DC operation only. • Always install this unit in the car dashboard. • • • • • • • Other locations can be dangerous as the rear of the unit heats up during use. To avoid short-circuit: before you connect, ensure that the ignition is off. Ensure that you connect the yellow and red power supply leads after all other leads are connected. Ensure that all loose leads are insulated with electrical tape. Ensure that the leads do not get caught under screws orin parts that will move (e.g. seat rail). Ensure that all ground (earth) leads are run to a common ground (earth) point. Use only the supplied mounting hardware for a safe and secure installation. Improper fuses can cause damage or fire. When you need to change the fuse, consult a professional. Note on the power supply lead (yellow) • When you connect other devices to this system, ensure that the rating of the car circuit is higher than the total fuse value of all the connected devices. EN 9 English 3 Get started 0DLQXQLW ޮԬଇ *36DQWHQQD ڧᇽႻၿൿೊ 5HG :KLWH <HOORZ ڧᇽ൮ൿೊ ڧᇽቔၿൿೊ %ODFN 3,1 WRRULJLQDO GLVSOD\VFUHHQ REVERSE PARKING <HOORZ CAMERA CVBS $9V\VWHP $8; 3,1 WRRULJLQDO&' SOD\HU <HOORZ ޮ൮ൿԟ 3,1 WRRULJLQDO&' SOD\HU <HOORZ 5HDUVFUHHQ ޮ൮ൿԟ 5HG :LUHOHVVKHDGSKRQH ޮႻၿൿԟ :KLWH ޮቔၿൿԟ WR&$1ER[ Connect GPS antenna To receive signal from satellites, connect the supplied GPS antenna to the system and your car. 1 Connect the supplier GPS antenna to the system. 10 EN 3,1 WRRULJLQDOLQFDU V\VWHP 3,1 WRRULJLQDOLQFDU V\VWHP English 2 Stick the other end of the GPS antenna to a metal surface of the car. Mount in the dashboard 4 Fix the mounting brackets (removed from the original in-car system) to the left and right side panels of the main unit. 5 Fix the exhaust outlets of the original airconditioner to the two openings. Note • Check wire connections before you mount the main unit into a car. • If preset radio stations are lost when the ignition key is turned OFF and then back ON, reconnect the red leads crosswise to the yellow ones. 1 If the car does not have an on-board drive or navigation computer, disconnect the negative terminal of the car battery. • If you disconnect the car battery in a car that has an on-board drive or navigation computer, the computer may lost its memory. • If the car battery is not disconnected, to avoid short-circuit, ensure that bare wires do not touch each other. 2 Ensure that the horizontal slant of the car dashboard opening is between 0 and 20 degrees. The unit cannot be used if the dashboard opening’s slant angle is above 20 degrees. 3 Fix the plastic clips and base support (removed from the original in-car system) to the main unit. EN 11 Turn on Caution • Risk of road accidents! Never watch video or adjust settings while you drive. 6 1 Press and hold /MUTE/VOL to turn on the unit. » The available OSD (On-Screen Display) languages are displayed. 2 Tap a language to select. » The OSD language is changed to the selected language immediately. • To turn off the unit, press and hold / MUTE/VOL. Fix the hazard warning switch (removed from the original in-car system) to the main unit. f Adjust screen To adjust screen brightness 7 Slide the unit into the dashboard and fix it to the car. 8 Reconnect the negative terminal of the car battery. 1 Press DISP/ / bar. 2 3 Tap / to adjust the value. • EN Press DISP/ / to confirm. To turn on/off the screen, press and hold DISP/ / . Set date and time 1 12 to show the brightness Tap to display home menu. 2 3 1 2 Tap [Time]. 3 Tap English Set time Tap on the displayed time. » A submenu is displayed. Tap [Settings]. Tap [Time]. » The date/time setup menu is displayed. or to set hour and minute. Tip • When date/time is set, tap to return to main menu. Set date 1 2 3 Tap [Date]. Tap on the displayed date information. » A submenu is displayed. Tap or to set year, month and day. Set clock mode 1 Tap [Clock mode]. 2 Tap on [12Hr] or [24Hr] to select clock mode. EN 13 4 Use map Note • You may need to upgrade the map (sold separately) before using it (see “Upgrade the map” section). 1 In the main menu, tap [Navigation]. » The navigation menu is displayed in a few seconds. 2 See the map manual to operate the navigation tool. Tip • You can press NAVI to enter/exit the navigation system. Upgrade the map 1 2 3 Turn off the car audio system. 4 Take out the card and bring it to the authorized service center for upgrade. 5 Insert the upgraded map card back into the map card slot. 14 EN Open the AV-IN/MAP socket cover. Press the map card (sold separately) until you hear a click sound. 6 Turn on the in-car system. » The map upgrades in a few minutes. 4 Tap one of the channels 01 to 06 to save the selected band. Tune to a radio station 1 2 Tap to display the home menu. Tap [Radio]. » Band and frequency information is displayed. Store stations automatically You can search for a station with intro search, which broadcasts a 10-second preview of each detected radio station. 3 Tap on FM or AM to select band: • FM band options: FM1, FM2, FM3 • AM band options: AM1, AM2 4 Briefly tap or to tune to a radio station by step. • Tap or for more than 1 second to tune to a radio station automatically. Store radio stations in memory 1 2 3 Select band. Tap . Tap [Search]. » Auto search starts. The six strongest stations of the selected band are saved in preset channels 1-6 automatically. Tune to a preset station 1 2 3 Tap [Radio]. Select band. Tap one of the preset channels (01 to 06) to select a preset station. You can store up to 6 stations in each band. Store stations manually 1 2 3 Tune to a station. Tap . Tap [Save]. EN 15 English 5 Listen to radio 6 Play Connect USB device Note Load discs • Ensure that the device contains playable content. You can play video, audio or images stored on the following discs: • DVD video, DVD-R, DVD-RW • VCD • Audio CD, CD-R, CD-RW 1 2 Open the USB/SDHC socket cover. Insert the USB storage device to the USB socket. » Play starts automatically. Note • Ensure that the disc contains playable content. 1 Insert a disc into the disc slot with the label side facing up. » Play starts automatically. Remove the USB device 1 2 » To remove the disc, press . » When the disc is ejected, the unit switches to the previous source, if connected. Otherwise, the unit switches to [Radio] mode automatically. Switch to another (non-USB) source. Remove the USB storage device. Insert USB or SD/MMC card Note • Ensure that the device contains playable content. • The unit supports SDHC card. 1 2 16 EN Open the USB/SDHC socket cover. Insert the SD/MMC card into the card slot. » Play starts automatically. Tap one of below icons to select folder/ file: • • • Remove the SD/MMC card 1 2 3 Switch to another source. Press the card until you hear a click sound. » The card is now disengaged. Remove the SD or MMC card. 3 4 English 2 : To display all available audio folders/track. : To display all available picture folders/files. : To display all available video folders/files Tap or to select a folder/track. Tap to start play. Search within a title/folder For audio files: Play/Pause 1 1 Tap . » The search screen is displayed. 2 Tap the numbers to input track/file number, then tap . • To clear the previous input, tap • To clear all input, tap . Once a disc, USB or SD/MMC card is inserted, play starts automatically. For DVD movie, if a menu appears, tap a item to start play. 2 To pause, tap . • To resume play, tap . Skip/search 1 Tap to return to playlist menu. . For video files: 1 Tap anywhere except for the upper left corner to display menu on the screen, if necessary. 2 3 Tap , and then tap . Tap to search by chapter/track or to search by time. EN 17 4 Tap the numbers to input track/file number or time, then tap . • To clear all input, tap . For MP3/WMA files: 1 Repeat During play, you can select different repeat play modes. During play, tap to select: • -1: play the current track repeatedly. • -Folder: play all the tracks in the current folder repeatedly. • (in grey color): cancel repeat play. Repeat a section For DVD/VCD movie disc: 1 2 3 Tap anywhere except for the upper left corner to display menu on the screen, if necessary. Tap 18 Tap to select: • [Repeat chapter]: play the current chapter repeatedly. • [Repeat title]: play all chapters in the title repeatedly. • [Repeat off]: cancel repeat play. Tap to select: • [Repeat one]: play the current track repeatedly. • [Repeat all]: play all tracks repeatedly. • [Repeat off]: cancel repeat play. EN 1 During play, tap anywhere except for the upper left corner to display menu on the screen, if necessary. 2 Tap to display the 2nd menu, if necessary. 3 Tap repeatedly to mark: • [Repeat A-]: the start of the section to repeat. • [Repeat A-B]: the end of the section to repeat. • The selected section plays repeatedly. 4 To exit A-B repeat mode, tap repeatedly until [Repeat A-B off] is displayed. to display the 2nd menu. For VCD karaoke: 1 You can repeat a specific section of video file (repeat A-B). Random play You can play audio tracks/files in random order. 1 During play, tap repeatedly to turn random play on or off. • is highlighted: start random play. • turns gray: cancel random play. For VCD: • [Shuffle on]: start random play. • [Shuffle off]: cancel random play. English Select audio language For video discs that contain two or more audio channels. 1 During play, tap anywhere except for the upper left corner to display menu on the screen, if necessary. 2 3 Tap to display the 2nd menu. Tap repeatedly. » The audio channel information is displayed on the upper line of the screen. 2 1 During play, tap anywhere except for the upper left corner to display menu on the screen. 2 Tap repeatedly until the audio mode is selected. repeatedly to rotate the picture. Zoom You can zoom in pictures for a close view. 1 During picture viewing, tap anywhere except for the upper left corner to display menu on the screen, if necessary. 2 Tap 3 Tap , , or to pan through the enlarged picture. Select audio mode When you play VCDs, you can select an audio mode (R/L/Stereo). Tap Select subtitle language repeatedly to zoom in the picture. For DVD or DivX discs that contain two or more subtitle languages. Select slide show duration 1 During play, tap anywhere except for the upper left corner to display menu on the screen, if necessary. 1 2 3 Tap anywhere except for the upper left corner to display menu on the screen, if necessary. Tap 2 Tap repeatedly to select: • Fast: 3 seconds • Normal: 5 seconds • Slow: 8 seconds to display the 2nd menu Tap repeatedly to select a language. » The selected language is displayed. Rotate pictures 1 When you view pictures, tap anywhere except for the upper left corner to display menu on the screen, if necessary. EN 19 7 Play with Bluetooth device You can make or receive phone calls with Bluetooth-enabled phones through the unit. You can also listen to music from a Bluetoothenabled device. Pair the Bluetooth-enabled devices Disconnect Bluetooth devices 1 To disconnect one device, tap » (green) is displayed. (red). Tip • The device will also be disconnected when the device is moved beyond the operational range. • If you want to reconnect the device to the To connect your Bluetooth device to the unit, you need to pair the device to the unit. Pairing needs only to be done once. You can pair up to eight devices. unit, place it within the operational range. • If you do not want to reconnect the device to the unit automatically, tap >[Auto connect], then select [Off]. For details, see the “Adjust Bluetooth settings” section. Note • The operational range between this unit and a • • • • Bluetooth device is approximately 10 meters (30 feet). Before you connect a Bluetooth device to this unit, familiarize yourself with the Bluetooth capabilities of the device. Compatibility with all Bluetooth devices is not guaranteed. Any obstacle between this unit and a Bluetooth device can reduce the operational range. Keep this unit away from any other electronic device that may cause interference. 1 Turn on the Bluetooth function on the device. 2 Search for Bluetooth device with the device. 3 4 Select “CID3693” in the pairing list. 20 Enter default password “0000”. » if pairing succeeds. phone call record is displayed. EN Make a call 1 2 3 Pair the phone with the unit. 4 Tap or then tap 5 Tap or to search for phone number from the following list: Tap to display the home menu. Tap [Bluetooth]. » The Bluetooth menu is displayed. to select the paired phone, . • • • • • • Or tap to dial. [Missed calls] [Received calls] [Dialed calls] [Phone book] [Sim phone book] [Local phone book] to dial number directly, then tap Answer call By default, the in-car system answers all incoming calls automatically. 1 2 If the connected Bluetooth device supports Advanced Audio Distribution Profile (A2DP), you can listen to the music stored on the device through the unit. If the device also supports Audio Video Remote Control Profile (AVRCP) profile, you can use the control on the unit to play music stored in the device. 1 2 3 Pair the phone with the unit. 4 Start to play music stored in the device. Tap to return to home menu. Tap [Bluetooth]. » The Bluetooth menu is displayed. If there is incoming call, [Incoming call...] flashes on the screen. Speak into the Bluetooth microphone. If your device supports AVRCP, 1 Tap . When conversation ends, tap to terminate the call. 2 Tap to start play. (red) Tip • To answer calls manually, set [Auto answer] to [Off]. Switch phone call to the mobile If you do not want your passenger to hear your incoming call, you can switch the call to your mobile phone. 1 Listen to music from Bluetooth device During the call, tap . Adjust Bluetooth settings You can change below Bluetooth settings: • [Bluetooth]: to turn on or off “Bluetooth” function • [Auto connect]: to turn on or off “Auto connect” function • [Auto answer]: to turn on or off “Auto answer” function • [Pairing code]: to set paring code EN 21 English » The voice is transferred from the in-car system’s loudspeaker to the mobile phone. • 1 2 [Phone Book Sync]: to synchronize phone book In Bluetooth menu, tap . » The option menu is displayed. Tap an option to change the setting. Tip 8 Adjust sound Adjust volume 1 Turn /MUTE/VOL button clockwise to increase volume. 2 Turn /MUTE/VOL button anti-clockwise to reduce volume. Mute 1 • You can also adjust Bluetooth settings in the “Settings” menu. During play, press /MUTE/VOL. • To restore the sound, press / MUTE/VOL again. Tip • You can also tap on the screen to turn off sound. Adjust fader/balance You can also adjust the front and rear speaker balance, the left and right speaker balance, and bass and treble settings. 22 EN 1 Tap anywhere except for the upper left corner to display menu on the screen, if necessary. 2 Tap . » Below options are displayed: 3 Tap or to change bass and treble settings. • [Bass]: bass range: -5 to +5. 5 [Treb]: treble range: -5 to +5. Tap F, R, L, or R to adjust fader/balance value. • [Fade] fader range: +7 to -7. (F = front speaker, R = rear speaker) • [Balance] balance range: -7 to +7. (L = left speaker, R = right speaker) Tap 9 Adjust settings English • 4 Display system setup menu 1 Tap 2 Tap [Settings]. » The settings menu is displayed. to display main menu. to exit. Set Dynamic Bass Boost (DBB) 1 Tap to toggle between the settings. • [DBB] on: The icon is illuminated. • [DBB] off (default): The icon is gray. Tip • When the setup is complete, tap to return to main menu. Adjust general settings 1 Tap [General], if necessary. 2 3 Tap or to highlight a setting. Tap on the option to display/select an option. General settings [Blackout] Options Description [off] Never turn on the screen saver. EN 23 [10s] Turn on the screen saver automatically 10 seconds after last operation. [20s] Turn on the screen saver automatically 20 seconds after last operation. [Night] Select this mode [Dimmer Mode] at night. [Dark] Select this mode in dark environment. [Normal] Set screen dimmer to normal mode. [Bright] Select this mode in bright environment. [Key color] [Red] Button backlight turns red. [Blue] Button backlight turns blue. [Beep] [On] Turn on the beep sound. Each time you press a button, the unit beeps. [Off] Turn off the beep sound. [WallPaper] [Blue] Turn background color to blue. [Black] Turn background color to black. [Red] Turn background color to red. [F1] Select F1 picture as wall paper. [Screen [On] Turn on the screen Saver] saver. [Off] Turn off the screen saver. [ScrSaver Select the screen Time] saver time. [Calibration] Calibrate the touch screen. 24 EN 4 Tap to exit. Adjust video settings 1 Tap [Video]. 2 Tap an option repeatedly to select: Video settings [Aspect ratio] [Video input] Options [Full] Description For widescreen display. [Normal] For normal display. [Auto] The correct format is set automatically. Select this option if you are not sure which format should be selected. [NTSC] Used in the United States, Canada, Japan, Mexico, the Philippines, South Korea, Taiwan, and some other countries. [PAL] Used in China, India, Singapore, the western European countries (except France), Australia, and some other countries. [Secam] Used in France, Russia and other countries. [Normal] When you drive in reverse, the rear view is displayed normally. [Mirror] When you drive in reverse, the rear view is displayed in mirror. [Parking] [On] Disable video view during drive. [Off] Enable video view during drive. [DivX View code for DivX registration registration. code] 3 Tap [Auto answer] [On] [Off] [Pairing code] 3 Tap Answer paired phone call automatically. Answer phone call manually. View code for pairing the unit with other Bluetooth devices. to exit. Adjust language settings 1 Tap [Language]. 2 Tap an option repeatedly to select: to exit. Adjust Bluetooth settings 1 Tap [Bluetooth]. Language settings [OSD] 2 Tap an option repeatedly to select: Bluetooth settings [Bluetooth] Options Description [On] [Off] [Auto connect] [On] [Off] Turn on the Bluetooth function. Turn off the Bluetooth function. If the pre-paired device is within the effective range, the unit re-connects to pre-paired device automatically. Need to re-connect manually. [DVD audio] [DVD subtitle] Options Description [English] Select on-screendisplay language. [ࡩᇓ໗] [ْᇓ໗] [English] Select DVD audio language. Options available are depends on DVD disc. [ࡩᇓ໗] [ْᇓ໗] [English] Select DVD subtitle language. Options available are depends on DVD disc. [ࡩᇓ໗] [ْᇓ໗] EN 25 English [Rear camera] [Off] [Disc menu] [English] Turn off subtitle language display. Select DVD menu language. Options available are depends on DVD disc. Adjust DVD rating 1 Tap [DVD rating]. 2 Tap an option repeatedly to select: [ࡩᇓ໗] [ْᇓ໗] 3 Tap to exit. Adjust volume settings You can set different volume for different modes. 1 Tap [Volume]. » The volume setting sub-menu is displayed. 2 Tap on a source. • [DVD] • [USB] • [SDHC] • [Radio] • [Bluetooth] • [AV-IN1] • [AV-IN2] • [Navigation] 3 Tap or to assign a value: 0 to 12. » When you switch to the source, the volume increases automatically. 4 Tap 26 EN to exit. DVD rating Options Description [Set Set password to password] restrict the play of discs. The default password is 0000. [Rating [Kid Acceptable for level] safe] children. [G] Acceptable for general viewers. [PG] Parental guidance suggested. [PG-13] Unsuitable for children under age 13. [PG-R] Recommend parents to restrict children under 17 to view. [R] Restricted. Recommend parent to guide children under 17 to view. [NC-17] Unsuitable for children under age 17. [Adult] Acceptable for adults only. [Load Restore to default factory] settings. 3 Tap to exit. 4 5 To turn on/off throttle control, tap . To turn on/off the plasma cluster mode, tap . English 10 Air conditioning ION 1 In the home menu, tap [AC]. » The air conditioning interface is displayed. 6 To remove ice and condensation from the windscreen and side windows, tap . 7 To turn on/off the refrigeration and dehumidification function, tap [A/C]. Turn on automatic climate control 1 Press AUTO on the main unit. » The air conditioner starts and the system controls the temperature, fan speed, recirculation and air distribution automatically. 2 To adjust the temperature, press TEMP . • You can tap [DUAL] to change the temperature on the driver’ s side or the front passenger side separately. Adjust climate control settings 1 On the air conditioning interface, tap to change the fan speed. 2 To switch the air distribution modes, tap [MODE] repeatedly. • : Direct air to the upper body. • : Direct air to the upper body and footwell. • : Direct air to the footwell. • : Direct air to the footwell and turn on the windscreen defroster. 3 To turn on/off the pollen filter, tap . EN 27 11 CD compartment controls 12 Others Listen to other devices Tip 1 In the home menu, tap [CDC]. » The CD compartment interface is displayed. • When air conditioning information changes, the air conditioning information interface will be displayed for 10 seconds. You can connect an external audio/video device to the unit. 1 • • • • • • • To select a disc, tap the available disc (1-6). To skip to the previous/next disc, tap / . To skip to the previous/next track, tap / . To search within a track or disc, tap / . To pause play or start play, tap or . To play tracks repeatedly, tap . To play tracks randomly, tap . Connect the device to the unit with the supplied AV cable. AV IN 2 3 4 Tap to display home menu. Tap [AV-IN1]. Play the connected device (see the instructions manual of the device). Tip • If you connect the system to other audio device through the REAR OUT L/R connector (see “Connect wires” section), tap [AV-IN2] to listen to that device. Reset When the unit hangs up, you can reset it. 1 28 EN Open the MAP/SD card socket cover. Press the RESET button with a ball-point pen or similar tool. 3 Remove the exhaust outlets, mounting brackets, and plastic clips. English 2 Tip • When the unit is reset, all the settings remain unchanged. Remove the unit To repair, replace fuse, or replace the unit, remove it from the dashboard. 1 2 Pull the unit out from the dashboard. Remove the hazard warning switch from the main unit. EN 29 Replace fuse If there is no power, the fuse may be damaged and need to be replaced. 1 2 3 4 13 Product information Take out the unit from dashboard. Check the electric connection. Buy a fuse that matches the voltage of the damaged fuse (5A) Replace the fuse. Note • Product information is subject to change without prior notice. General Power supply Note • If the fuse gets damaged immediately after it has been replaced, there may be an internal malfunction. In such case, consult your Philips dealer. Fuse Suitable speaker impedance Maximum power output Continuous power output Pre-Amp output voltage Aux-in level Dimensions (W x H x D) Weight (main unit) 12 V DC (11 V - 16 V), negative ground 5A 4-8 50 W x 4 channels 22 W x 4 channels (4 10% T.H.D.) 2.0 V ( CD play mode; 1 kHz, 0 dB, 10 k load) 500 mV 288.7 x 302.4 x 185 mm 2.5 kg Disc player System Frequency response Signal/noise ratio Total harmonic distortion Channel separation Video signal format Video output 30 EN DVD / CD audio / MP3 system 20 Hz - 20k Hz >75dB Less than 1% >55dB NTSC only 1 +/- 0.2V Screen size Display resolution Contrast ratio Brightness • 8 inches (16:9) 800 x 480 dots 500 450 cd/m2 Bluetooth Communication Bluetooth Standard system version 2.0 Output Bluetooth Standard Power Class 2 Maximum Line of sight approx. 8m communication range Frequency band 2.4 GHz band (2.4000 GHz - 2.4835 GHz) Compatible Hands-Free Profile (HFP) Bluetooth Handset Profile (HSP) profiles Advanced Audio Distribution Profile (A2DP) Audio Video Remote Control Profile (AVRCP) Supported codecs Receive SBC (Sub Band Codec) Transmit SBC (Sub Band Codec) File name in Unicode UTF8 (maximum length: 128 bytes) Supported MP3 disc format: • ISO9660, Joliet • Maximum title number: 512 (depending on file name length) • Maximum album number: 255 • Supported sampling frequencies: 32 kHz, 44.1kHz, 48 kHz • Supported Bit-rates: 32-320 Kbps and variable bit rate Supported video formats: • DVD • Divx Home theater • Xvid Note • To ensure a better playback, it is recommended that: • - the image size is not larger than 640 X 480 pixels. • - the frame rate is 20 fps. • - the data rate is not higher than 500 kbps. Compatible USB devices: • USB flash memory (USB 2.0 or USB1.1) • USB flash players (USB 2.0 or USB1.1) • Memory cards (SD / MMC / SDHC) Supported formats: • USB or memory file format: FAT16, FAT32 • MP3 bit rate (data rate): 32-320 Kbps and variable bit rate • WMA v9 or earlier • Directory nesting up to a maximum of 8 levels • Number of albums/ folders: maximum 99 • Number of tracks/titles: maximum 999 • ID3 tag V2.0 to V2.4 EN 31 English LCD 14 Troubleshooting Warning • Never remove the casing of this apparatus. To keep the warranty valid, never try to repair the system yourself. If you encounter problems when using this apparatus, check the following points before requesting service. If the problem remains unsolved, go to the Philips web site (www. philips.com/welcome). When you contact Philips, ensure that the apparatus is nearby and the model number and serial number are available. No power • Car engine has not been started. Start the car engine. • Connections is incorrect. • Fuse has been damaged. Replace fuse. No sound • Volume is too low. Adjust volume. • Speaker connections is incorrect. Disc does not play • Disc is upside down. Ensure the printed side is upwards. • Disc is dirty. Clean the disc with a clean, soft, lint-free cloth. Wipe the disc outwards from the center. • Disc is defective. Try another disc. • incompatible disc is used. Try another disc. • Disc rating exceeds the restrict setting. Change the rating settings to lower one. • Disc region code is not compatible with the unit. Use disc with proper region code. 32 EN No image • Parking brake wire connection is incorrect. Check the parking wiring. Image flashes or distorted • Video DVD settings do not match with the DVD. Adjust video DVD settings. • Video connection is improper. Check the connections. Noise in broadcasts. • Signals are too weak. Select other stations with stronger signals. • Check the connection of the car antenna. • Change broadcast from stereo to mono. Preset stations lost. • Battery cable is not correctly connected. Connect the battery cable to the terminal that is always live. Fuse is broken • The Fuse type is incorrect. Replace it with a 5A fuse. • Speaker wire or power wire is grounded. Check the connections. Display show ERR-12 • USB/SD/MMC data error. Check the USB device or SD/MMC card. About Bluetooth device Music playback is unavailable on the system even after successful Bluetooth connection. • The device cannot be used with the system to play music. The audio quality is poor after connection with a Bluetooth-enabled device. • The Bluetooth reception is poor. Move the device closer to the system or remove any obstacle between the device and the system. English Cannot connect with the system. • The device does not support the profiles required for the system. • The Bluetooth function of the device is not enabled. Refer to the user manual of the device for how to enable the function. • The system is not in the pairing mode. • The system is already connected with another Bluetooth-enabled device. Disconnect that device or all other connected devices and then try again. The paired mobile phone connects and disconnects constantly. • The Bluetooth reception is poor. Move the mobile phone closer to the system or remove any obstacle between the mobile phone and the system. • Some mobile phones may connect and disconnect constantly when you make or end calls. This does not indicate any malfunction of the system. • For some mobile phones, the Bluetooth connection may be deactivated automatically as a power-saving feature. This does not indicate any malfunction of the system. EN 33 15 Glossary B Bite rate The max data transfer through the USB port. Bluetooth Bluetooth® is a short-rang wireless protocol that is meant to allow mobile devices to share information and applications without the worry of cables or interface incompatibilities. The name refers to a Viking King who unified Denmark. Operate at 2.4GHz. For more information, see www.bluetooth.com. M MMC MultimediaCard. A type of memory card with a flash memory. MP3 A file format with a sound data compression system. MP3 is the abbreviation of Motion Picture Experts Group 1 (or MPEG-1) Audio Layer 3. With the MP3 format, one CD-R or CD-RW can contain about 10 times more data than a regular CD. R Region code A system that allows discs to be played only in the region designated. This unit only plays discs that have compatible region codes. You can find the region code of your unit on the product label. Some discs are compatible with more than one region (or ALL regions.) S SD Secure Digital. A type of memory card with a flash memory. 34 EN SDHC Secure Digital High Capacity (SDHC) is a type of flash memory card based on the SDA 2.00 specification. The SDA 2.00 specification enables SD cards to reach higher capacities from 4GB to 32GB, and growing. W WMA (Windows Media Audio) An audio format owned by Microsoft, is a part of Microsoft Windows Media technology. Includes Microsoft Digital Rights Management tools, Windows Media Video encoding technology, and Windows Media Audio encoding technology. © 2010 Koninklijke Philips Electronics N.V. All rights reserved. CID3693_00_UM_V1.0


