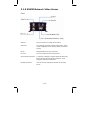
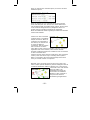
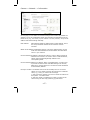
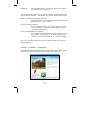
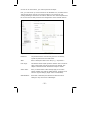
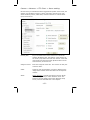
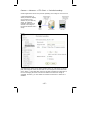
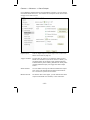
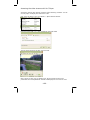
1
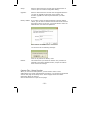
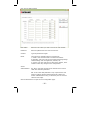
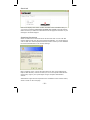
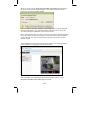
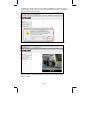
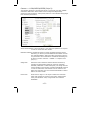
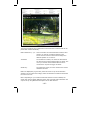
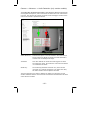
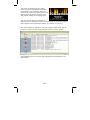
View size: You can define the size of the live video by selecting the
value of your choice. Depending on the camera model and settings,
you may select values such as 320x240, 640x480, 2x, 1x, 1/2x, 1/4x.
Protocol: Select from any of these protocols: HTTP, TCP, UDP. The
default value is HTTP, and normally there is no reason to change it.
Video buffer: Turn the Video Buffer function On or Off. Enabling the
video buffer makes the video stream smoother in unsteady network
environments or over remote Internet connections. But activating the
buffer also means that there is a longer delay between real time and
when the events appear on your screen.
(3):
The image setup allows control of the
image parameters shown on the right.
Depending on your camera model, these
options can vary. You can either move the
slider to adjust the value, or you can type
the value into the field.
Brightness: Higher values generate
brighter video and vice versa.
Contrast: Raise or lower the contrast of the video.
Sharpness: Crisper video can be generated if the sharpness is set to a
higher value.
Saturation: When set to “0,” the image becomes black and white.
Raise the value to increase the amount of color in the video.
Hue: Most sources of visible light contain energy over a band of
wavelengths. Hue is the wavelength within the visible-light spectrum
at which the energy output from a source is greatest. If you don’t
understand any of this, don’t worry. Normally there is no need to
change the default value.
Exposure (not shown): This optional parameter allows controlling the
exposure time which has a direct impact on the brightness of the
image. The smaller the value, the darker the image becomes. This
parameter is useful for cameras that are installed outdoors, or pointing
to the outside.
- 45 -