1
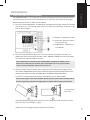
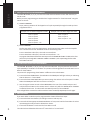
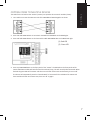
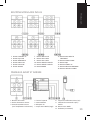
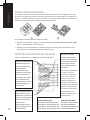
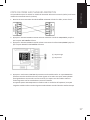
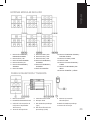
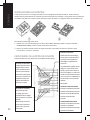
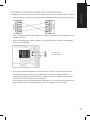
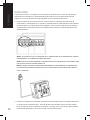
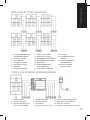
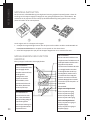
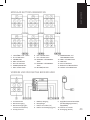
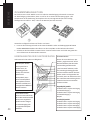
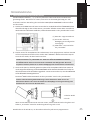
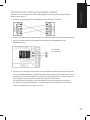
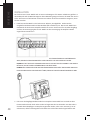
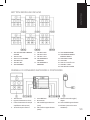
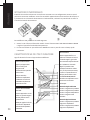
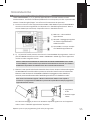
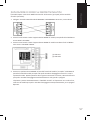
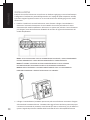
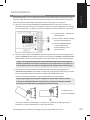
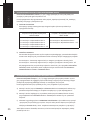
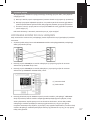
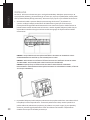
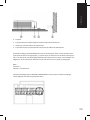
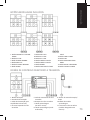
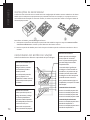
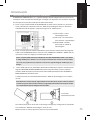
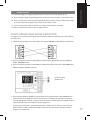
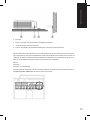
ENGLISH
ASSEMBLY instructions
The Techconnect2 Control2 comes assembled with a common button configuration. You may need to
change buttons to suit the equipment you are controlling. For example, if the projector has a single
power button on the remote control, you will use a 1-button panel and load the power button into it.
To change buttons follow these steps:
1. Undo the locking screw on the side of the module. Hold the assembly WITH BUTTONS FACING
DOWN and remove the front panel from the rear chassis.
2. Slide the button panels out sideways. Swap the buttons and panels as necessary, then reassemble.
FUNCTION BUTTON CAPABILITIES
Each row of button has different learning capabilities:
POWER BUTTONS
Can learn up to 3 codes
each which are sent
simultaneously when the
button is pressed.
Useful when you want
to turn on a projector
and amplifier, and lower
a motorized screen with
one press of a button.
VOLUME BUTTONS
Can only learn one code,
but repeatedly sends the
codes when the button is
held down.
4
Suitable for volume
control or motorized
projector ceiling lifts.
INPUT BUTTONS
Can learn up to 4 codes.
The “Single Command” switch on
rear means each code is broadcast
sequentially.
“Dual Command” means codes 1
and 3 are sent at the same time,
and with the next press codes 2 and
4 are sent. This is useful when you
need to toggle between PC1 and
PC2 AND switch an amplifier at the
same time with one button press.
For example:
Single command selected
Press 1: Projector PC1 Input
Press 2: Projector PC2 Input
Press 3: Projector VID Input
Press 4: Projector S-VID Input
Dual command selected
Press 1: Projector PC1 Input and
Amplifier Input 1
Press 2: Projector PC2 Input and
Amplifier Input 2